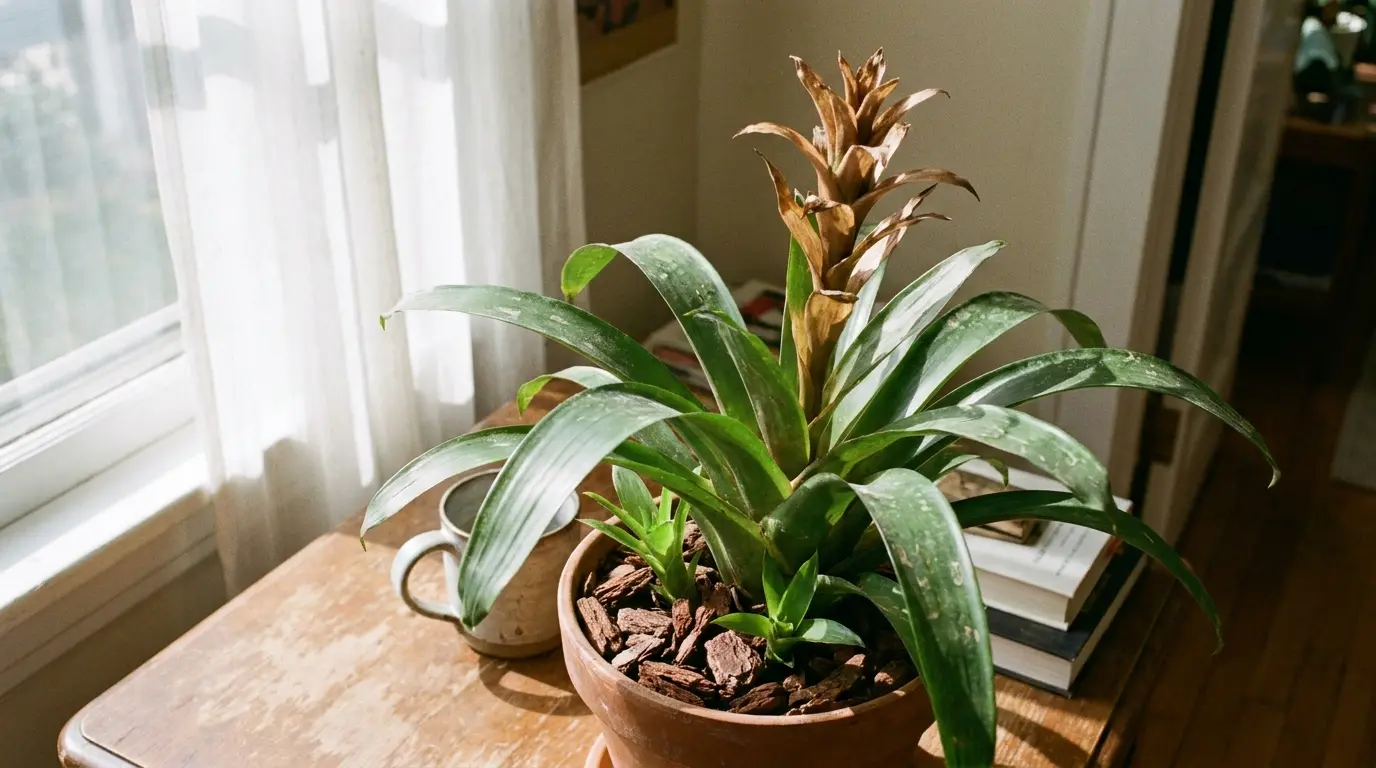
The first time one of my bromeliads finished blooming, I checked it every morning and wondered if I had done something wrong.
Watching that plant color up for months, then fade, feels personal, especially here on the Gulf Coast, where our humidity actually helps these plants outlast the ones grown in drier climates. You may feel the same way right now, staring at a dull flower stalk and wondering what comes next.
Bromeliad plant care after blooming does not have to feel confusing once you know which parts of the plant to watch. The mother rosette slows down, but it is still feeding a batch of pups at its base.
The sections ahead walk through what to keep, what to trim, and how to give those new pups the best start.
What Changes After Blooming?
After blooming, the flower stalk fades and dries, the mother rosette begins a slow decline, and small pups start forming around the base. The table below breaks down each stage, including pups, also called offsets, the small new plants that grow from the base.
|
Plant part |
Visible change |
Meaning |
|---|---|---|
|
Flower display |
Color fades, and the stalk begins drying |
The flowering stage is ending |
|
Mother rosette |
Older outer leaves slowly lose color |
The mother rosette (the original flowering plant) is entering its natural decline |
|
Pups |
Small groups of leaves appear around the base |
New offsets are developing |
Most flowering bromeliads decline gradually over months or years and eventually die back, according to the University of Georgia Extension. Their pups carry the plant’s life cycle forward. Check each part before deciding what to cut, keep, or separate.
Bromeliad Plant Care After Blooming

There’s no need to throw a bromeliad away once flowering ends. Many common indoor rosette-forming bromeliads keep producing pups from the mother plant before it declines, so a few simple steps guide the transition after blooming.
- Cut the flower stalk: Sanitize a knife or shears with rubbing alcohol, then cut the dried flower stalk cleanly and as low as possible without damaging nearby leaves or young offsets.
- Let the mother rosette finish its job: Wait until it turns brittle and lifts free easily, since it keeps producing pups until it finally dies; then cut it out rather than pulling it free.
Following this guidance protects the pups growing nearby while the mother plant completes its natural cycle.
According to the University of Florida IFAS Extension, mature bromeliads keep sending up new pups until the original plant finally dies back.
How Do You Care for and Separate Bromeliad Pups After Blooming?
Post-bloom pup care comes down to three things: steady watering, light feeding, and separating each pup once it reaches about a third of the mother plant’s size. The mother and pups may share a crowded container, so each task should protect their bases and limited roots.
The following steps cover ongoing care, separation timing, potting, and early root growth.
1. How Should You Water After Blooming?

Check if the leaves form a central tank, the natural reservoir created where the overlapping leaf bases meet. If they do, keep fresh water inside it and flush the cup weekly to remove debris and mineral deposits.
Moisten the potting mix when the top layer starts to dry, then let the excess drain completely. Never leave the container standing in water. Use rainwater, distilled water, or low-mineral tap water, and avoid softened water because it contains added sodium.
2. What Light, Soil, and Temperature Work Best?

Place the plant in bright light filtered from strong midday and afternoon sun. Pale or bleached patches can signal excessive exposure, while stretched or weak growth may point to insufficient light.
Use a loose bromeliad mix made with orchid bark, coarse perlite, and a small amount of coir (coconut fiber) or peat-free potting mix. Keep tropical types above 55°F and away from cold glass, heaters, air-conditioning vents, and sudden drafts.
Here on the Gulf Coast, our natural humidity actually works in the plant’s favor, something drier climates have to fake with pebble trays or humidifiers.
3. Should You Fertilize After Blooming?

Feed pups only while they’re actively producing new leaves. As a general guideline, dilute a balanced, water-soluble fertilizer to one-quarter or even one-eighth of the label’s strength. Apply it once a month during active growth, since exact needs vary by bromeliad type.
Choose an application method suited to the bromeliad type. Never place solid granules inside the central cup. Reduce or stop feeding during slower growth, since excess fertilizer may cause salt damage, weak foliage, or faded color.
4. When Is a Bromeliad Pup Ready to Separate?

Judge readiness by size and structure, not age. A pup can usually be removed after reaching at least one-third of the mother plant’s size and forming a small rosette of firm leaves.
Visible roots help but aren’t required, since a healthy offset can form them after removal. Waiting until it reaches closer to one-half of the mother’s size can make cutting, handling, and early establishment easier.
In my years fielding calls on GardenLine, most listeners try to separate pups too early. Patience is what actually pays off here.
5. How Do You Separate and Pot a Pup?

Choose a 3- to 4-inch pot with drainage holes and add the prepared potting medium. Expose the point where the pup joins the mother, lifting the cluster from its container if needed.
Sanitize a sharp knife with rubbing alcohol, then cut near the mother while preserving the pup’s base and any roots. Set its lowest leaves above the mix, and use stakes if it cannot remain upright.
6. What Care Does a Separated Pup Need?

Place the newly potted pup somewhere warm and humid; it may benefit from slightly gentler light while establishing. Keep the medium lightly moist but toward the dry side as roots begin forming.
Avoid heavy watering because a small root system cannot use moisture quickly. Fresh leaves or slight resistance during a stability check may signal root development. Afterward, move the plant gradually into its normal light and watering routine.
This same slow, hands-off approach applies to other pup-producing houseplants; staghorn fern pups establish on a nearly identical timeline.
Is the Bromeliad Declining Normally or Developing a Problem?
Brown or yellow tissue can result from normal aging, poor growing conditions, or pests. Check its texture, location, smell, and rate of change before deciding how to respond.
Most flowering bromeliads fully decline within one to two years of blooming, so gradual browning during that window is expected, not a warning sign.
|
Sign |
Possible cause |
What to do |
|---|---|---|
|
Older leaves become dry and papery over time |
Normal decline after flowering |
Trim each leaf after it becomes fully dry |
|
The base or roots feel soft and smell foul |
Rot from excess moisture or poor drainage |
Remove wet mix, cut damaged roots with a sanitized tool, and repot in fresh, airy mix |
|
White crust appears inside the cup or on the leaves |
Mineral or fertilizer deposits |
Flush the affected areas with low-mineral water and reduce feeding |
|
Leaf tips turn brown without soft tissue |
Dry air, salt buildup, or uneven watering |
Check humidity, water quality, and watering habits |
|
Tan or bleached patches face the window |
Sun damage |
Filter strong sunlight or move the plant farther from the glass |
|
Cotton-like clusters, hard bumps, or sticky residue appear |
Mealybugs or scale insects |
Isolate the plant, identify the pest, and treat it promptly |
|
A firm pup grows slowly |
Roots may still be forming |
Maintain steady warmth and suitable light before changing its routine |
Tip: Photograph the affected area and note the date. Comparing it later can show if the damage has stopped or continues to spread.
Frequently Asked Questions
Can bromeliad pups stay attached to the mother plant?
Yes. Pups can remain attached and form a cluster in the same container. Separation is optional and mainly depends on the shape you prefer or the number of plants you want.
What if my bromeliad has no pups after blooming?
Not every bromeliad produces pups right away, so a bare base isn’t a problem yet. Check gently around the base, keep conditions steady, and allow more time. If no pups appear and the mother plant fully dies, that bromeliad has completed its growth cycle.
How many pups can a bromeliad produce?
The number varies by plant. Some bromeliads produce one pup, while others form several during the mother plant’s decline. Light, temperature, plant type, and general health may affect how many offsets appear and how quickly they grow.
How long does a bromeliad pup take to flower?
Many pups flower one to three years after they’re separated, though some types take longer. Steady light, warmth, and watering shape how quickly a pup reaches blooming size. Give a newly rooted pup time to establish before expecting flowers.
Can an apple make a bromeliad flower?
Yes, it may. A mature bromeliad usually blooms only once, but its pups can eventually flower on their own. Ethylene from a ripening apple can also encourage a first bloom. Place the plant and apple in a clear plastic bag for 7 to 10 days, away from direct sun.
Final Takeaway
Thoughtful bromeliad plant care can make the post-bloom stage feel more manageable. You can move forward with greater confidence and less uncertainty. Check its growth type, watch for changes, and make one adjustment at a time.
A fading flower does not need to become a source of confusion. Clear signs can help you decide when to prune, water, divide, repot, or check for a problem.
What change did you notice first on your bromeliad? Share your experience or question in the comments.