Have you ever pulled up a beautiful garlic harvest only to watch the bulbs turn soft and moldy a few weeks later? It is incredibly frustrating to lose your hard work to rot.
I know that feeling well, and it usually happens because of improper drying. Mastering how to cure garlic is the secret to making your harvest last for months.
You will find exactly how to prepare, bundle, and hang your bulbs safely. I share the clear signs that show your crop is fully dried and ready for the pantry.
By the end, you will have the absolute confidence to preserve every single bulb perfectly.
Garlic Curing Process and Its Importance After Harvest
Curing garlic is an essential post-harvest step that helps improve bulb quality, enhance flavor, and extend storage life.
During this process, excess moisture leaves the garlic while the outer layers become dry and protective, helping prevent mold, rot, and spoilage. Properly cured garlic develops firm cloves, strong protective skins, and better keeping quality for long-term use.
Understanding the curing process ensures harvested garlic remains fresh, flavorful, and usable for months. These same drying principles carry over well beyond garlic, and if you are also thinking about extending root crop storage, you will notice the same airflow and moisture rules apply.
When Should You Harvest Garlic for Curing?
- Lower leaves start turning yellow or brown
- Several upper leaves remain green and healthy
- Bulbs develop firm cloves with mature outer layers
- Soil becomes loose enough for easy bulb removal
Before harvesting the entire crop, dig one test bulb to check clove size and wrapper tightness. Harvest on a dry day whenever possible to reduce extra moisture during curing.
Harvesting garlic at the right stage ensures larger bulbs, stronger flavor, and longer storage life. Picking too early may produce underdeveloped cloves, while delaying harvest can lead to split bulbs and reduced quality. Proper timing creates the ideal foundation for successful curing.
How To Cure Garlic After Harvest
Curing starts the moment garlic leaves the soil. The goal is to keep the bulbs whole, dry, shaded, and well-spaced so that moisture can drain slowly without weakening the skins.
Each step matters because garlic that looks fine at harvest can still mold, split, or soften later if handled roughly. These steps show how to lift, clean, arrange, dry, and check garlic before it moves into long-term storage.
Step 1: Spread Garlic Out After Harvest
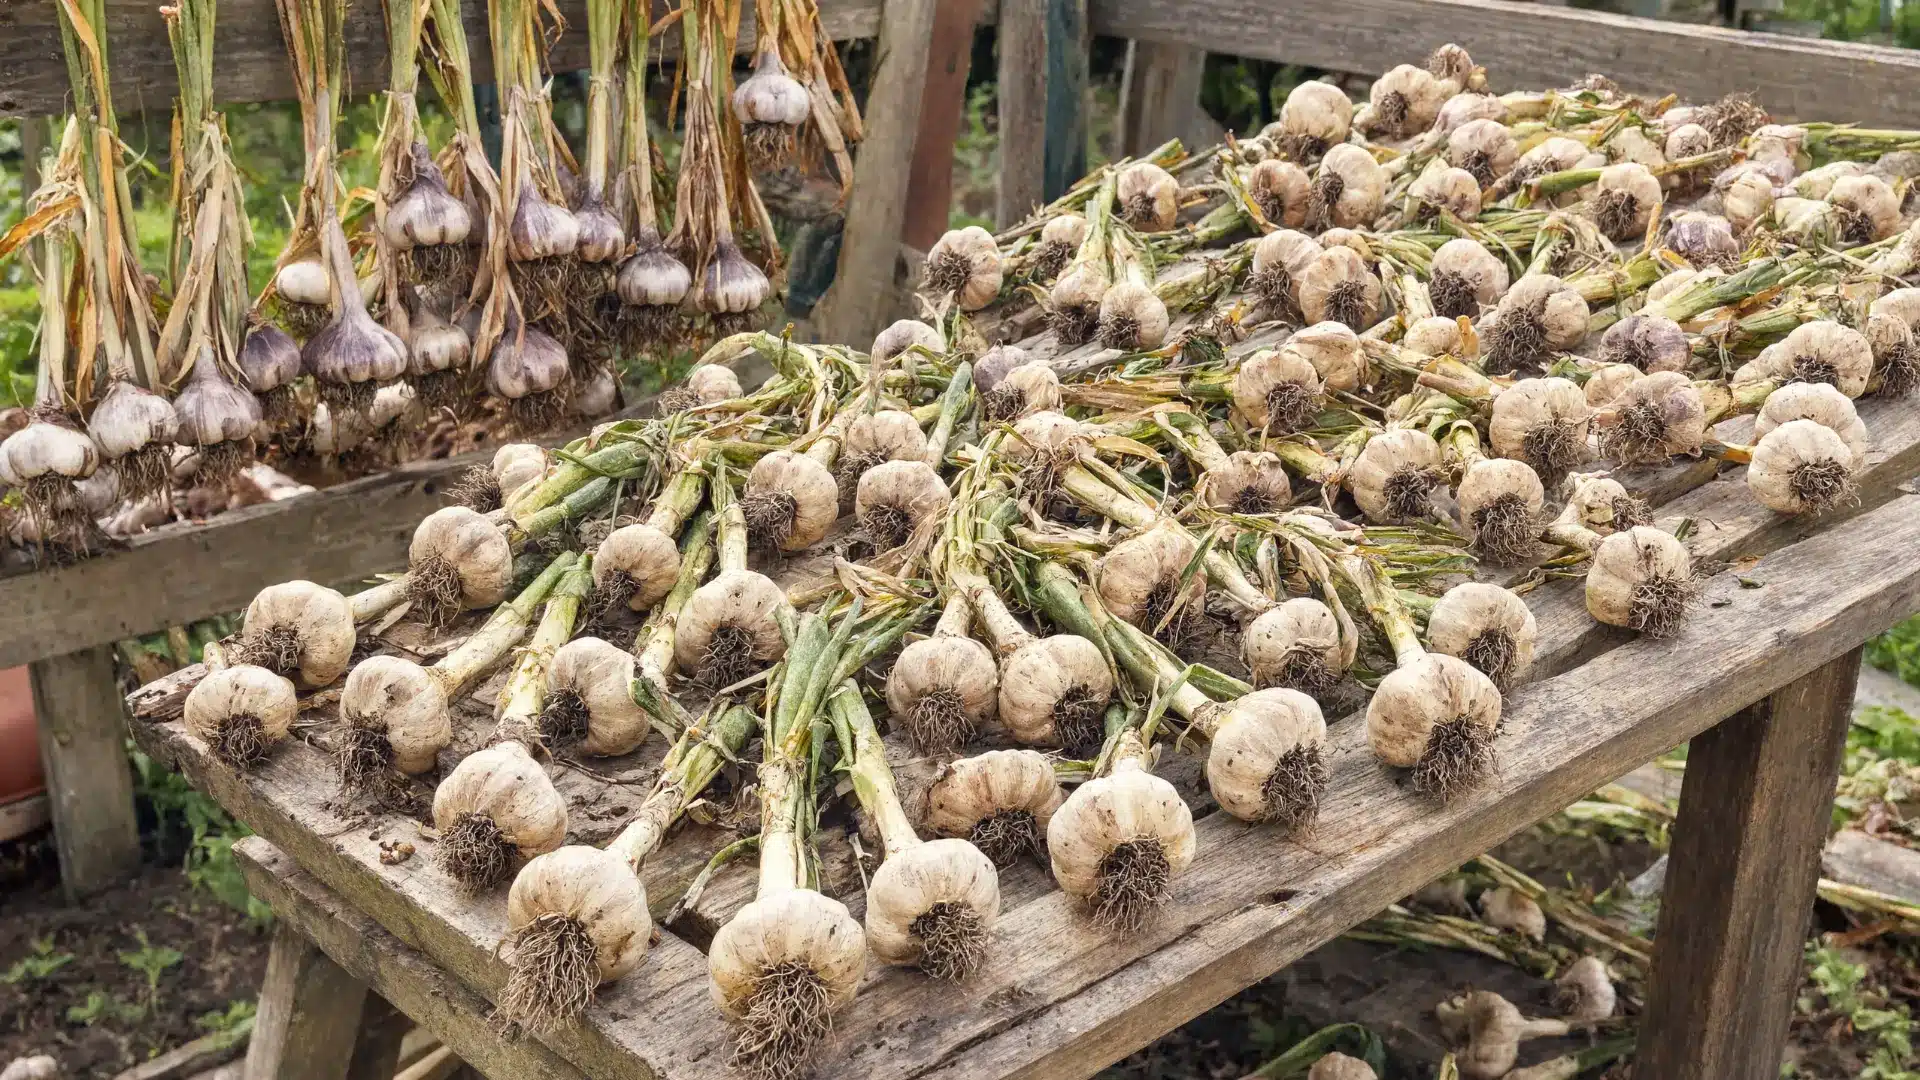
After harvesting, spread garlic in a shaded place where air can move around the bulbs. A covered patio, an old window screen, a drying rack, or a board setup can work well.
The main goal is to keep garlic out of direct sunlight as it begins to dry. Garlic needs at least a couple of weeks to lose extra moisture before it is trimmed and stored.
Step 2: Trim Long Tops For Bundling
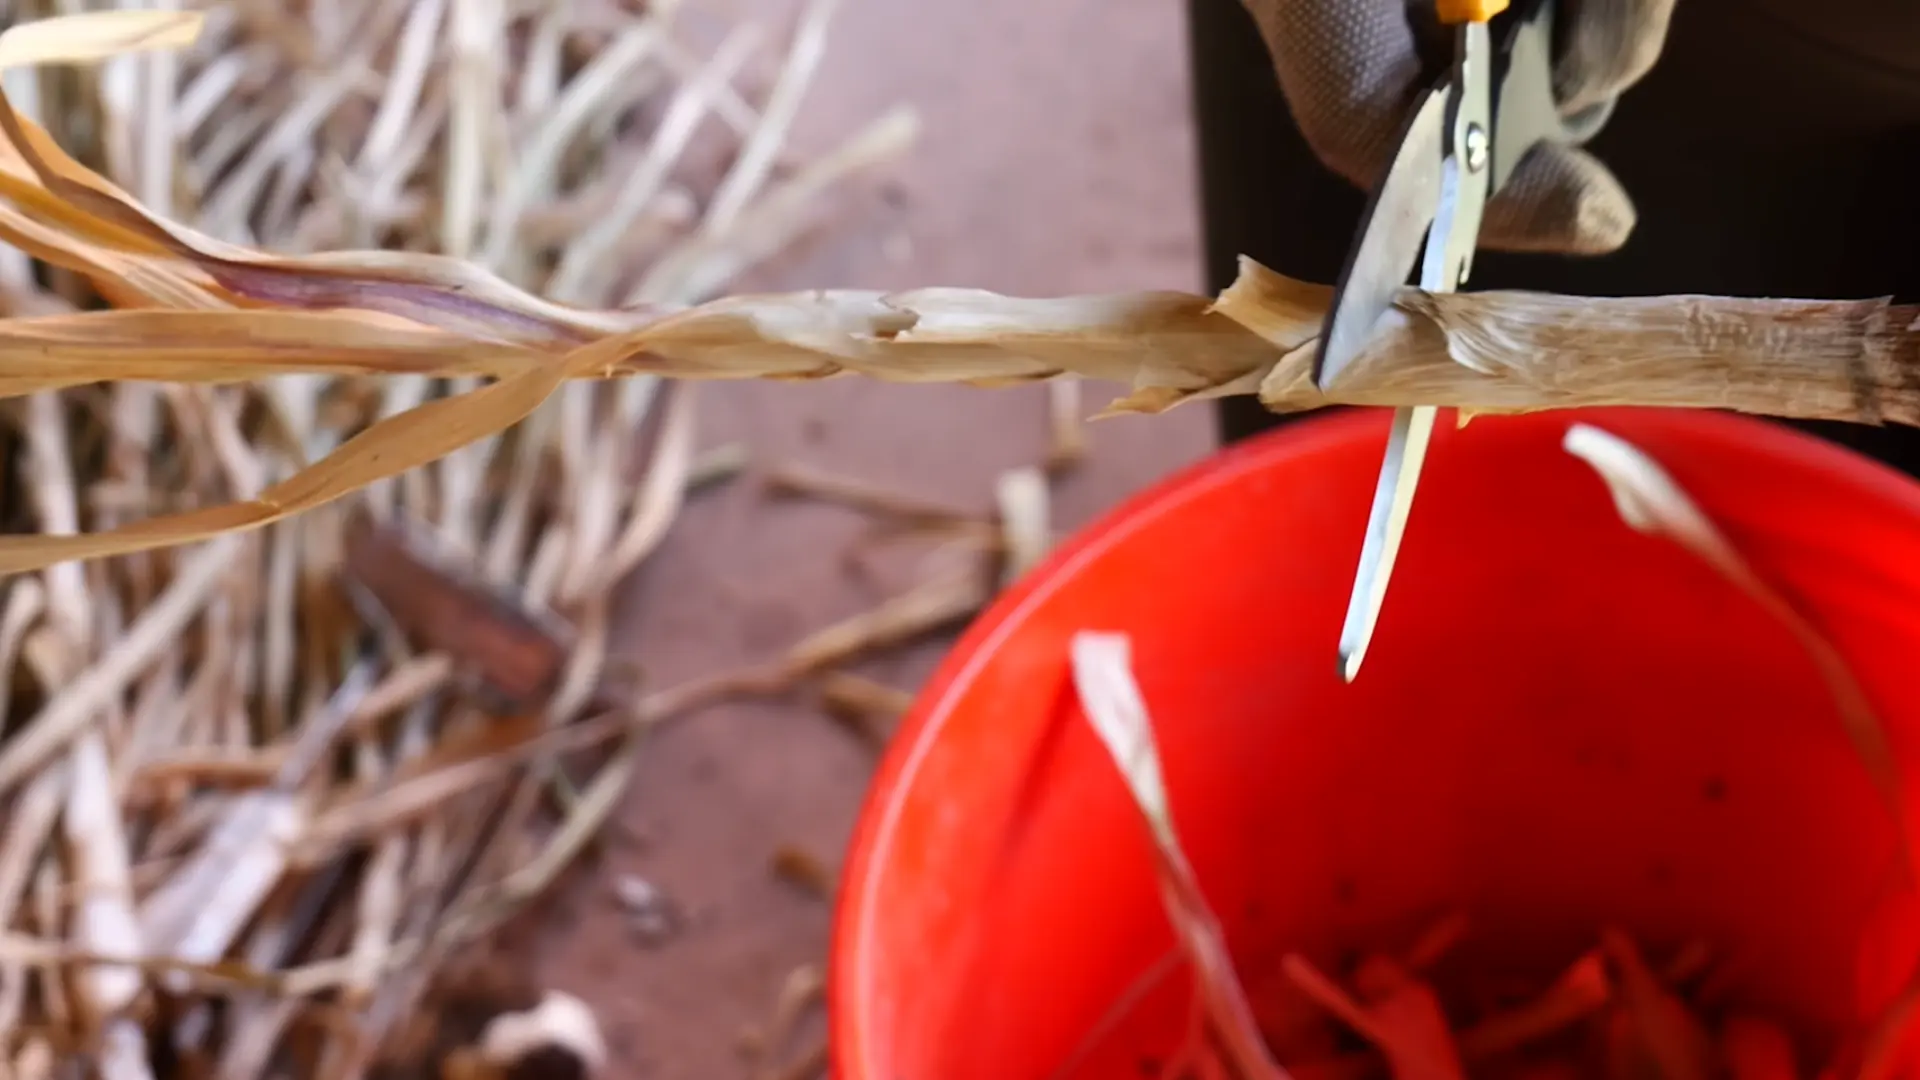
Before hanging garlic, trim very long tops so the stems are easier to manage. Leave about 8 to 10 inches of stem if the garlic will be tied with twine.
This gives enough length to wrap and hang the bundles without cutting too close to the bulb. Avoid removing the whole stem while moisture still remains in the neck.
Tip: Leave extra stem if the neck still feels slightly moist.
Step 3: Clean Off Loose Soil
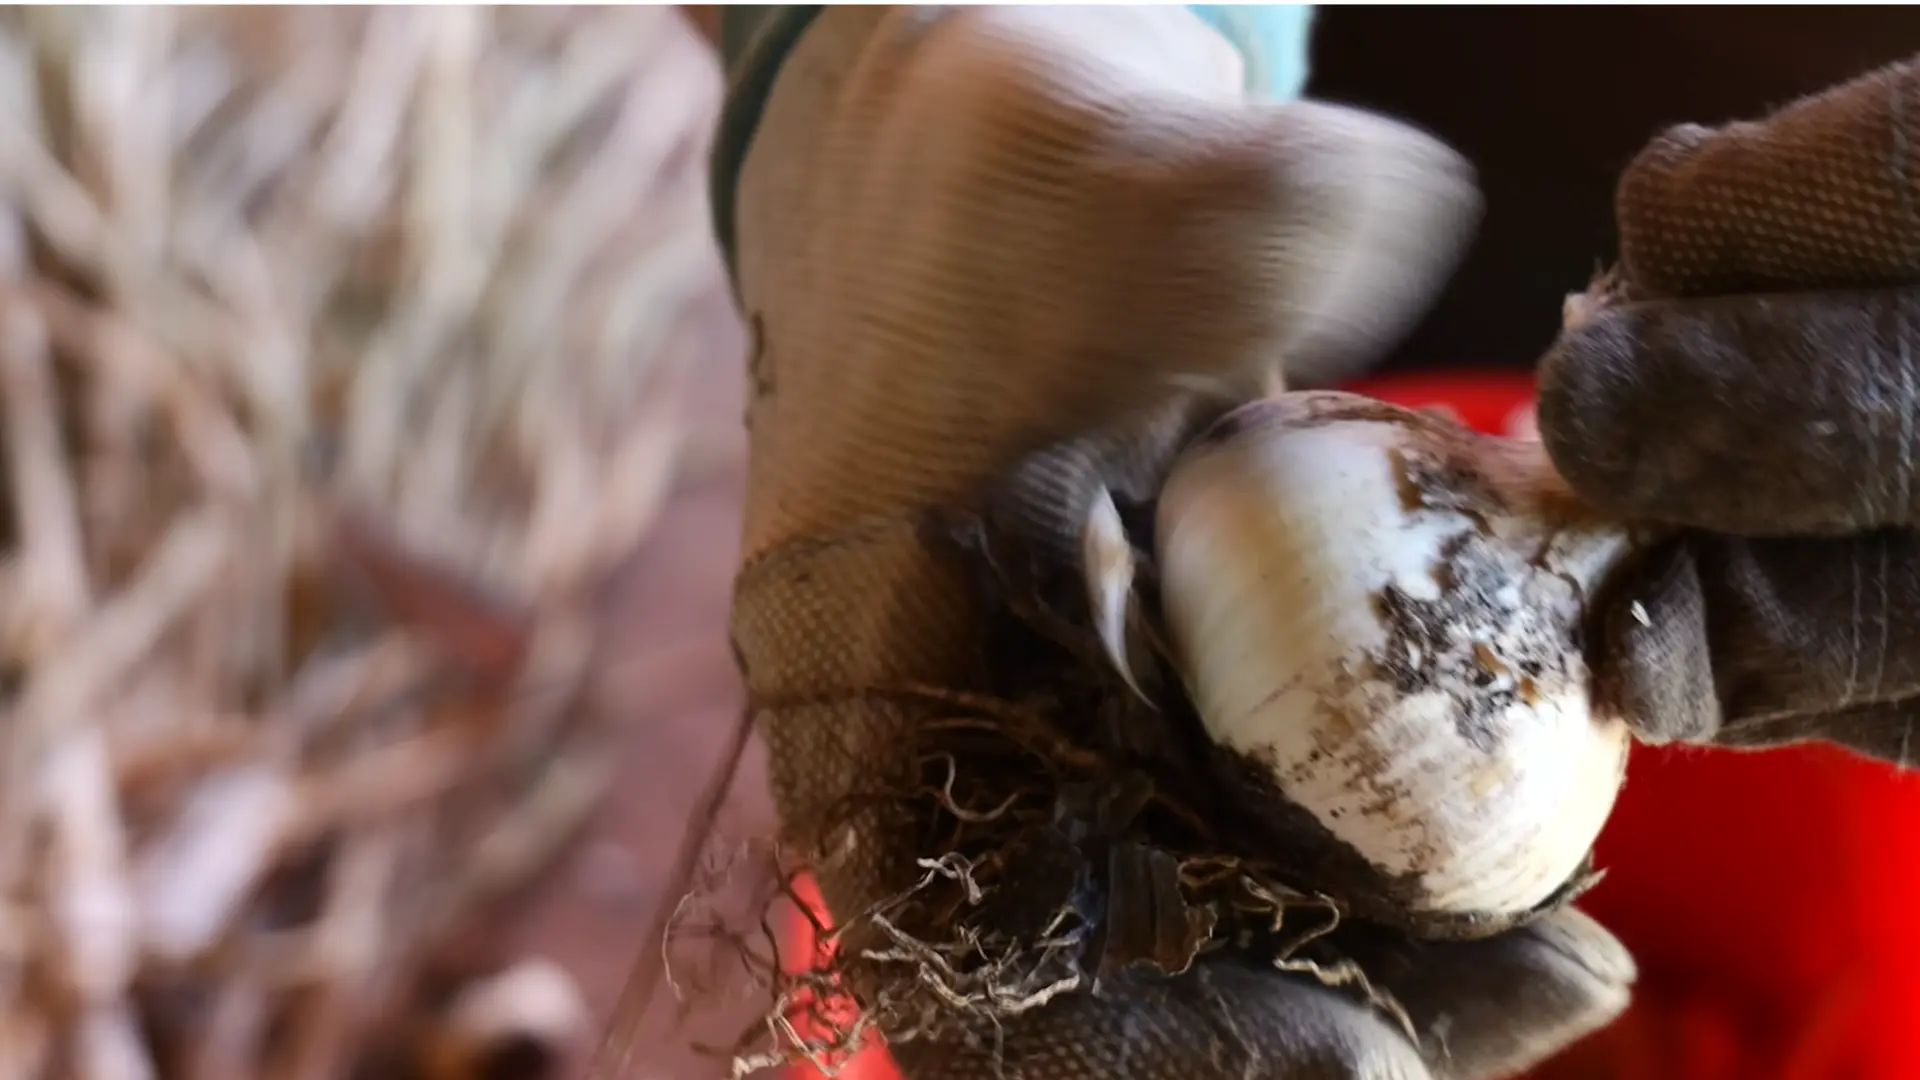
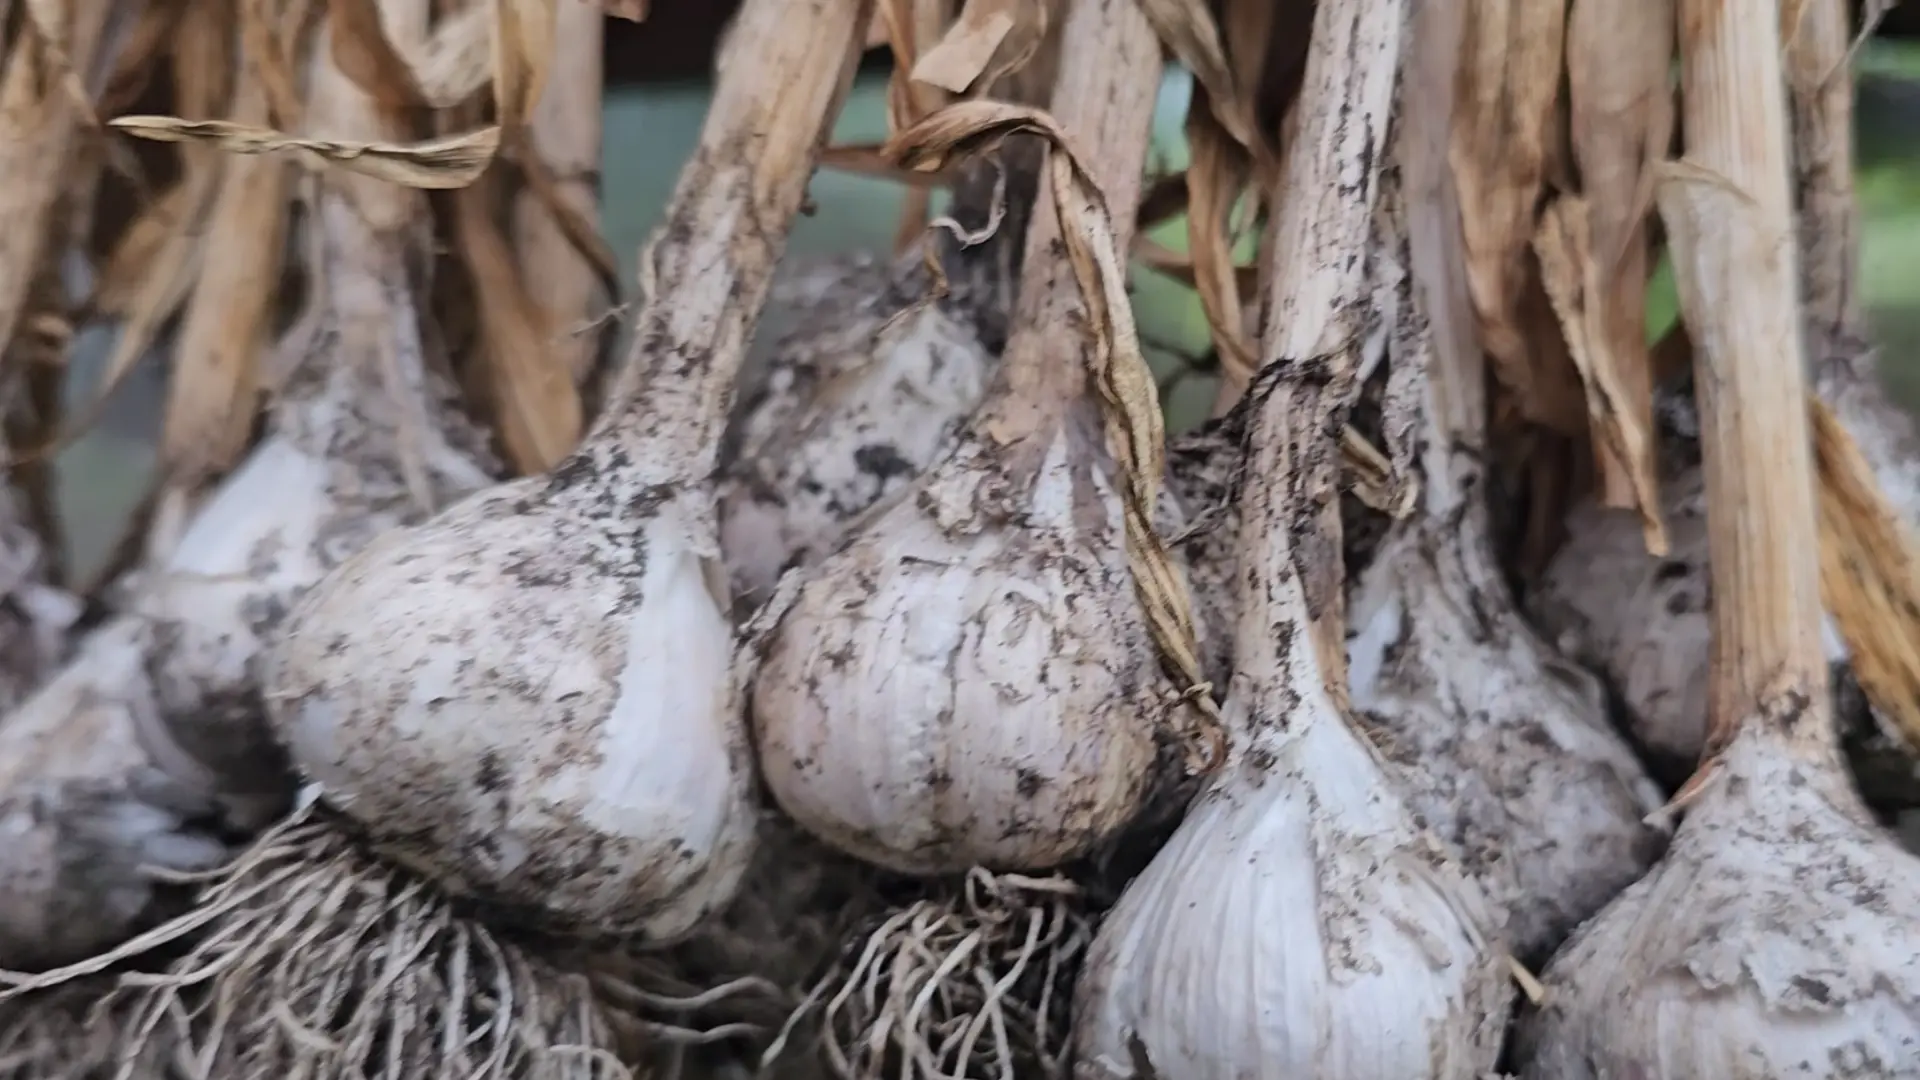
Brush or rub away loose soil before bundling the garlic, but do not over-clean the bulb. The goal is to remove loose dirt that may fall during hanging, not peel away protective skins.
If the soil is stuck firmly, leave it until the garlic dries more. Keeping the outer wrappers intact helps protect the cloves during storage. The same gentle touch matters when curing other garden crops, since scrubbing too soon on squash or potatoes can just as easily weaken their skins.
Step 4: Trim Roots Lightly
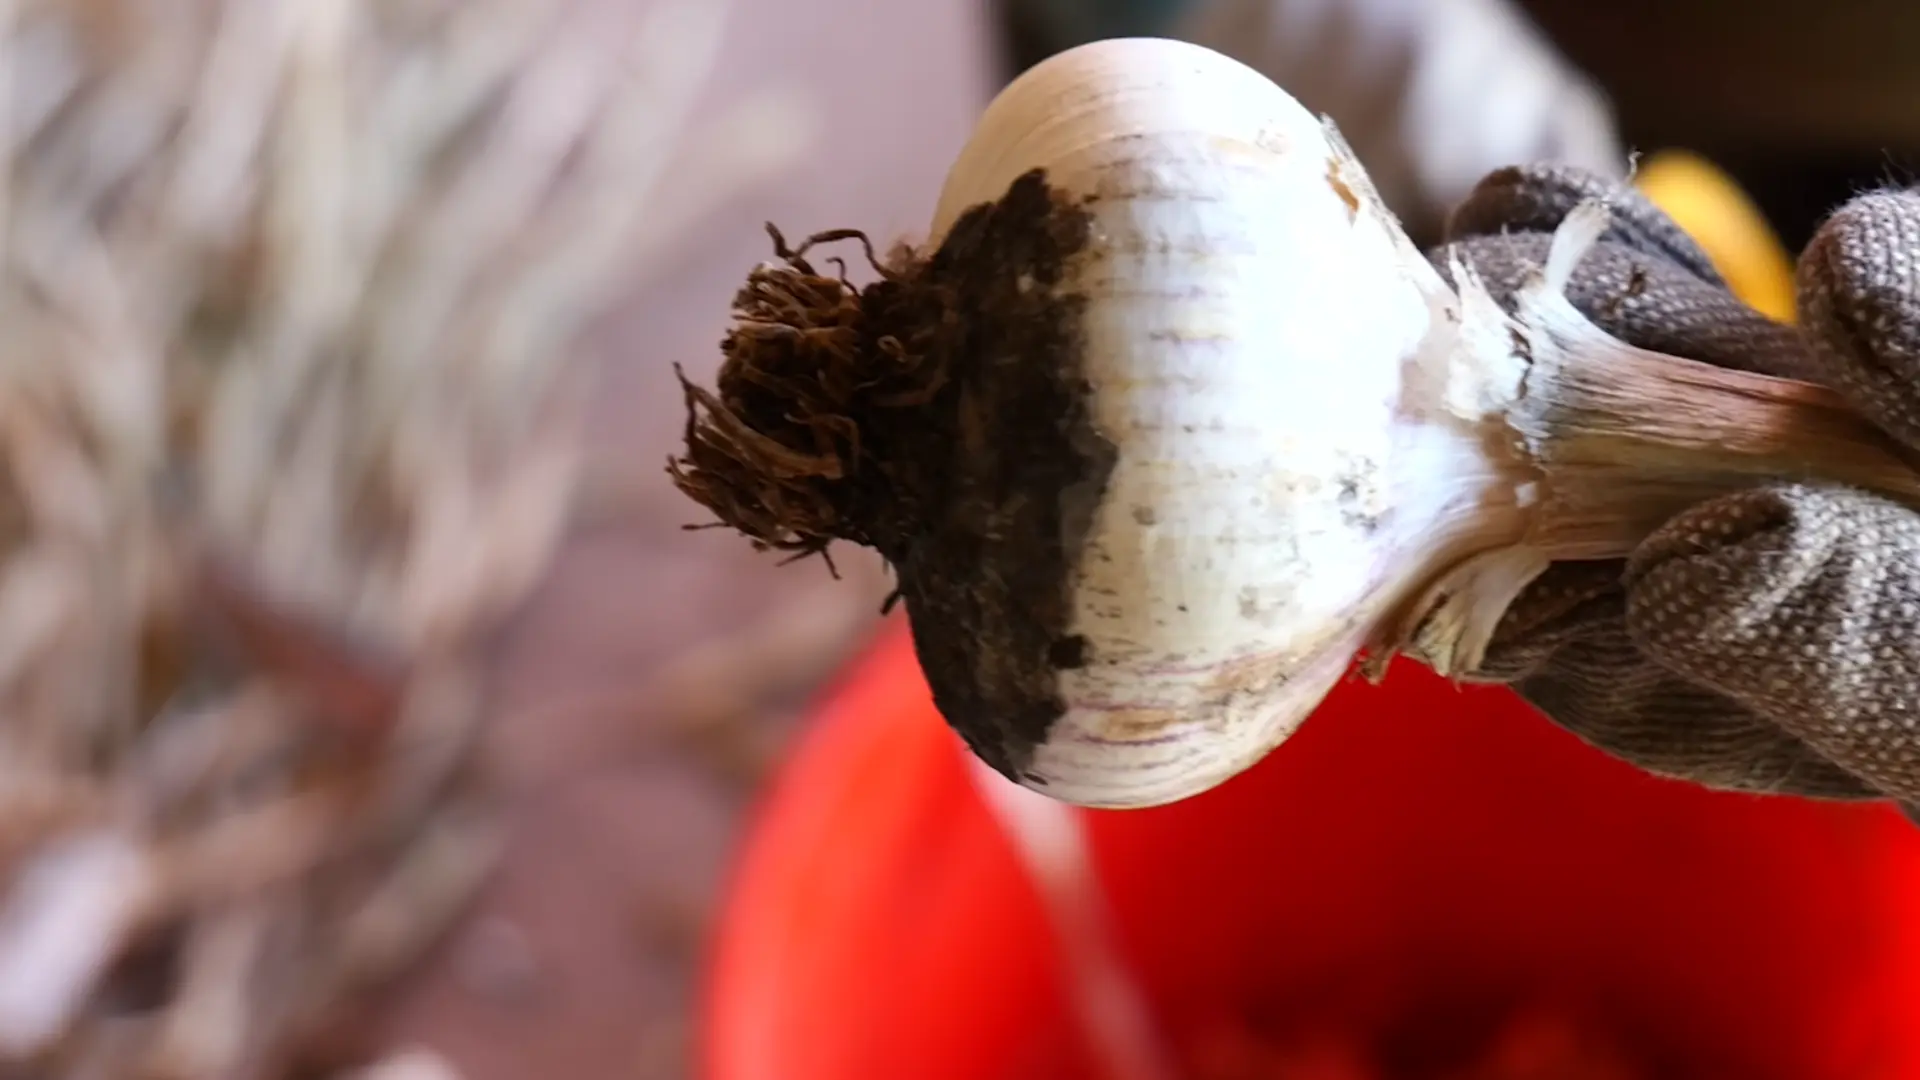
Trim the roots to about one inch, but avoid cutting into the root plate where the roots meet the bulb. Damaging that base can shorten storage life by weakening the bulb’s structure. Use clean scissors or pruners and trim gently.
The garlic should look neater, but the bottom of the bulb should stay fully protected.
Tip: Never cut into the hard base of the bulb while trimming roots.
Step 5: Bundle Garlic In Groups
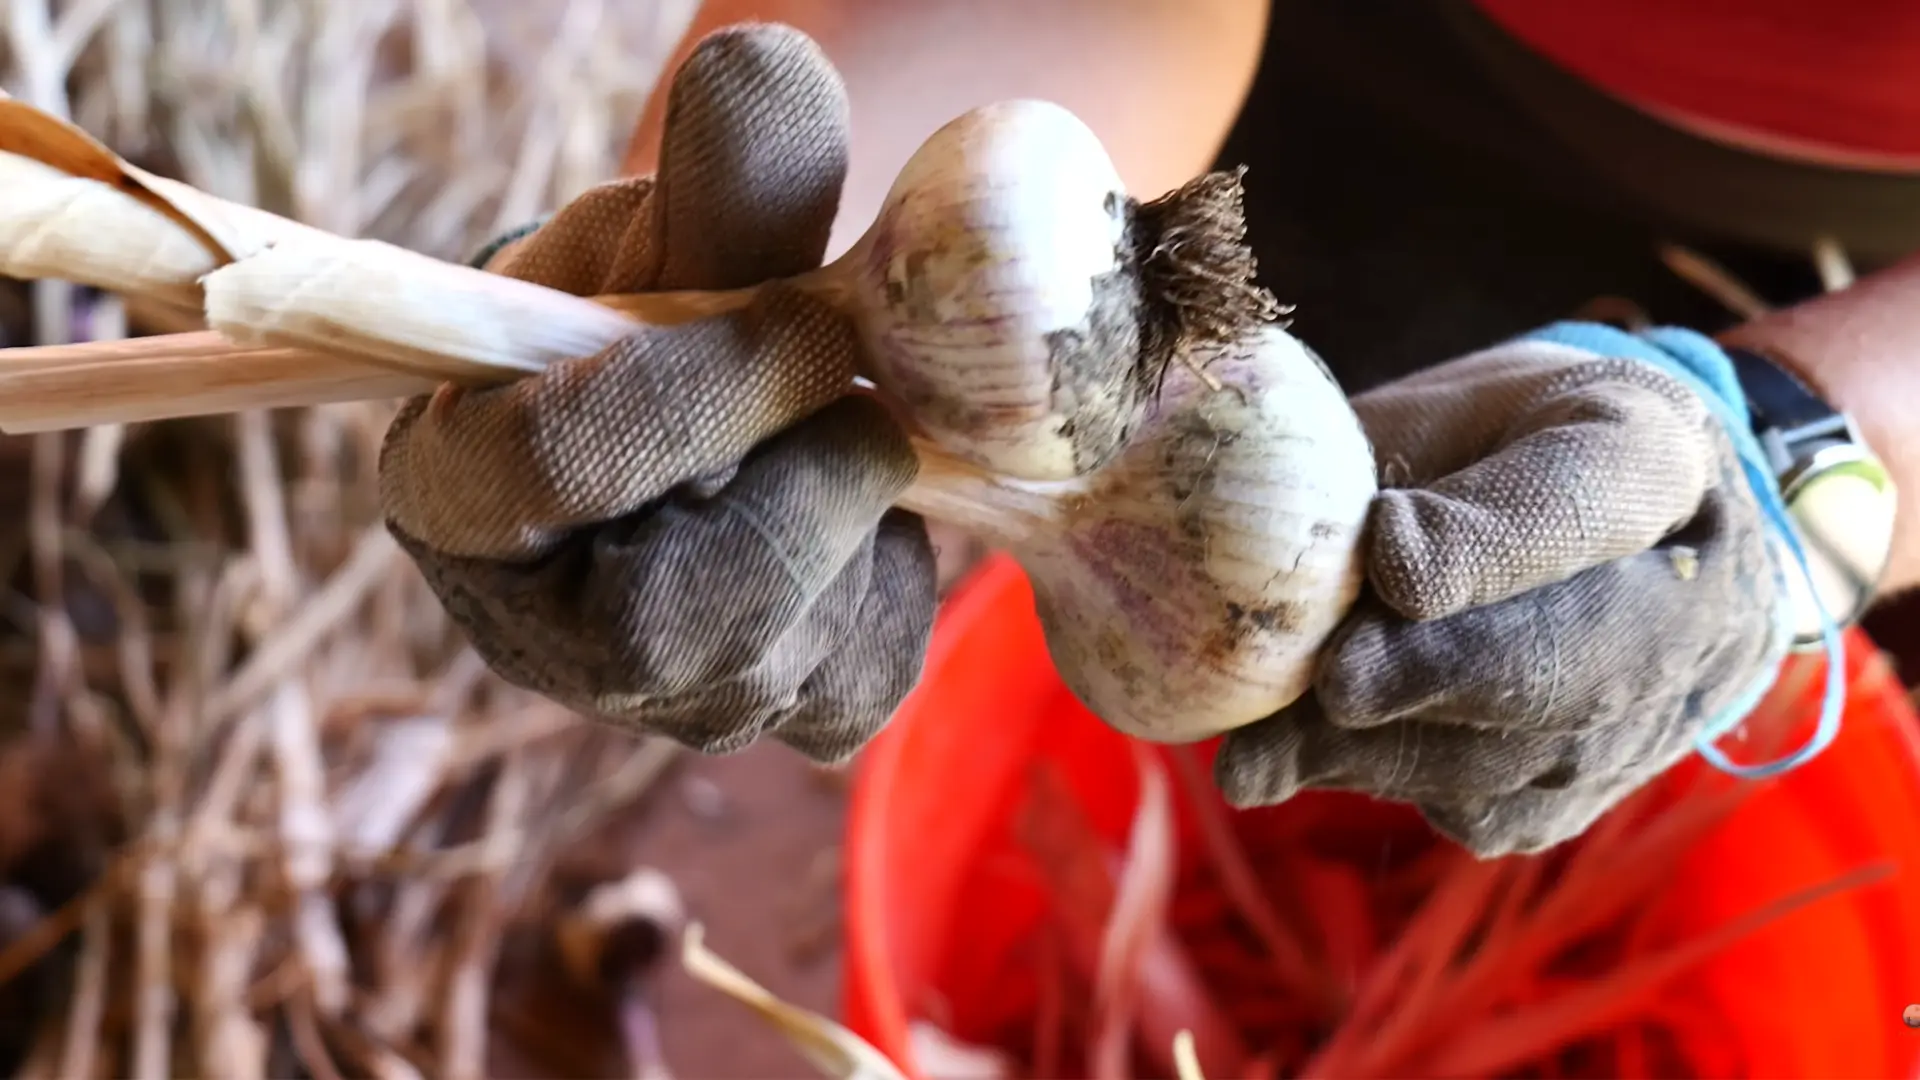
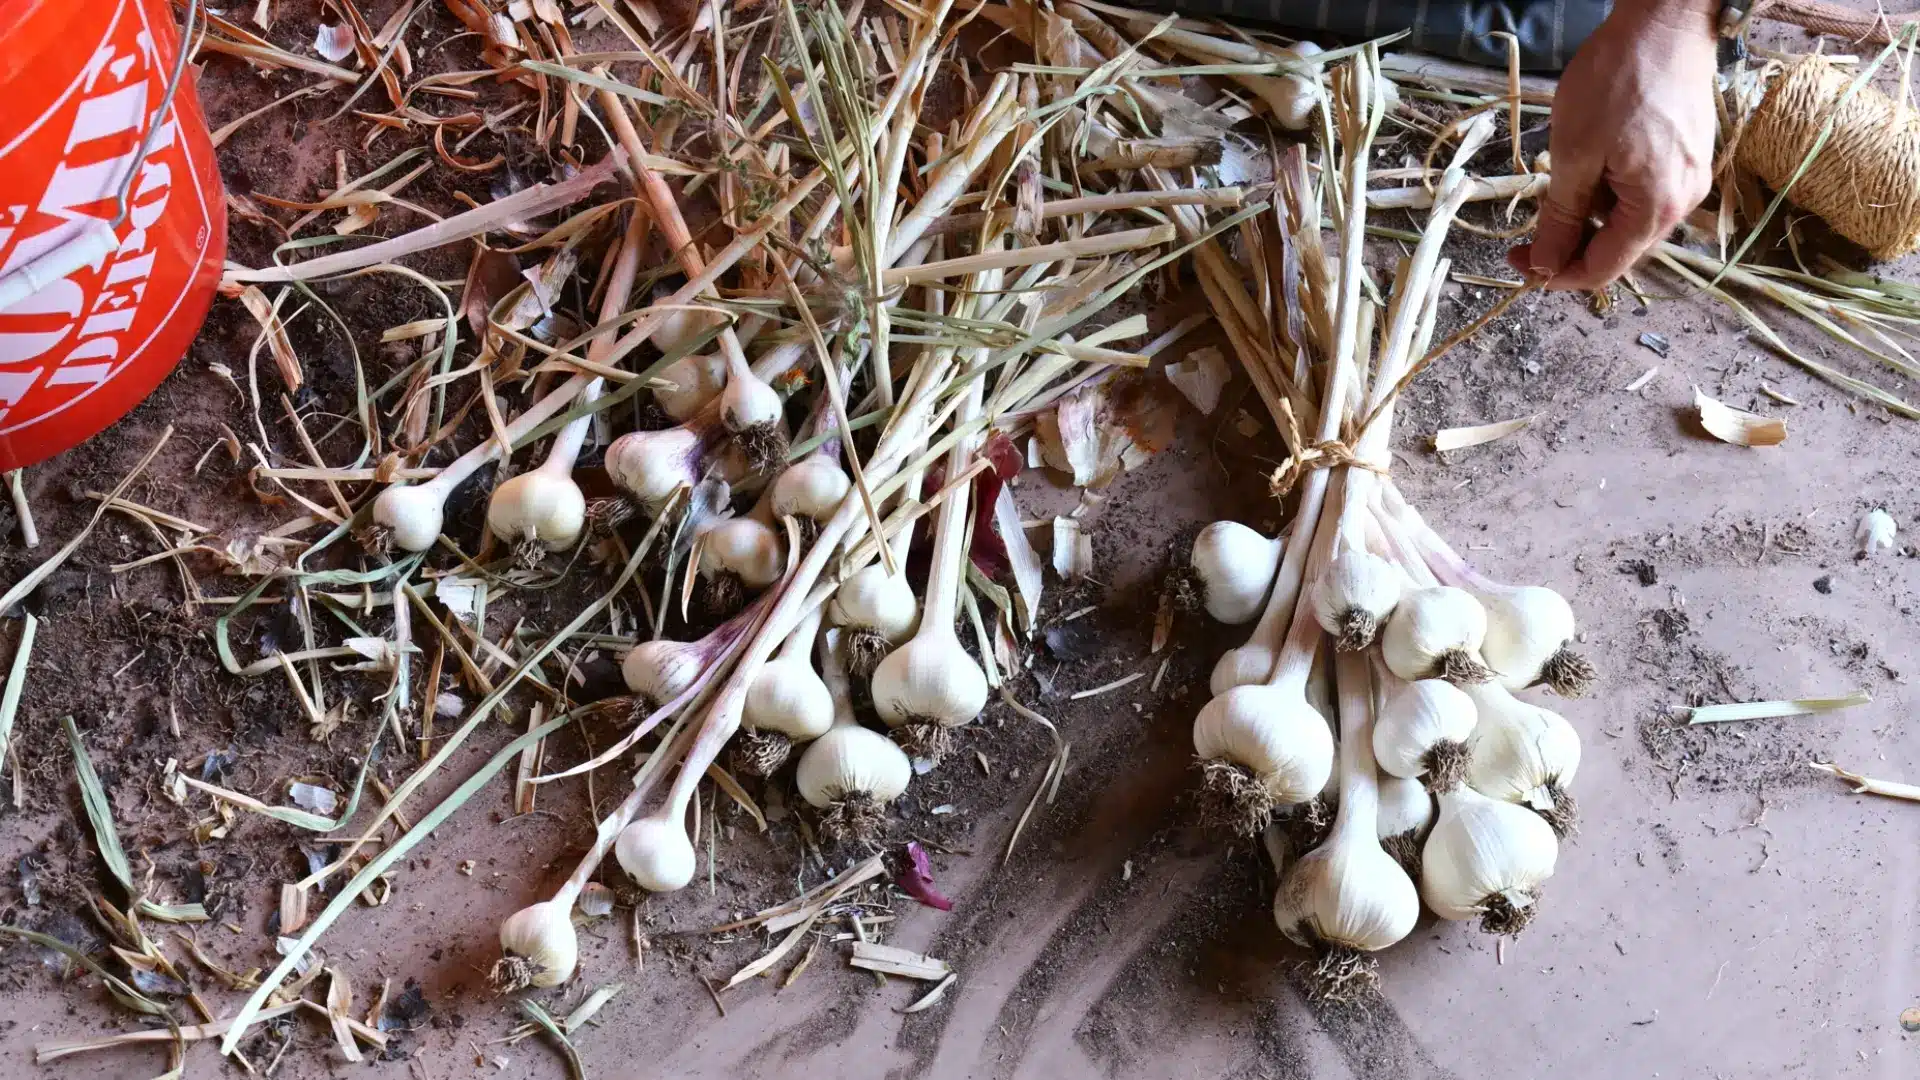
Gather garlic into small groups before tying. A bundle of about 10 to 12 bulbs can work if the stems are dry enough and the bunch is not packed too tightly. Keep the bulbs facing downward and the stems gathered neatly at the top.
Bundling makes it easier to hang garlic while keeping each group organized during curing.
Step 6: Tie Bundles With Twine
Wrap twine around the stems and tie a secure knot so the bundle can hang safely. A simple double knot works well and does not need to look fancy. The tie should hold the stems firmly without crushing them.
Once tied, the bundle can be lifted onto a hook, wire, or hanging frame to finish curing.
Tip: Tug the twine lightly before hanging to ensure the bundle does not slip.
Step 7: Label Each Garlic Variety

If more than one garlic variety is grown, add a label to each bundle before hanging. This makes it easier to track which row or variety produced the best bulbs. Labels also help when choosing seed garlic for next season.
Keeping varieties separate can show which garlic stores well and which one gives the strongest harvest.
Step 8: Hang Garlic In Shade
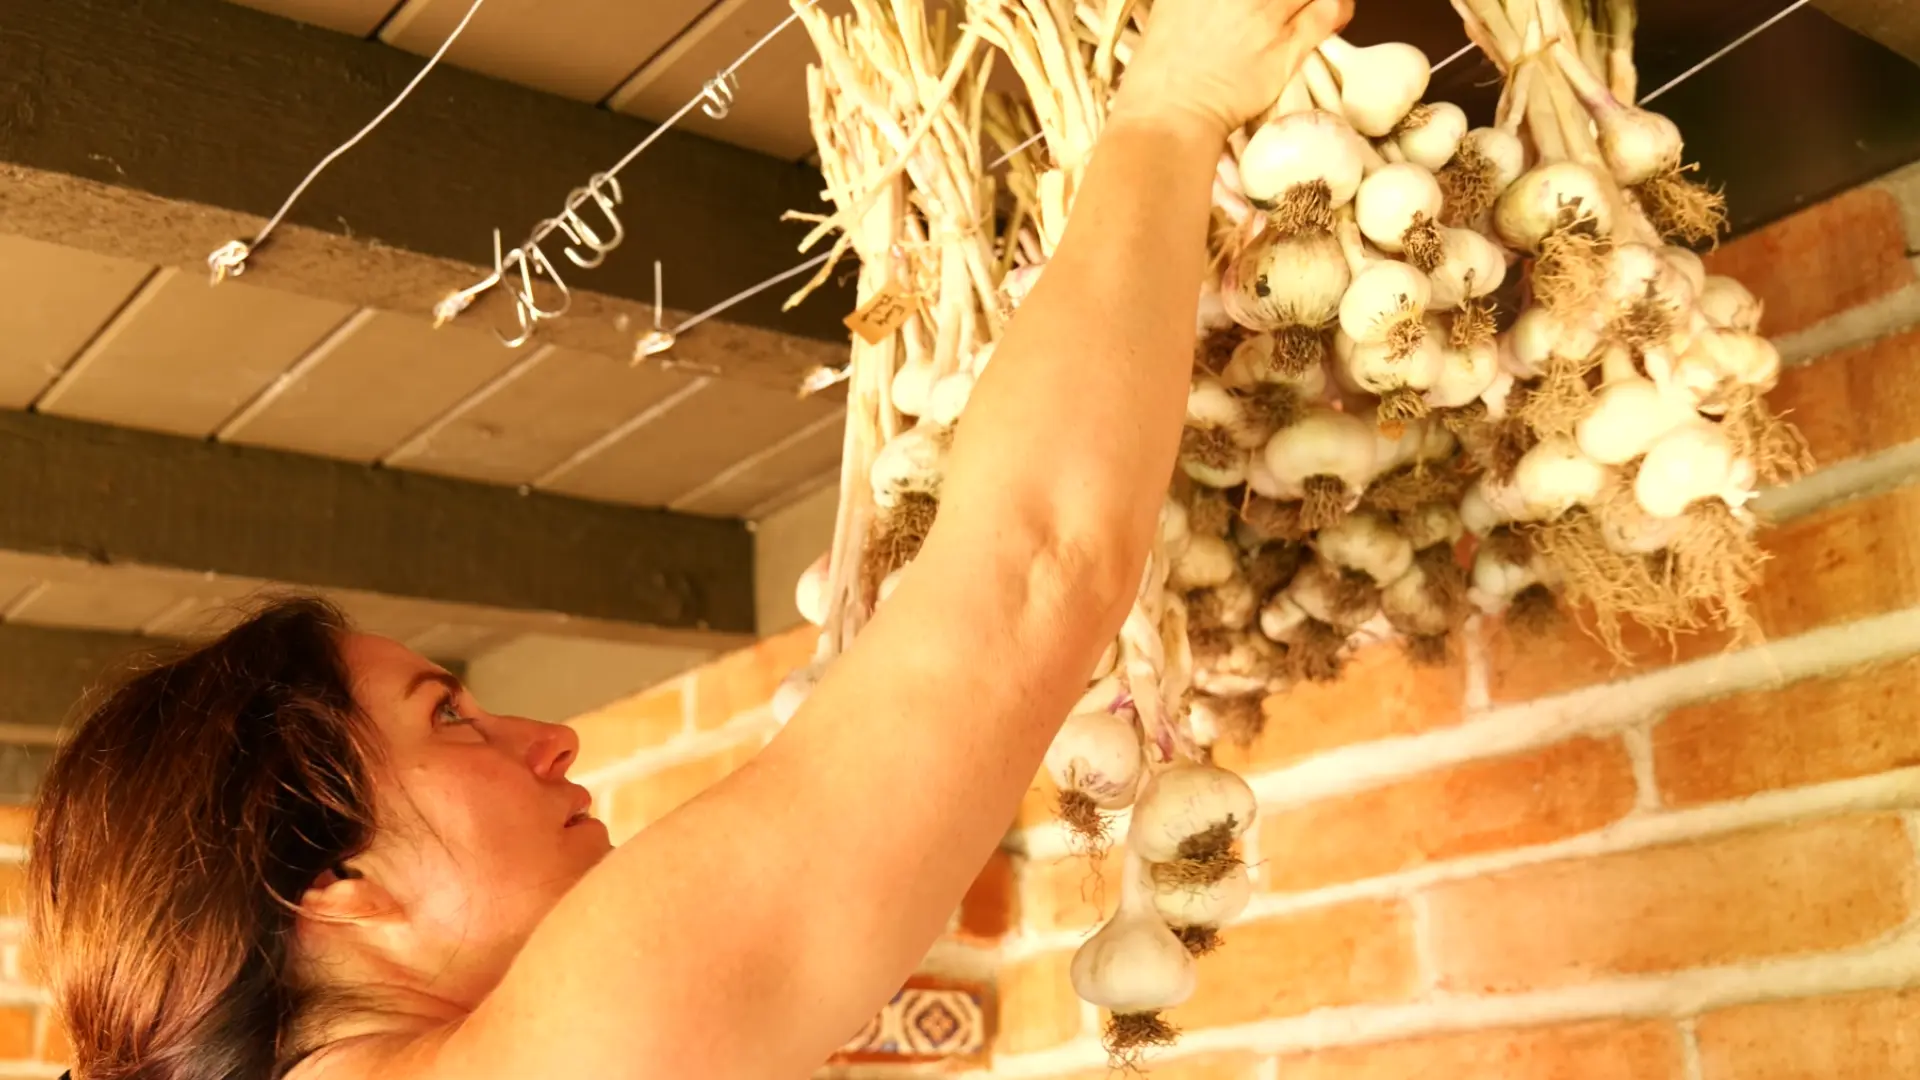
Hang the bundles on hooks, wire, or a raised drying frame in a shaded spot. Garlic should stay protected from direct sunlight while still getting enough airflow. Hanging also keeps the crop away from ground moisture and pests.
The bulbs should have space around them so the remaining moisture can leave slowly and evenly.
Step 9: Check The Neck Before Storage
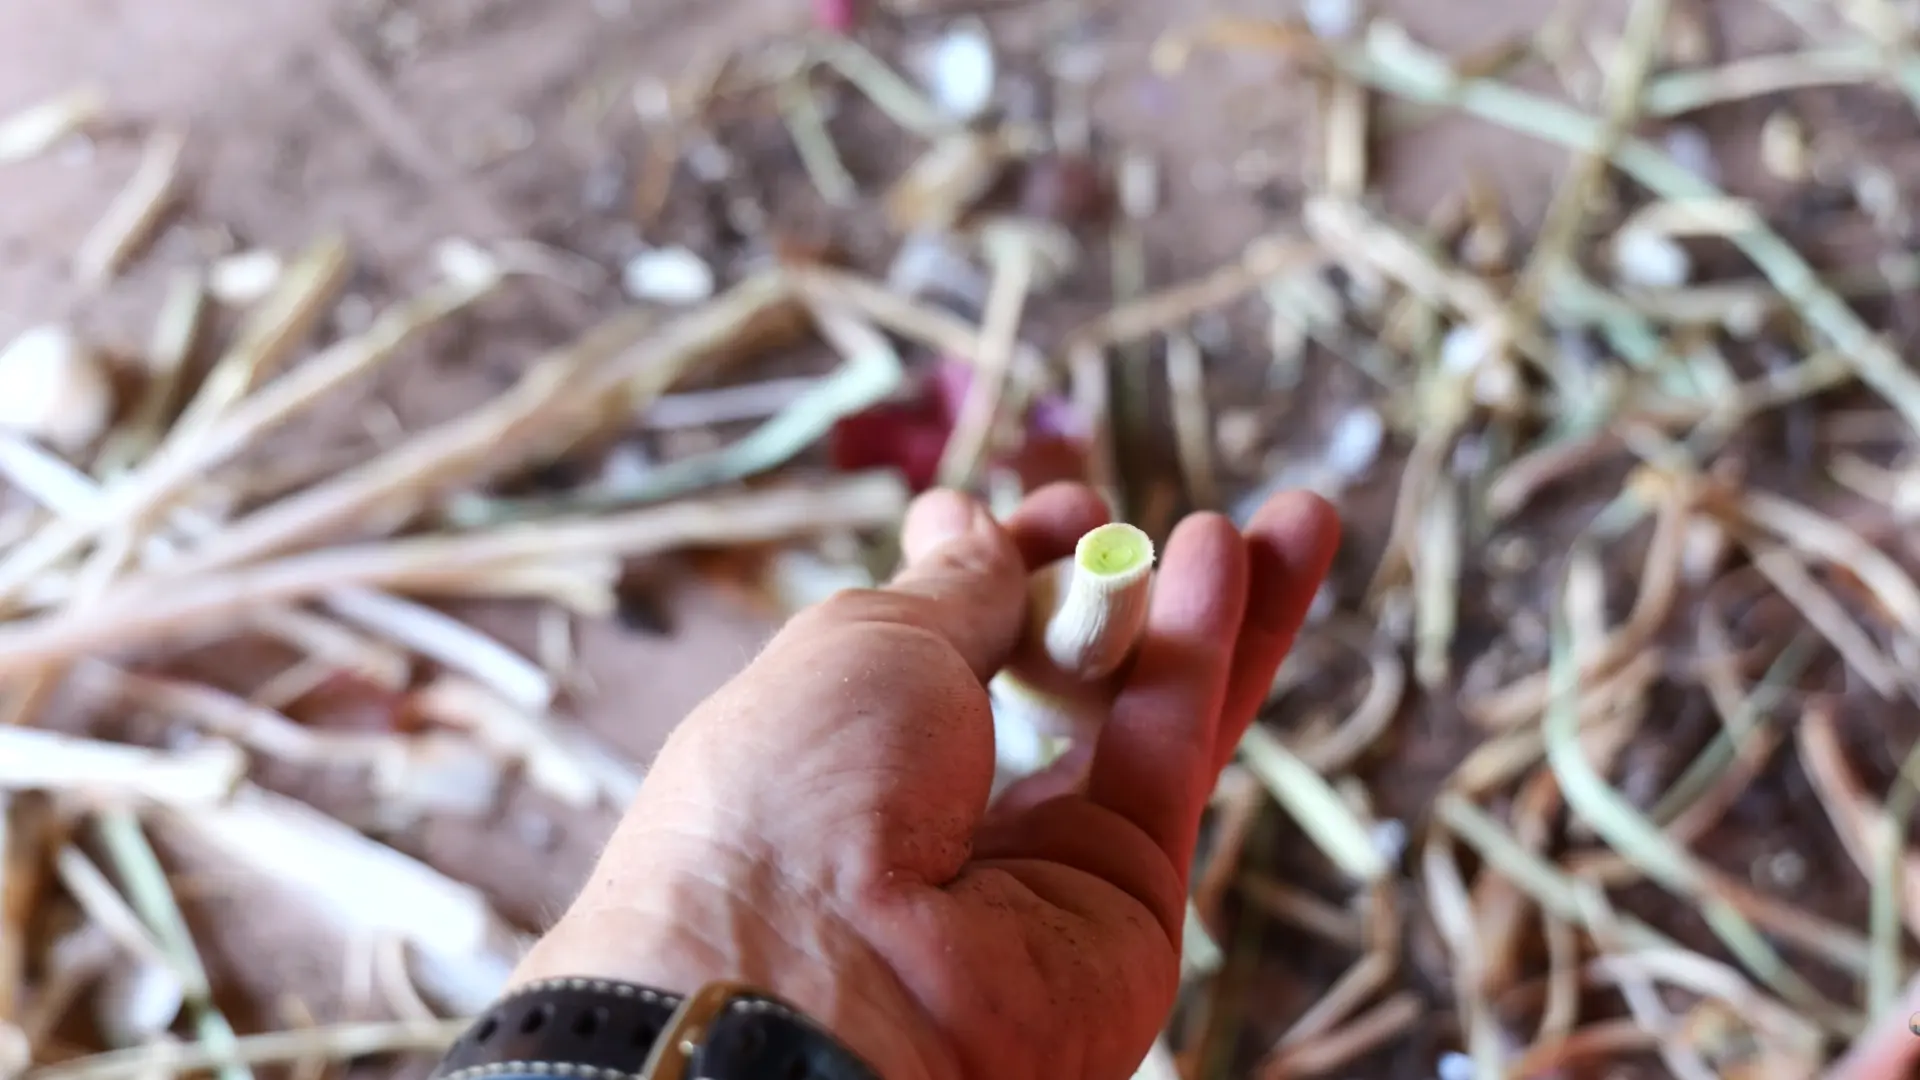
Before storing garlic, check the neck where the stem meets the bulb. Even when the leaves look fully dry, the inside of the neck may still be green or moist.
This part often takes longer to dry than the outer leaves. Garlic should not be stored until the neck feels dry and firm.
Tip: If the neck still shows green inside, keep curing longer.
Step 10: Finish Curing Before Indoor Storage
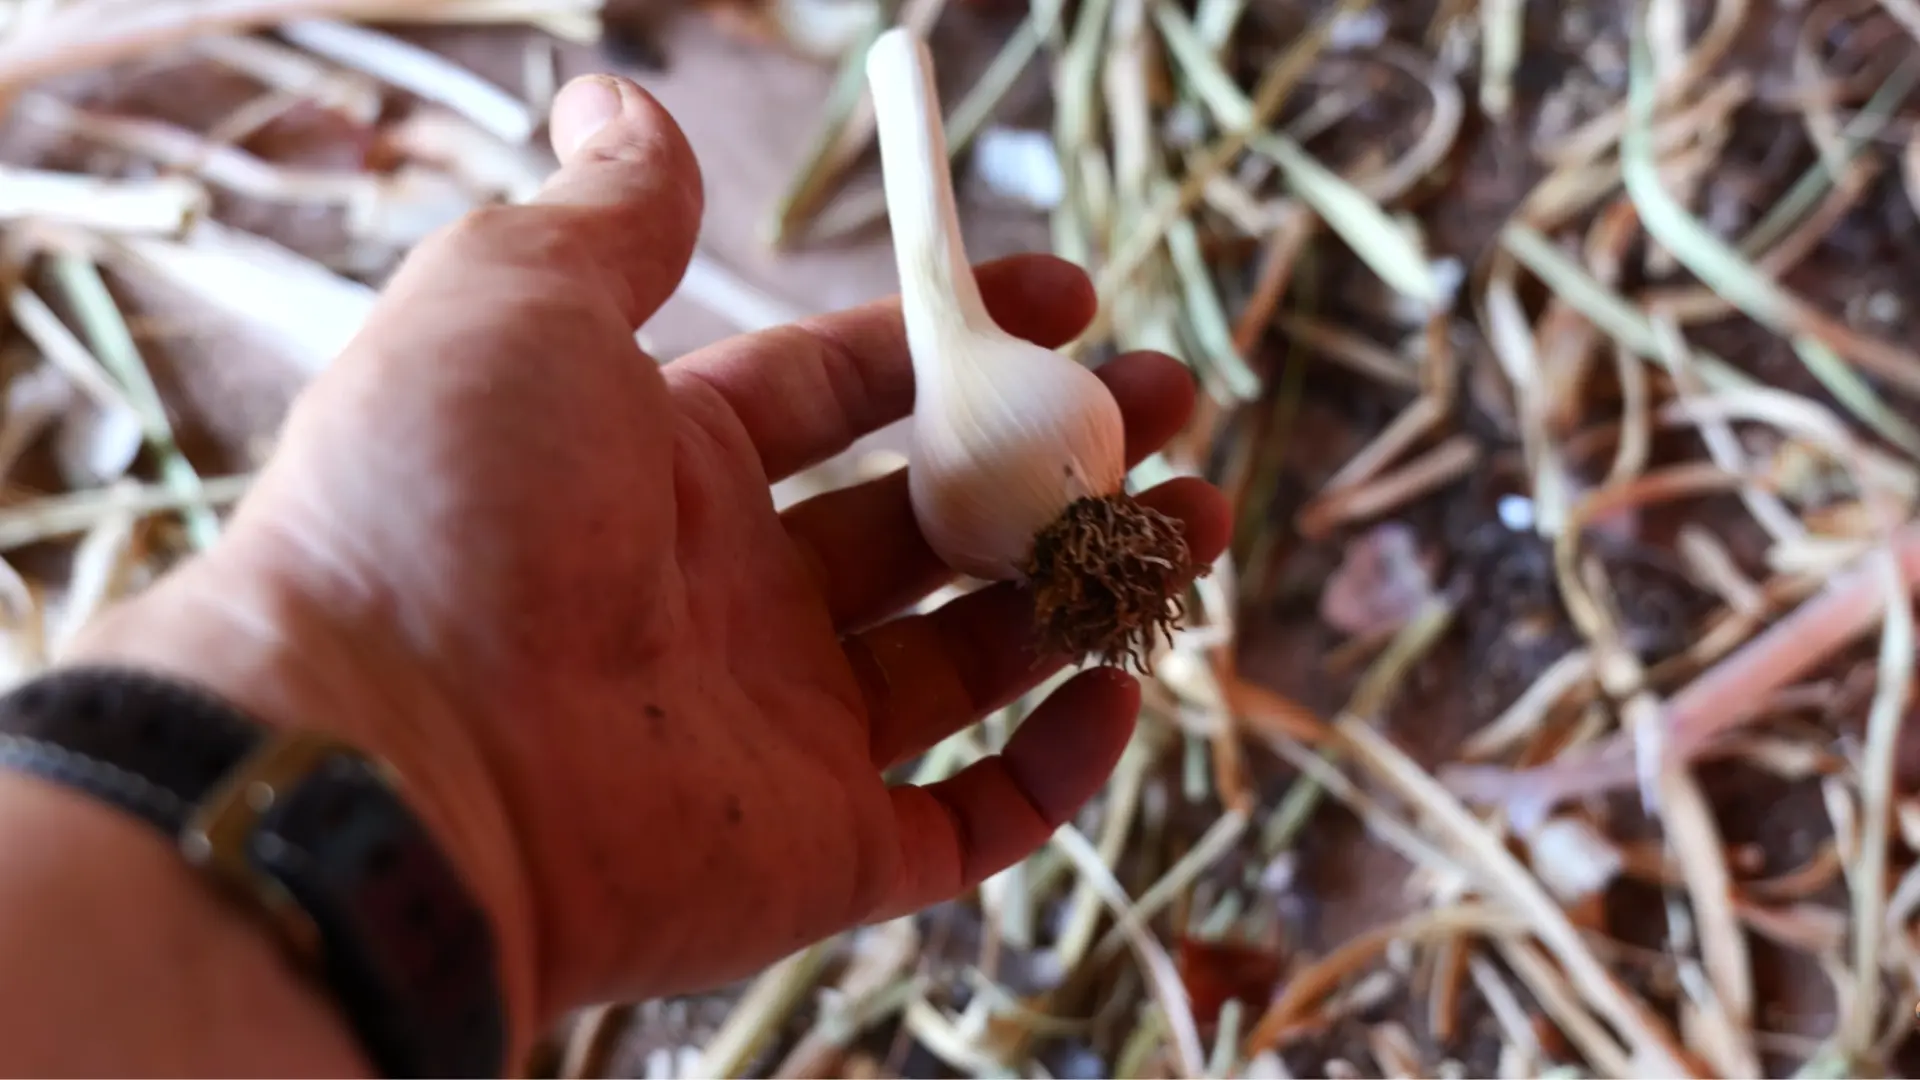
Let the garlic finish curing until the moisture is gone from the stems, necks, roots, and outer skins. Once fully dry, the bulbs can be trimmed more neatly and taken indoors for storage. Rushing this final stage can lead to soft bulbs or mold.
You can watch the video below to see the complete curing process in action.
Signs Garlic Is Fully Cured
Before storing garlic, it is important to check whether it is fully cured, as timing affects storage life. Simple checks using sight, touch, and smell help confirm if the bulbs are ready or still need more drying time in a shaded, airy space.
- Papery Skins: Outer skins feel dry and papery, producing a light rustling sound when gently touched. This shows moisture has fully left the outer layers, and the bulb is ready for storage.
- Firm Bulbs: The bulb feels solid and firm in the hand, with no rubbery or soft spots near the neck. A strong structure means the cloves inside are properly protected for long storage.
- Dry Roots: Roots appear brown, dry, and stiff rather than soft or fresh. Dry roots indicate the garlic has completed its curing stage and no longer holds excess moisture.
- Brown Stalks: Stalks appear brown, brittle, and fully dried rather than green or flexible. This is a clear sign that moisture has completely moved out of the plant.
- Neck Condition: The neck near the bulb should feel dry and tight. If it still feels green, thick, or flexible, the garlic needs more curing time before storage.
- Smell Check: Properly cured garlic has a clean, normal garlic smell. Any sour, musty, or damp smell can indicate incomplete curing or early spoilage.
Garlic is ready for storage only when all signs confirm dryness and firmness together. Careful checking now helps ensure months of clean, usable bulbs without early spoilage.
How Long Does Garlic Curing Take
Some gardeners cure garlic for a full month or longer, especially when storing it through winter. That extra time can help large bulbs dry more evenly. If the center neck still feels green or soft, keep curing. Trimming too soon can trap moisture near the bulb and shorten storage life.
| Garlic Condition | Usual Curing Time |
|---|---|
| Small bulbs in dry weather | 2 to 3 weeks |
| Average homegrown garlic | 3 to 4 weeks |
| Large hardneck bulbs | 4 weeks or longer |
| Humid climate | 4 weeks or longer |
| Poor airflow | Longer with higher mold risk |
You can use the calendar as a guide, but the bulb tells the real story. Garlic is ready only when the neck, roots, and skins are dry.
Community Insights On Garlic Curing
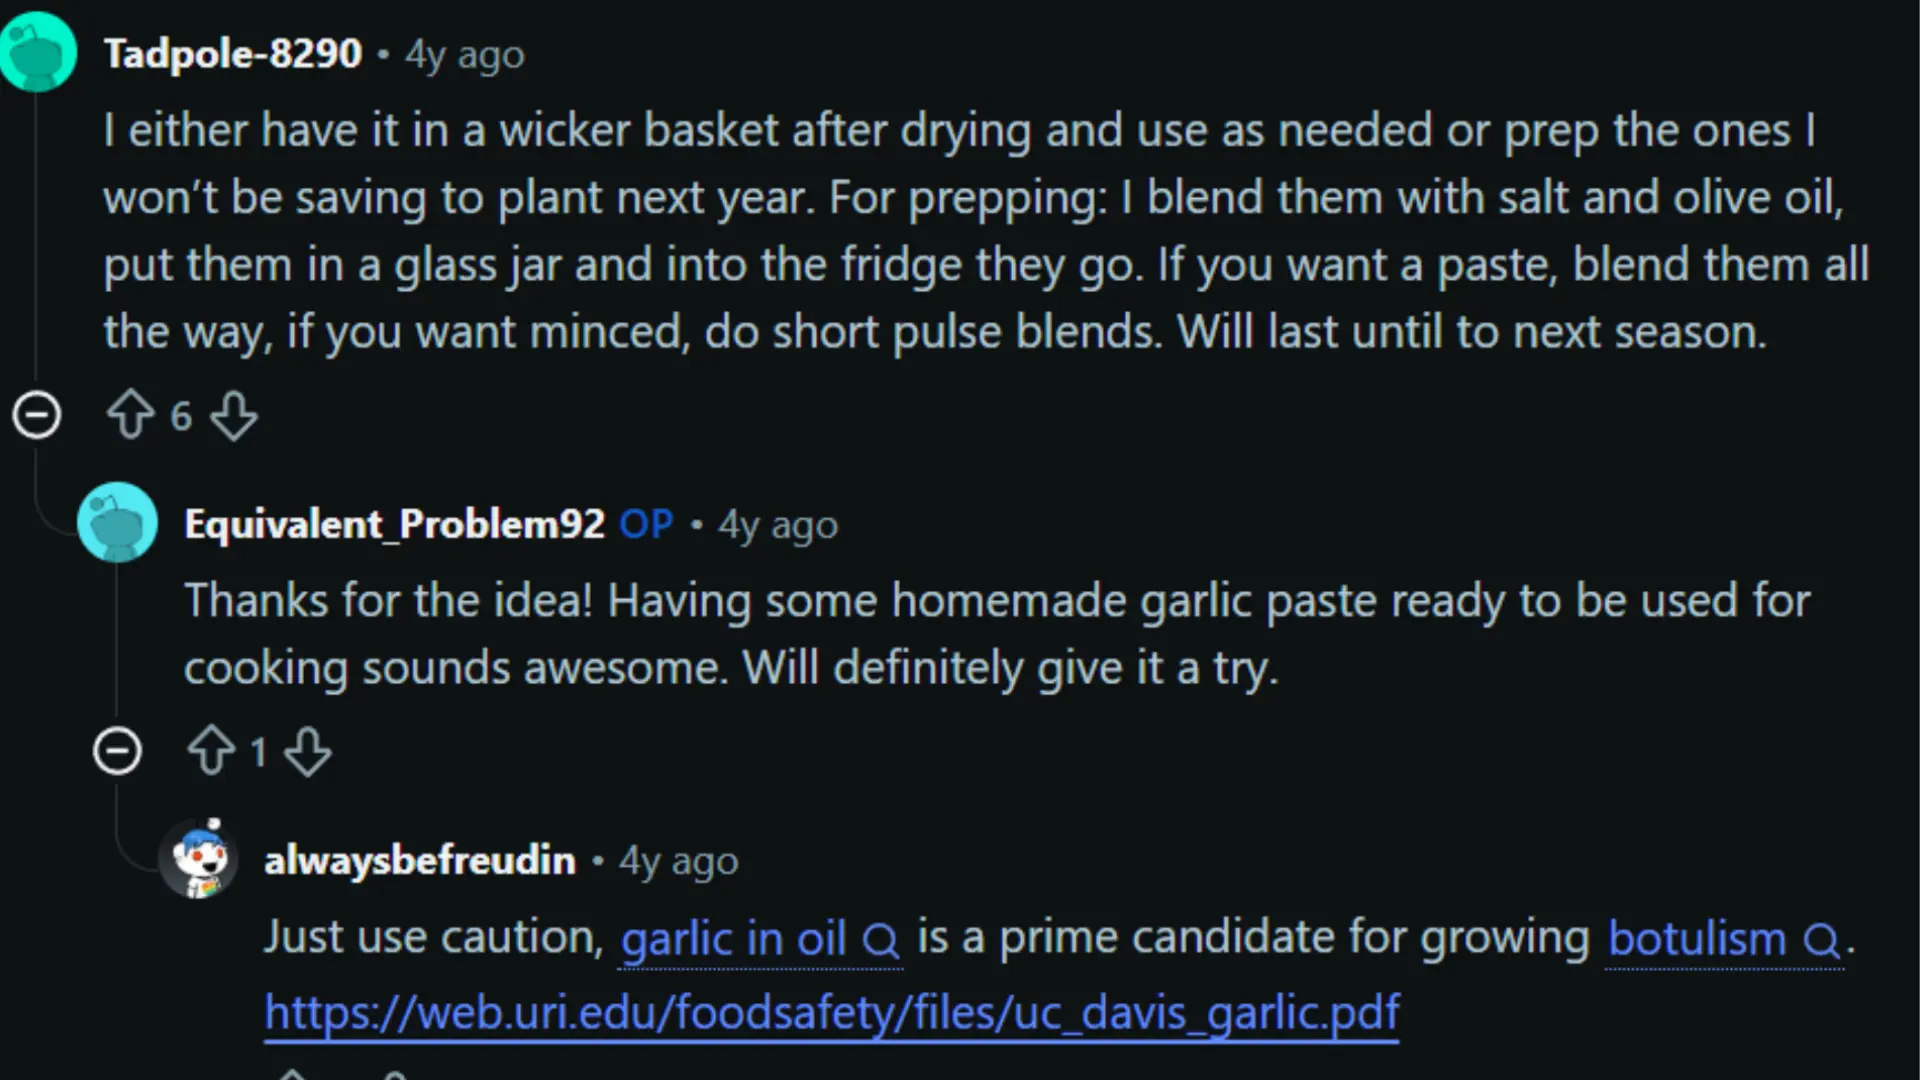
This Reddit discussion shows how common confusion is after harvesting garlic, especially for first-time growers. I often see the same questions come up about whether garlic should be washed, how long it should be dried, and where it should be stored.
From the replies, one thing becomes very clear: curing garlic properly is more important than the harvest itself. Most experienced gardeners recommend keeping bulbs unwashed, brushing off soil gently, and allowing them to dry slowly in a shaded, airy space.
There is also a strong focus on avoiding moisture and giving enough airflow so the skin can tighten naturally. What I find most useful is how practical these real-life tips are, especially for small home gardens where storage space and climate conditions vary widely.
Best Places To Cure Garlic
The best place to store garlic is always a shaded, dry, and well-ventilated space where air can move freely around each bulb. I have learned that you do not need any fancy setup, but you do need consistent airflow and protection from moisture buildup.
A garage works well for home harvests when garlic is placed on racks or hung in loose bundles, but you must watch for heat buildup and still air. A covered porch is great for natural airflow, although rain splash and direct sunlight should be avoided. A shed can handle larger harvests, but damp corners and pests need attention.
For smaller batches, a spare room works if airflow is supported with a fan. Barn spaces are suitable for big harvests but may carry dust and humidity risks. A garage or porch is often ideal, but avoid basements because trapped moisture can slow drying and affect curing quality.
Hardneck vs. Softneck Storage Differences
Garlic type affects storage time. You can still cure both types in the same basic way, but storage expectations should be different. Hardneck garlic has a stiff central stalk and fewer larger cloves.
It often grows well in colder areas, but it may not store as long as softneck garlic. Softneck garlic has flexible stems and tighter wrapper layers, so it is often better for longer storage.
| Garlic Type | Storage Pattern | Best Use |
|---|---|---|
| Hardneck garlic | Often stores for a shorter time | Cold climates, large cloves, bold flavor |
| Softneck garlic | Often stores longer | Warmer areas, braiding, pantry storage |
| Elephant garlic | Storage varies | Mild garlic-like cooking uses |
Use damaged hardneck bulbs first, save the largest healthy bulbs for planting, and check stored bulbs more often.
How To Store Cured Garlic
Storing cured garlic the right way makes a big difference in how long it stays fresh and usable. I have found that simple storage choices and steady conditions help keep bulbs firm, flavorful, and free from early spoilage when handled correctly at home.
- Cool Storage: Keeping garlic in a cool space slows sprouting and helps preserve firmness and flavor over several months without affecting bulb quality.
- Dark Environment: Storing garlic in a dark environment prevents green shoots from forming and helps maintain natural freshness and long-term storage stability.
- Dry Conditions: A dry space protects garlic from moisture buildup, which can cause mold, soft spots, and early breakdown in stored bulbs.
- Breathable Containers: Mesh bags, baskets, and cardboard boxes allow airflow, preventing trapped humidity and keeping garlic in better condition longer.
- Avoid Plastic: Sealed plastic traps moisture around bulbs, increasing the risk of rot, mold, and faster spoilage during storage periods.
- Pantry or Cellar: A pantry, cupboard, or cellar works well when air is stable and not damp, offering ideal everyday storage conditions.
- Monthly Check: Checking stored garlic monthly helps remove any soft or sprouting bulbs before they affect the rest of the batch.
Storing garlic well is all about balance, and I always remind you that small habits make a big difference in keeping your harvest usable for months.
Garlic Curing Problems And Fixes
Even a good harvest can run into trouble if the curing space is humid, hot, crowded, or too still. Quick checks can save the rest.
| Problem | Likely Cause | What To Do |
|---|---|---|
| Mold during curing | Humidity or poor airflow | Spread bulbs out and use a fan |
| Green neck after weeks | Bulbs need more drying time | Keep curing and check again |
| Bulbs split open | Harvested too late | Use these bulbs first |
| Soft cloves | Bruising or rot | Remove from storage |
| Sprouting in storage | Warmth, light, or fridge moisture | Move bulbs to a darker, drier spot |
If garlic was harvested too early, cure it anyway, but expect shorter storage. If it was harvested too late, set split bulbs aside for cooking first. Storage quality depends on firm bulbs, intact wrappers, and dry necks.
Using Cured and Uncured Garlic
These recipes help you use both cured and uncured garlic in different ways, depending on the flavor you want. I often switch between the two because they bring completely different depth to cooking.
Where Cured Garlic Works Best

Cured garlic works best in recipes where you want a balanced garlic flavor without too much sharpness. Since the cloves have lost extra moisture, they become softer and easier to mash, roast, or blend into different dishes. The mellow flavor allows garlic to support other ingredients rather than overpower them.
- Roasted Garlic Pasta: Cured garlic blends with butter, olive oil, and herbs to create a smooth sauce base. The gentle sweetness of roasted cured cloves adds richness without making the pasta taste too strong.
- Garlic Herb Spread: Soft-cured garlic can be mashed with butter, parsley, salt, and herbs to create a creamy spread. It works well on bread, toast, or warm homemade rolls.
- Soups and Stews: Slow cooking allows cured garlic to release its flavor gradually. It adds warmth and depth to soups, stews, and other comfort dishes without creating a sharp garlic bite.
- Roasted Vegetables: Tossing cured garlic with vegetables before roasting creates a lightly sweet and caramelized flavor. The cloves soften during cooking and add extra richness to simple vegetable dishes.
Use cured garlic when you want a smoother flavor that blends naturally into slow-cooked meals and sauces.
Where Uncured Garlic Works Best

Uncured garlic is ideal when you want a stronger garlic presence in your food. Because it has not gone through the curing process, it contains more moisture and delivers a sharper, fresher taste. It works especially well in recipes where garlic is meant to stand out.
- Fresh Stir-Fry: Uncured garlic adds a strong aroma when quickly cooked with vegetables, noodles, or protein. Adding it early in hot oil helps release its fresh flavor throughout the dish.
- Salad Dressings: Crushed raw garlic adds a bold flavor to homemade dressings and pairs well with olive oil, vinegar, lemon juice, and herbs for a fresh topping.
- Chutneys and Sauces: Fresh garlic blends easily into spicy chutneys and sauces, creating a stronger flavor that pairs well with vegetables, grilled foods, and snacks.
- Quick Sauté Base: Lightly frying uncured garlic in oil creates a fragrant base for everyday meals. It can be used before adding vegetables, meat, rice, or pasta.
If you have extra uncured garlic that cannot be used immediately, preserve it by properly curing or drying it. Learning how to dry garlic starts with slicing cloves evenly, slowly removing moisture, and storing the dried pieces in a clean, airtight container for later use.
Frequently Asked Questions
Can I use a food dehydrator or an oven on a low setting to speed up the curing process?
No, you should never use artificial heat to cure garlic bulbs. Curing is a slow, natural drying process, not cooking. Applying heat from an oven or dehydrator will inadvertently cook or change the chemical composition of the cloves, ruining their texture, flavor, and long-term viability. Dehydrators should only be used if you are actively drying individual, sliced cloves to make garlic powder.
Is it safe to peel off the outermost dirty layer of skin after the garlic is fully cured?
Yes, absolutely. Once the garlic is completely cured, you can gently peel away the very top, dirt-stained papery layer to reveal a clean, bright wrapper underneath. This is a common practice if you plan to gift your garlic or want it to look pristine in the pantry. Just be careful not to peel off too many layers, as the bulb needs those wrappers to stay protected from air and moisture.
What should I do if I notice a single bulb starting to rot inside a hanging bundle?
Remove it immediately. Rot and mold can quickly spread to adjacent bulbs via spores or direct contact. Cut the affected bulb out of the bundle, inspect the surrounding bulbs for any soft spots or dampness, and increase the airflow in your curing space by introducing a fan.
Can I store cured garlic in the refrigerator to extend its shelf life?
Avoid storing whole, cured bulbs in the refrigerator. The cold, humid environment of a standard fridge mimics winter soil conditions for the garlic. This triggers a biological response that tells the bulb it is time to grow, causing it to break dormancy and sprout green, bitter shoots within days of being brought back out to room temperature.
Does a late-spring frost right before harvest affect how the garlic cures?
A light frost won’t usually hurt mature bulbs, but a severe freeze right before harvest can damage the cellular structure of the outer layers. If your garlic went through a hard freeze just before you dug it up, it will hold more water and be much more prone to rotting during the curing phase. You will need to give it extra spacing and highly active airflow to ensure it dries out properly
Final Garlic Curing Storage
Keeping your homegrown harvest fresh for the winter relies entirely on patience right after digging. I always remind myself that a slow, shaded drying period is what turns a vulnerable crop into a long-lasting pantry staple.
Good curing habits help maintain garlic quality throughout storage.
Now that you know how to cure garlic effectively, you can avoid common pitfalls such as mold and soft cloves. These habits keep your kitchen stocked with rich flavor for months.
I encourage you to try these steps with your current batch. Share your thoughts below or check out my other helpful storage guides.