Stains happen. Coffee on a white shirt, grass on your kid’s jeans, grease on your favorite top.
Store-bought stain removers are expensive, full of chemicals you cannot pronounce, and still leave you scrubbing. A two-ingredient mix from your cabinet handles most stains just as well, sometimes better, than that $10 bottle.
This guide covers different homemade stain remover methods, from sprays to sticks to soaks, so you can pick the right one every time.
What’s in Your Store-Bought Stain Remover?
Most commercial stain removers contain surfactants, oxygenated bleach, alcohol-based solvents, and synthetic fragrances.
The two active ingredients doing the real work, hydrogen peroxide and washing soda, cost under $5 total at any grocery store.
You can make the same thing at home, skip the chemicals you cannot pronounce, and spend far less per use.
Ingredients You Need Before You Start
Most of these are probably already in your kitchen or bathroom. Here is what each one does and why it matters.
- Hydrogen Peroxide: Breaks down the color molecules inside stains. Use only a fresh 3% solution; an old bottle loses its strength quickly.
- Dish Soap (Dawn specifically): Acts as a surfactant, helping water and oil mix, so greasy stains lift off fabric instead of spreading. Dawn Ultra works best because it contains enzymes that most other dish soaps do not.
- Baking Soda: Has a mildly rough texture that loosens stuck-on stains and pulls odors out of fabric. It also helps thicken pastes so they stay put.
- White Vinegar: Cuts through light, alkaline-based stains like sweat, grass, and coffee residue. Not great on grease, so pair it with dish soap for those.
- Washing Soda (Sodium Carbonate): Stronger than baking soda and more alkaline. This is the main ingredient in homemade OxiClean-style soaks. Do not confuse it with baking soda; they are different products.
- Lemon Juice: Contains citric acid that works like a mild bleach on white or very light fabrics. Best for yellow armpit stains and light rust marks. Keep it away from dark or colored fabrics.
6 DIY Homemade Stain Remover Methods
Not every stain needs the same fix. A fresh tomato splash is a very different problem from a grease mark that sat through the dryer twice. These six DIY stain-remover styles cover every situation you’re likely to run into.
Method 1: The Spray (Best for Everyday Stains)
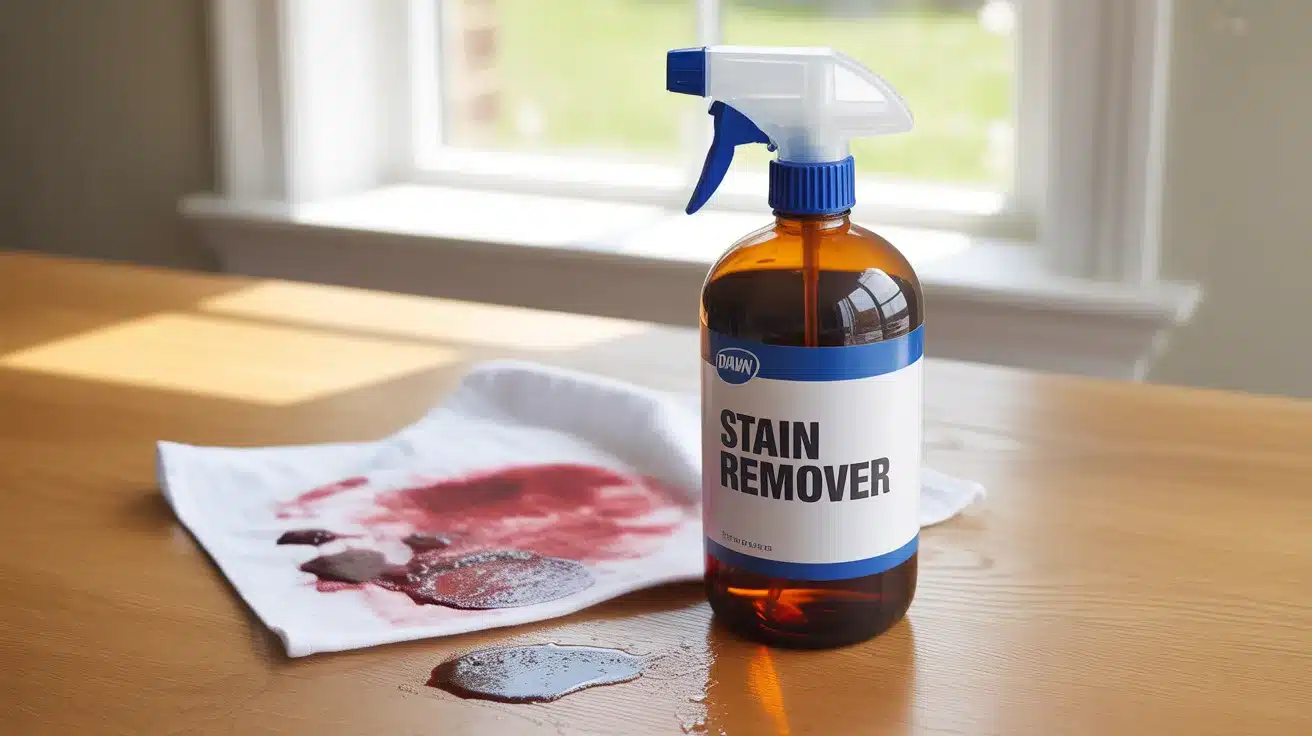
This is the most popular DIY stain remover for good reason. It takes two minutes to make, lives in your laundry room, and handles most everyday stains on contact. Works on food, wine, blood, pet accidents, and yellow fabric discoloration.
Ingredients:
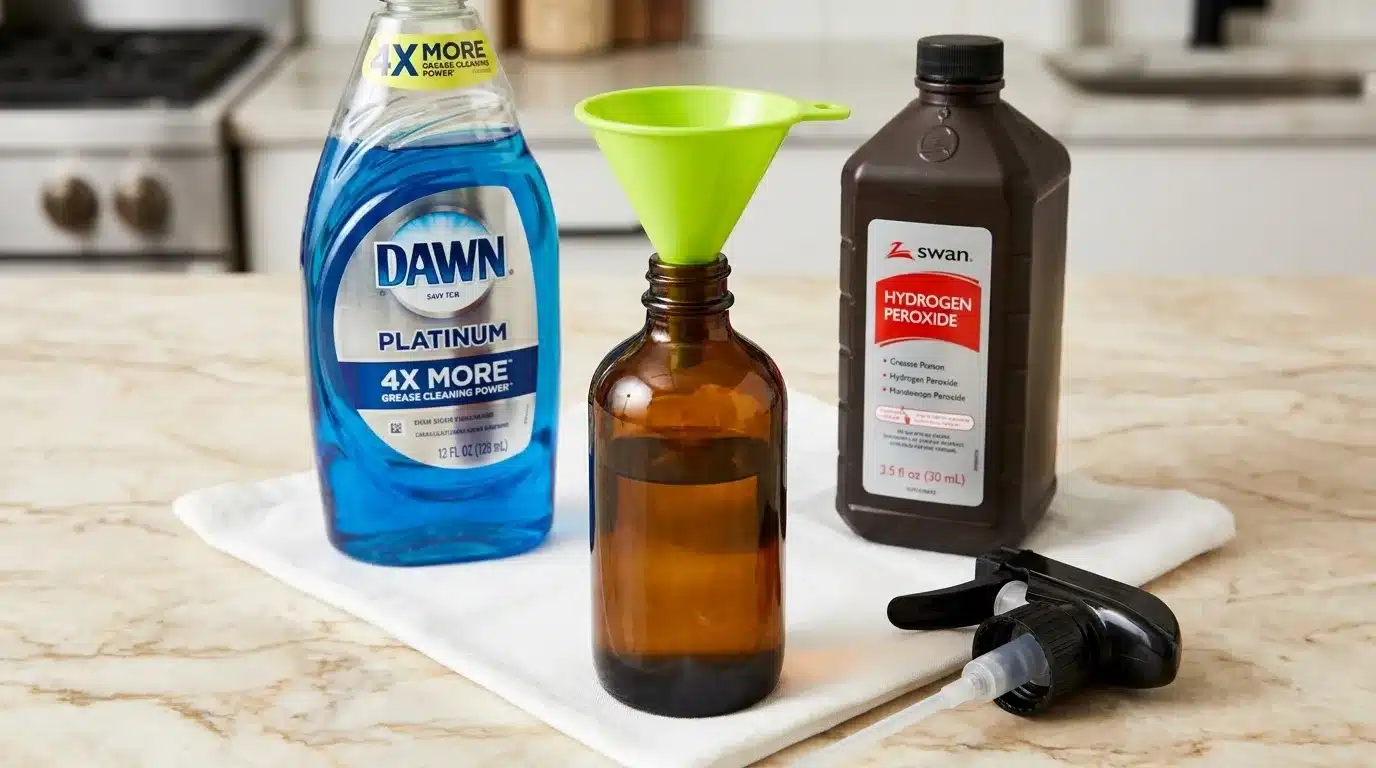
- 1 part Dawn dish soap (e.g., 1/4 cup)
- 2 parts hydrogen peroxide (e.g., 1/2 cup)
Steps:
- Pour hydrogen peroxide into a dark or amber spray bottle first. This protects it from light, which would otherwise break it down quickly.
- Add the dish soap to the same bottle. No need to measure exactly; the 1-to-2 ratio is a guideline, not a strict rule.
- Gently tip the bottle back and forth to combine. Do not shake it. Shaking creates excess foam that is hard to control.
- Spray the stain until it is fully saturated, then rub gently with your finger or a soft brush to work the solution into the fabric.
- Let it sit for 10 to 15 minutes for fresh stains, or up to one hour for tougher ones, then wash as normal and check before the dryer.
Storage: Keep in the amber bottle, sealed, away from light. Fresh hydrogen peroxide remains active for up to 6 months when stored correctly.
Method 2: The Paste (Best for Stubborn or Set-In Stains)
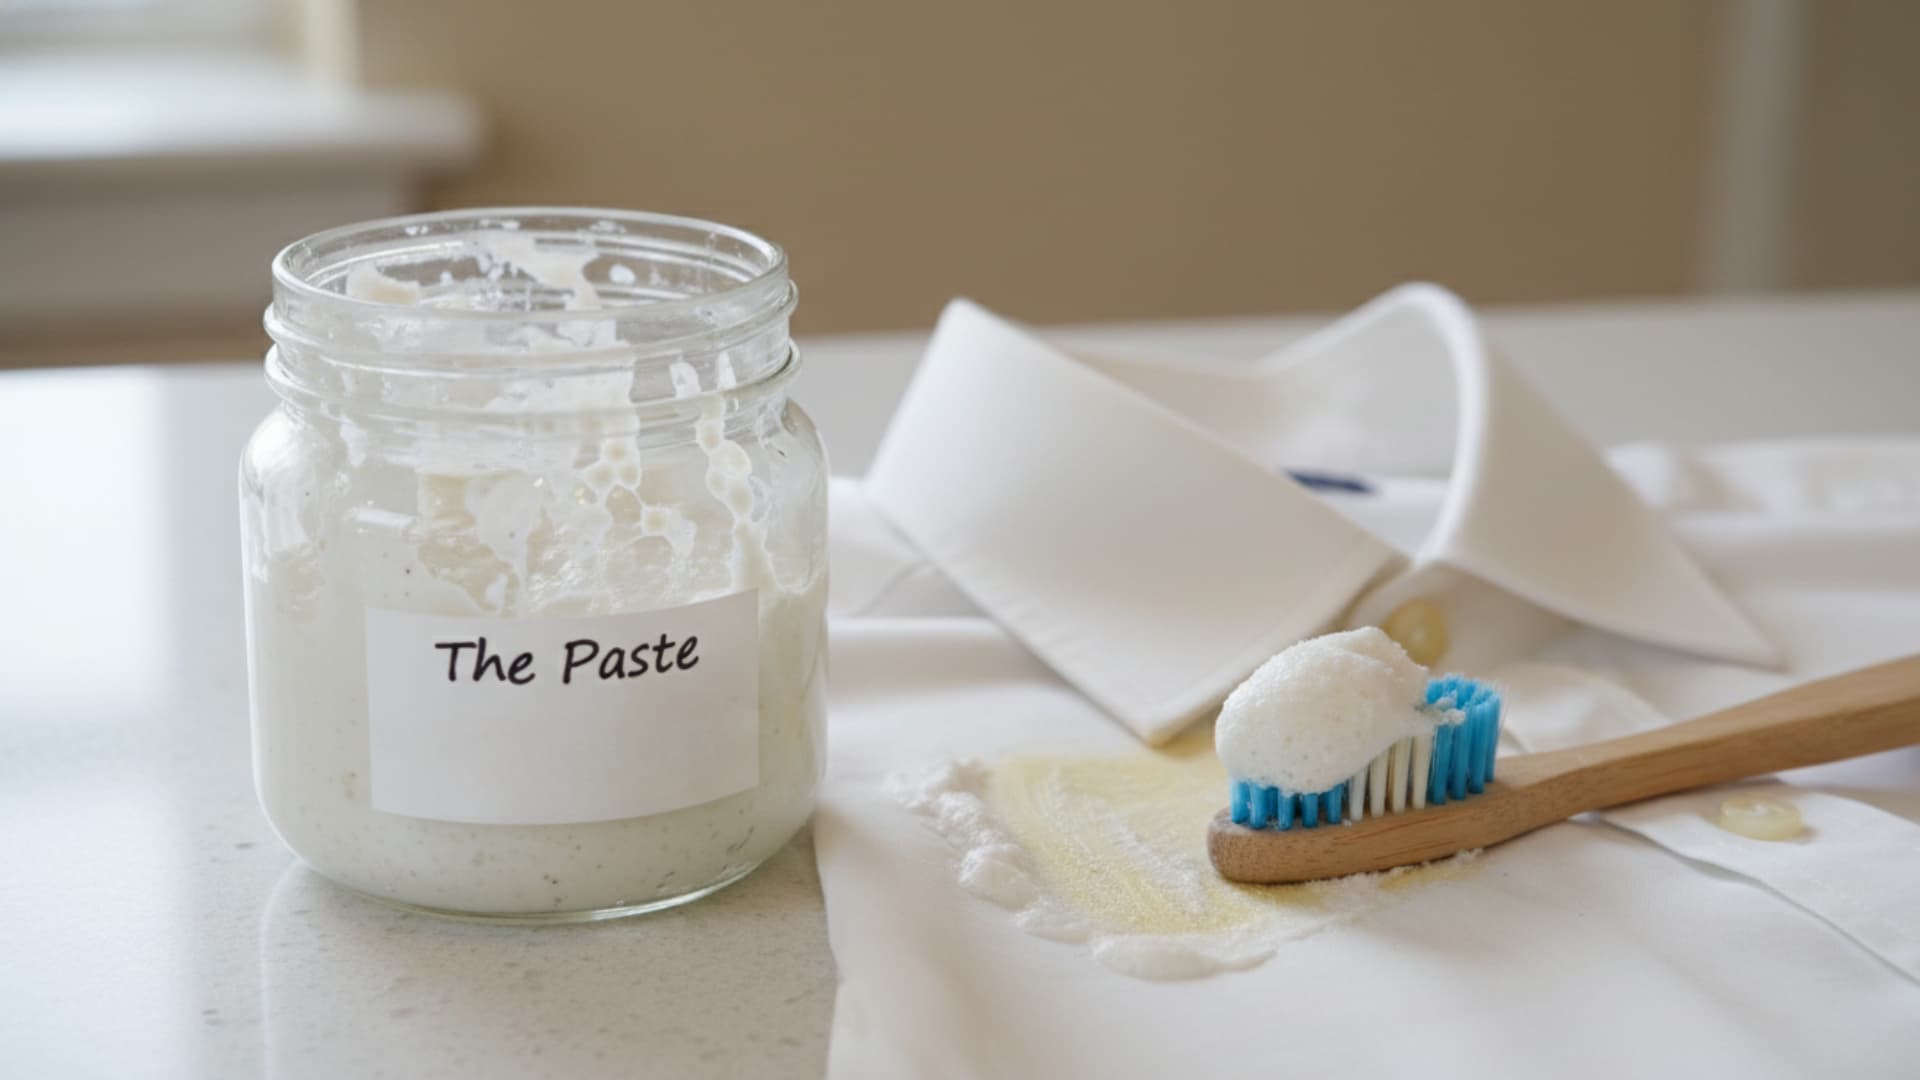
A thicker consistency means it clings to the stain longer and soaks deeper into the fabric. This is the right choice for yellow armpit marks, ring-around-the-collar, and stains that have already been through the wash once.
Ingredients:
- 1 tablespoon baking soda
- 1 tablespoon dish soap
- 2 tablespoons hydrogen peroxide
Steps:
- Combine all three ingredients in a small glass jar and stir gently until the mixture forms a thick paste. If it is too runny, add a small amount of extra baking soda.
- Apply a generous amount directly onto the stain using a spoon or your finger so the paste fully covers the area.
- Use an old toothbrush to scrub the paste into the fabric with small circular motions. This pushes the ingredients deeper into the fibers.
- Leave the paste on the stain for at least 30 minutes. For stubborn or old stains, let it sit for up to 1 hour without disturbing it.
- Wash normally without rinsing the paste off first. Check the stain before putting the item in the dryer; if any trace remains, treat it again.
Storage: Make small batches and use within one to two weeks. Store in a sealed glass jar in a dark cabinet.
Method 3: The Stain Stick (Best for On-the-Go Use)
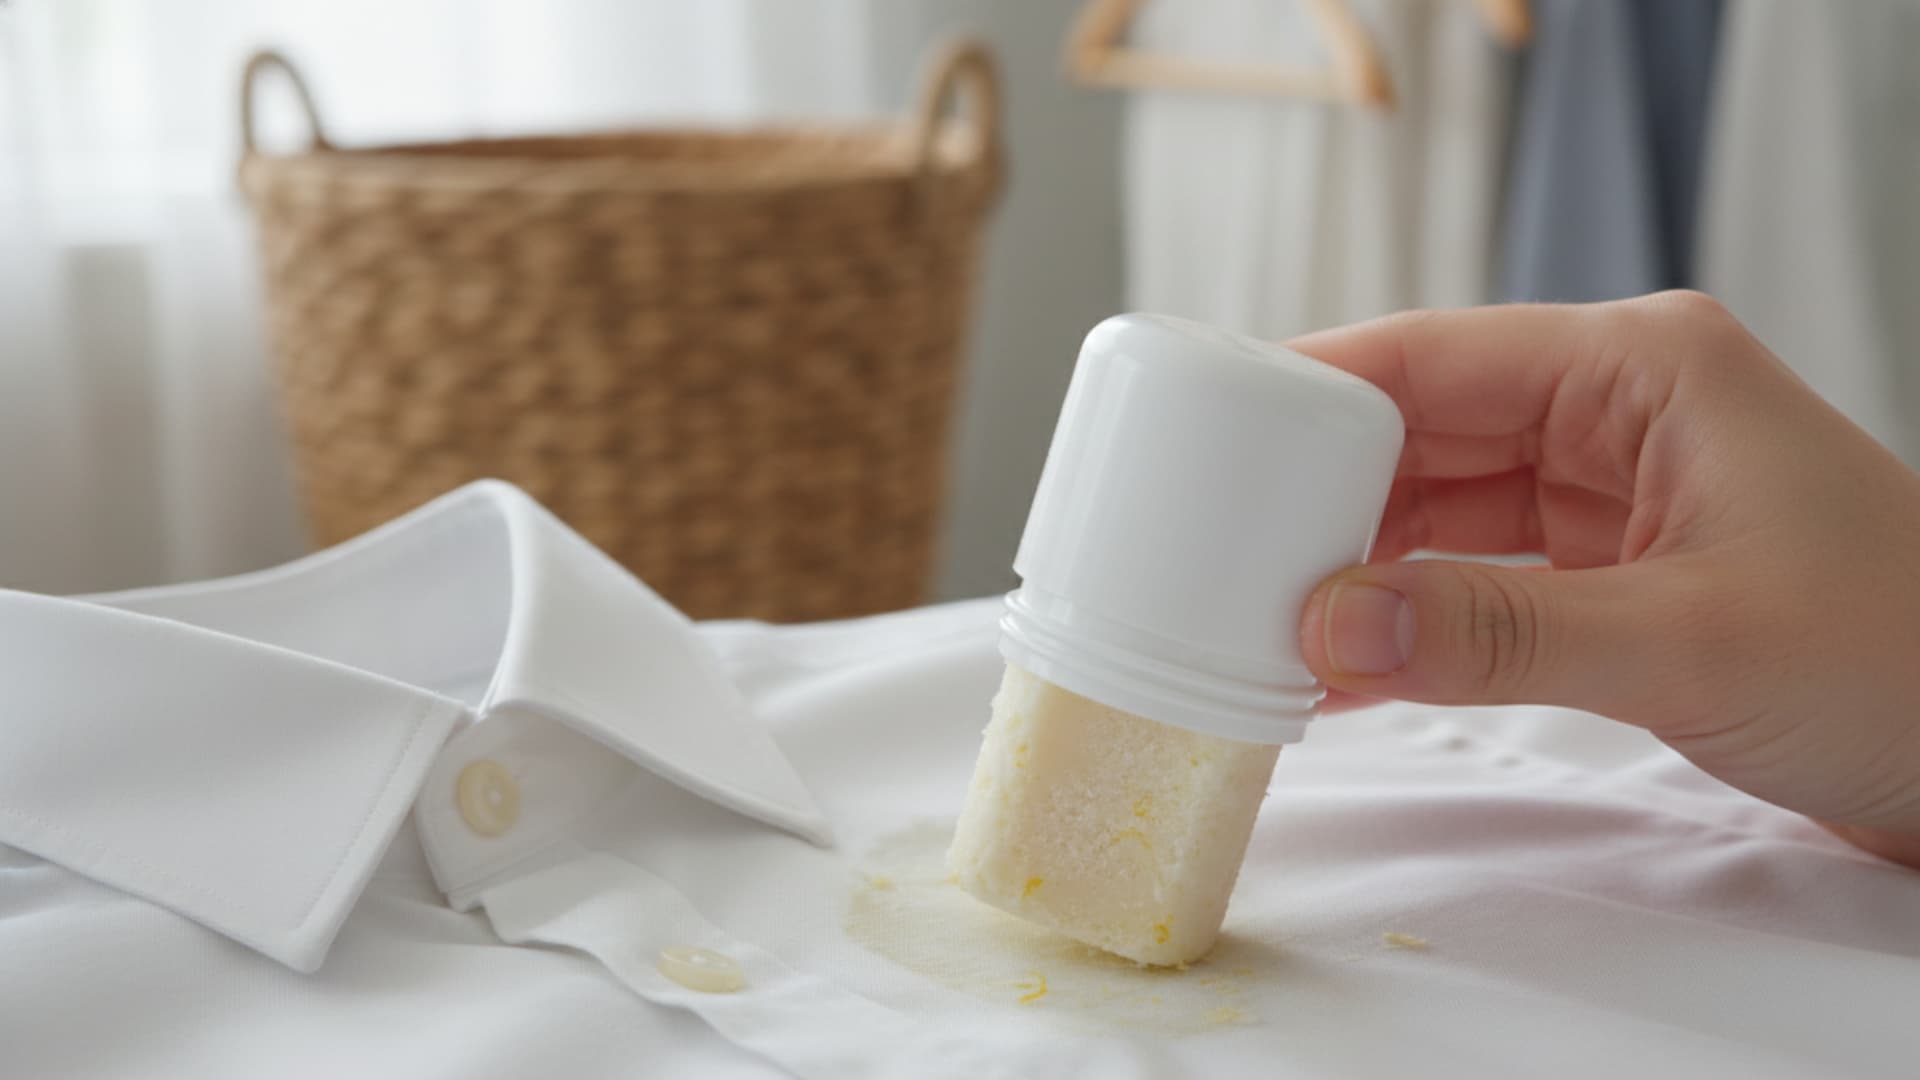
This solid format is easy to carry in a bag, keep in a car, or stash in a desk drawer. You rub it onto the stain and leave it until laundry day. Good for collar marks, food stains, and grease spots when a wash is hours away.
Ingredients:
- 1/4 cup grated plain bar soap (unscented)
- 2 tablespoons coconut oil
- 1 tablespoon lemon juice or 10 drops lemon oil
Steps:
- Melt the grated bar soap and coconut oil together in a small pot over the lowest possible heat setting, stirring until fully combined.
- Remove from heat and stir in the lemon juice or lemon oil while the mixture is still liquid.
- Pour the mixture into a small container or an empty deodorant tube, and let it cool at room temperature for 1 to 2 hours until solid.
- Rub the stick directly onto the stain, applying enough to cover the entire affected area with a visible coating.
- Leave it on the fabric until you are ready to wash. It can sit for several hours without causing fabric damage, then launder as normal.
Storage: Keep at room temperature in a sealed container. Lasts two to three months.
Method 4: The Dry Powder Scrub (Best for Fine or Sensitive Fabrics)
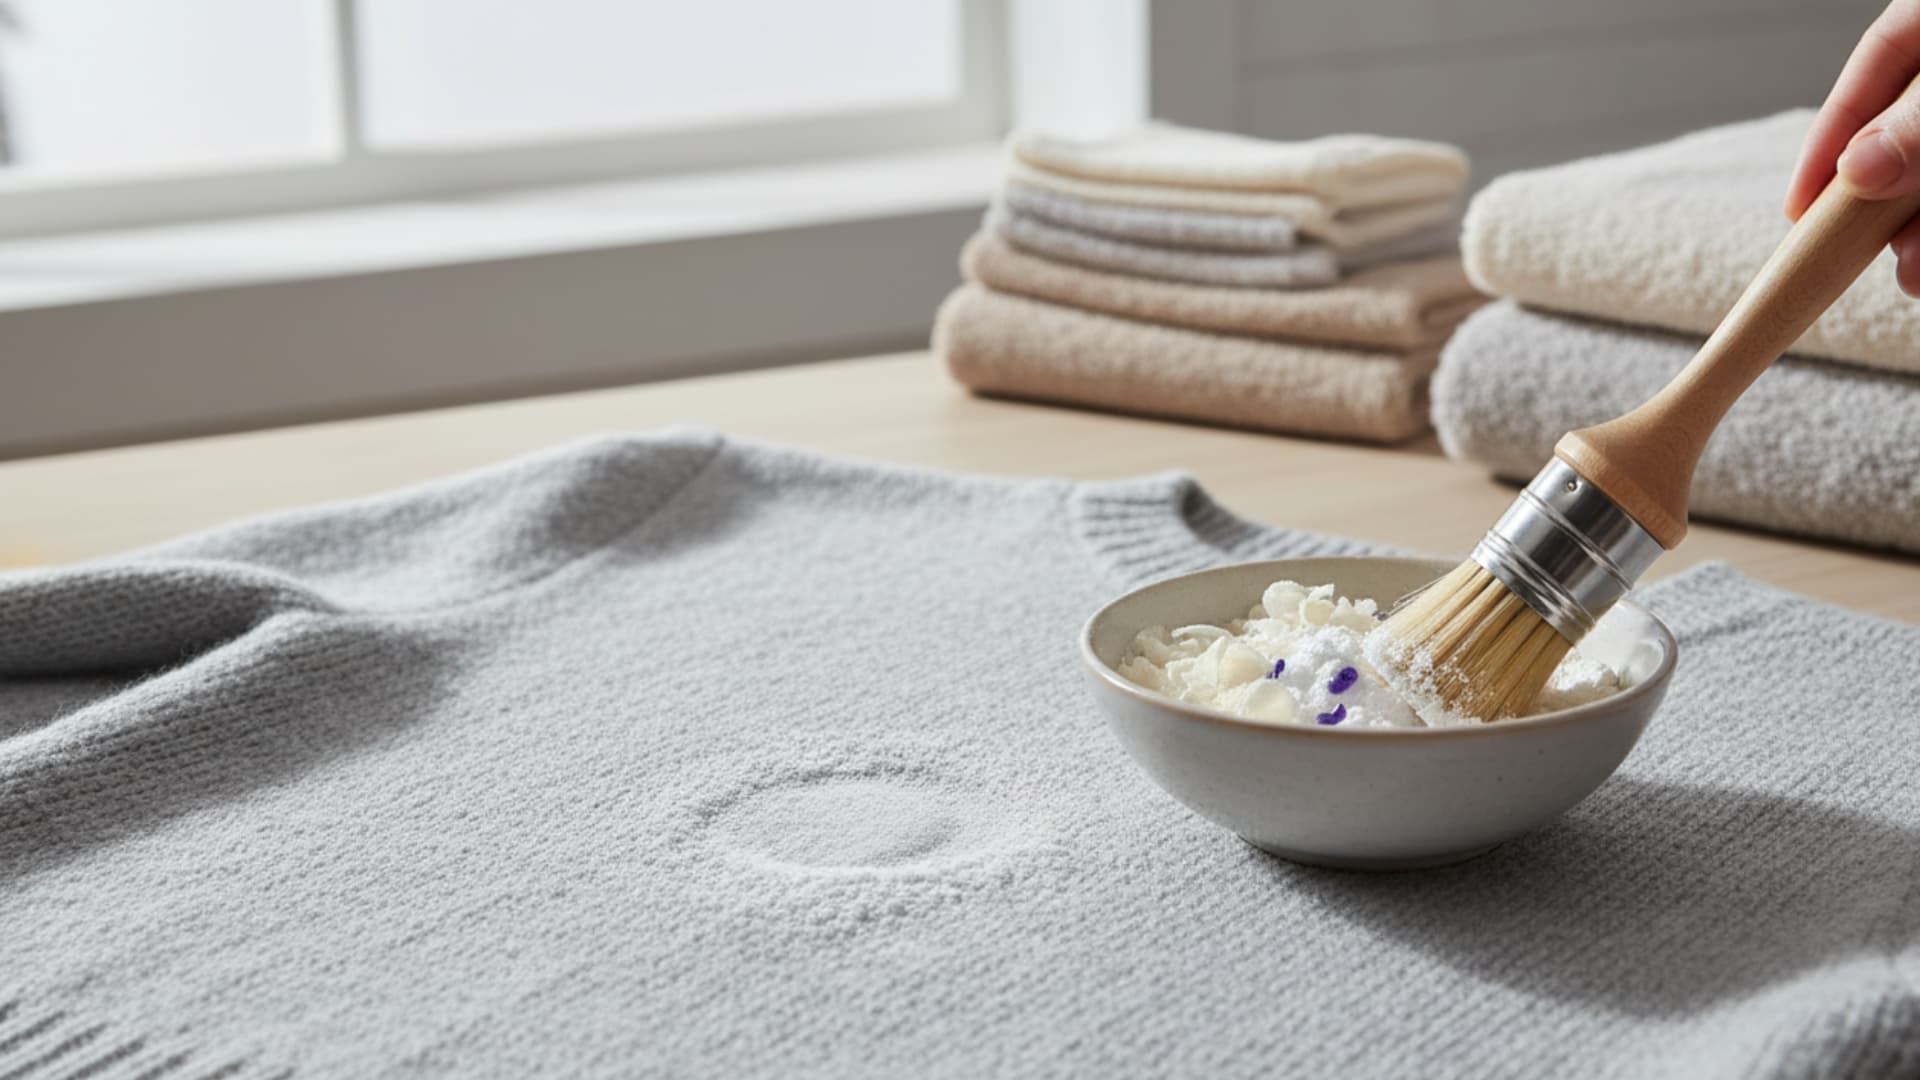
No liquid means no risk of water marks, color bleeding from over-saturation, or damage to loosely woven materials. This method works well on items labeled hand-wash or gentle cycle.
Ingredients:
- 2 tablespoons baking soda
- 1 tablespoon soap flakes or very finely grated bar soap
- 5 to 8 drops of tea tree or lavender oil (optional)
Steps:
- Combine the baking soda and soap flakes in a small bowl and mix until evenly distributed. Add oil drops if using and stir through.
- Sprinkle the powder mixture directly onto the dry stain, covering the entire area with a thin, even layer.
- Dip a soft brush into plain water, then gently work the powder into the fabric. Use light pressure; scrubbing too hard can damage fine fibers.
- Leave the powder on the stain for 20 to 30 minutes without disturbing it so the ingredients have time to absorb the stain.
- Brush off the powder with a dry cloth, then wash the item according to its care label instructions.
Storage: Store the powder mix in an airtight container at room temperature. Stays effective for up to six months.
Method 5: The Soak (Best for Large or Old Stains)

When the stain covers a wide area or has been through the dryer more than once, soaking the whole garment works better than spot-treating. This is the DIY version of an OxiClean-style presoak.
Ingredients:
- 1 gallon of warm water
- 1/2 cup washing soda (sodium carbonate)
- 1/2 cup hydrogen peroxide
Steps:
- Fill a large basin or bucket with 1 gallon of warm water, then add the washing soda and stir until fully dissolved before adding anything else.
- Add the hydrogen peroxide to the washing soda solution and stir once more to combine everything evenly.
- Fully submerge the stained garment in the solution, pressing it down so no dry areas remain above the waterline.
- Let it soak for 30 minutes to one hour for most stains. For stains that have been through the dryer multiple times, an overnight soak gives better results.
- Remove the garment and wash it in the machine as normal. Check the stain before drying; if it is still visible, repeat the soak once more.
Storage: Always make this mixture fresh. The combination of hydrogen peroxide and washing soda releases gas as it sits, which can cause a sealed container to expand or crack.
Method 6: The Spot Treatment (Best for Ink, Makeup, and Rust)
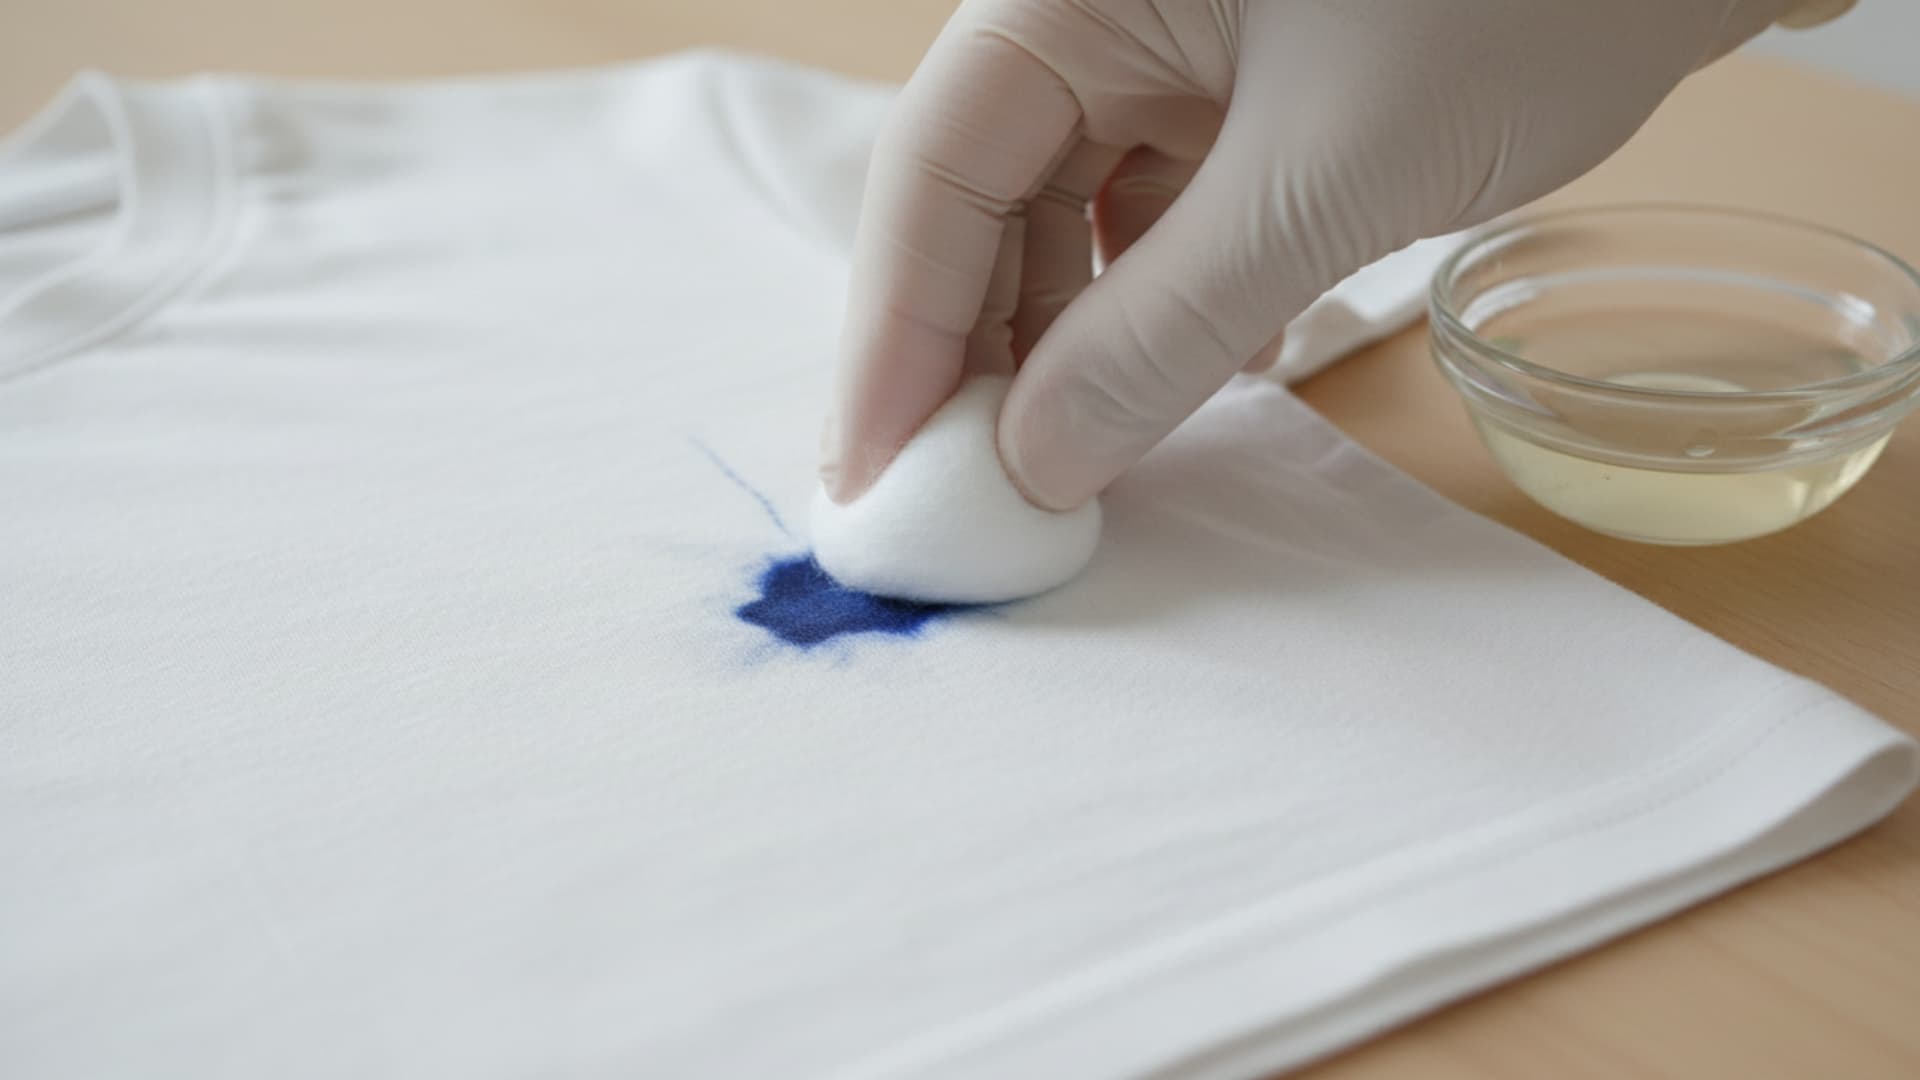
Standard spray formulas do not work well on ink, lipstick, mascara, or rust. These stains need a targeted acid or solvent approach to break them down at the source.
Ingredients (for ink and makeup):
- Equal parts lemon juice and rubbing alcohol
Ingredients (for rust and yellowing):
- 1 tablespoon citric acid powder dissolved in 1 cup of water
Steps (Ink and Makeup):
- Mix equal parts lemon juice and rubbing alcohol in a small bowl or cup. One teaspoon of each works fine for a single stain.
- Dip an old toothbrush or cotton ball into the mixture until it is fully saturated with the solution.
- Apply it directly to the ink or makeup stain and work it in with small back-and-forth strokes. Do not press so hard that you spread the stain outward.
- Let the mixture sit on the stain for 10 minutes without rinsing or disturbing it so the alcohol has time to break down the stain.
- Rinse the area with cold water, then launder the item as normal and check before drying.
Steps (Rust and Yellowing):
- Dissolve one tablespoon of citric acid powder in one cup of water and stir until the powder is fully absorbed into the liquid.
- Apply the solution directly to the rust mark or yellowed area using a cloth or cotton ball.
- Let it sit for 15 to 20 minutes. You may see the rust mark begin to fade during this time, which is normal.
- Rinse well with clean water to fully remove the citric acid before washing.
- Wash the item as usual and air-dry to confirm the stain is fully gone before using any heat.
Storage: Make the lemon-and-alcohol mix in small batches and refrigerate. Use within two to three weeks.
Which Method Works Best for Which Stain?

Different stains need different chemistry. Knowing which formula to reach for saves you from the frustrating cycle of treating something three times with the wrong product. Here is a breakdown by stain type.
1. Grease and Oil
Use the paste or the spray. Dawn dish soap is the key ingredient here because it breaks the bond between oil and fabric. Sprinkle baking soda on the area first to absorb surface oil, then apply the spray for large grease spots.
2. Red Wine
The spray works well if you treat it fast. For a dried stain, go straight to the soak method and leave it overnight. The hydrogen peroxide does most of the work by breaking down the color compounds in the wine.
3. Blood
Use cold water first, never hot. Then apply the spray directly and let it sit. Hot water sets protein-based stains permanently, so temperature matters more with blood than with any other stain type.
4. Grass Stains
The paste method with a toothbrush scrub is the most effective approach. Grass stains are a mix of protein and pigment, so you need both the abrasion from baking soda and the lifting action from dish soap and peroxide together.
5. Yellow Armpit Stains
Use the paste and scrub it in with a toothbrush. Let it sit for a full hour before washing. These stains are a mix of sweat proteins and deodorant residue that builds up over time, so they need a longer dwell time than most.
6. Coffee and Tea
The spray works for fresh spills. For dried coffee stains, a short vinegar soak (30 minutes in equal parts white vinegar and water) before washing loosens the tannins that give coffee its staying power.
7. Pet Stains on Fabric
Use the spray and add a sprinkle of baking soda on top before scrubbing. The baking soda pulls the odor out while the peroxide and soap handle the visible stain. Rinse well before washing.
8. Ink and Makeup
Go straight to Method 6. Standard stain sprays push ink and lipstick deeper into fibers rather than lifting them. Rubbing alcohol is what actually dissolves these stains.
9. Rust Marks
Only the citric acid treatment in Method 6 addresses rust. Nothing else in this list reacts with rust effectively; the acid is what converts and lifts the iron compounds from the fabric.
How to Use a Homemade Stain Remover the Right Way
- Always do a spot test first. Apply a small amount to a hidden seam or inner hem, wait five minutes, and check for color change before treating the visible area.
- Act fast on fresh stains. Fresh stains lift more easily than dried ones; if you cannot treat right away, rinse the area with cold water to slow the setting.
- Blot, do not rub. Rubbing a fresh stain pushes it deeper into the fabric and spreads it outward; always blot with a clean cloth before applying any treatment.
- Use cold water on protein stains. Blood, egg, and sweat stains set permanently when exposed to heat; cold water is the rule for anything protein-based, including pet accidents.
- Let it sit long enough. Rushing the dwell time is the most common reason DIY stain removers seem to “not work.” Most natural ingredients need 15 to 30 minutes to fully break down a stain.
- Check the dryer before every use. Dryer heat sets whatever remains in the fabric permanently. If any trace of the stain is still there, treat it again before applying heat.
- For set-in stains, repeat the process. Old stains that have been through the dryer may need two or three rounds of treatment. Each round lifts a little more.
Homemade vs. Store-Bought: Is It Worth It?
Most people switch to DIY stain removers because of cost or ingredient concerns, then stick with it because the results hold up. Here is a direct comparison so you can decide for yourself.
| Factor | Homemade | Store-Bought |
|---|---|---|
| Cost per use | Under $0.30 | $0.50 to $1.50+ |
| Ingredients known | Fully | Often unclear |
| Fragrance/chemical load | Minimal | Can be high |
| Shelf life | 2 weeks to 6 months (by type) | 1 to 3 years |
| Works on tough stains | Yes, with the right method | Yes |
| Safe for baby/sensitive skin | Generally yes | Check label |
| Portable format | Yes (stain stick) | Yes (Tide to Go) |
| Requires preparation | Yes | No |
Where Else Can You Use a Homemade Stain Remover?
A good DIY stain remover does not stop at laundry. Most of these formulas work across the home with minor adjustments.
- Carpet and Rugs: Use the spray at a higher peroxide-to-soap ratio (3 to 4 parts peroxide per 1 part Dawn) to keep suds low. Blot after applying; never scrub carpet fibers, as that damages the pile. Rinse the area with clean water afterward to remove all soap residue.
- Upholstery and Sofas: Blot, do not soak, and rinse the treated area well with a damp cloth once the stain lifts. Concentrated dish soap left sitting on the cushion fabric can attract dirt over time, defeating the purpose.
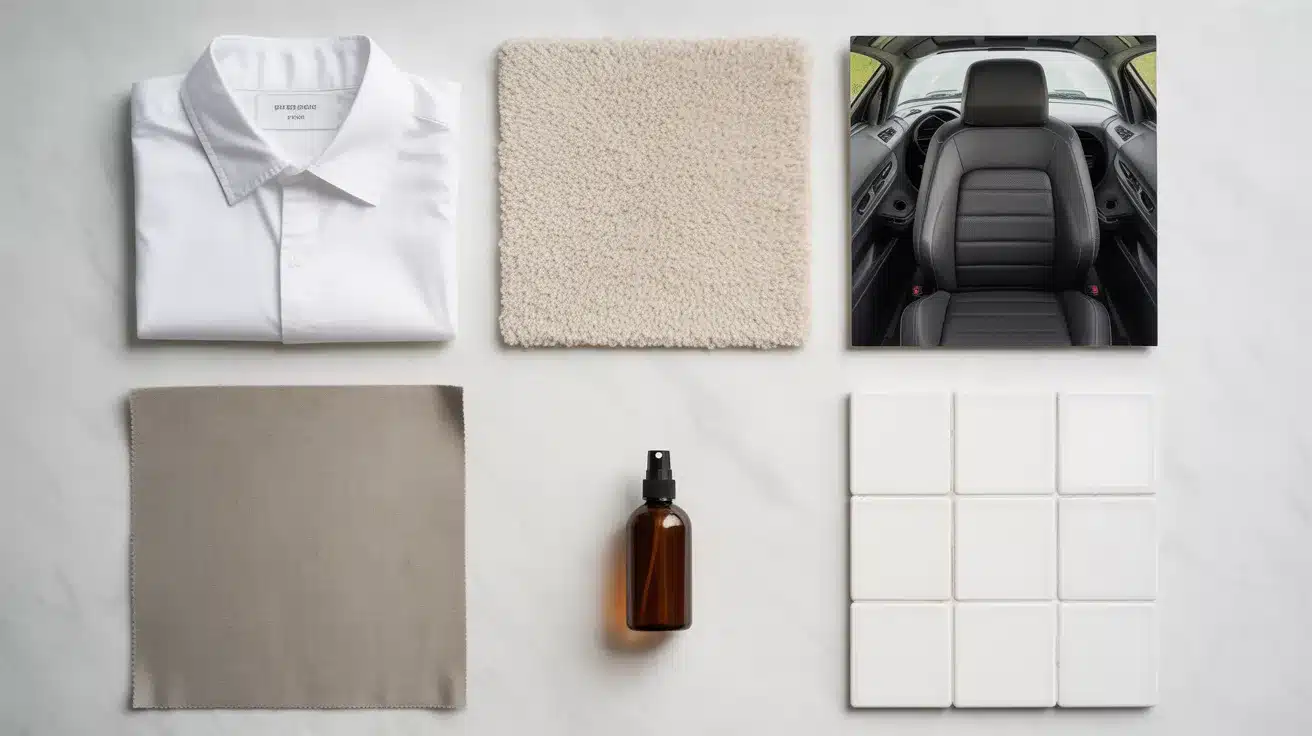
- Car Seats: Use the vinegar-based spray (Method 1 alternative) or a diluted version of the standard spray. Apply, blot, and let the seat air dry fully before use to prevent any moisture from building up underneath the padding.
- Walls and Hard Surfaces: A drop of lemon oil on a damp cloth removes marker, grease, and sticky residue from painted walls and wood surfaces. Test on a hidden spot first, particularly on matte paint finishes.
- What to Avoid: Do not use hydrogen peroxide-based formulas on silk, satin, or wool. Do not use lemon juice on dark or colored fabrics. For anything labeled dry-clean-only, take it to a professional rather than trying to clean it at home.
How to Store Each Type of Homemade Stain Remover
Storage affects whether your DIY stain remover stays effective or slowly loses its effectiveness. The spray formula needs a dark or amber bottle with a tight lid, kept away from heat and direct light.
Hydrogen peroxide breaks down in sunlight, so a clear bottle on a sunny shelf will lose its strength within days. The paste stores best in a small, sealed glass jar in a dark cabinet and remains usable for 1 to 2 weeks.
The stain stick stays solid at room temperature in a sealed container for 2 to 3 months. The dry powder mix keeps well in an airtight jar at room temperature for up to six months.
Always write the mixing date on the label so you know when to make a fresh batch.
The Bottom Line
A good homemade stain remover does not need a long ingredient list or expensive products. Two ingredients handle most everyday stains. A simple paste tackles the stubborn ones.
A soak takes care of the rest. The six DIY methods in this guide cover clothing, carpet, upholstery, and more, so you are ready for whatever shows up. Try the two-ingredient spray first.
It handles the majority of stains most people deal with day to day. Tried any of these methods? Drop a comment and tell us which one worked best for your toughest stain.