Hanging curtains sounds like a weekend afternoon kind of project, and honestly, it can be.
But anyone who has stood on a stepladder with a drill, staring at a wall that refuses to cooperate, knows it takes a little more than good intentions.
Most US homes are built with drywall, which has its own quirks when it comes to holding things up.
Add in window trims that never quite line up, and you start to understand why so many beautiful rods end up crooked.
Tools, measurements, and installation methods are all covered here, so your windows finally get the moment they deserve.
Where to Place a Curtain Rod?
Placement is honestly where most people second-guess themselves, and it shows in the final result.
Hang the rod too low, and the room feels squished; too narrow, and the windows look smaller than they are.
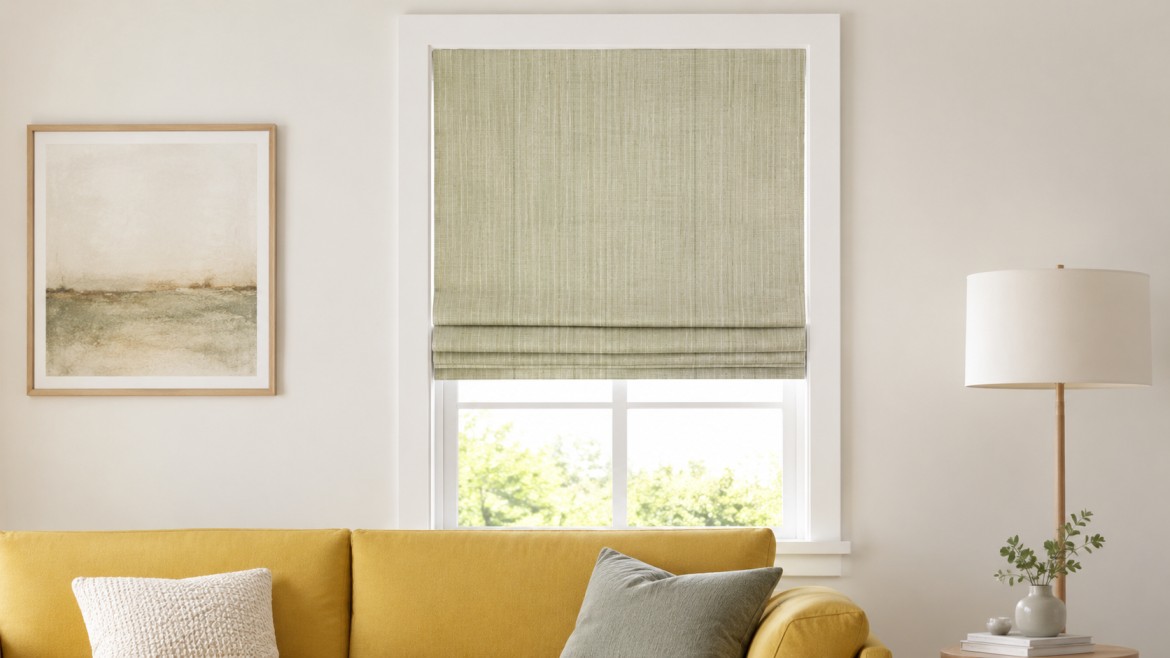
The general rule most interior designers swear by is mounting the rod 4 to 6 inches above the window frame and extending it 3 to 6 inches beyond the frame on each side.
This lets the curtains stack neatly without blocking natural light, and gives any room that effortlessly tall, airy look worth pinning.
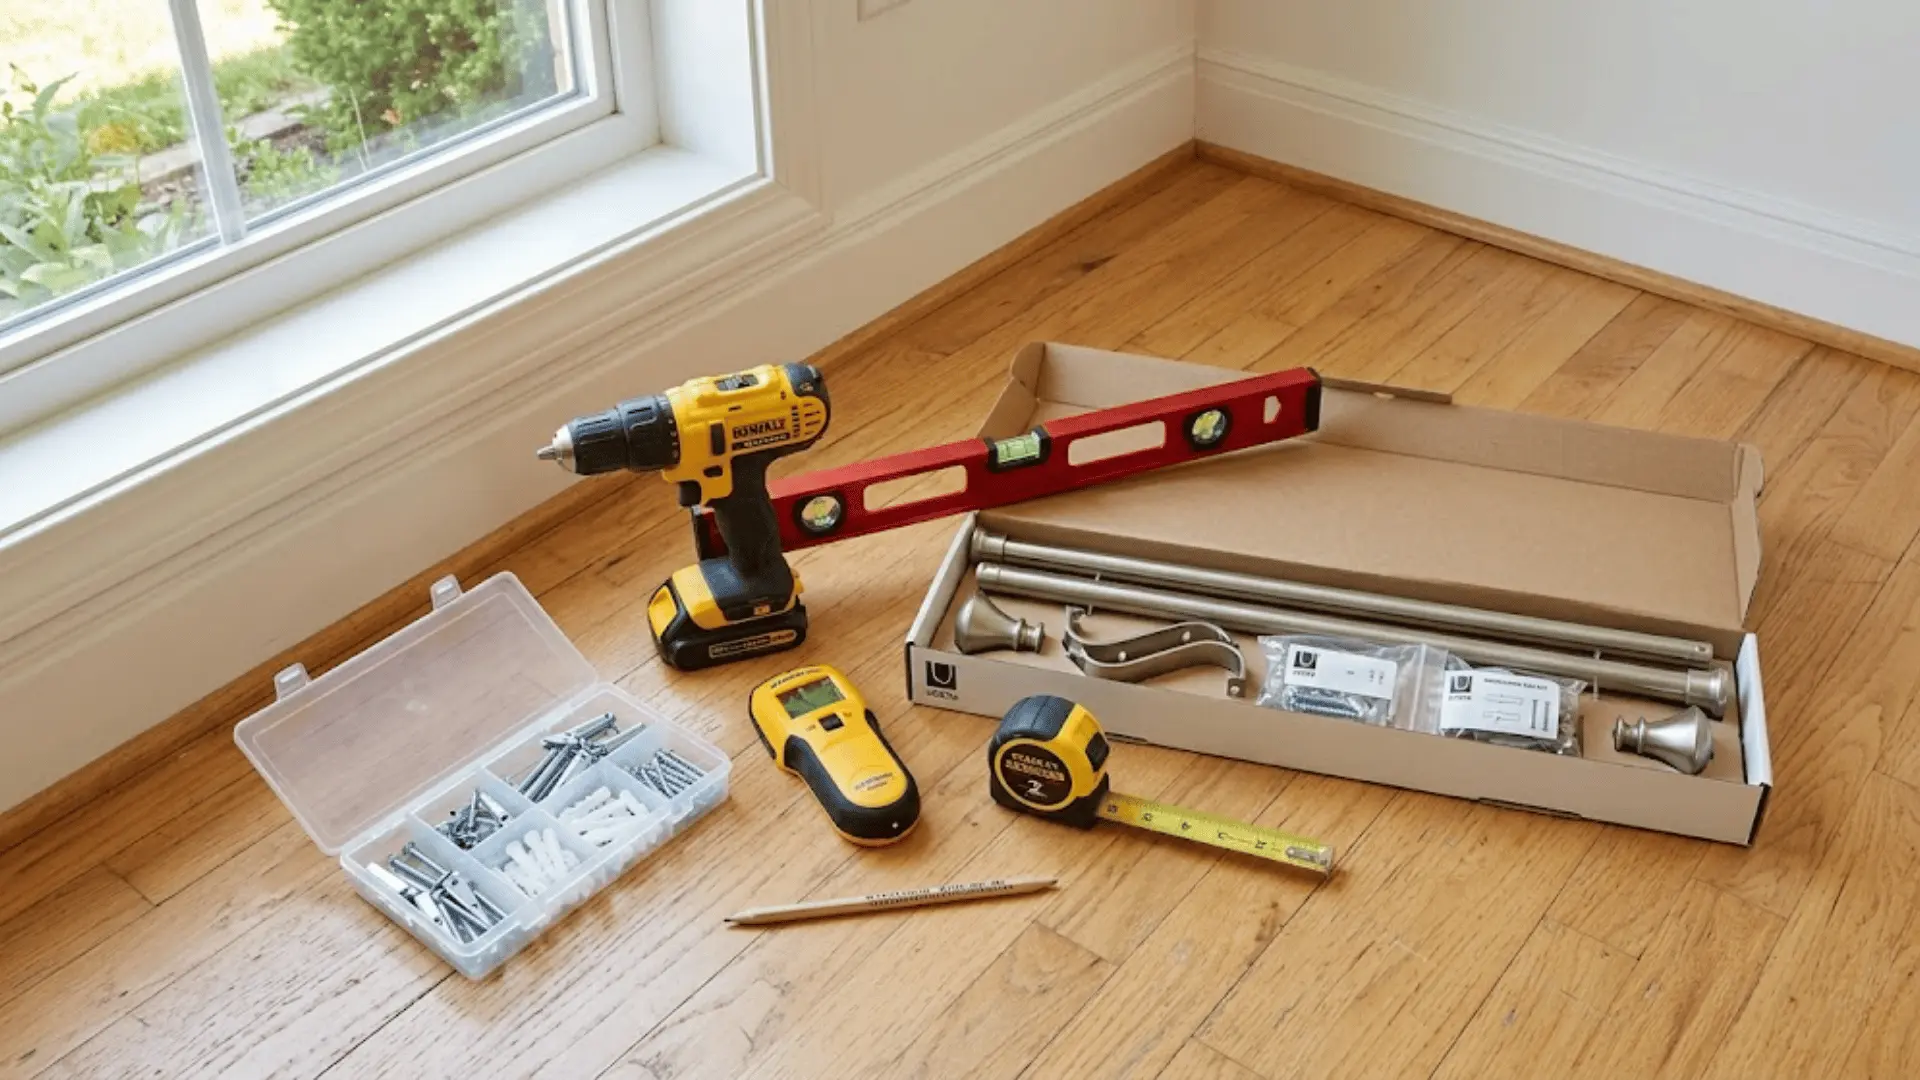
Tools & Materials Needed
Before you start putting holes in walls, it helps to have everything within arm’s reach. Gathering your tools beforehand saves you the mid-project scramble, and trust me, nobody wants to climb down a ladder twice.
Essential Tools
- Power drill (corded or cordless)
- Drill bits (wood and masonry, depending on your wall type)
- Stud finder (a must-have for standard US drywall construction)
- Tape measure (in inches)
- Level
- Pencil
Materials
- Curtain rod kit (rod, brackets, and screws)
- Wall anchors (toggle bolts or plastic anchors work well for drywall)
- Optional: drywall screws or molly bolts for heavier curtains
Understanding Wall Types Before Installation
Not all walls are built the same, and drilling into the wrong one without preparation is how brackets end up loose after a week.
Knowing what your wall is made of before you pick up the drill saves a lot of patching later.
| Wall Type | Common In | Key Consideration |
|---|---|---|
| Drywall | Most US homes | Anchors required; mind the weight limit |
| Wood Studs | Behind drywall, 16 or 24 inches apart | Drill directly; no anchors needed |
| Plaster | Older US homes | Drill slowly; use plaster-rated anchors |
| Brick or Concrete | Basements, exterior walls | Masonry drill bits only |
Curtain Rod Placement Guidelines
Getting placement right is less about following strict rules and more about knowing which guidelines actually make a difference visually. These are the ones that consistently work.
- Mount the rod 4 to 6 inches above the window frame for a classic, proportional look.
- Prefer a more dramatic feel? Hang it closer to the ceiling for that tall, airy effect.
- Extend the rod 8 to 12 inches beyond each side of the window to maximize natural light.
- Floor-length curtains are the most popular choice and work in nearly every room.
- A slight break means the fabric just grazes the floor; puddling lets it pool for a more luxurious feel.
When in doubt, go higher and wider than feels necessary. It almost always looks better once the curtains are up.
Step-by-Step: How to Install a Curtain Rod?
Getting the installation right comes down to working in the right order and not skipping the small stuff. Take it one step at a time, and the whole thing comes together faster than you’d expect.
Step 1: Measure and Mark Your Bracket Positions
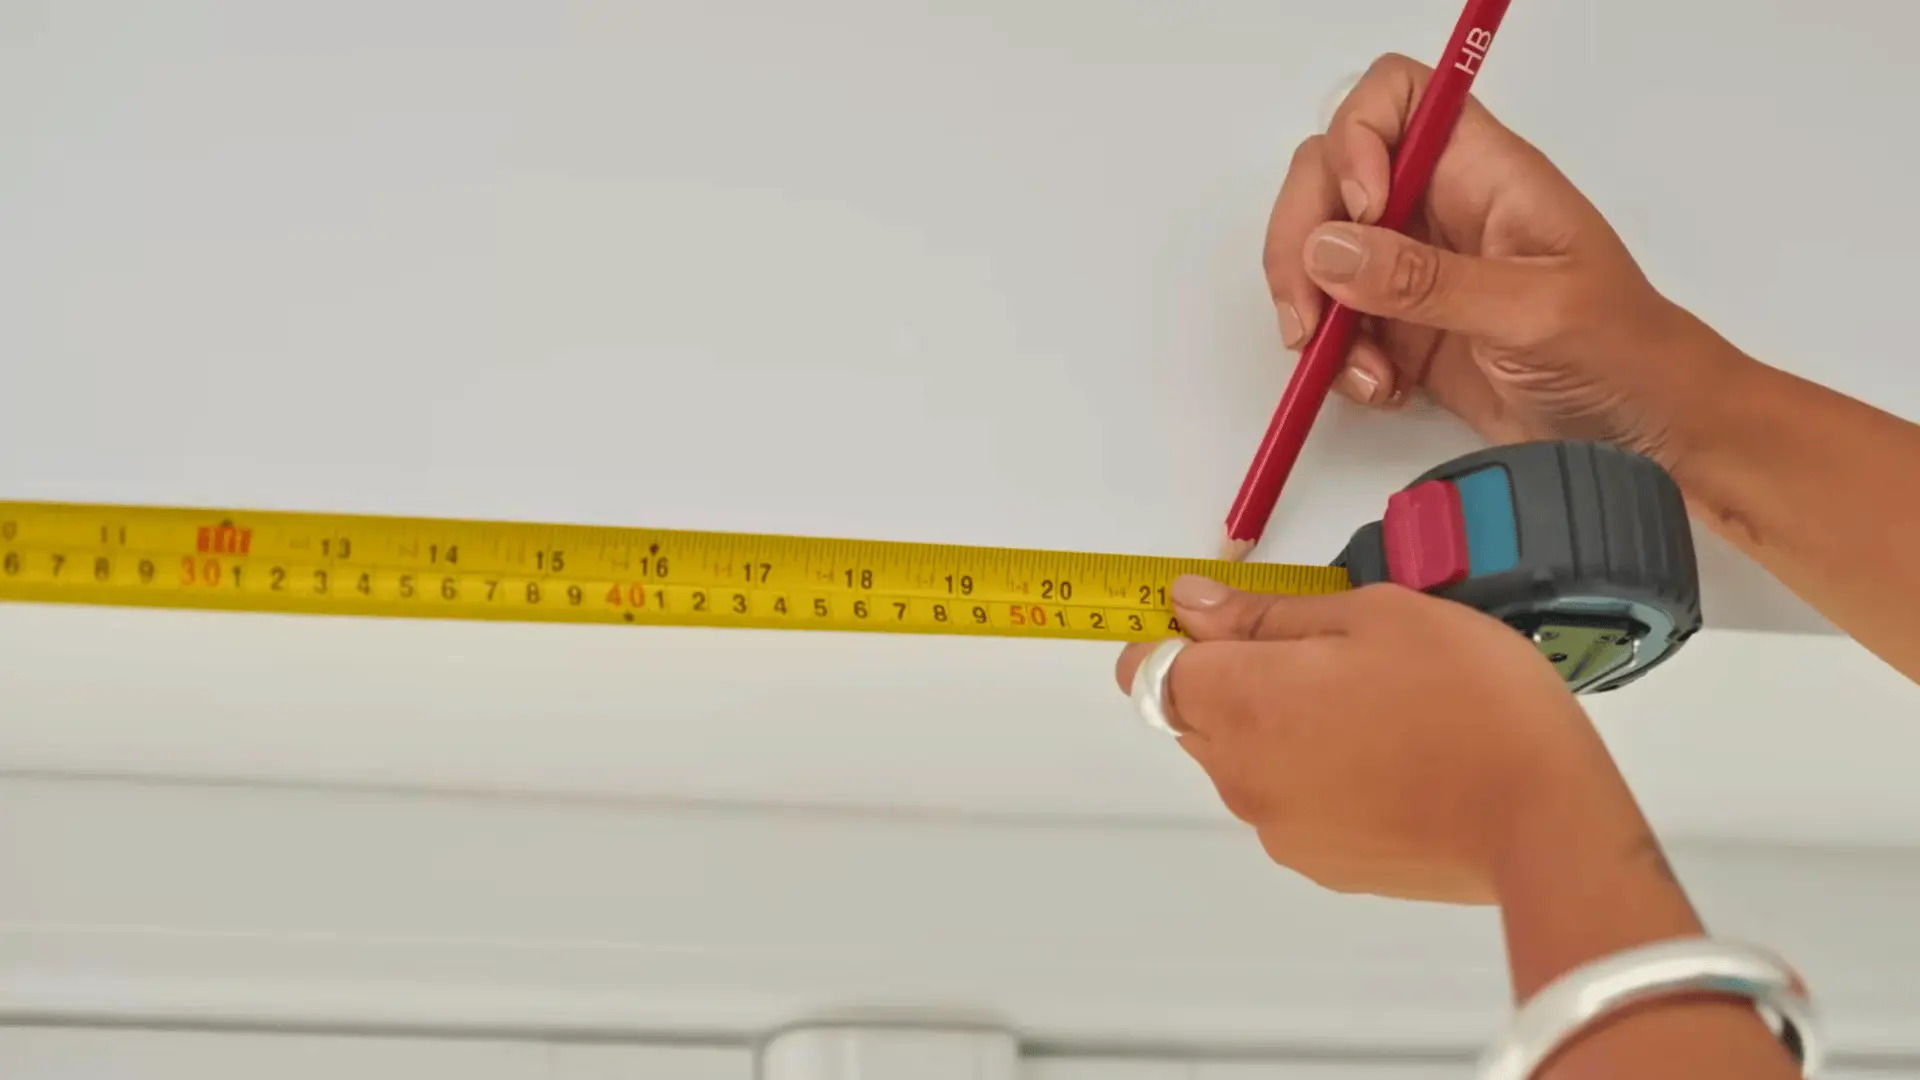
Find the window’s center, especially if it needs a middle bracket. Measure to the desired curtain drop, then double-check with the curtains before marking.
Eyelet curtains, for instance, sit slightly above the pole, so holding them up against the wall gives you a far more accurate mark than measurements alone.
Step 2: Scan the Wall Before You Drill

Run a stud finder across the wall before picking up the drill. This one step protects you from accidentally hitting electrical wires or pipes hidden behind the surface.
It takes about two minutes and saves a significant amount of trouble. Once you know what’s behind the wall, you can drill with confidence rather than guesswork.
Step 3: Drill the Holes and Insert Wall Plugs
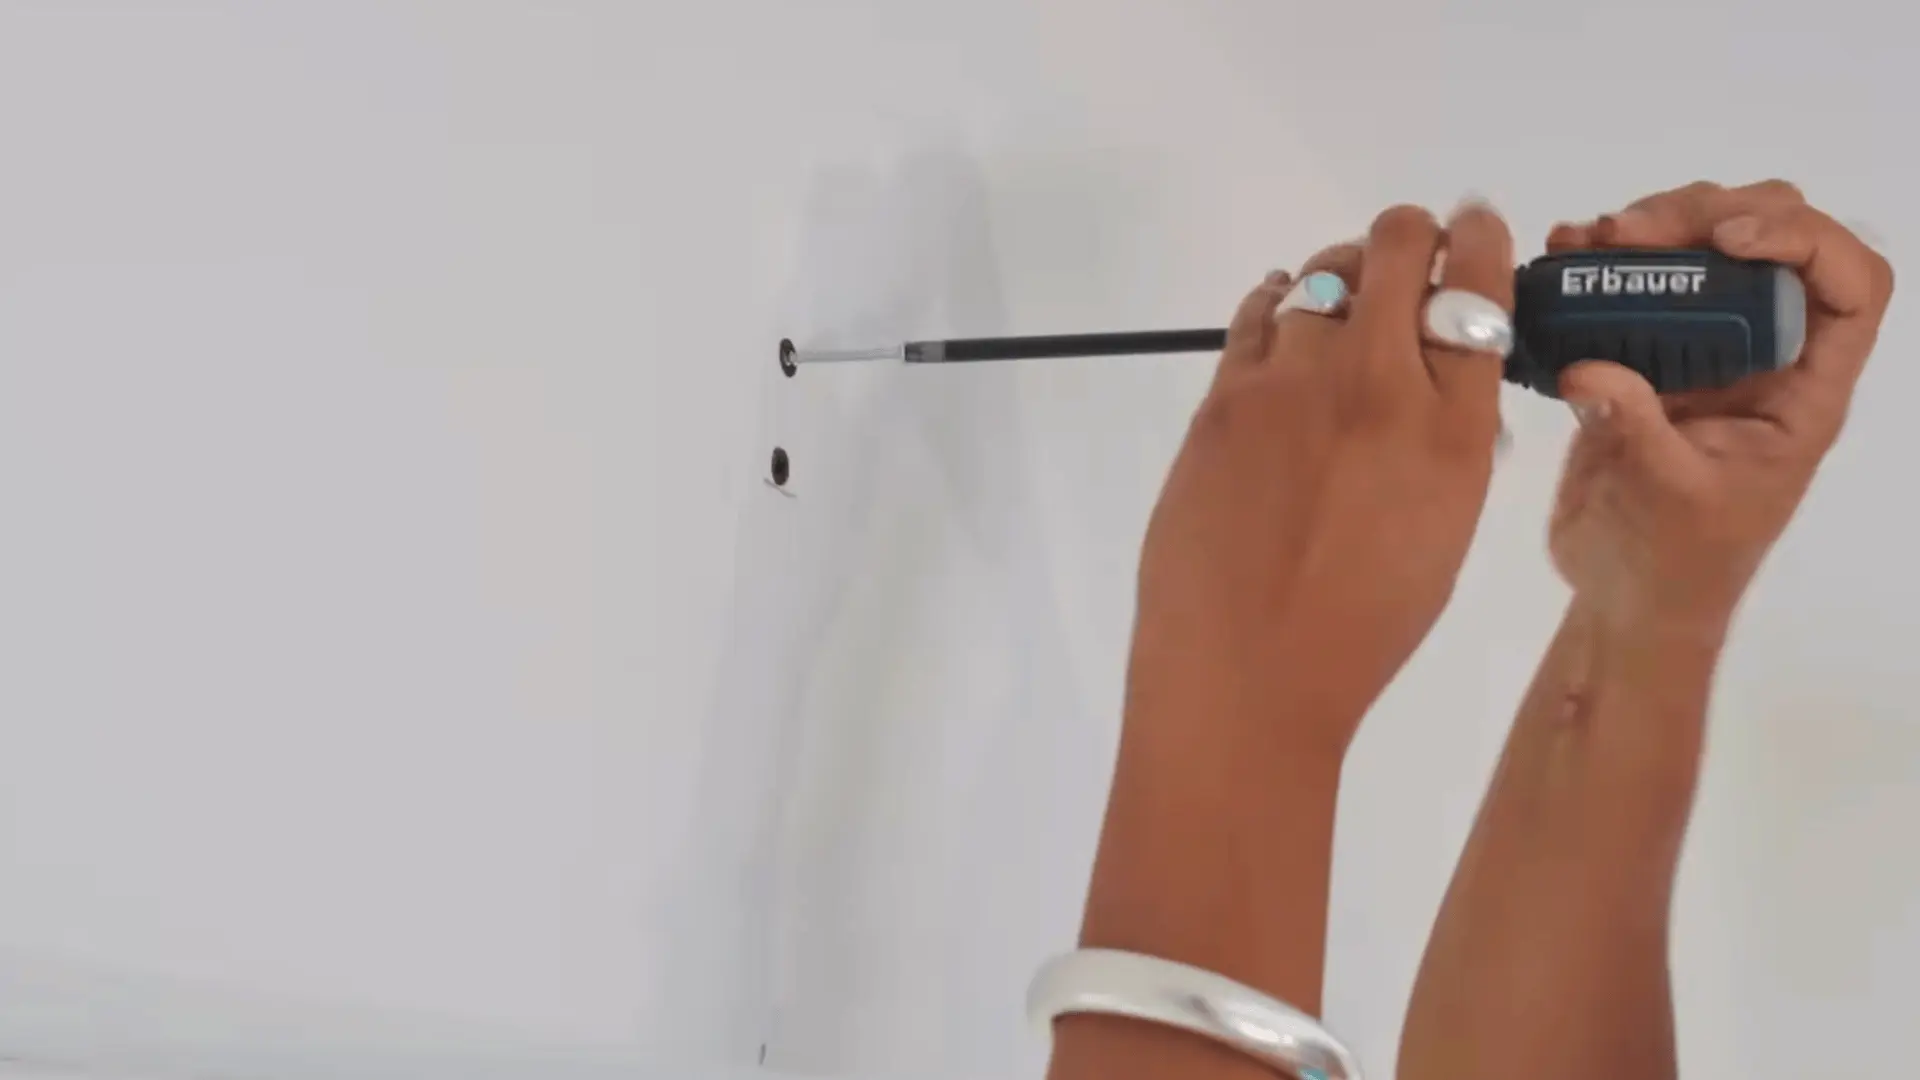
Match your drill bit to your wall type. Masonry walls need masonry bits and masonry plugs; plasterboard needs its own specific anchors.
A handy trick before drilling is to tape an open envelope just below the mark to catch dust as you go. Once the holes are done, insert the wall plugs and drive in the first screw to create a support base for the bracket.
Step 4: Secure the Brackets and Thread the Curtains
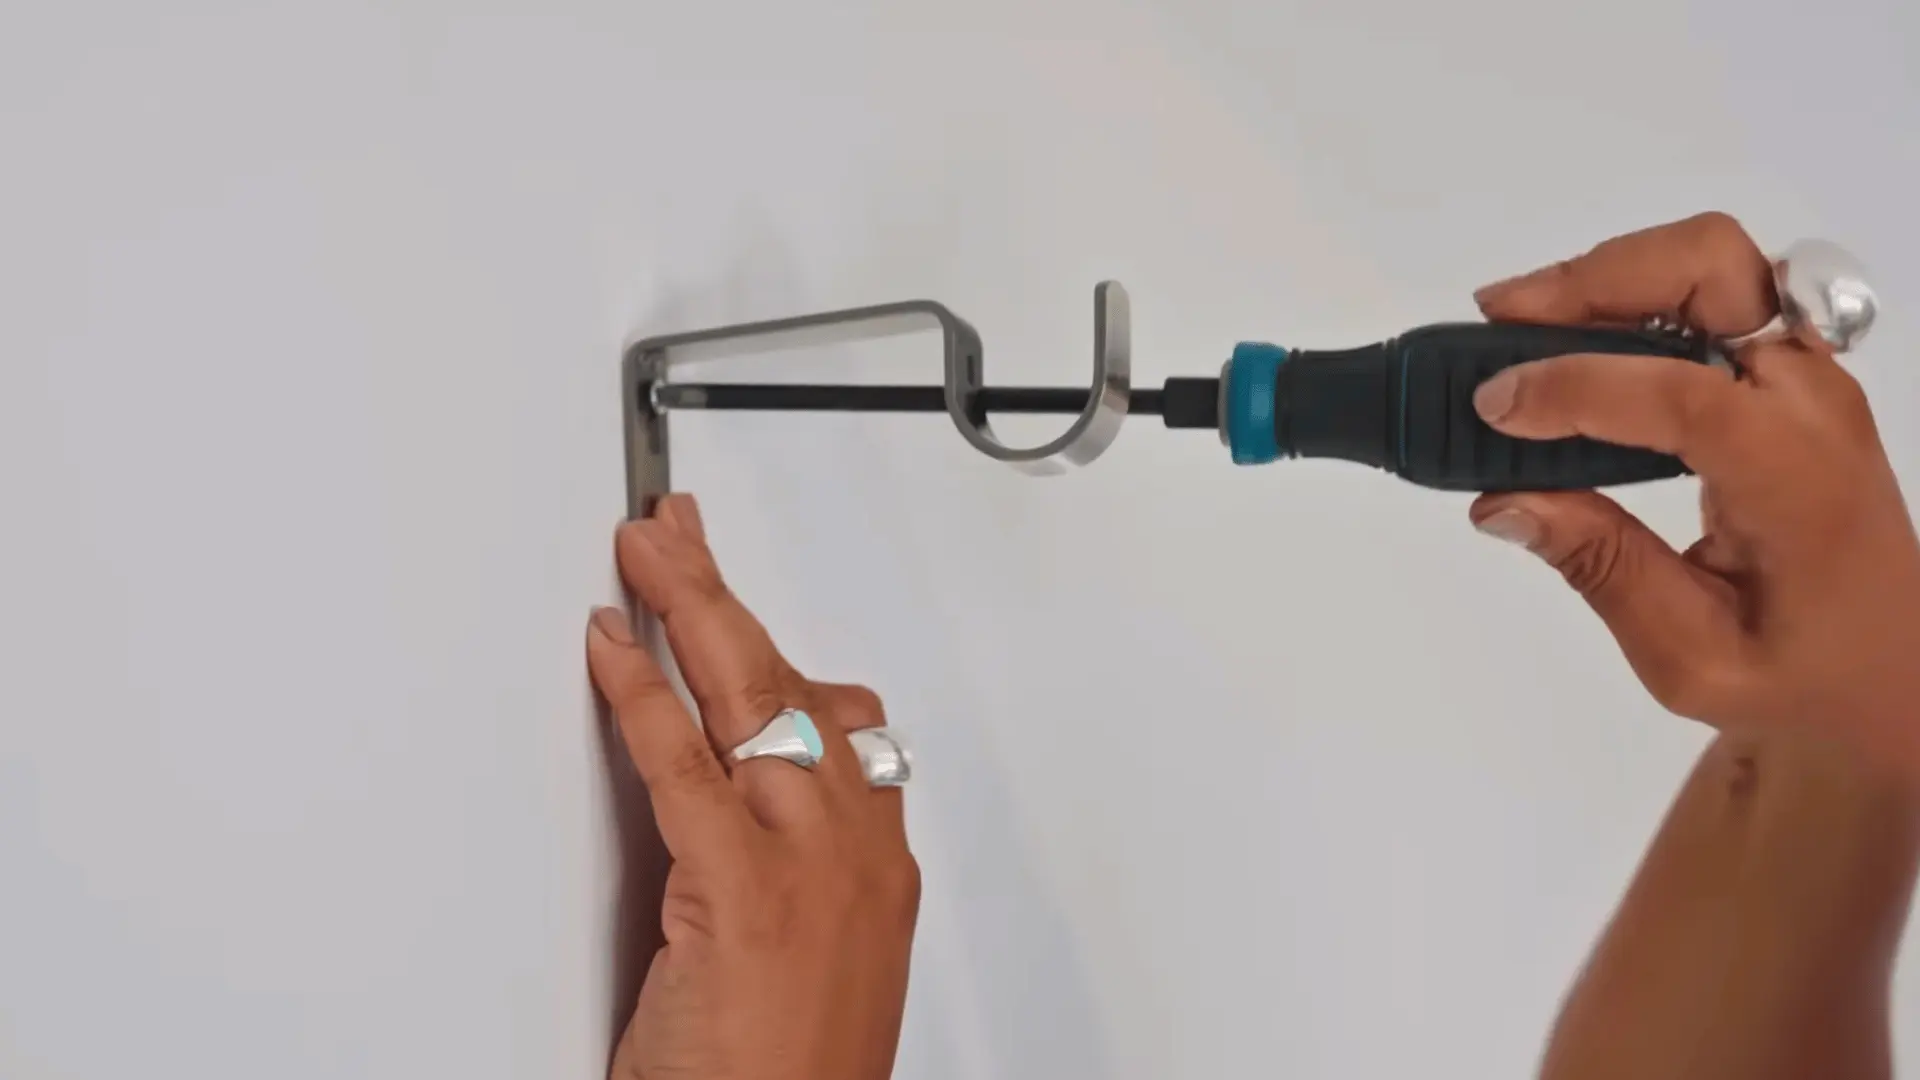
Hook the bracket over the first screw, then tighten the bottom screw to lock it in place. Repeat on the other side and the center if needed.
Once all brackets are secure, thread the curtains onto the pole, making sure the pleats face the right way. Slide everything toward the finial end first, then position the first pleat just past the outer bracket so it stays put.
Step 5: Level the Pole and Make Final Adjustments
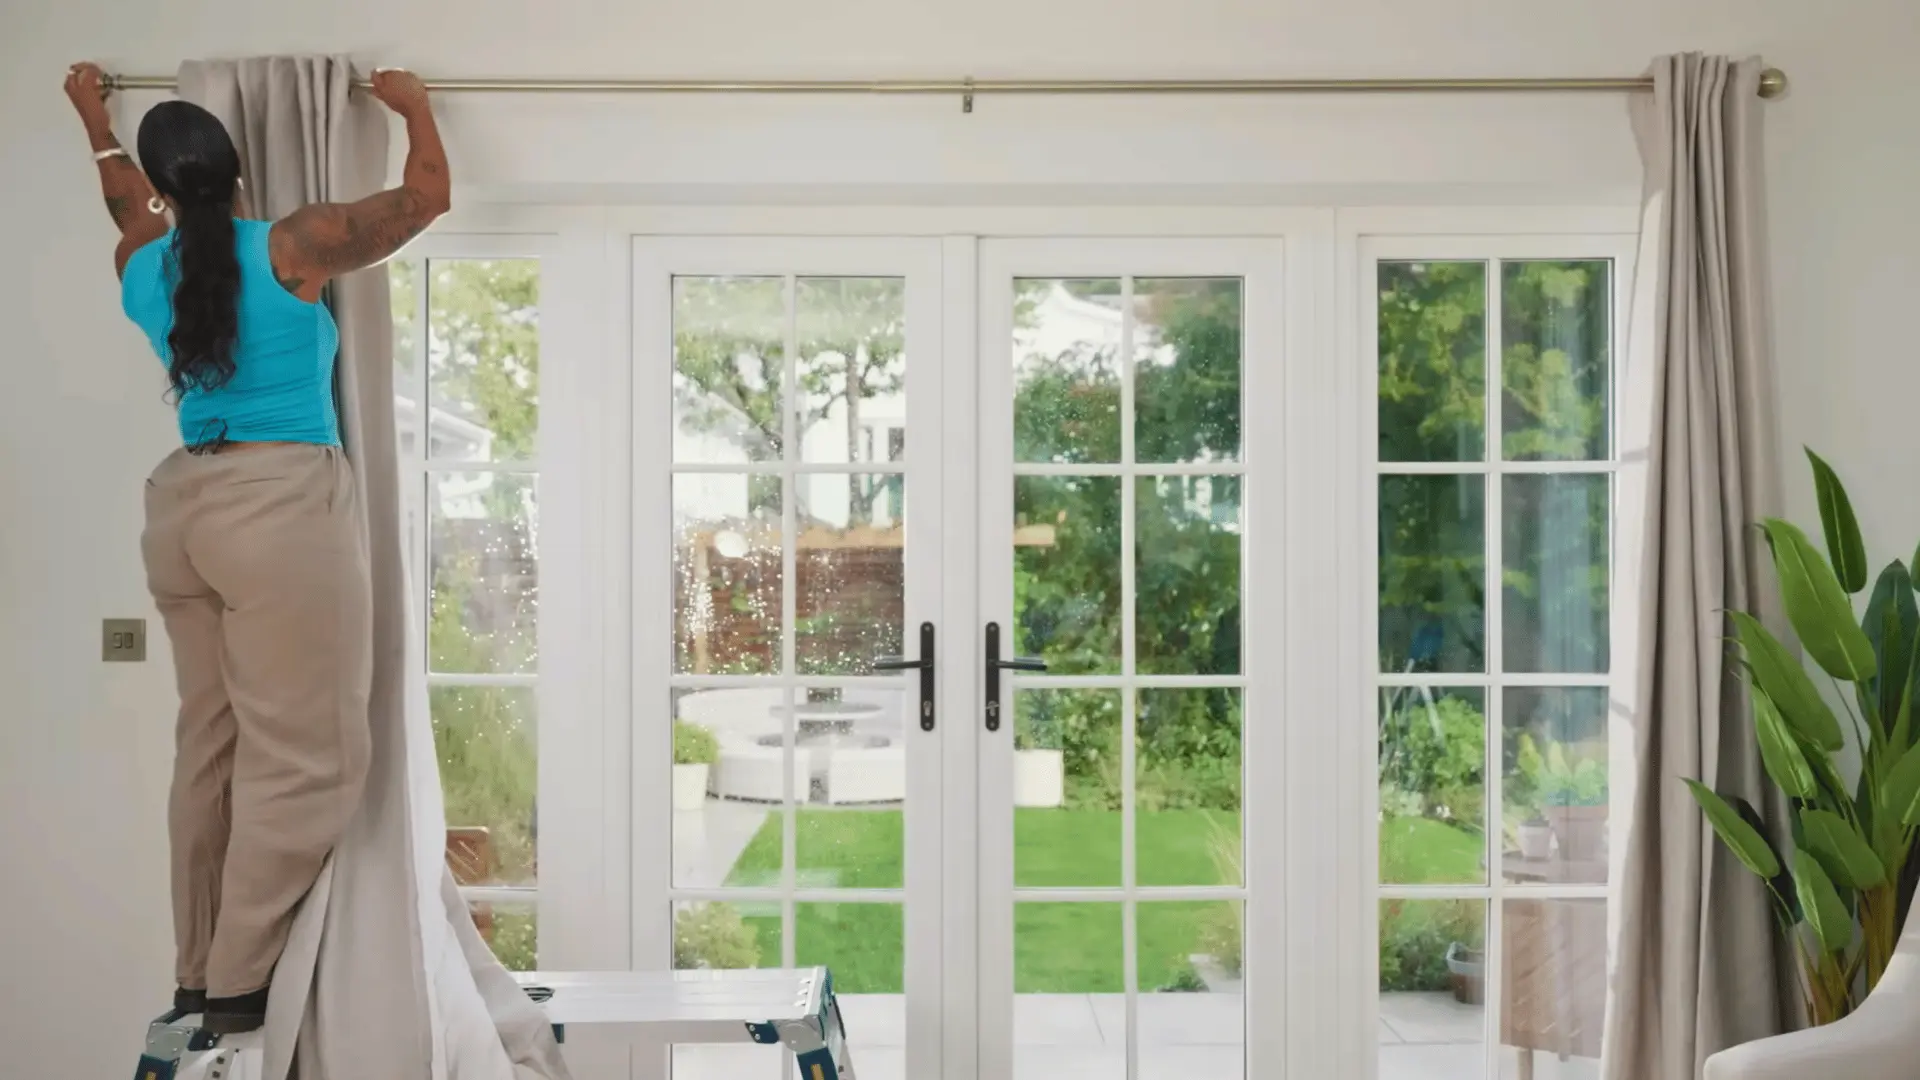
Before calling it done, hold a spirit level against the pole to check alignment. Most brackets allow a slight adjustment if one side sits higher than the other.
If the central bracket feels loose or the pole keeps spinning, tuck the small rubber piece that usually comes with the kit behind it. That one small fix keeps everything stable and looking clean.
For a more detailed walkthrough of the process, check out the complete video tutorial below by
B&Q.
How to Hang Curtains for a Designer Look?
The difference between curtains that look thrown up and ones that look intentional usually comes down to a few small decisions made before anything goes on the rod.
Style, layering, and fabric fullness all play a bigger role than most people realize.
Popular Curtain Styles
Each curtain style hangs differently and suits different aesthetics, so it’s worth knowing what you’re working with before you buy.
| Style | How It Hangs | Best For |
|---|---|---|
| Grommet | Metal rings slide directly onto the rod | Modern, clean-lined interiors |
| Rod Pocket | Fabric sleeve slips over the rod | Casual, relaxed spaces |
| Ring Clip | Clips attach fabric to rings on the rod | Versatile; works with most decor styles |
Layering Curtains
Layering is one of the easiest ways to add depth to a window without overcomplicating the look. A double rod setup makes the whole thing surprisingly straightforward.
- Mount a double curtain rod so both layers hang independently without bunching.
- Place sheer curtains on the front rod to keep the room feeling light during the day.
- Hang blackout curtains on the back rod for full light control at night.
- Make sure both layers can draw open and closed without catching on each other.
Styling Note: For curtains that look full and intentional rather than flat, use fabric that measures at least twice the width of your window. Even, consistent pleating across the panel makes the biggest visual difference once everything is hanging.
Installing Curtain Rods on Different Surfaces
The installation process shifts depending on what your walls are made of, and using the wrong hardware for the wrong surface is the most common reason brackets fail.
Here’s how to approach each one.
1. Drywall Installation (Most Common Case)
Drywall is forgiving to work with as long as you use the right anchors. Skip them, and the bracket will pull straight out under the weight of the curtains.
- Step 1: Mark your bracket positions and scan for studs or hidden wiring with a stud finder.
- Step 2: Drill pilot holes sized to match your chosen anchor type.
- Step 3: Insert toggle bolts or plastic anchors before screwing in the bracket.
- Step 4: Keep weight limits in mind; heavier drapes need toggle bolts, not standard plastic anchors.
2. Stud Installation (Best for Heavy Drapes)
Drilling directly into a stud is the most secure method available and skips the need for anchors entirely.
- Step 1: Use a stud finder to locate the stud behind the drywall.
- Step 2: Mark the center of the stud precisely before drilling.
- Step 3: Drive screws directly into the stud for a hold that can support even the heaviest drapes.
3. Brick and Concrete Walls
Brick and concrete need a slower, more deliberate approach. Rushing the drill is the fastest way to crack the surface or burn out a bit.
- Step 1: Fit your drill with a masonry bit rated for brick or concrete.
- Step 2: Drill slowly and let the bit do the work without forcing it.
- Step 3: Insert masonry anchors into the holes before mounting the brackets.
No-Drill Curtain Rod Options
Not every window needs a drill and a wall full of holes, especially in rentals where damage deposits are very much on the line.
These two options hold up well for lighter curtains and come down just as easily as they go up.
| Option | Best For | Weight Limit | Permanence |
|---|---|---|---|
| Tension Rods | Apartments, rentals | Light curtains only | Fully removable |
| Adhesive Brackets | Temporary setups | Lightweight fabrics only | Weakens over time |
Safety Tips & Weight Guidelines
A bracket that pulls out of the wall mid-hang is not the kind of surprise anyone wants. A few quick checks before you finish go a long way.
- Always verify the weight capacity of your brackets before purchasing, especially for lined or blackout curtains.
- Use a center support bracket for any rod spanning over 48 to 60 inches to prevent sagging.
- Secure anchors fully into drywall before mounting; a loose anchor will fail under consistent weight.
- Match your anchor type to your curtain weight: toggle bolts for heavy drapes, plastic anchors for lighter ones.
- Double-check every screw after the curtains are hung and tighten anything that feels even slightly off.
When everything is properly anchored and supported, the hardware essentially disappears into the background, and the curtains do exactly what they’re supposed to.
Curtain Rod Installation Cost
Whether you do it yourself or bring someone in, curtain rod installation is one of the more affordable home updates you can make.
Here is a quick breakdown of what to expect.
| Method | Estimated Cost | What it Covers |
|---|---|---|
| DIY | $15 to $50 | Basic rod kit, anchors, and hardware |
| Professional Installation | $75 to $200 per window | Labor, hardware, and varies by location |
The Bottom Line
Installing a curtain rod well is one of those small wins that quietly change how a room feels.
Get the placement right, use the correct hardware for your wall type, and the rest falls into place faster than expected. And once those curtains are up, the whole space just feels more intentional.
If you found this helpful or have a tricky window situation that gave you trouble, drop it in the comments below. Would love to hear how your installation went and what worked best for your space.
Frequently Asked Questions (FAQs)
Do I Need a Stud Finder to Install Curtain Rods?
Not always, but it is strongly recommended. Drilling without one risks hitting electrical wires or pipes hidden behind the wall, and that is a situation worth avoiding entirely.
How Far Should Curtain Rods Extend Past Windows?
Anywhere between 3 and 6 inches works well for most windows. If you want the space to feel more open, extending up to 8 to 12 inches lets the curtains stack completely off the glass when drawn.
Can I Install Curtain Rods in Apartments Without Drilling?
Absolutely. Tension rods and adhesive brackets both work well for rentals, just stick to lighter fabrics. Neither holds up well under the weight of heavy-lined or blackout curtains over time.