Growing plants that love to climb? A moss pole might be just what you need.
These simple plant supports help vines and climbing plants grow upward naturally, creating a more compact and healthy display in your home.
While you can buy pre-made moss poles, making your lets you customize the size and style while saving money.
This guide walks you through creating, installing, and maintaining the perfect moss pole for your indoor plants.
With basic materials and a little time, you’ll give your climbing plants the support they need to thrive. If you have a monstera, pothos, or philodendron, a homemade moss pole will encourage beautiful upward growth and stronger plants.
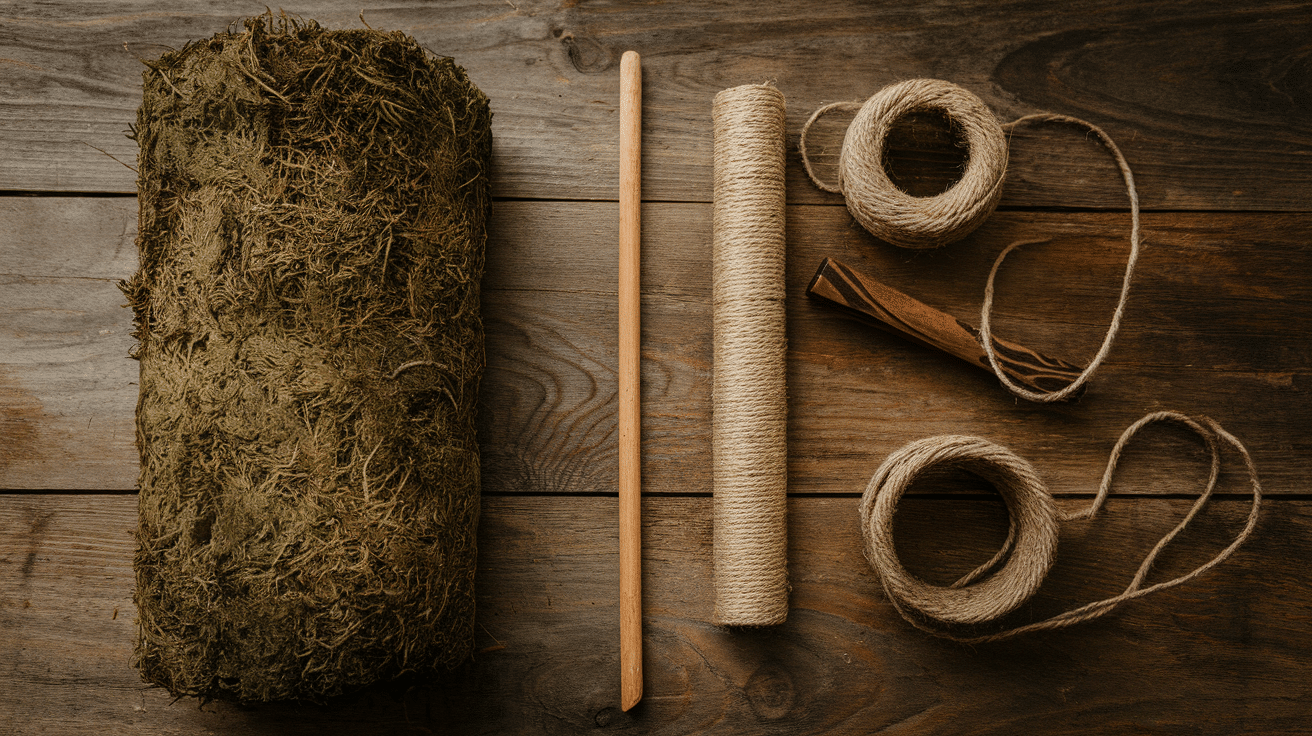
Materials You’ll Need to Make a Moss Pole
Before starting your plant support project, gather all the necessary items. Having everything ready will make the building process much easier and quicker.
Here’s what you’ll need:
Stake Options
You have several choices for the main structure. A bamboo stake works well and provides natural support. PVC pipe offers sturdiness and can be cut to any height you want.
Wooden dowels give good stability for smaller plants. If you’re making a small pole, even bamboo chopsticks can work perfectly for tiny houseplants.
Moss Types
Sphagnum moss is the most common choice because it holds water very well, which helps your climbing plants.
Coconut fiber (coco coir) is another option, though it doesn’t keep moisture as long as sphagnum. Sheet moss can also work and give your pole a different look.
Wrapping Materials
To secure the moss to your stake, you’ll need something to tie it all together. Twine and jute are natural options that blend well with the moss.
The fishing line is less visible but very strong. You might also find tape or cable ties useful to make sure everything stays in place, especially at the beginning and end of your pole.
Optional Tools
Scissors are essential for cutting your wrapping material to the right length. Some people also use plastic mesh to help hold moisture better.
This can be wrapped around your pole to keep the moss from falling off and help maintain dampness longer.
Step-by-Step Guide to Making Your Moss Pole
Making a moss pole is simpler than you might think. Follow these clear steps, and you’ll have great support for your climbing plants in no time.
Let’s break down the process into manageable parts:
Step 1: Prepare Your Materials
Start by getting everything ready. If you’re using sphagnum moss, soak it completely in water until it’s wet.
This helps the moss hold onto water better once it’s on your pole. Make sure your stake is clean and dry before you begin working with it.
Having all your supplies within reach – your soaked moss, stake, twine, and any tools – will make the process much smoother.
Step 2: Wrap the Stake
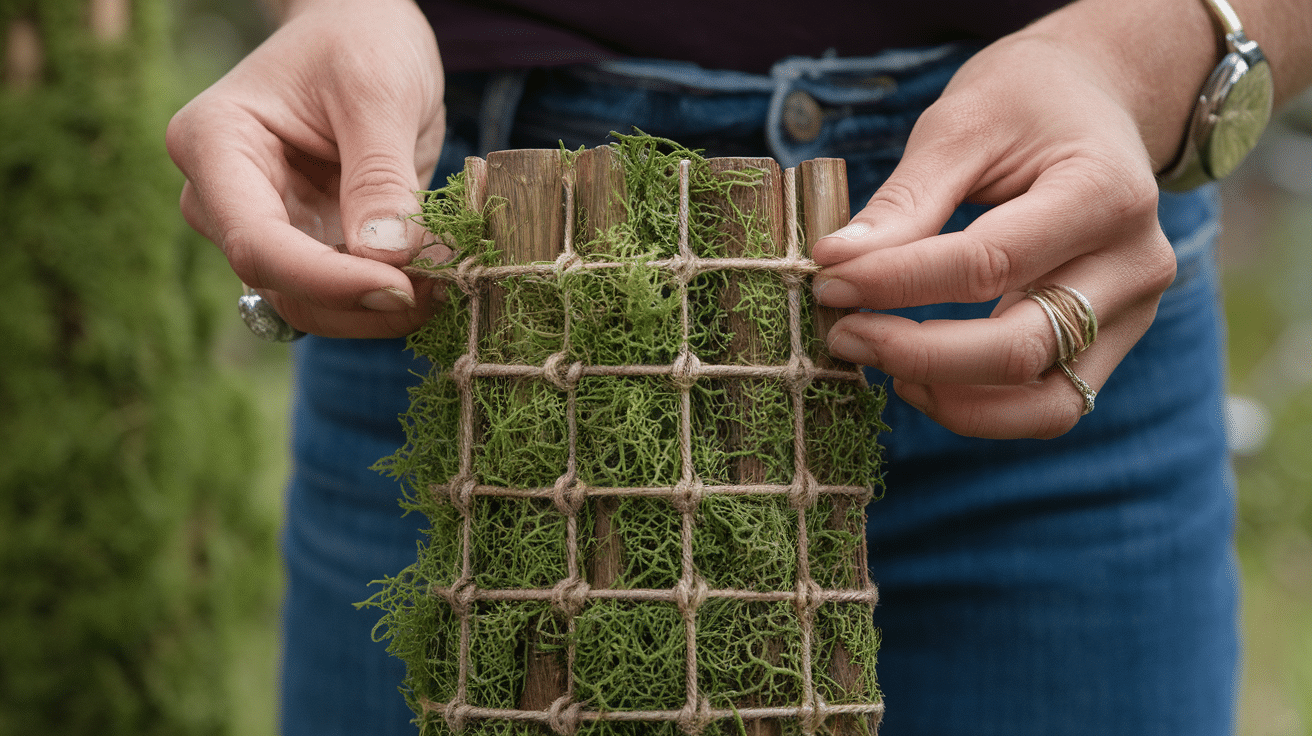
Begin by tying one end of your string or twine to the bottom of your stake. Then start wrapping it upward, making sure to overlap each layer slightly as you go.
This creates a grid-like pattern that will help hold the moss in place. Keep the wrapping tight but not too tight, and try to space it evenly as you move up the stake.
You can secure the string with a bit of tape at the top once you’re done.
Step 3: Add Moss to the Stake
With your string framework in place, start adding the wet moss.
- Press small handfuls of moss into the spaces between the string, working it in so it sticks to the stake.
- Add enough moss to create a thick layer all around – about 1-2 inches is good.
- Work your way up the stake until it’s fully covered.
- The string should help keep the moss from falling off as you build up the layers.
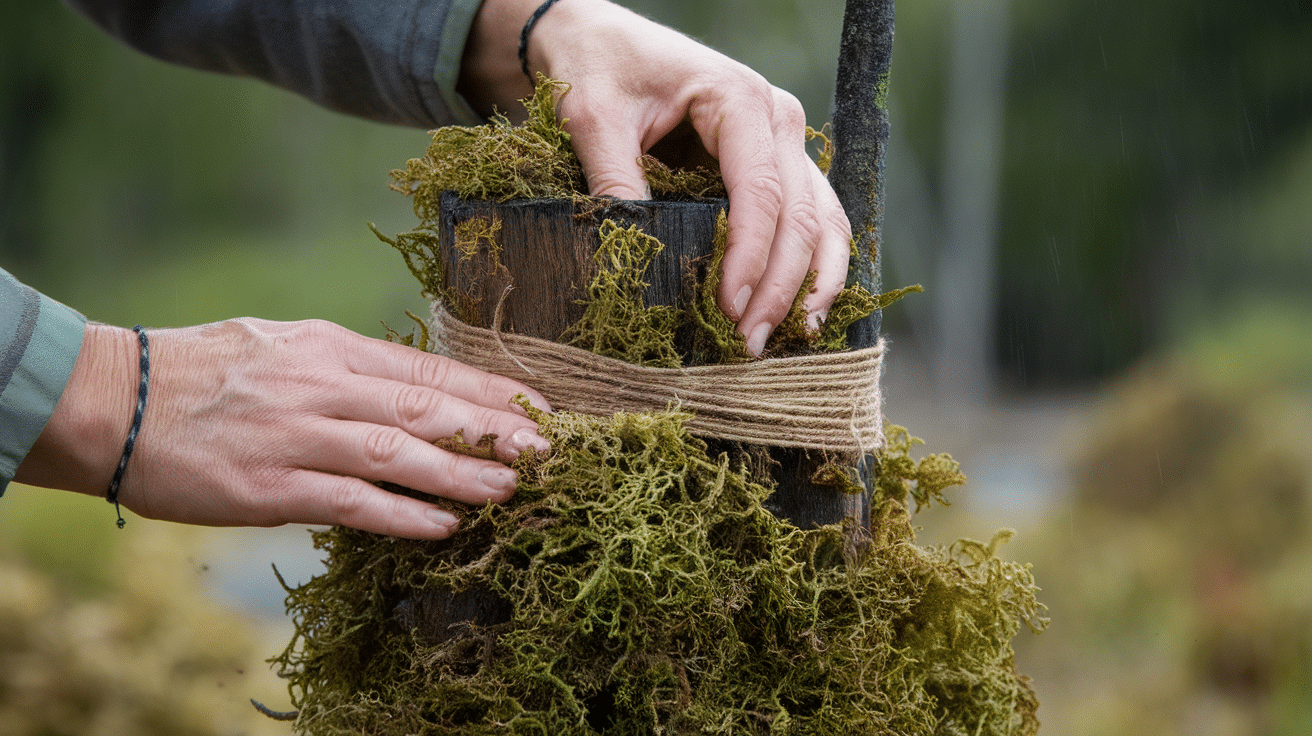
Step 4: Secure the Moss
Once your stake is covered with moss, you’ll want to make sure everything stays in place. To do this, you can wrap more string around the outside of the moss, creating a spiral pattern from bottom to top.
For extra security, use tape or cable ties at the top, bottom, and middle sections. This step is important because it keeps your moss from sliding down or falling off when you water it.
Step 5: Final Placement in Pot
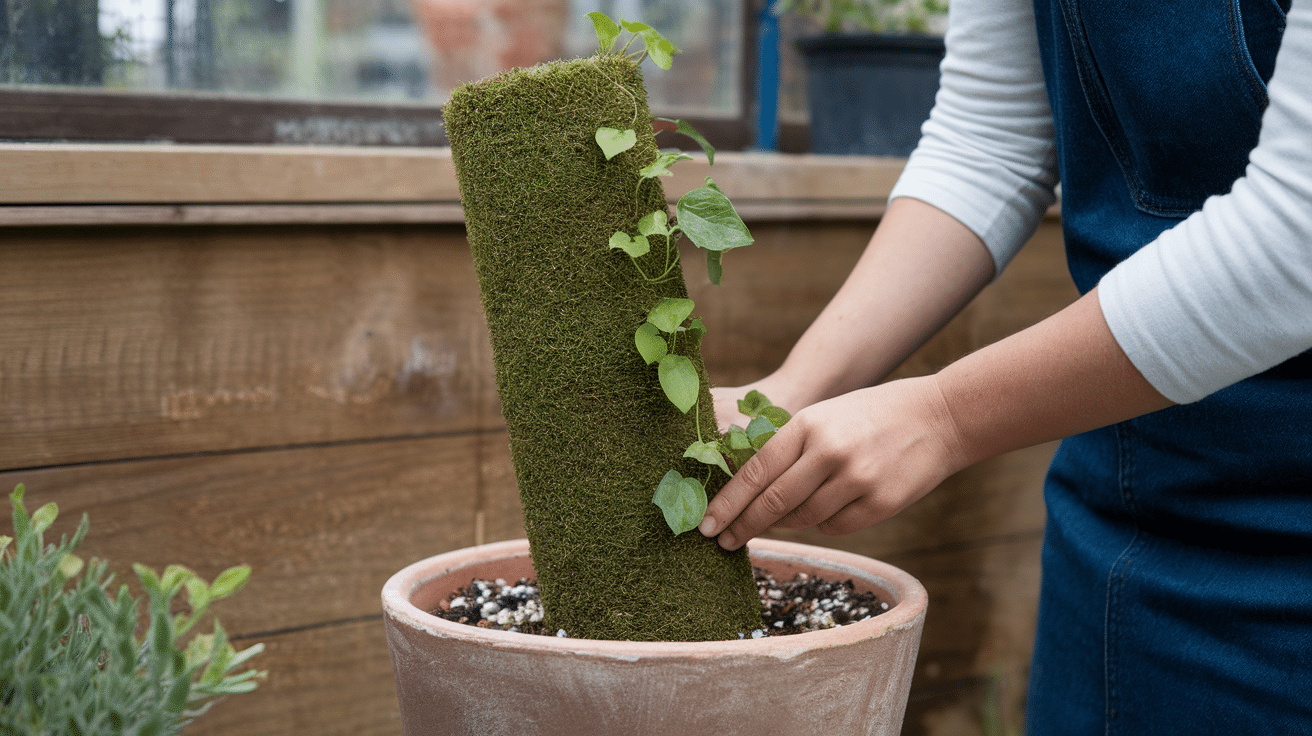
When your moss pole is complete, it’s time to add it to your plant’s pot. To ensure stability, push the bottom of the pole deep into the soil—at least 3-4 inches.
Position it close to the main stem of your climbing plant, but be careful not to damage any roots.
Once in place, you can gently guide any stems or aerial roots toward the moss pole to help your plant start climbing.
How Tall Should a Moss Pole Be?
The right height for your moss pole depends on both your current plant size and how tall you expect it to grow.
For small, young plants, a pole about 1-2 feet taller than the current plant height gives room to grow without looking too large.
For fast-growing plants like monstera or pothos, consider a taller pole from the start—about 3-4 feet is good for most home plants.
You can always add height later by attaching a new section to the top of your existing pole.
Remember to push at least 3-4 inches of the pole into the soil for stability. Pot size also matters—larger pots can support taller poles without tipping over.
Moss Pole Maintenance and Care
Taking care of your moss pole is just as important as making it. Good care helps your plants grow better and keeps your pole working well for a long time.
The main goal is to keep the moss damp since this creates the humid environment climbing plants love. Your plant will attach its aerial roots to the moist moss, helping it grow upward instead of outward.
Regular attention to your pole ensures your plant stays healthy and grows in the direction you want.
- Water your moss pole whenever it feels dry, typically 1-2 times weekly, depending on your home’s humidity.
- Mist the pole with a spray bottle to maintain moisture without soaking the plant’s soil.
- Gently guide new stems and aerial roots toward the pole using soft plant ties.
- Check the moss every few months for signs of drying out or decay, adding fresh moss as needed.
- For self-watering poles, refill the water inside the tube when levels get low.
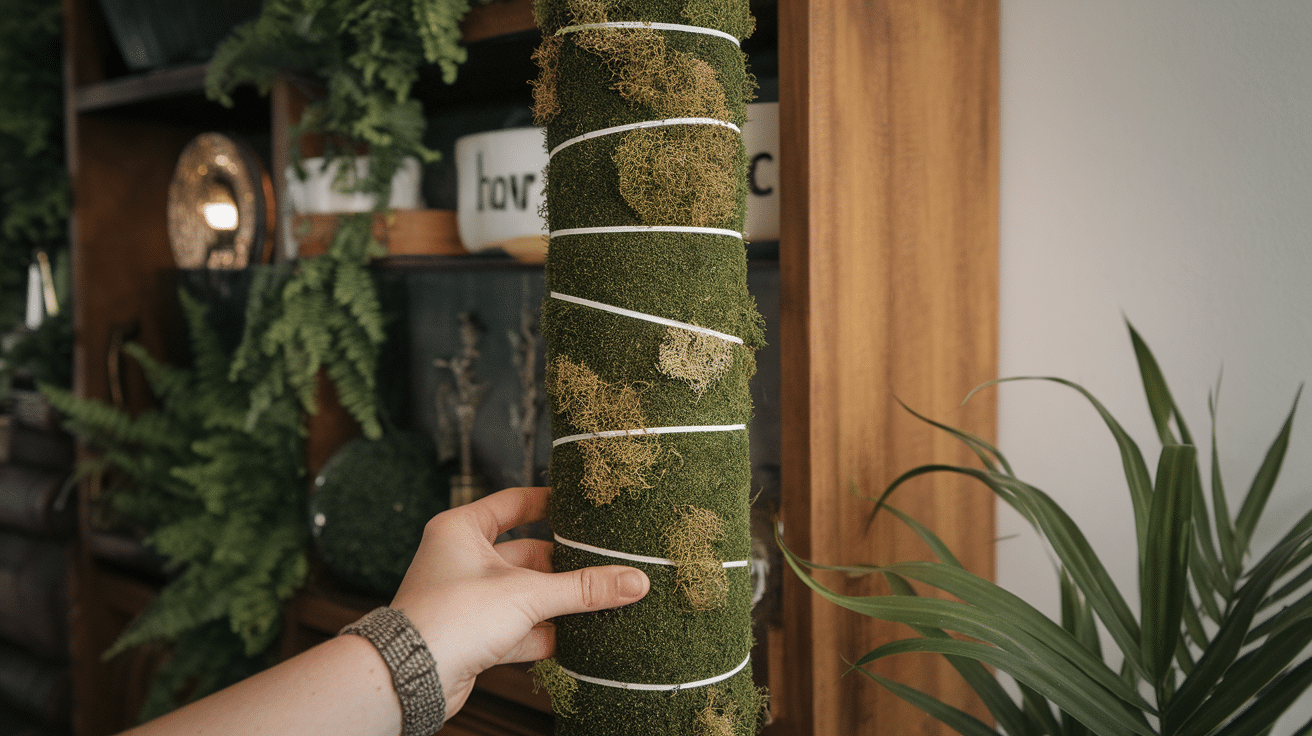
Alternative Materials and Techniques
Some plant owners have found ways to improve the basic moss pole design for better results. These changes help keep the moss wetter longer and make caring for climbing plants easier.
Using plastic mesh or a liner on the back of your moss pole helps trap moisture against the moss.
D-shaped poles with a flat plastic backing maintain dampness better than fully round poles, often requiring watering only once every 1-2 weeks.
The self-watering moss pole is ideal for busy plant owners. Made with a capped PVC pipe that serves as a water reservoir, this design slowly releases moisture through small drilled holes.
You fill the pipe from the top, and the water gradually seeps into the moss, keeping it damp without frequent manual watering.
What Can You Use Instead of a Moss Pole?
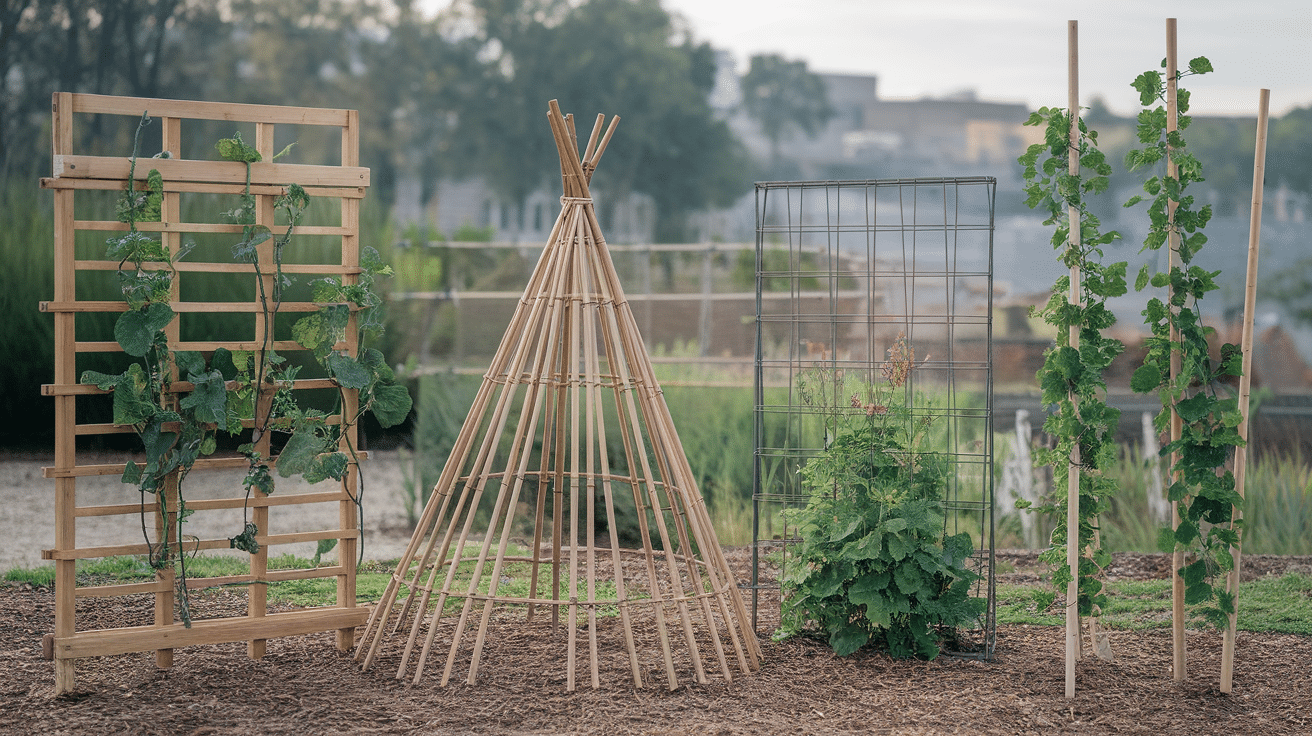
If a moss pole doesn’t fit your needs, several other options can support your climbing plants. A simple wooden trellis works well for many plants and can be bought or made in various shapes.
Bamboo stakes arranged in a teepee shape make a natural-looking support that many plants can climb. Some plant owners use wire frames bent into shapes like hoops or spirals.
Coco coir poles work similarly to moss poles but use coconut fiber instead. Even a simple stake with jute string wrapped in a spiral pattern gives vines something to grab onto.
The best choice depends on your plant type and how you want it to look as it grows.
Conclusion
Making a moss pole is a simple project that can help your climbing plants grow healthier and look better. We’ve covered all the steps, from choosing materials to building and maintaining your pole.
Remember that you can try different designs based on what works for your plants and home. Some plants might take time to climb, so be patient with them as they learn to grow upward.
Have you made a moss pole for your plants? We’d love to see how it turned out! Share photos of your creation in the comments below.
If you have questions about plant care or need help with your climbing plants, let us know, and we’ll do our best to assist you.