Let’s be honest, succulents get called “impossible to kill,” but a few small mistakes at planting time can prove that wrong fast. The plant isn’t fragile; it’s just been set up incorrectly.
Dense nursery soil, poor drainage, buried leaves, weak light, and watering too soon can all set a succulent back before it even settles in. None of these mistakes are hard to avoid once you know what to look for.
Learning how to plant succulents the right way doesn’t take special skills or expensive tools. The fix is simpler than it sounds: follow the right steps in order, from choosing supplies to planting, and your succulent will settle in with very little fuss.
Why Succulents Have Become So Popular
Succulents are popular houseplants because they need less care than many other indoor plants.
Their thick leaves and stems store water, allowing them to handle longer periods between watering. This makes them suitable for busy homes, small spaces, and people who want easy greenery. However, succulents have different needs than typical houseplants.
They prefer fast-draining soil, pots with proper drainage, and bright light to maintain their shape and health.
Keeping them in constantly wet soil or low light can lead to soft leaves, stretching, or root problems.
Choosing the right pot, soil mix, and planting depth from the beginning helps succulents grow well with minimal attention. Understanding these basic needs makes it easier to keep these plants healthy indoors.
What You Need Before Planting
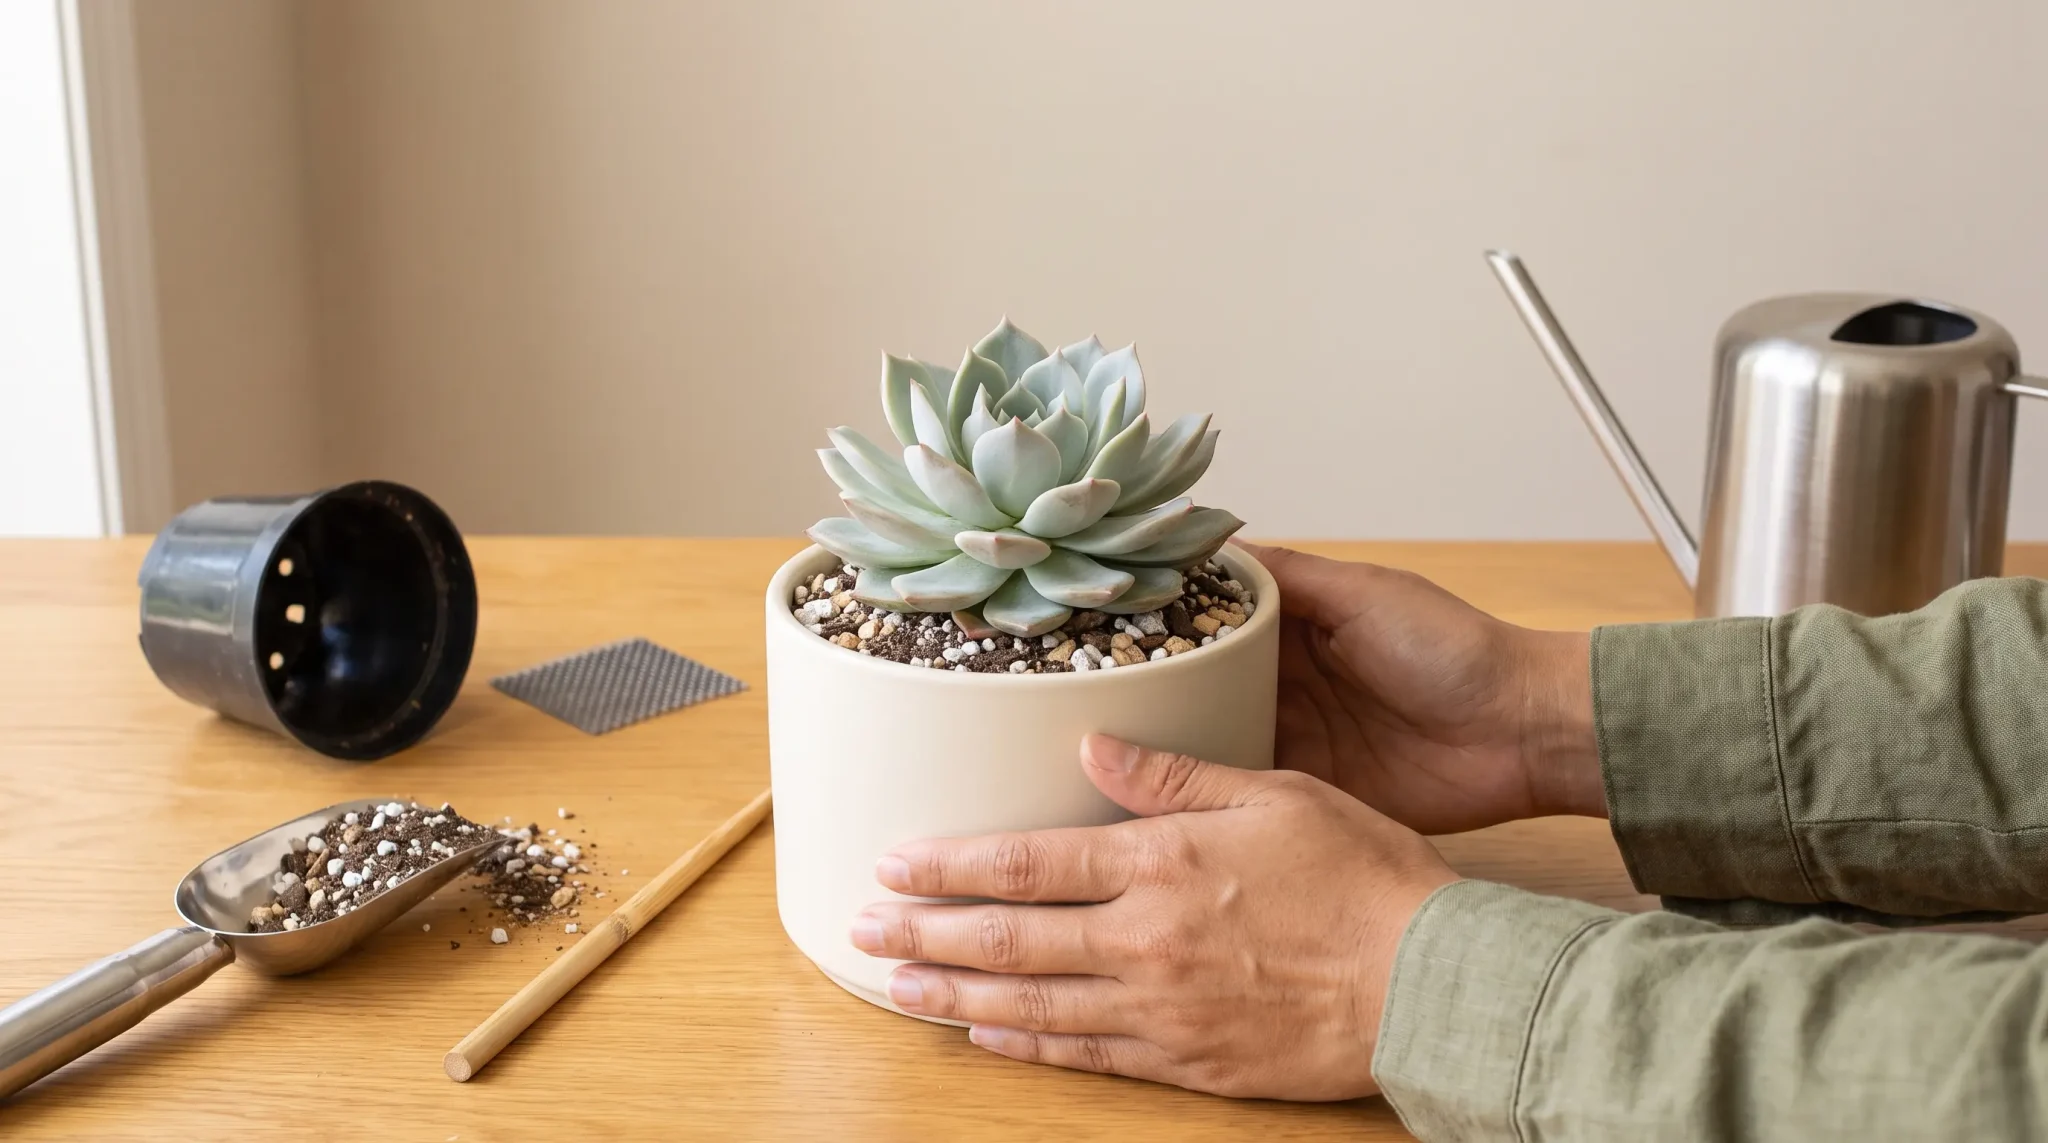
A succulent’s long-term health starts with what you use at planting time, and this is really where learning how to plant succulents properly begins: the pot, soil, and a few tools shape drainage, root health, and stability from day one.
Essential:
- A rooted succulent
- A pot with a drainage hole
- Fast-draining soil (succulent or cactus mix)
Helpful but optional:
- Mesh or a coffee filter, to help keep soil from washing through the drainage hole
- A small scoop, for adding soil without spilling
- A narrow tool, like a chopstick, for closing air pockets around the roots
- Clean snips, for trimming damaged leaves
- Gloves, for spiky or bristly varieties
- A plant label
- Decorative top dressing
- A watering can with a narrow spout
You don’t need expensive or specialized gear; the essentials above will do. Aloe vera, a close relative in the succulent family, follows the same drainage-first soil approach, so the same supply list applies almost without exception.
How to Plant Succulents Step by Step
Planting follows a simple sequence, from removing the plant to letting it settle in before its first drink of water. Each step below covers one part of the process, with a few tips and cautions along the way.
Step 1: Remove the Succulent From Its Nursery Pot
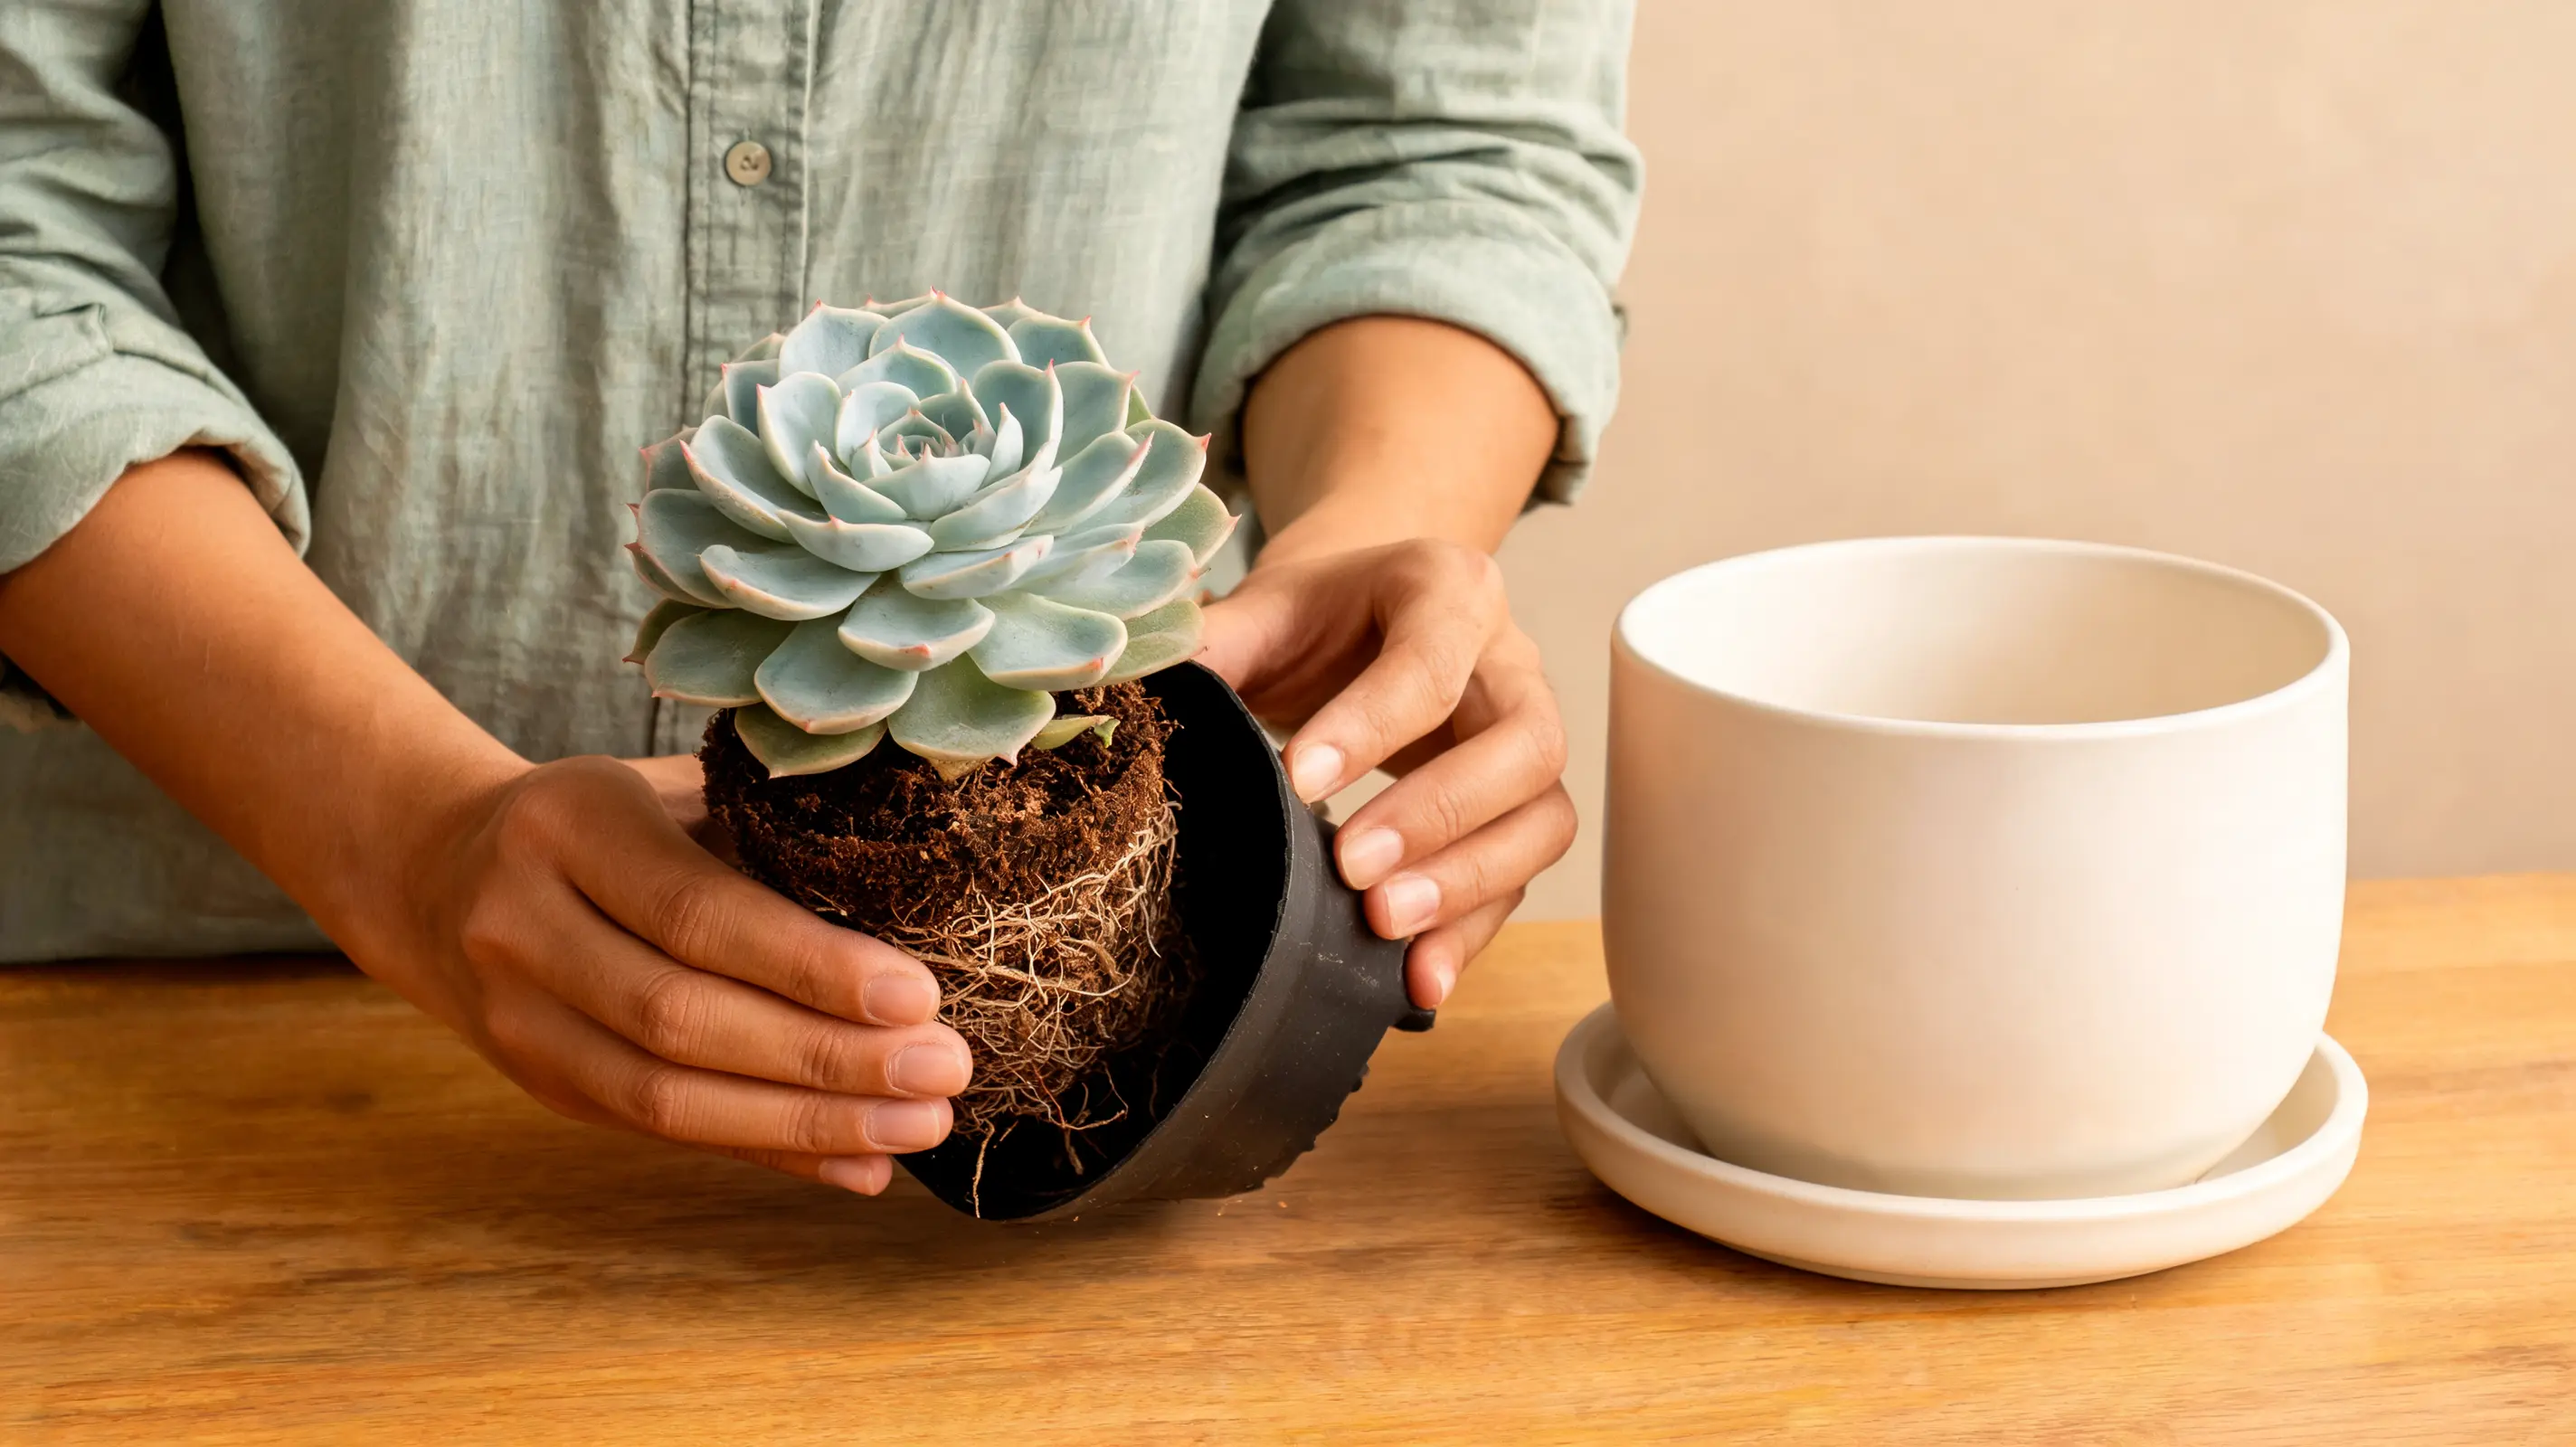
Support the plant gently near its base, then squeeze or flex the sides of the nursery pot to loosen the soil inside.
Slide the root ball out slowly rather than tugging on the plant itself. Never pull the succulent out by a leaf or stem, since they detach or snap easily under pressure. Tap the sides of the pot first if it won’t budge, and check that the roots come free cleanly before setting the plant aside.
Step 2: Loosen the Roots and Remove Nursery Soil
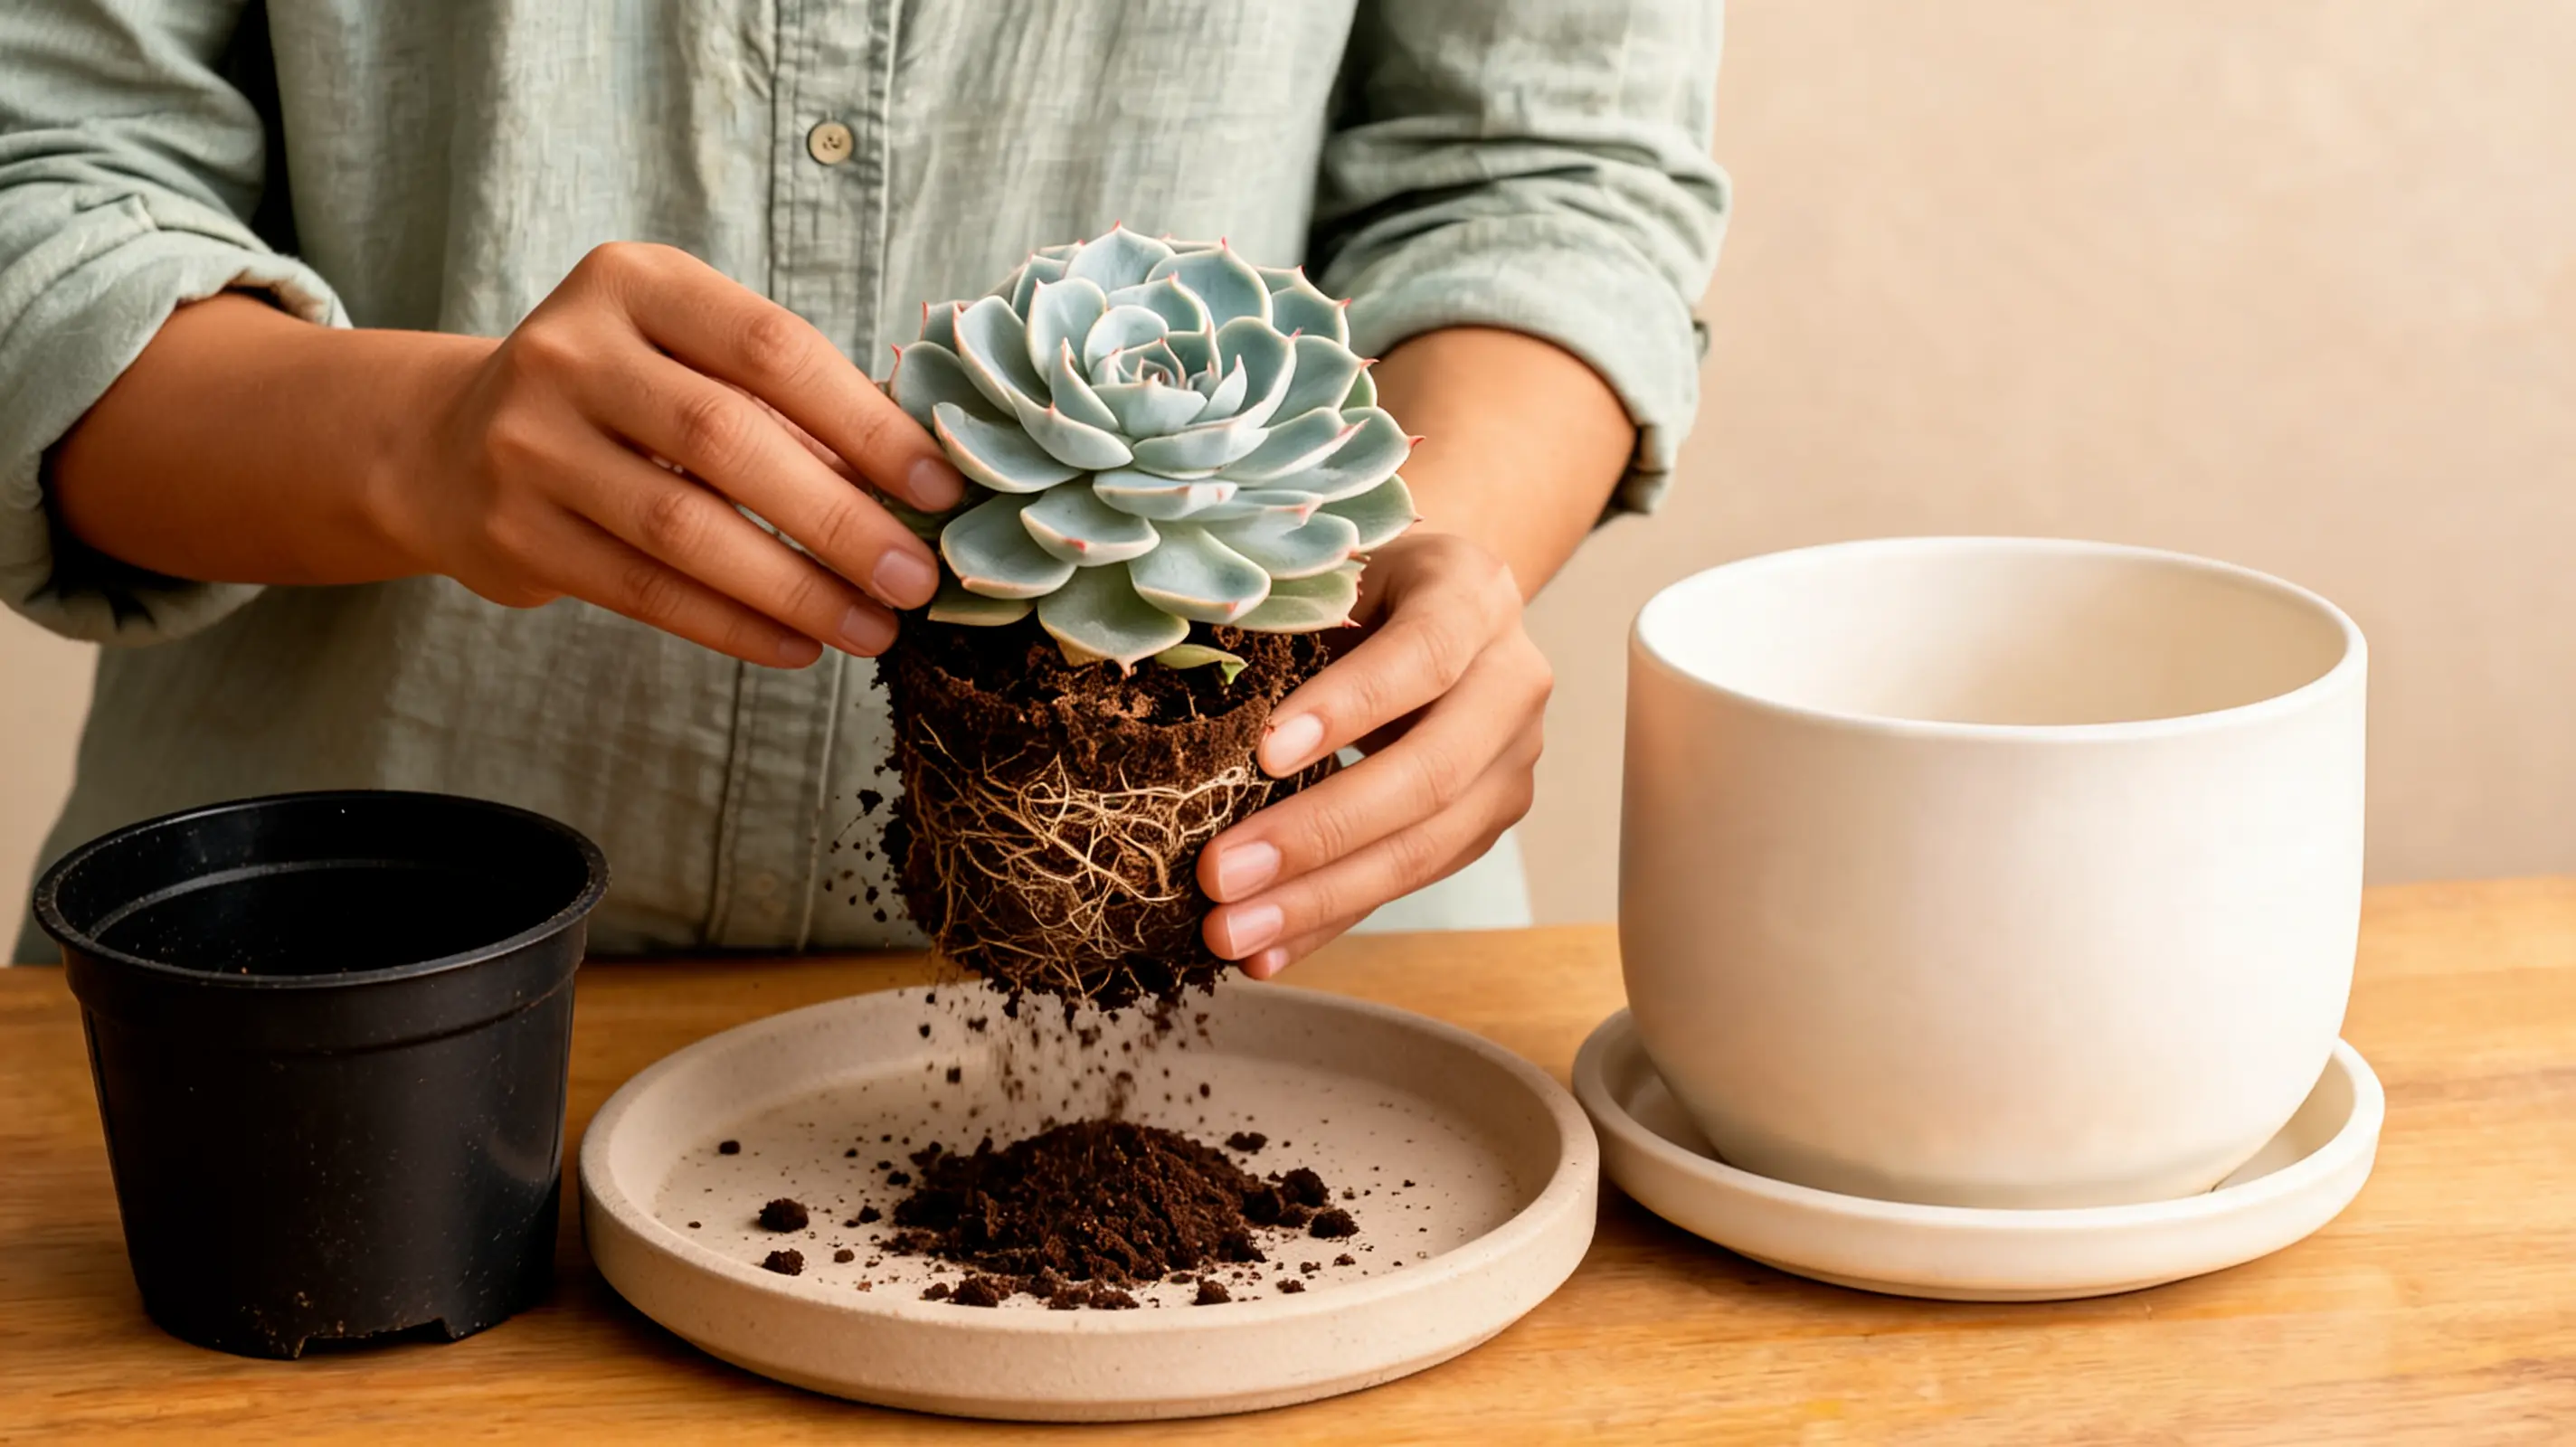
Work through the compacted nursery soil around the roots, clearing out as much of the dense mix as you can. A little leftover soil is fine, since the goal isn’t bare roots, just removing soil that won’t drain well.
In most cases, loosen the old soil while the roots are dry, and avoid forcing apart fine, tangled roots. Rinsing is only needed if stubborn clumps won’t budge or you spot a deeper root problem.
Step 3: Inspect the Roots and Lower Leaves
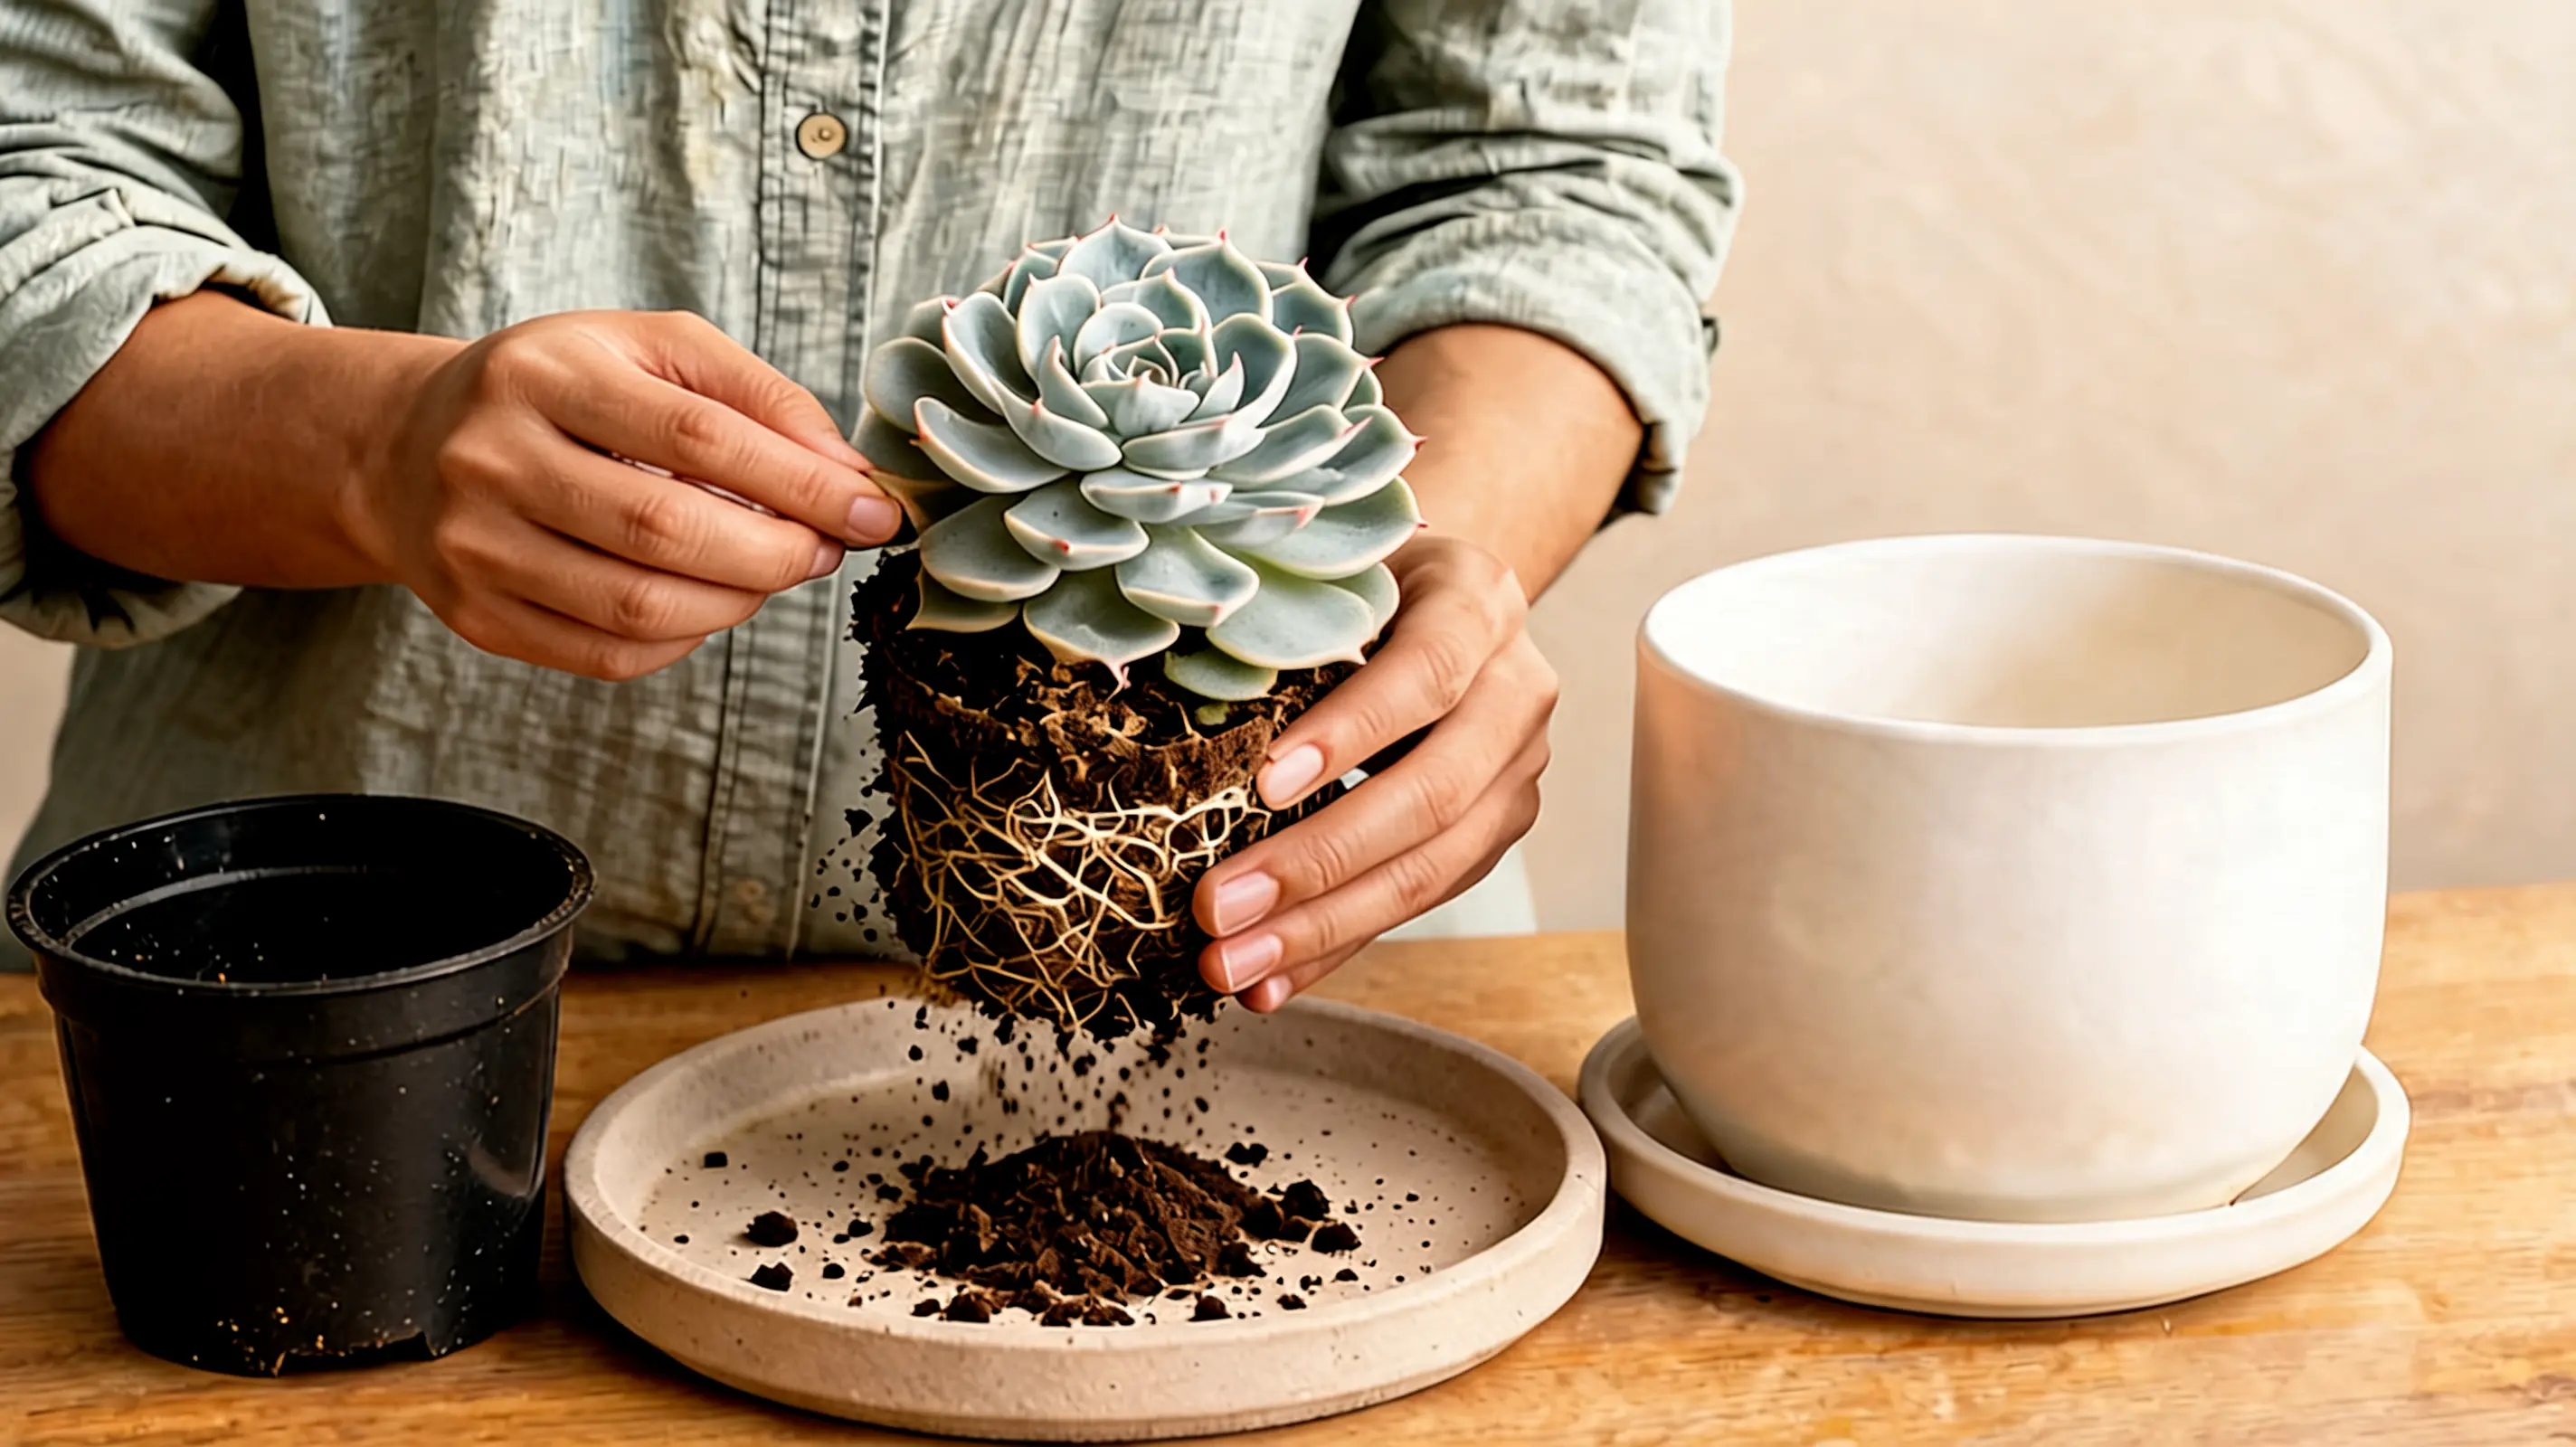
Check for soft, dark, or damaged roots, rotten tissue, insects, dead lower leaves, or healthy offsets attached to the parent plant. Trimming damaged material now prevents small problems from spreading once the plant is repotted and settling in.
This is also the moment to decide whether to separate offsets, since it’s harder once the plant is replanted. Use clean snips to trim away anything damaged, wiping the blades between cuts to avoid spreading rot.
Step 4: Prepare the Pot and Position the Plant
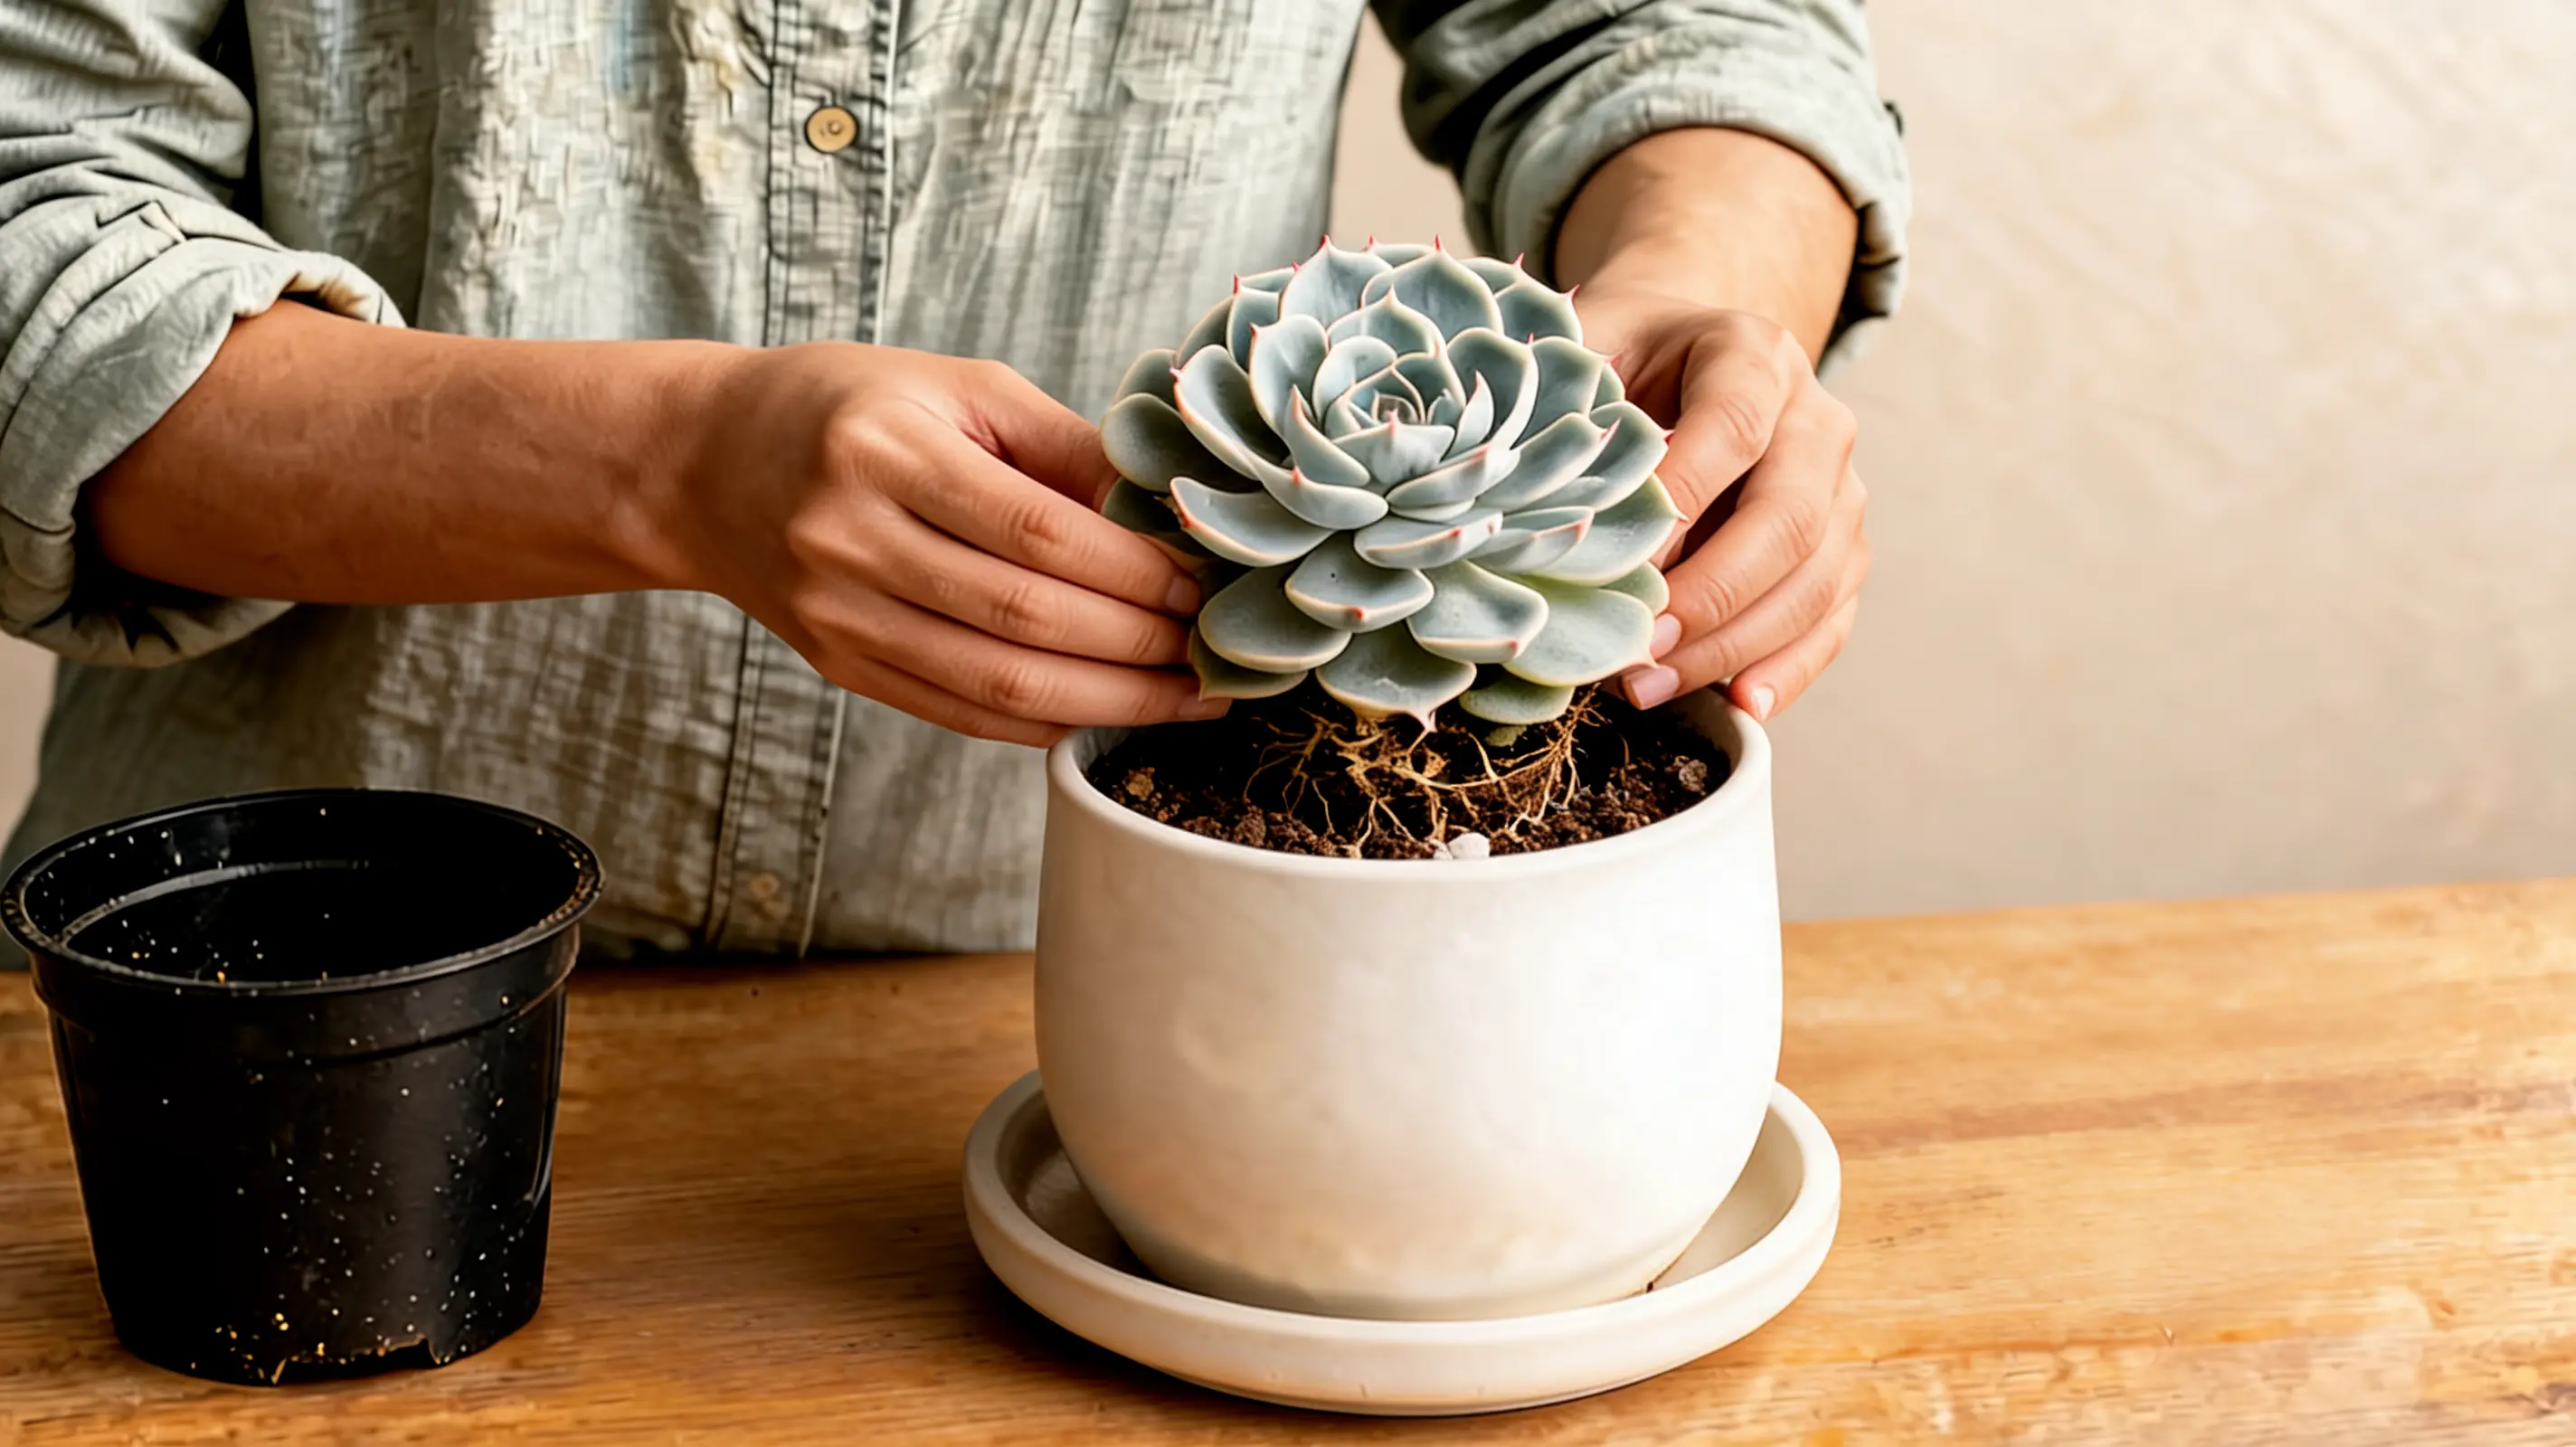
Cover the drainage hole with mesh or a coffee filter, then fill the pot most of the way with soil. Set the plant on top to check its height, center it, and nestle a few roots into the loose soil, keeping every leaf above the surface.
Don’t bury the rosette, since leaves touching damp soil can rot. Off-center placement can work too, leaving room for decoration or future offsets to grow.
Step 5: Fill Around the Roots
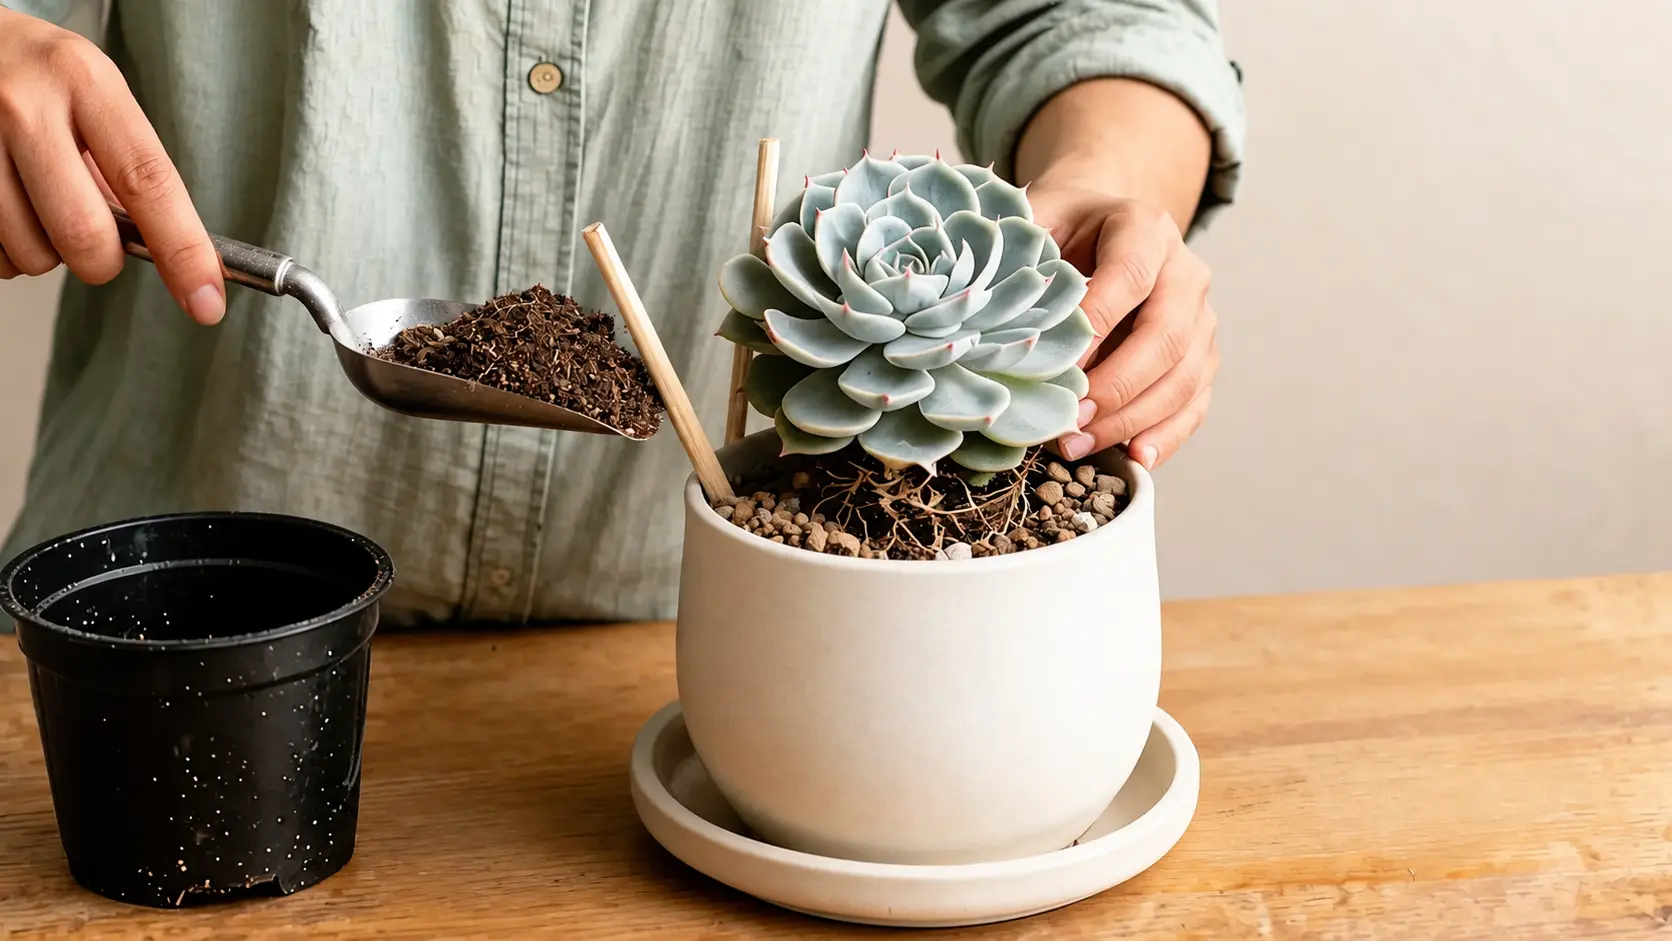
Add soil around the outer edge of the pot first, then work gradually toward the roots, using a chopstick or narrow tool to close any air pockets. Firm the soil gently as you go, checking the plant’s position along the way.
Clearing gaps now helps prevent the soil from sinking later, so avoid packing the soil too tightly around the roots, which can restrict airflow and slow root growth.
Optional Top Dressing: If you’d like a finished look, top the soil with gravel, granite chips, or similar material. This is purely decorative; it doesn’t affect the plant’s health but can help hold it steady. Keep it away from the center of the rosette.
Step 6: Let the Succulent Rest
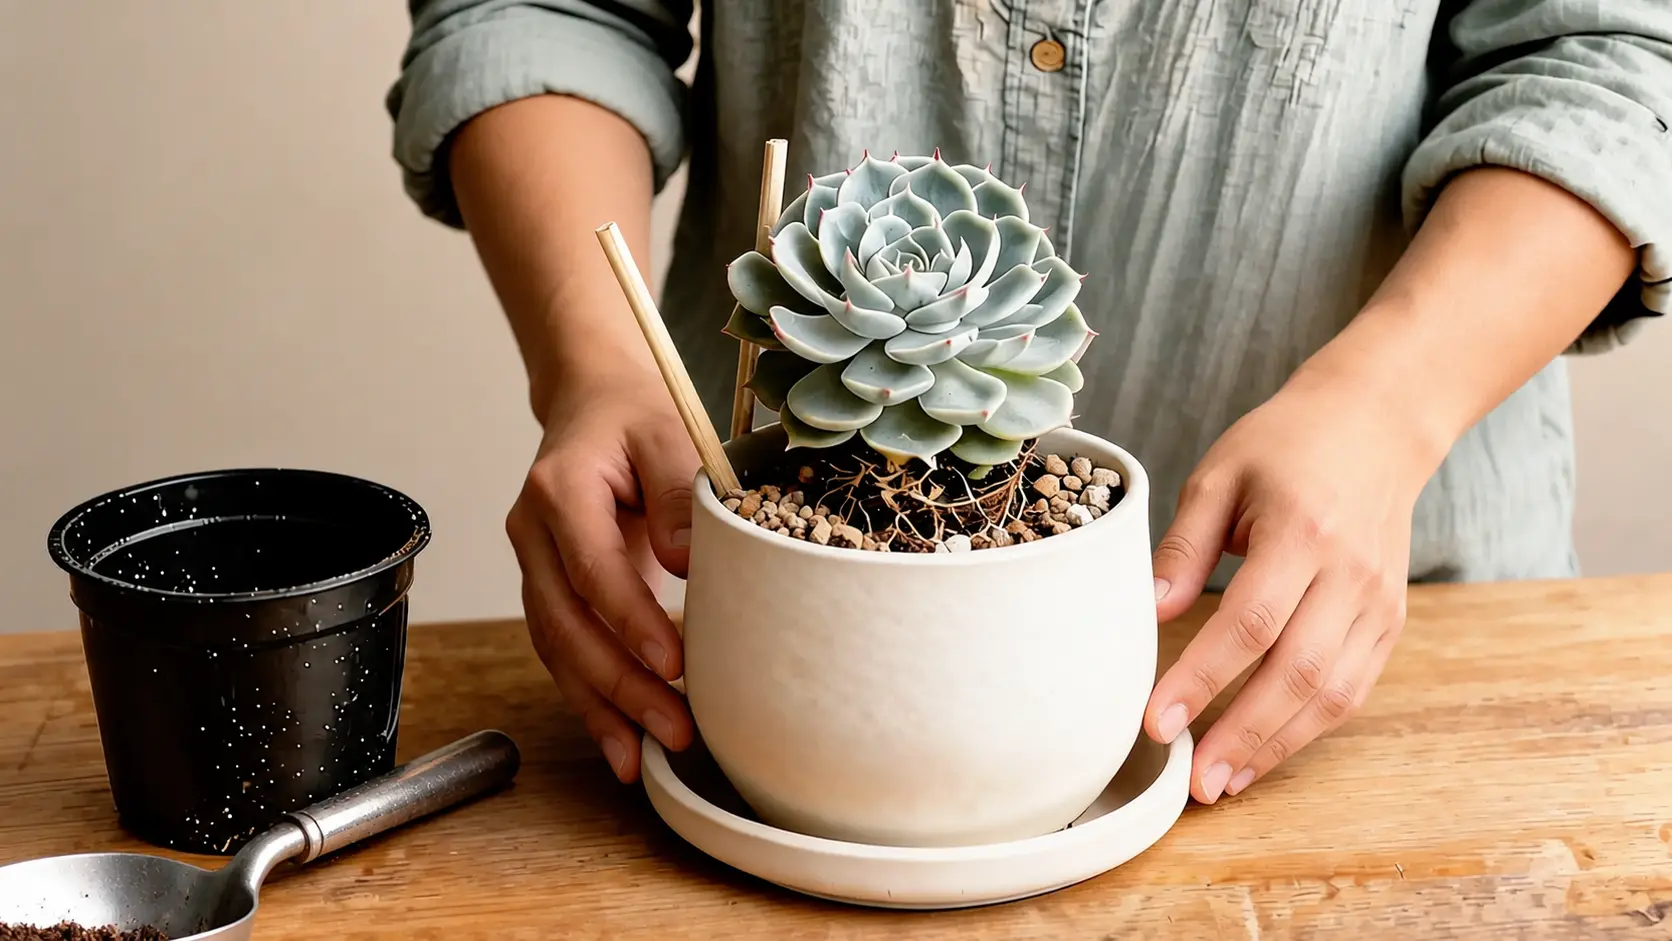
Place the finished pot in bright, indirect light and wait one to two days before watering. This resting period gives the roots time to heal after being disturbed during planting and handling, so don’t skip this step even if the soil already looks dry.
Keep the plant out of direct, harsh sun during this rest period, since intense light adds extra stress right when the roots need calm conditions most.
Step 7: Water After Resting
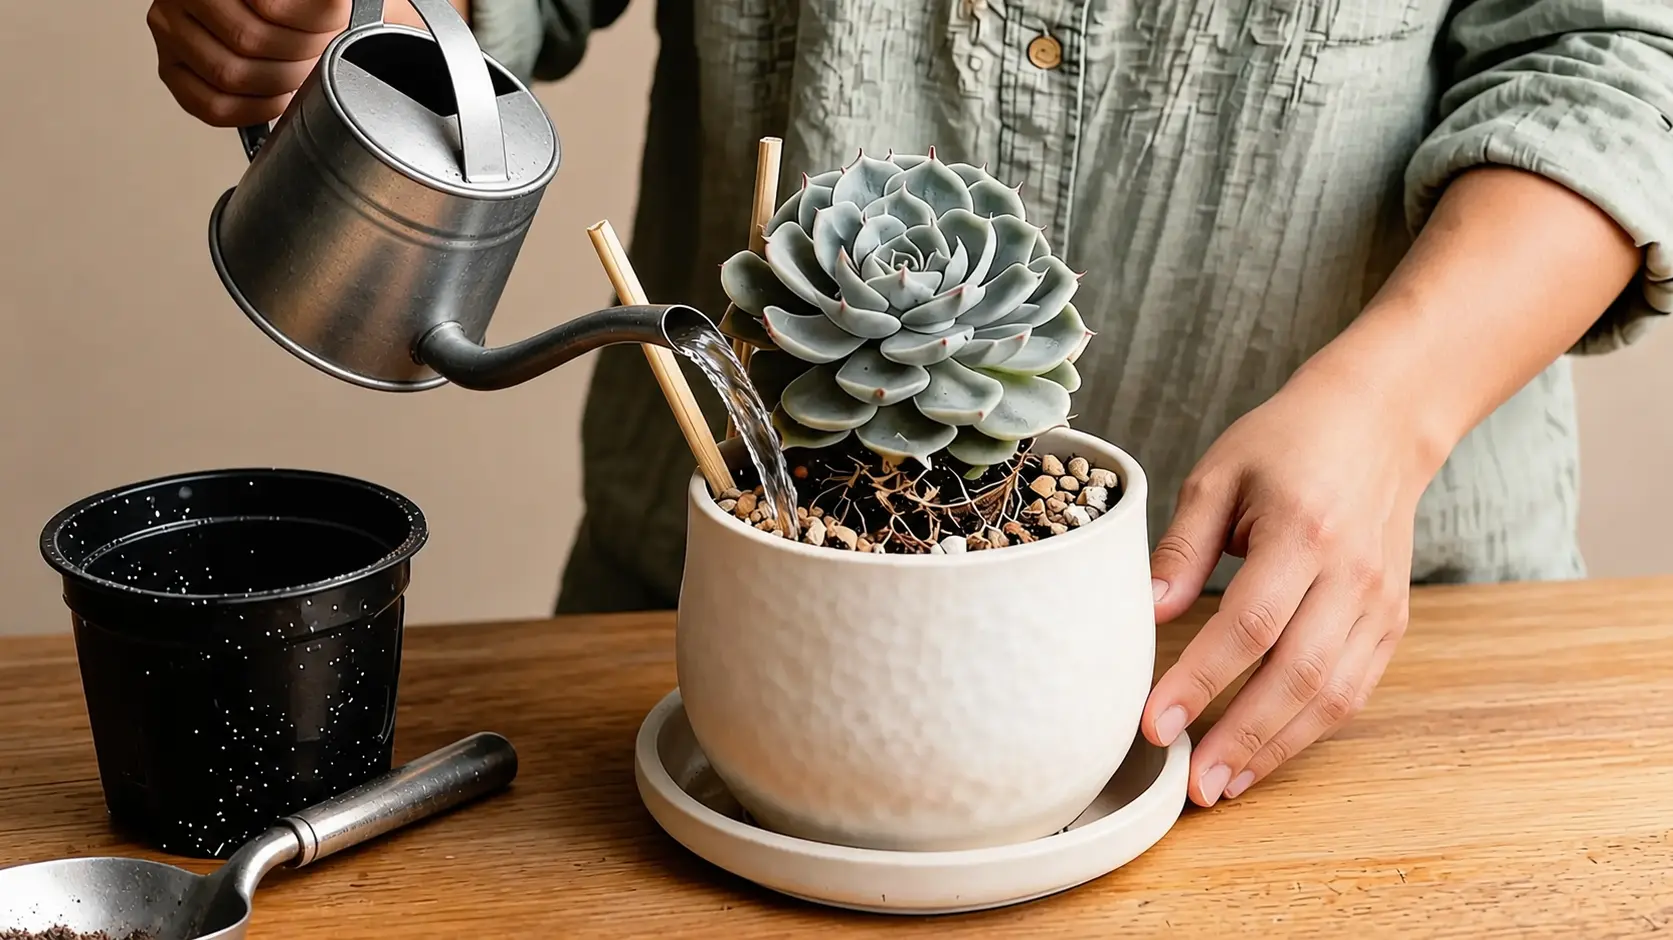
Once the wait is over, water the soil thoroughly and let the excess water drain out through the hole at the bottom.
This first watering settles the soil around the roots for good, so pour slowly and let the soil absorb evenly instead of running straight through. Avoid getting water directly on the leaves or into the rosette, since trapped moisture there can lead to rot.
How to Care for a Newly Planted Succulent
Once your succulent is settled in its pot, day-to-day care is straightforward. A few simple habits around watering, light, and observation will keep it healthy in the weeks ahead. The University of Minnesota Extension’s guide to cacti and succulents notes that excess water trapped in the soil can cause rot within a short window, which is exactly why the habits below matter so much.
- Watering: After the resting period in Step 6, water only when the soil has dried out, not on a fixed schedule. Soak it thoroughly and let the excess drain out the bottom. Avoid letting water pool on the leaves or sit in the rosette.
- Light and placement: Keep the plant in bright, indirect light at first, and introduce stronger sun gradually. A bright window works well indoors; add a grow light if natural light is weak, and rotate the pot occasionally for even growth. Stretching or leaning toward the light means it needs more.
- Signs the plant is settling in: Empty saucers after watering and keep the drainage hole clear. Healthy signs include firm leaves, a compact shape, steady color, and new growth. Watch for ongoing softness, yellowing, heavy shriveling, sticky residue, insects, or a loose stem.
Get these three habits right, and your succulent should need very little beyond an occasional check on the soil and the light.
When to Repot a Succulent
Repotting isn’t just for plants that have outgrown their pots. Several other signs point to the same need, from a poor starting mix to pests or decline. Here’s what to watch for in each situation.
| Situation | What to Look For |
|---|---|
| Soon after purchase | Nursery soil is often dense and holds moisture too long at home; repotting lets you check the roots and switch to a better mix. |
| Root-bound plant | Roots filling the pot, growing through the drainage hole, little loose soil left, or slowed growth. |
| Soil causing problems | Soil staying wet too long, draining poorly, or compacted and hard. |
| Pests or rot | Sudden decline, a loose stem, soft roots, rotten tissue, or insects near the roots; remove contaminated soil and clean the pot. |
Catching any of these signs early makes repotting a quick fix rather than a rescue mission. A fresh pot and the right soil give the succulent a much better chance to recover and keep growing steadily.
Setting Up the Pot and Soil for a Healthy Succulent
The pot and soil work as a team, and getting both right sets the tone for everything that follows.
Choosing the Right Pot
A pot without proper drainage traps water around the roots, so this is the first thing to get right.
- Drainage: Pick a pot with a working drainage hole.
- Size: Choose a pot only slightly larger than the plant, leaving about ½ to 1 inch between the leaves and the pot edge.
- Oversized pots: Skip these, since extra unused soil stays wet for too long.
- Pots without holes: Riskier and better suited to experienced growers than beginners.
Once the pot is sorted, the soil inside it needs to match that same drainage-first approach.
Choosing the Best Soil
Soil that holds too much moisture works against even the best container, so drainage matters here too.
- Drainage: Pick a mix that lets water pass through quickly and doesn’t stay wet around the roots.
- Good options: A commercial succulent soil, a cactus mix, or a light potting soil amended with coarse sand or perlite.
- What to avoid: Fine play sand and vermiculite, since both trap extra moisture. The difference between the two amendments comes down to how they handle water, a distinction covered well in this breakdown of what perlite is and how it’s used.
- Climate check: Favor faster drainage in humid areas and slightly more moisture retention in very dry ones.
What matters most is how quickly the soil dries in your space, not the label on the bag.
Common Problems and Fixes
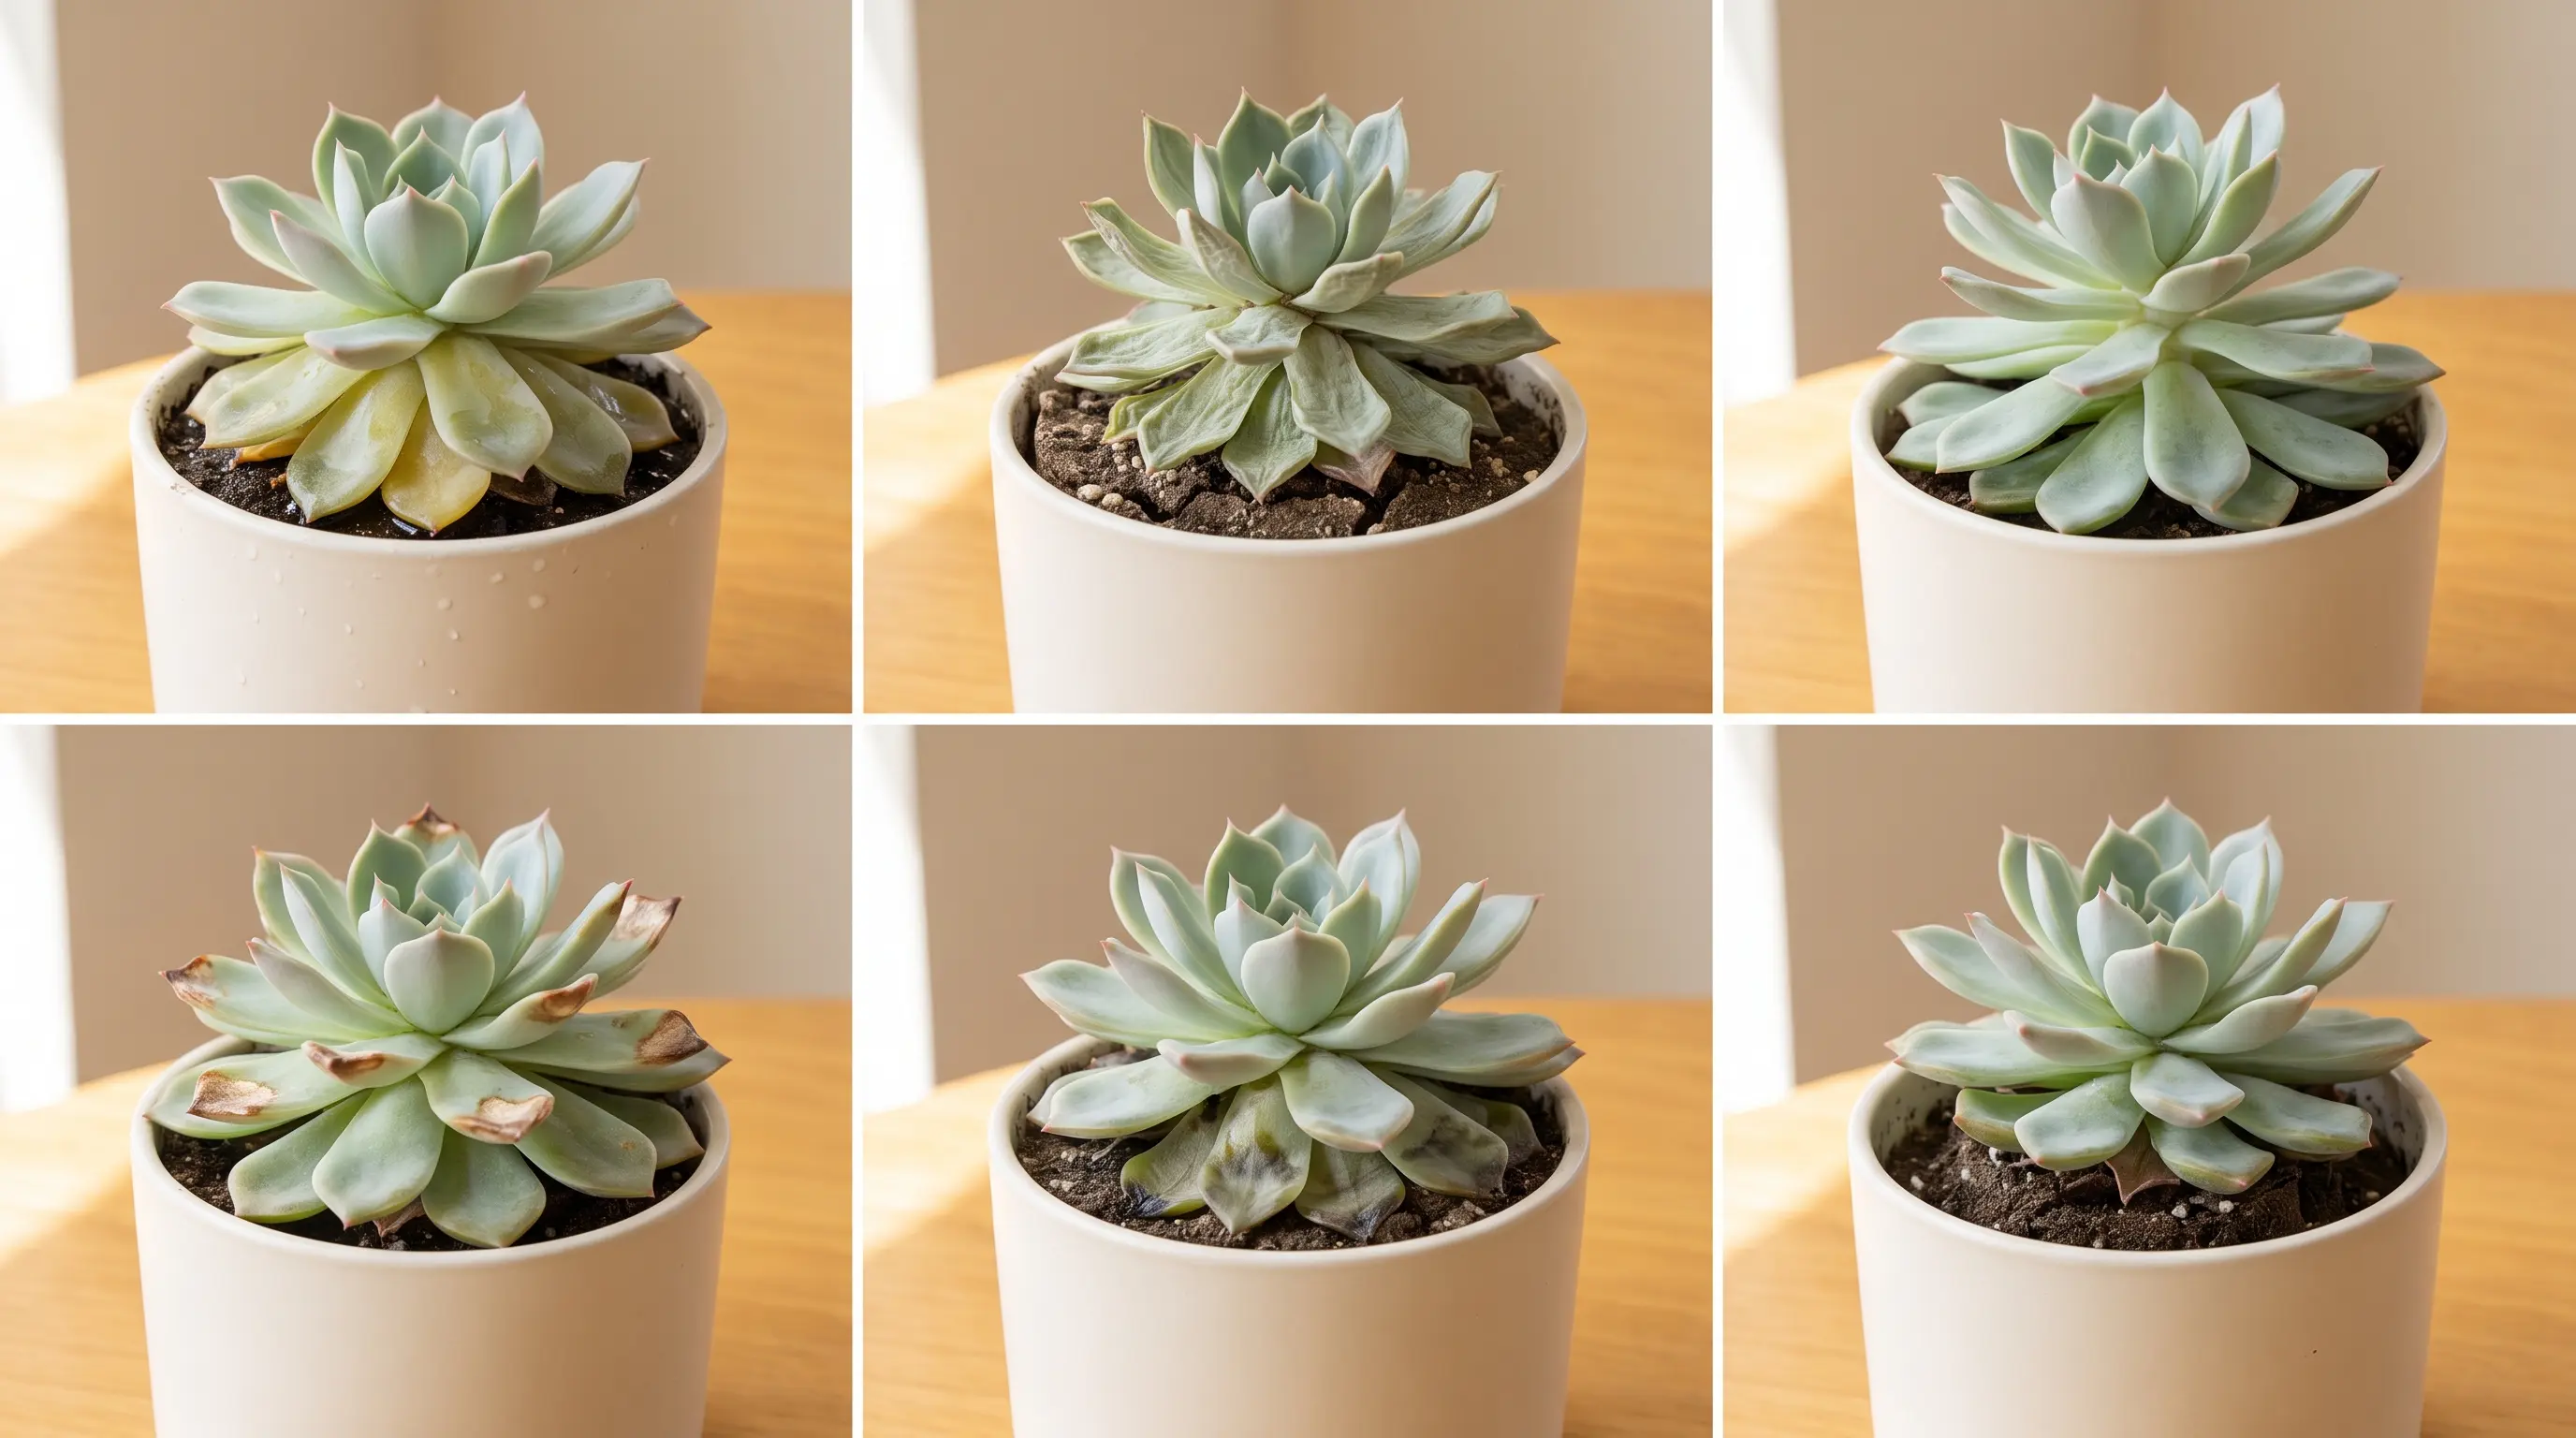
Even with careful planting, a few issues can still show up as a succulent settles in, and that’s normal even when every step of how to plant succulents was followed correctly. Here’s a quick way to spot the cause and fix it before it becomes a bigger problem.
- Soft or yellow leaves: because of overwatering. Let the soil dry fully and check drainage.
- Shriveled leaves: because of underwatering or root damage. Check soil dryness first, then inspect roots if watering seems fine.
- Stretching or leaning: due to weak or one-sided light. Move gradually to brighter light and rotate the pot.
- Brown or scorched patches: caused by sudden strong sun. Return to indirect light and reintroduce sun gradually.
- Rotting lower leaves: because of leaves touching damp soil. Remove affected leaves and keep the rest clear of soil.
- A loose plant: due to weak roots or unsettled soil. Firm the soil gently; trim and repot if roots are damaged.
- Soil sinking after watering: likely because of air pockets from planting. Add a bit more soil to restore the level.
- Little or no growth: because of low light or a root-bound pot. Move to brighter light, or repot into a slightly larger container.
Most of these problems trace back to watering habits, light levels, or how the plant was set up at planting time. Catching them early usually means a simple fix rather than starting over.
Pests and root problems: Watch for aphids, sticky residue, small insects near the roots, or soft, rotten tissue at the stem. If you spot any of these, isolate the plant, inspect the roots, and remove rotten material. For treatment steps, see our full guide on succulent pests.
Can You Plant Succulent Leaves, Cuttings or Offsets?
Yes, but each one needs a slightly different setup than a rooted nursery plant, since none of them start out with an established root system.
Offsets, the small plants that grow near the base of a mature succulent, are usually the easiest option.
Because they develop while still attached to and supported by the parent plant, they often already have a small set of roots by the time you separate them, so they can go straight into a small pot with the same fast-draining soil used for a full-grown plant.
Leaves and stem cuttings work differently.
A leaf needs time to callus over and grow its own roots before it touches soil, while a cutting is usually left to dry for a few days at the cut end first. Watering either one heavily or burying it in soil too soon is one of the most common reasons propagation attempts fail.
Frequently Asked Questions
Should I water a succulent immediately after planting?
No, wait one to two days before watering. This short rest gives the roots time to heal from handling during planting and lowers the risk of rot from watering too soon.
Does every succulent pot need a drainage hole?
A pot with a drainage hole is the safest choice, especially for beginners. Some growers use containers without one, but this requires careful, controlled watering to avoid trapping excess moisture around the roots.
How deep should I plant a succulent?
Plant it so the roots are fully covered, while the crown and leaves stay above the soil line. This positioning helps prevent leaves and stems from sitting in moisture and rotting.
How often should I water an indoor succulent?
Water once the soil has fully dried out, rather than on a fixed schedule. Indoor soil can dry more slowly depending on light levels, room temperature, and airflow.
Can several succulents grow in one pot?
Yes, as long as they share similar water and light needs. You can plant them close together for an instant, full look, or space them out to leave room for future growth.
Final Thoughts
Once you know how to plant succulents the right way, the rest gets much easier: a small pot, fast-draining soil, the right planting depth, and patient watering are really all it takes.
Get those basics right, and the plant will be much easier to care for afterward. Most of the trouble people run into traces back to one of these early choices, so a little extra care at the start pays off for months to come.
The good part is that once a succulent is settled in, it asks for very little. A quick check on soil dryness and a glance at the light every so often is usually enough. Pick a pot, prepare the soil, and give your succulent a healthier start this weekend.
Drop a comment below and let us know how your succulent turned out.