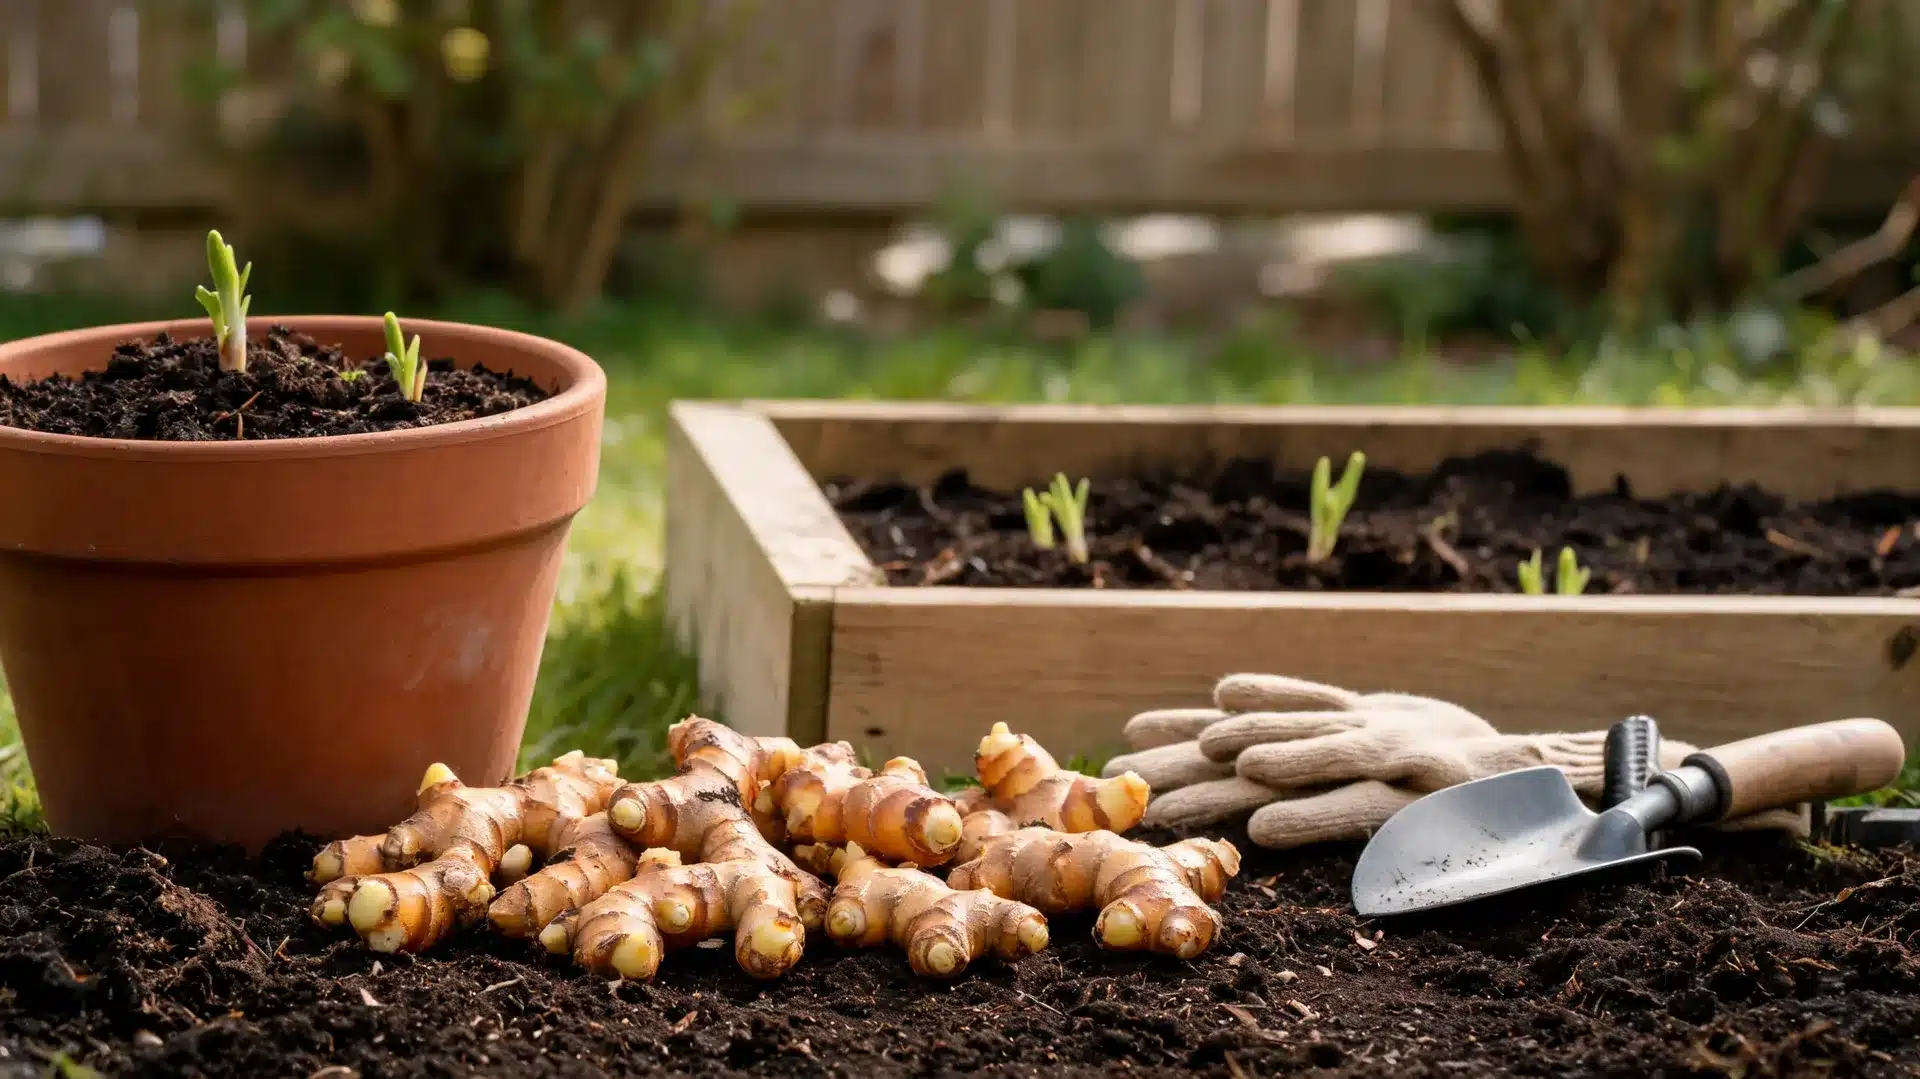
I like plants that make you feel involved from the very first step. Turmeric does that. You start with a small fresh rhizome that looks simple, almost like ginger, then wait for little green shoots to push through. It feels like a small win before the plant even reaches a pot.
If you enjoy growing food at home, this is a good plant to try, as it thrives in containers, raised beds, and warm garden spaces. The part that matters most is patience. Turmeric does not rush. It needs warmth, moisture, rich soil, and enough time to form new rhizomes underground.
This article shows how to grow turmeric from fresh rhizomes, including how to choose planting pieces, sprout them, plant them in soil, care for the plant, address community-style growing problems, and harvest at the right time.
What Is Turmeric and What Part Do You Plant?
Turmeric is a tropical plant grown for its underground rhizomes. Its scientific name is Curcuma longa, and it belongs to the ginger family. The part used in cooking is not a true root. It is a rhizome, which is an underground stem that can send up shoots and roots.
UC Master Gardeners explain that turmeric is related to ginger and that the portion used is a rhizome rather than a root.
For home growing, you do not start with turmeric powder. You start with fresh rhizomes. These pieces should have small bumps or “eyes.” Those eyes become new shoots when the rhizome wakes up.
Turmeric grows slowly at first because the plant builds roots before it grows strong leaves. Once the roots settle in, the plant can send up tall green stems and broad leaves. Under the soil, new rhizomes form around the original planting piece.
Turmeric is often compared with ginger because both grow from rhizomes and like warm, humid conditions. Fresh ginger and turmeric from the produce section can be used to grow plants at home if the pieces are firm and have eyes.
Think of the rhizome as the starting engine. If it is fresh and alive, the plant has a real chance. If it is dried, soft, or treated, sprouting becomes less reliable.
What Turmeric Rhizomes Should You Start With?
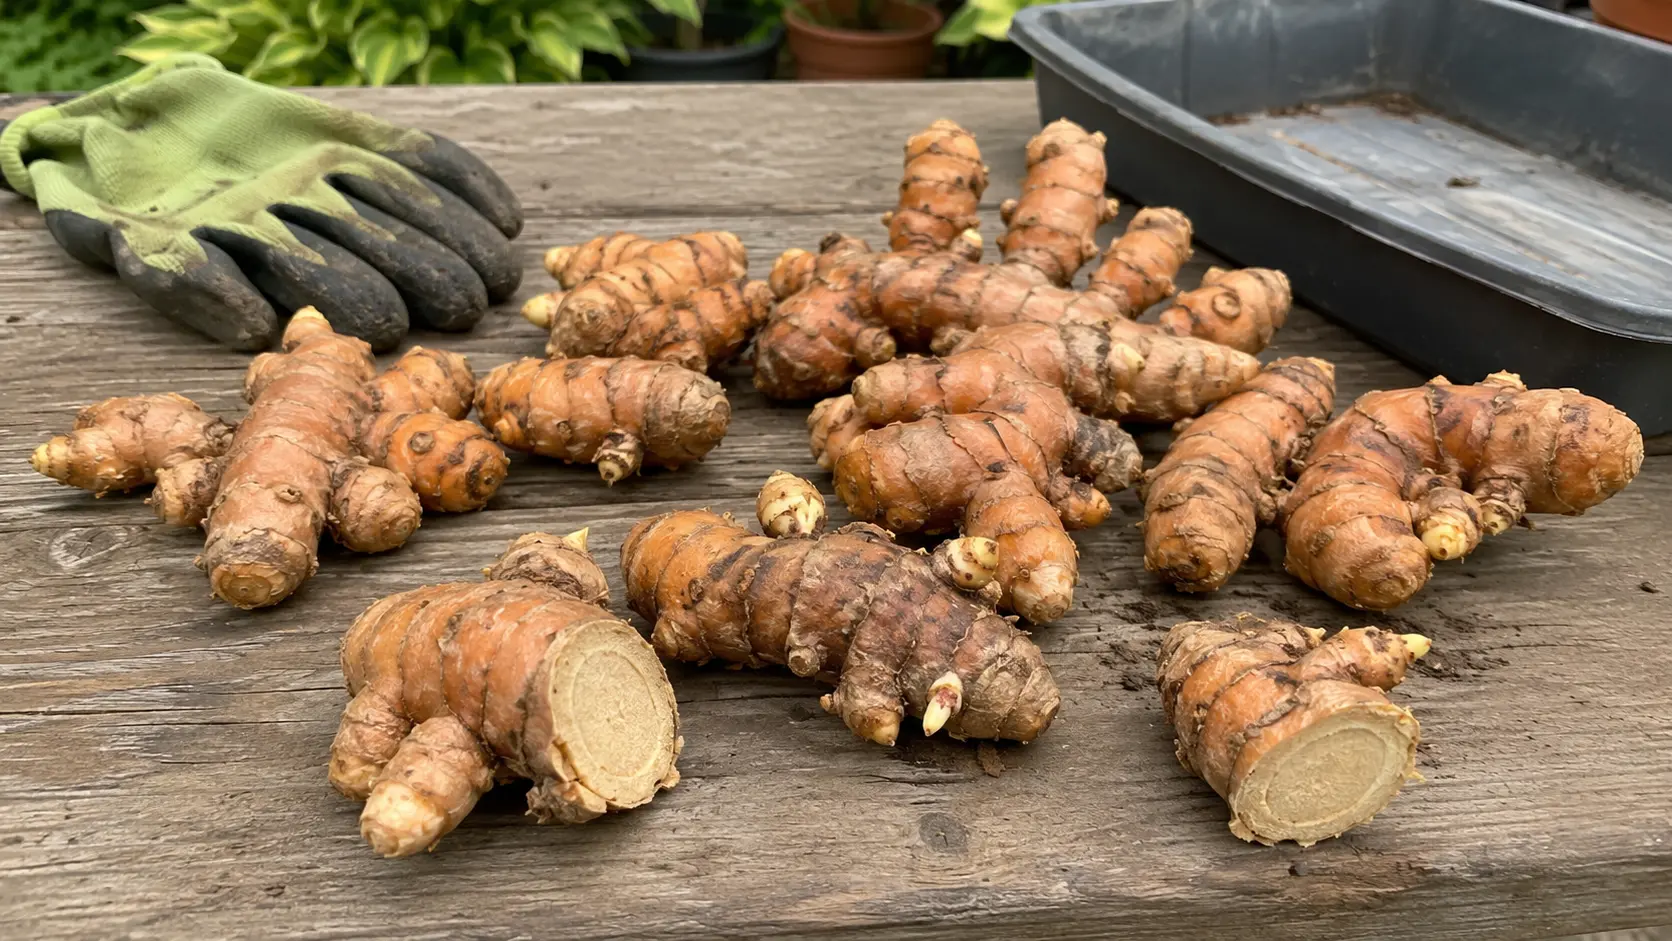
Start with fresh, firm turmeric rhizomes that have visible eyes or small buds. These bumps are the growth points where new shoots can form, so they matter more than the size of the rhizome.
Choose rhizomes that are:
- firm and plump
- fresh in color
- showing at least one healthy eye
- free from mold
- not soft, dry, or shriveled
You can buy turmeric from a garden center, farmers’ market, Asian market, or grocery store. Grocery-store turmeric can grow, but wash it well before planting. Organic rhizomes are often a better choice because they are less likely to be treated to slow sprouting.
If a rhizome is large, cut it into 1 to 3-inch pieces. Make sure each piece has at least one healthy bud. Let the cut pieces dry for a day or two before planting so they are less likely to rot in moist soil.
Do not use dried turmeric root or turmeric powder. They will not grow. Once you have fresh rhizomes, you can either plant them directly or pre-sprout them first for better control.
What Soil, Pot, Light, and Temperature Does Turmeric Need?
Turmeric grows best when the soil is loose, rich, and well-drained. It likes steady moisture while it is actively growing, but the rhizomes should never sit in wet soil. Too much water can cause rot before the plant has a chance to grow well.
| Growing need | Best choice | Why it matters |
| Soil | Loose, rich soil | Helps rhizomes spread and grow |
| Water | Moist, not soggy | Lowers the risk of rot |
| Light | Full sun to partial shade | Supports leaf growth without leaf stress |
| Pot | Wide container with drainage | Gives rhizomes space to form |
| Temperature | Warm conditions | Helps sprouting and steady growth |
If you are planting in the ground, choose a warm spot with rich soil and good drainage. A raised bed can work well because it keeps the soil loose and helps extra water move away from the rhizomes.
For containers, use a wide pot with drainage holes. Turmeric grows sideways underground, so width matters more than a narrow, deep pot. As the rhizomes thicken, the plant may need a larger container later in the season.
In cooler areas, start turmeric indoors where it can stay warm. Move it outside only after frost risk has passed and nights are warm. Treat turmeric like a warm-season crop, not something that should sit in cold spring soil.
How to Grow Turmeric Step by Step
The short answer to how to grow turmeric is simple: start with fresh rhizomes, wake them up in a warm sprouting tray, gently transplant them into rich soil, and keep the young plants warm while their roots strengthen. The steps below follow the video sequence in the same order.
| Pre-sprouting note: Pre-sprouting turmeric helps you check which rhizomes are alive before moving them into pots or garden soil. It is most useful in cooler homes, short growing seasons, or when using grocery-store turmeric. Once shoots and roots appear, the rhizome is ready for richer soil. |
1. Choose Fresh Rhizomes With Healthy Eyes
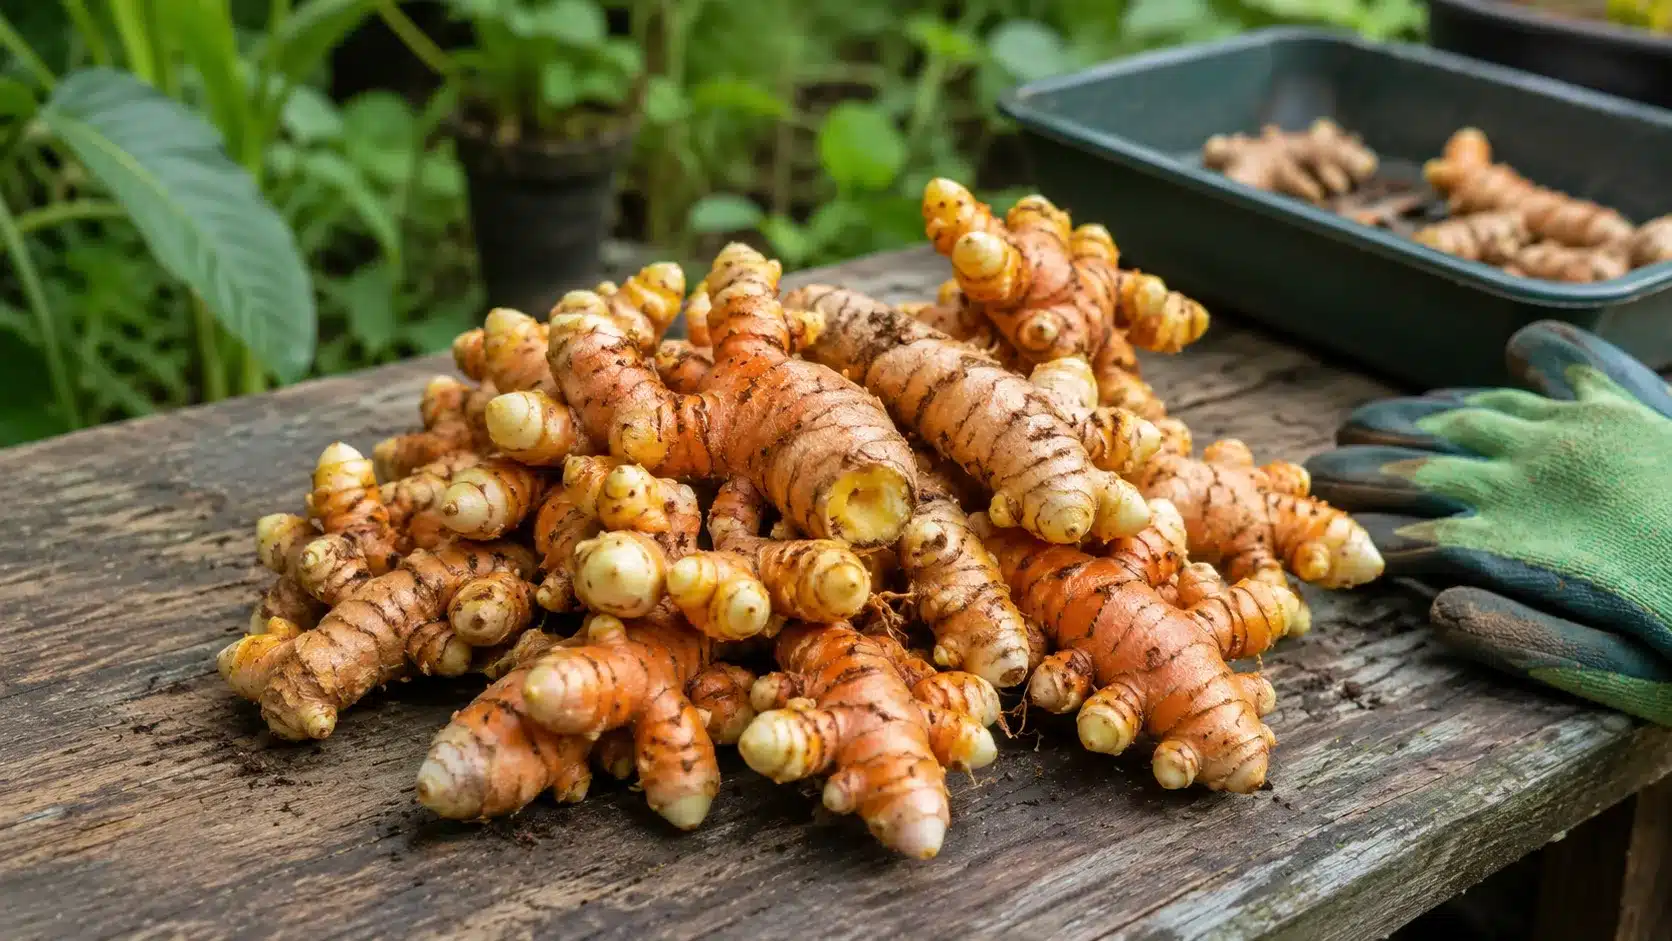
A good turmeric plant starts with the right rhizome. Fresh pieces with healthy eyes have the best chance of sending up shoots. Dry, soft, or moldy pieces may sit in the soil without growing, even if the rest of your setup is right.
How to do it:
- Buy fresh turmeric.
- Pick firm pieces with several small eyes or buds.
- Avoid moldy, soft, cracked, or dry rhizomes.
- Choose organic turmeric when possible.
- Wash grocery-store turmeric well before sprouting.
| Tip: A rhizome without visible eyes may still grow, but it is less reliable. Choose pieces that already show small bumps where shoots can form. |
2. Soak Rhizomes and Prepare the Sprouting Tray
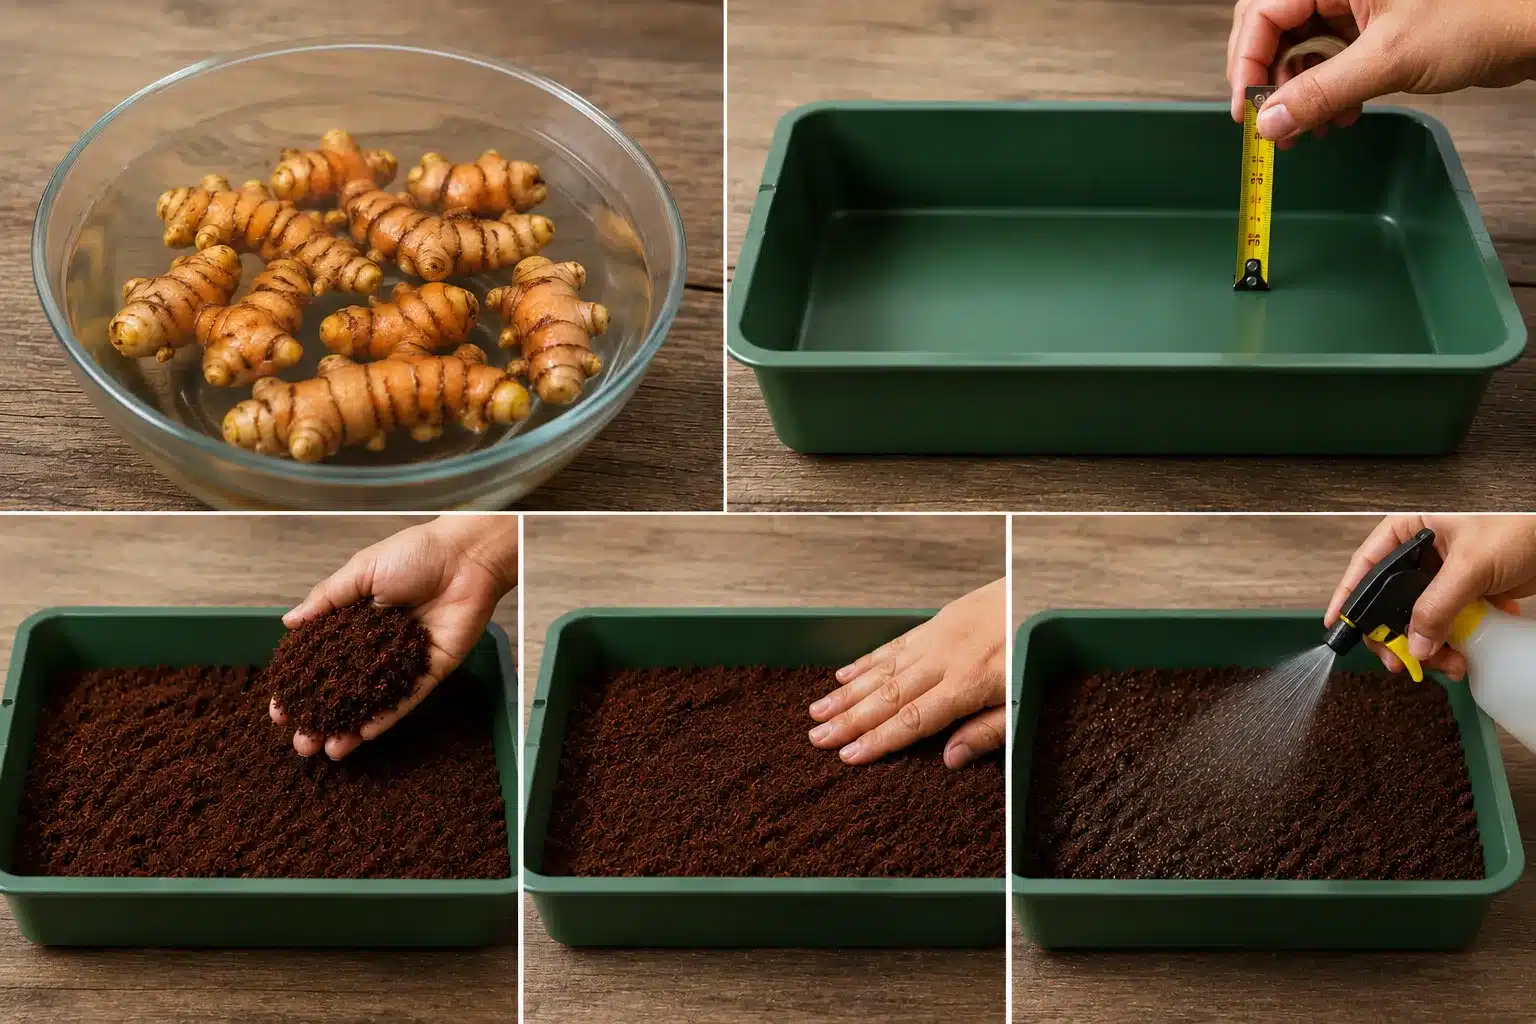
This step wakes up the rhizomes and gives them a moist place to start. The goal is not to bury them deeply yet. You only want a shallow, even sprouting setup where warmth and moisture reach each piece.
How to do it:
- Place rhizomes in plain water overnight.
- Use a shallow tray or container about 2 inches deep.
- Add about 1 inch of moist coconut coir.
- Level the coir so each rhizome gets even contact.
- Add water before placing rhizomes if the medium feels dry.
| Tip: The medium should feel moist, not soggy. Too much water can increase the risk of rot before roots form. |
3. Place the Rhizomes in the Tray
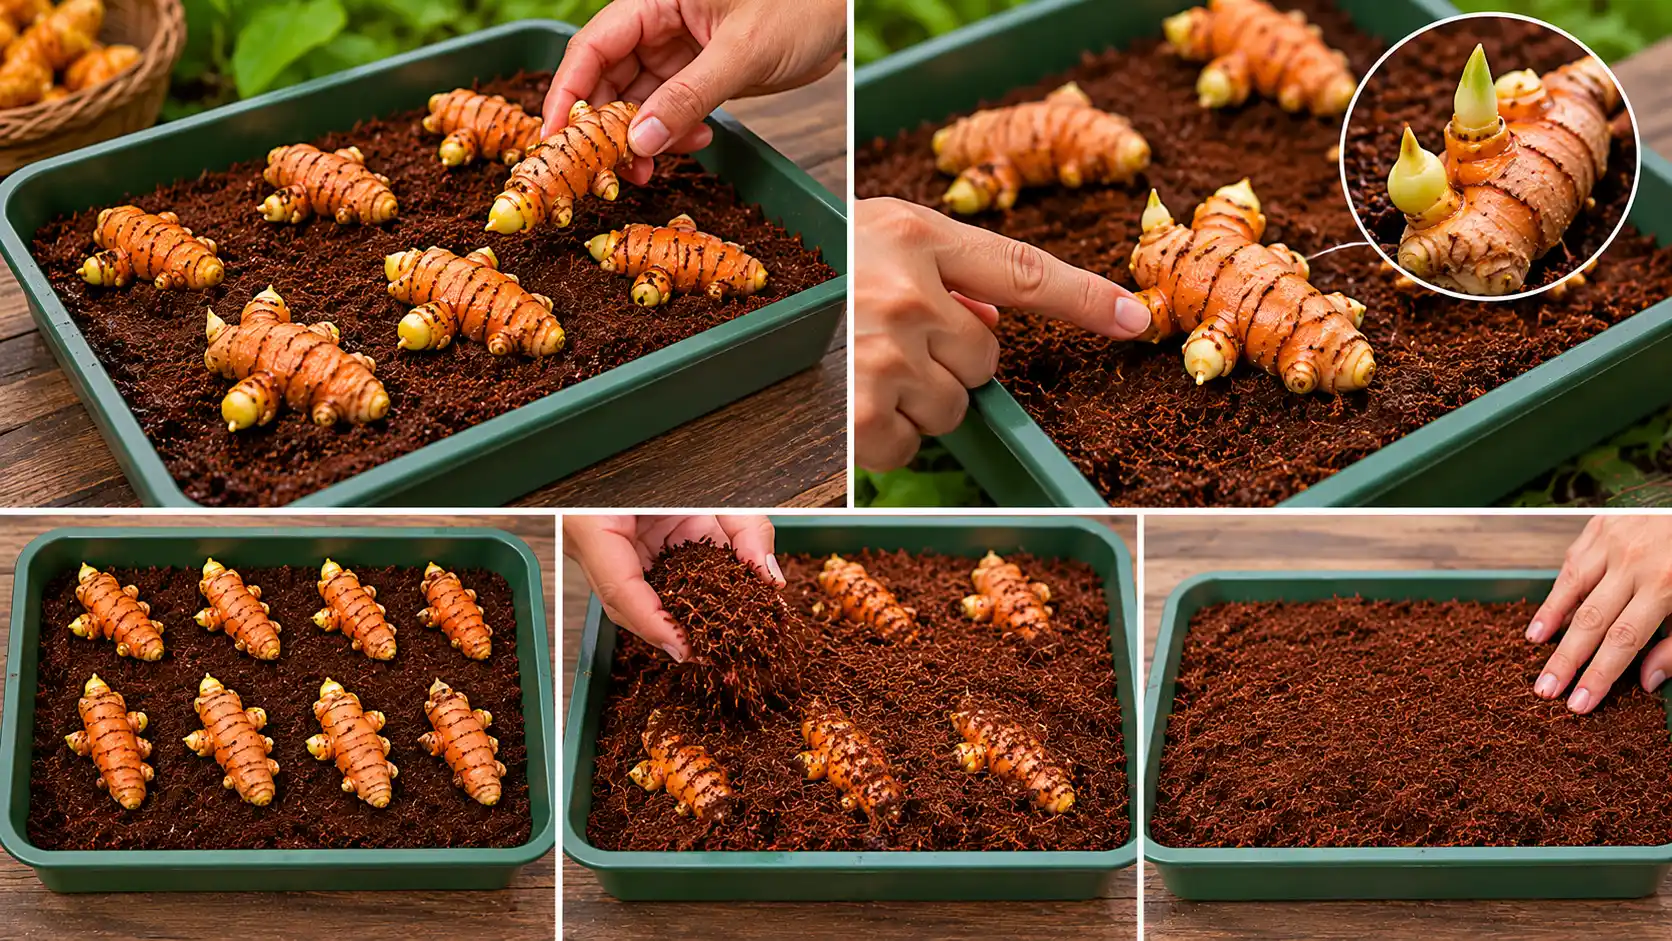
At this stage, the rhizomes need space and light covering, not pressure. Laying them out neatly makes it easier to track where each one is once covered, especially when shoots start pushing through the medium.
How to do it:
- Lay each rhizome flat on the moist medium.
- Keep buds facing up when you can see them.
- Space pieces 3 to 4 inches apart.
- Place them in the same direction so you know where each one is under the coir.
- Cover loosely with up to 1 inch of coconut coir.
- Do not press the medium down hard.
| Tip: Loose covering is better than packed covering. Young shoots are soft and need room to push upward. |
4. Keep the Tray Warm, Humid, and Be Patient
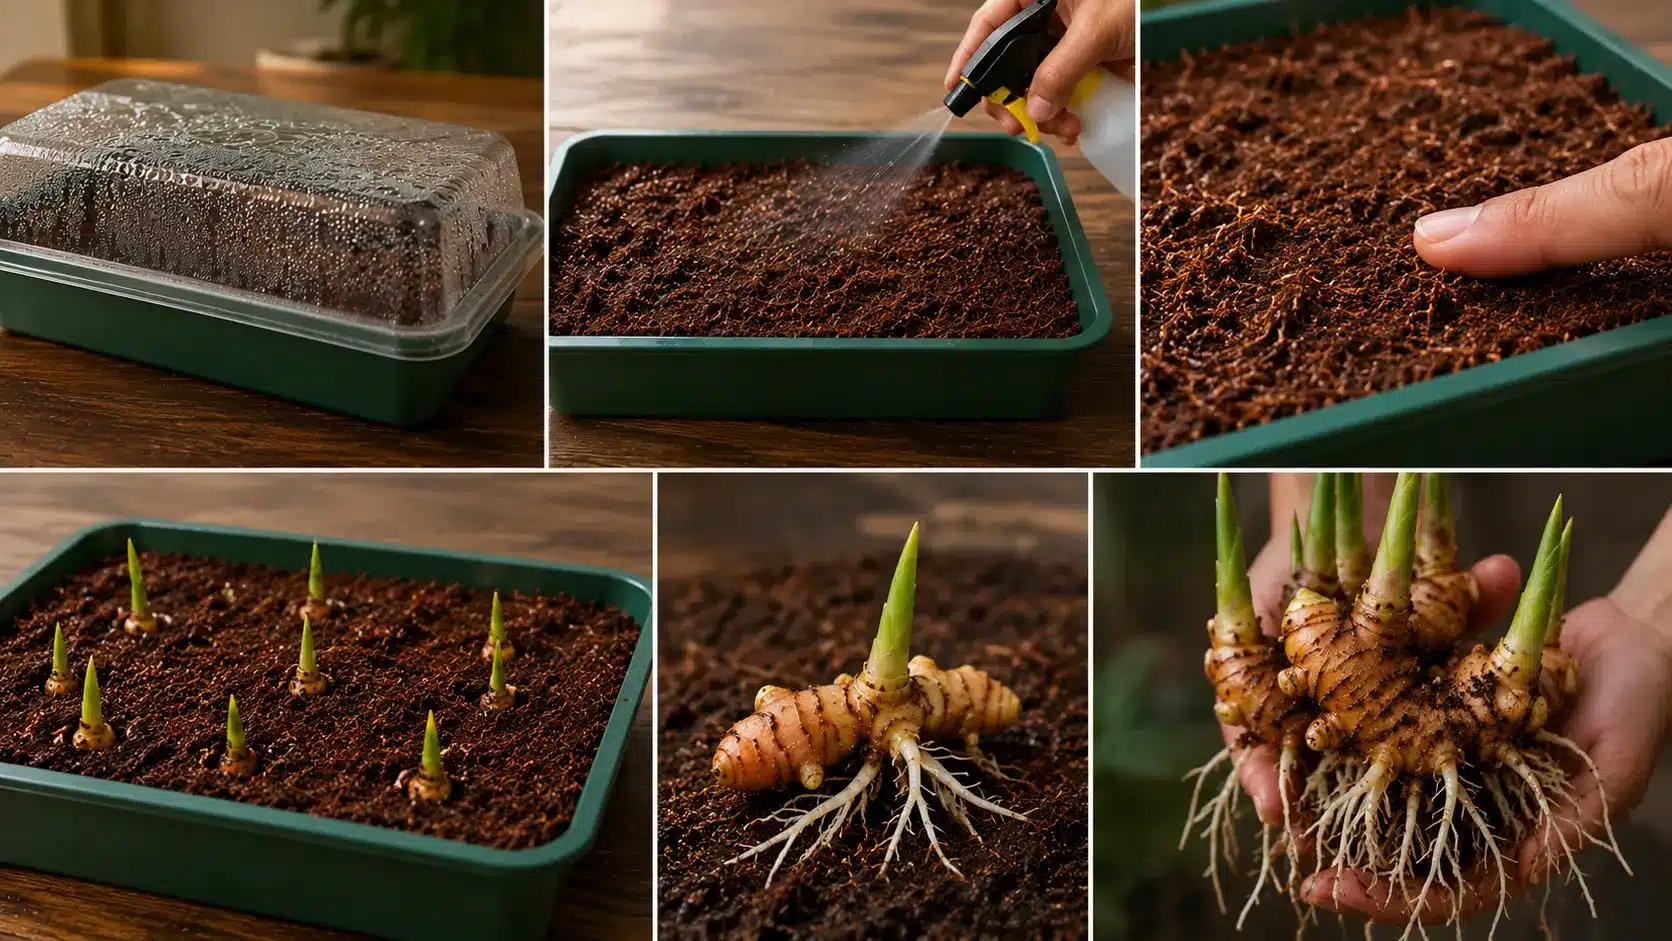
Turmeric does not always sprout quickly. Warmth and humidity help the rhizome form roots and shoots below the surface before much green growth appears. If the rhizome stays firm, slow progress can still be normal.
How to do it:
- Keep the tray warm.
- Keep the medium evenly moist.
- Avoid standing water.
- Watch for green tips after a couple of weeks.
- Wait longer if the rhizome is still firm.
- Look for both shoots and roots before potting.
| Tip: Slow sprouting is common. If the turmeric is firm and not rotten, give it more time. |
5. Prepare Small Pots With Rich Soil
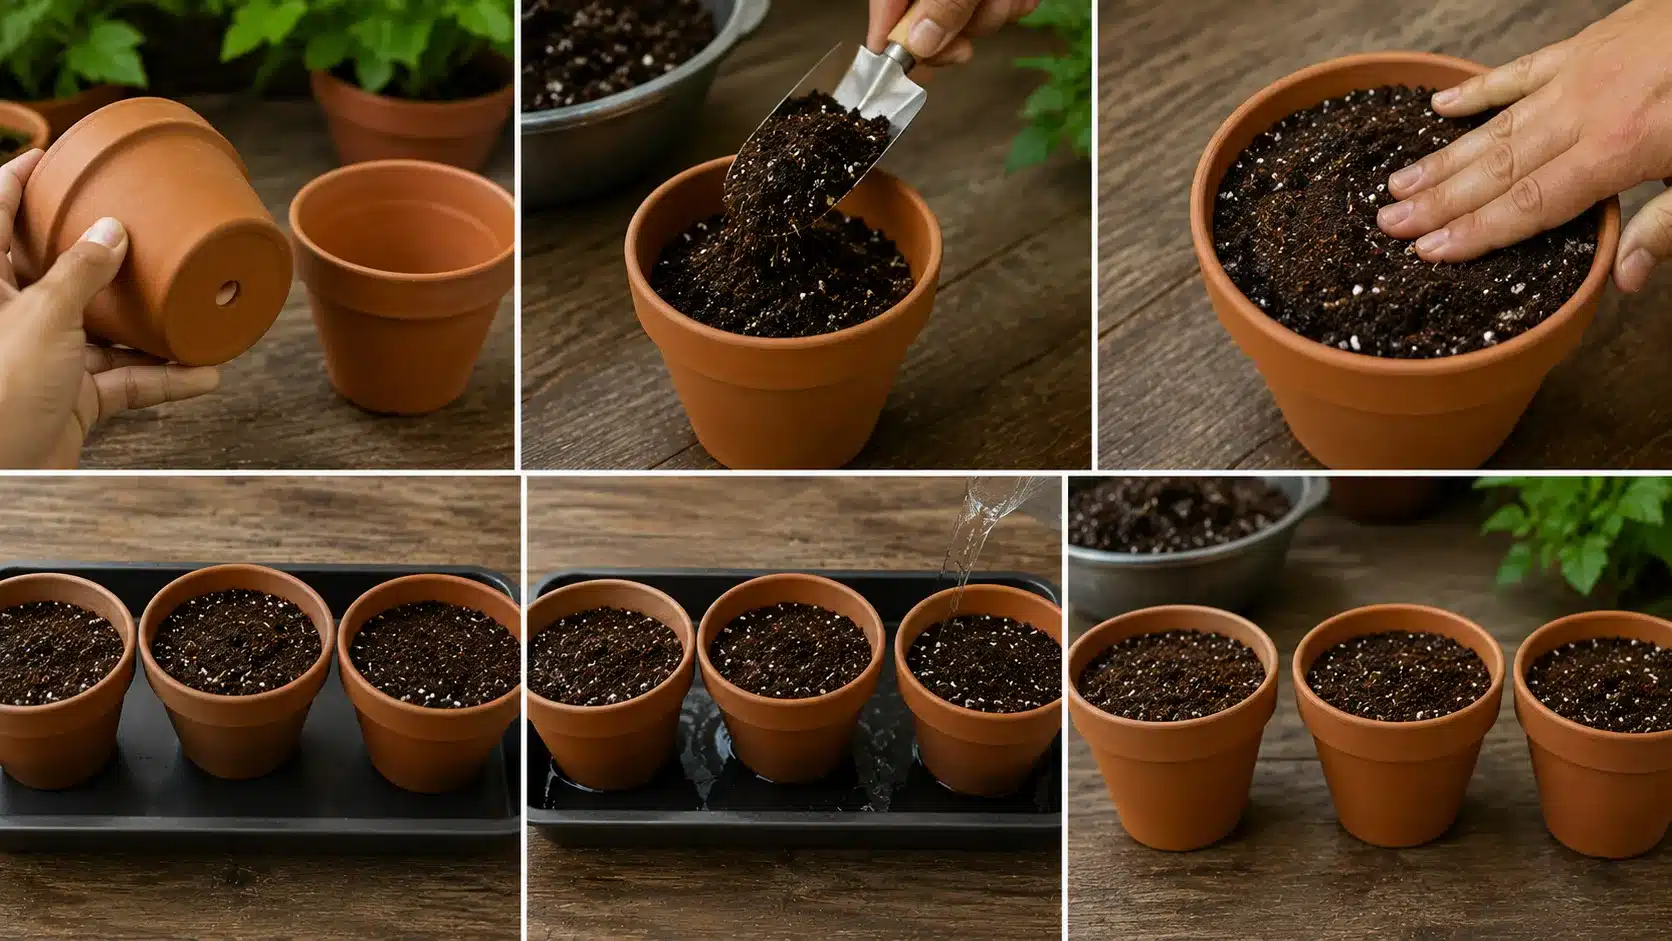
Once shoots and roots appear, turmeric needs more nutrition than a sprouting tray can provide. Small pots help the young plants build a stronger root system before they move into larger containers or outdoor beds.
How to do it:
- Choose pots with drainage holes.
- Fill them with quality potting mix.
- Use compost-rich soil if available.
- Press the soil down lightly.
- Soak the pots from below before transplanting.
- Let extra water drain away.
| Tip: Moist soil gives young roots a softer landing and helps reduce transplant stress. |
6. Transplant the Sprouted Turmeric Carefully
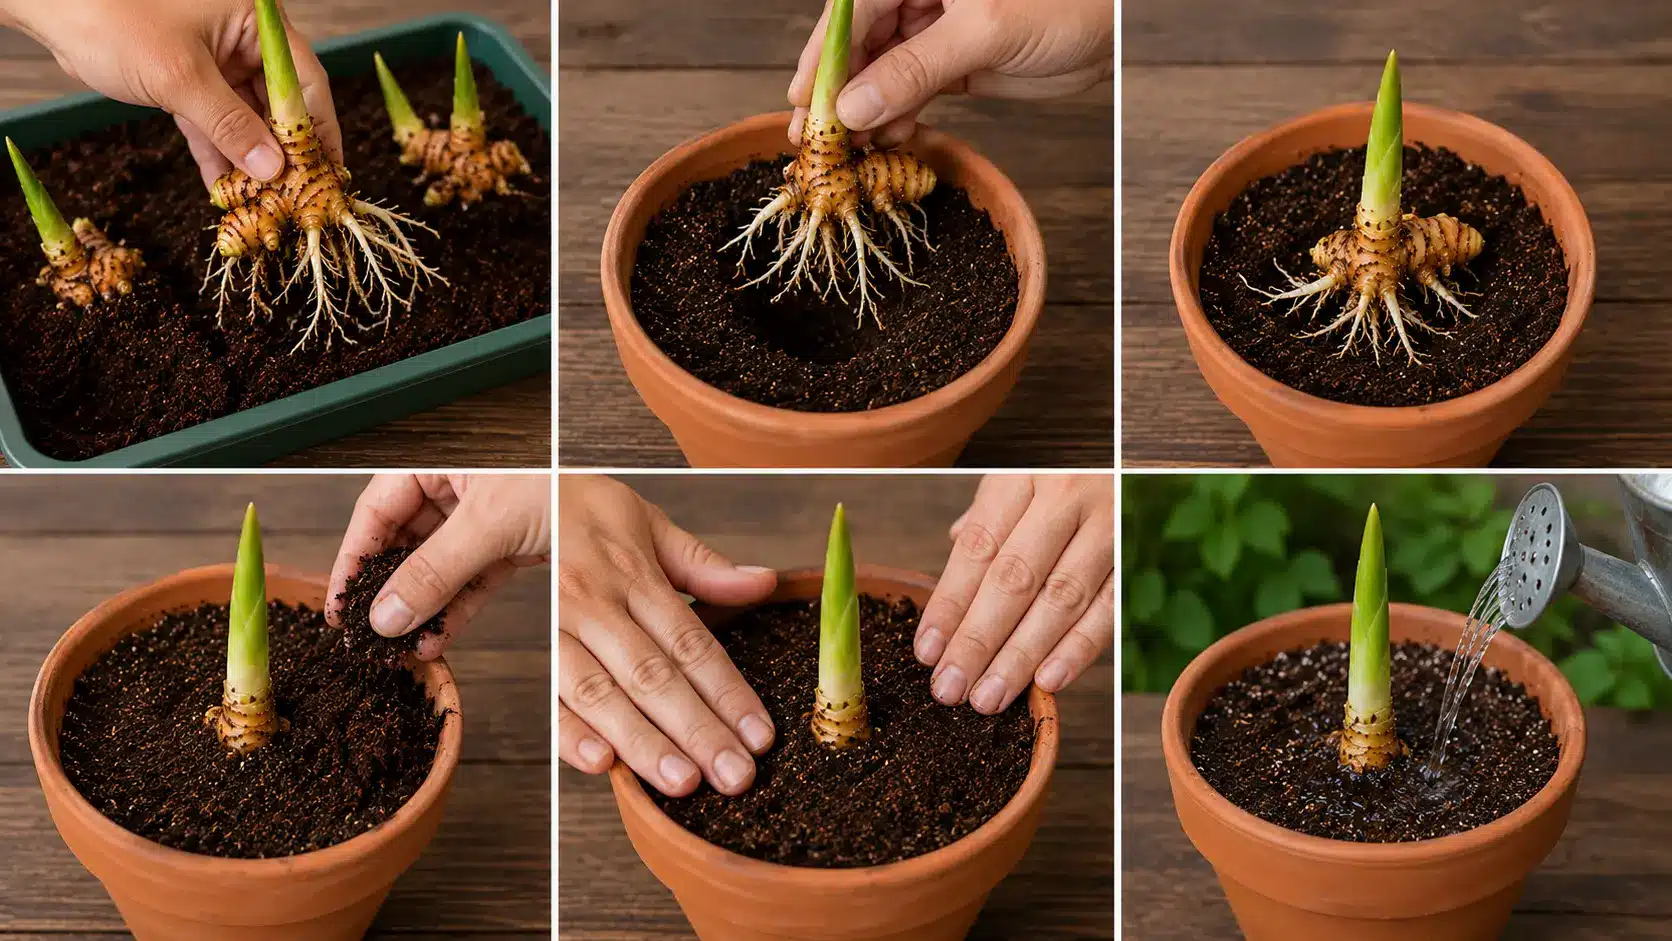
Young turmeric shoots and roots can break easily, so this step needs a gentle hand. Keep the plant at the same depth it had in the tray and support it with soil without pressing directly on the rhizome.
How to do it:
- Lift each sprouted rhizome carefully from the tray.
- Check that it has shoots and roots.
- Place it in the pot at the same depth it grew in the tray.
- Keep the shoot centered and upright.
- Fill the soil around the rhizome.
- Press soil gently around it, not directly on the rhizome.
- Water lightly if needed.
| Tip: Do not plant it deeper than it was growing in the tray. Deep planting can slow the shoot and stress the young plant. |
7. Keep Young Plants Warm Until They Are Ready to Size Up
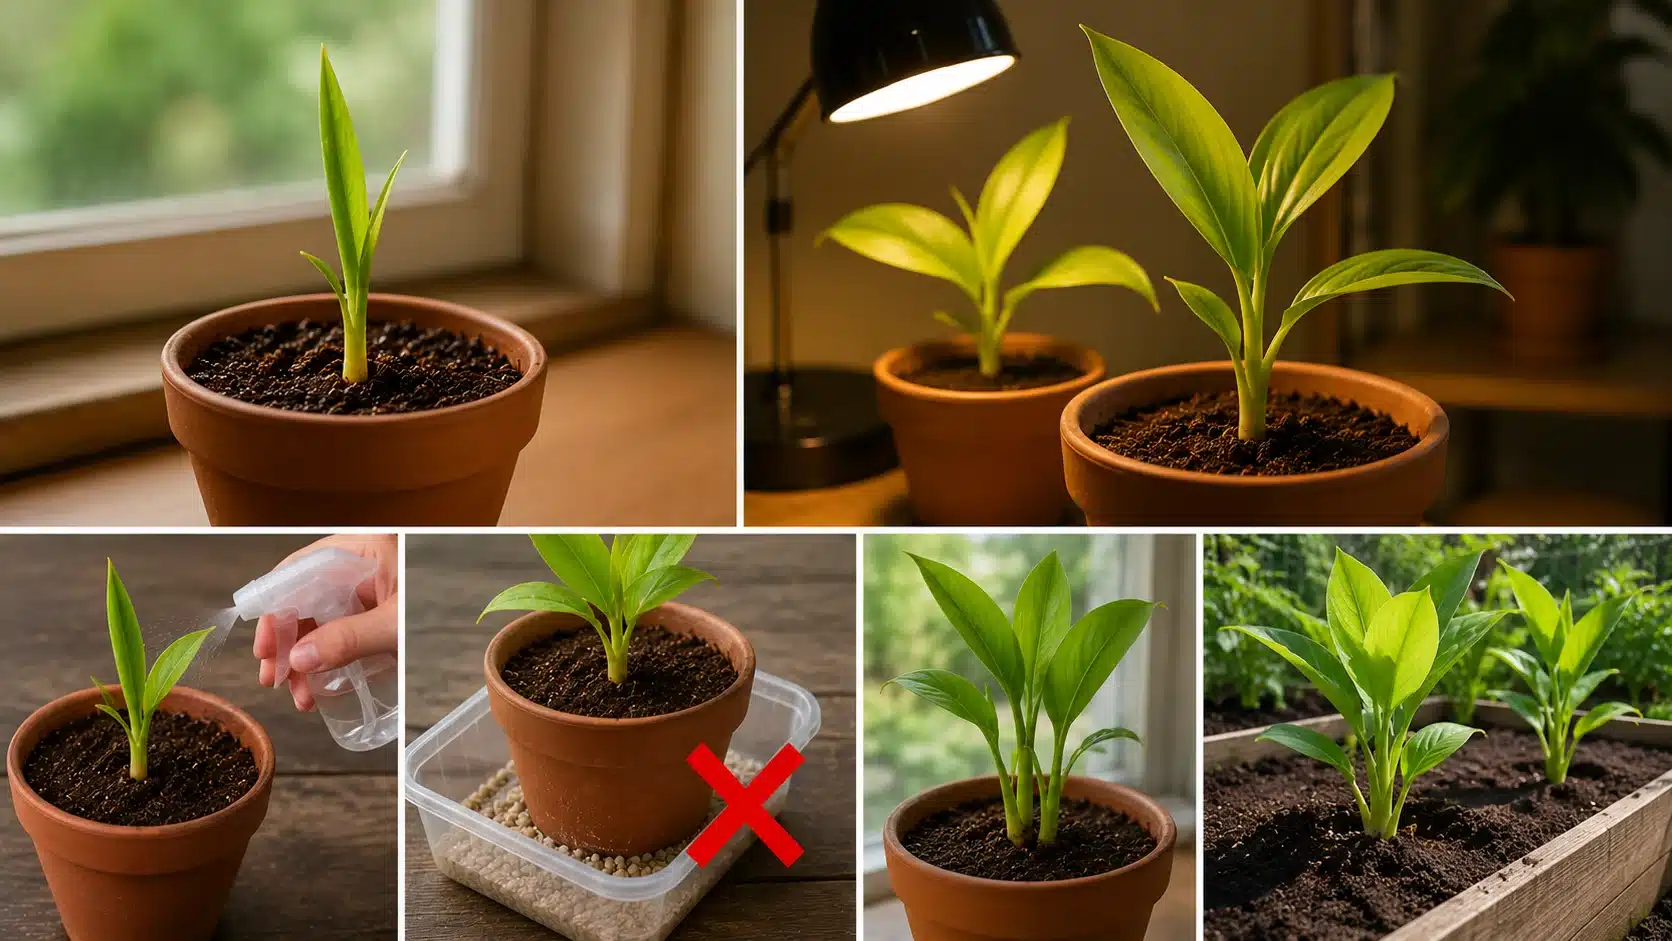
After potting, turmeric still needs protected growing conditions. Warmth, light, and steady moisture help the new roots settle in. Wait for stronger growth before moving plants into larger pots, raised beds, or outdoor garden soil.
How to do it:
- Place newly potted plants somewhere warm.
- Give them bright, indirect light or a gentle grow light.
- Keep soil lightly moist.
- Do not let pots sit in water.
- Watch for steady leaf growth.
- Move to a larger pot, raised bed, or garden bed only after the plant is stronger and the weather is warm.
| Tip: If nights are still cool, keep turmeric indoors. Warmth matters more than rushing the plant outside. |
At this point, the sprouting and first potting stage is complete. The next section should cover care and maintenance, because that is where turmeric builds the underground rhizomes you will harvest later.
Care and Maintainance After Planting
After turmeric is potted or moved outside, care becomes simple but steady. The plant needs warm conditions, even moisture, rich soil, and protection from stress. What happens above the soil helps the rhizomes grow stronger below it.
| Care area | What to do | Why it matters |
| Watering | Keep soil moist, not soggy. | Prevents rhizome rot. |
| Sunlight | Give bright light with some shade. | Protects leaves from heat stress. |
| Feeding | Add compost or worm castings. | Supports underground rhizome growth. |
| Drainage | Use draining pots or raised soil. | Stops water from sitting around roots. |
| Container care | Move to a wider pot as it grows. | Gives rhizomes room to spread. |
| Seasonal care | Expect yellowing near maturity. | Signals dormancy and harvest timing. |
Good turmeric care is not about doing too much. Keep the plant warm, moist, well-drained, and fed with organic matter. Then give it enough months to develop strong underground rhizomes.
Discussions and Advice Exchanged Within Communities
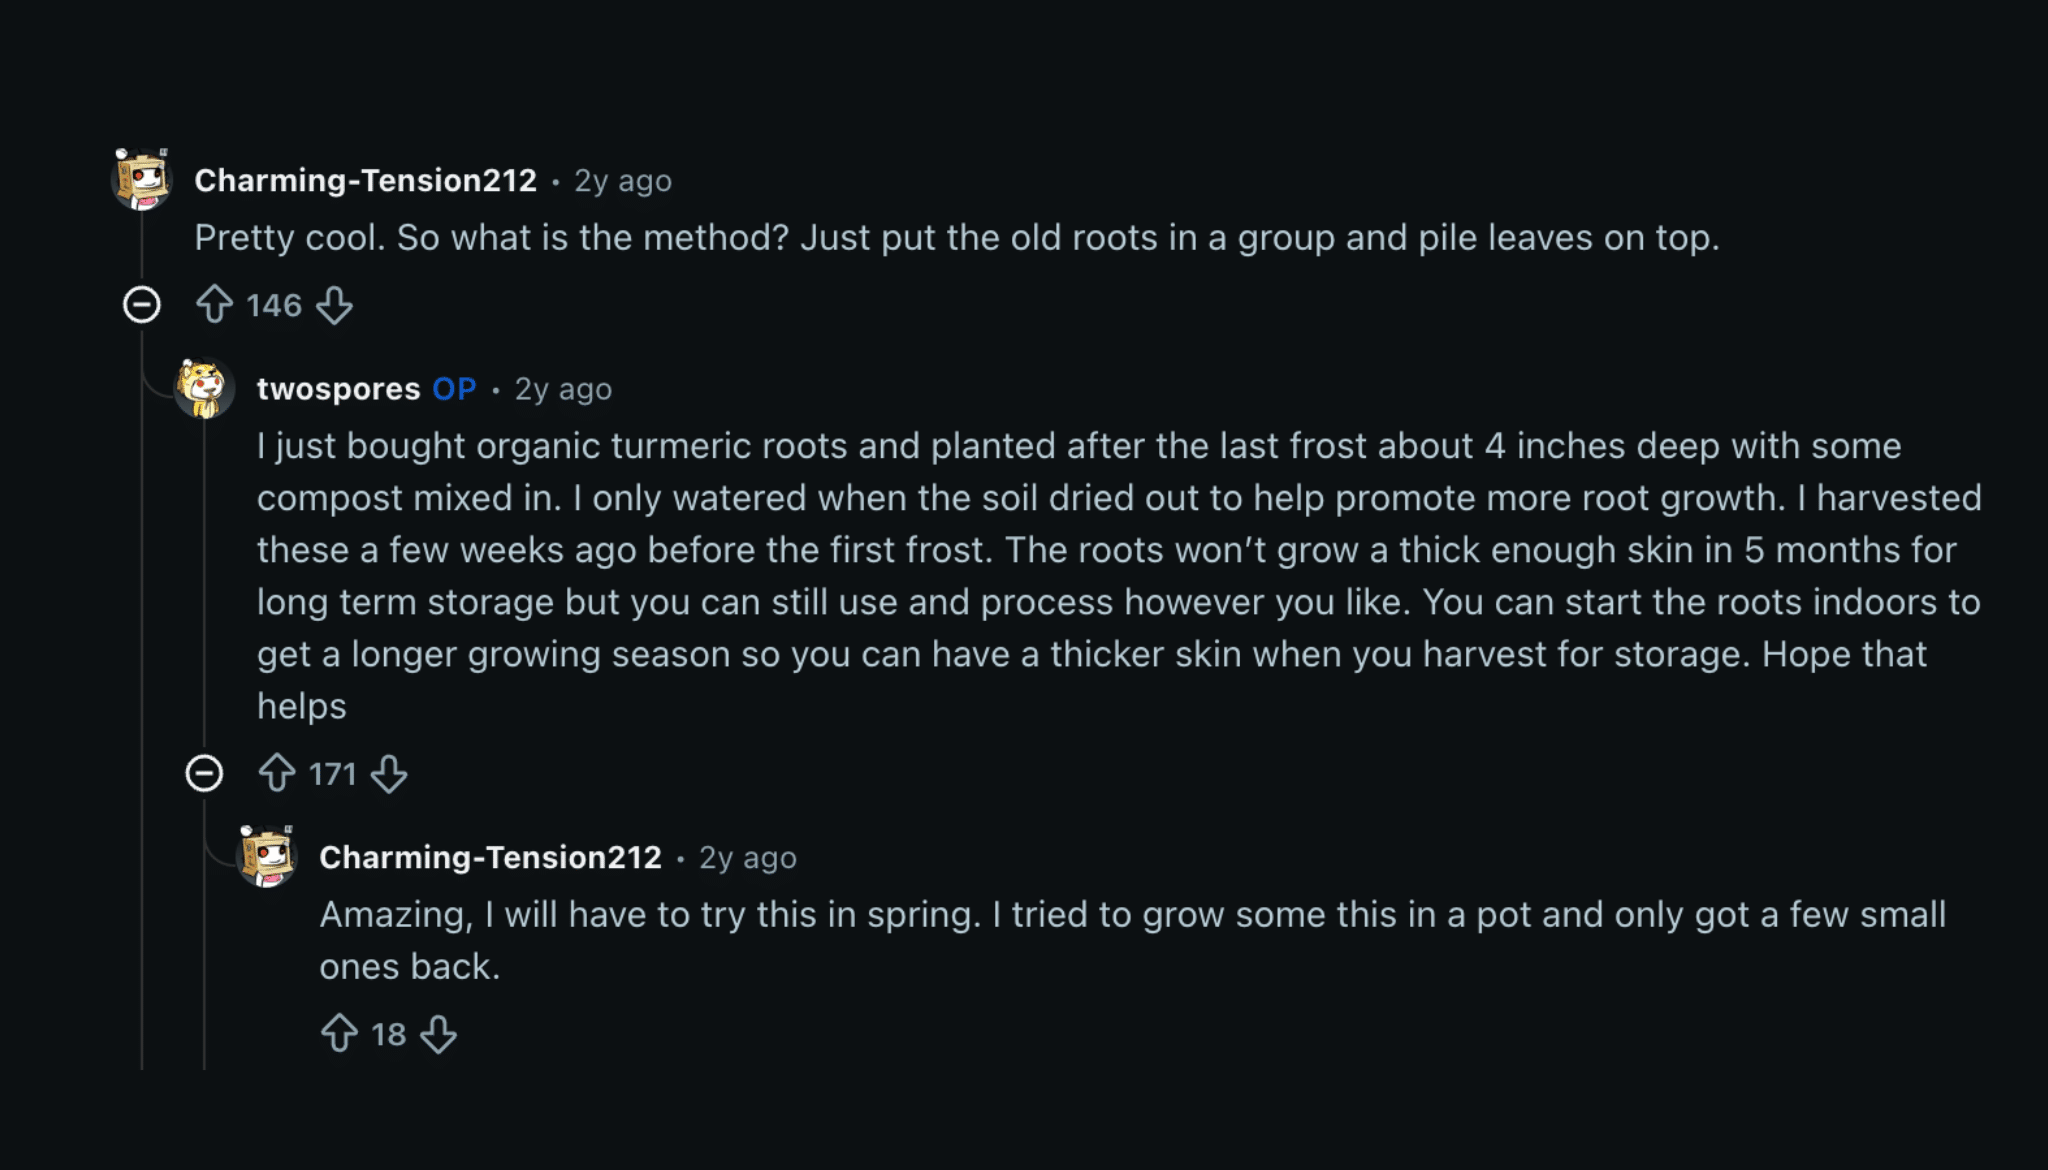
Gardening communities show that many home growers are testing turmeric outside tropical climates. In this Reddit discussion, a Zone 6 gardener shared that they planted organic turmeric roots after the last frost, set them about 4 inches deep in compost, watered only when the soil dried, and harvested before the first frost.
The main takeaway is that turmeric can grow in cooler zones if the season is warm enough, but timing matters. Several users asked about planting depth, indoor starting, harvest timing, and storage. The original gardener also noted that a 5-month crop may not form thick skin for long-term storage, so starting indoors earlier can help extend the growing season.
Use this community example as a practical note, not the main source of advice. Pair it with official guidance on warm soil, moist but well-drained conditions, compost-rich soil, and harvesting when the plant begins to die back.
What Mistakes Should You Avoid
Most turmeric problems come from poor rhizomes, cold soil, wet soil, or giving up too soon. Avoid these mistakes, and the plant has a better chance of growing strong rhizomes.
- Using old or dried rhizomes: Dried or shriveled pieces may not sprout. Start with fresh, firm rhizomes that have visible buds.
- Skipping visible buds: Buds are the growth points. A piece without eyes may grow, but it is less reliable.
- Planting in cold soil: Cold soil slows sprouting and can increase the risk of rot. Start indoors if spring is still cold.
- Keeping soil soggy: Turmeric likes moisture, not standing water. Wet soil can rot the rhizome before shoots appear.
- Using a tiny pot: Rhizomes need room to spread. A cramped pot can limit the harvest.
- Putting plants in harsh sun: Hot afternoon sun can stress leaves. Partial shade is safer in hot climates.
- Harvesting too early: An early harvest yields smaller rhizomes. Wait until the plant matures and starts drying back.
- Giving up too soon: Turmeric can take weeks to sprout. If the rhizome is firm, wait before tossing it.
- Once these mistakes are avoided, turmeric becomes much easier to manage. The plant mostly needs warmth, moisture control, space, and time.
When and How Do You Harvest Turmeric?
Harvest turmeric when the plant slows down and the leaves begin to dry. The leaves are the easiest sign to watch, as they indicate when the rhizomes are mature enough to lift.
| Harvest point | What it means | What to do |
| Timing | Usually ready after 8 to 10 months. | Wait until the plant starts going dormant. |
| Leaf signs | Green means growing; yellow and dry means ready. | Harvest when most leaves have dried back. |
| Cold weather | Frost can damage the plant. | Harvest before frost or move pots indoors. |
| Lifting rhizomes | Rhizomes grow in underground clusters. | Loosen soil, lift gently, rinse, and dry. |
| Replanting | Healthy pieces can grow again. | Save firm rhizomes with visible buds. |
After harvesting, handle the rhizomes gently. Use some fresh, store some for later, and set aside the healthiest pieces if you want to grow turmeric again next season.
How Do You Store Turmeric After Harvesting?
Fresh turmeric does not store well if it is left dirty, wet, or damaged. After harvesting, clean the rhizomes gently, dry the surface, and choose the storage method based on how soon you plan to use them.
- Refrigerate for Short-Term Use: Keep fresh, unpeeled turmeric in a sealed bag or container in the refrigerator. This works well if you plan to use it within the next few weeks.
- Freeze for Longer Storage: Freeze whole or sliced turmeric to keep it longer. Wash it, dry it well, and store it in a freezer-safe bag or container.
- Dry for Powder: Slice the turmeric thinly, dry it thoroughly, then grind it into a powder. Make sure the pieces are completely dry before storing, so they do not mold.
- Save Some for Replanting: Pick firm, healthy rhizomes with visible buds. Keep them dry, cool, and protected until planting time. Do not save soft, moldy, or damaged pieces.
Stored well, your harvest can be used in the kitchen or saved for the next growing season. Keep the best rhizomes aside first if you want to plant turmeric again.
Frequently Asked Questions About Growing Turmeric
Can turmeric leaves be used?
Yes, turmeric leaves are edible and can be used as wraps or to add aroma while cooking. UF/IFAS notes that turmeric leaves can be used much like cabbage, banana, or grape leaves. Use clean, healthy leaves and avoid any plant that has been treated with chemicals.
Does turmeric need a heat mat to sprout?
A heat mat is not required, but it can help if your room is cool. Turmeric sprouts better in warm conditions. If your rhizomes sit for weeks without growth, gentle bottom heat may help, as long as the medium stays moist, not wet.
Can turmeric grow beside ginger?
Yes, turmeric and ginger can grow near each other because they like similar warm, humid, bright-shade conditions. Give each plant enough room, since both form underground rhizomes. Containers can make spacing easier and help you harvest without disturbing both plants.
How should fresh turmeric be stored after harvest?
Fresh, unpeeled turmeric can be kept in a plastic bag in the refrigerator for several weeks. For longer storage, UC Master Gardeners say it can be frozen or dried. Save firm pieces with healthy buds separately if you plan to replant next season.
Ending Note
Turmeric is a good plant to grow if you enjoy slow, hands-on kitchen gardening. It starts with a small rhizome, but with warmth, loose soil, steady moisture, and enough time, it can turn into a useful homegrown harvest.
The key is not to rush the process. When you learn how to grow turmeric, the main focus should be choosing fresh rhizomes, sprouting them in warm conditions, planting them gently, and waiting until the leaves dry back before harvesting.
If you have tried growing turmeric in a pot, raised bed, or garden space, share your growing zone and what worked for you in the comments. Your experience can help other home gardeners avoid mistakes and grow better turmeric.