Composting does not need to feel like a backyard science project. I like to think of it as giving my food scraps one more useful job instead of sending them straight to the bin.
You can start with dry leaves, fruit peels, and a small container, even if you have limited space. Composting basics begin with knowing what to add, what to avoid, and how to keep the mix balanced so waste can slowly turn into rich soil.
I get why it can seem messy at first, because that was my first thought, too. Once the simple rules make sense, you’ll see how everyday scraps can support healthier plants and less waste at home.
| Difficulty | 2 out of 5, mostly sorting scraps, balancing materials, and basic bin care |
| Time | 20 to 30 minutes to set up, plus 5 to 10 minutes of weekly care |
| Cost | $0 to $150, depending on whether you use a DIY setup or buy a compost bin |
| Tools Needed | Compost bin, kitchen scrap container, gloves, garden fork or trowel, dry leaves, cardboard, and water |
| Skill Required | Beginner, no prior experience needed, but moisture and green-to-brown balance need simple attention |
What Is Composting?
Composting is nature’s way of recycling. When organic materials like food scraps and dry leaves break down together, they create a dark, nutrient-rich material called compost, often called black gold by gardeners.
The process is driven by microorganisms like bacteria and fungi. They feed on organic waste, break it down, and transform it into something your soil absolutely loves. Moisture, air, and the right mix of materials keep these microbes working efficiently.
Composting isn’t a modern trend; farmers and civilizations have been doing it for thousands of years. Today, it’s one of the simplest and most impactful things you can do for both your garden and the planet. Think of it as giving your waste a second, much more useful life.
Why Should You Compost at Home?
Composting at home helps turn daily waste into something useful. I find it makes waste feel easier to manage while supporting healthier soil.
- Reduces household waste: Composting helps cut down the food scraps and garden waste sent to the trash.
- Makes waste useful: It gives organic materials a second life instead of sending them to landfills.
- Supports healthier soil: Finished compost can improve soil quality and help plants grow better.
- Saves money over time: It can reduce the need for store-bought soil products.
- Builds better habits: I find composting makes waste feel more manageable and less automatic.
- Supports a cleaner lifestyle: It is a simple way to make everyday home habits more sustainable.
With small habits, composting becomes simple and useful. You reduce waste, support your plants, and make better use of everyday scraps.
Understanding How Composting Works and the Green-to-Brown Ratio
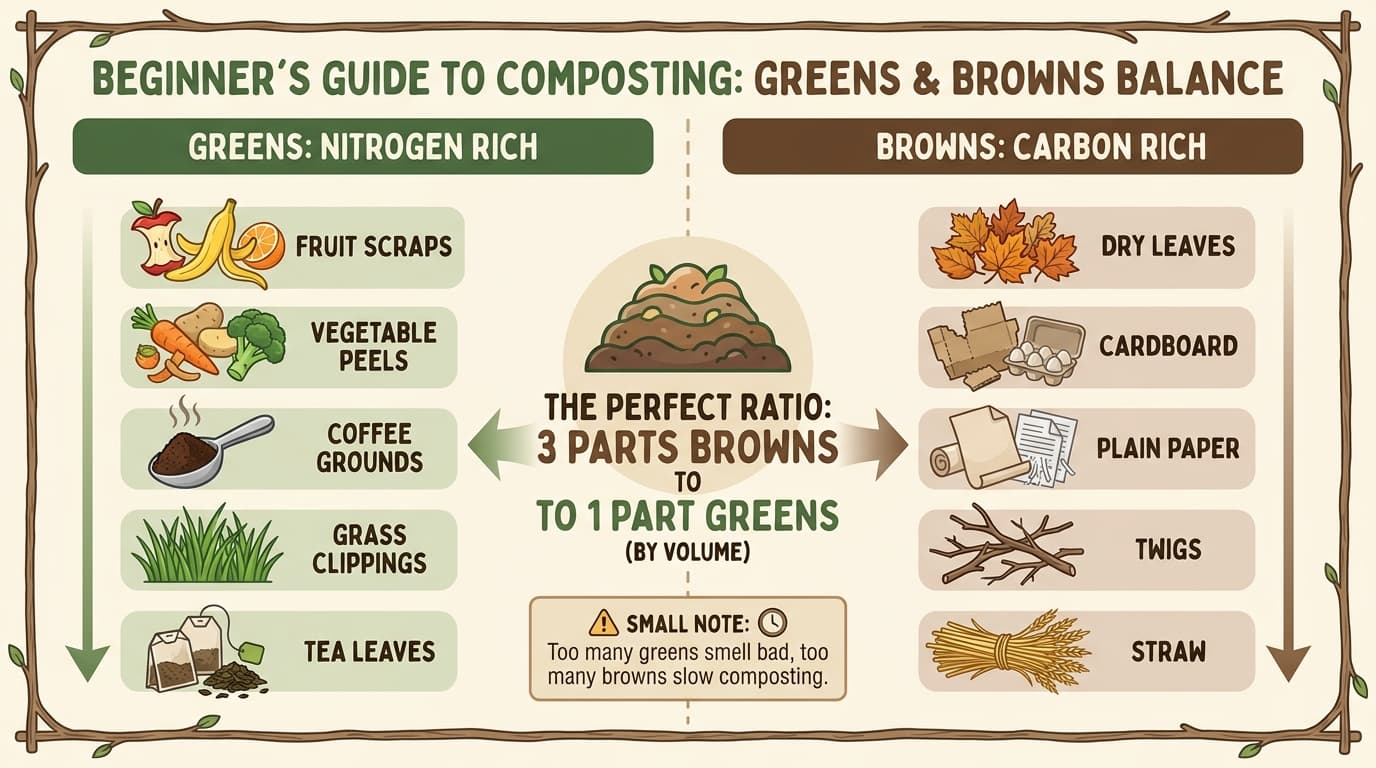
Composting works when greens, browns, air, and moisture stay balanced. Greens are moist, nitrogen-rich materials like fruit scraps, vegetable peels, coffee grounds, grass clippings, and tea leaves. They break down quickly and feed the tiny organisms that help create compost.
Browns are dry, carbon-rich materials like dry leaves, cardboard, plain paper, twigs, and straw. They add structure, help airflow, and stop the pile from becoming too wet or smelly.
The best balance is about 3 parts browns to 1 part greens by volume. Too many greens can make the compost wet, compacted, and foul-smelling. Too many browns can slow the process because the pile lacks enough nitrogen.
Compost also needs oxygen, light, and moisture. It should feel like a damp sponge, not soaked or dusty. If it smells bad, add more browns and turn it. If it feels dry and slow, add greens and a little water.
What Can and Cannot Go Into a Compost Bin?
Choosing the right compost materials keeps the bin healthy and easier to manage. Some scraps help the process, while others attract pests or create odors.
| What Can Go | What Cannot Go |
|---|---|
| Fruit and vegetable scraps | Meat and fish |
| Coffee grounds | Dairy products |
| Fresh grass clippings | Oily foods |
| Plastic-free tea bags | Diseased plants |
| Plant trimmings | Treated wood |
| Fallen leaves | Pet waste |
| Shredded cardboard | Glossy or coated paper |
| Paper egg cartons | Plastic packaging |
| Straw | Charcoal ash |
| Plain shredded paper | Large branches |
A balanced compost bin starts with simple choices. Add natural scraps that break down well, and avoid anything that attracts pests, causes odors, or poses safety risks.
Types of Composting Methods for Your Home
Different homes need different composting setups. The right method depends on your space, the amount of waste, and how much time you want to spend.
- Outdoor Compost Pile: This is the simplest composting method. You pile organic materials in a garden corner, making it best for large yards with plenty of waste. It needs little setup but takes longer, usually 6 months to 1 year.
- Enclosed Compost Bin: An enclosed bin keeps compost neat and helps deter pests. It works well for suburban gardens and homes that produce regular kitchen and garden waste. Most garden centers sell simple, affordable bin options.
- Tumbler Composting: A compost tumbler uses a rotating drum, which makes turning much easier. It can produce compost faster, sometimes in 4 to 6 weeks with steady care. It is also pest-resistant and beginner-friendly.
- Vermicomposting: Vermicomposting usesred wiggler worms to break down food scraps. It works well in small spaces, balconies, or even indoors. A small worm bin can fit under a kitchen sink.
- Bokashi Composting: Bokashi composting uses beneficial microbes to ferment waste. It works well on a kitchen countertop and can handle items like meat and dairy, which most home composting methods avoid.
Choose the method that fits your daily routine. A simple system that feels easy to maintain will work better than one that feels difficult.
How to Start Composting at Home: Step by Step
Composting at home becomes easier when each step has a clear purpose. With the right materials, moisture, and care, kitchen waste can turn useful
Step 1: Gather the Materials Needed
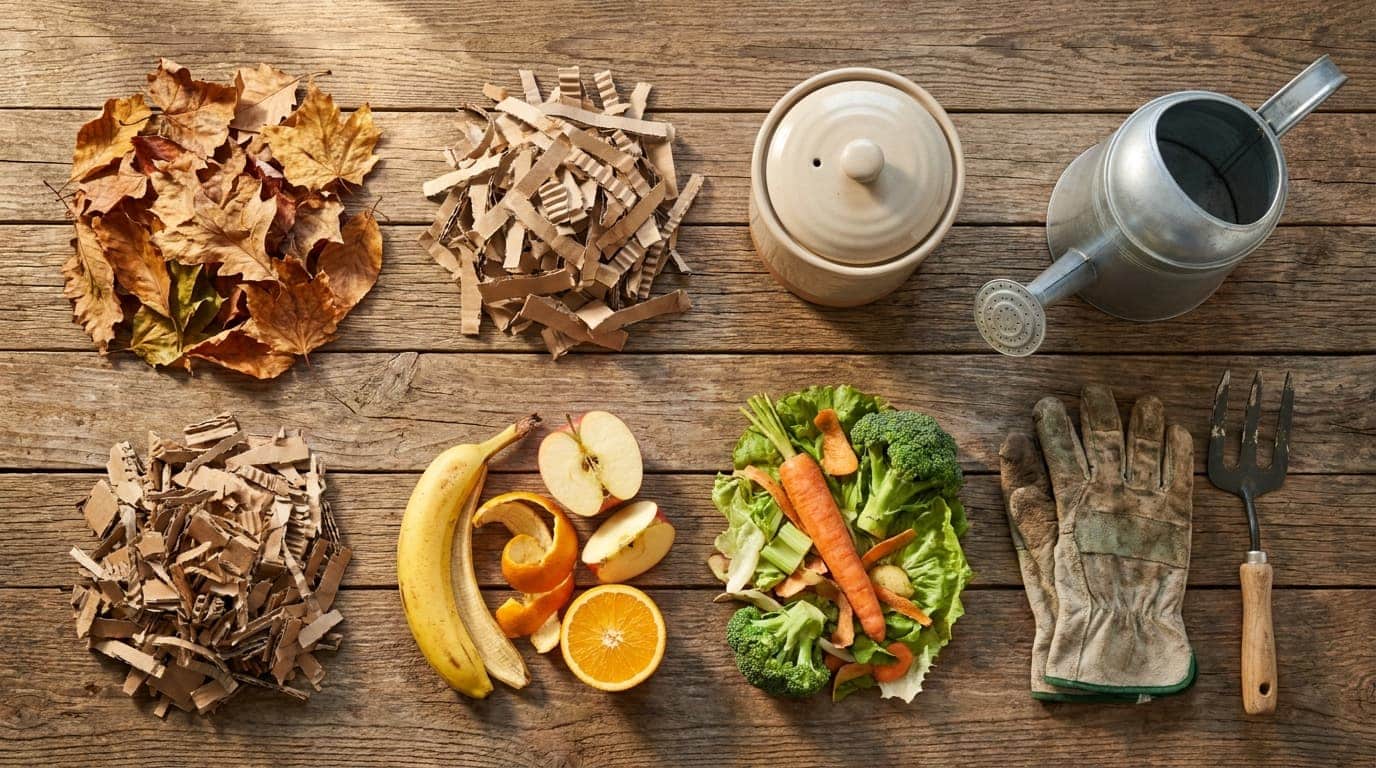
| Material Type | Examples | Estimated Cost |
|---|---|---|
| Brown materials | Fallen leaves, paper, cardboard, twigs, dried prunings | $0 to $10 |
| Green materials | Kitchen scraps, lawn clippings, green garden waste | $0 |
| Compost bin | Store-bought bin or DIY container | $0 to $100 |
| Covering material | Bin lid, tarp, or sack | $0 to $20 |
| Water source | Watering can or hose | $0 to $25 |
| Turning tool | Garden fork, shovel, or compost aerator | $10 to $40 |
Step 2: Choose and Prepare the Compost Area
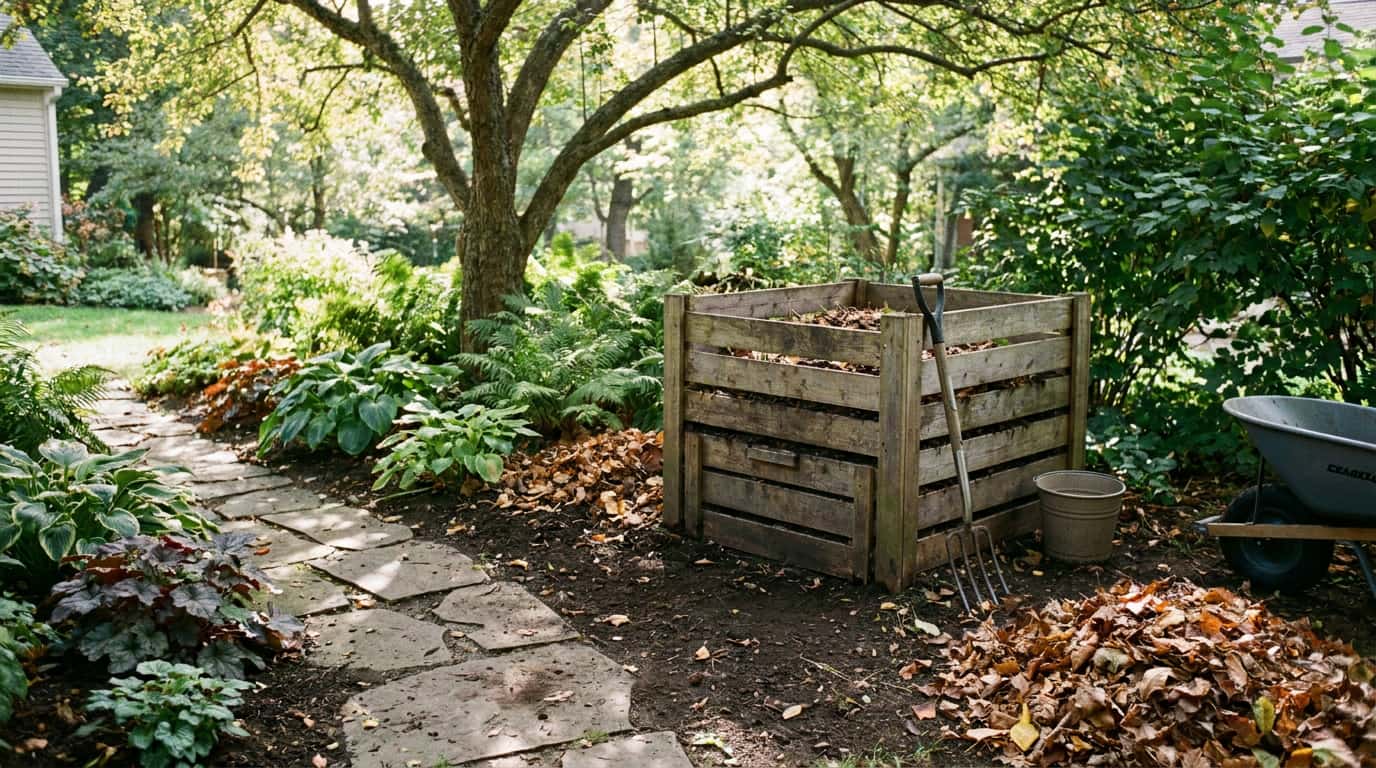
Pick a shady and easy-to-reach spot in the garden for the compost bin. The bin should touch the ground so worms and tiny organisms can move in and help break down the waste. I find this setup easier to manage because the pile stays close enough for regular care without feeling like extra work.
Step 3: Build the Base and Add Layers
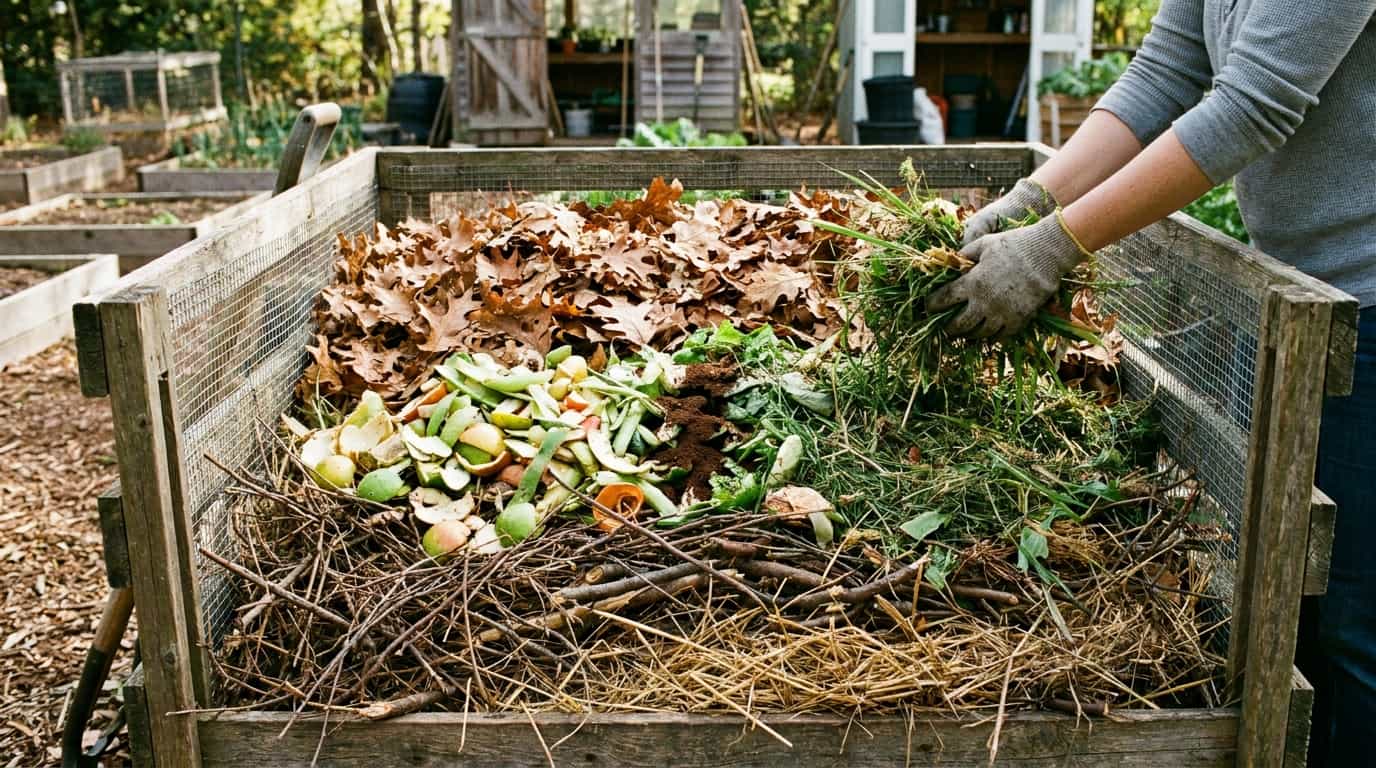
Start with large brown materials, such as twigs, straw, or dried prunings, at the bottom. This base helps air move through the pile. After that, add greens and browns in layers.
Try to keep the mix close to equal parts green and brown materials so the compost breaks down without becoming too wet, dry, or smelly.
Step 4: Cut, Wet, and Cover the Materials
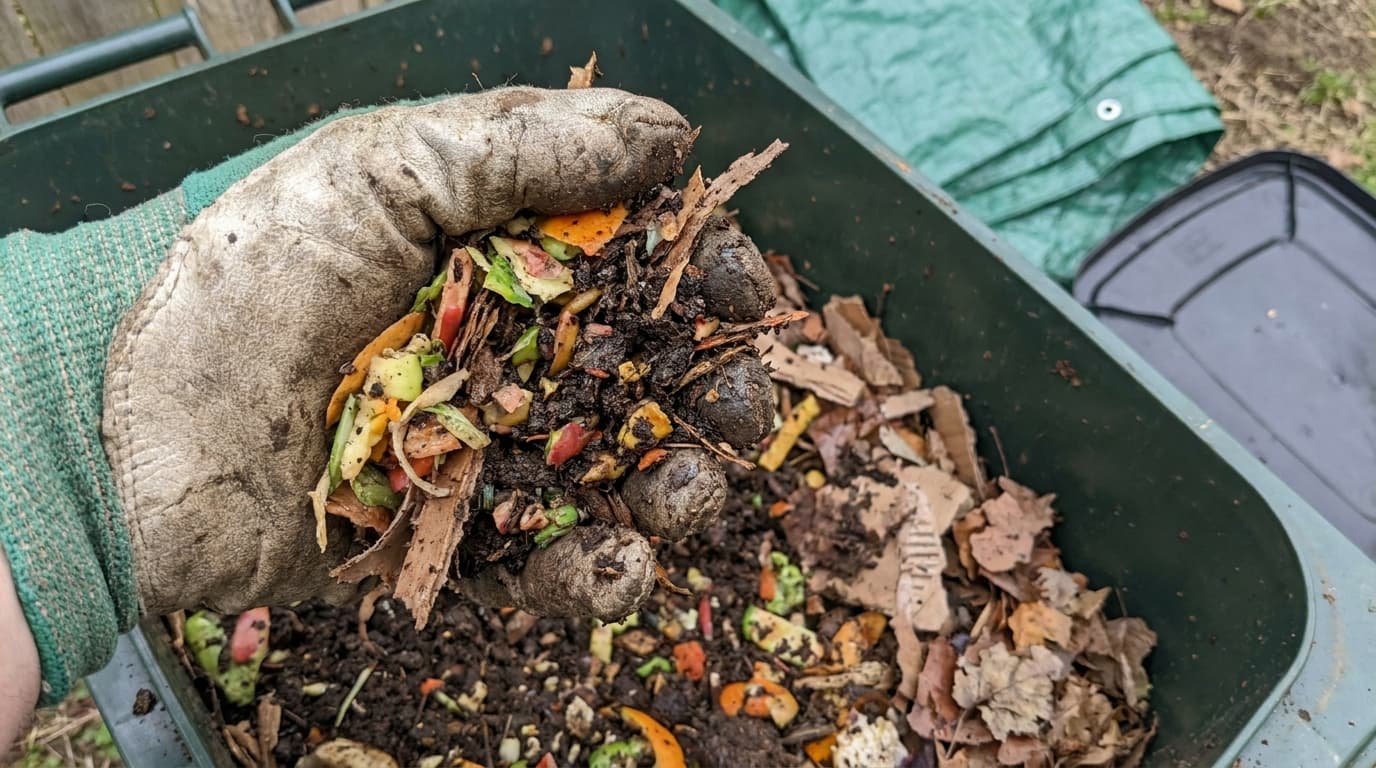
Cut or shred kitchen and garden waste before adding it to the compost bin. Smaller pieces break down faster and mix more evenly with the pile. Add water until the compost feels damp, not soaked. Then cover the bin with a lid, tarp, or sack to hold moisture and protect the pile.
Step 5: Turn and Maintain the Compost
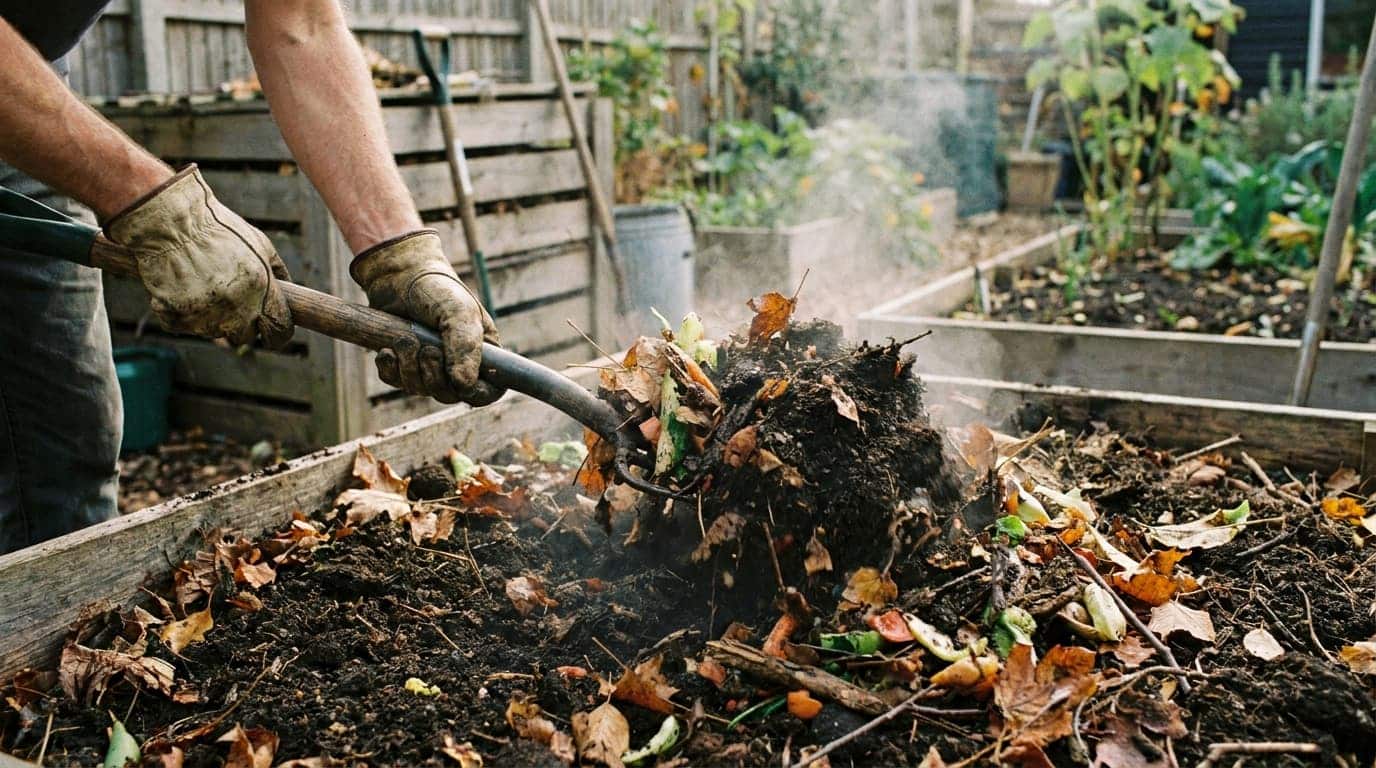
Turn the compost every one to two weeks using a garden fork, shovel, or compost aerator. This adds air, which helps the materials break down better. While turning, check the moisture level. The pile should feel like a wrung-out sponge. Add water if it feels dry, or add browns if it feels too wet.
Step 6: Add New Scraps Correctly
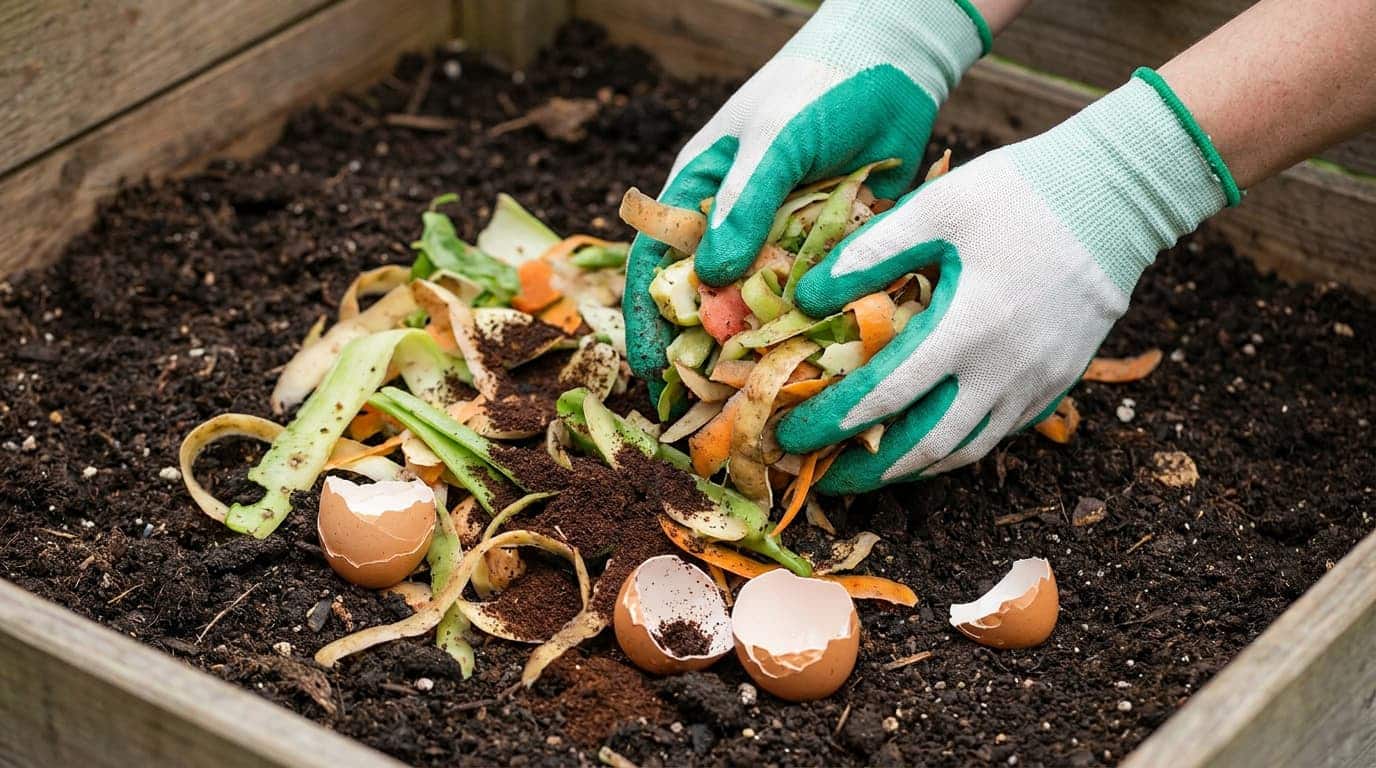
Add new kitchen scraps when turning the compost, not just on top of the pile. Place them near the center so they break down faster and attract fewer pests. Add a similar amount of brown material after each fresh layer. I like this habit because it keeps the bin cleaner and easier to balance.
Step 7: Let the Compost Develop
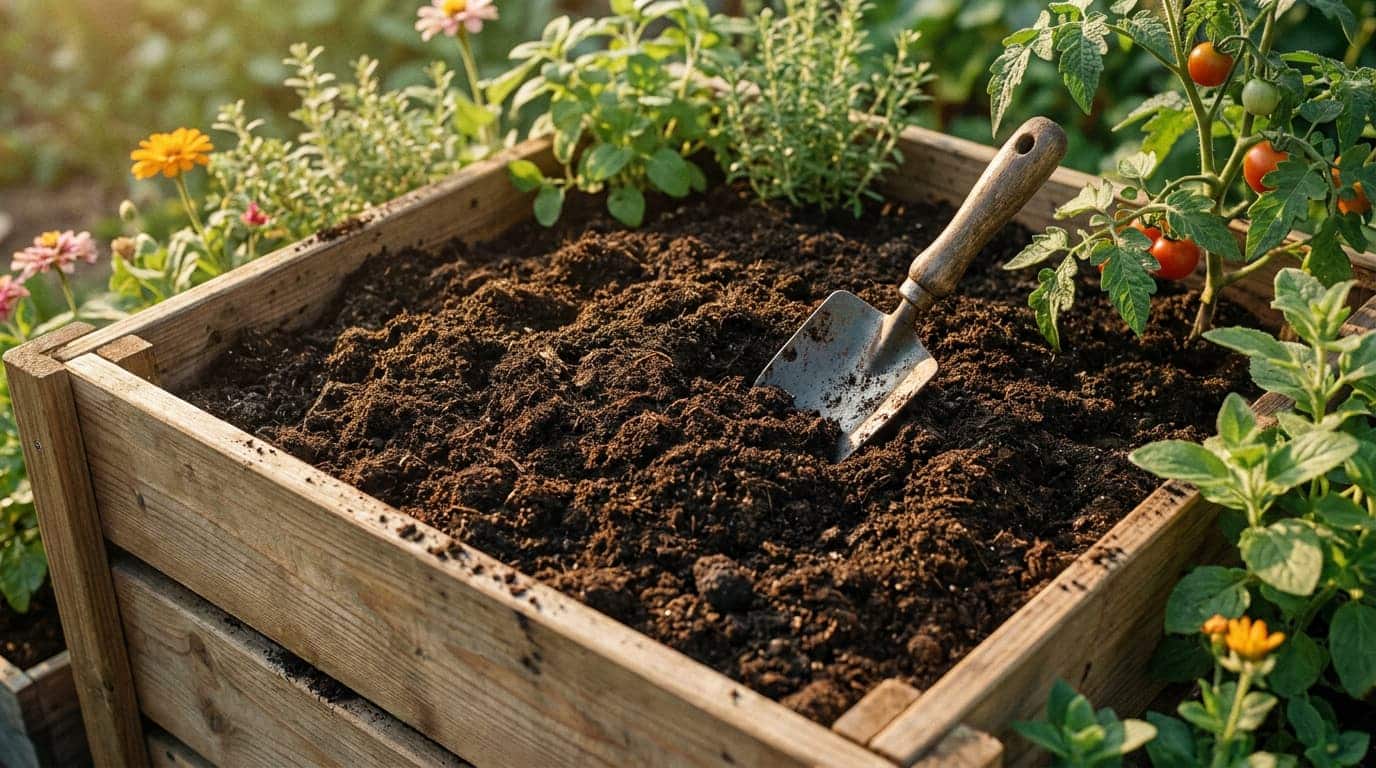
After the last scraps are added, give the compost time to finish breaking down. This usually takes around eight to twelve weeks, depending on moisture, airflow, and material size. Finished compost should look dark, crumbly, and soil-like. It should smell earthy, not rotten, before being used around garden plants.
Once the steps become routine, composting feels simple. Regular turning, balanced materials, and steady moisture help waste break down into useful garden compost.
Common Composting Problems and Fixes
Composting problems are usually easy to fix once the cause is clear. Most issues stem from moisture, airflow, balance, or the use of the wrong materials.
| Problem | Likely Cause | Easy Fix |
|---|---|---|
| Bad smell | Too many greens, too much moisture, or poor airflow | Add morebrowns, turn the pile, and avoid overwatering. |
| Compost is too dry | Not enough moisture or too many dry browns | Add a little water and mix in some fresh green materials. |
| Compost is too wet | Too much water or too many moist scraps | Add dry leaves, shredded cardboard, or paper to absorb moisture. |
| Waste is not breaking down | Pieces are too large, the pile is dry, or there is not enough air | Chop scraps smaller, turn the pile, and check moisture. |
| Pests around the bin | Food scraps are exposed, or the wrong items were added | Bury scraps in the center and avoid meat, dairy, and oily foods. |
| Too many flies | Fruit scraps are left uncovered near the top | Cover fresh scraps with browns or finished compost. |
| The pile feels compacted | Not enough structure or airflow | Add twigs, straw, or dry leaves, then turn the pile well. |
A compost pile does not need to be perfect. Small changes, like adding browns, turning often, or checking moisture, usually solve most problems.
How Long Composting Takes and Signs When It Is Ready
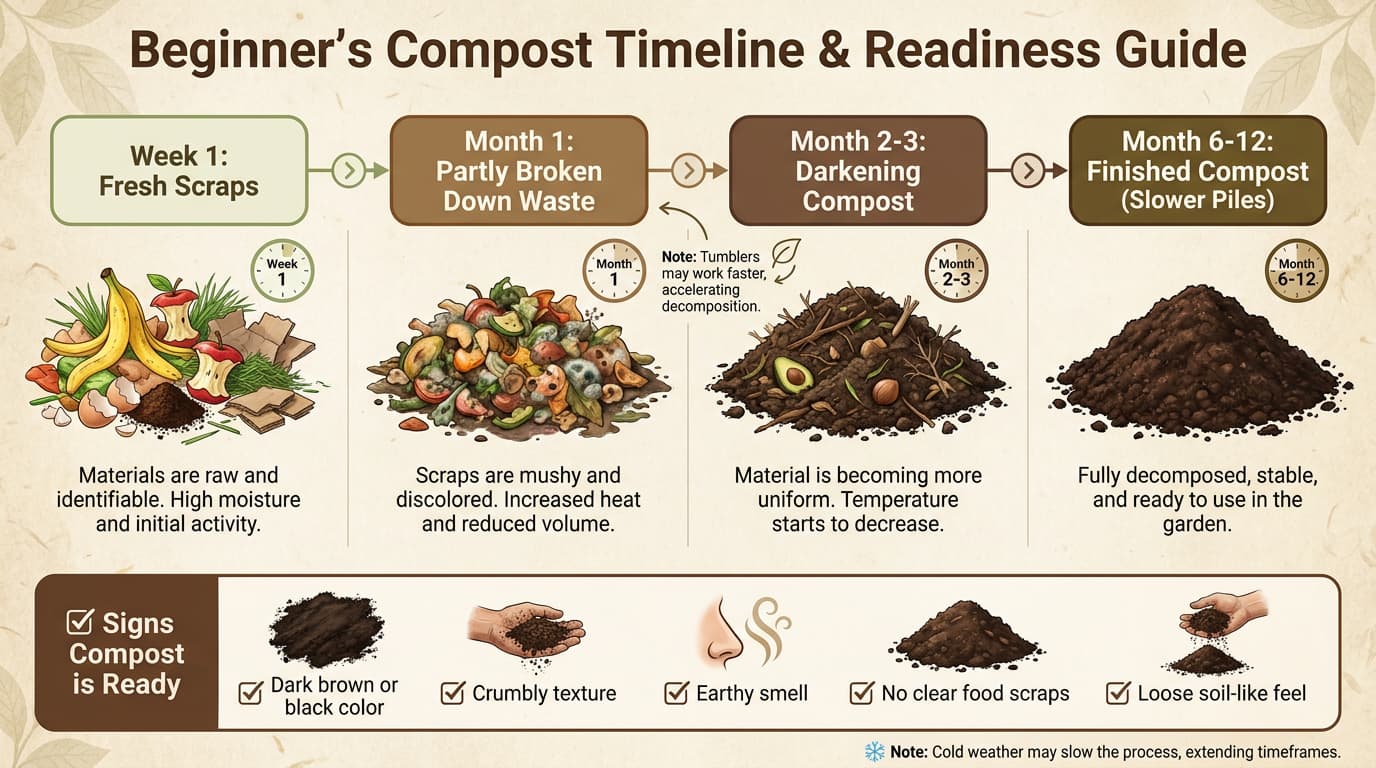
Composting can take 2 months to 1 year, depending on how the pile is built and cared for. The timing depends on the bin type, weather, scrap size, moisture level, and how often the compost is turned.
Tumblers and well-managed piles usually work faster because they are easier to mix, aerate, and keep balanced. Larger scraps, dry materials, cold weather, or poor airflow can slow everything down. I find it better to judge compost by its signs, not just by time.
Finished compost should look dark brown or black, feel crumbly and loose, and smell earthy rather than rotten. There should be no clear food scraps left. When it feels like soft, loose soil, it is usually ready to use around plants or mix into garden beds.
How to Use Finished Compost
Finished compost can improve many parts of the garden when used in the right way. A little goes a long way, especially near growing plants.
- Mix it into garden soil: Blend compost into the top layer of soil before planting to improve texture and nutrients.
- Add it around plants: Spread compost around the base of plants, but keep it slightly away from stems.
- Use it in raised beds: Mix compost into raised bed soil to refresh it before a new growing season.
- Add it to potted plants: Use small amounts because too much compost can make pots heavy or too rich.
- Spread it over lawns: Apply a thin layer across the grass to feed the soil slowly.
Use compost in small, steady amounts. It helps soil stay healthier and gives plants natural support without needing complicated garden products.
Composting Tips for Beginners
Composting gets easier with a few simple habits. These small steps can prevent smells, slow breakdown, and messy bins before they become problems.
- Start small: Begin with a small bin or pile so the process feels easy to manage.
- Keep a kitchen scrap container: Store scraps neatly before moving them to the compost bin.
- Chop scraps before adding them: Smaller pieces break down faster and mix better.
- Cover food scraps with browns: Use dry leaves, cardboard, or paper to reduce smell and pests.
- Avoid overwatering: Compost should feel damp, not soaked.
- Turn the pile regularly: Mixing adds air and helps materials break down evenly.
- Keep extra browns nearby: Dry leaves or cardboard make it easier to fix wet or smelly compost.
Beginner composting does not need to be perfect. With steady care and simple habits, the pile becomes easier to manage over time.
Frequently Asked Questions
Can moldy food go into compost?
Yes, small amounts of moldy plant-based food can usually go into compost. Mold is part of the natural breakdown. Avoid moldy cooked meals, dairy, or greasy leftovers because they can create odors and attract pests in a home setup quickly.
Should a compost bin have holes?
Yes, holes can help air move through the bin and let extra liquid drain away. Good airflow supports faster breakdown and helps reduce bad smells. Place the bin where drainage will not stain floors, patios, or nearby surfaces.
Can weeds be added to compost?
Weeds can be composted only if they have not gone to seed. Seeded weeds may survive and spread later when compost is used. For beginner composting, it is safer to leave seed heads and aggressive weeds out entirely.
Can compost be stored after it is ready?
Yes, finished compost can be stored in a dry, covered container or sack. Keep it slightly moist, not wet. Store it away from direct rain so nutrients do not wash out before it is added to plants.
Is compost safe for young seedlings?
Compost can help seedlings, but it should be used lightly. Too much rich compost may overwhelm young roots. Mix a small amount with regular soil, and make sure the compost is fully finished before using it near seedlings.
Final Thoughts
Composting turns everyday waste into something useful, and I think that is what makes it such a practical habit. Once you understand composting basics, you can choose the right method, balance greens and browns, avoid the wrong materials, and fix small problems before they grow.
You also know how long compost can take, when it is ready, and how to use it around plants. These steps matter because they make composting feel less messy and more manageable at home.
I like that my food scraps can support the soil instead of filling the trash. Try these tips with your own scraps, and share your composting questions or results in the comments.