Knock on a wall in any home built before 1950. It sounds solid. Dense. Almost like knocking on stone. That is lath and plaster. If you are renovating an older home, you are going to run into it.
Lath and plaster walls were the standard for over 200 years of American construction. They are durable, surprisingly good at blocking noise, and built to last.
But they can also crack, loosen, and cost a lot to repair if you do not know what you are dealing with.
This post covers what lath and plaster walls are, how they were built, the types used, and exactly what to do when something goes wrong.
What Are Lath and Plaster Walls?
Lath and plaster walls are a two-part wall system. Thin wood strips, called laths, are nailed across wall studs to form a base.
Wet plaster is applied over those strips in layers, hardening into a dense, solid surface. The finished wall typically measures close to one inch thick, far denser than the standard drywall used in homes today.
A Brief History of Lath and Plaster in American Homes
This method dates back to colonial America in the 1700s and stayed the standard wall system for well over 200 years.
- American builders in the 1700s had no drywall or sheet materials, lath and plaster was the only option.
- Craftsmen nailed thin wood strips to wall frames by hand and applied wet plaster coat by coat.
- The method remained the standard in American homes right through the 1940s.
- After World War II, a massive housing boom pushed builders toward faster and cheaper wall systems.
- Drywall arrived and replaced lath and plaster in most new construction by the mid-20th century.
- In the UK, plasterboard entered the market in the 1930s and gradually took over from lath and plaster.
How Lath and Plaster Walls Are Built?
Building a lath and plaster wall was nothing like hanging drywall. It was a multi-step process that required skill, the right materials, and patience at every stage.
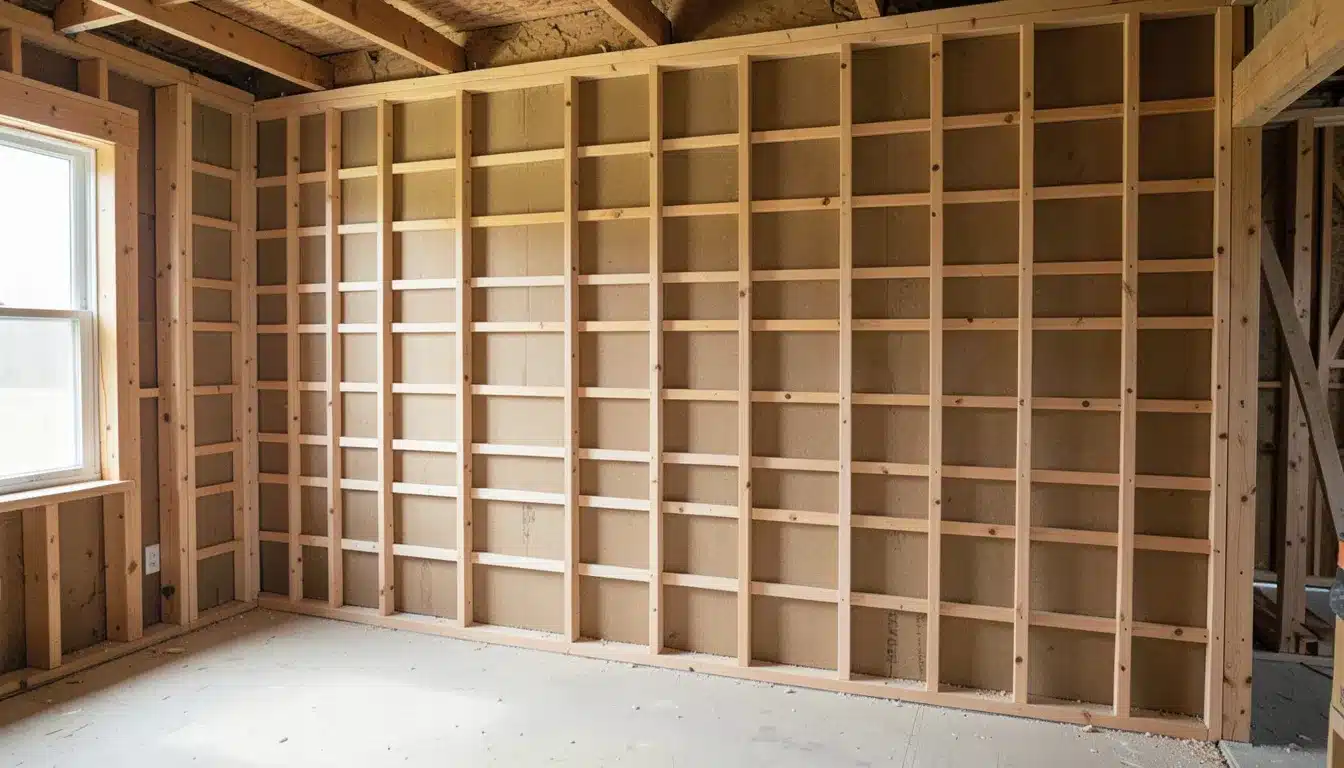
Step 1: Installing the Lath
Thin wood strips are nailed horizontally across the wall studs, with a small gap of about 6mm between each strip. That gap is deliberate. It is where the wet plaster presses through to grip the back of the lath.
Strips are always staggered during installation so their ends never line up in a straight row, which prevents a weak point from forming in the finished wall.
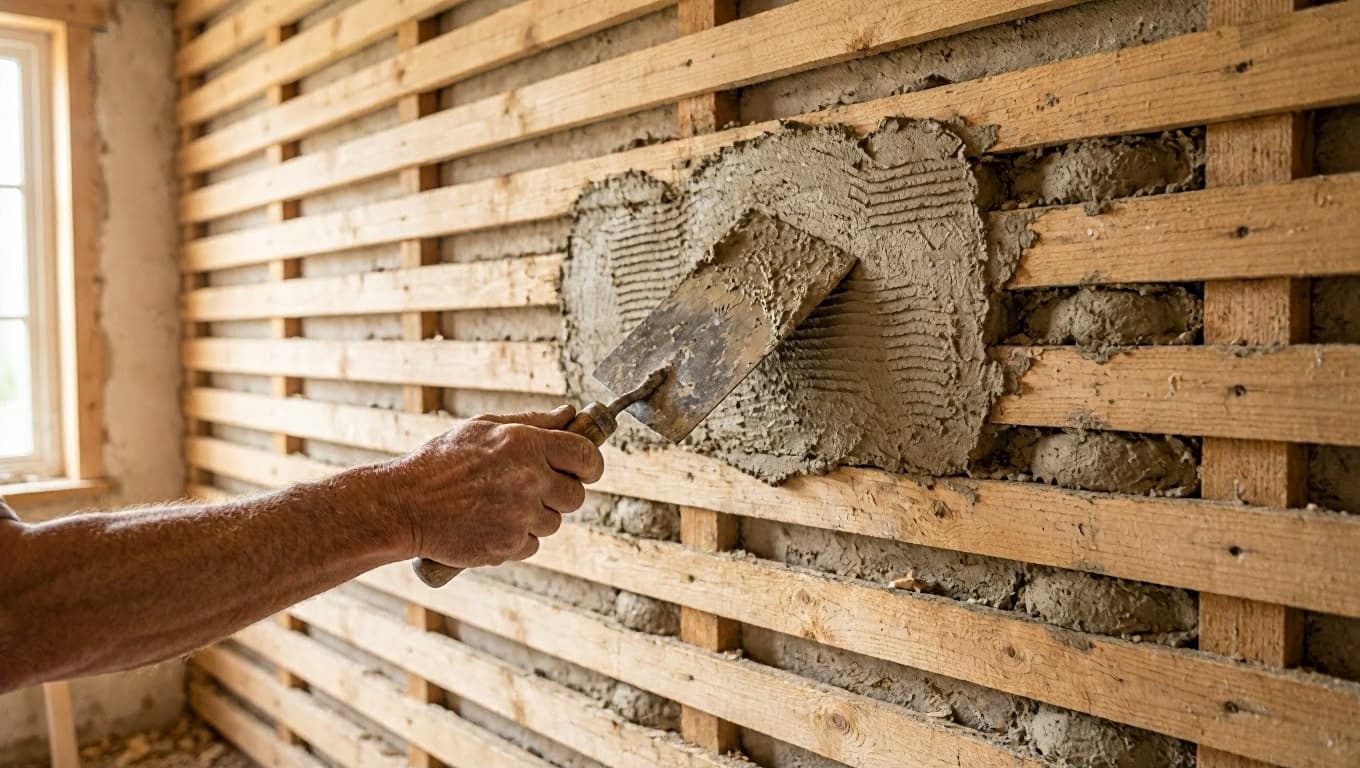
Step 2: The Scratch Coat
The first coat of plaster is pressed directly onto the lath. As it is applied, some squeezes through the gaps to form a grip on the back side.
This coat uses a mix of lime putty, sharp sand, and animal hair, typically horsehair, in roughly a 1:3 ratio. Once it firms up, the surface is scored with a comb or tool so the next coat bonds properly.
Step 3: The Brown Coat
The brown coat is the second, thicker layer. Its job is to build up the wall and level out any uneven spots left by the scratch coat. This layer must dry fully before the final coat is applied.
Step 4: The Finish Coat
The finish coat is thin and smooth. It creates the final, paintable wall surface. It is made from lime putty and fine sand in a 3:1 ratio, or sometimes just lime putty alone.
Hand-troweling this coat leaves subtle surface marks, something many owners of older homes actually value and want to keep.
Types of Lath Used in Construction
Not all lath and plaster walls were built the same way. The type of lath used depended on when the home was built and where the wall was located.
1. Wood Lath
Wood lath is the oldest type, used from the colonial era through the mid-20th century.
Thin strips of oak or chestnut, roughly 1.25 to 1.5 inches wide and about a quarter inch thick, were nailed across wall studs with small gaps between them.
Early lath was hand-split, giving it a rough surface that helped the plaster grip better. By the late 1800s, machine-sawn lath became common, more uniform but smoother, which made the plaster keys even more critical for holding everything in place.
2. Metal (Wire) Lath
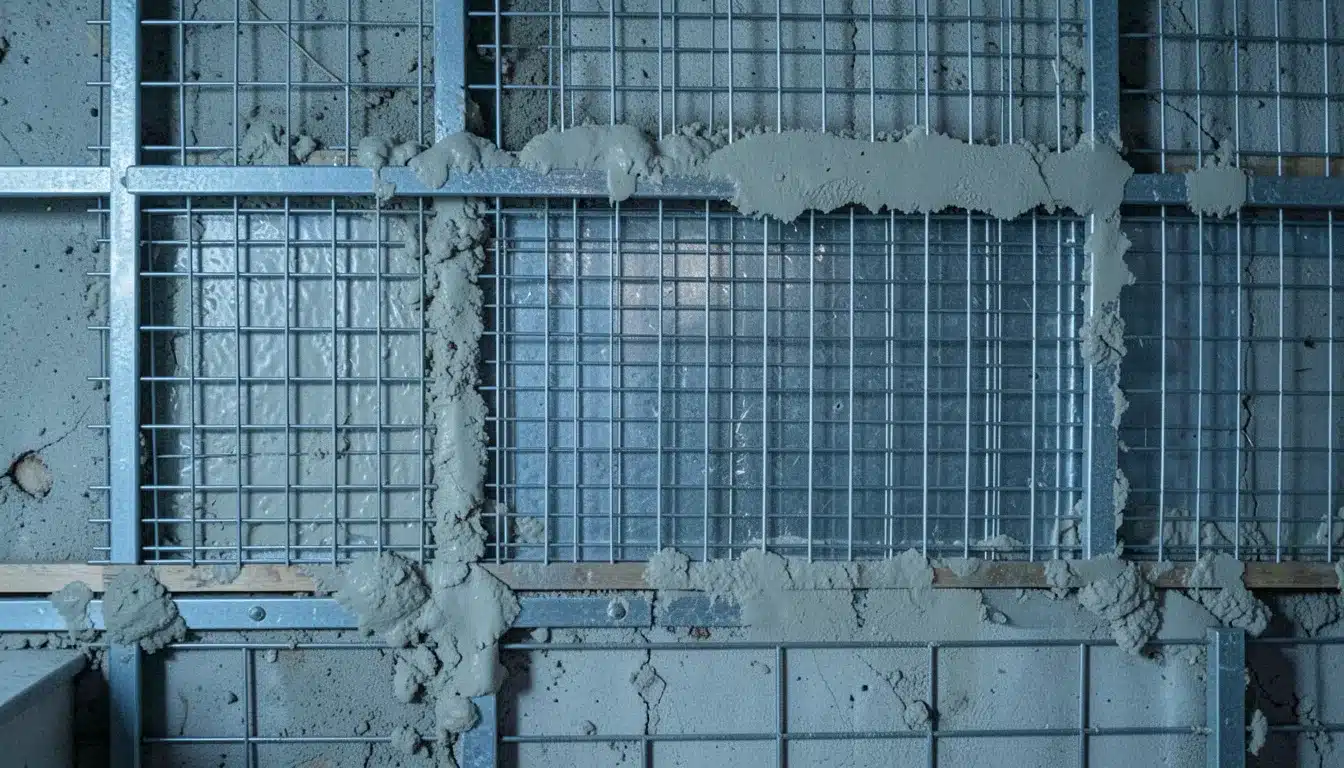
Expanded metal lath came into wider use from the late 1800s onward. It is a steel mesh that plaster presses into rather than through.
More common in commercial spaces, high-moisture areas, and curved walls, it is still used today for stucco and curved interior features.
Worth noting: lime plaster is known to stick less easily to metal lath, which is partly why harder cement-based and gypsum plasters were used alongside it.
3. Rock Lath (Gypsum Board Lath)

Rock lath, also called button board, came into use around 1900 and became the most widely used method in residential plastering by the late 1930s.
It is made from small sheets of gypsum board, typically 2 by 4 feet, with holes spaced across the surface to give the plaster grip points.
Think of it as an early form of drywall, but always finished with multiple coats of wet plaster on top. It is the thickest and densest of the three types, and the hardest to remove during renovation.
Pros and Cons of Lath and Plaster Walls
Lath and plaster walls come with real strengths and real limitations. Here is a straight look at both sides before you decide what to do with them.
Pros
- Sound insulation: The thick, dense plaster significantly reduces noise between rooms. Older homes are often noticeably quieter than newer builds because of this.
- Fire resistance: Lime and gypsum plaster are naturally fire-resistant. In many older buildings, lath and plaster ceilings slowed fire spread in a meaningful way.
- Durability: Well-maintained lath and plaster can last for many decades. Some walls in well-kept homes are over 100 years old and still in good condition.
- Curved walls and custom shapes: The lath bends. This makes forming arches, rounded ceilings, and curved features far more manageable than rigid drywall allows.
- Low environmental impact: Made from natural materials like lime and sand. The original installation had a low carbon footprint, and the materials are easily recyclable.
Cons
- Cracks over time: Plaster is hard but brittle. As any house settles naturally, cracks appear. This is one of the most reported issues in homes with these walls.
- Costly to repair: Fixing lath and plaster requires a skilled plasterer. These specialists are increasingly hard to find and significantly more expensive than general drywall contractors.
- Moisture sensitivity: Plaster absorbs moisture. Over time, this can cause mold on the surface and rot in the wood lath underneath.
- Difficult for modern upgrades: Running new wiring, insulation, or pipes inside lath and plaster walls is more complex and costly than doing the same in drywall.
- Not ideal for high-moisture areas: Bathrooms, kitchens, and laundry rooms with poor ventilation are tough environments for lath and plaster to hold up in.
Lath and Plaster Walls vs. Drywall
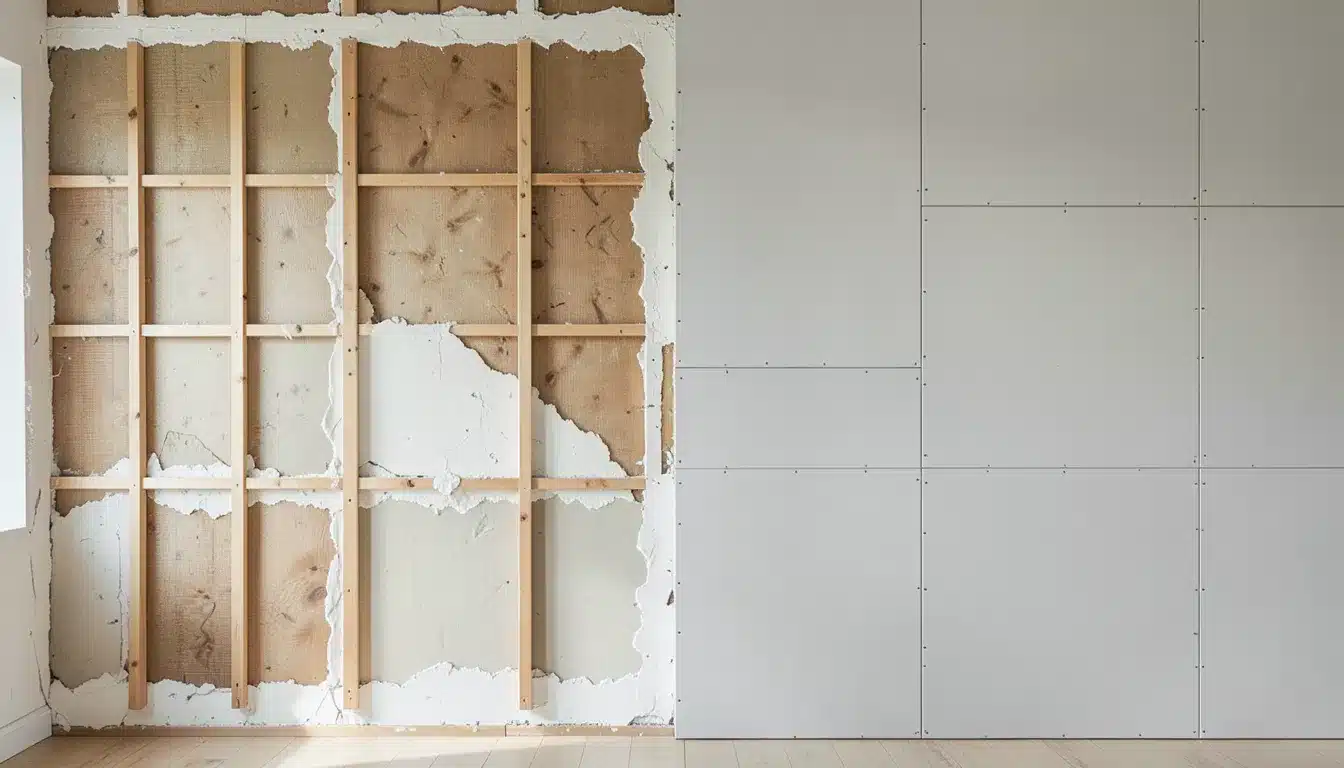
Drywall replaced lath and plaster mainly because it was faster and cheaper to install. But faster and cheaper do not always mean better, and the comparison is worth looking at properly.
| Feature | Lath and Plaster | Drywall |
|---|---|---|
| Wall thickness | Close to 1 inch or more | About 0.5 inch (standard) |
| Sound insulation | Significantly better | Weaker |
| Fire resistance | Higher (lime or gypsum base) | Lower |
| Repair difficulty | Hard, needs a specialist | Easier, often DIY-friendly |
| Installation speed | Slow, multi-coat process | Fast, panels hung in hours |
| New installation cost | Much higher | Lower |
| Moisture resistance | Lower | Slightly better |
| Curved walls and arches | Easier | Harder with standard panels |
| Lifespan (with maintenance) | Decades to over 100 years | Typically 30 to 70 years |
| Wiring and plumbing access | Difficult to open and close | Easier to cut and patch |
How to Repair Lath and Plaster Walls?
Repairing lath and plaster walls is not the same as patching drywall. The materials behave differently, the steps take longer, and using the wrong products can cause more damage than you started with.
- Fixing small cracks: Clean the crack, dampen the area to slow moisture loss, press patching compound in with a putty knife, let it dry fully, sand smooth, then prime and paint.
- Patching holes where the lath is still intact: Secure any loose lath strips with screws, apply a bonding agent to the exposed lath and surrounding plaster edges, press plaster in layers to form new keys, tape the joint with nylon mesh tape, apply a thin skim coat, sand, and paint.
- Repairing holes where the lath is damaged: Cut back to the nearest studs on both sides, fit either a plasterboard patch or a galvanised metal mesh (expanded metal lath), apply plaster over the top, skim, sand, and paint.
- Re-securing loose plaster (key failure): Drill small holes through the plaster with a masonry bit, vacuum out the dust, apply a plaster conditioner, inject a plaster adhesive into the holes, clamp the plaster back against the lath with washers and screws until the adhesive sets, then fill and repaint.
|
When to call a professional? If the damage covers a large area, if there is visible water damage or mold behind the wall, or if you suspect asbestos in the plaster (common in homes built between the 1920s and 1980s), stop and call a qualified plasterer or certified inspector before doing anything else. |
Should You Repair or Replace Lath and Plaster Walls?
If the plaster is structurally solid with no key failure or water damage, repair is almost always the better call, especially in a historic home where the original construction is worth preserving.
But if there is widespread key failure, rot in the lath, or you are doing a full renovation that needs access inside the wall cavities for wiring or insulation, replacing with drywall makes more practical sense.
The condition of the walls matters more than the method. When you are not sure, get a structural inspection before making the final call.
The Bottom Line
Lath and plaster walls have been part of American homes for centuries. They are not perfect.
They crack, they need specialist repairs, and they can catch you off guard mid-renovation. But they are also some of the most durable, sound-resistant walls ever built into a home.
If your home has them, that is not a problem. It is just something worth understanding before you pick up a hammer.
Now you know what they are, how they work, and what to do when something goes wrong.
Have lath and plaster walls in your home? Found something unexpected behind them? Drop your experience in the comments below.