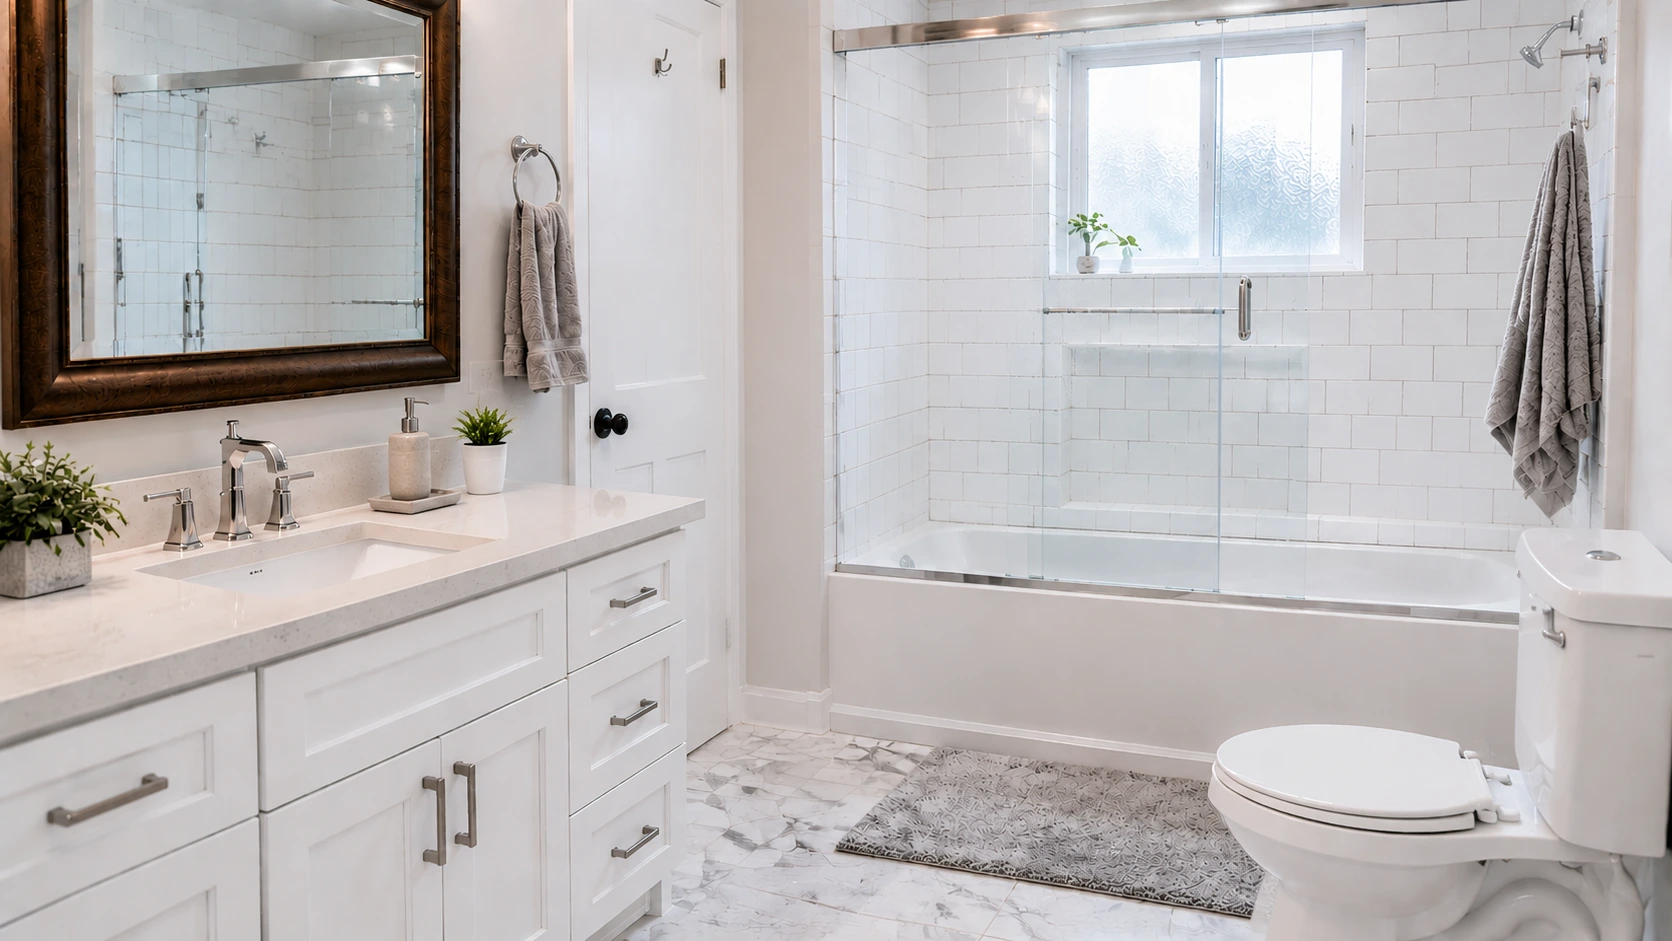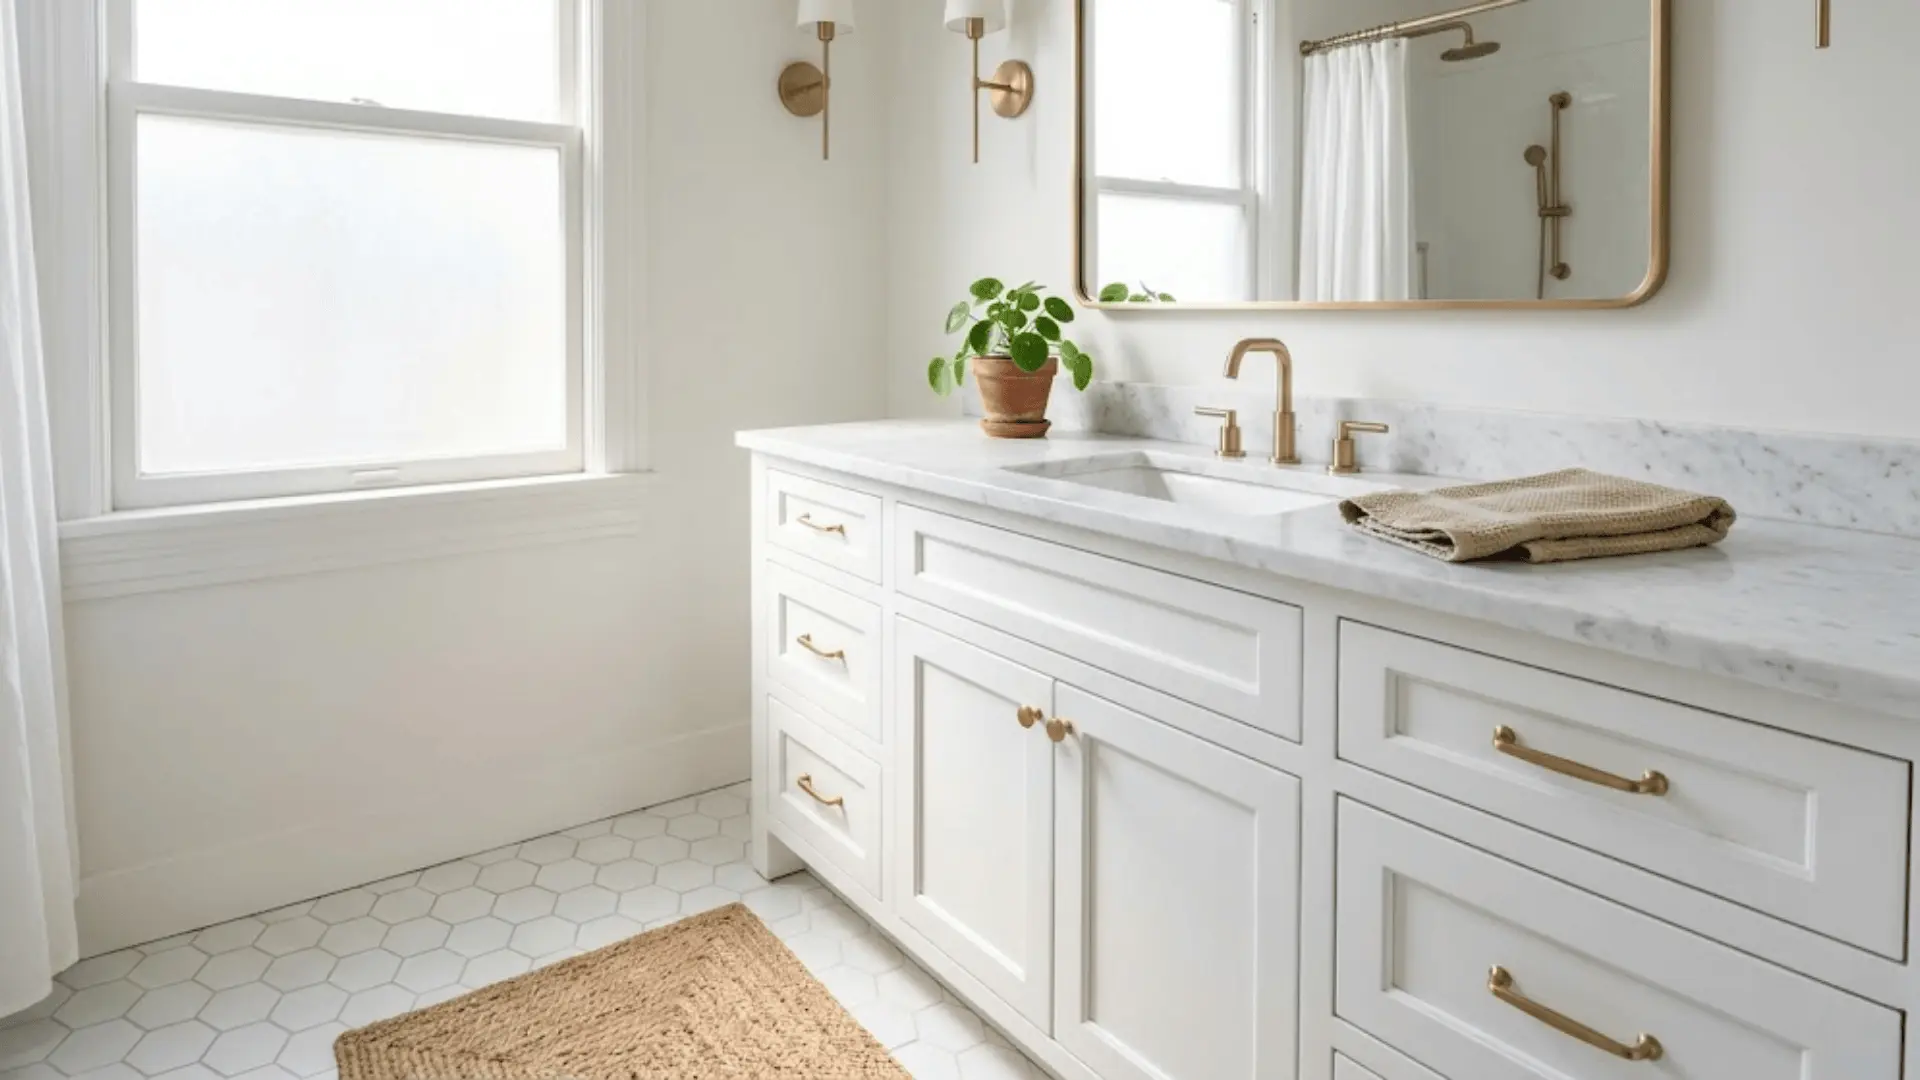
Tired of staring at the same dull vanity every morning? A fresh coat of paint might be all your bathroom needs to feel brand new again.
Painting your bathroom vanity is surprisingly simple, budget-friendly, and honestly one of the most satisfying weekend projects you can take on.
No contractors, no chaos, just you, the right supplies, and a vision.
Every step, from prep to finish, is more doable than you think, and the results? Totally worth it.
Skip the Renovation. Paint Your Vanity Instead.
Replacing bathroom cabinets can cost a fortune, but painting them? A fraction of the price with results that look just as polished.
You get complete creative control over colors, finishes, and hardware, so the final look is entirely yours.
No settling for whatever the showroom has in stock. And the best part is that this is genuinely a weekend project. Two days, some prep work, and you walk away with a bathroom that feels completely converted.
Sometimes the smallest changes really do make the biggest difference.
Before You Start: What You Need to Know?
Not every vanity is the same, but most, including wood, MDF, and laminate, can be painted beautifully with the right prep work.
Skipping that prep is where most people go wrong.
Paint selection matters just as much. Latex, oil-based, and cabinet-specific paints each behave differently, and choosing the wrong one can mean peeling within months.
Then comes finish. For a bathroom, satin, semi-gloss, or gloss are your best options since they hold up against moisture and are easy to wipe clean.
Knowing this upfront saves a lot of frustration later.
Tools and Materials You’ll Need
Getting your supplies together before starting makes the whole process so much smoother.
Here’s everything you’ll want to have on hand:
Essential Tools
- Screwdriver (with correct bits)
- Foam sanding pads / sandpaper
- Paintbrush
- Foam roller
- Shop vac or dust-collecting sander
Materials
- Bonding primer (shellac-based recommended)
- Cabinet paint, enamel, or water-based lacquer
- Painter’s tape
- Drop cloths
- Tack cloth or cleaning wipes
- Denatured alcohol (for cleanup)
- Micron strainers (if using a sprayer)
- Separate containers or Tupperware (for hardware storage)
Optional but Worth it: Paint sprayer for a noticeably smoother, more professional finish
Step-by-Step: How to Paint Your Bathroom Vanity?
This is where everything comes together. Follow these steps carefully and you’ll end up with a finish that looks professional, lasts long, and makes your bathroom feel completely refreshed.
Step 1: Remove Hardware and Label Everything
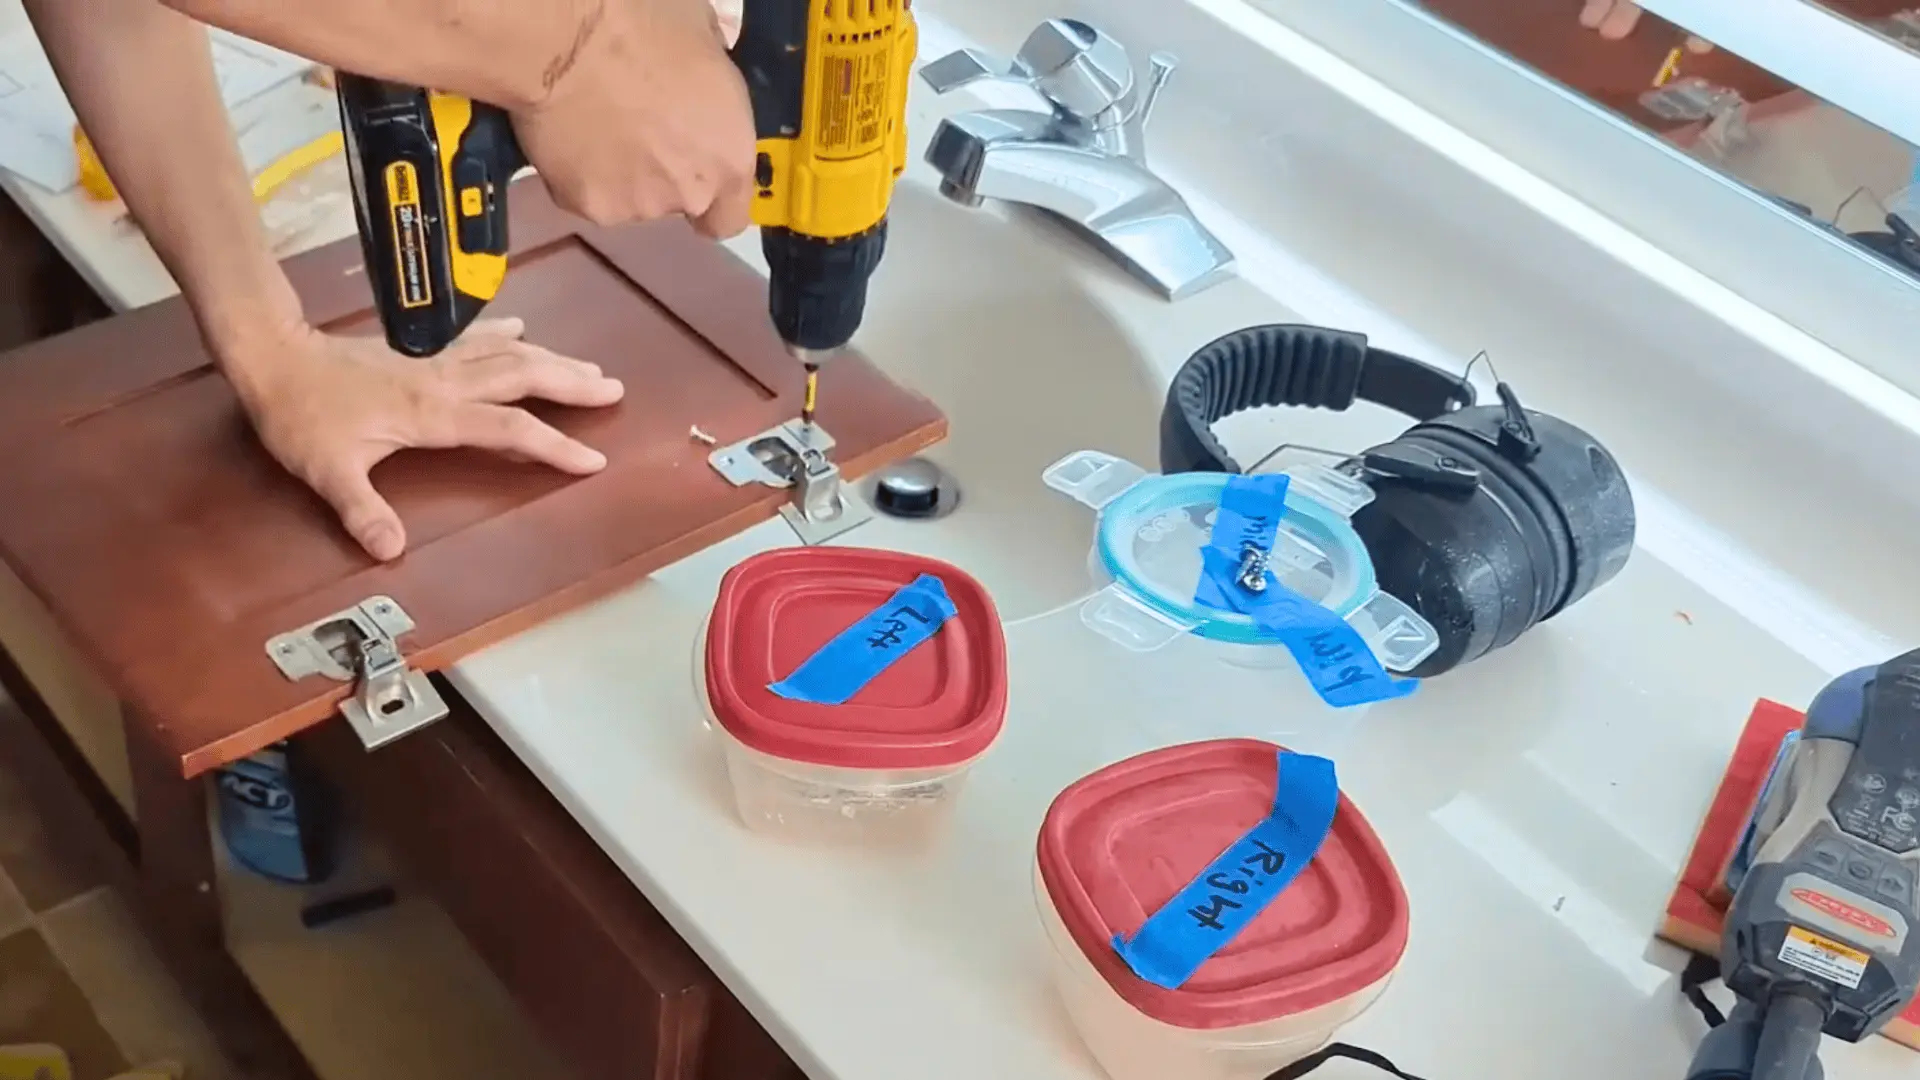
Take off all knobs, hinges, and face plates before starting. Label each piece with painter’s tape and store them in separate containers so nothing gets mixed up.
Putting hinges back on the wrong door can affect how it closes, so a little organization here saves a lot of frustration later.
Step 2: Sand and Clean the Surface
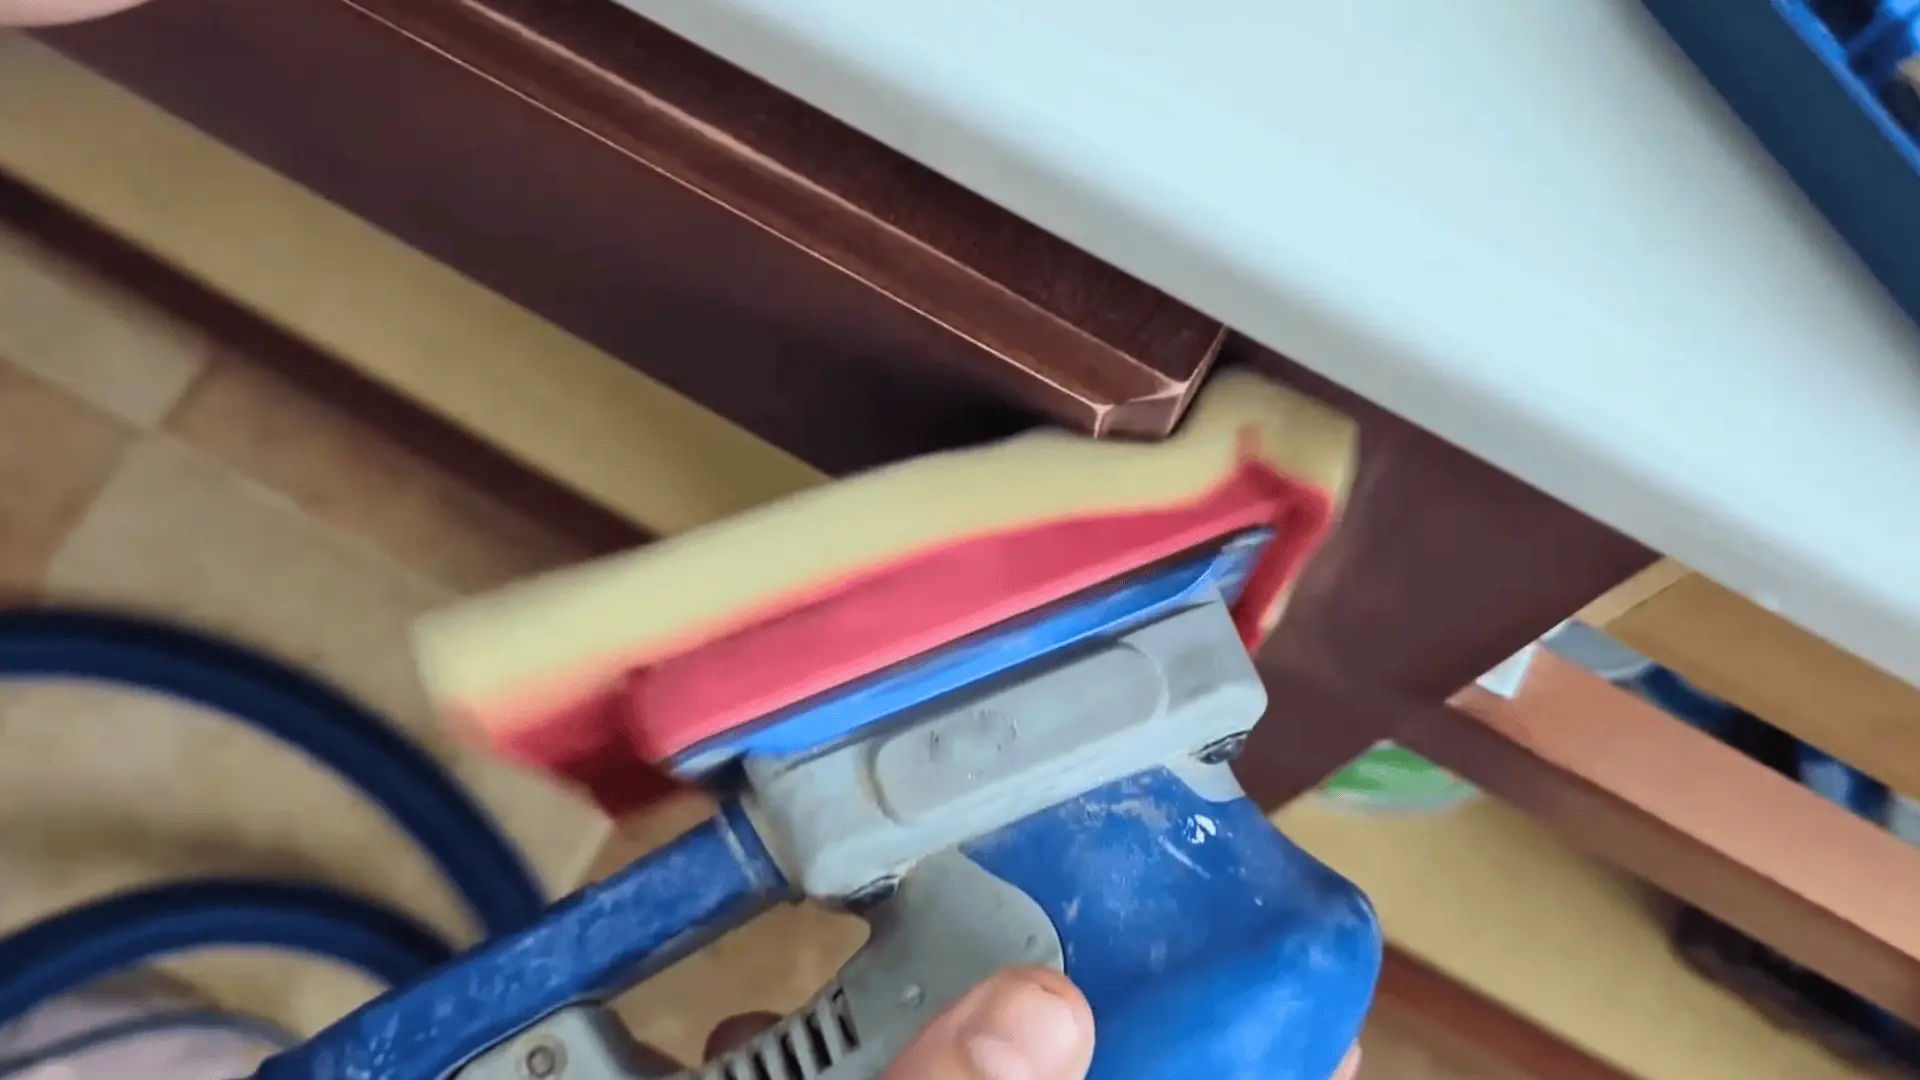
Roughing up the surface is what makes your paint actually stick. Use a foam sanding pad and work your way into the corners and curves too since those are easy to skip.
Once done, wipe everything down with a tack cloth or cleaning wipes to remove every bit of dust and residue before moving on.
Step 3: Apply Bonding Primer

A bonding primer is non-negotiable for cabinet projects. Use a fine foam roller for flat surfaces and a brush for edges. Two coats work best, with full drying time in between.
Once dry, lightly sand the primer down with a fine pad to level out any uneven spots and create a perfectly smooth base for paint.
Step 4: Paint Your Vanity
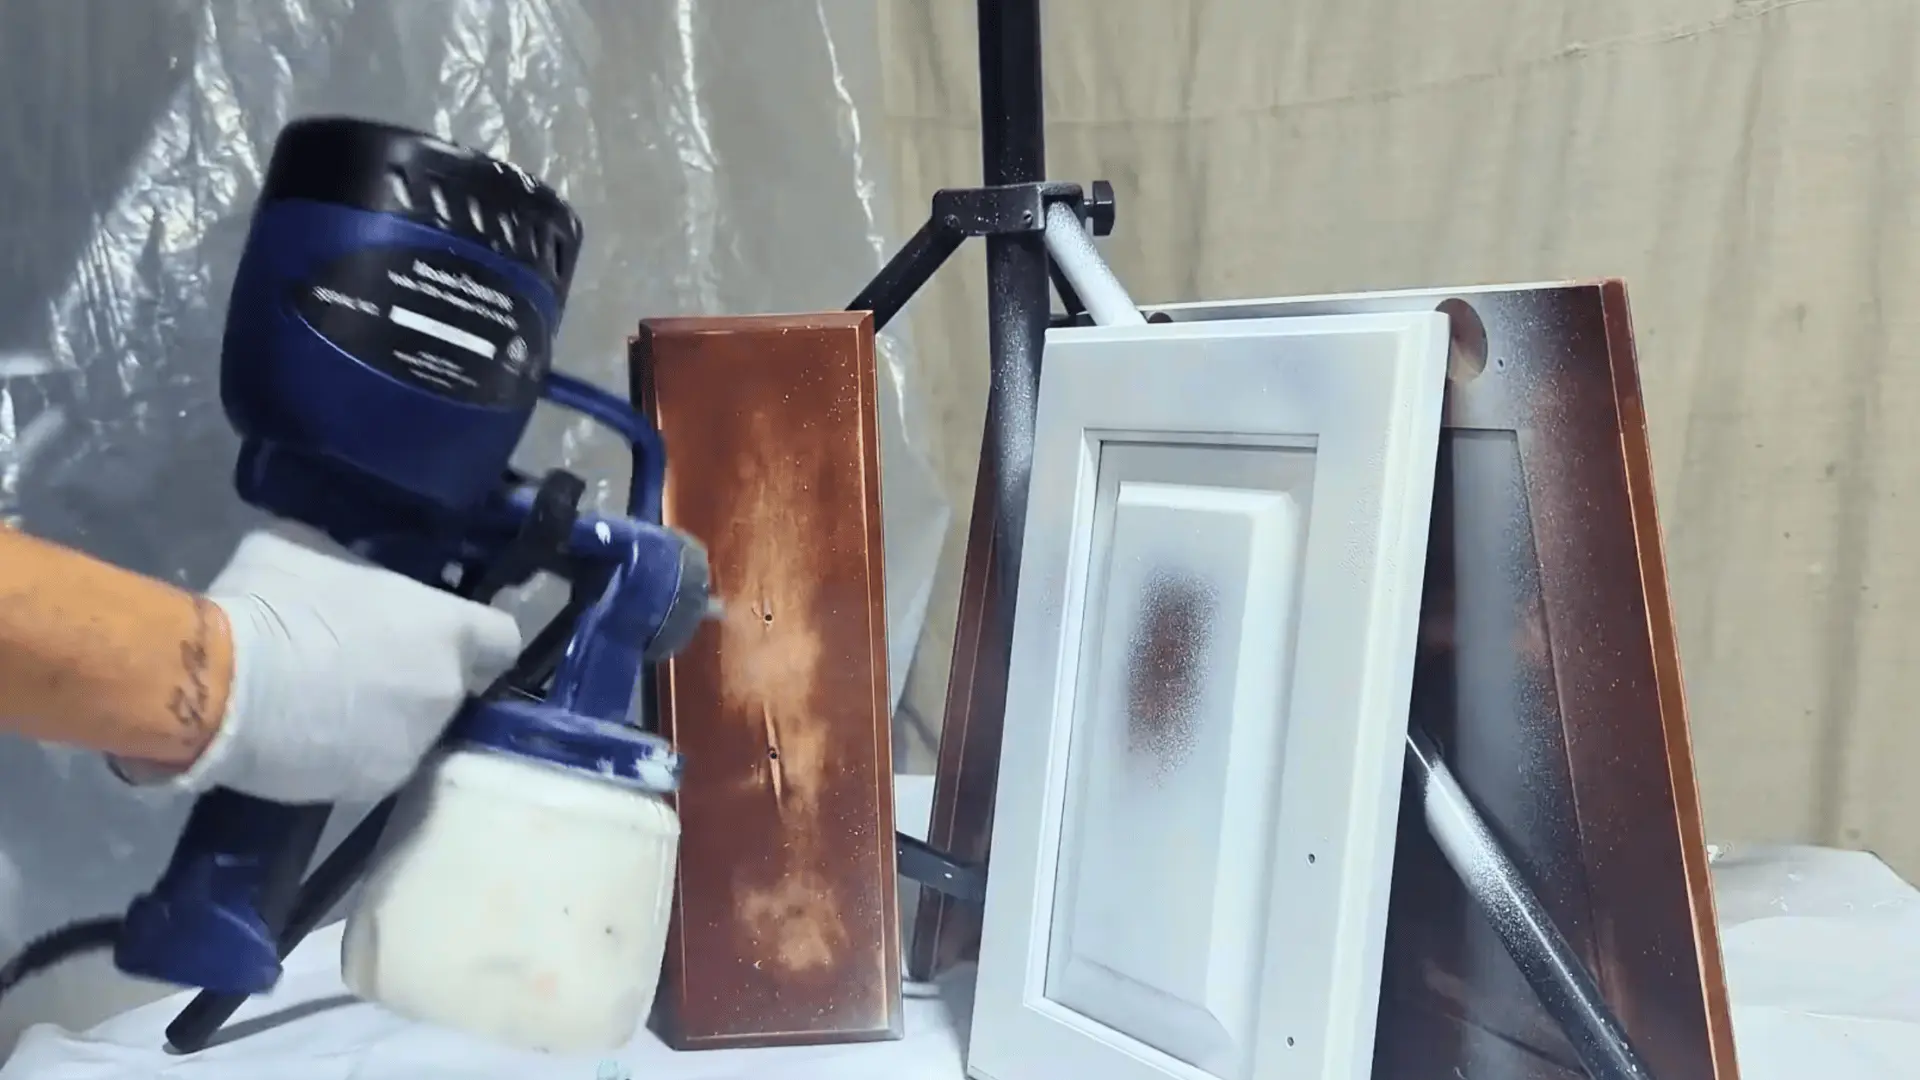
Cabinet-specific paint, enamel, chalk paint, or water-based lacquer all work well here. Start with a roller or brush, and if the finish looks uneven or bubbly, a paint sprayer for the second coat makes a noticeable difference.
Always strain your paint before loading it into a sprayer to avoid clogs and keep the finish clean.
Step 5: Reassemble and Reveal
Once the paint is fully cured, reattach all the hardware using your labeled containers to put everything back exactly where it belongs.
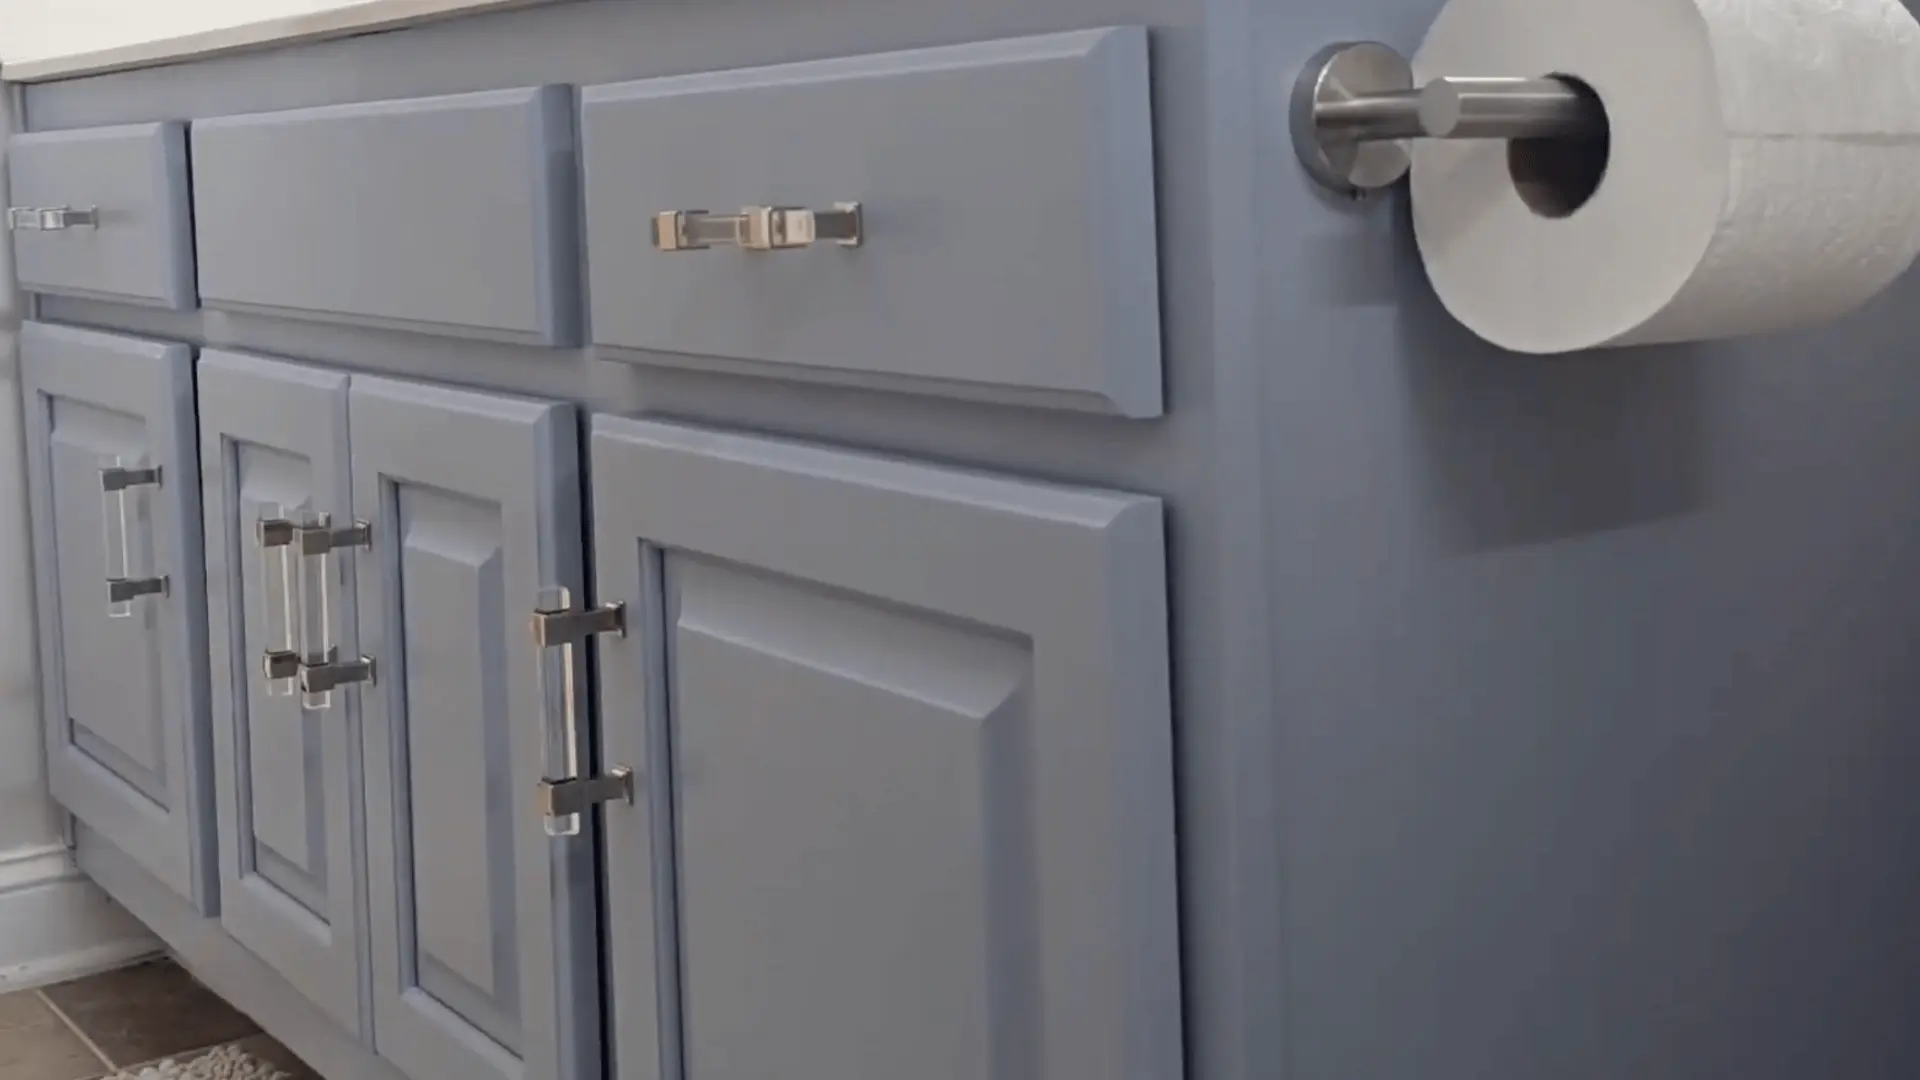
Switch out old knobs for something fresh if you want to take the look even further. At this point, your vanity is basically unrecognizable in the best way possible.
For a more detailed walkthrough of the process, check out the complete video tutorial below by The Broken Masterpiece.
Best Techniques for a Professional Finish
The tools you use matter just as much as the paint itself.
Here’s a quick breakdown to help you choose the right technique and get the smoothest result possible.
| Technique | Best For | Pro | Con |
|---|---|---|---|
| Brush | Edges and detailed areas | Great control, reaches tight spots | Can leave brush marks if not applied carefully |
| Foam Roller | Flat cabinet surfaces | Smooth, even coverage | Cannot reach corners or curves |
| Paint Sprayer | Full cabinet finish | Most professional, streak-free result | Requires prep, straining, and masking surroundings |
To avoid brush marks: always use high-quality brushes, apply thin coats, and sand lightly between each layer. That last step is what really separates a smooth, flawless finish from one that looks uneven up close.
How to Refinish Bathroom Vanity for Long-Lasting Results?
A beautiful finish means nothing if it starts peeling within a year.
Once your paint is fully cured, consider applying a protective topcoat for an extra layer of durability, especially on high-contact areas like drawer fronts and doors.
Bathrooms are humid by nature, so choosing a moisture and humidity-resistant finish from the start is what actually makes it last. Wipe down surfaces regularly and avoid letting water sit on the wood.
A little care after the fact goes a long way in keeping that fresh look intact.
Color Ideas for Bathroom Vanities
Choosing the right color can completely change the mood of your bathroom.
Here are some popular directions to inspire your next pick:
| Style | Color Ideas | Best For |
|---|---|---|
| Classic and Neutral | White, cream, soft gray, warm beige | Small bathrooms, timeless looks, resale value |
| Bold and Statement | Navy, forest green, black, terracotta | Accent vanities, larger bathrooms, personality-driven spaces |
| Modern Two-Tone | White upper with navy lower, gray with black accents | Contemporary homes, adding visual depth and dimension |
Maintenance Tips After Painting
Protecting your finish is just as important as getting it right in the first place. Keep these simple habits in mind:
- Stick to gentle, non-abrasive cleaners for everyday wiping down.
- Avoid scrubbing pads or anything rough that can scratch the surface.
- Dry off any water splashes quickly to prevent moisture from settling in.
- Let the paint fully cure before heavy use, usually a few weeks.
- Touch up small chips early before they spread into bigger problem areas.
A little consistency with upkeep keeps your vanity looking freshly painted for years to come.
Wrapping Up
Painting your bathroom vanity is one of those projects that genuinely surprises you, not just with how approachable it is, but with how much it alters the entire space.
From picking the right paint to nailing the finish, every step is completely doable and the results speak for themselves.
Your bathroom deserves a little love, and sometimes all it takes is a weekend and the right inspiration to get there.
Tried this project yourself or planning to? Drop your experience, questions, or color choices in the comments below because there is nothing better than seeing a good before and after.