Bathroom cabinets take more abuse than most people realize. Every day, they deal with steam from hot showers, water splashes, toothpaste smears, lotion residue, and constant opening and closing.
My cabinets were starting to look dingy and outdated, and I knew a fresh coat of paint could completely change the feel of the space, but only if I did it right.
A painted vanity can look clean and high-end, but the finish only lasts if the prep, primer, paint, and cure time are handled correctly. A rushed job might look fine for a few weeks before it starts peeling, chipping, or going sticky near the hinges.
I bring everything you need to know: the right paint, tools, prep work, a step-by-step process, common mistakes, maintenance, and color ideas so your cabinets come out looking like a professional did them.
What to Know Before Painting Bathroom Cabinets
Painting bathroom cabinets is different from painting walls. Walls sit in the open air and are rarely touched, wiped down with cleaners, or handled dozens of times a day.
Cabinets do all of that while sitting in a humid room where temperature and moisture levels shift every time someone showers. That means the finish needs to be tougher than standard wall paint, and the surface has to be genuinely clean and prepped before any product goes on.
Paint does not bond well to soap residue, grease, or glossy old finishes. The goal is not just to change the color, but to get the paint to grip, harden, and stay intact through years of daily use.
This is a beginner-friendly project, but it is not quick. A smooth, lasting result depends on thin coats, patience between steps, and not rushing the cure time at the end.
Best Paint for Bathroom Cabinets
The paint you choose matters more for cabinets than almost any other surface in your home. Bathroom cabinets get touched, wiped, and exposed to humidity every single day, so regular wall paint will not hold up.
| Paint Type | Best For | Notes |
|---|---|---|
| Acrylic enamel | Beginners and low-odor projects | Easy cleanup and good durability |
| Alkyd enamel | Harder, furniture-like finish | Strong finish, but needs better ventilation |
| Urethane alkyd enamel | Bathrooms with frequent use | Durable, smooth, and commonly used for cabinets |
| Cabinet, door, and trim enamel | Most DIY vanity projects | Better choice than regular wall paint |
For sheen, both satin and semi-gloss work well on bathroom cabinets. Satin gives a softer, slightly muted look, while semi-gloss is easier to wipe clean in a busy bathroom and shows fewer fingerprints over time.
Tools and Materials You’ll Need
Before you start, gather everything so you don’t have to stop mid-project to run to the hardware store.
Tools
- Screwdriver or drill
- Painter’s tape
- Drop cloth
- Degreaser or TSP substitute
- Microfiber cloths
- Wood filler
- Putty knife
- 150-grit sandpaper
- 220-grit sandpaper
- Vacuum
- Angled brush
- Small foam or microfiber roller
- Paint tray
Materials
- Bonding or stain-blocking primer
- Cabinet-grade paint
- Caulk, if needed
- New knobs or pulls, optional
- Spray paint for hardware, optional
Basic tools are enough for most vanities. The most important part is using cabinet-grade paint and primer, not whatever wall paint is already in your garage.
How to Paint Bathroom Cabinets Step by Step
Are you confused as to how do you paint bathroom cabinets? This section walks through the full process in order. Each step builds on the last, so skipping ahead or combining steps tends to show up in the final result.
Step 1: Remove and Clean the Cabinet Parts
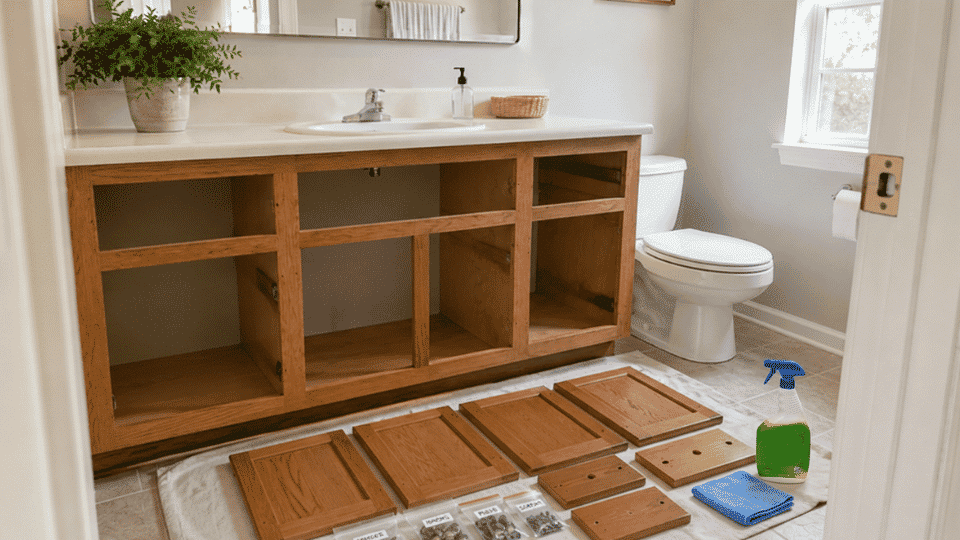
Take off the cabinet doors, drawers, hinges, knobs, and pulls. Keep screws and hardware in labeled bags so reassembly is easier later.
Wipe the cabinet frame, doors, and drawer fronts with a degreaser or TSP substitute. Remove soap residue, oils, toothpaste, dust, and old cleaner buildup.
This gives you clean, open access to every surface and helps the primer bond properly. Let everything dry completely before filling, sanding, or priming.
Step 2: Fill the Damage and Sand the Surface
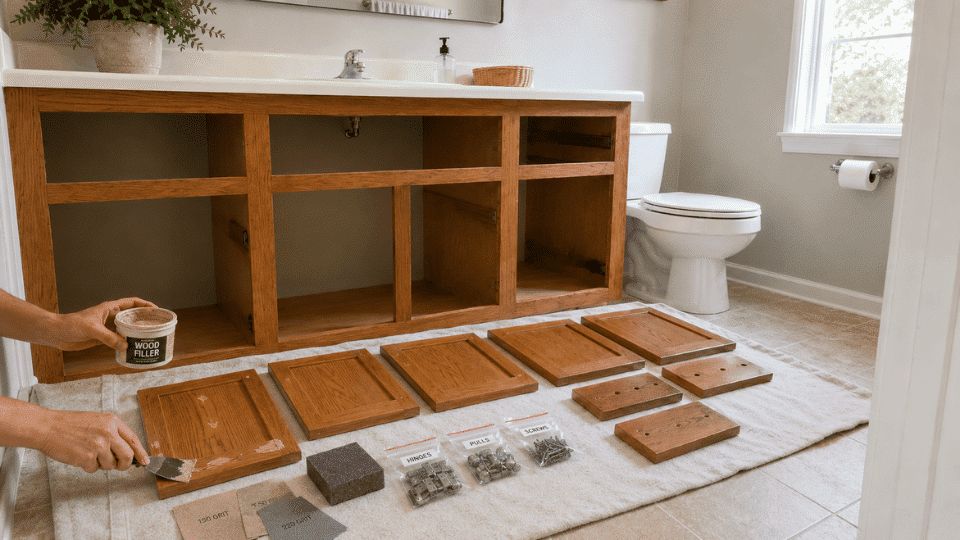
Fill dents, scratches, and old hardware holes with wood filler. Once dry, sand glossy areas with 150-grit to rough up the surface, then smooth everything with 220-grit for a cleaner base.
Sanding is not about stripping the finish down to bare wood; it is about dulling the sheen so primer has something to grip. Pay extra attention to edges and corners, where old paint tends to accumulate.
Step 4: Remove Dust Completely
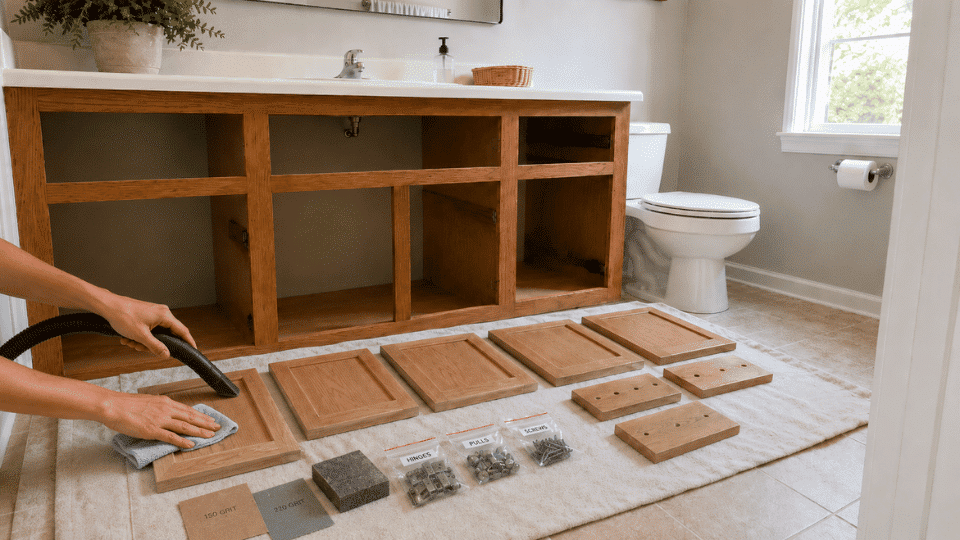
Vacuum the cabinet and the surrounding area to clear sanding debris. Wipe every surface with a damp microfiber cloth to pick up fine dust the vacuum misses.
Let everything dry fully before applying primer. Dust particles left on the surface get trapped under primer and show through the final coat as texture, which is hard to fix without starting over.
Step 5: Apply Primer
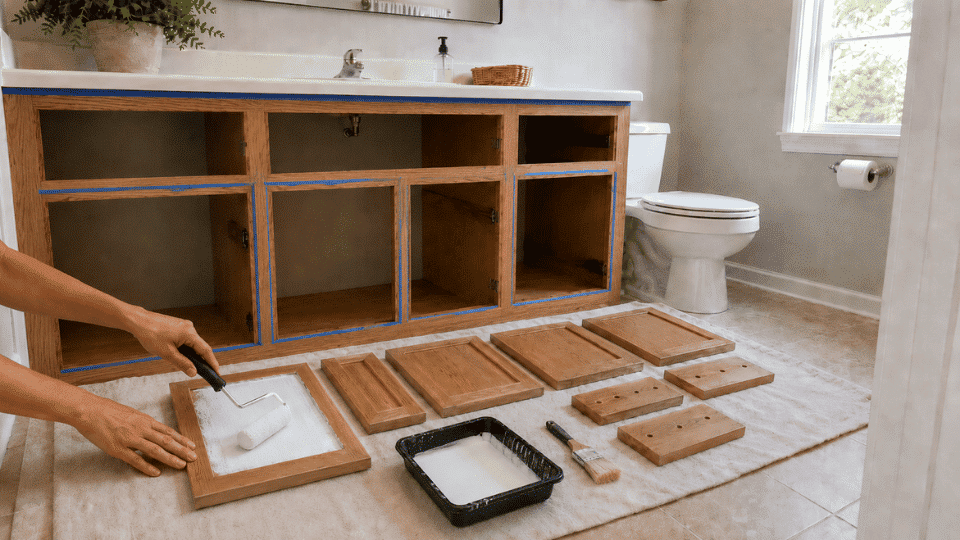
Use an angled brush to cut in corners, edges, and trim, then switch to a small roller for flat surfaces.
Apply one even coat and let it dry completely. Once dry, sand lightly with 220-grit to knock down any raised grain or texture, then wipe clean again before painting.
Using a bonding or stain-blocking primer is essential in a bathroom because it creates the adhesion layer that keeps the paint from peeling in humid conditions.
Step 6: Apply the First Coat of Paint
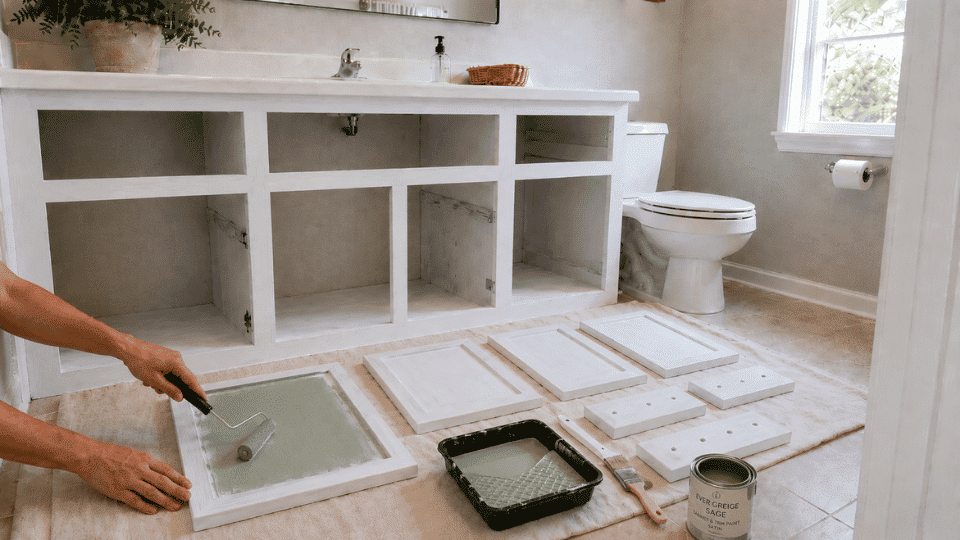
Brush detailed areas first, then roll the flat sections using long, even strokes. Keep the coat thin and even to avoid drips, texture, and slow drying.
A thin coat also helps the paint cure more reliably than a single thick one. If you notice any drips or runs, smooth them out while the paint is still wet; do not try to fix them after they have dried.
Step 7: Apply the Second Coat
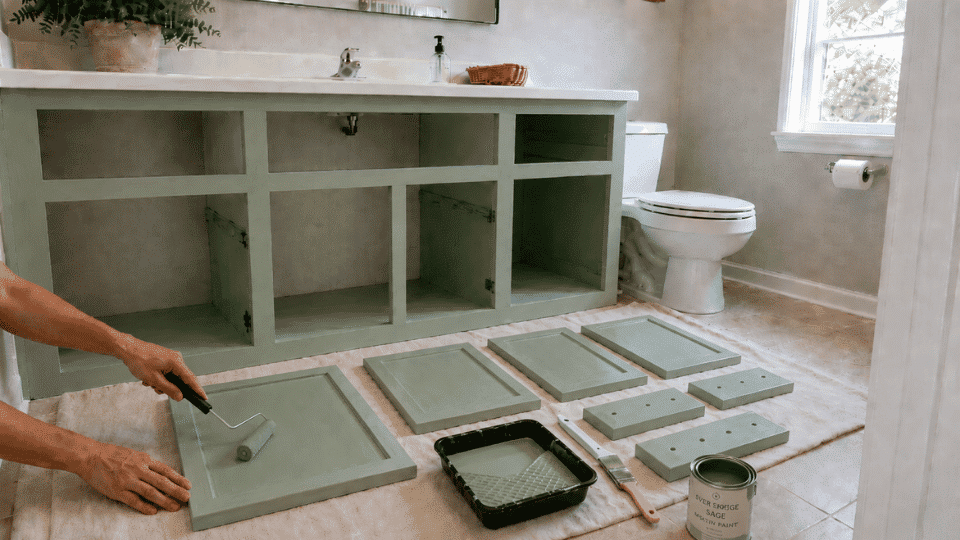
Once the first coat is dry, sand lightly with 220-grit and wipe the surface clean. Apply a second thin coat using the same brush-then-roll approach.
The second coat builds color depth, fills any uneven spots from the first pass, and creates a more durable surface overall.
Most cabinet-grade paints reach their full appearance and hardness after two coats, though some deeper colors may benefit from a third coat.
Step 8: Let the Paint Cure
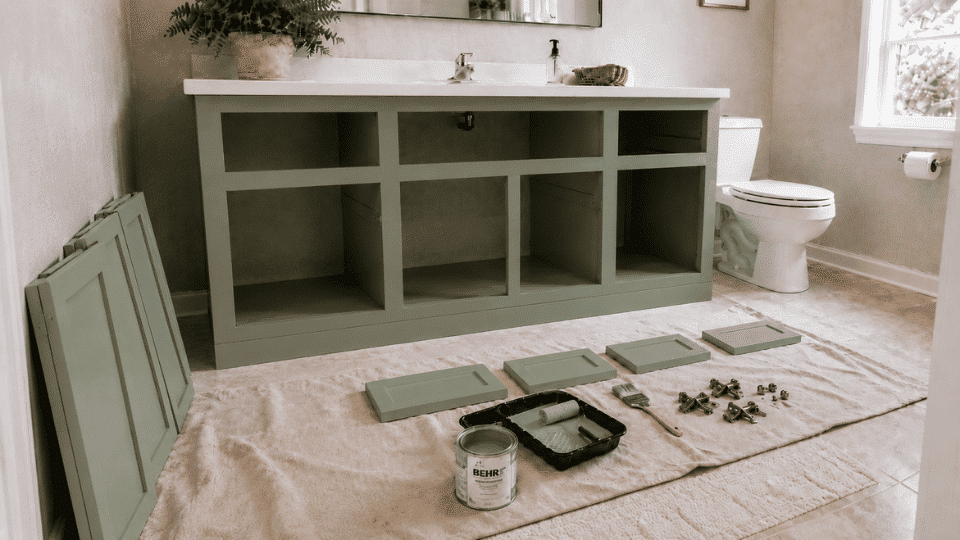
Wait until the paint has hardened enough for handling before putting anything back in place. Cabinet paint can feel dry within hours, but full cure time usually takes several days.
Rushing this stage can damage the finish before the project is even done. Letting the paint cure properly helps prevent chips, dents, and sticking once the doors and drawers go back on.
Step 9: Reassemble the Cabinet
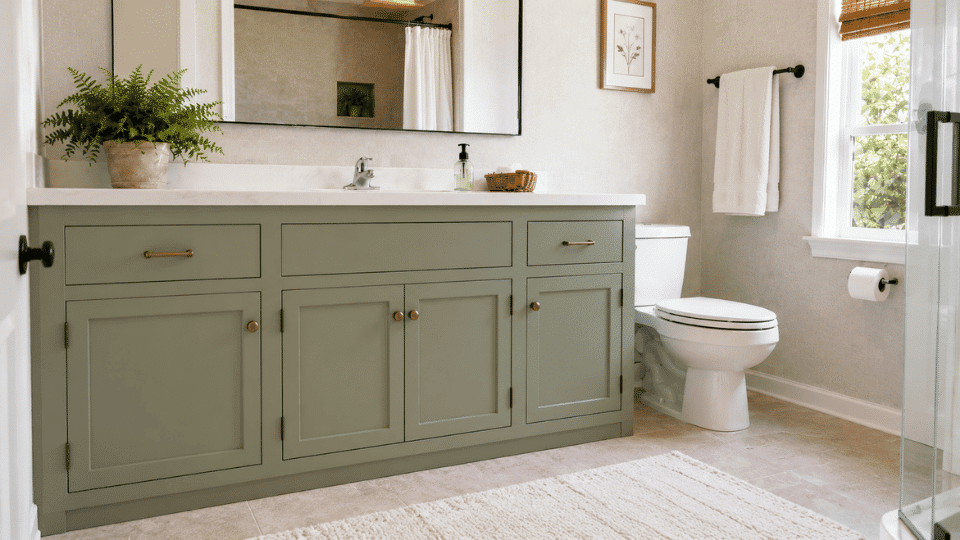
Once the paint has fully cured, reattach the doors, drawers, hinges, knobs, and pulls. Check alignment as you go so the doors open smoothly, and the finish stays protected.
Putting everything back carefully is the final part of the project. A slow reassembly helps avoid scratching the fresh paint and leaves the vanity looking clean, finished, and ready for daily use.
Bathroom Cabinet Paint Color Ideas
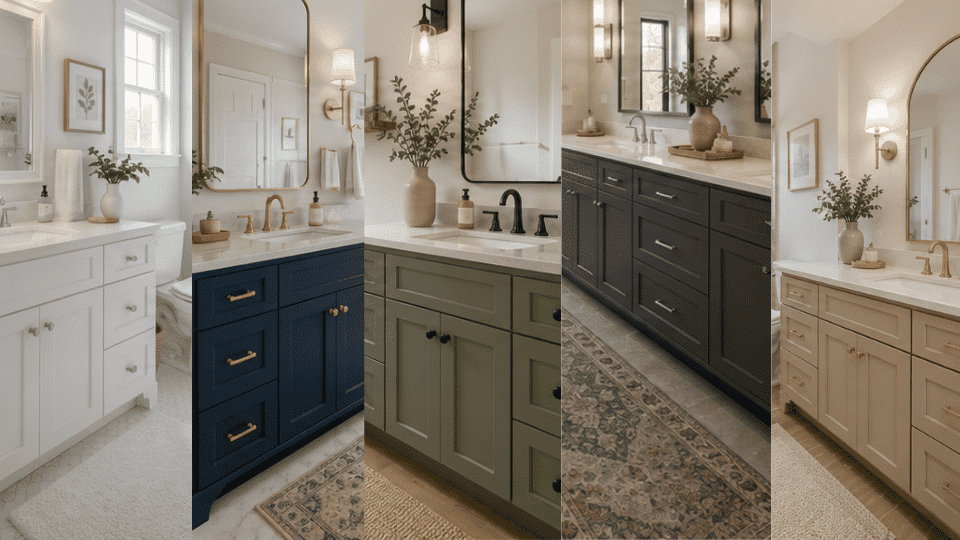
Choosing the right color is where many people get stuck. The process is done, the primer is on, and suddenly picking between navy and sage feels harder than the actual painting.
1. White
White is the most versatile cabinet color, making bathrooms brighter and more open without specific wall or tile choices. In small or dark bathrooms, white cabinets reflect limited light, preventing a closed-in feel.
They photograph well, which is beneficial if selling later. However, white shows grime and yellowing more visibly over time, needing more frequent touch-ups in busy bathrooms.
2. Navy
Navy offers a classic, tailored look that suits various styles. It’s bold without feeling trendy, so it won’t seem dated soon. Navy pairs well with white or light gray walls, gold or brushed brass hardware, creating a polished contrast. In small bathrooms, navy makes the space seem intimate and finished, especially with light surroundings.
3. Sage Green
Sage green balances neutral and color, appearing soft and natural. It pairs well with warm woods, white walls, and brushed-nickel or matte-black hardware.
Popular for years, it’s a timeless, earthy tone, unlikely to feel outdated. Ideal for those wanting more interest than gray but not bold.
4. Charcoal
Charcoal is a dark neutral that adds depth and weight to a vanity without being fully black. It pairs with most wall colors and gives the bathroom a grounded, finished look, unlike white or light cabinets.
It complements both warm and cool hardware tones, making it flexible if you’re unsure about metal finishes. In larger bathrooms, charcoal cabinets anchor the space, highlighting mirrors, lighting, and countertops.
5. Warm Beige or Greige
Beige and greige tones are underused in bathrooms, but are a strong choice now. They add warmth without seeming outdated, especially grays with gray undertones for a modern look.
They go well with wood floors, warm tiles, linen walls, and hardware. In warm bathrooms, greige cabinets offer a cohesive look, perfect for those who find white too stark and gray too cold.
Common Mistakes That Ruin Painted Bathroom Cabinets
Most cabinet paint failures come back to a small number of avoidable decisions made early in the process.
- Skipping the cleaning: Paint will not bond well over soap scum, lotion, toothpaste, or cleaner residue. Cleaning should happen before sanding, not after primer.
- Using regular wall paint: Wall paint is not made for surfaces that get opened, closed, and wiped down every day. Use cabinet, door, and trim enamel for better durability.
- Applying thick coats: Thick paint looks uneven, drips easily, and takes much longer to dry and cure. Thin coats create a smoother finish and are more reliable.
- Reassembling too soon: Paint can feel dry to the touch long before it has fully cured. Putting doors back on too early causes chips, dents, and sticky edges that are hard to fix cleanly.
How to Keep Painted Bathroom Cabinets Looking Good
Once the paint has cured, keeping the finish in good shape does not take much effort. A few simple habits go a long way.
- Wipe water splashes quickly rather than letting them sit and dry
- Use mild soap and a soft cloth for routine cleaning
- Avoid bleach, abrasive scrubbers, and harsh chemical cleaners
- Keep the bathroom ventilated so moisture does not build up on the cabinet surface
- Do not scrub freshly painted areas, even after the cure period
- Touch up chips and scratches as soon as you notice them, before moisture works its way underneath
- Tighten hardware gently and avoid over-torquing screws near painted edges
Bathroom cabinets need a gentler hand than tile, sinks, or countertops. The paint is durable, but it is not indestructible. The finish lasts longest when it is cleaned with soft cloths and mild products.
Frequently Asked Questions
What is the difference between paint drying and paint curing, and why does it matter for cabinets?
Drying and curing are different: drying happens when the surface no longer feels wet, usually within hours, while curing takes days or weeks for the paint to reach full hardness and durability.
For cabinets, this distinction is crucial because a surface that has dried but not cured can still dent, chip, or stick. Reinstalling doors on a dry but not cured surface is a common cause of damage to freshly painted cabinets.
Can I paint laminate bathroom cabinets, or does it only work on wood?
Laminate cabinets can be painted, but need careful prep. Since laminate is non-porous, paint tends to peel off on its own.
Light sanding and a bonding primer for slick surfaces ensure better adhesion. Without primer, the paint peels at the edges within months. After priming, painting is like that on wood cabinets.
Why do my painted cabinet doors look different than the cabinet frame?
Paint application varies by surface orientation. Cabinet doors are painted flat, while the frames are painted vertically, which affects paint behavior. Factors like sanding, coats, and drying time influence sheen and color. Light sanding and a uniform topcoat help match finishes.
Does the cabinet interior need to be painted, too?
Interior painting depends on visibility and condition. Many skip inside closed doors, focusing on external surfaces. If shelves are worn or discolored, paint inside to enhance cleanliness.
For open or glass cabinets, interior painting improves visual consistency. Use the same primer and paint as the exterior for durability.
Conclusion
Painting bathroom cabinets is one of the most budget-friendly ways to refresh a bathroom without replacing tile, countertops, or fixtures.
The finish holds up when you respect the process: clean the surface, sand it, prime it, apply thin coats, and give the paint enough time to cure before putting everything back together.
My experience is that prep and patience matter far more than the paint brand or the color.
Follow the steps, use a cabinet-grade enamel, and the result will last. Got questions about your cabinet material or color choice? Drop them in the comments, I’d love to help.