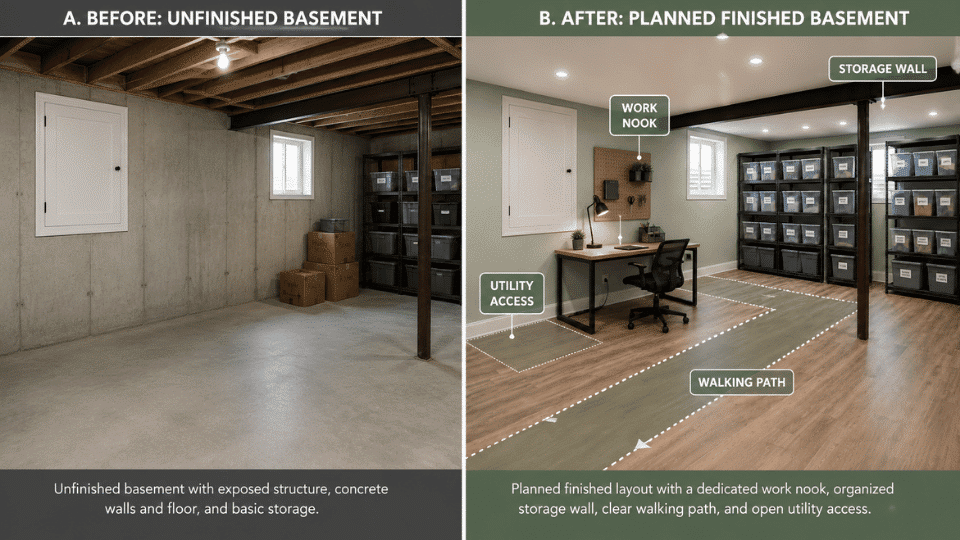
An unfinished basement can feel like wasted square footage, especially when it only holds boxes, tools, and things nobody wants to sort.
When I helped a friend plan a DIY basement finishing project, my first thought was simple: give the space a purpose before buying materials.
A full family room felt too much for the budget, but a storage room with a work nook felt useful and realistic.
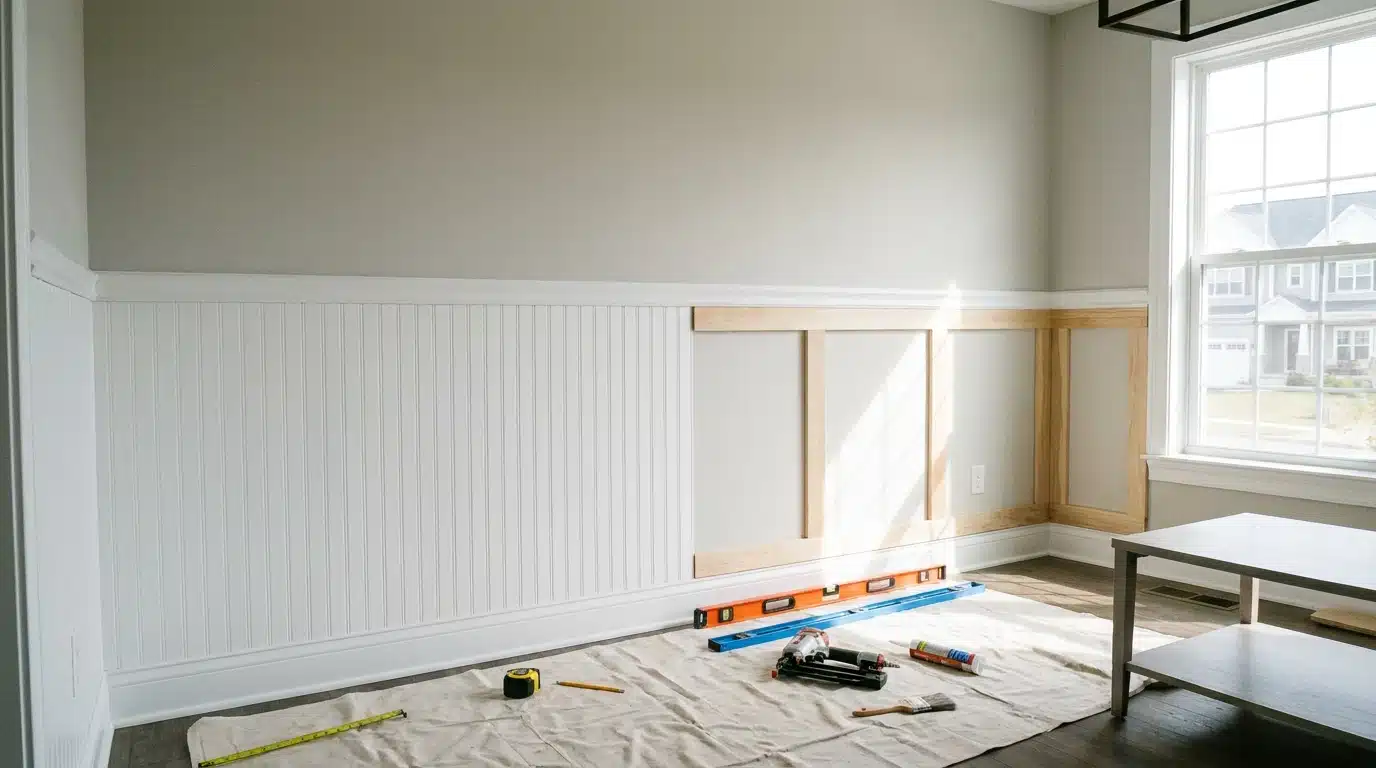
My favorite part of this plan is that it still uses real basement finishing ideas, like framing, insulation, drywall, lighting, and flooring, without turning the project into a luxury remodel.
Why This Basement Project Works
This basement project works because it gives the space a clear job. Instead of trying to finish the entire basement at once, the plan focuses on one useful zone.
One side becomes organized storage, and one corner becomes a simple work nook for paperwork, crafts, tools, or laptop work.
That makes the project easier to plan, price, and build in stages. It also keeps the basement practical, which matters because many basements still need access to utilities, shutoff valves, drains, and mechanical equipment.
Before starting, the basement should be dry, safe, and free from active leaks. The EPA says moisture control is the key to mold control, so water problems should be fixed before finishing begins. (US EPA)
Do not design this as a bedroom unless the space meets local egress and building-code rules. Basement sleeping rooms usually need proper emergency escape access. (ICC Safe)
Materials Required for This Basement Finishing
This list keeps the project realistic without naming every tiny fastener. Exact quantities depend on your basement size, layout, and local code requirements.
| Project Stage | Materials Needed |
|---|---|
| Demo and cleanup | Pry bar, hammer, utility knife, contractor bags, broom, shop vacuum, gloves, safety glasses, dust mask |
| Moisture check | Clear plastic sheet, painter’s tape, hygrometer, dehumidifier if needed |
| Subfloor | Basement-rated subfloor panels or approved underlayment, tape measure, saw, or utility knife |
| Insulation | Rigid foam board, compatible foam-board adhesive, seam tape, spray foam for gaps |
| Framing | Pressure-treated bottom plates, 2×4 studs, top plates, shims, framing nails or screws, and concrete fasteners |
| Electrical | Outlet boxes, switch boxes, wiring, outlets, switches, lighting, permits, or an electrician where required |
| Drywall | Drywall sheets, drywall screws, joint tape, joint compound, corner bead, sanding sponge |
| Paint and trim | Drywall primer, interior paint, roller, brush, tray, drop cloths, baseboards, trim, caulk |
| Flooring | Basement-friendly vinyl plank, carpet tiles, carpet, or another below-grade approved flooring |
| Storage and work nook | Freestanding shelves, clear bins, labels, desk, chair, task light, pegboard, or wall shelves |
The safest material choices are the ones that match your basement’s moisture level, code requirements, and intended use. A dry storage nook needs fewer upgrades than a finished family room.
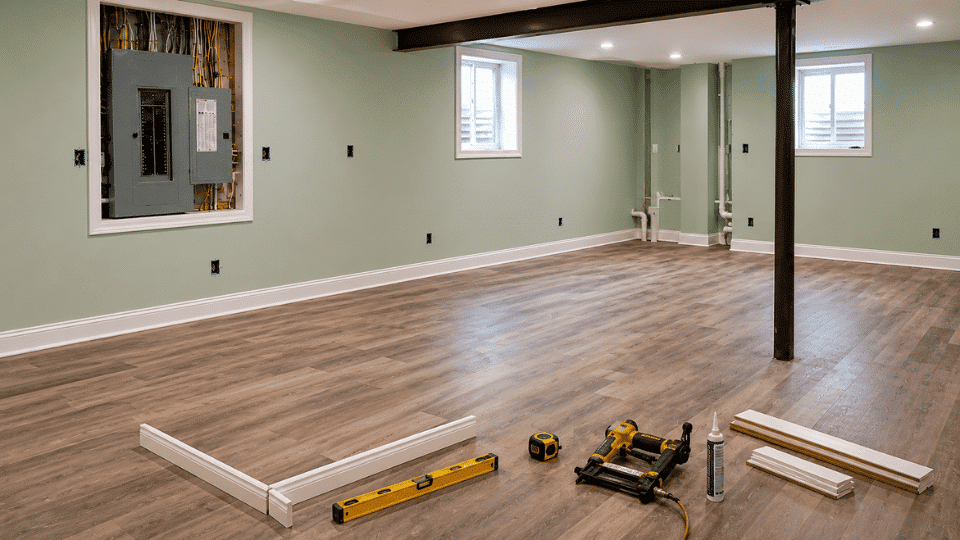
DIY Basement Finishing: Step-by-Step Storage Room & Work Nook
Before the basement looks finished, the build needs a clear order. These steps move from planning to final setup without skipping important basics.
Step 1: Plan the Layout Before You Touch Anything
- Choose one basement section for the storage wall and one nearby corner for the work nook.
- Measure the wall length, ceiling height, walking path, and available floor space before buying materials.
- Mark shelves, outlets, lighting, doors, and desk placement with painter’s tape on the floor.
- Keep access to panels, stairs, windows, valves, drains, and all mechanical equipment open.
Caution Tip: Do not design this as a bedroom unless it meets local egress and building-code rules.
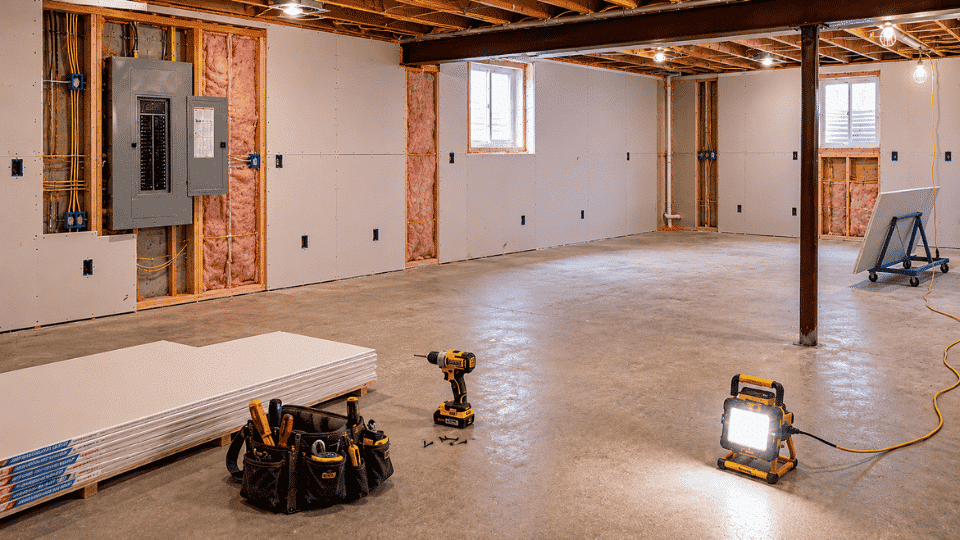
Step 2: Demolish and Clear the Existing Basement Area
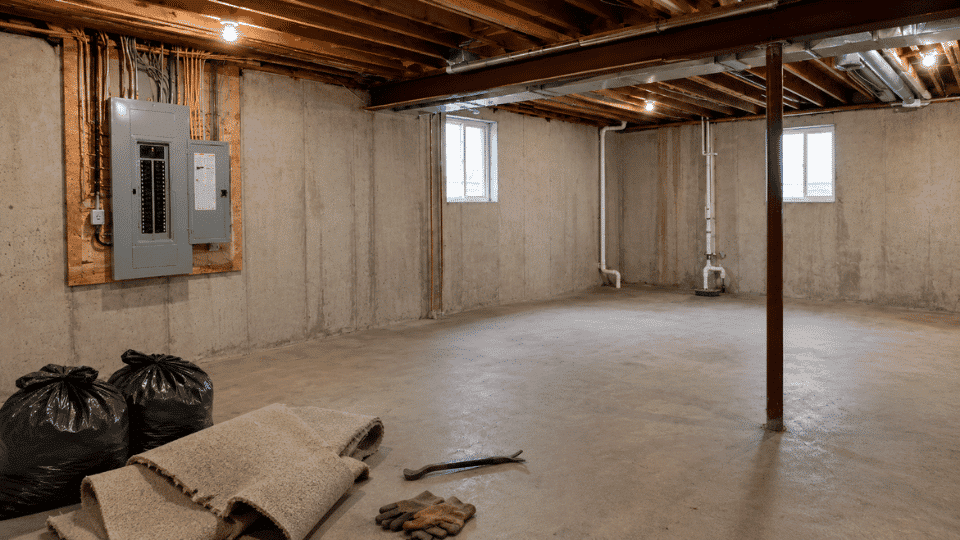
- Remove old shelves, loose paneling, damaged drywall, worn carpet, broken trim, and unwanted storage.
- Use a pry bar carefully, especially near pipes, outlets, stairs, windows, and existing framing.
- Cut old carpet or underlayment into smaller sections so cleanup feels easier and safer.
- Stop work if you find mold, rotten wood, unsafe wiring, active leaks, or foundation damage.
Caution Tip: Wear gloves, eye protection, and a dust mask during demolition, especially around old carpet or damaged materials.
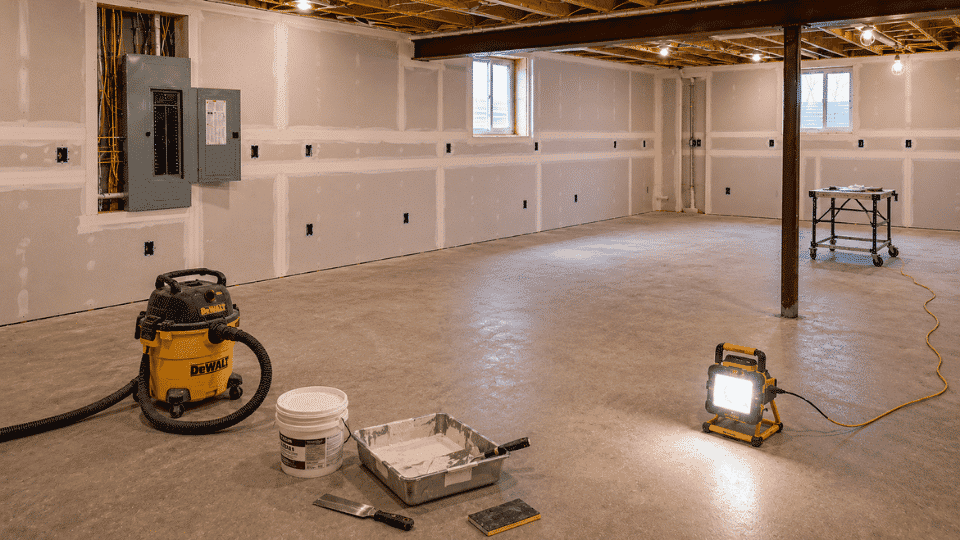
Step 3: Clean and Check for Moisture
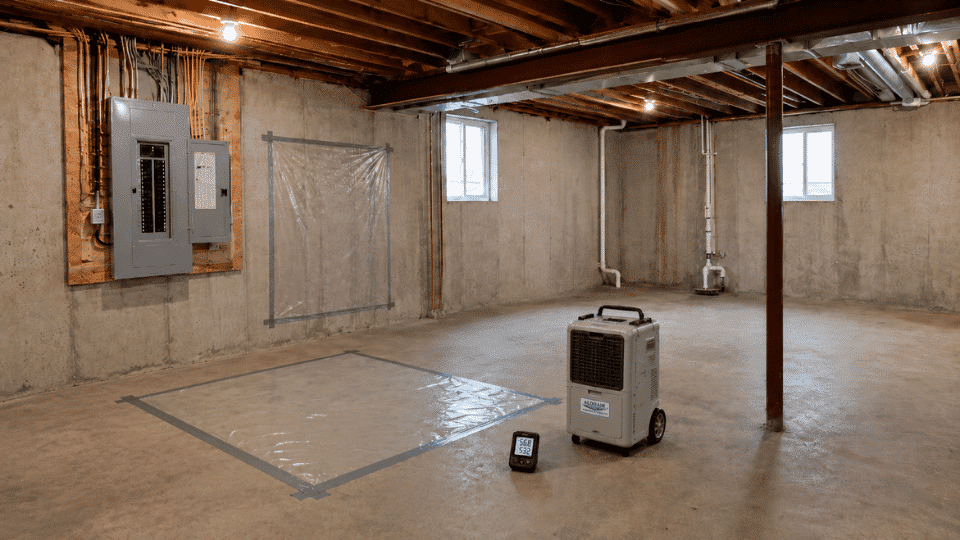
- Sweep and vacuum the floor, wall edges, corners, joists, and exposed concrete surfaces thoroughly.
- Wash dusty walls and floors with mild cleaner, then let the basement dry completely.
- Tape clear plastic to the concrete wall or floor and seal all four edges.
- Check it after 24 hours, and pause the project if moisture appears behind it.
Caution Tip: Do not cover damp concrete or mold with paint, insulation, flooring, or drywall.
Step 4: Install a Basement-Rated Subfloor
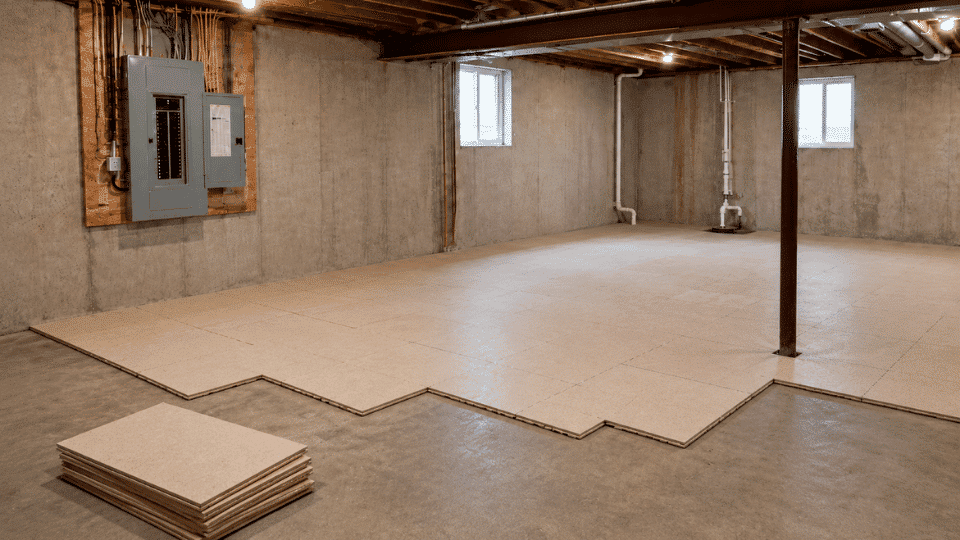
- Clean the slab again so dust and grit do not sit under the subfloor.
- Lay basement-rated subfloor panels or approved underlayment according to the product directions.
- Start in one corner and work across the room, keeping seams neat and tight.
- Cut panels around posts, corners, and doorways using the manufacturer’s recommended method.
Step 5: Insulate and Frame the Basement Walls
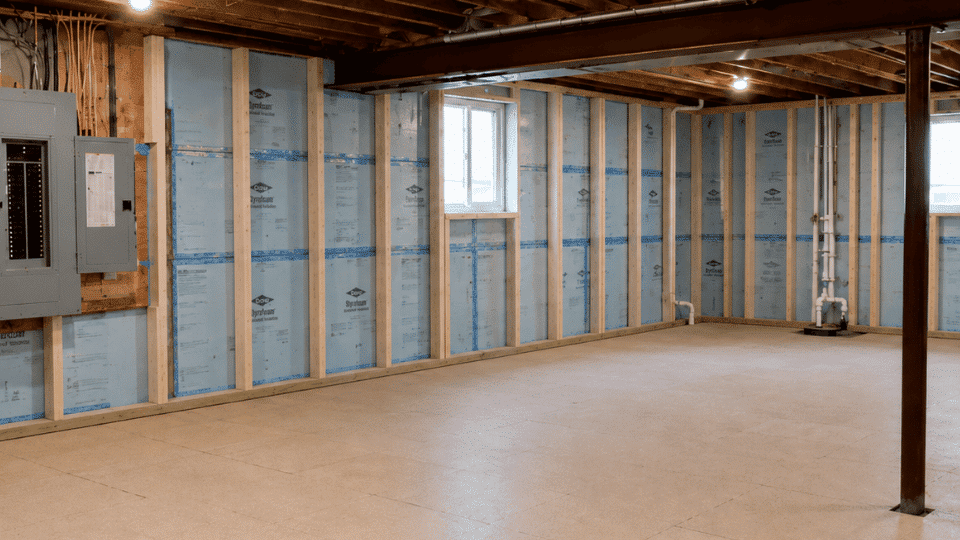
- Cut and attach rigid foam board to the concrete foundation walls.
- Tape the seams and seal small gaps around edges, pipes, and rim joists.
- Mark the wall line, then fasten pressure-treated bottom plates to the floor.
- Install top plates and vertical studs to frame around windows, doors, and utilities.
Caution Tip: Do not leave foam exposed unless code allows it, and keep utility access open.
Step 6: Rough In Electrical and Lighting
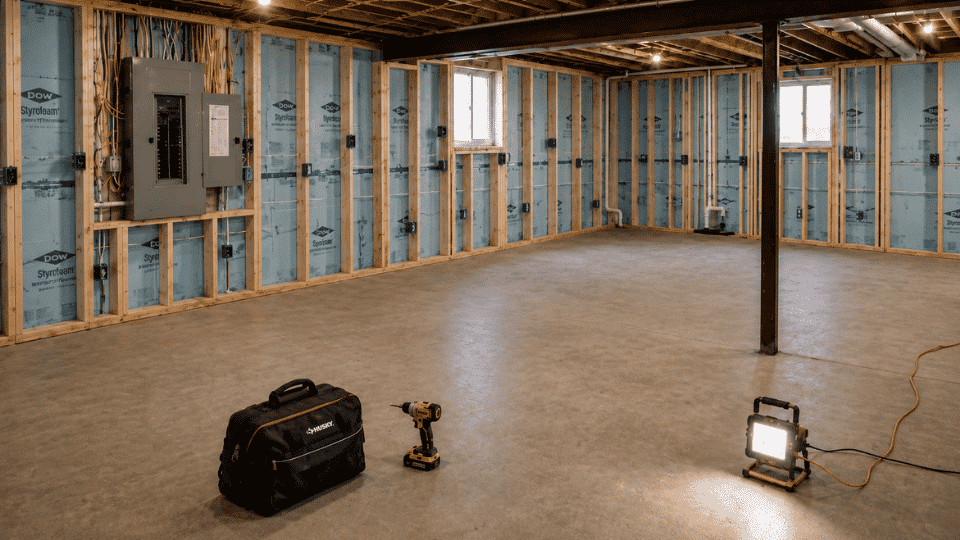
- Plan outlet, switch, and light locations before drywall covers the framed walls.
- Add enough power near the work nook for a lamp, laptop, charger, or small tool.
- Check local permit rules before adding new circuits, permanent lights, switches, or outlets.
- Hire a licensed electrician where code requires professional electrical work or panel changes.
Caution Tip: Do not treat panel work, new circuits, or permanent wiring as casual DIY.
Step 7: Add Cavity Insulation and Fire Blocking
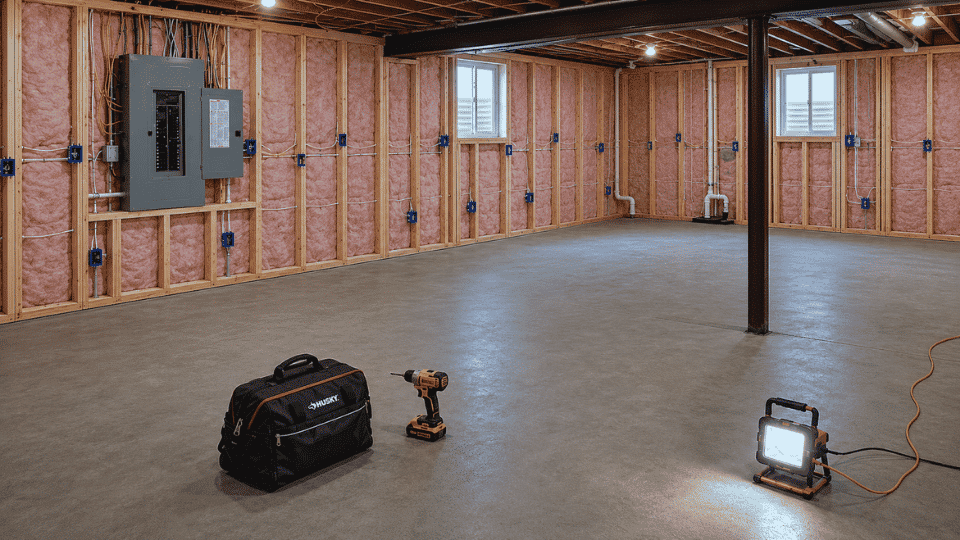
- Add required cavity insulation between studs after the rough electrical work is complete.
- Use the R-value required by your climate zone, local code, and insulation plan.
- Fit insulation neatly between studs without crushing, bunching, or leaving large empty gaps.
- Seal required wall and ceiling gaps with approved fire-blocking materials where required by code.
Caution Tip: Fire blocking and insulation rules vary by location, so check local code before closing walls.
Step 8: Hang Drywall on Walls and Ceiling
- Measure each framed section carefully before cutting drywall sheets to fit the wall.
- Lift each drywall sheet into place and fasten it to studs with drywall screws.
- Cut clean openings for outlets, switches, windows, doors, pipes, and utility access points.
- Use drywall or an accessible ceiling system, depending on future access for plumbing and wiring.
Step 9: Tape, Mud, Sand, and Prime
- Apply drywall tape over seams, corners, and joints where two drywall sheets meet.
- Cover tape, screw heads, and corner bead with a smooth layer of joint compound.
- Let the compound dry fully, then sand rough areas until the surface feels even.
- Add another thin coat where seams show, then sand again after it dries.
- Vacuum drywall dust before applying primer to the walls and ceiling.
Caution Tip: Wear a dust mask while sanding joint compound, and ventilate the basement as much as possible.
Step 10: Paint the Finished Basement Walls
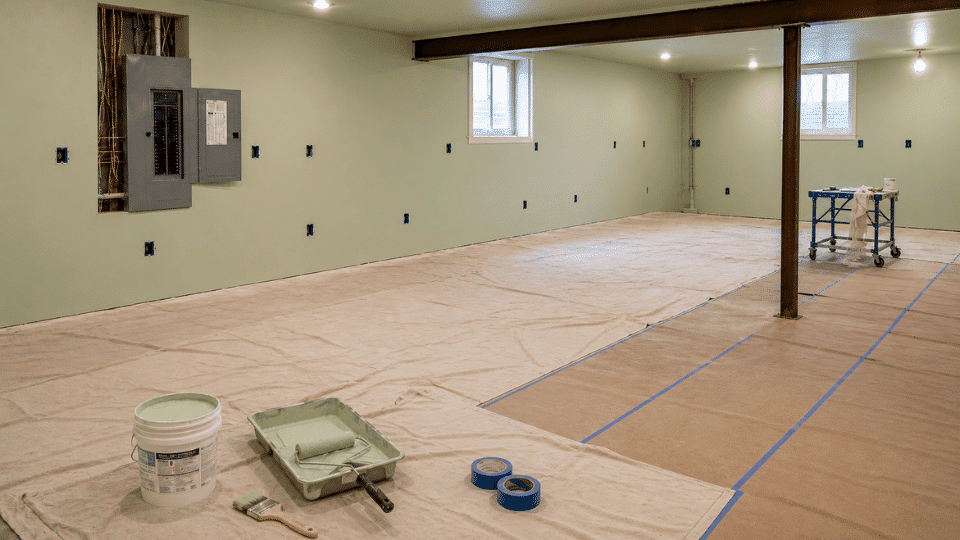
- Paint the ceiling first so drips do not ruin freshly painted basement walls.
- Use a brush for corners and edges, then roll the larger wall sections.
- Choose a light color like warm white, soft gray, beige, or soft greige.
- Let the paint dry fully before installing trim, flooring, doors, or storage pieces.
Step 11: Install Basement-Friendly Flooring
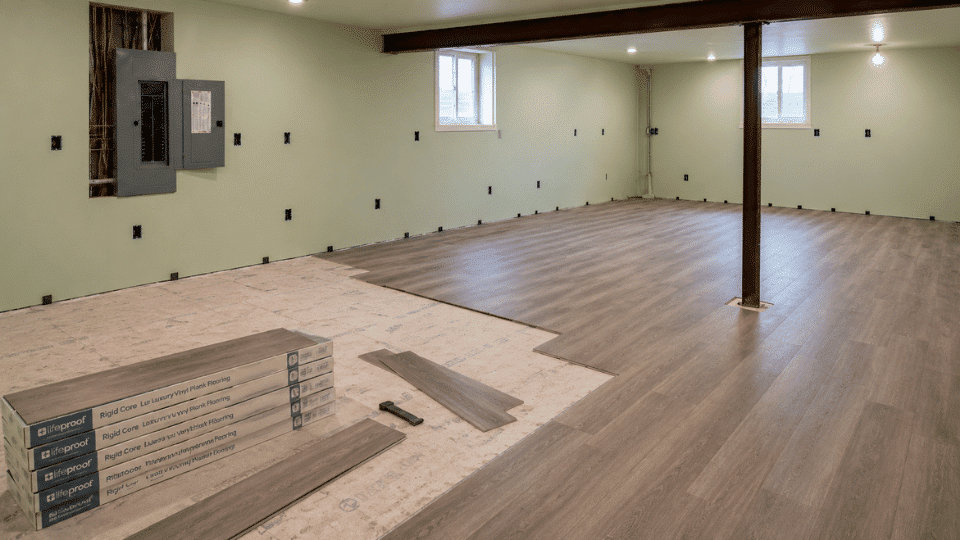
- Choose flooring approved for below-grade spaces, not just flooring that looks attractive.
- Check the product’s moisture limits, underlayment needs, and expansion-gap instructions before installation.
- Install flooring only after the basement is dry, painted, and ready for finish work.
- Use vinyl plank, carpet tiles, sealed concrete, or basement-rated carpet for better durability.
Caution Tip: Do not install flooring over damp concrete or ignore the product’s moisture limits.
Step 12: Install Trim, Doors, and Final Details
- Install interior doors for storage rooms, utility closets, or separated unfinished basement areas.
- Check each door for level, plumb, and square before fastening it fully.
- Add baseboards, door casing, and window trim after walls and flooring are finished.
- Caulk small trim gaps, then paint or touch up the trim after drying.
Step 13: Build the Storage Wall

- Place freestanding shelves along the finished wall, leaving utility access clear and reachable.
- Use clear bins and simple labels so stored items are easy to find.
- Put heavy bins on lower shelves and lighter seasonal items on higher shelves.
- Keep frequently used items at waist or chest height for easier access.
- Group items by category, such as tools, holiday decor, sports gear, and supplies.
Caution Tip: Do not overload shelves or store heavy bins overhead where they can fall.
Step 14: Set Up the Work Nook
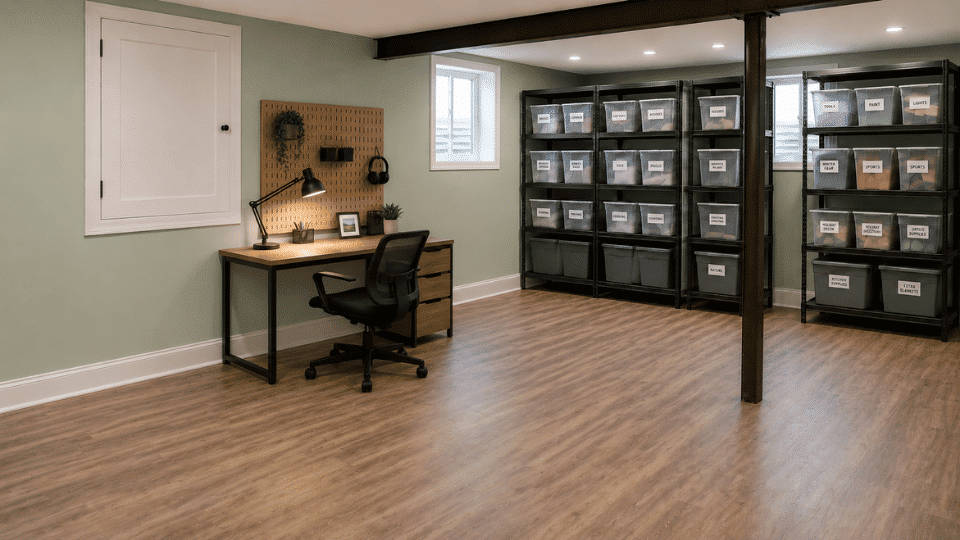
- Place a small desk or sturdy table in the planned corner of the basement.
- Add a chair, task lamp, and simple organizer for everyday supplies or paperwork.
- Keep cords against the wall so they do not cross the walking path.
- Mount pegboard or shelves only into studs or anchors rated for the wall type.
Caution Tip: A finished basement should look complete, but it should never make emergency access or maintenance harder.
3 Other Things You Could Do
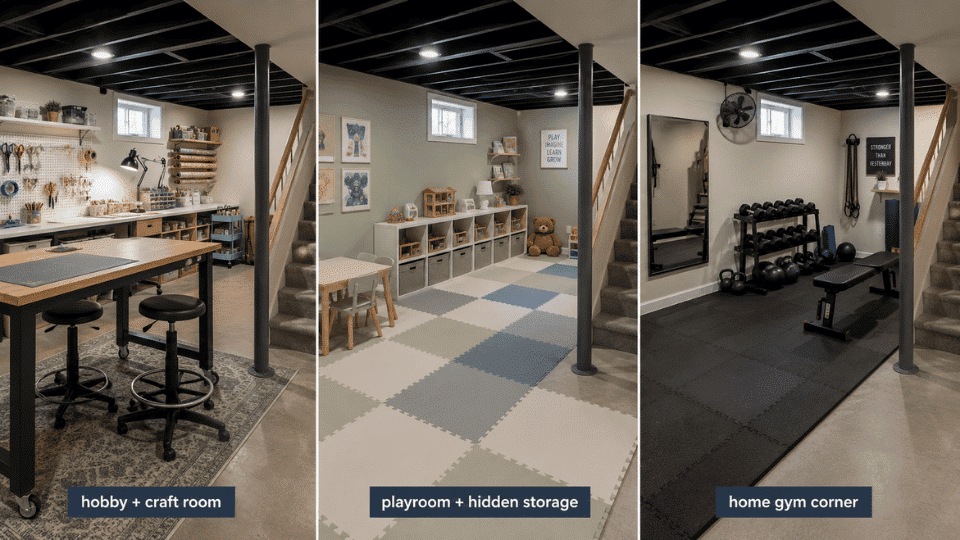
A storage room and work nook is not the only option. These three ideas still keep the basement practical while giving it a stronger purpose.
1. Create a hobby and craft room
Use one finished wall for shelves and another area for a large worktable. Add a pegboard for scissors, tape, tools, thread, paint, or wrapping supplies. This works well if the basement has decent lighting and enough storage.
2. Build a playroom with hidden storage
Use soft flooring, closed bins, low shelves, and washable paint. Keep open floor space in the middle so the room feels safe and flexible. Avoid sharp furniture and keep utility access separate.
3. Make a home gym corner
Use rubber flooring, wall mirrors, storage hooks, and a small fan. Keep equipment away from low ceilings, pipes, and mechanical areas. This works best in a dry basement with good ventilation.
Each idea should start with the same basic checks: moisture, safety, access, lighting, and flooring. A pretty basement still fails if it ignores those basics.
Common Mistakes to Avoid When Finishing a Basement
Basement finishing can go wrong when the visible work starts before the hidden issues are handled. These seven mistakes are worth calling out because they affect moisture, safety, code, and long-term comfort.
- Skipping the moisture check: Do not assume the basement is dry because it looks dry. Test the concrete, check humidity, and fix leaks before adding framing, insulation, drywall, or flooring.
- Covering mold instead of fixing it: Paint, caulk, drywall, or paneling will not solve mold. Find the moisture source first, then properly clean or remove affected materials.
- Using the wrong materials: Basements need materials that can handle below-grade conditions. Use pressure-treated lumber against concrete and choose flooring approved for basement use.
- Blocking utility access: Keep the electrical panel, furnace, water heater, sump pump, cleanouts, shutoff valves, and drains easily accessible after the basement is finished.
- Guessing on electrical work: Outlet and lighting placement can be planned early, but new circuits, panel work, and permanent wiring may need permits or a licensed electrician.
- Choosing insulation without a moisture plan: Basement walls are different from above-ground walls. Pick insulation that suits your climate, wall type, code rules, and condensation risk.
- Closing walls too early: Once drywall goes up, framing, wiring, insulation, and fire blocking are hidden. Take photos and complete required inspections before closing the walls.
A good basement finish should look clean, but it also needs to stay dry, safe, and serviceable. That is what makes the project last.
Frequently Asked Questions
How much space do I need for a basement work nook?
A small work nook can fit in a corner that holds a compact desk, chair, and task light. Aim for enough room to pull the chair out comfortably. The area should not block walkways, stairs, outlets, windows, or access to mechanical systems.
Can I finish only one part of my basement?
Yes, finishing one section is often more realistic than tackling the whole basement. You can frame, insulate, drywall, paint, and floor one planned zone first. Just make sure unfinished utility areas remain accessible and the finished section follows local code rules.
Should basement storage shelves be built-in or freestanding?
Freestanding shelves are usually better for a beginner project because they are easier to move, adjust, and replace. Built-ins can look cleaner, but they make future access harder. In basements, flexibility matters because utilities and moisture checks may still be needed.
What color works best for a finished basement?
Light colors usually work best because basements often have limited natural light. Warm white, soft gray, beige, and greige can make the room feel brighter. If the space feels cold, avoid stark white and choose a warmer neutral instead.
Do I need permits to finish a basement?
You may need permits for framing, electrical, plumbing, HVAC, egress changes, or turning the space into a habitable living area. Rules vary by location. Check with your local building department before starting, especially if you are adding walls, outlets, bedrooms, or bathrooms.
The Final Build
A DIY basement finishing project works best when the space has a clear purpose, and the hidden steps are handled properly.
For this build, the finished result is a dry, framed, insulated, painted basement with useful storage and a small work nook.
I like this approach because it feels realistic, not overdone. It also gives readers enough structure to understand what happens before the pretty final photos.
My biggest piece of advice is to prioritize moisture, code, and access before choosing colors or shelves. Save this plan, adapt it to your basement, and comment on the part you would tackle first.