Blank walls can feel unfinished, but filling them doesn’t need a big budget. With simple supplies and items you may already have, you can make personal wall art for far less.
Many projects use everyday materials like paper, paint, fabric scraps, or thrifted finds, so you won’t need to shop for anything expensive.
Below I have laid out the best budget-friendly DIY wall art ideas across styles, painted canvases, paper projects, fabric hangings, photo displays, upcycled decor, and geometric designs. Most are beginner-friendly, require no special tools, and can be done in an afternoon.
Need a large focal point, a renter-friendly piece, or a quick project for a small wall? You’ll find it below. Start with the at-a-glance list, then pick your favorite.
Find the Right DIY Wall Art for Your Space
Every wall is different, and so is every budget, skill level, and style. Want something bold above the sofa? Look at the large-scale and photo display ideas, since both work well as strong focal points in a larger room.
Renting and can’t drill holes? Stick to lightweight, no-damage options like paper, fabric, or clipboard displays, which come down just as easily as they go up.
Short on time? Several projects can be finished in an afternoon with basic supplies already sitting around the house.
If you’re weighing which upgrades matter most for a rental or a starter home, it helps to zoom out and think about wall decor as part of the bigger picture. Pairing a piece with a few of these cozy aesthetic room ideas can make the whole space feel warm and finished, not just the one wall.
Use the list below to browse by style, checking size, cost, and skill level as you go, then pick the one that actually fits your wall, your budget, and how much time you want to spend on it.
Painted & Abstract Canvas Art
Painted canvas projects are a simple way to fill a blank wall without paying for costly art. You can reuse an old canvas, work with a few paint colors, or use tape to direct your design. Most of these ideas are suitable for beginners and can be changed to match your room.
1. Thrifted Canvas & Primer Art
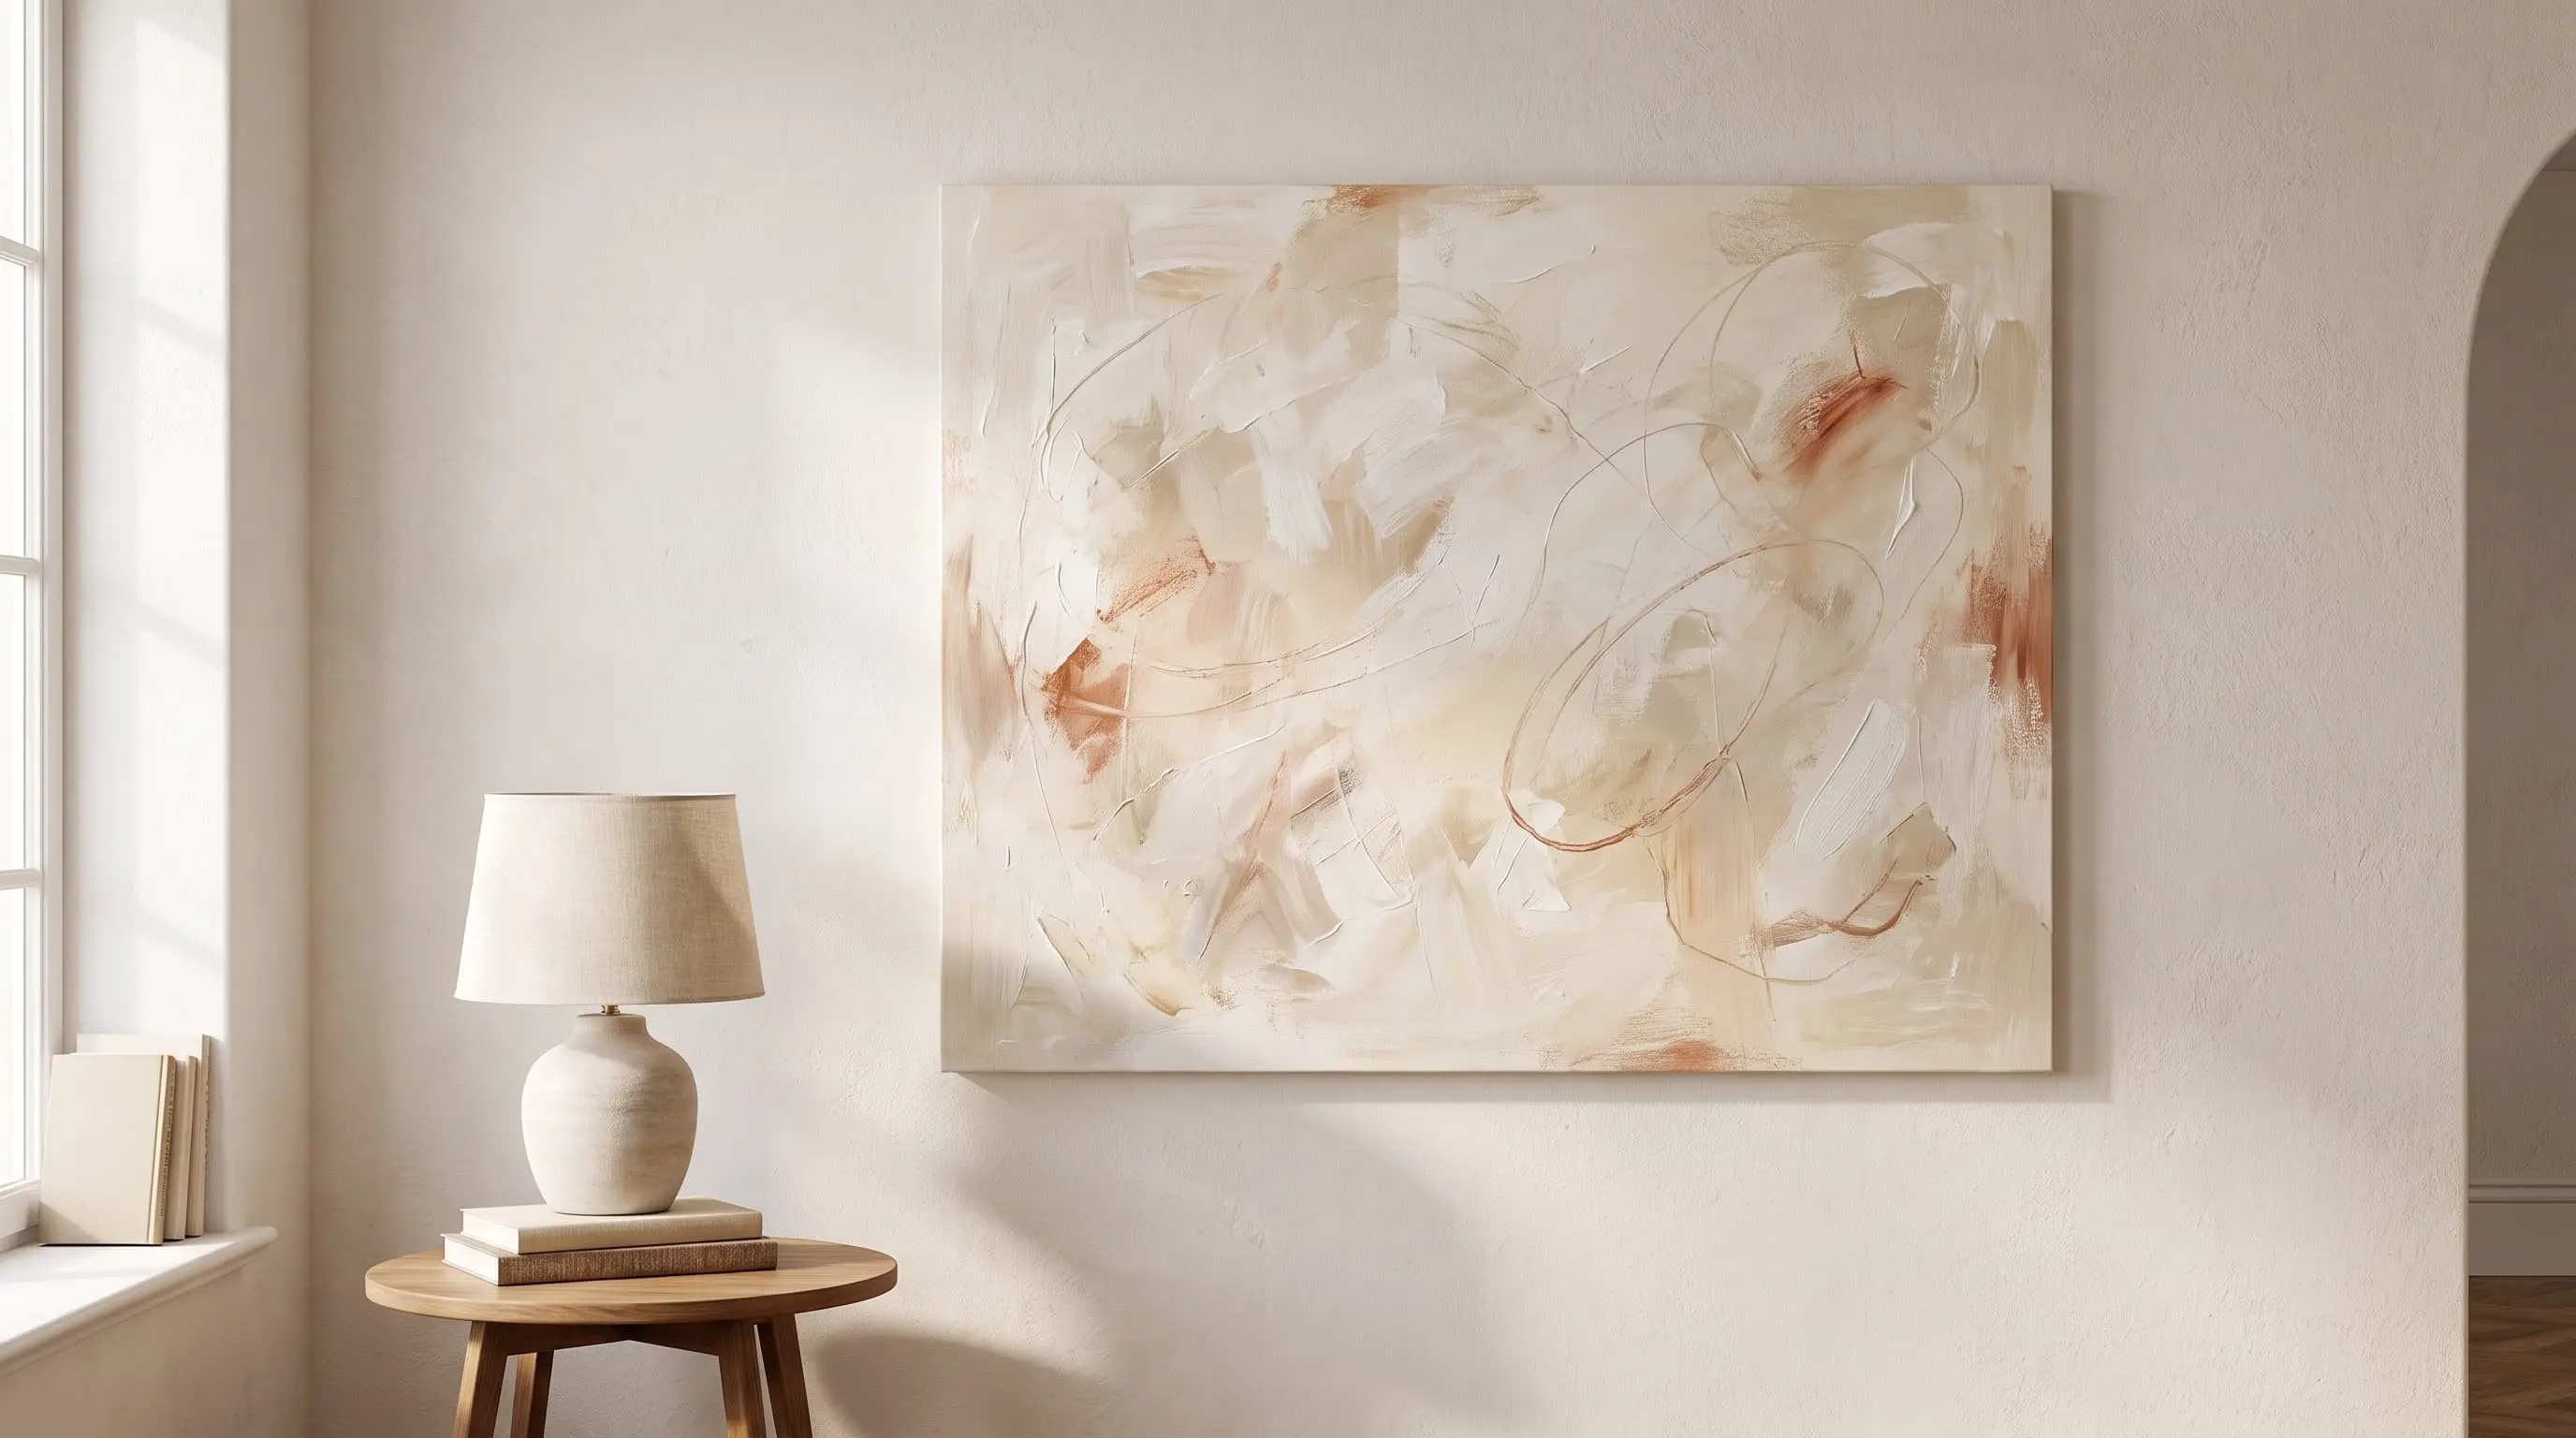
Give an old canvas a new use instead of buying new wall art. Cover the existing design with canvas primer, then paint simple lines, shapes, or brush marks that suit your room.
If the thrifted canvas or frame you’re reworking is old enough that its original paint layer is unknown, it’s worth a quick check of the EPA’s lead-safe renovation guidance before sanding down or priming over it.
| Cost | $10 to $15 |
| Skill level | Beginner- friendly |
| Material Required | Thrifted canvas, canvas primer, and paint. |
How to make it: Prime the canvas to cover the old design. Once dry, paint your own pattern on top – lines, shapes, or loose brush strokes work well. Let it dry fully before hanging.
2. Large-Scale Abstract Canvas
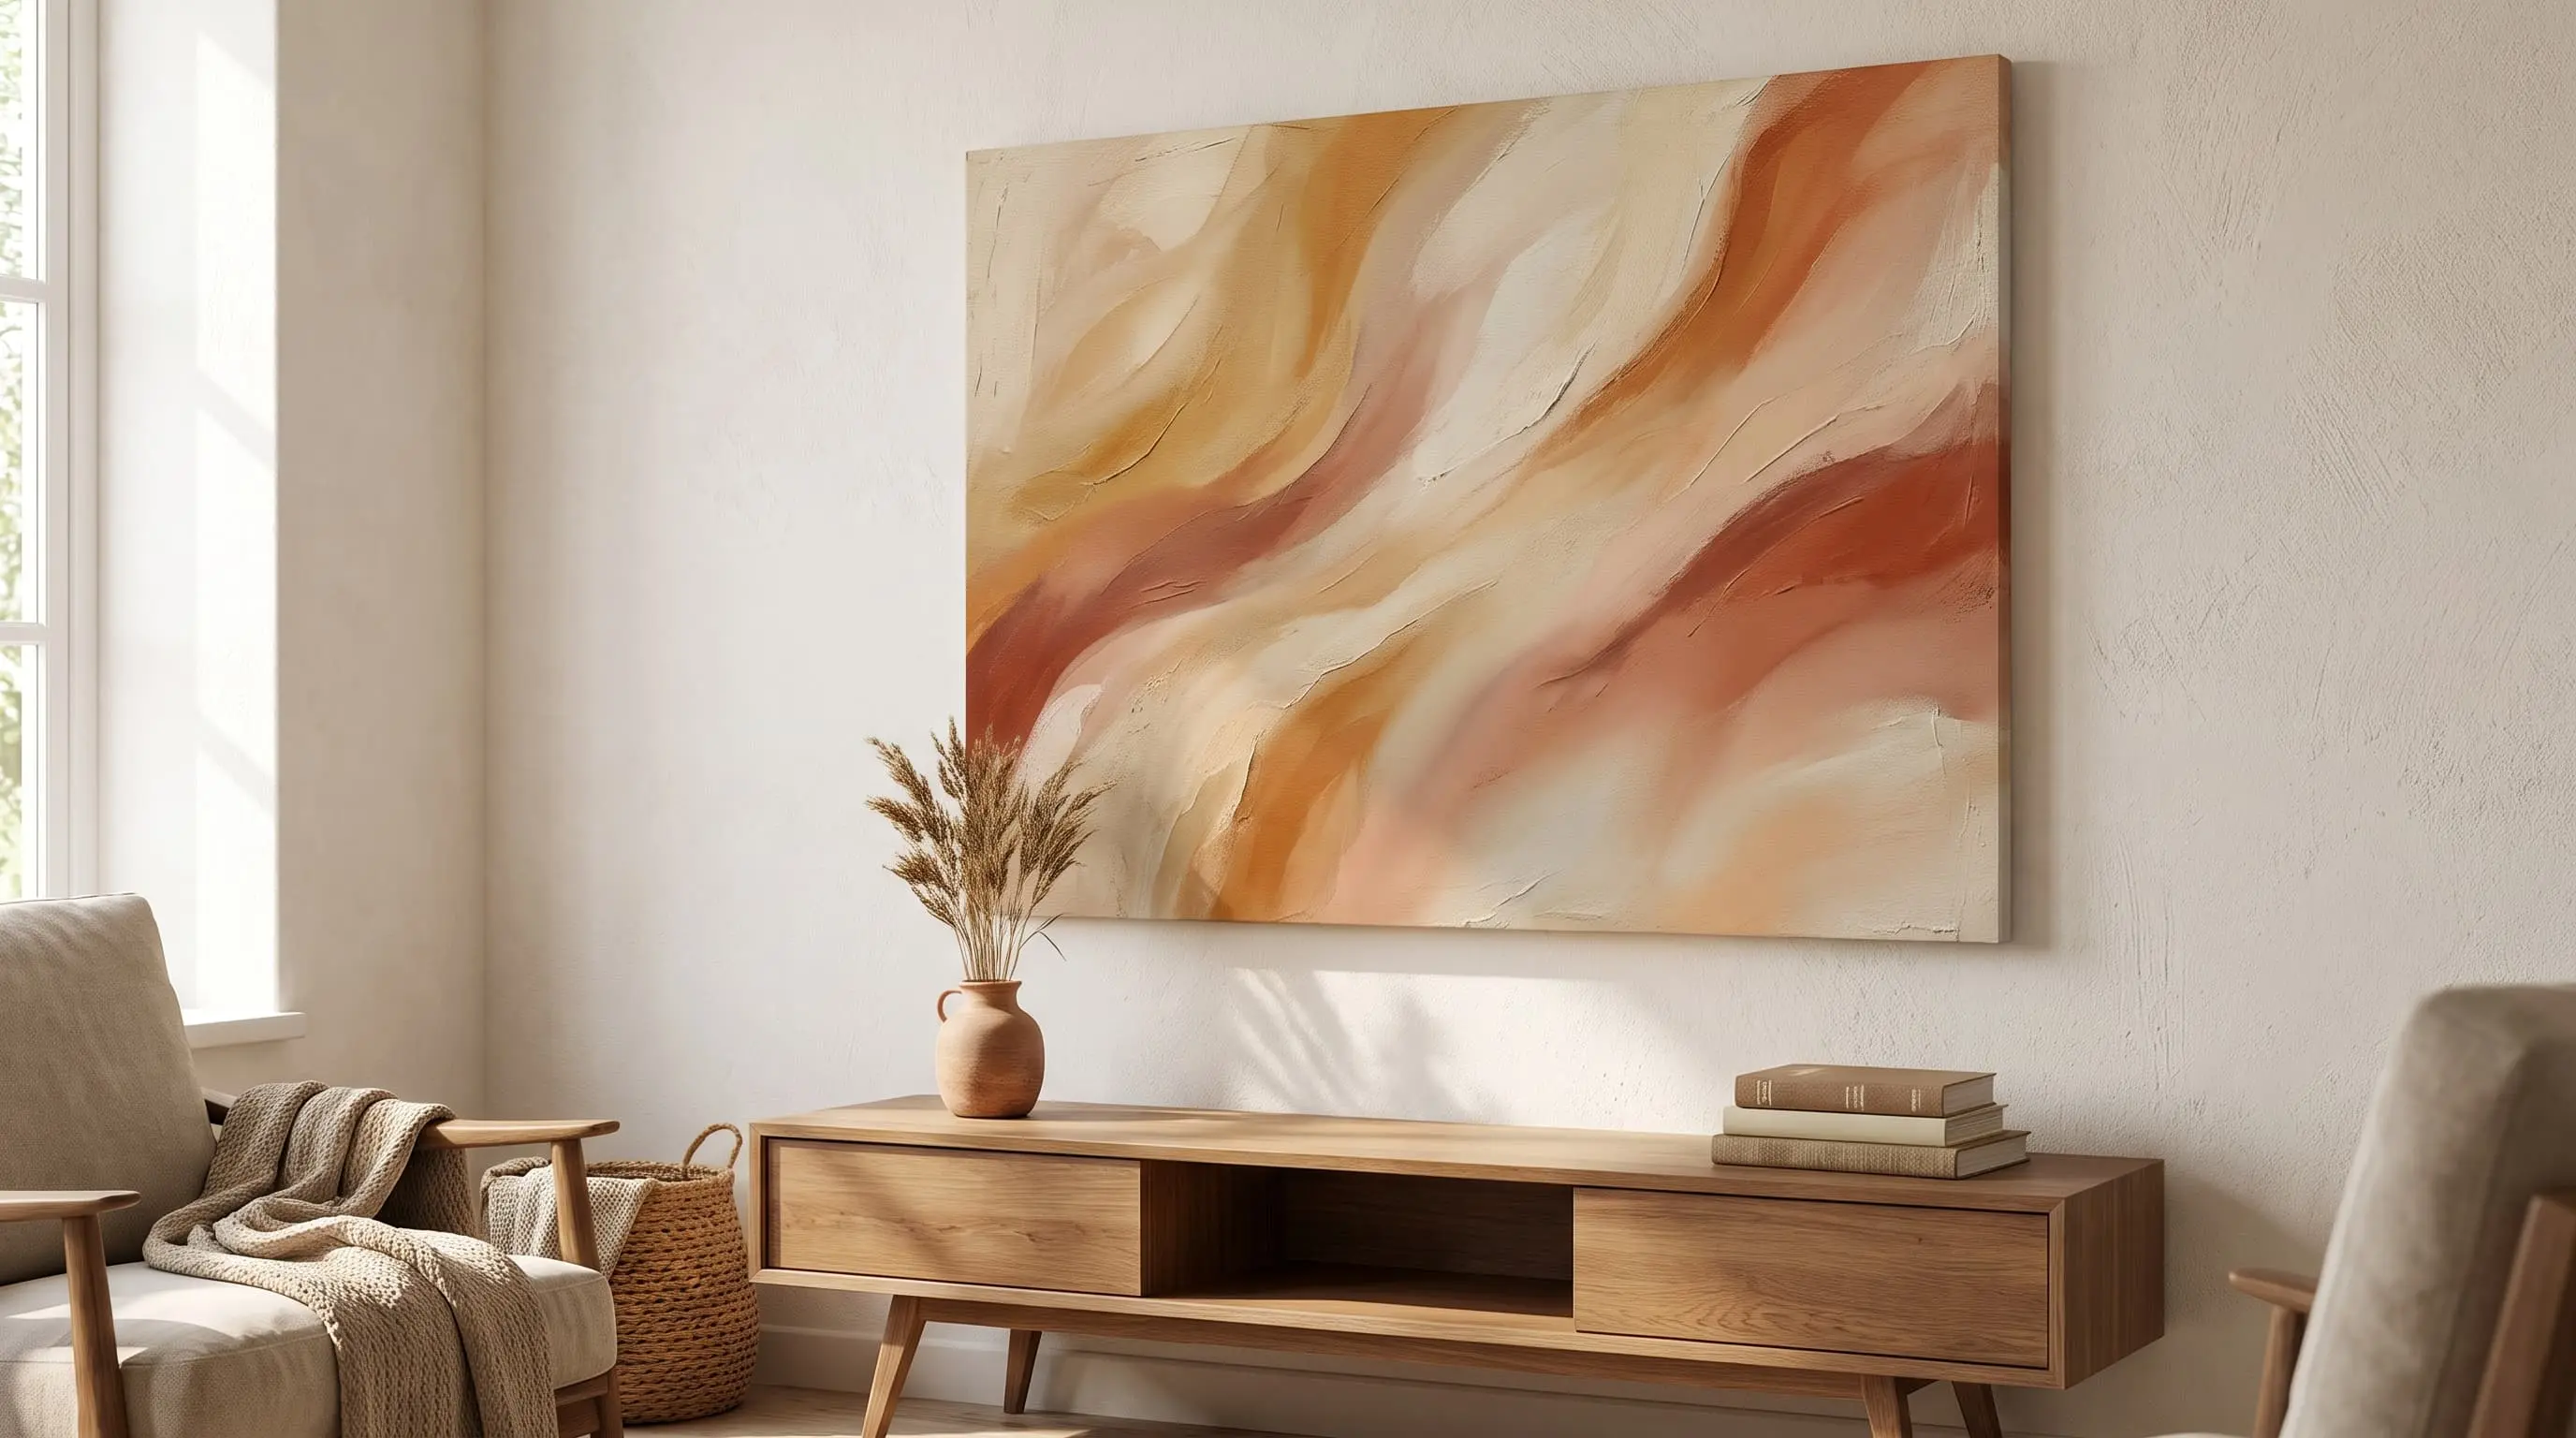
Skip buying an oversized canvas and build your own instead. This project uses a drop cloth stretched over a wood frame, painted with simple swirls. It works well behind a couch, over a bed, or in a dining room.
| Cost | $20 to $40 |
| Skill level | Beginner- friendly |
| Material Required | Wood, drop cloth, acrylic paint |
How to make it: Build a wood frame in the size you need, then stretch the drop cloth tightly over it. Paint loose swirls or broad lines across the surface. Let it dry, then hang it up.
3. Painted Ombre Canvas
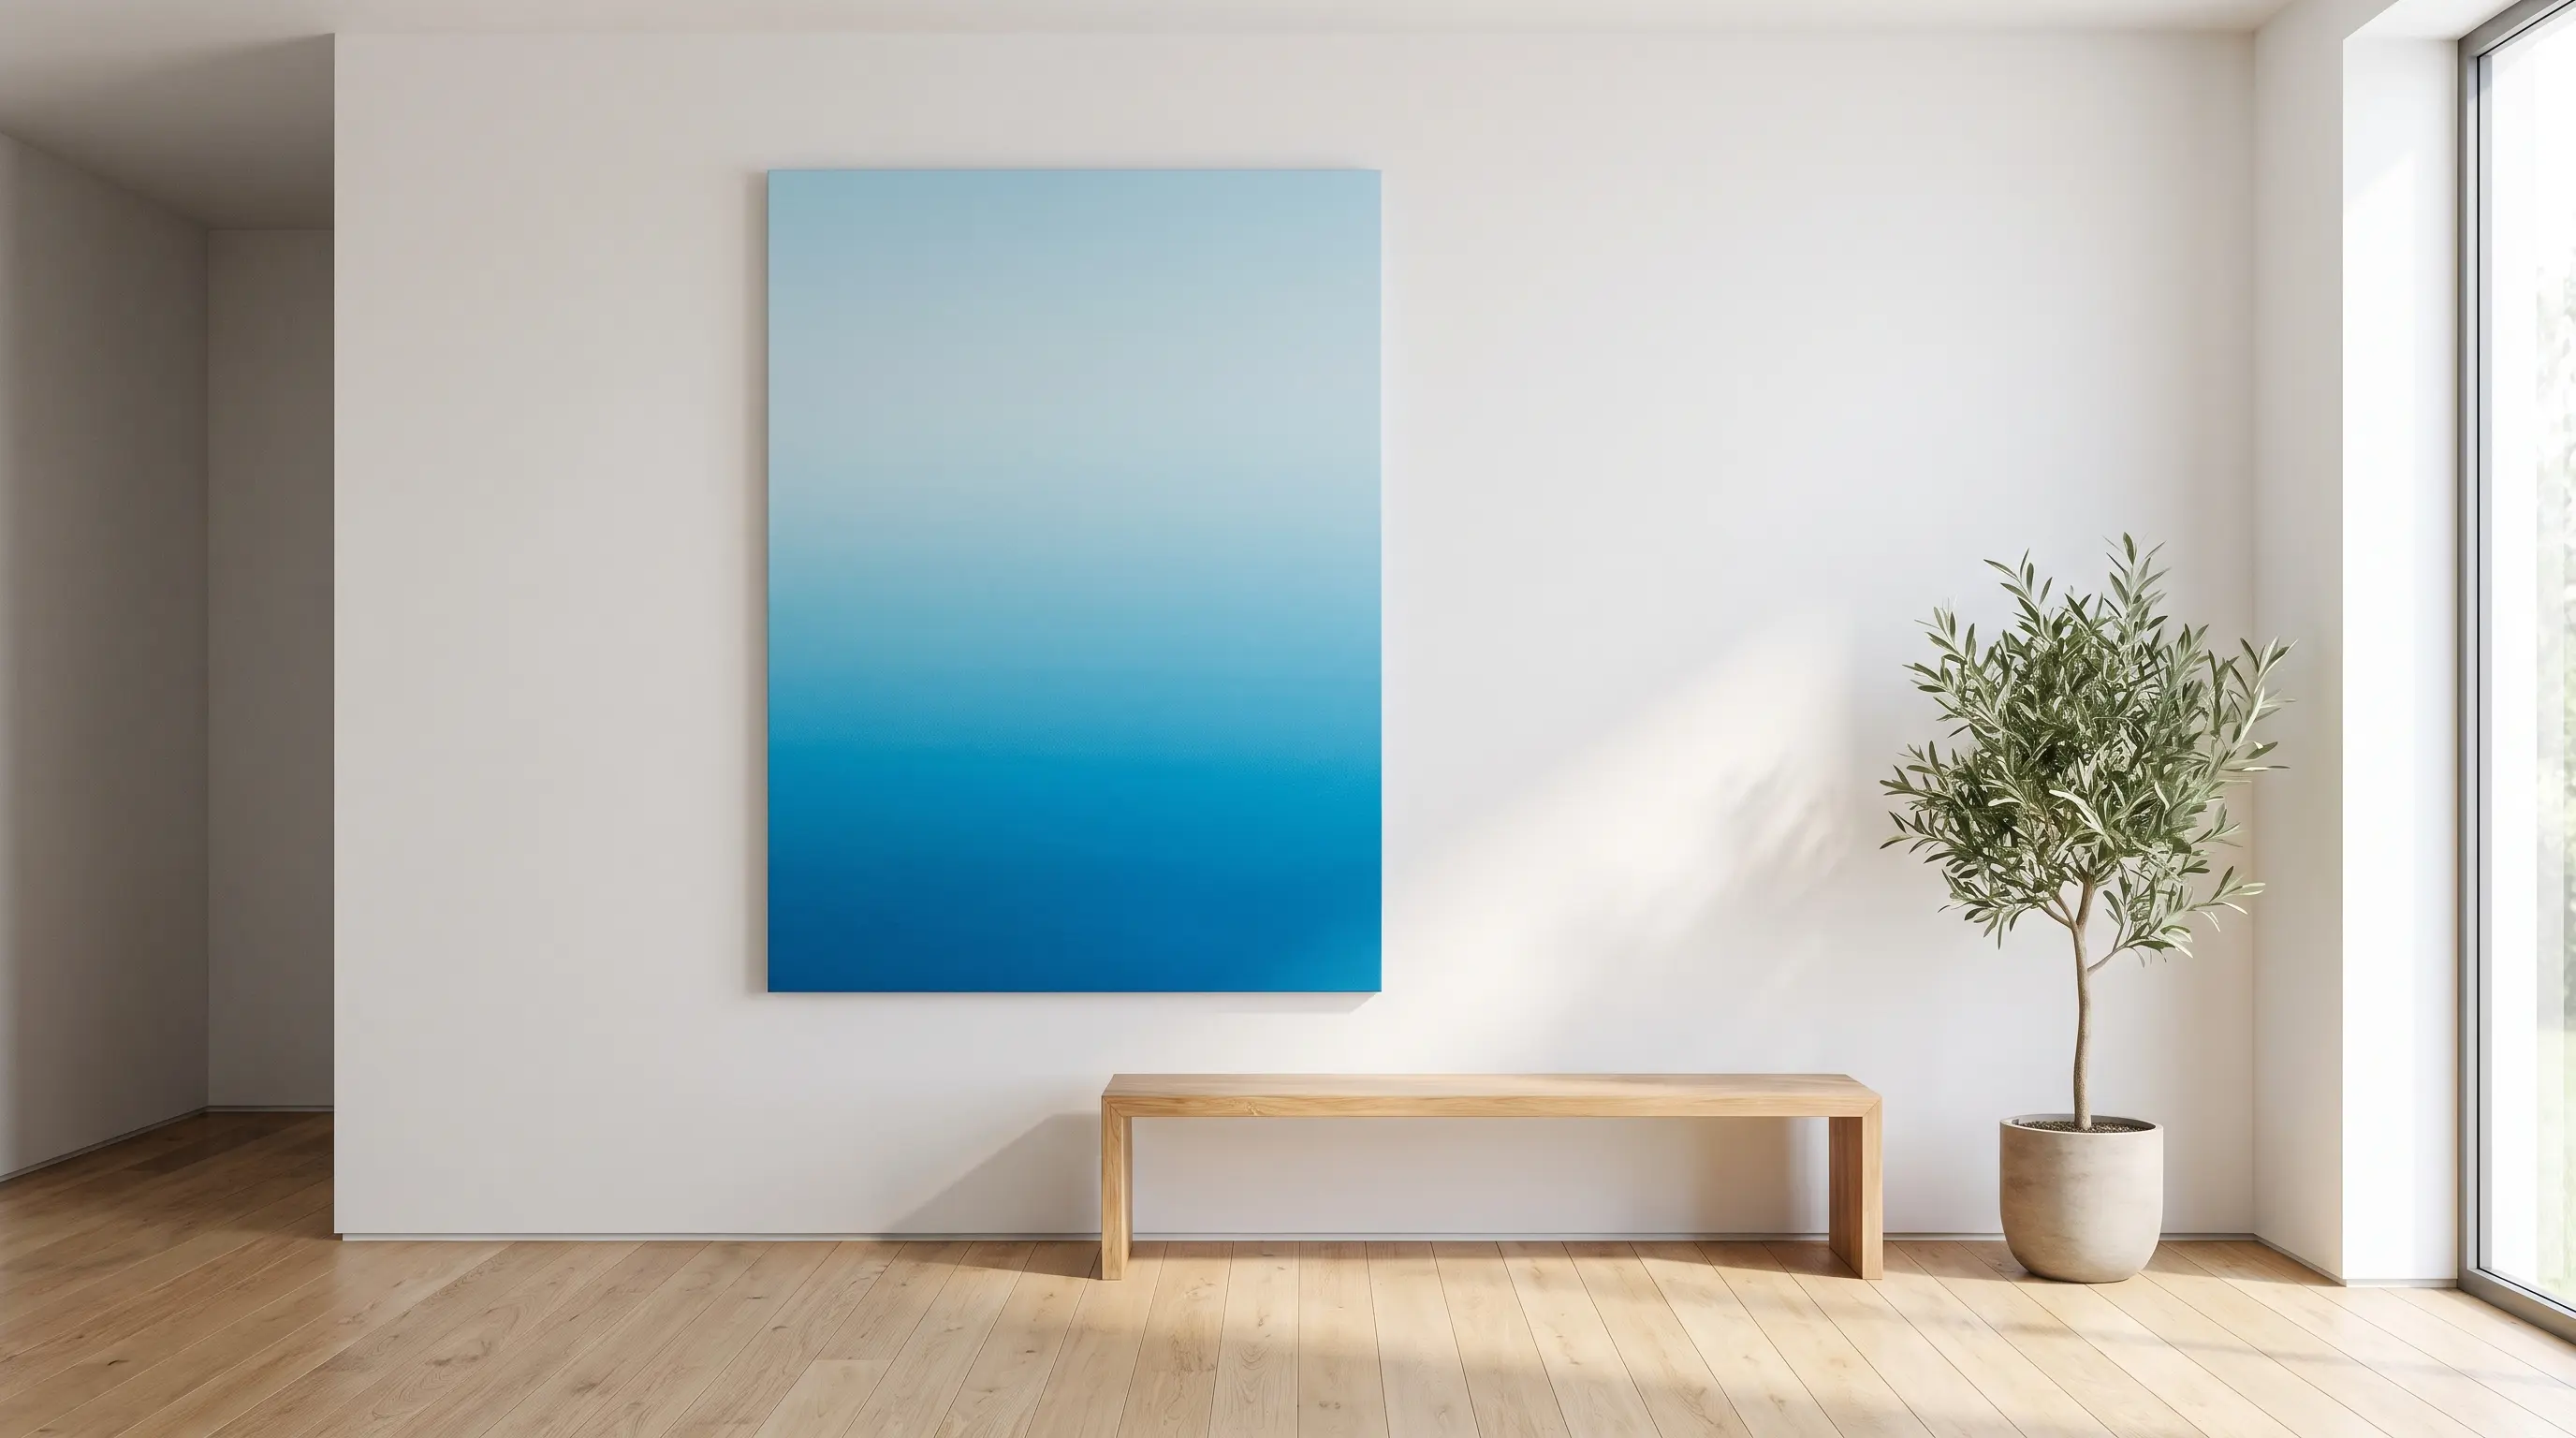
Blend one paint color from light to dark across a blank canvas. The gradual change in shade gives the wall a calm, clean look and is easy to match with your room.
| Cost | $15 to $30 |
| Skill level | Beginner- friendly |
| Material Required | Blank canvas, paint, and paintbrushes |
How to make it: Start with the lightest shade at one end of the canvas. Add more color as you move across, blending each section before the paint dries. Leave it flat until fully dry.
4. Modern Geometric Painting
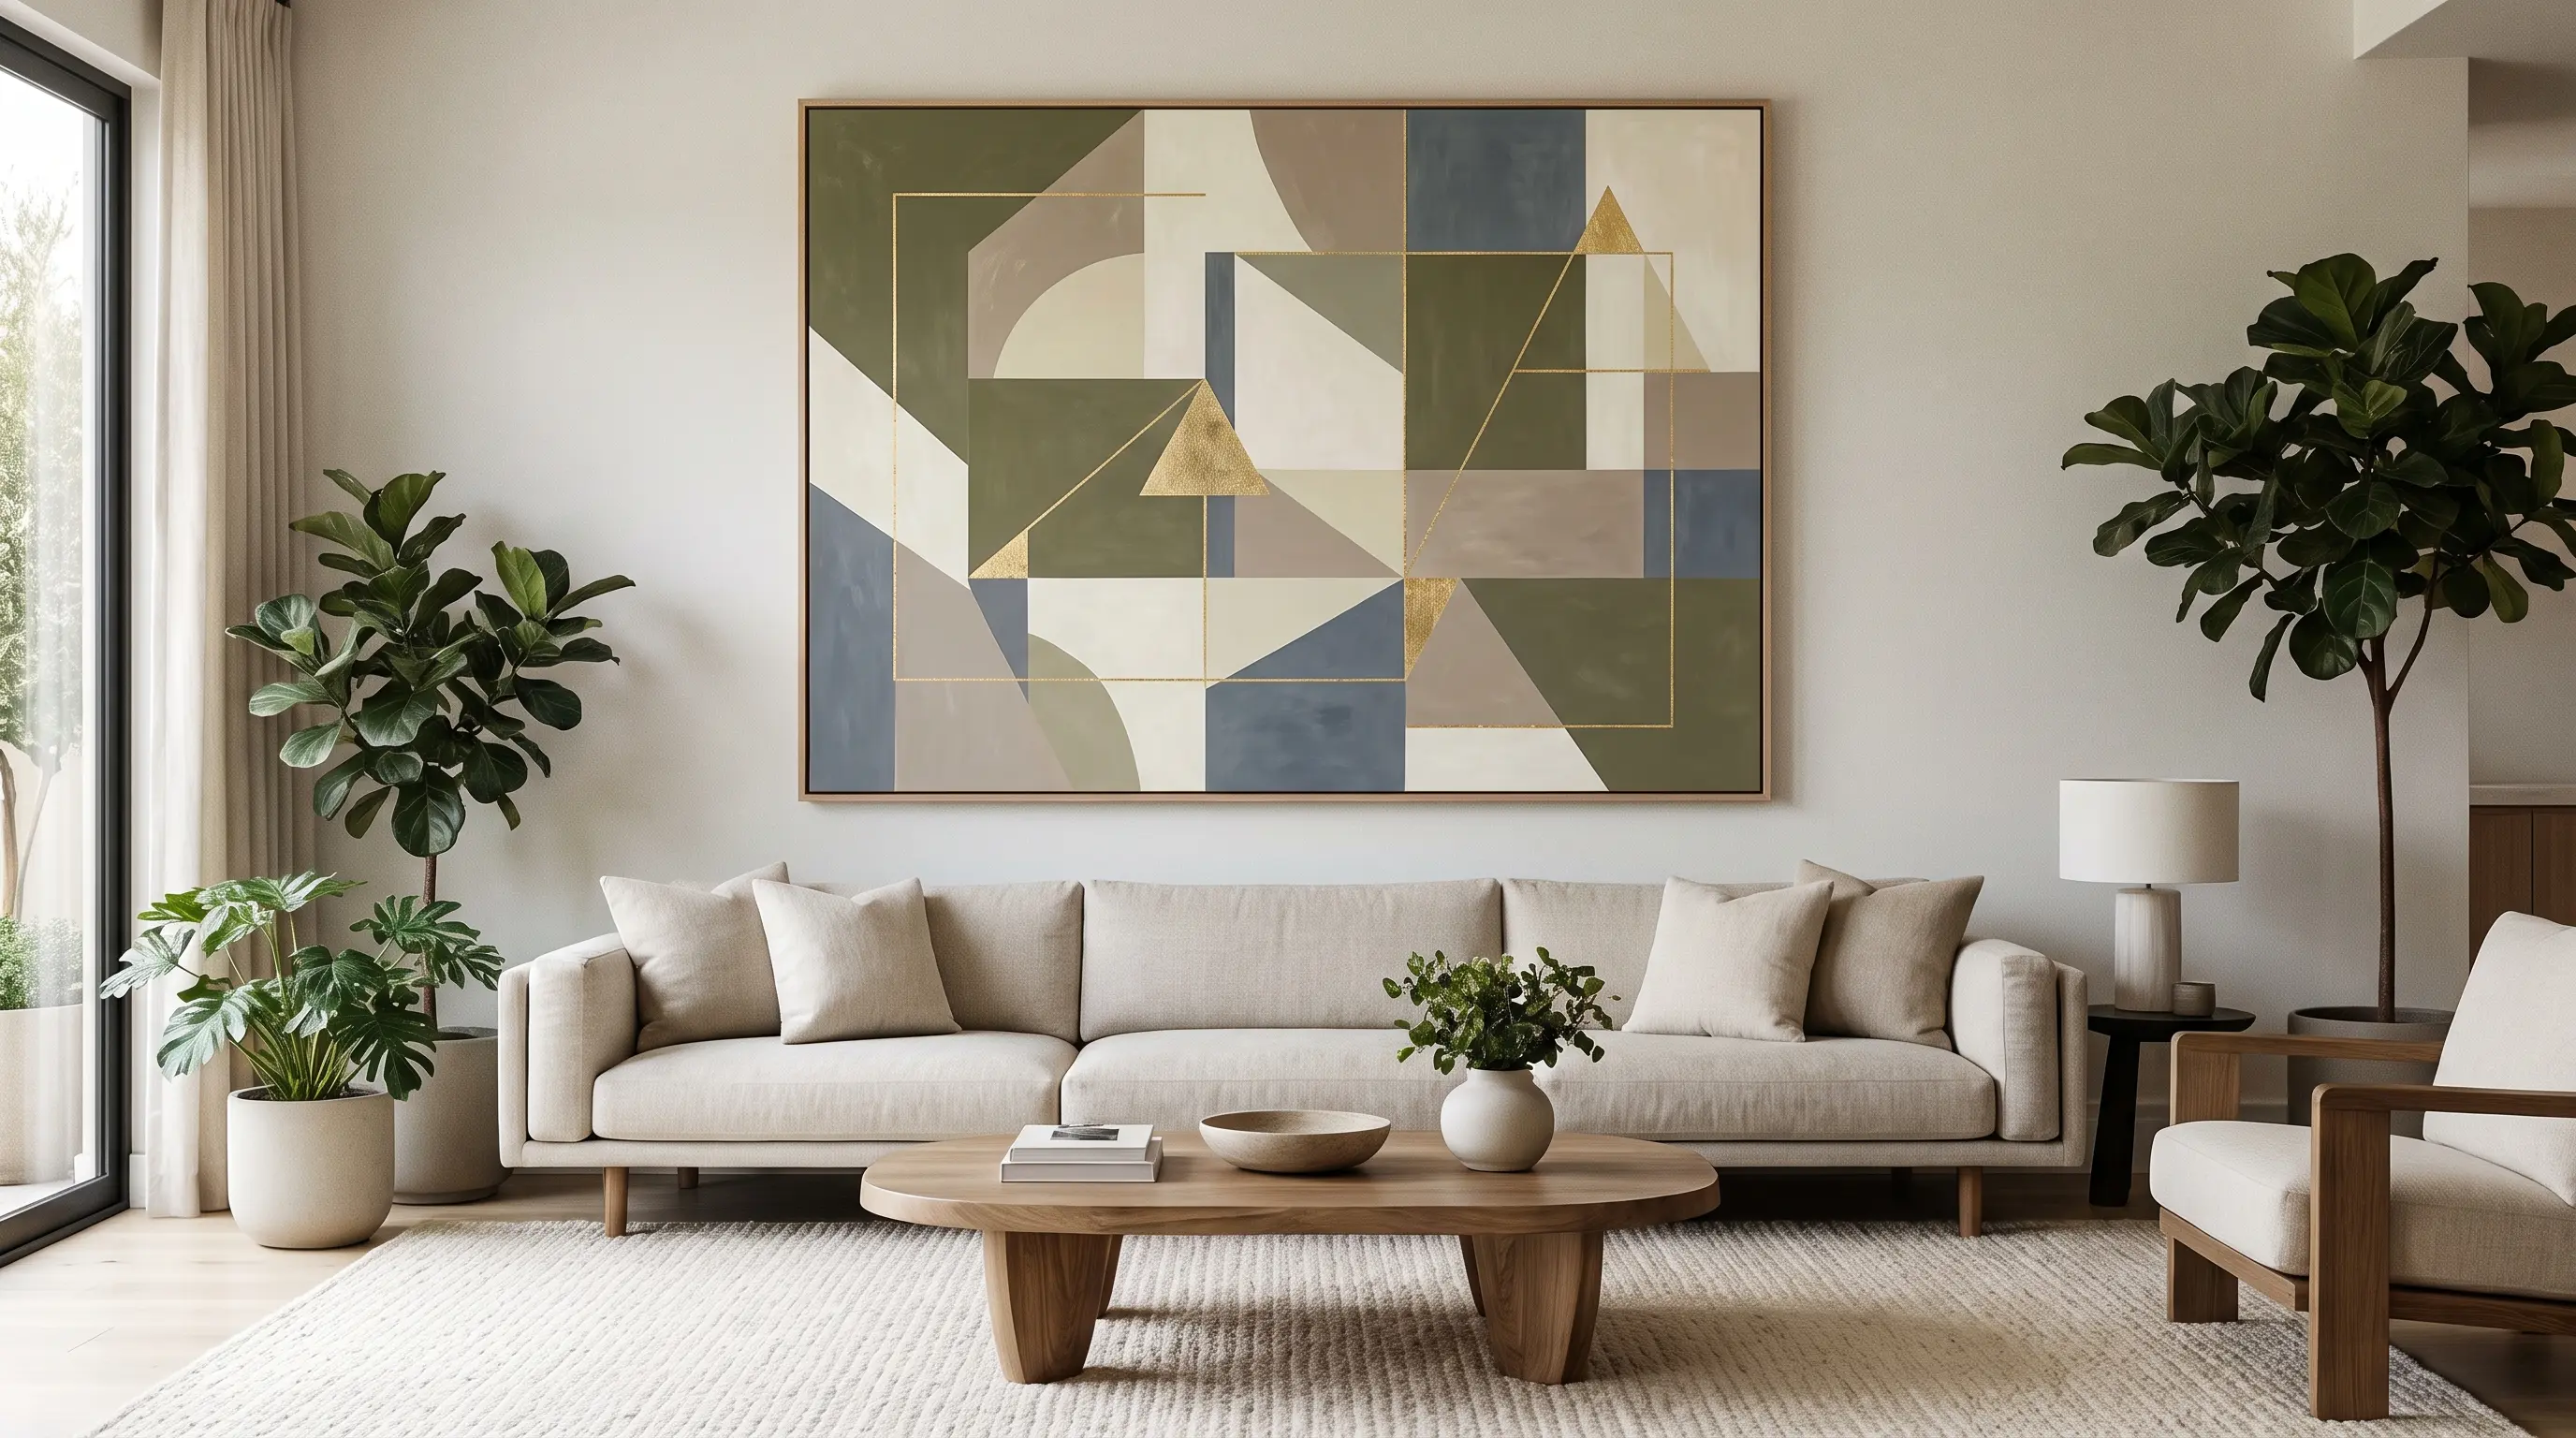
Painter’s tape helps you form clean shapes without needing strong painting skills. Use two or three colors for a neat design that works well in bedrooms, living rooms, or work areas.
| Cost | $20 to $40 |
| Skill level | Beginner- friendly |
| Material Required | Canvas, painter’s tape, paint, and paintbrushes |
How to make it: Place painter’s tape across the canvas to form squares, triangles, or uneven sections. Paint each open area, allow it to set, and peel away the tape to show the clean lines.
5. Spray-Bottle Drip Art
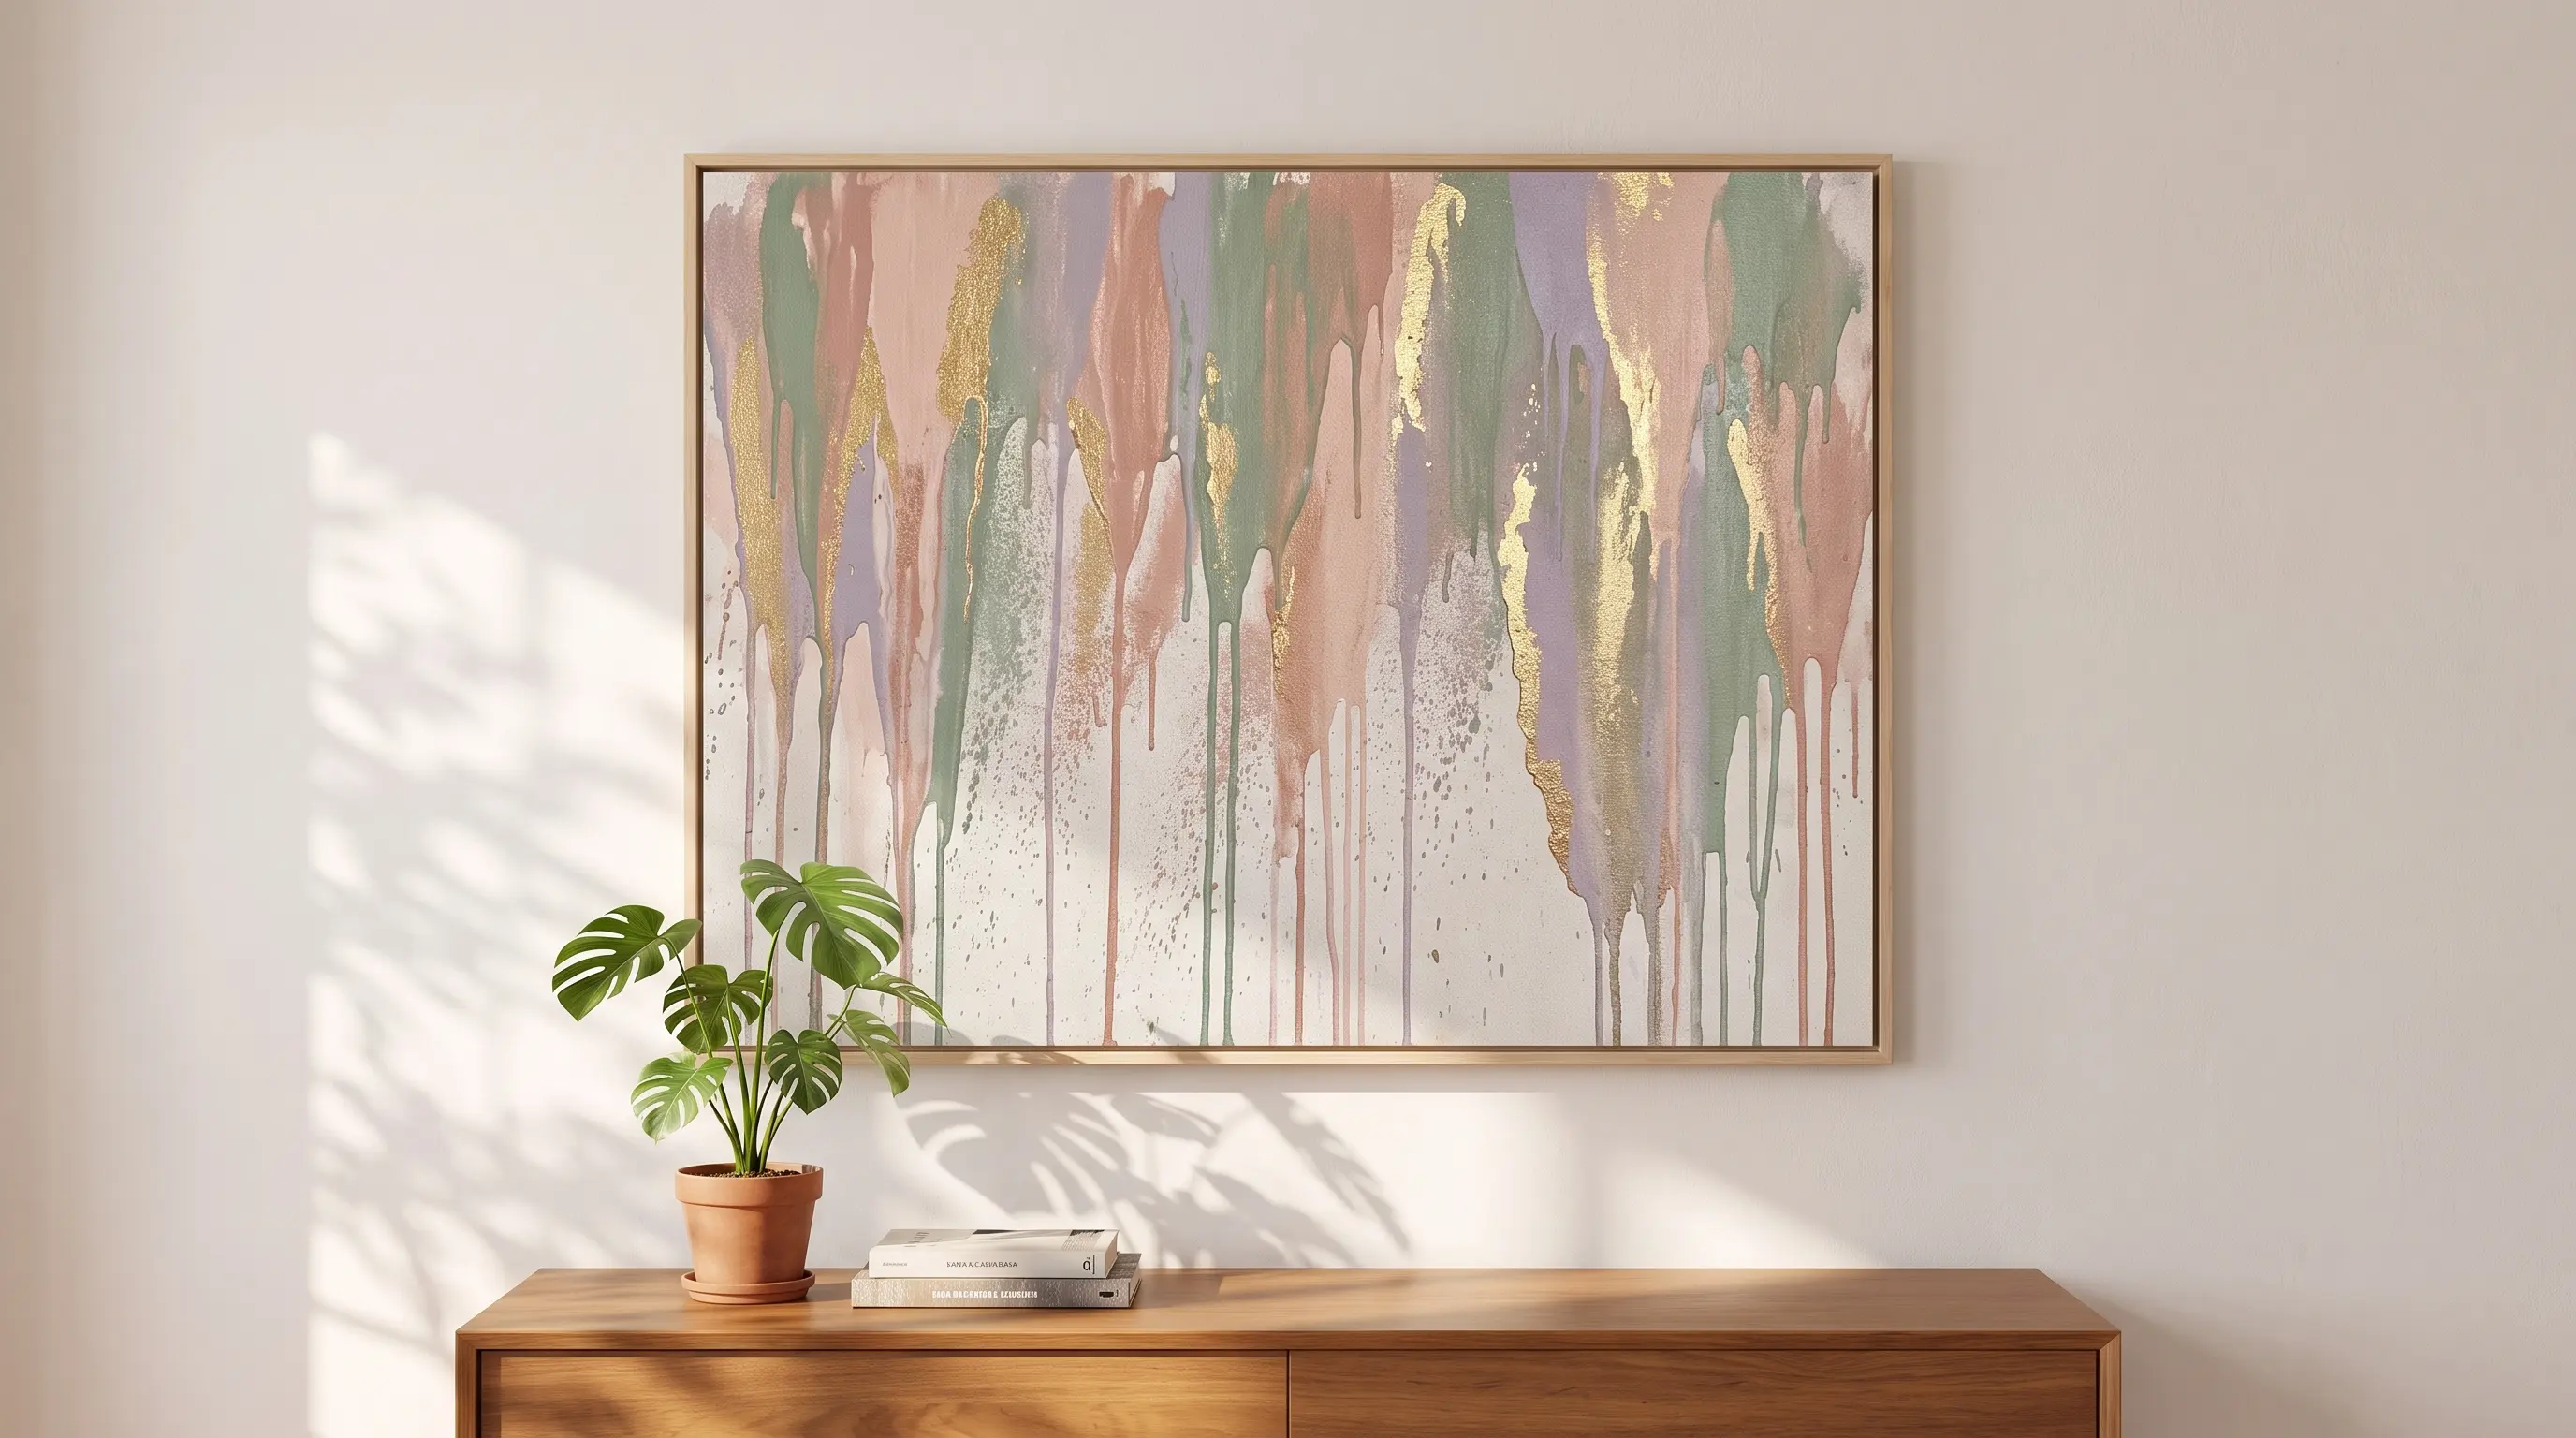
Turn simple paint drips into wall art with water and a spray bottle. Each run of paint forms on its own, so no two canvases will look the same.
| Cost | $10 to $35 |
| Skill level | Beginner- friendly |
| Material Required | Canvas, acrylic or latex paint, water, and a spray bottle |
How to make it: Stand the canvas upright and add paint near the top. Spray the wet paint with water so it runs down the surface. Let the drips dry before adding another color or a small touch of gold or silver leaf.
Paper & Origami Wall Art
Paper crafts are a low-cost way to add color and shape to a blank wall. You can cut, fold, layer, or frame paper to create art that fits your room.
6. Origami Paper Wreath
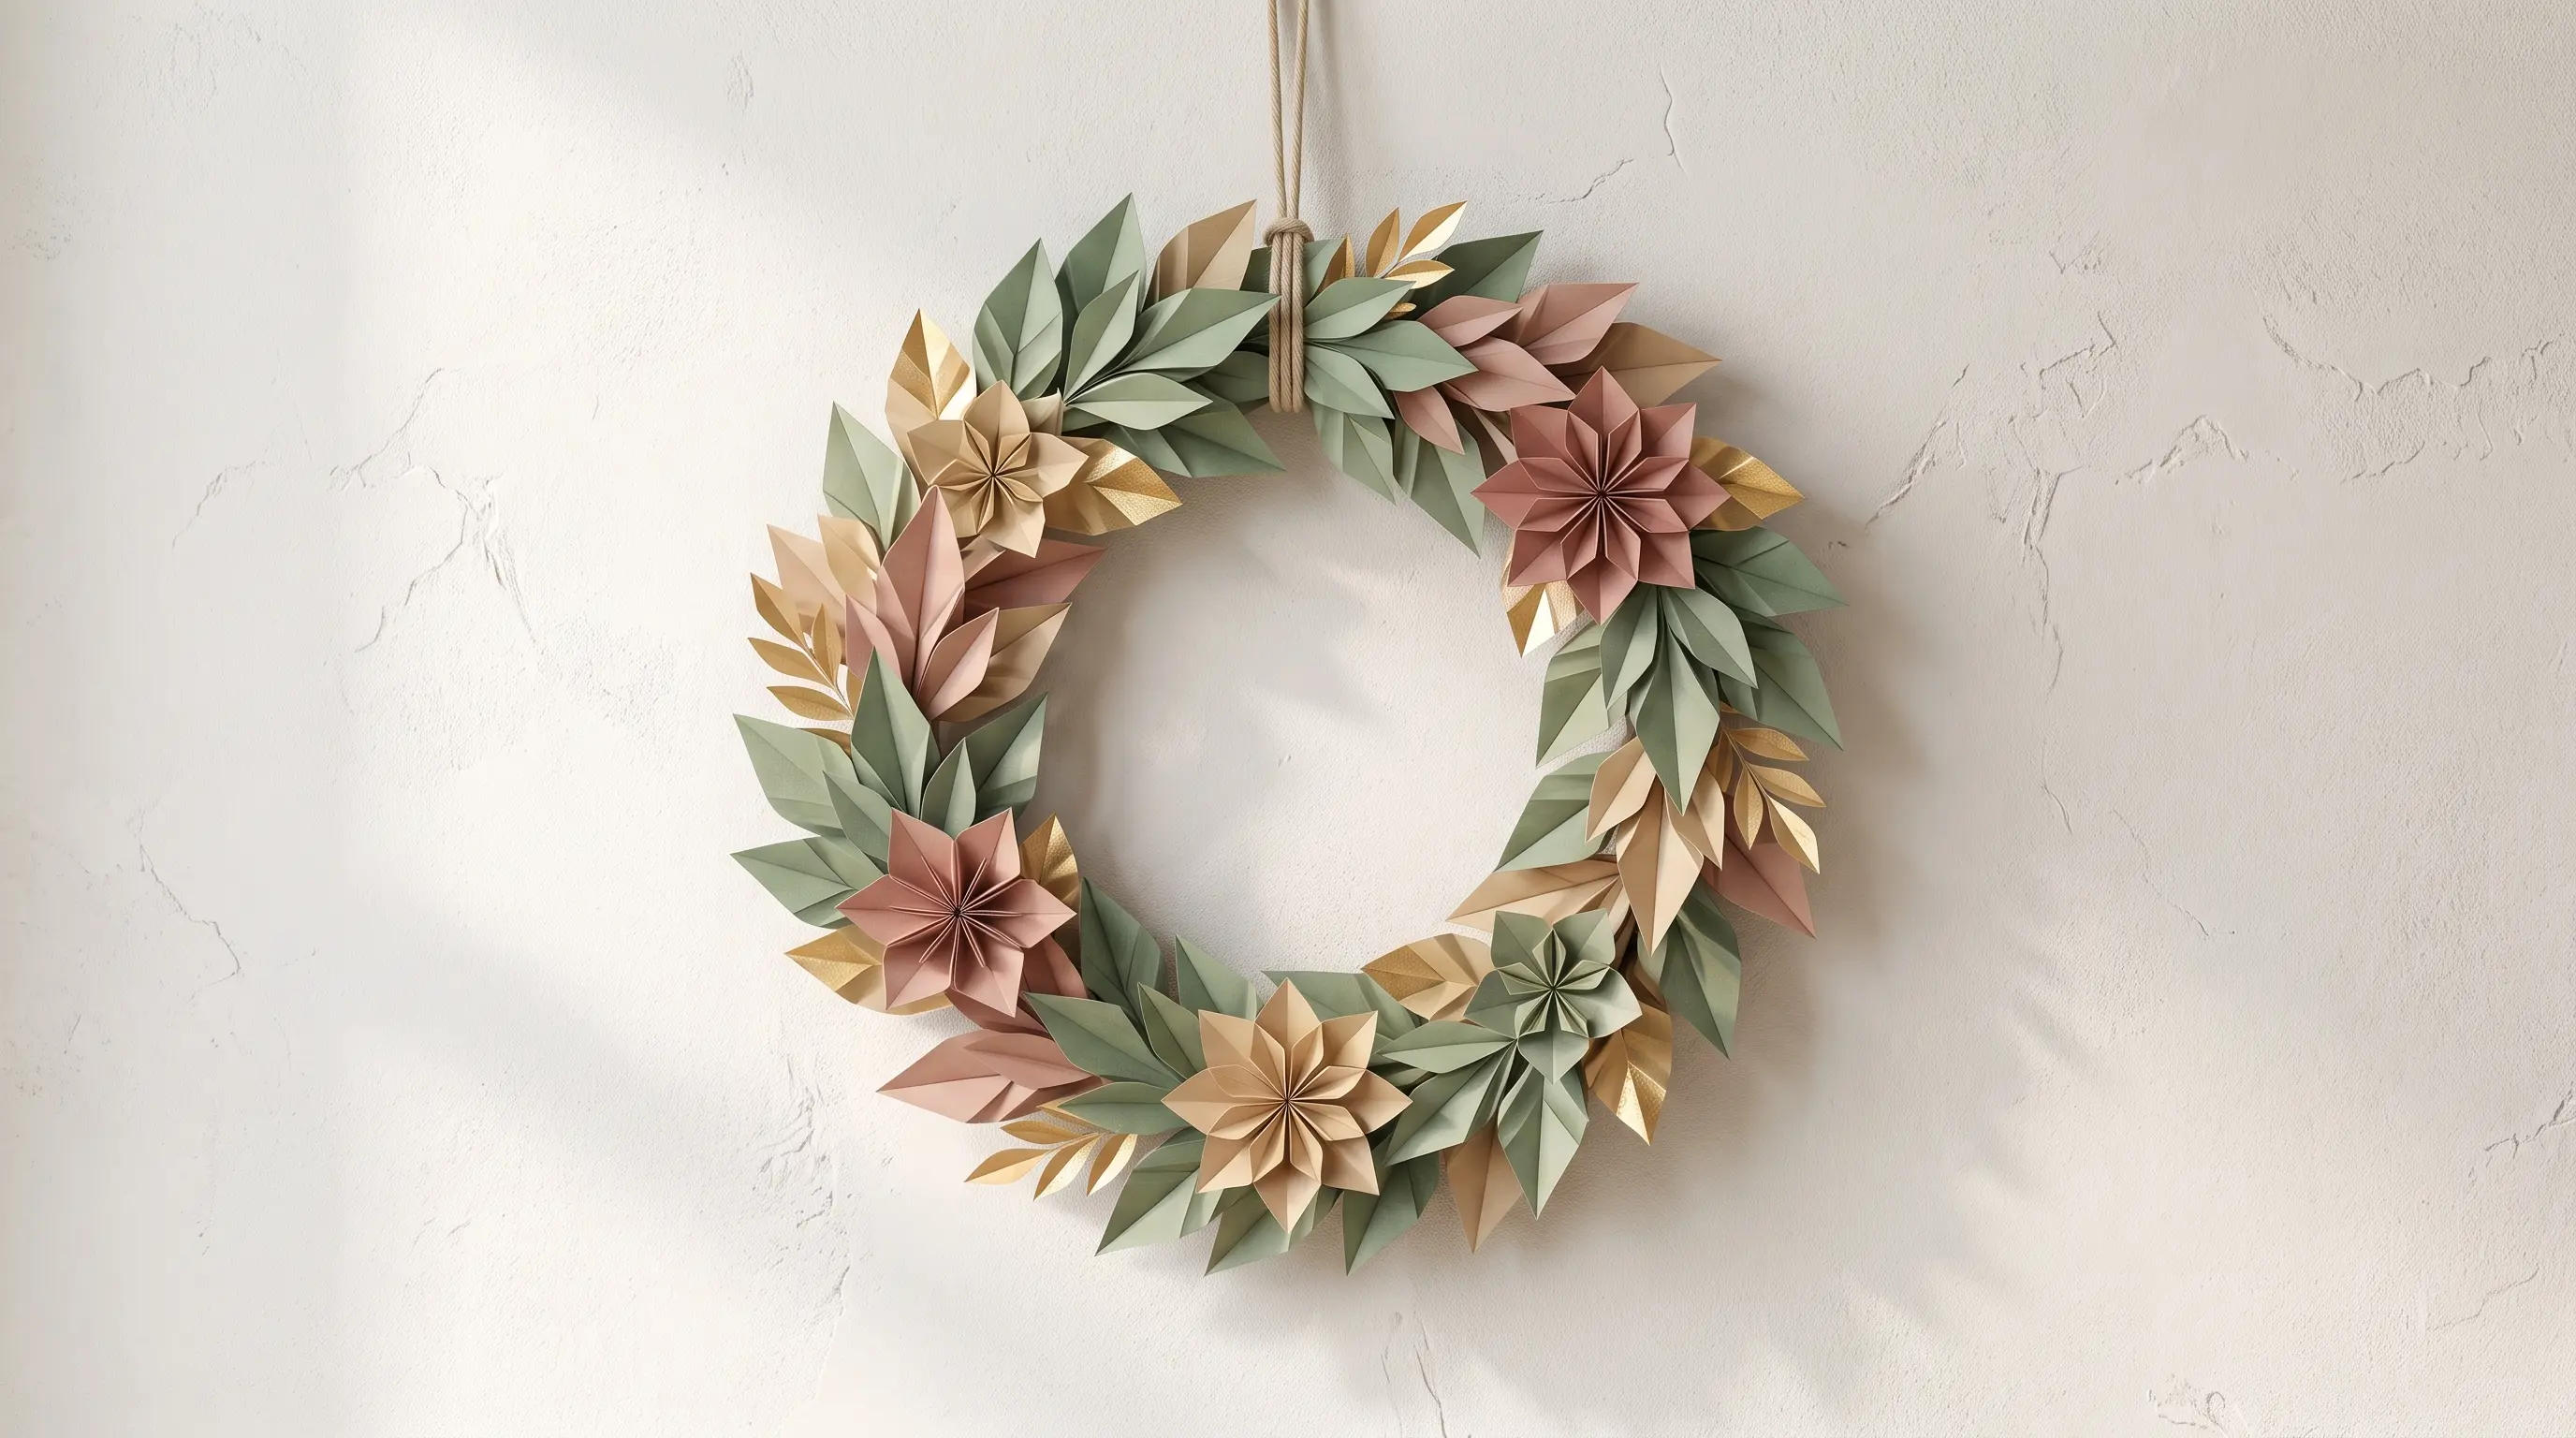
Fold bright paper into small shapes and join them in a circle to make a paper wreath. It adds color to a wall and can stay up year-round.
| Cost | $3 to $10 |
| Skill level | Beginner- friendly |
| Material Required | Origami paper, glue, and a round base |
How to make it: Fold several sheets of paper into matching units. Attach them around a round base, keeping the spacing even. Let the glue dry before hanging.
7. Origami Paper Garland
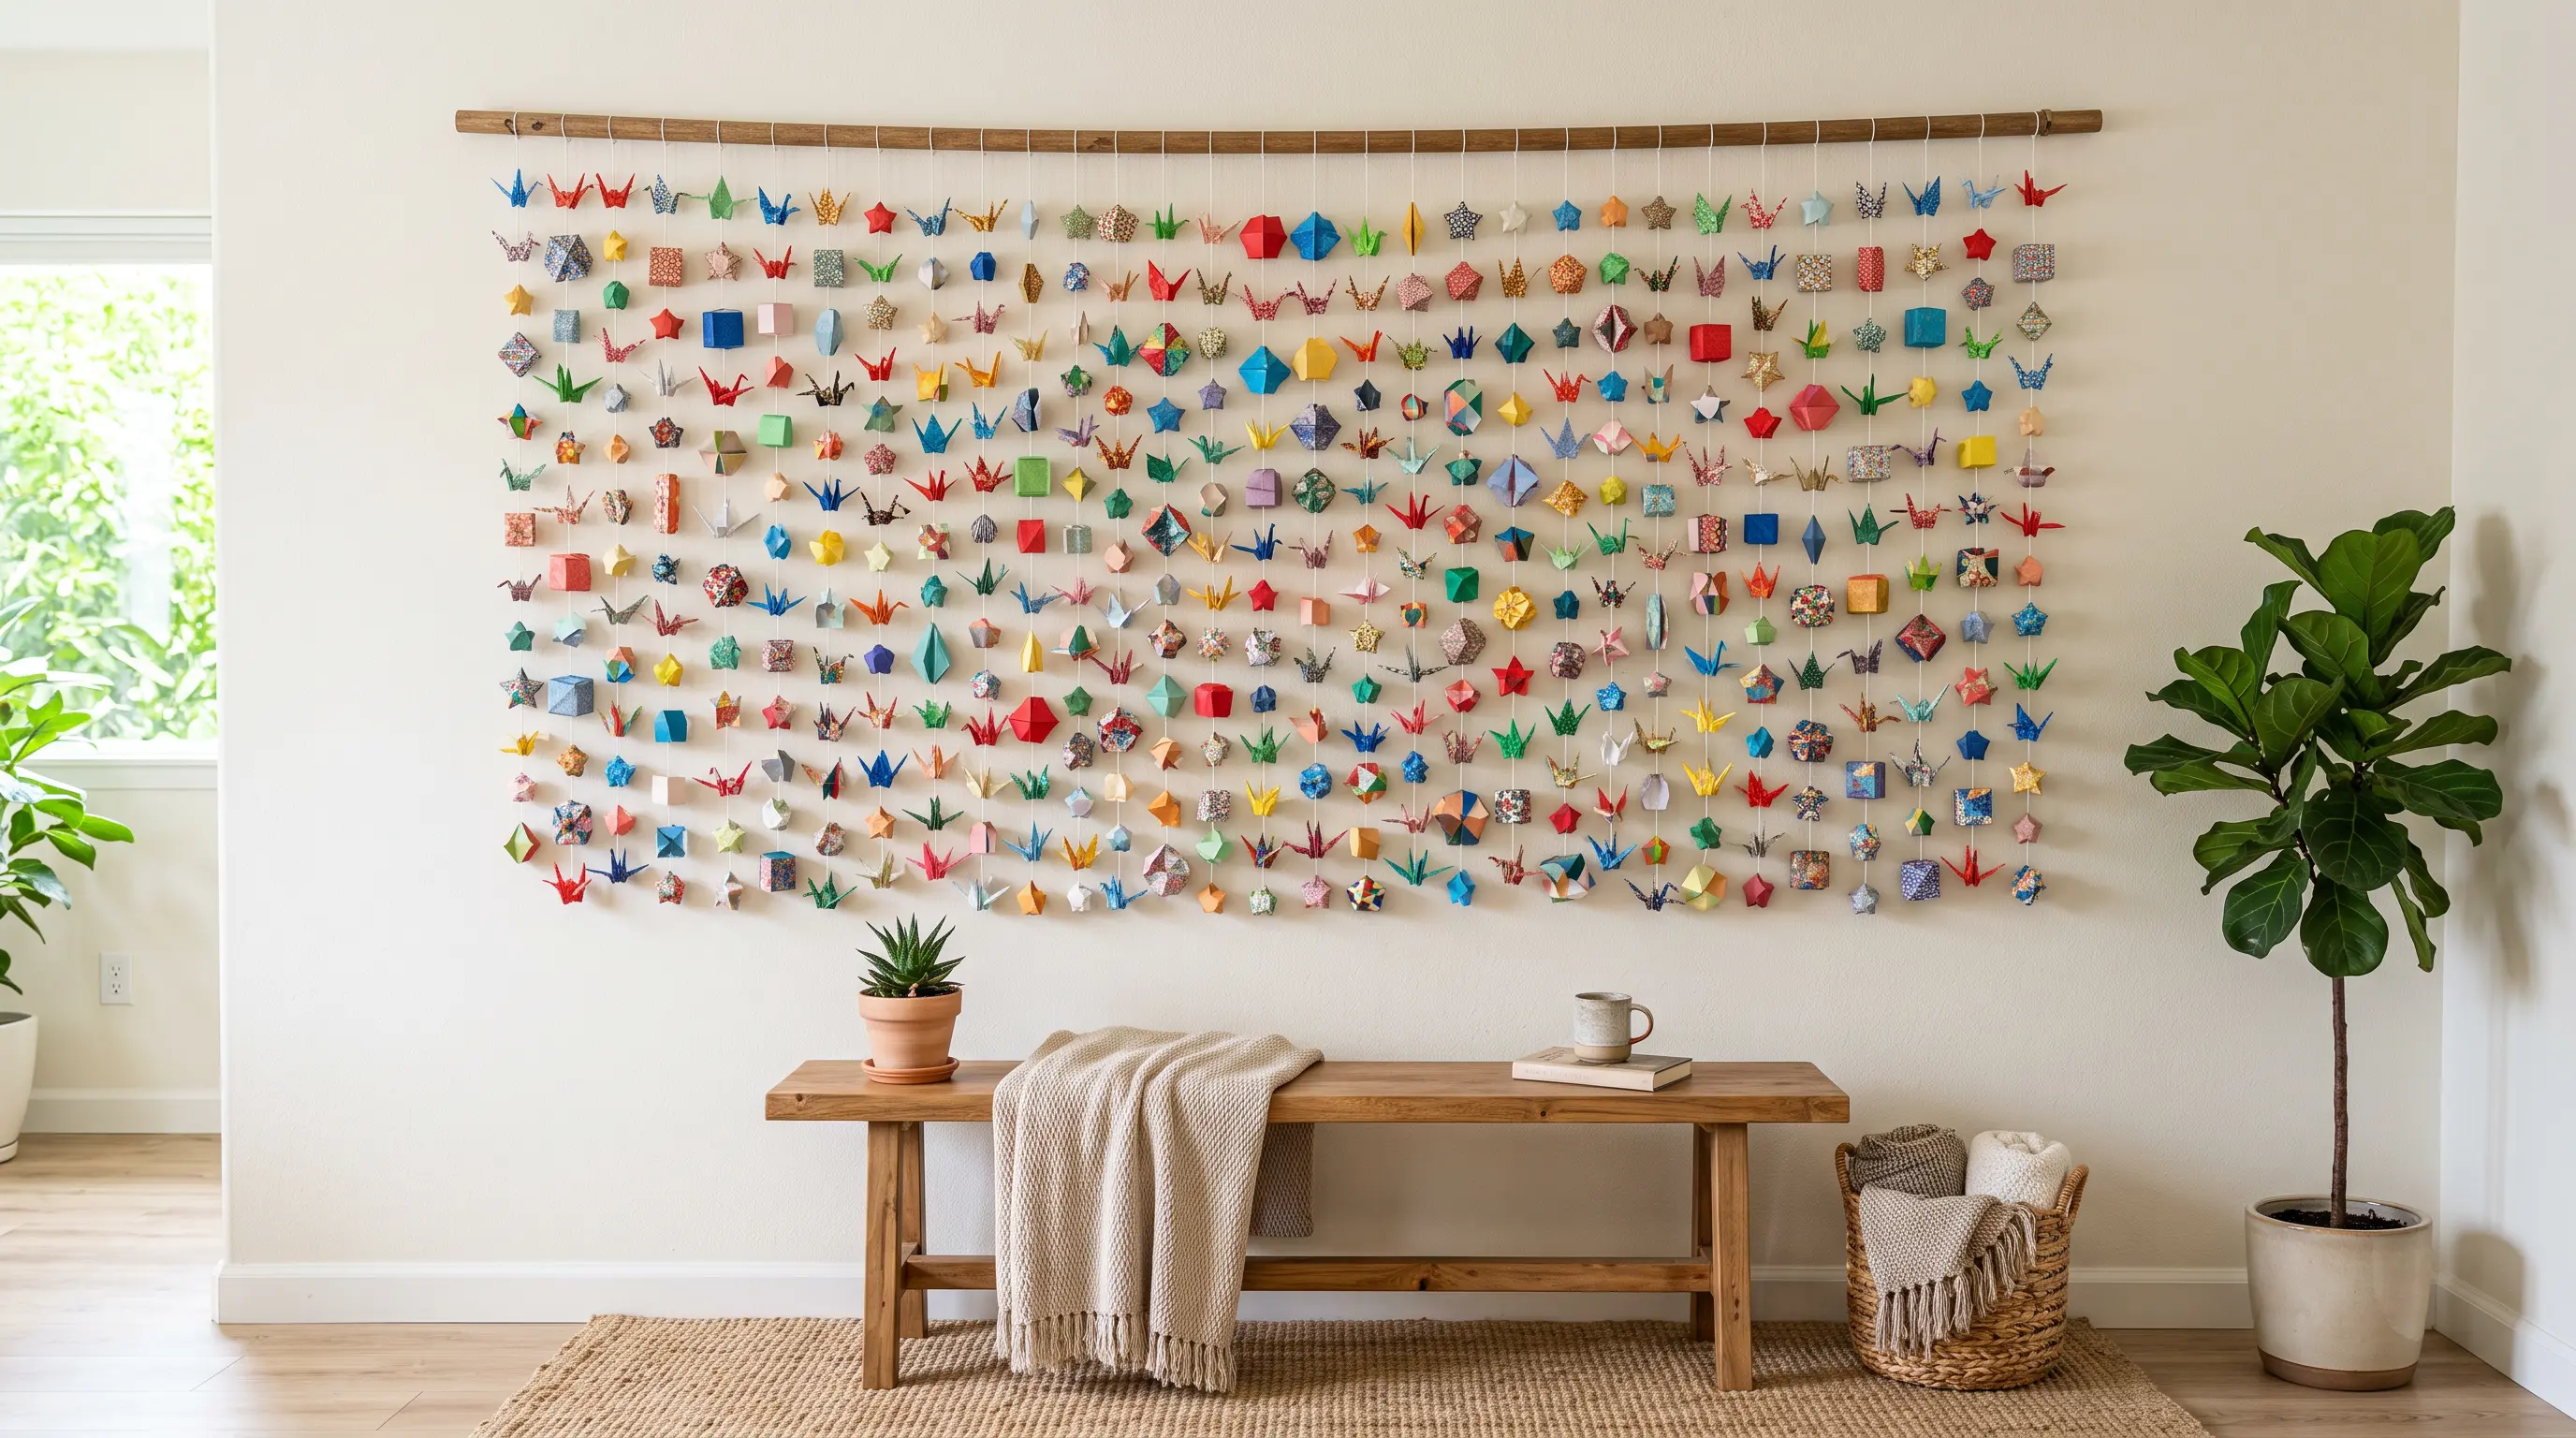
Join folded paper shapes to make a long wall garland. Hang it above a sofa, desk, or bed to add a bright line of color.
| Cost | $2 to $15 |
| Skill level | Basic paper-folding skills |
| Material Required | Origami paper, thread, and a sewing needle |
How to make it: Fold several paper shapes in different colors. Sew them together with space between each piece, then hang the garland from both ends.
8. Paper Butterfly Wall Art
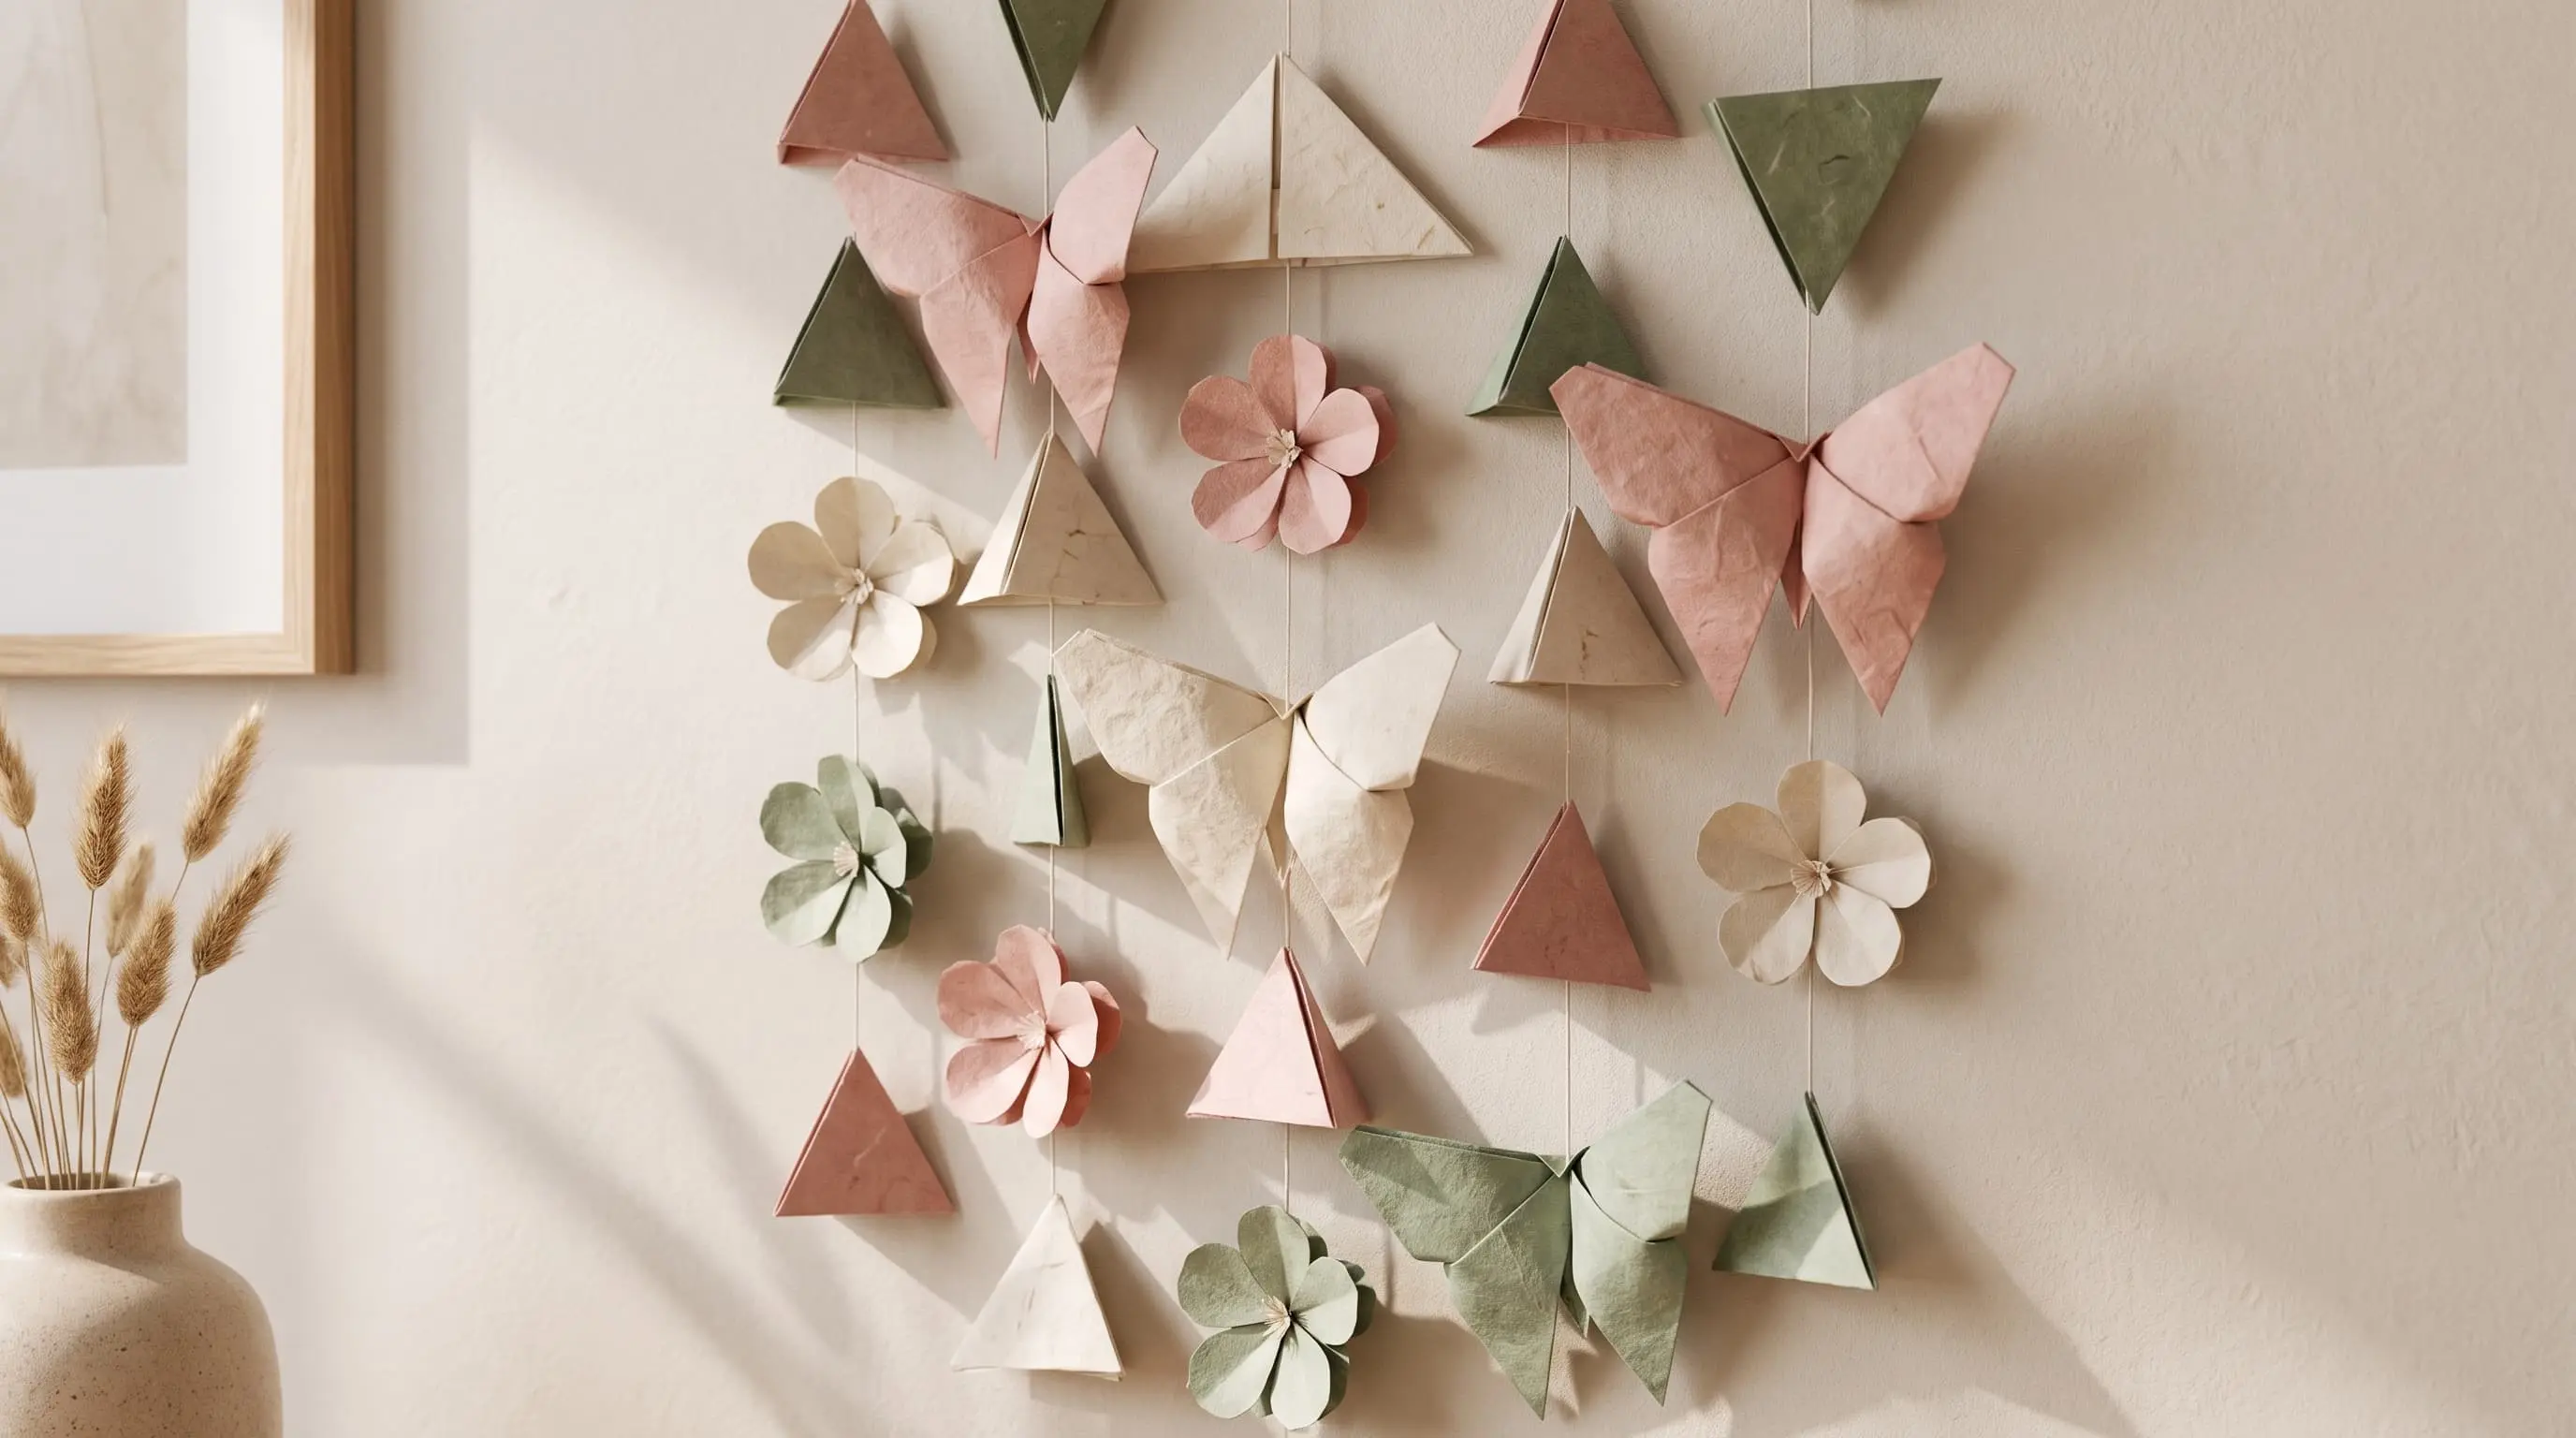
Cut butterfly shapes from card stock and fold the wings slightly so they lift away from the wall. Arrange different sizes in a frame or attach them directly with sticky putty.
| Cost | $2 to $12 |
| Skill level | Beginner- friendly |
| Material Required | Card stock, scissors, template, and sticky putty |
How to make it: Trace and cut butterflies in several sizes. Bend the wings gently, then arrange the shapes in a group before fixing them in place.
9. DIY Botanical Poster
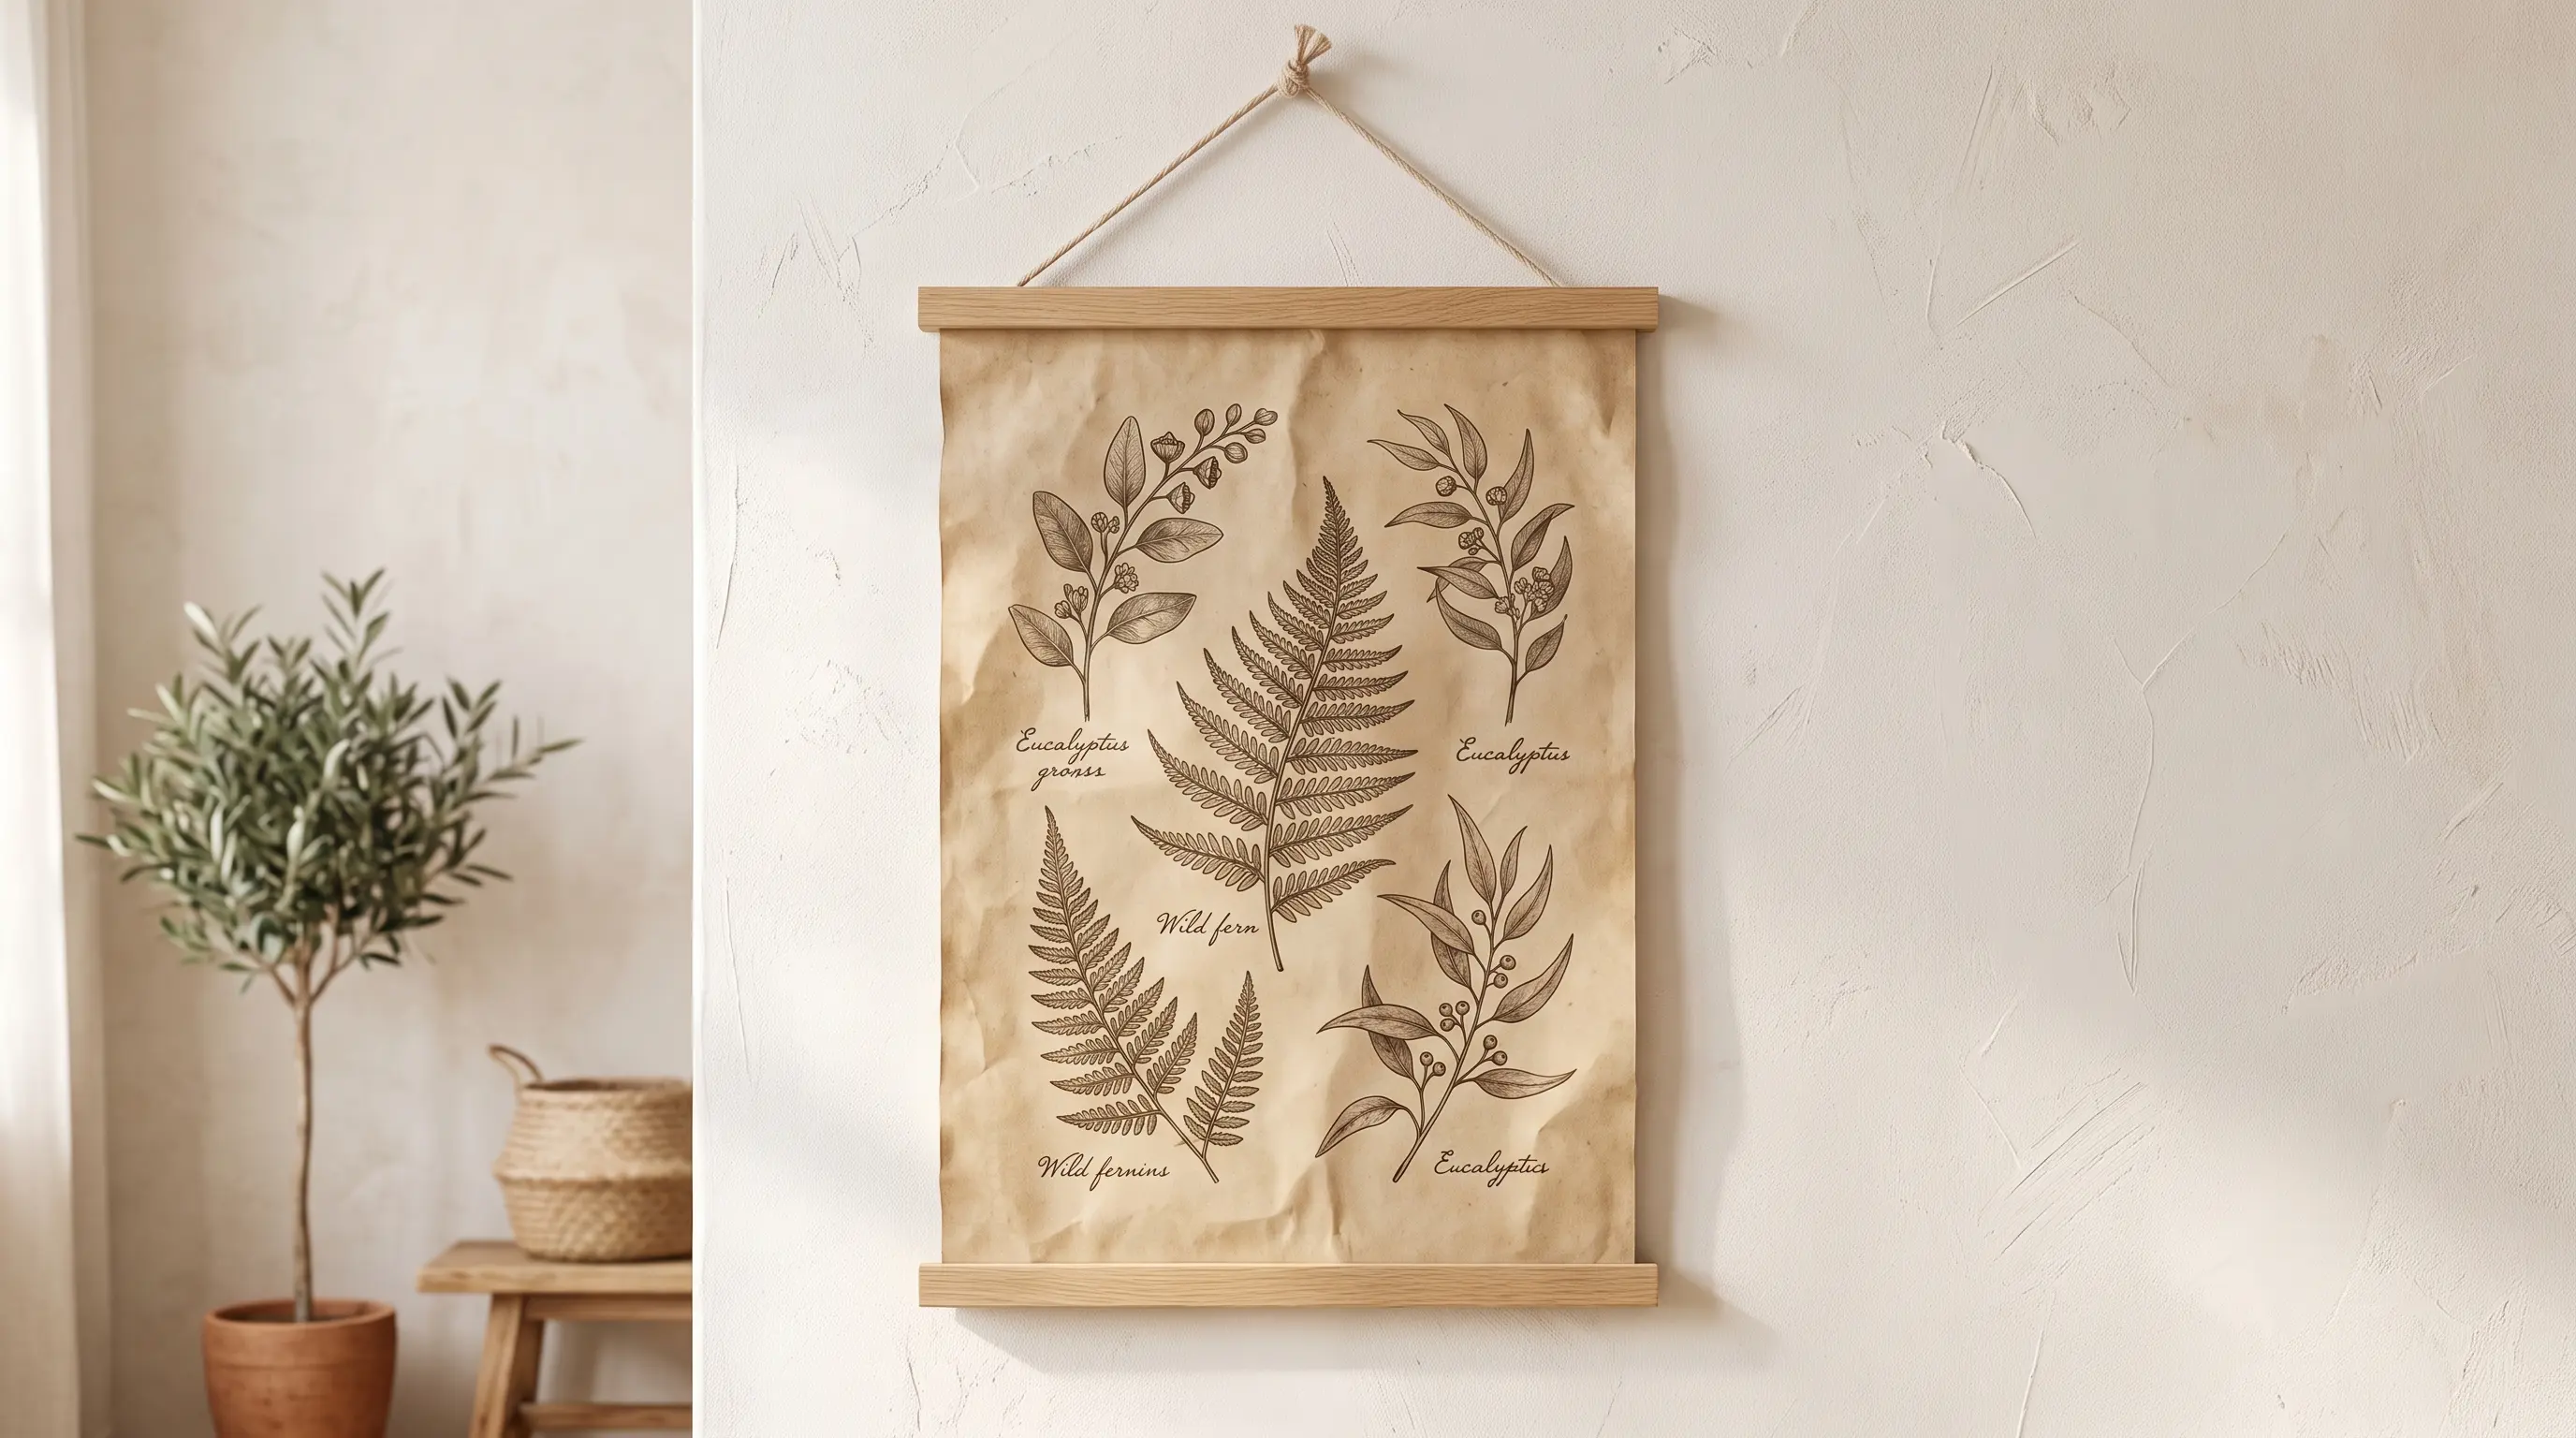
Paint bright flowers and leaves on dark poster board, then add a wooden dowel and string at the top. The dark background helps the painted colors stand out.
| Cost | $5 to $60 |
| Skill level | Basic painting skills |
| Material Required | Black poster board, paint, brushes, wooden dowel, string, and glue |
How to make it: Paint a simple flower and leaf design on the poster board. Once dry, glue a dowel along the top edge, add string, and hang it on the wall.
Nature-Inspired Wall Art
Wood, cork, branches, and leaves can bring natural color and texture into your room. These projects use simple forms and materials to fill both small and large wall spaces.
10. Cork World Map
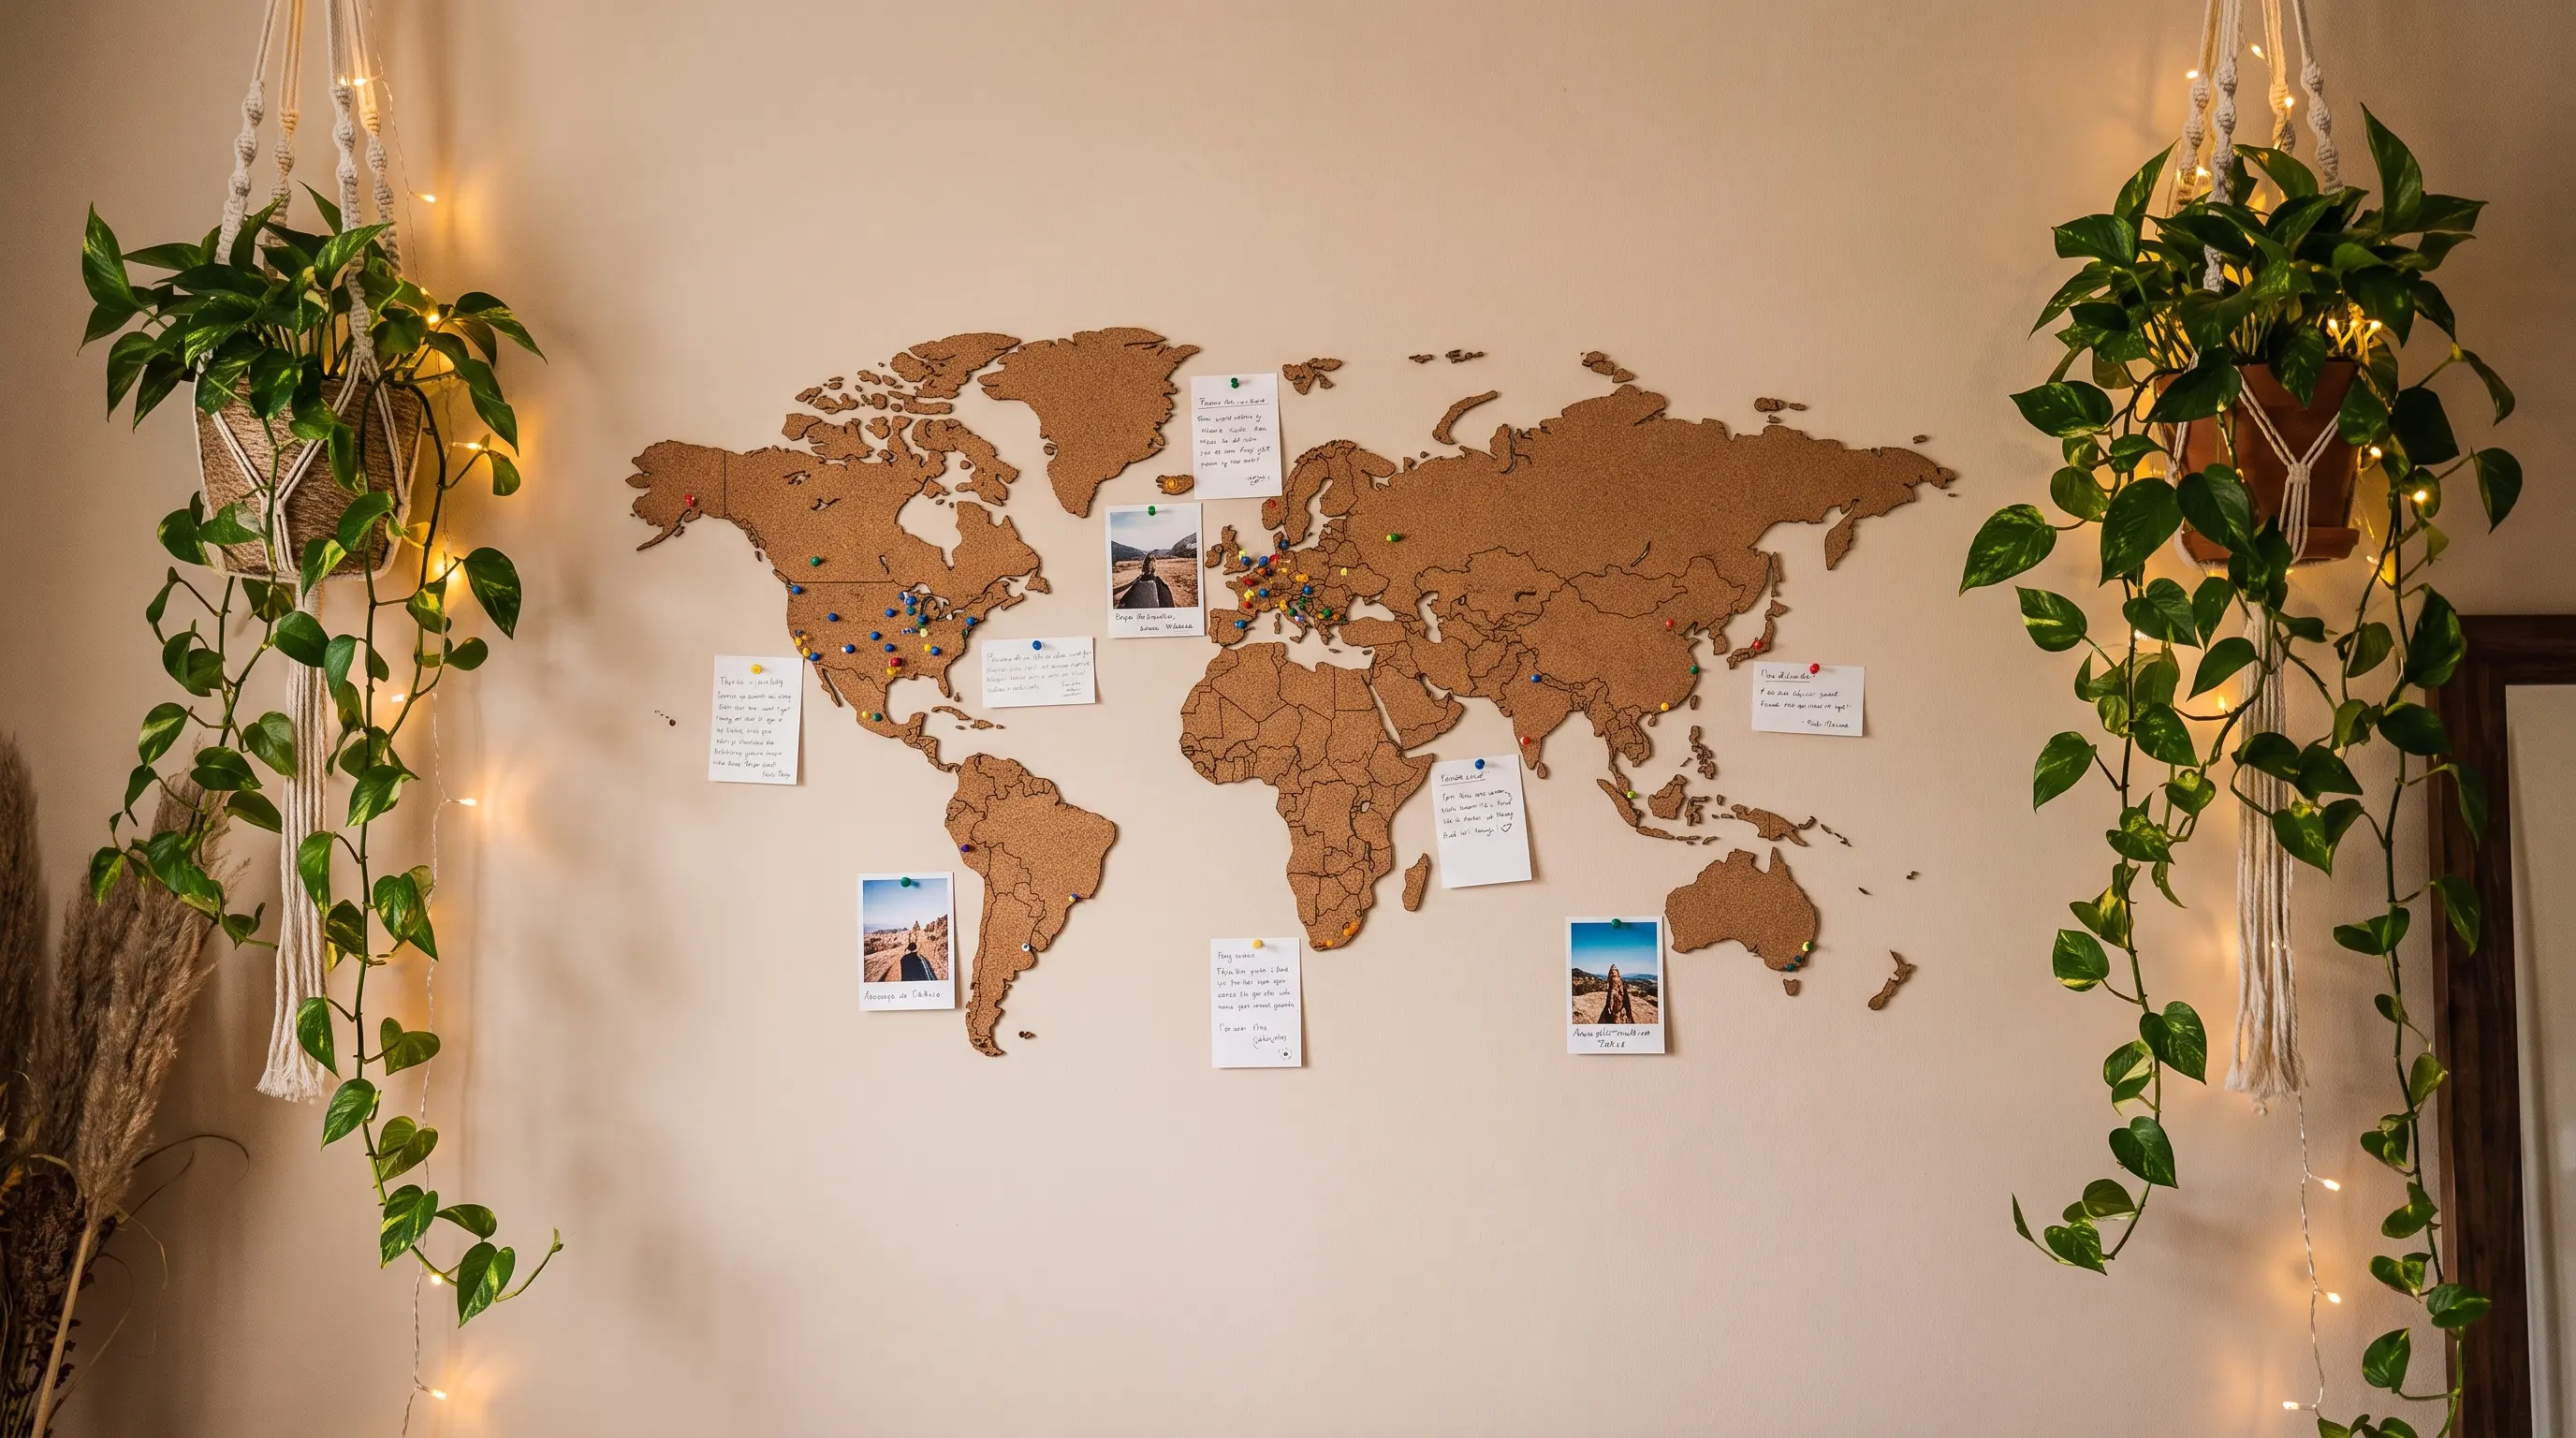
Cut cork into a world map shape and use pins to mark places you have visited or hope to visit. A bright paint color can give the map a more modern look.
| Cost | $20 to $40 |
| Skill level | Beginner |
| Material Required | Cork sheets, map template, cutting tool, paint, and pins |
How to make it: Trace a map onto the cork and cut out the main sections. Paint the cork if desired, mount it on the wall, and add pins to mark locations.
11. Cork Silhouette Art
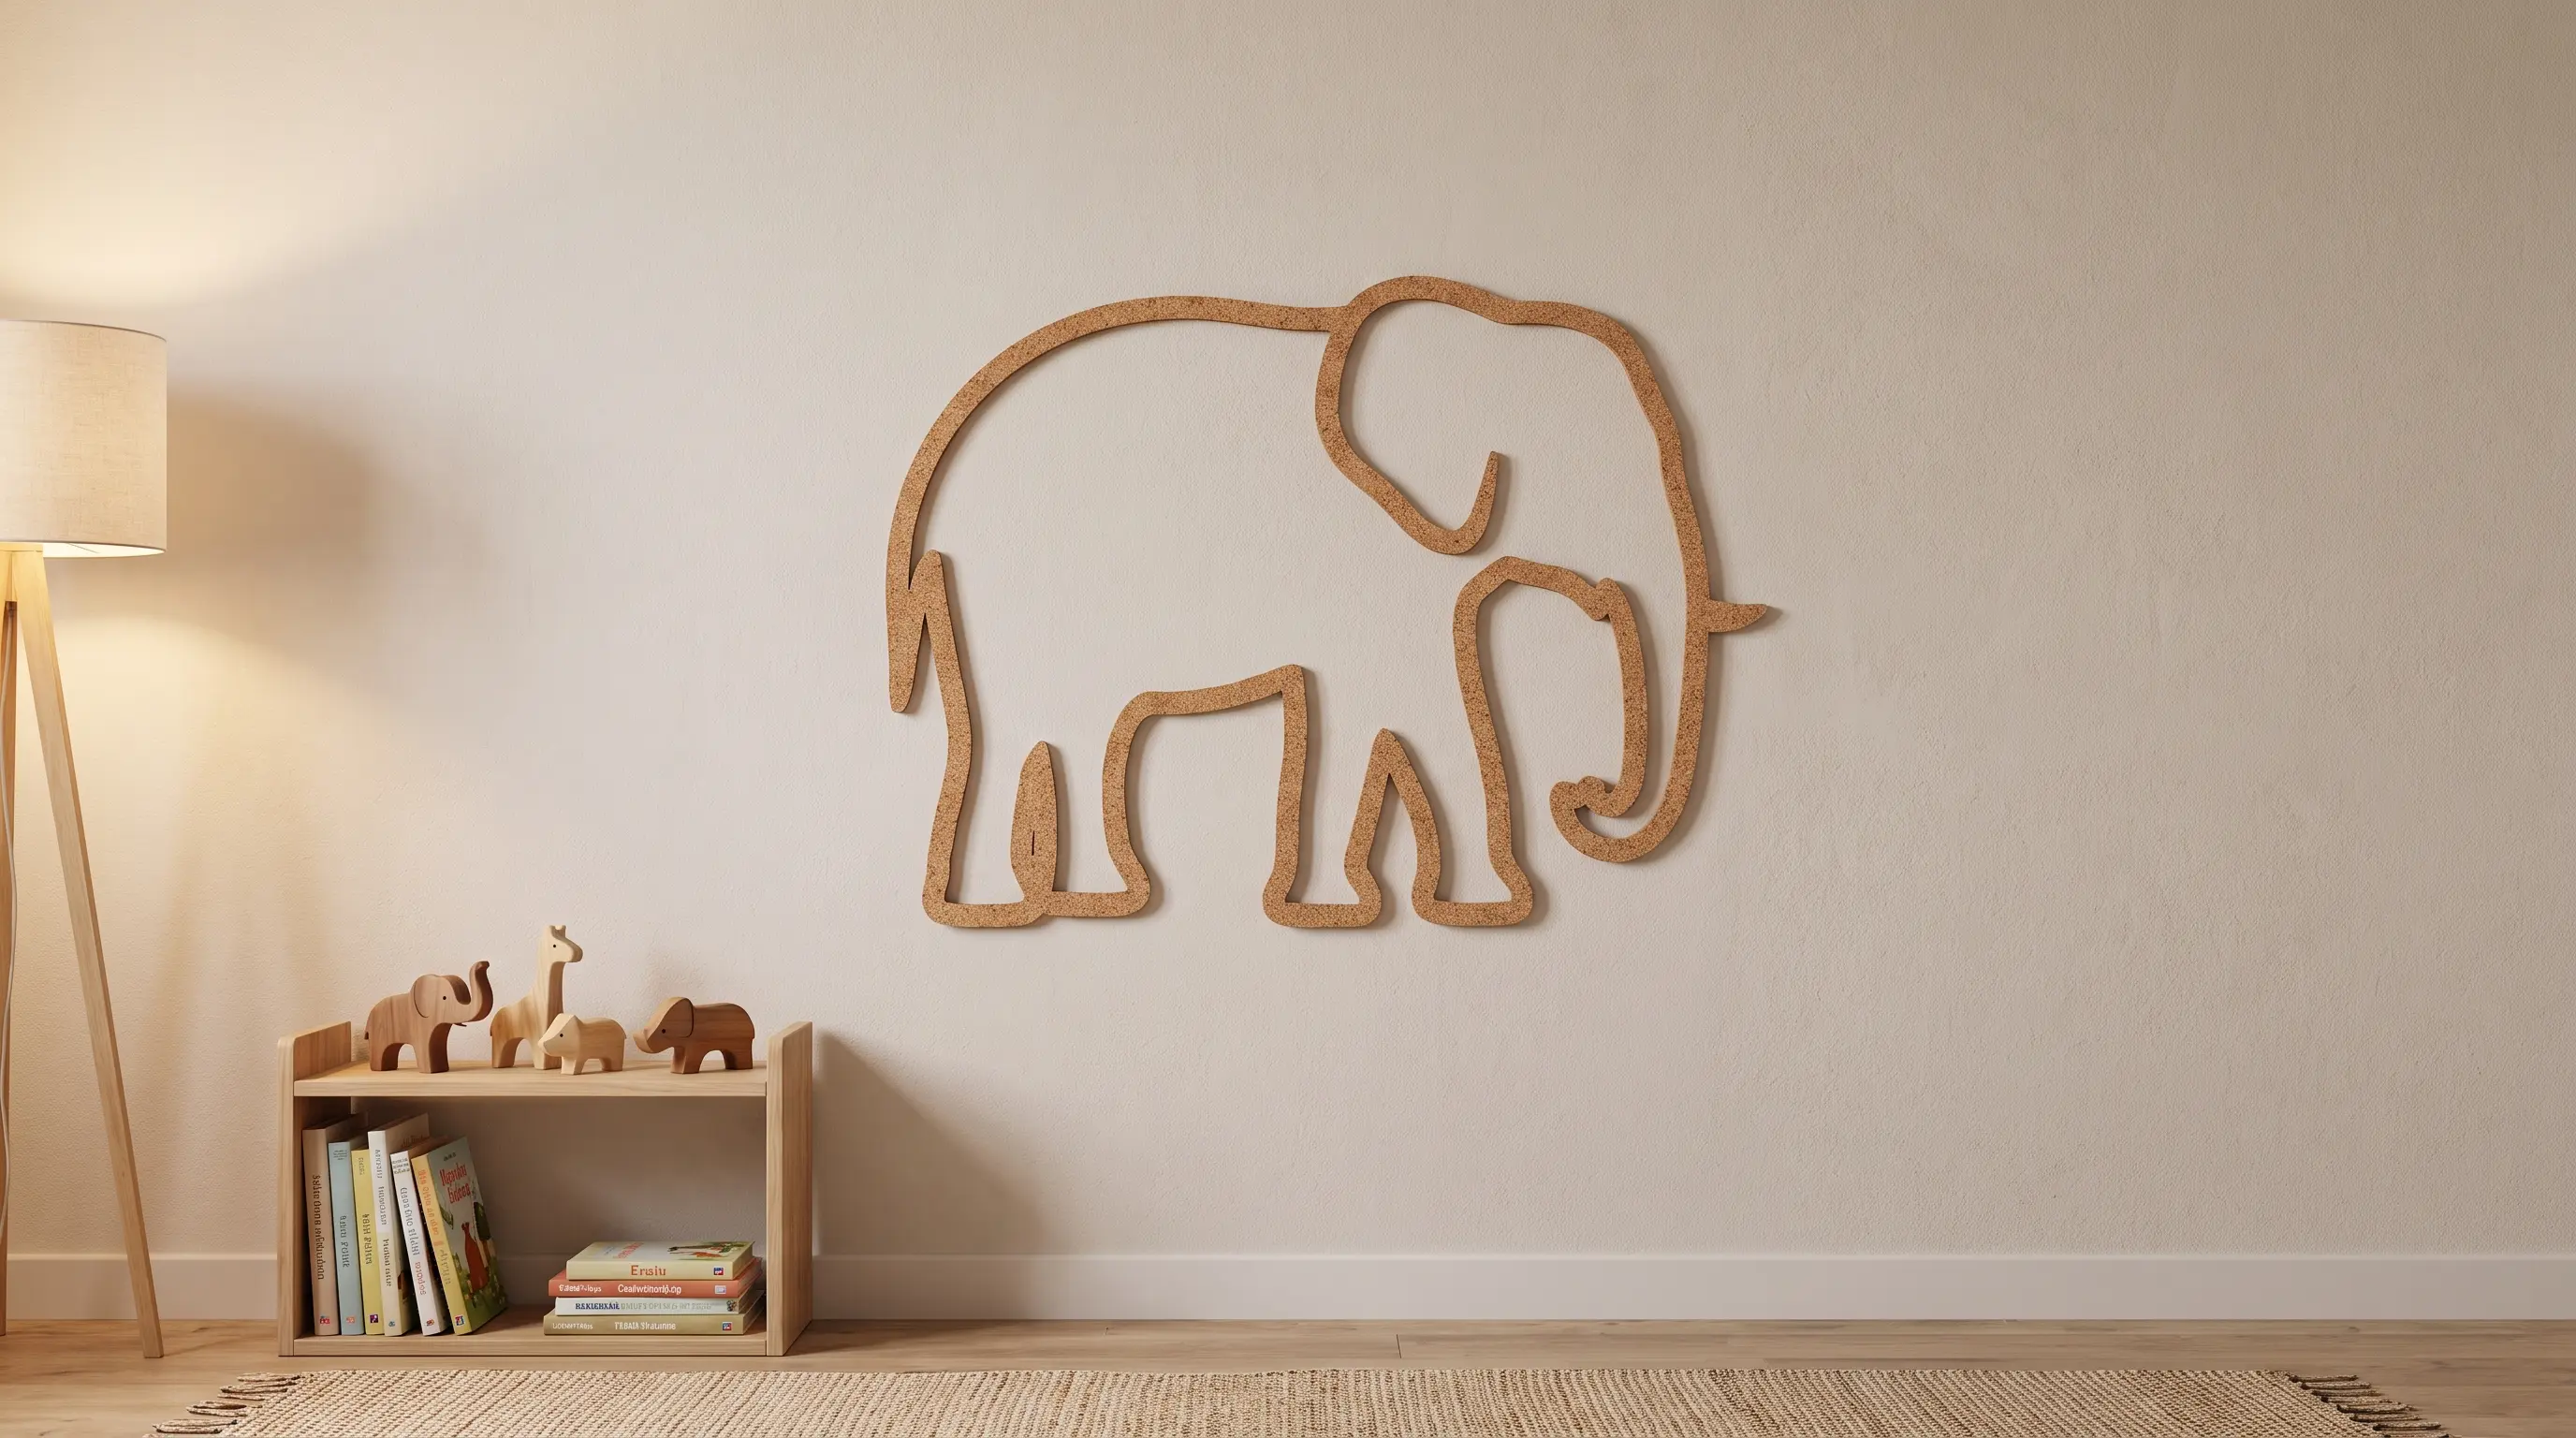
Use cork pieces to form a large animal or object shape directly on the wall.
| Cost | $10 to $30 |
| Skill level | Beginner- friendly |
| Material Required | Cork sheets, silhouette template, cutting tool, and wall-safe adhesive |
How to make it: Enlarge and trace your chosen shape onto cork. Cut out each section, arrange the pieces on the wall, and attach them once the placement looks right.
12. Organic Branch Display
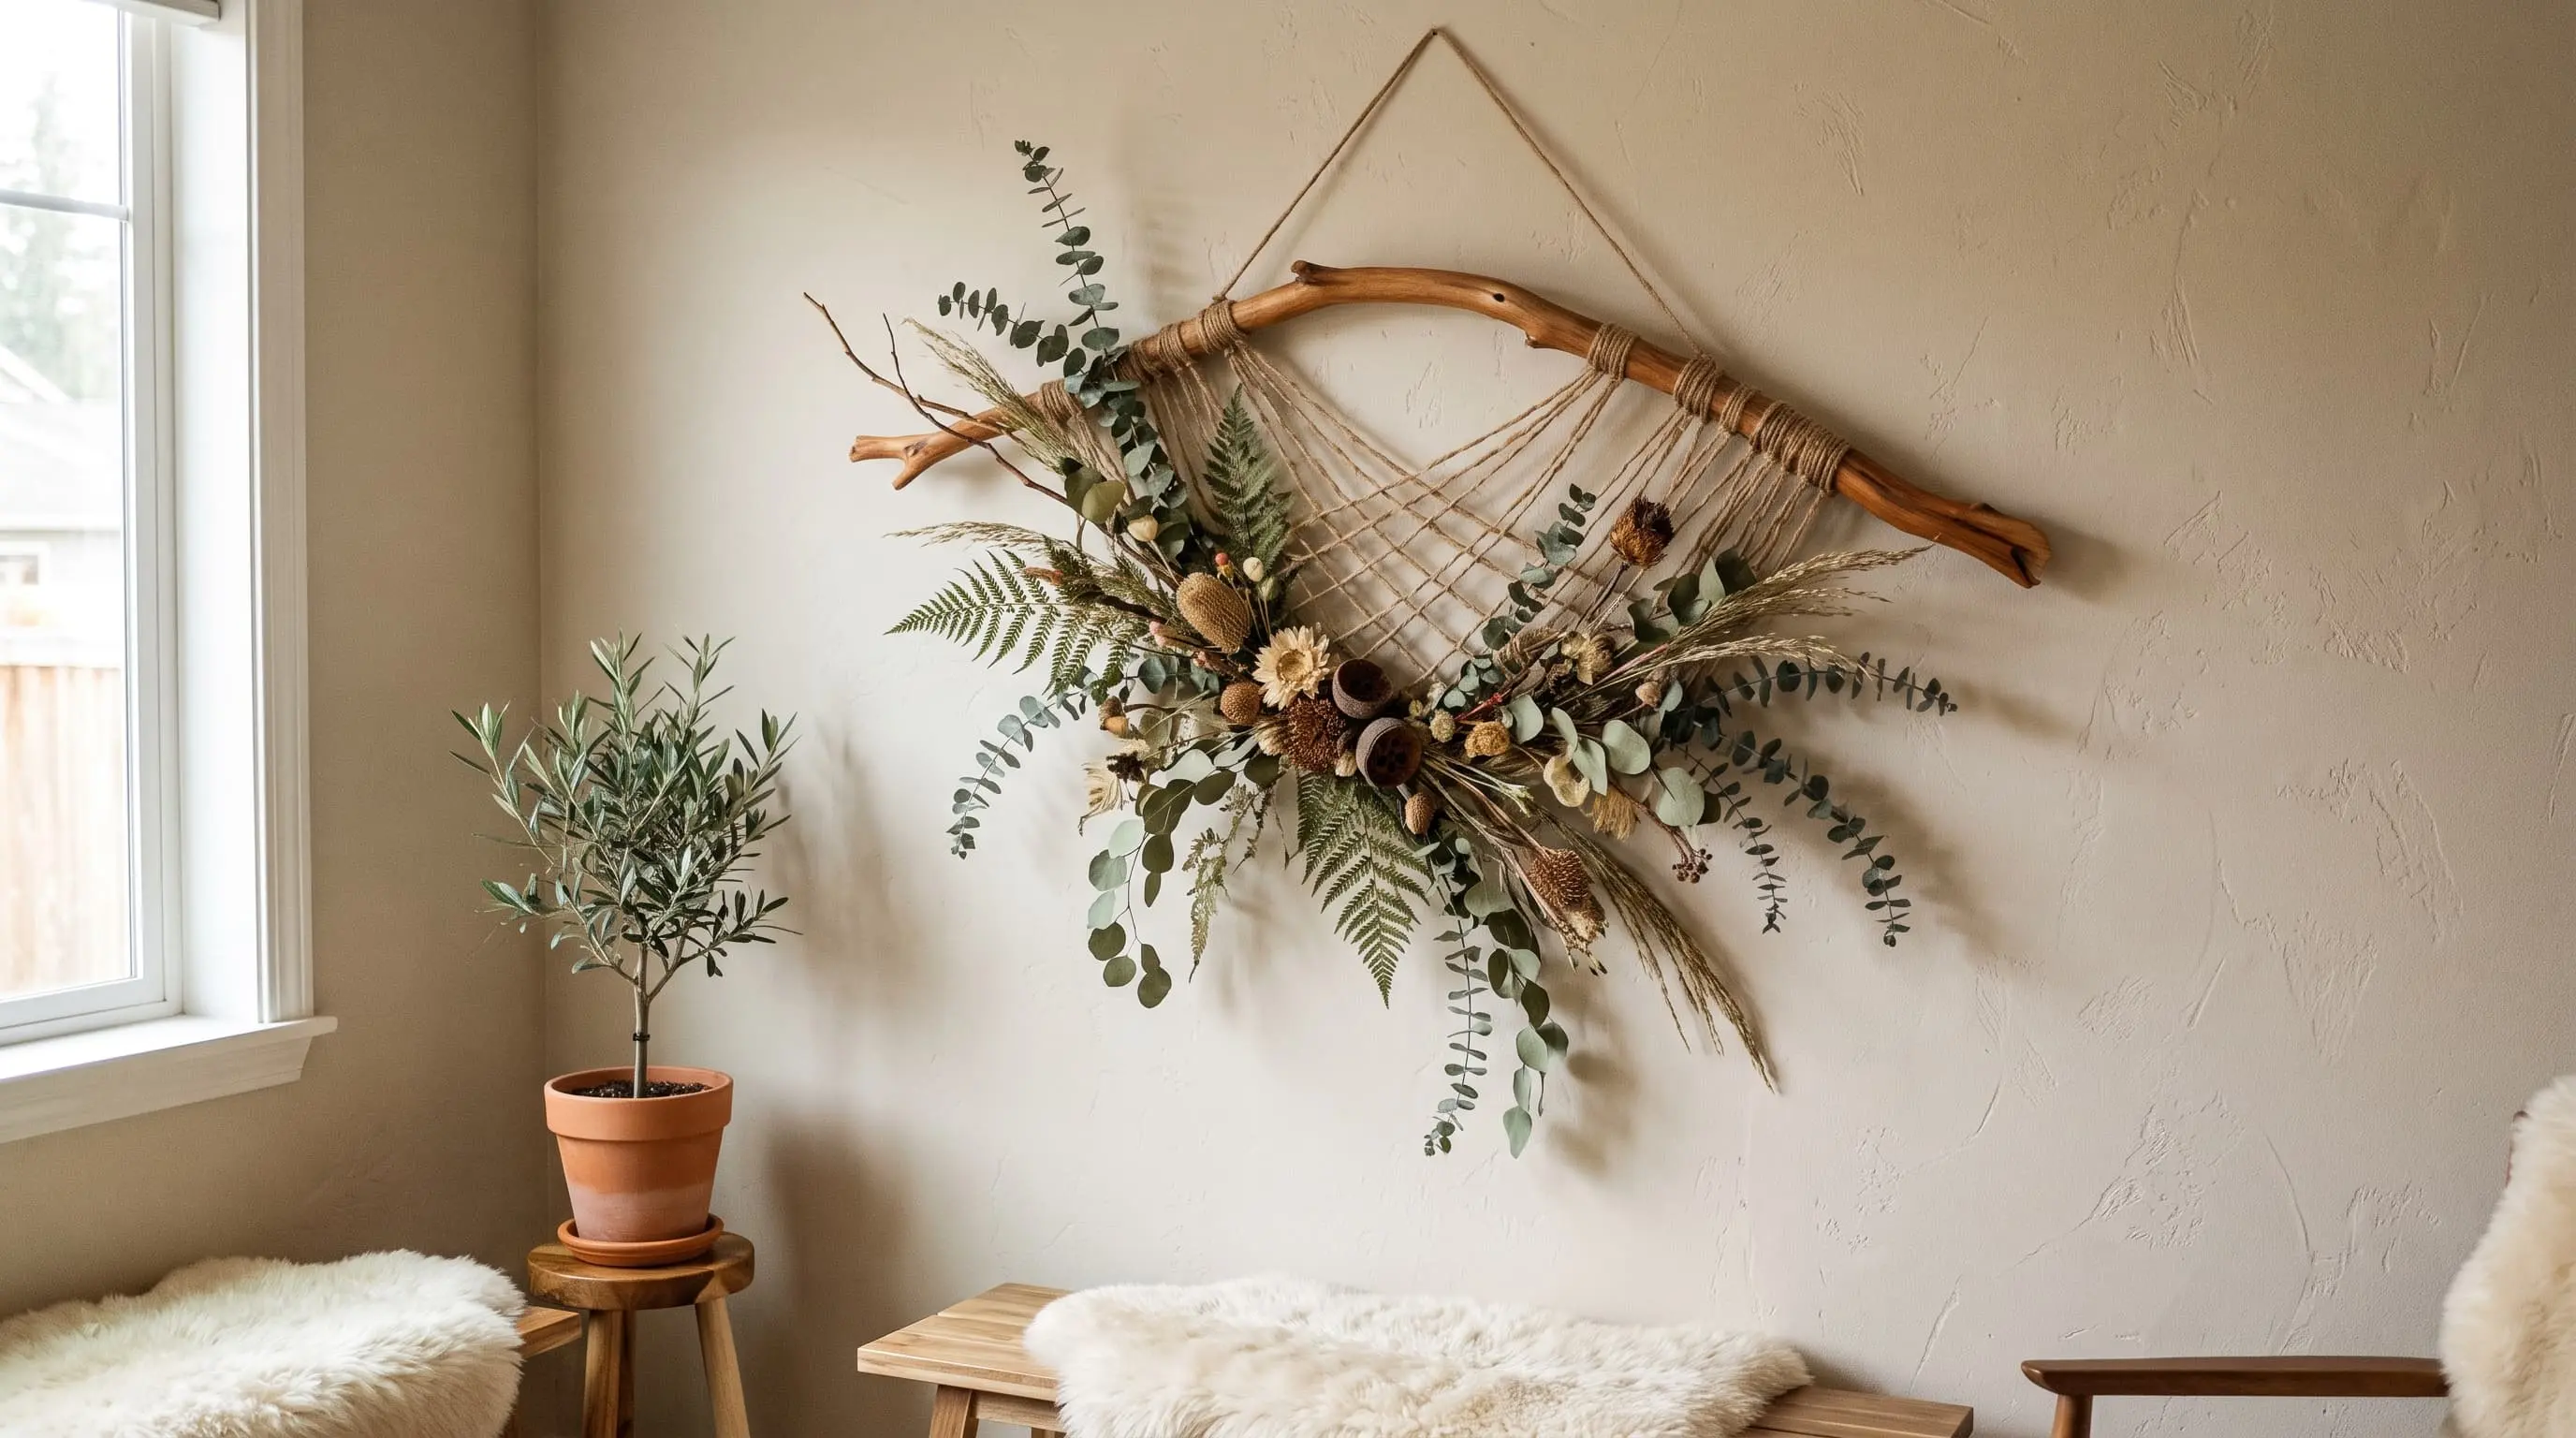
Use two branches, moss, and a wooden plaque to make a wall-mounted nature display. Choose branches with a similar size and form so the finished piece feels balanced.
| Cost | $5 to $50 |
| Skill level | Basic tool skills |
| Material Required | Wooden plaque, crafting moss, branches, clips, screws, and pruning shears |
How to make it: Trim the branches to the needed size. Fix them to the plaque with cable or plumbing clips and screws, add moss, then hang the plaque securely.
13. Cyanotype Sun Print
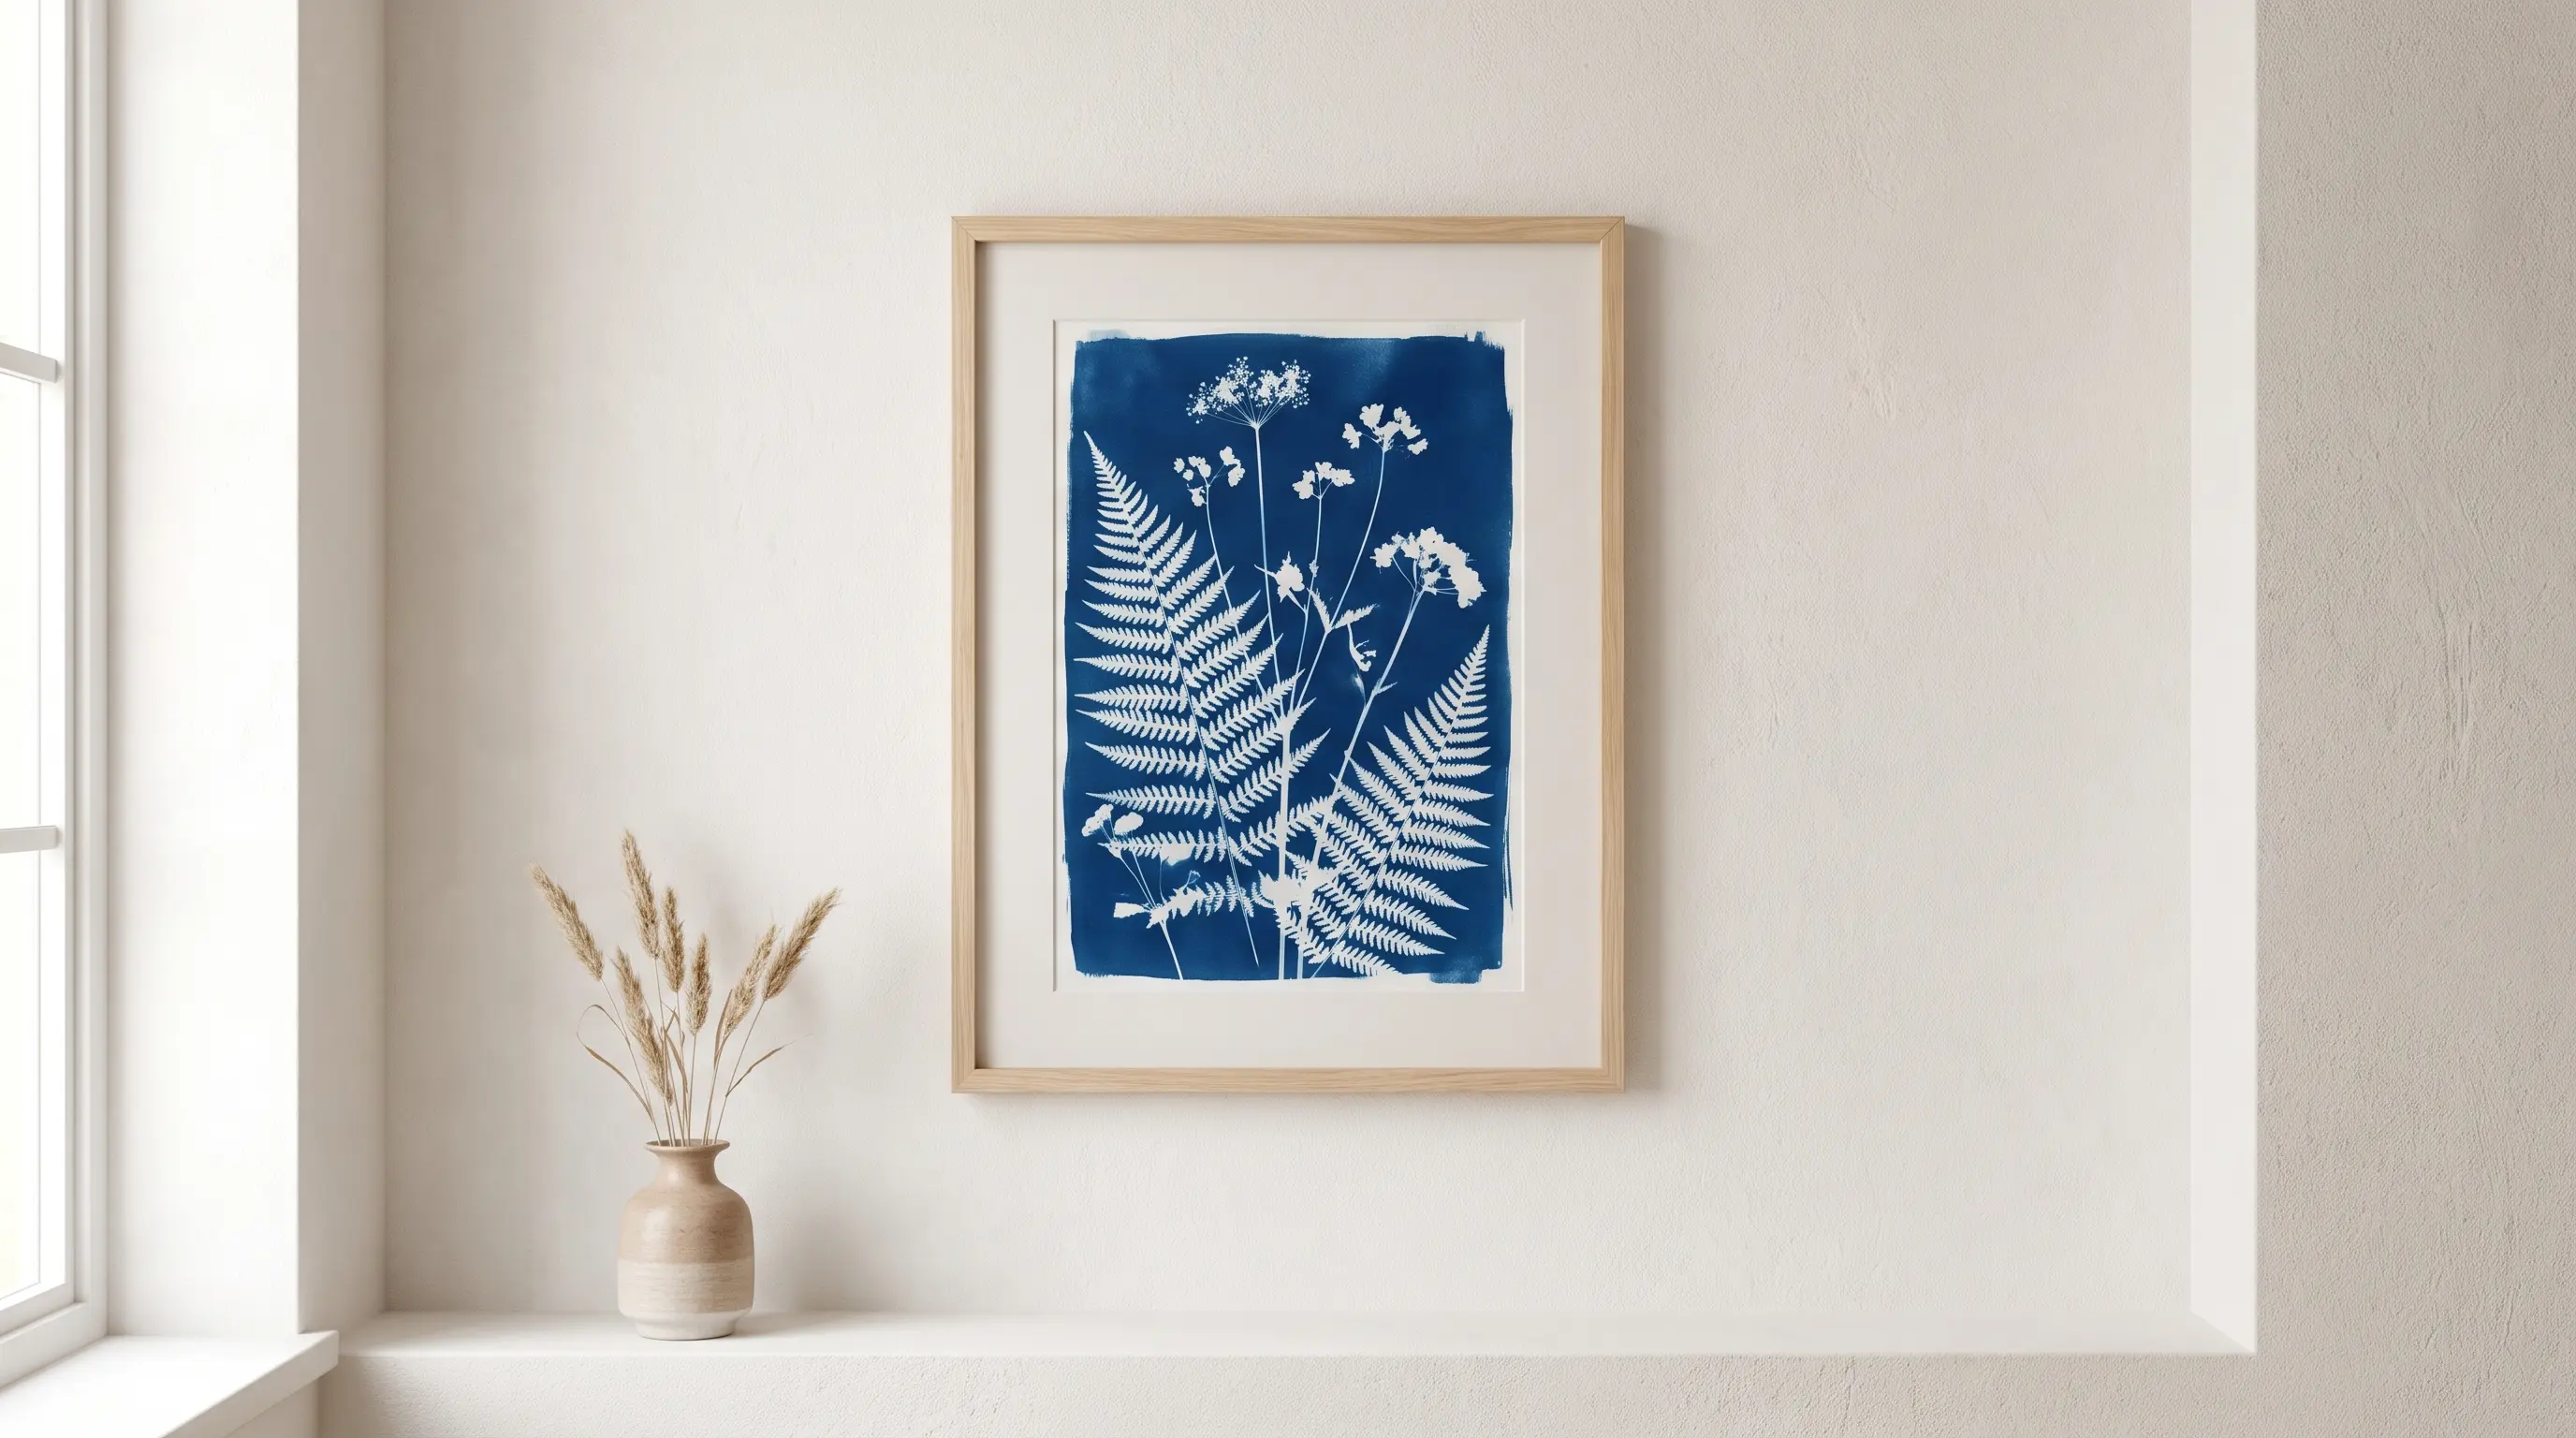
Use a sun-print method to make a custom blue wall print. Leaves or other flat items can form the main design, giving each print its own natural pattern. The source does not list the full supply list or method.
If you want to go deeper into the chemistry behind that Prussian-blue color, Smithsonian Associates’ cyanotype program walks through how the light-sensitive process actually works.
| Cost | $15 to $40 |
| Skill level | Beginner- friendly |
| Material Required | Light-sensitive chemicals or pre-coated paper, natural objects, and a water rinse |
How to make it: Coat paper or fabric with a light-sensitive cyanotype mixture in a dim room and let it dry completely. Then arrange the objects on top, expose them to direct sunlight for a few minutes, and rinse the print in cold water to reveal a rich Prussian blue image.
14. Simple Wooden Wall Art
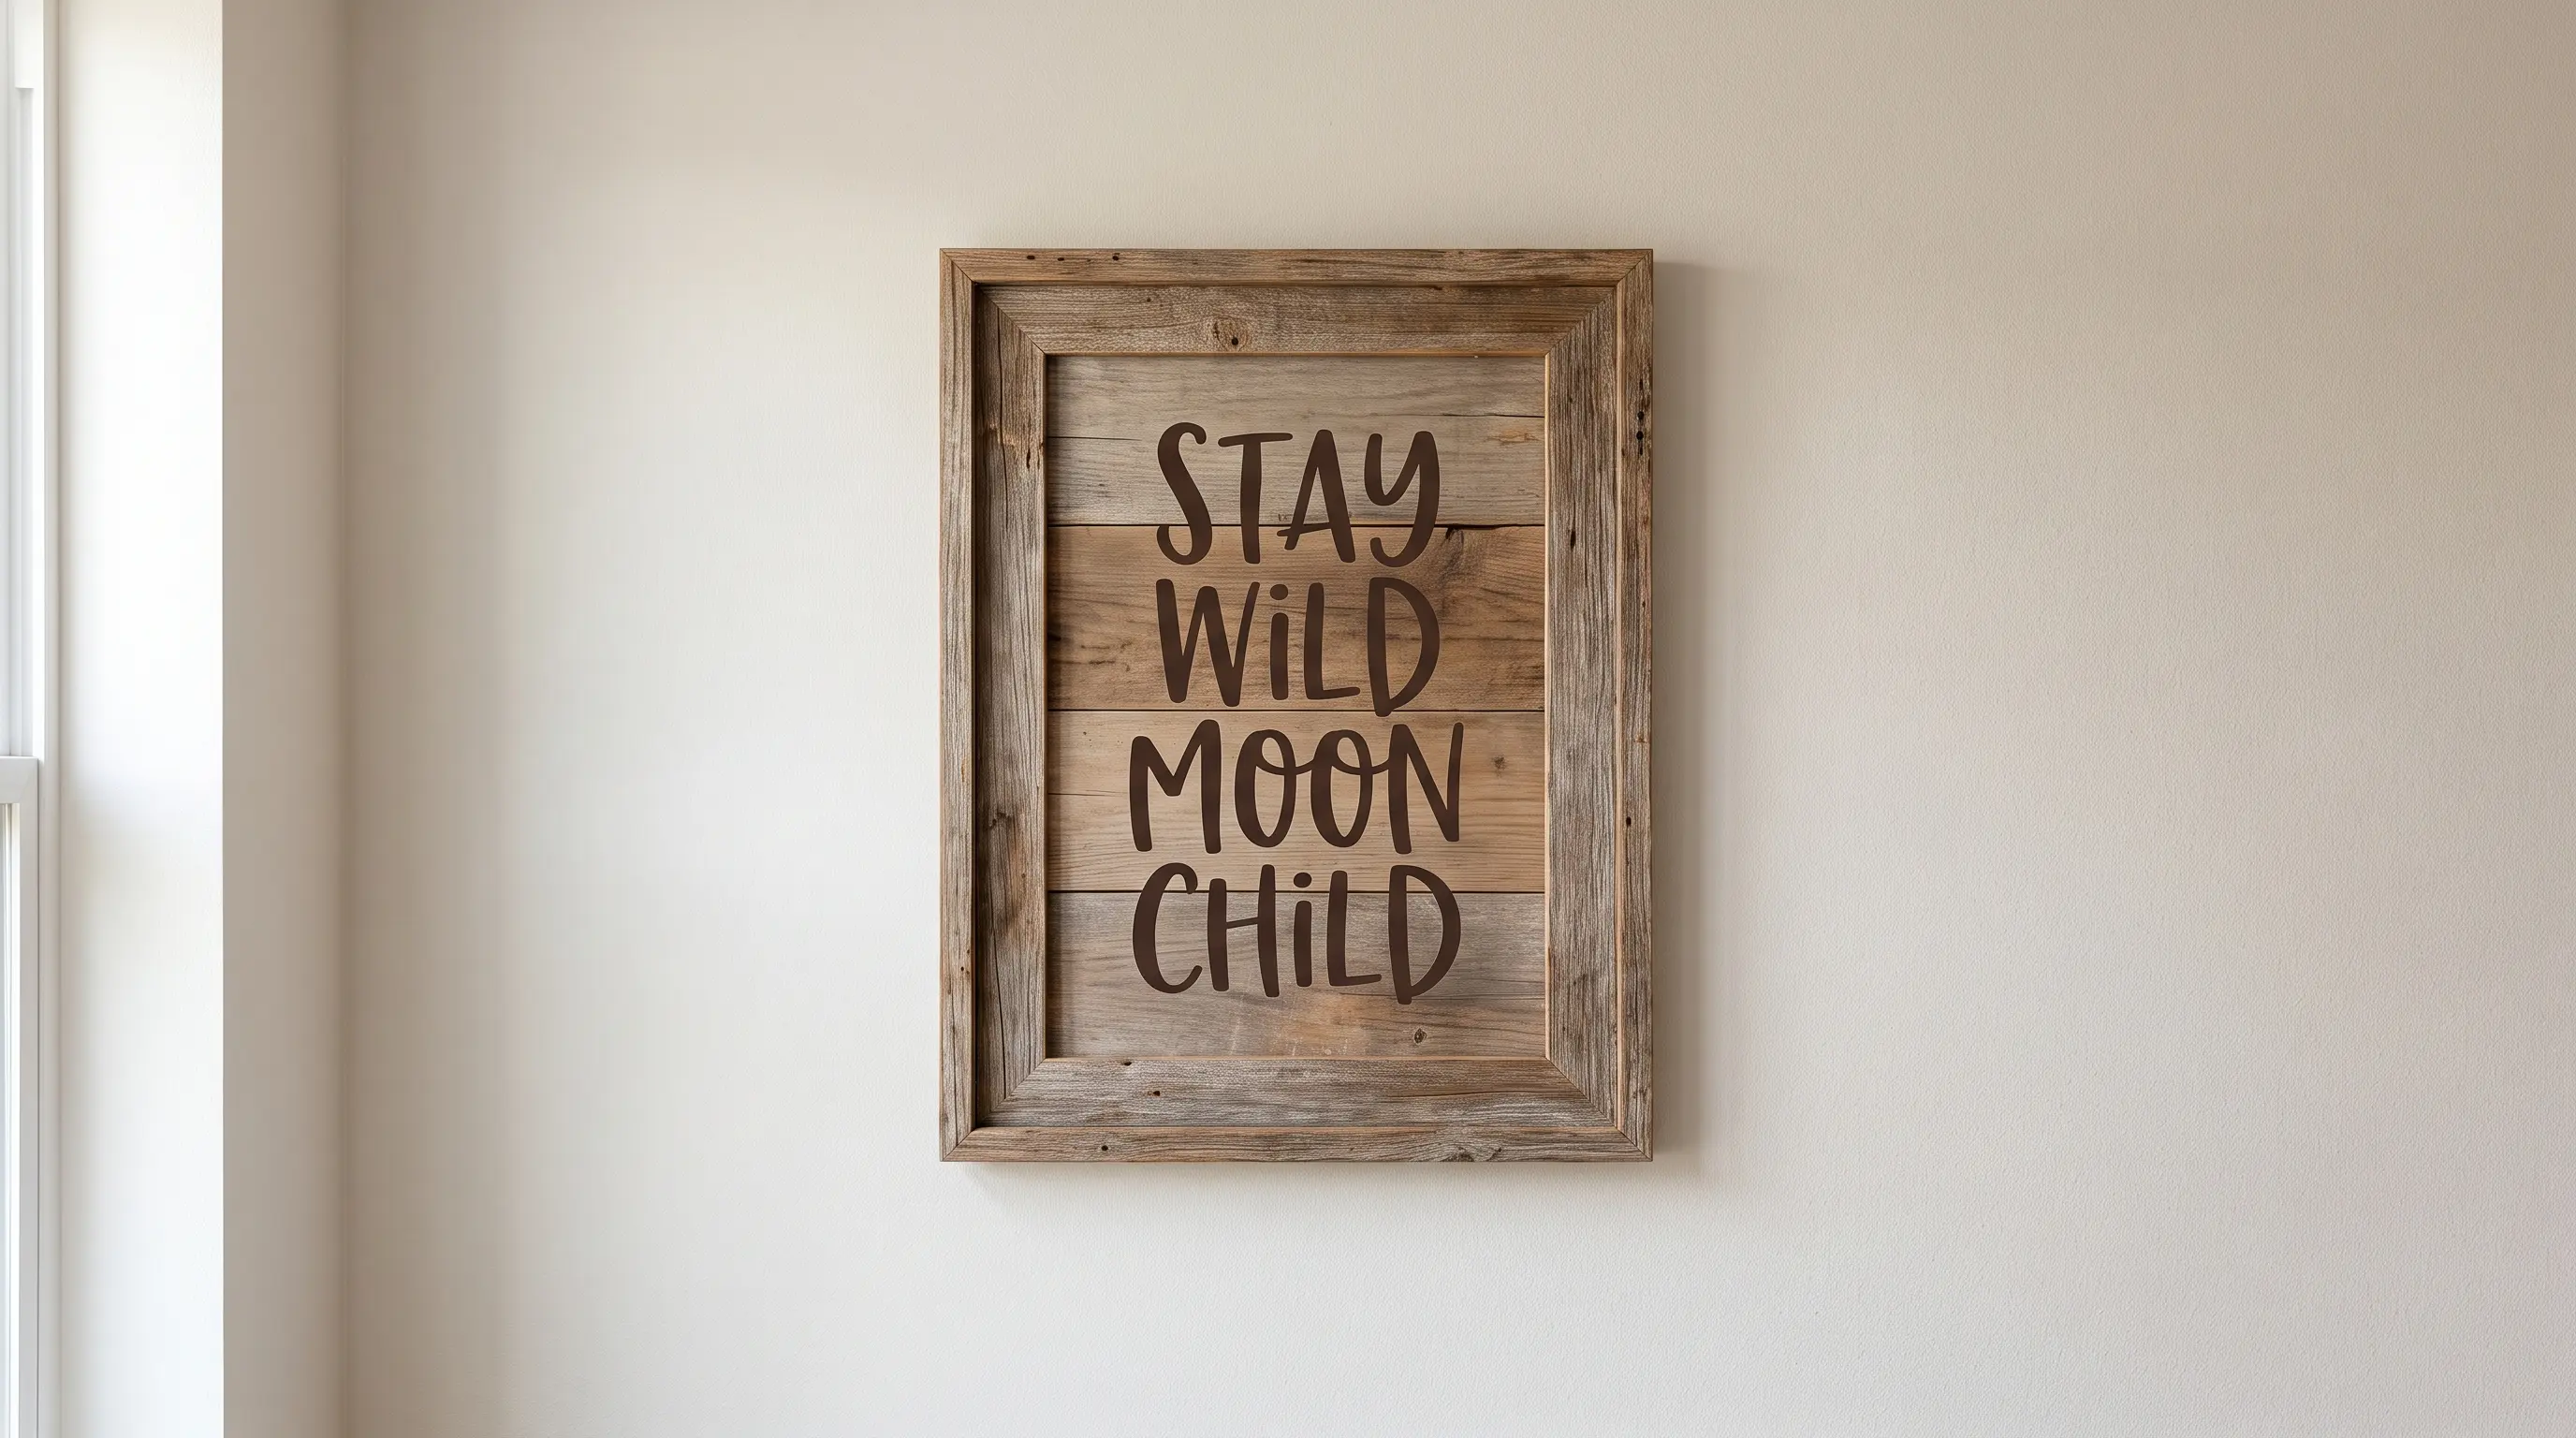
Use a piece of wood as the base for a favorite quote or short phrase. Vinyl lettering and a secondhand frame can help turn a basic piece of wood into a personal wall decor piece.
| Cost | $20 to $60 |
| Skill level | Intermediate |
| Material Required | Wood, vinyl lettering, cutting machine, and secondhand frame |
How to make it: Cut the wood to fit the frame, then create your chosen words from vinyl. Press the letters onto the wood, place the finished piece in the frame, and secure it before hanging.
Textile & Fabric Wall Art
Fabric, rope, baskets, and beads can add warmth and texture to a plain wall. These projects also give you useful ways to reuse old cloth, rugs, and items already stored at home.
15. Rug-Turned-Tapestry
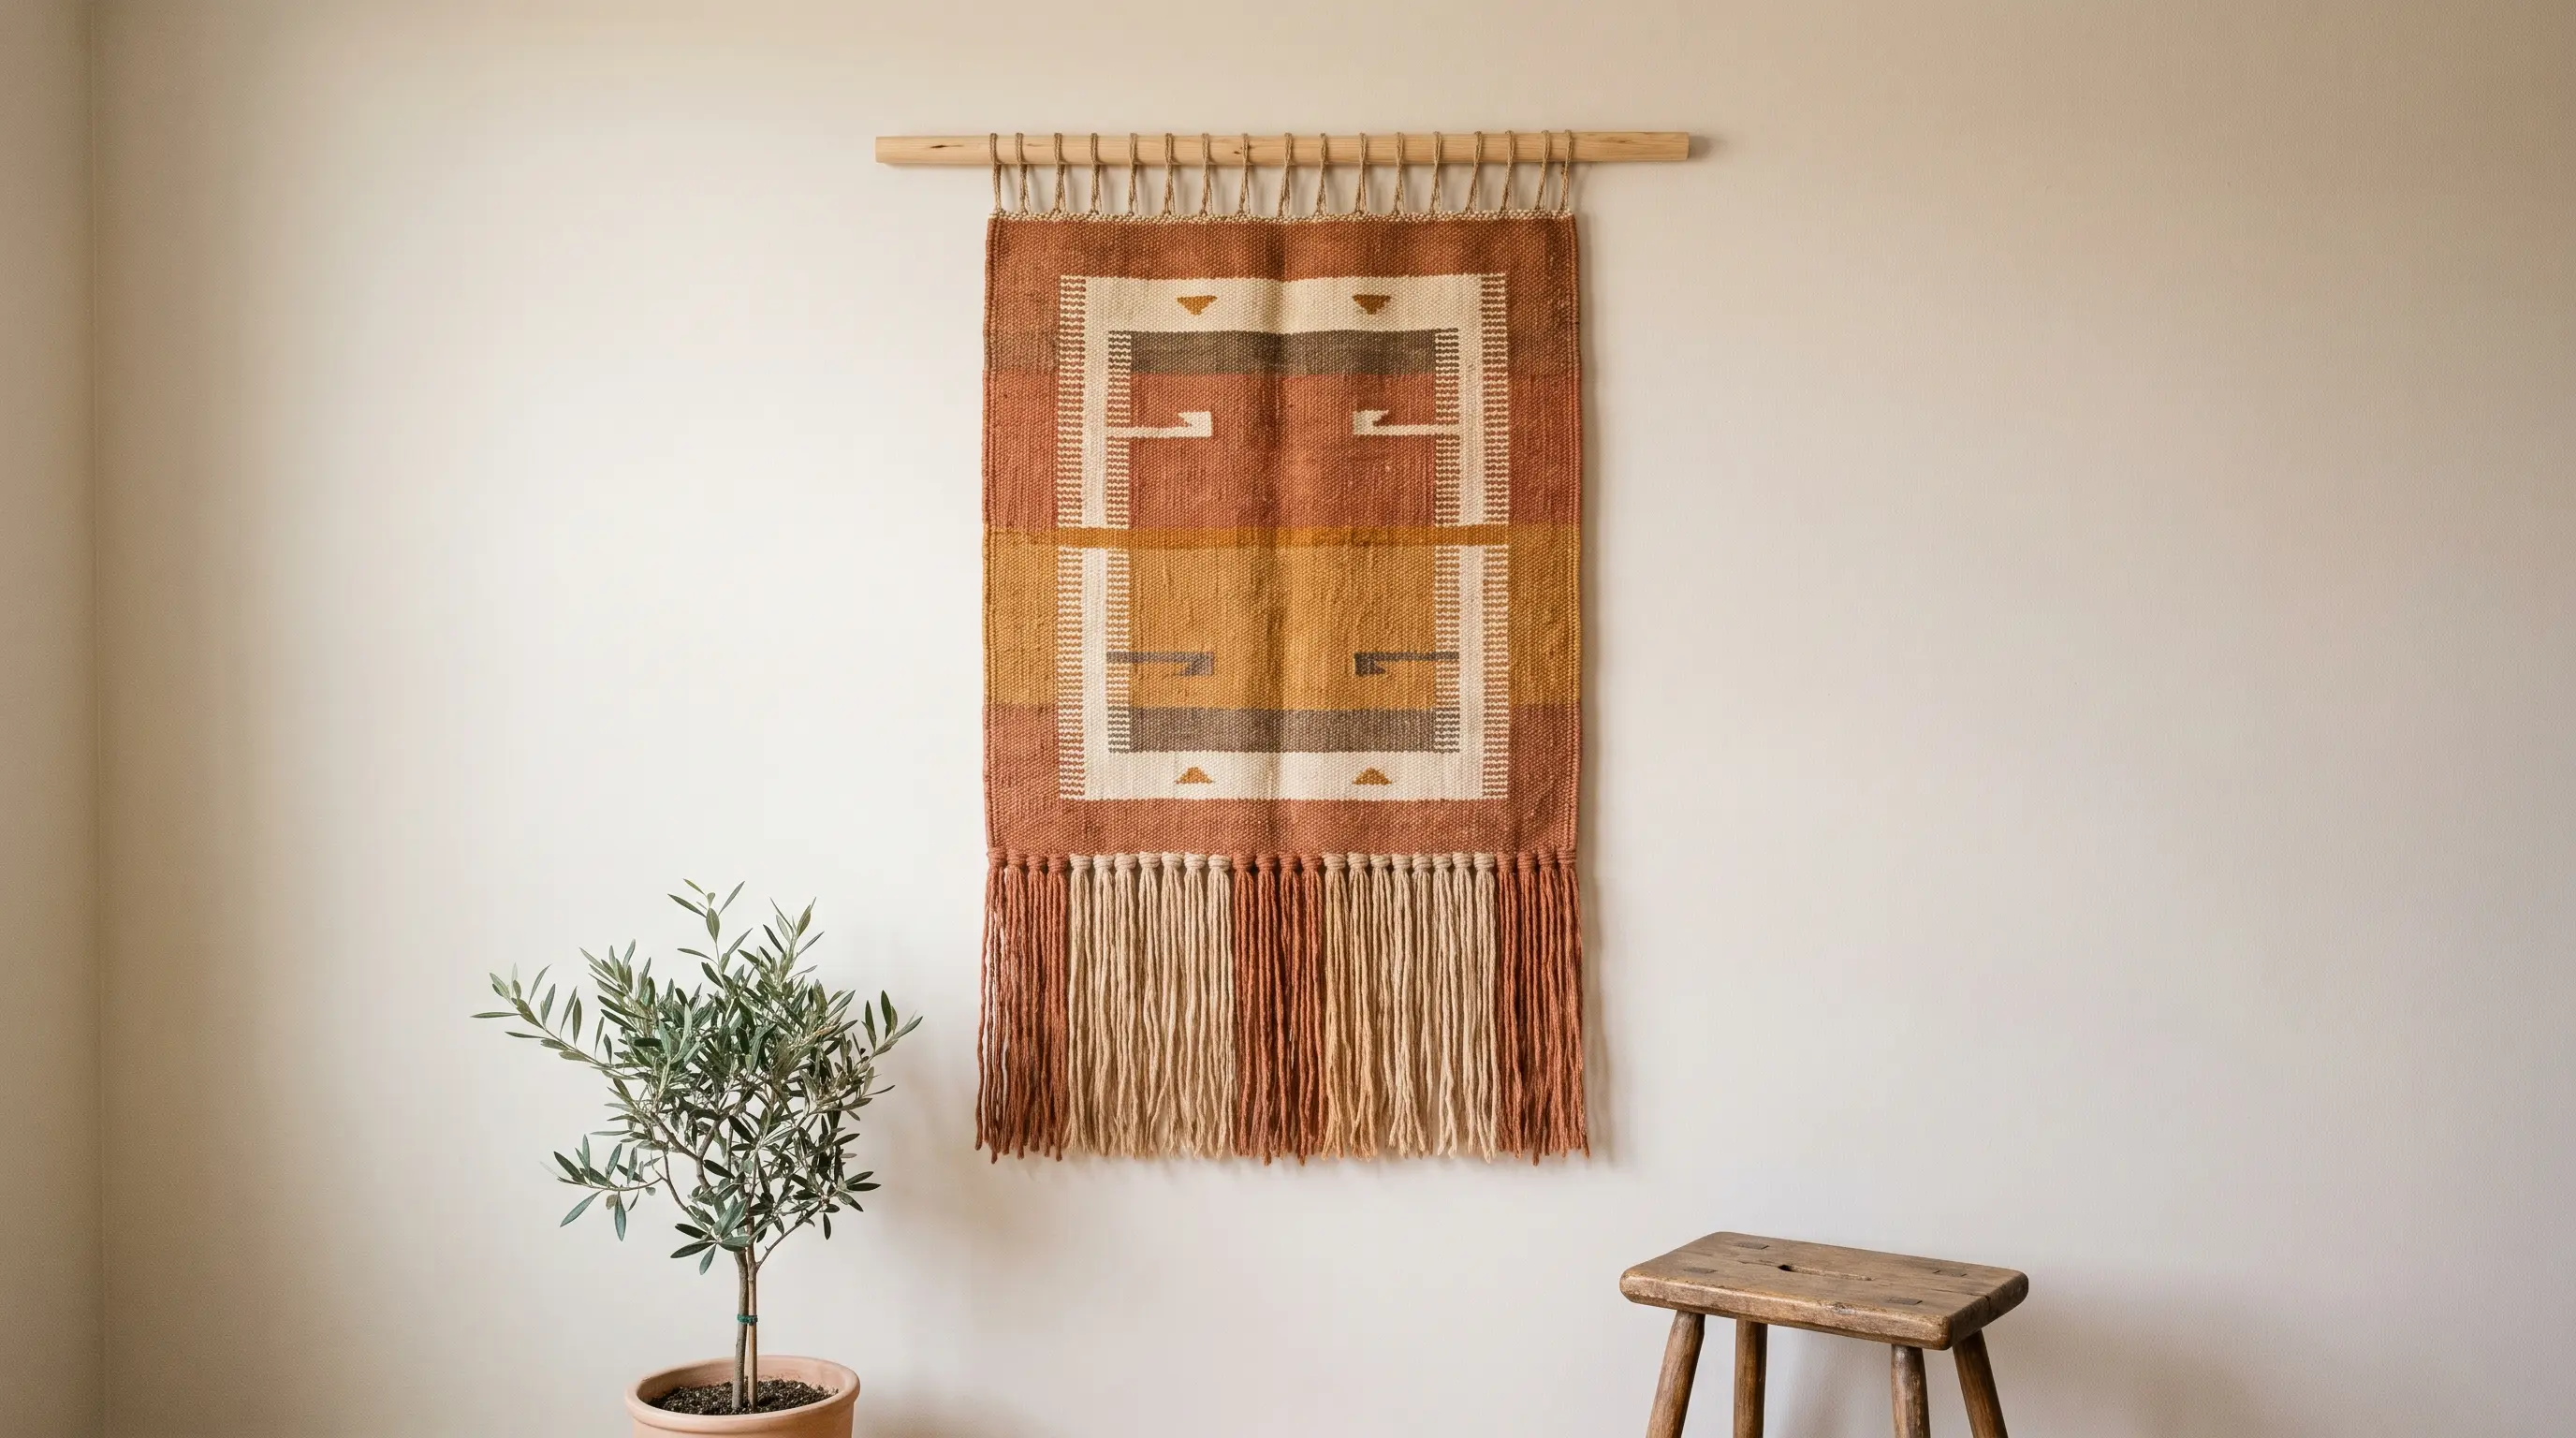
Place an unused rug on the wall instead of leaving it folded away. A basic wood support can help hold it flat and turn it into a large wall feature.
| Cost | $20 to $60 |
| Skill level | Beginner-friendly |
| Material Required | Small rug, basic lumber, and hanging hardware |
How to make it: Attach the top edge of the rug to a wood strip, then add safe hanging hardware to the back. Mount it firmly so the weight is spread across the wall.
16. Framed Textile Swatches
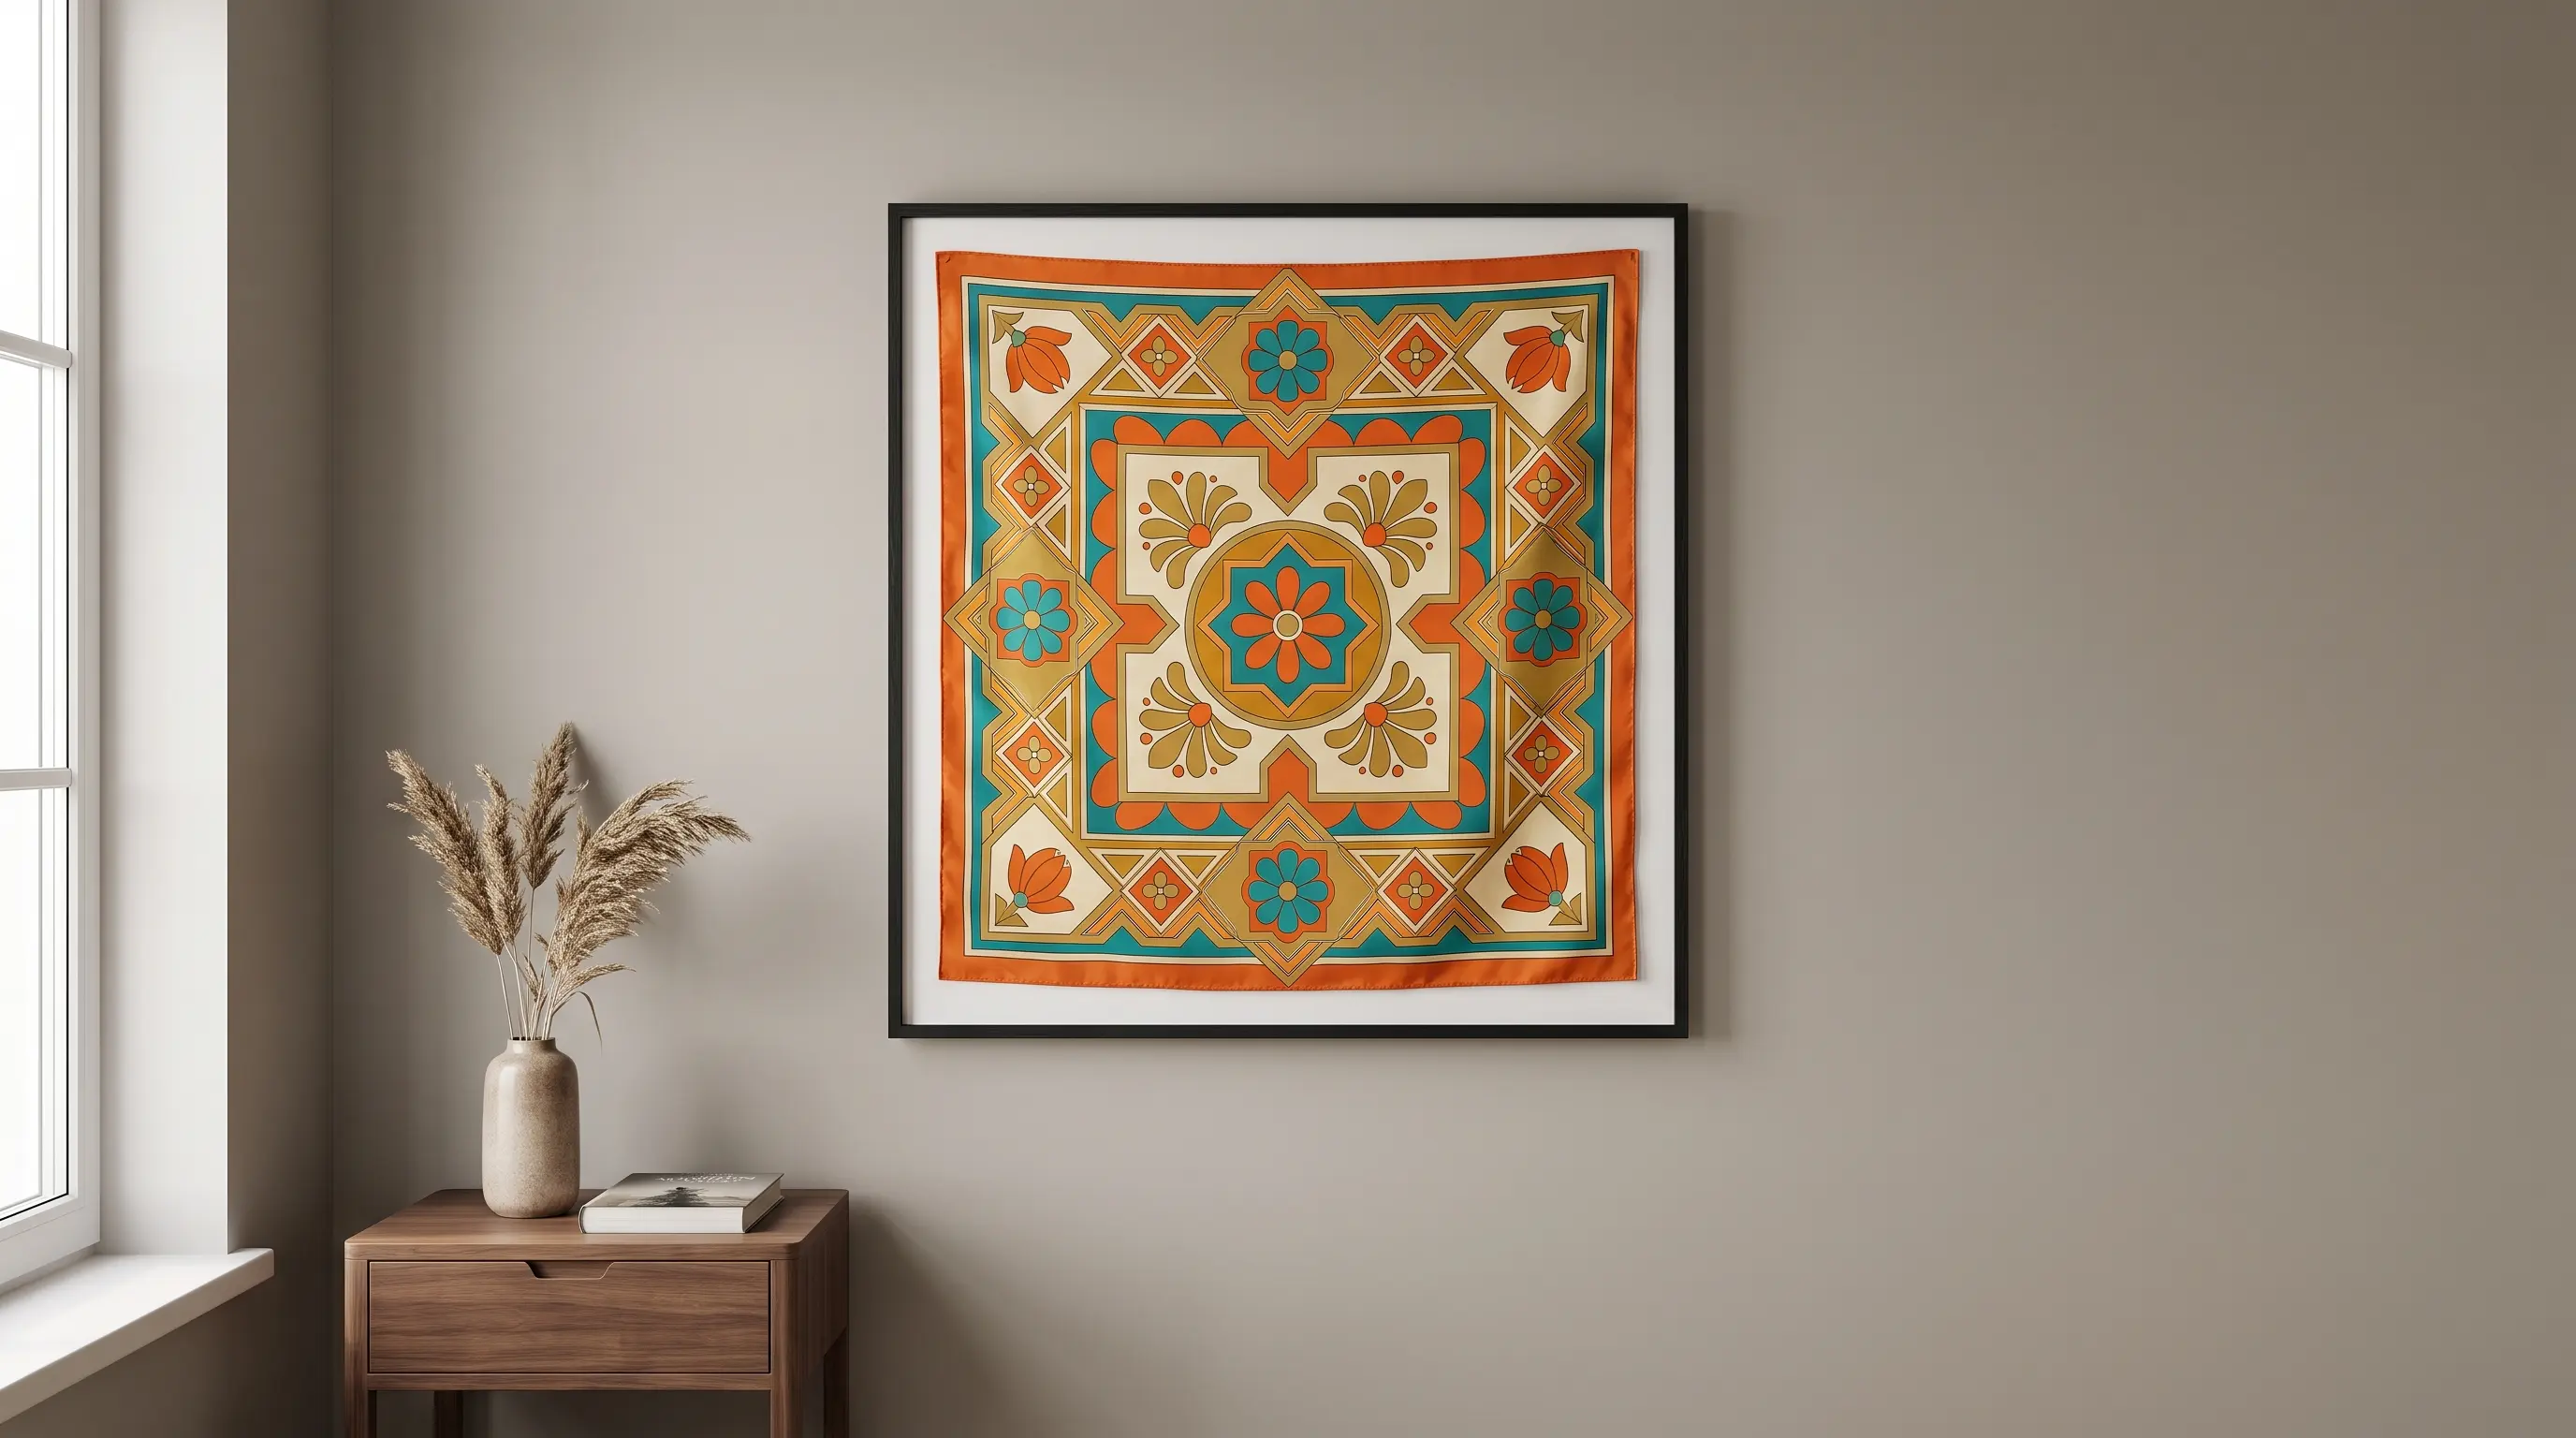
Frame an old scarf or fabric swatch to add color and pattern to a blank wall. A clean frame can make even a small piece of cloth feel neat and planned.
| Cost | $5 to $25 |
| Skill level | Beginner- friendly |
| Material Required | Fabric swatch or scarf, frame, and backing board |
How to make it: Press the fabric flat and place it over the backing board. Fold or trim the edges, secure the cloth, and close the frame before hanging.
17. Woven Basket Wall Display
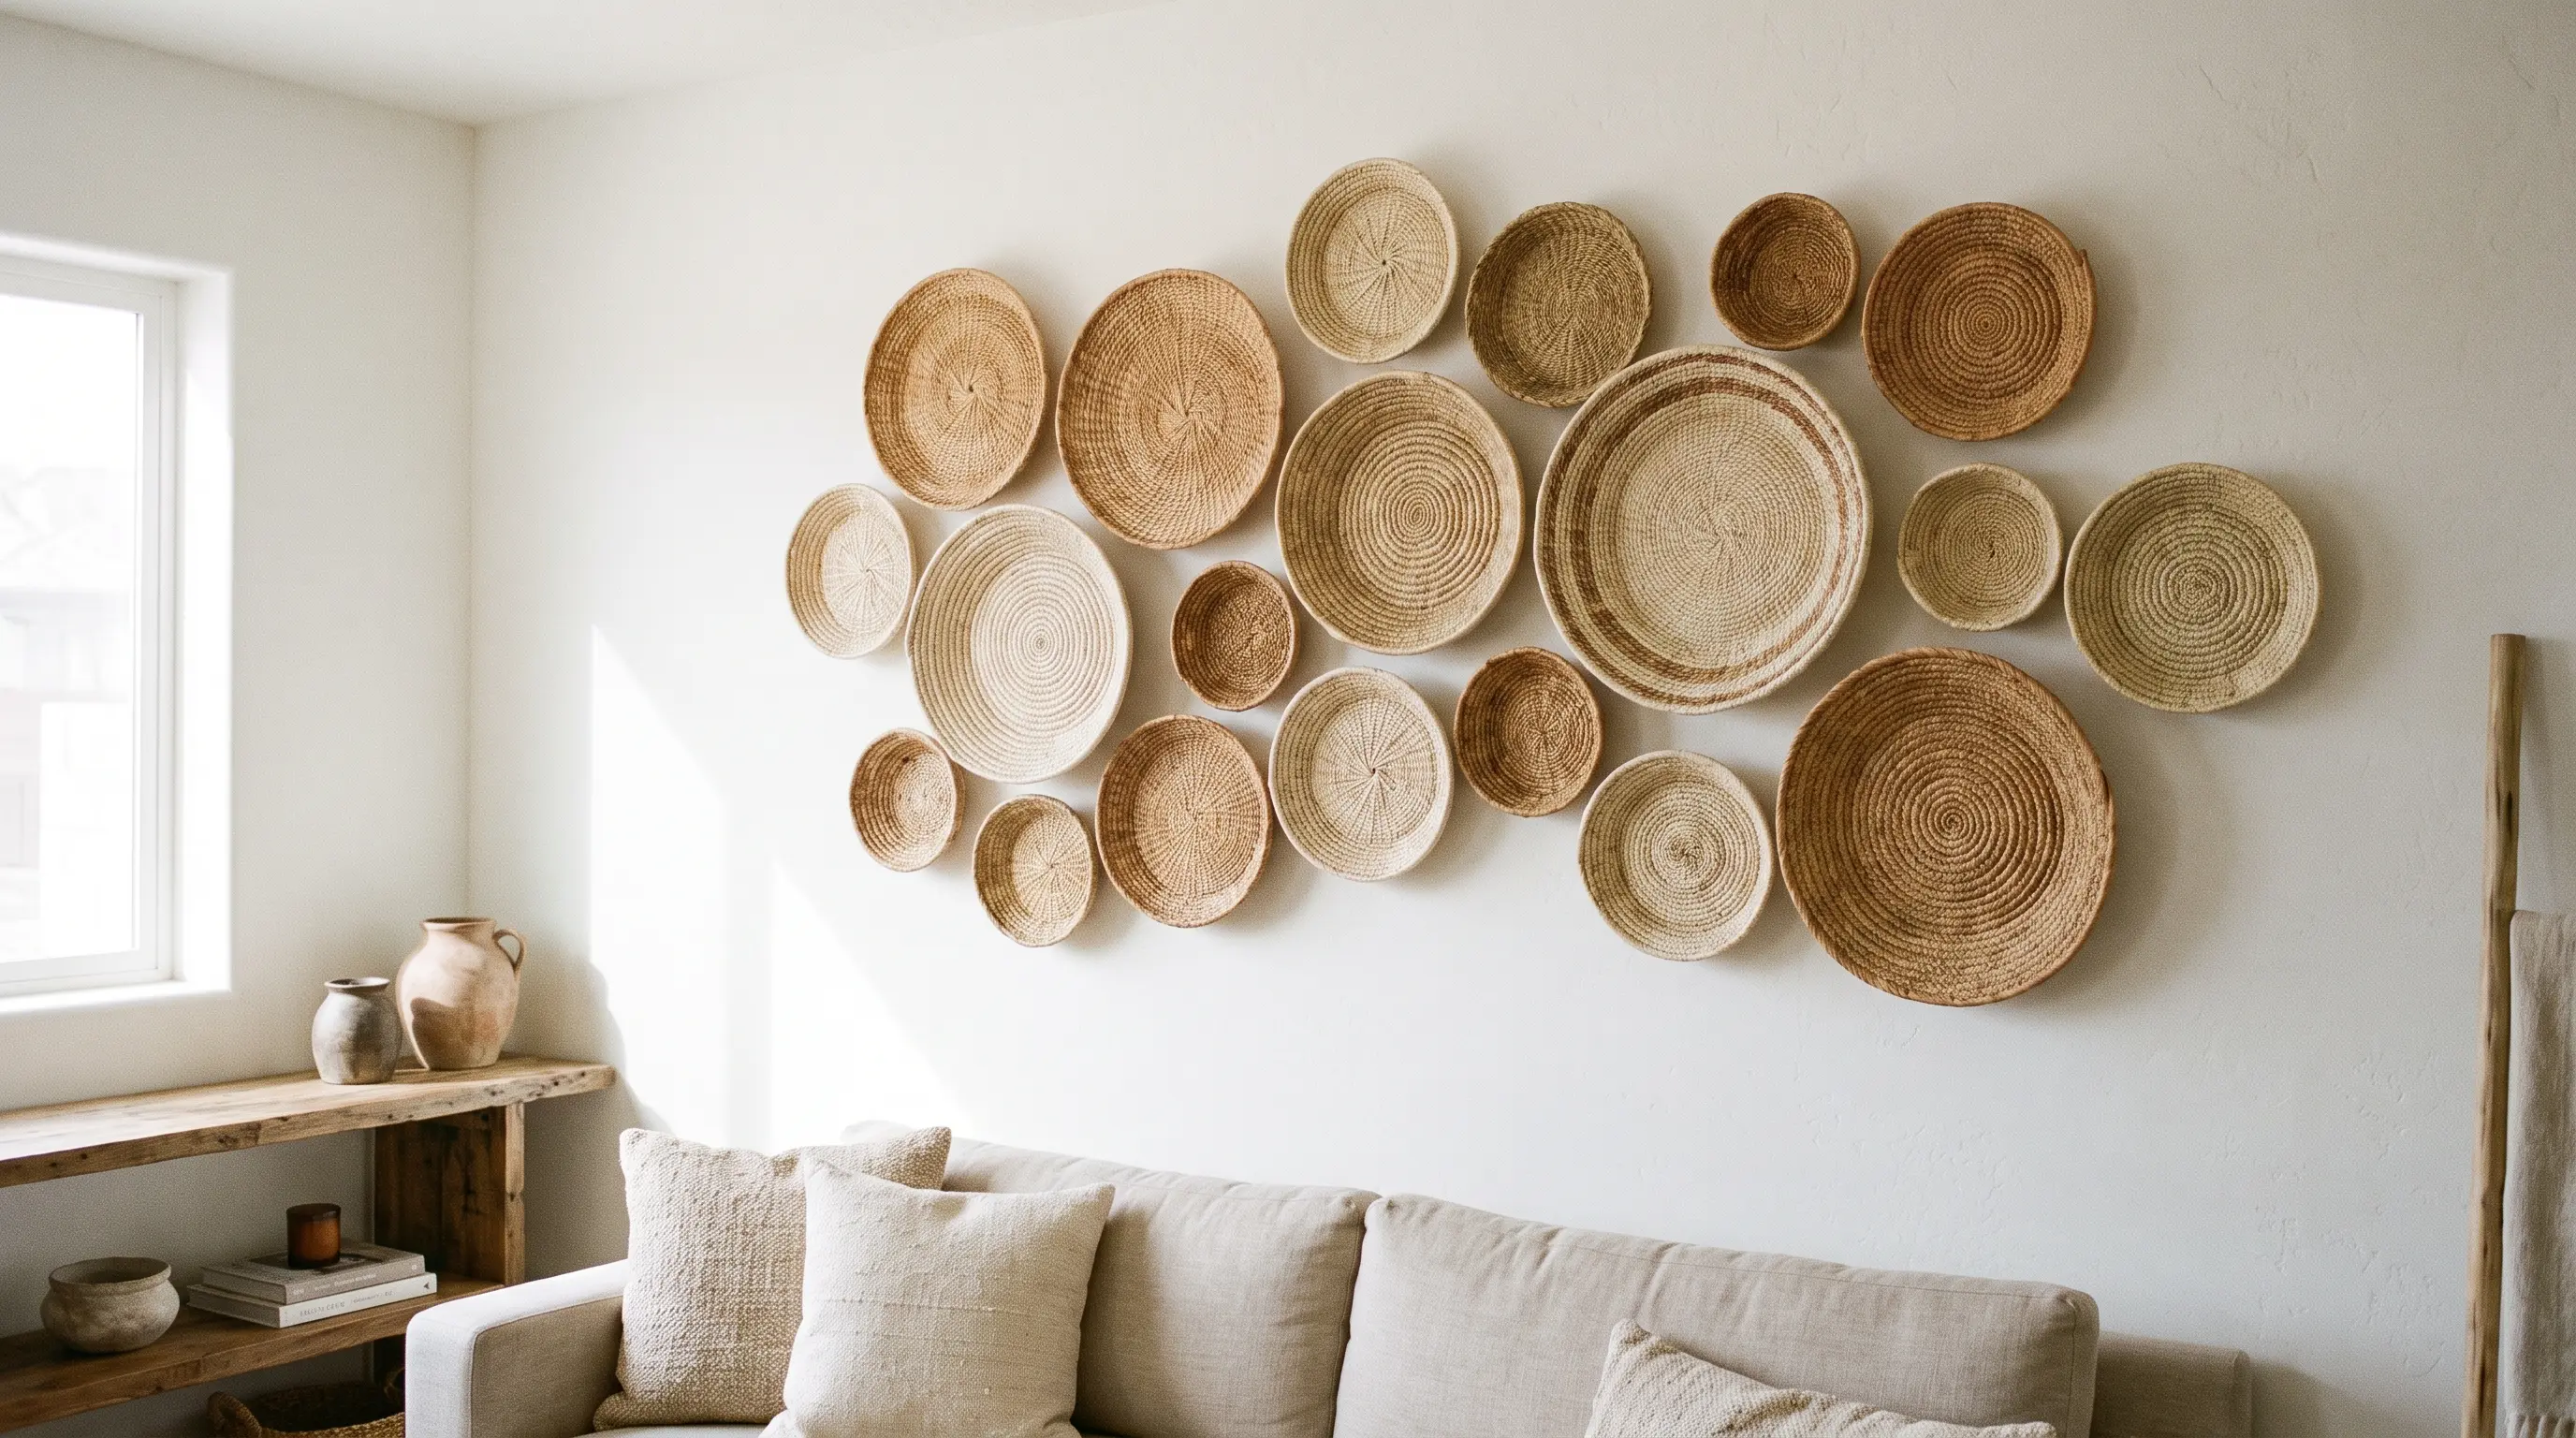
Group shallow baskets on the wall to add color, shape, and texture. Starting with the largest basket makes it easier to build a neat group around it
| Cost | $5 to $25 |
| Skill level | Beginner- friendly |
| Material Required | Shallow baskets, nails, and a hammer |
How to make it: Hang the largest basket first. Add the smaller baskets around it, letting a few edges overlap. Fix each basket through its center so it stays in place.
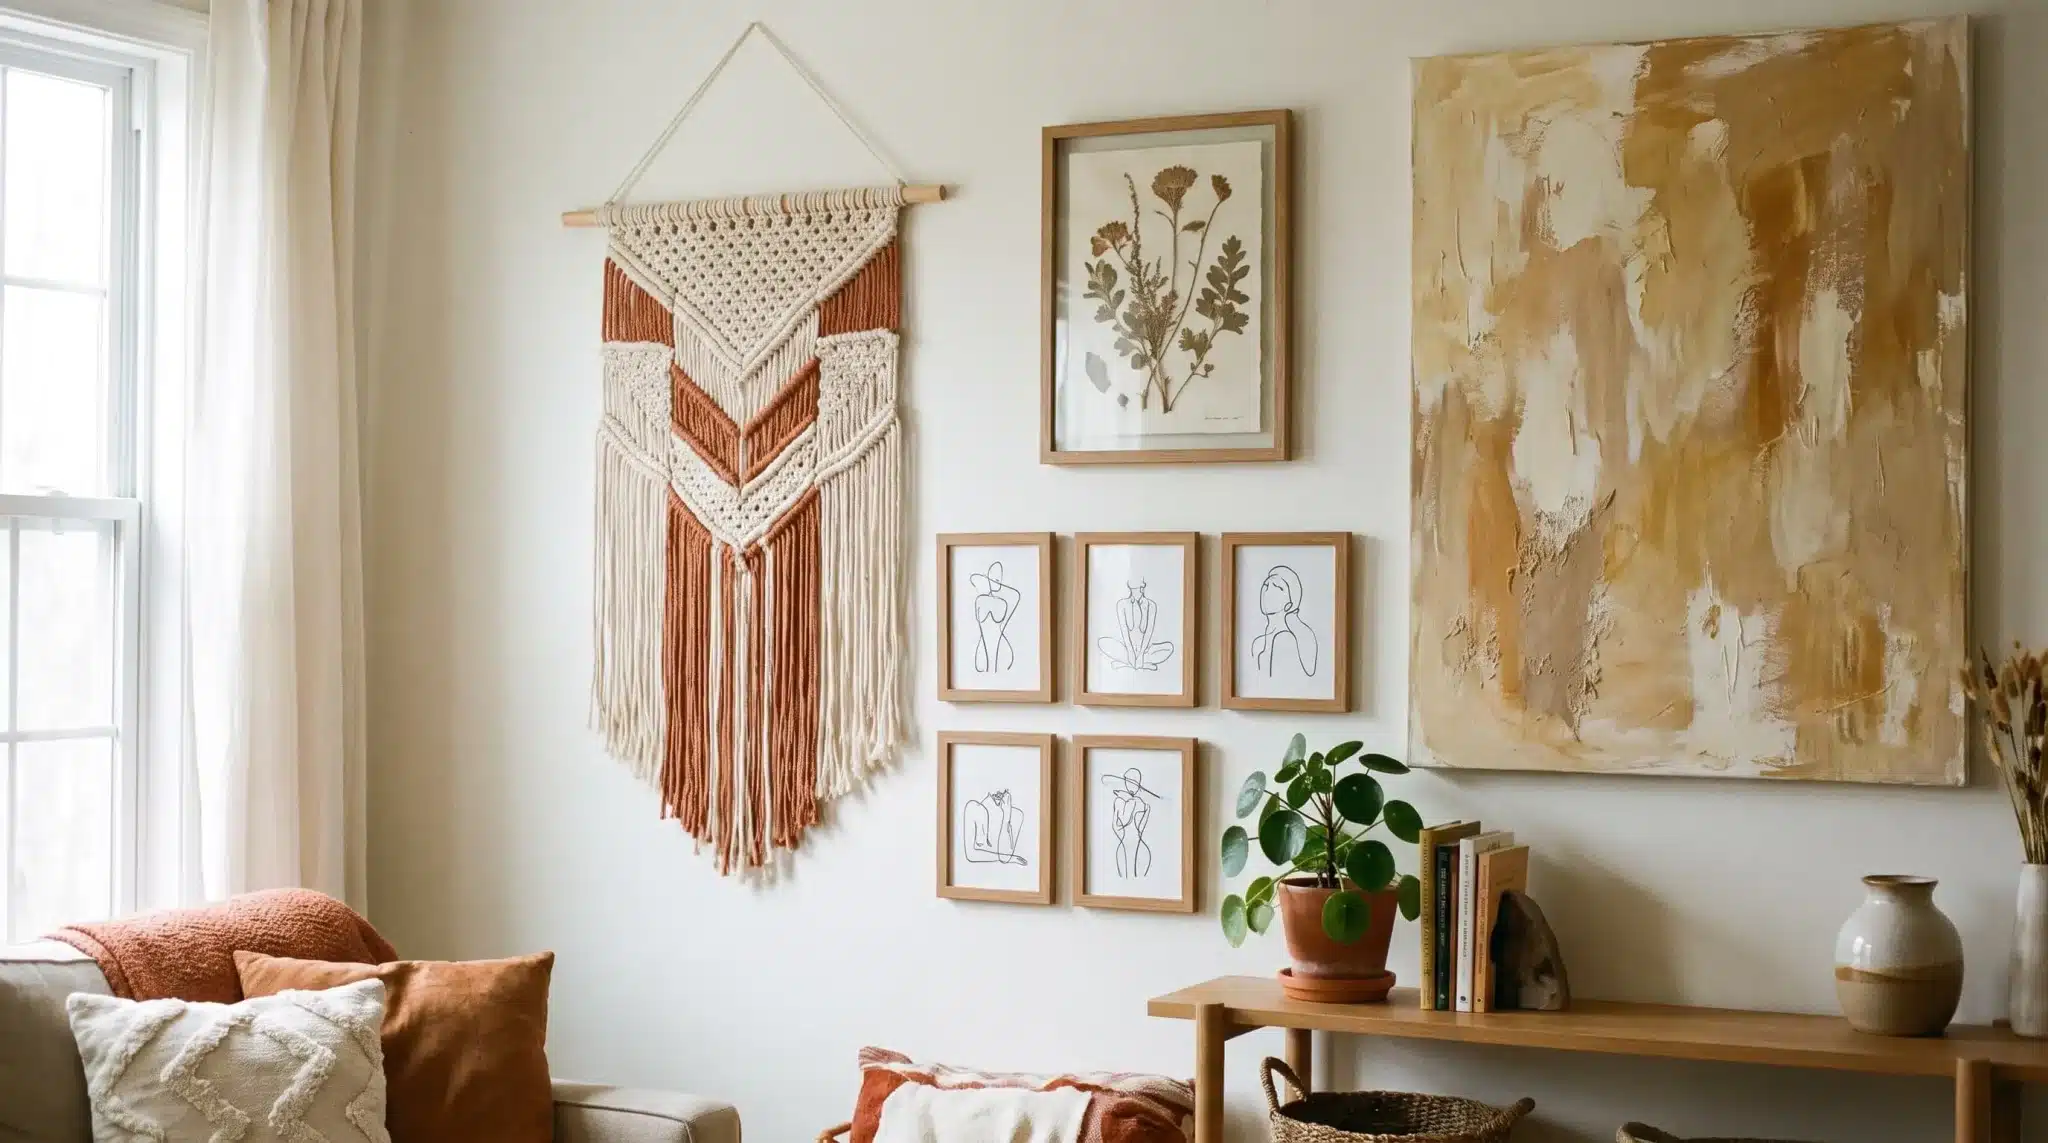
18. Fiber/Macrame-Style Wall Art
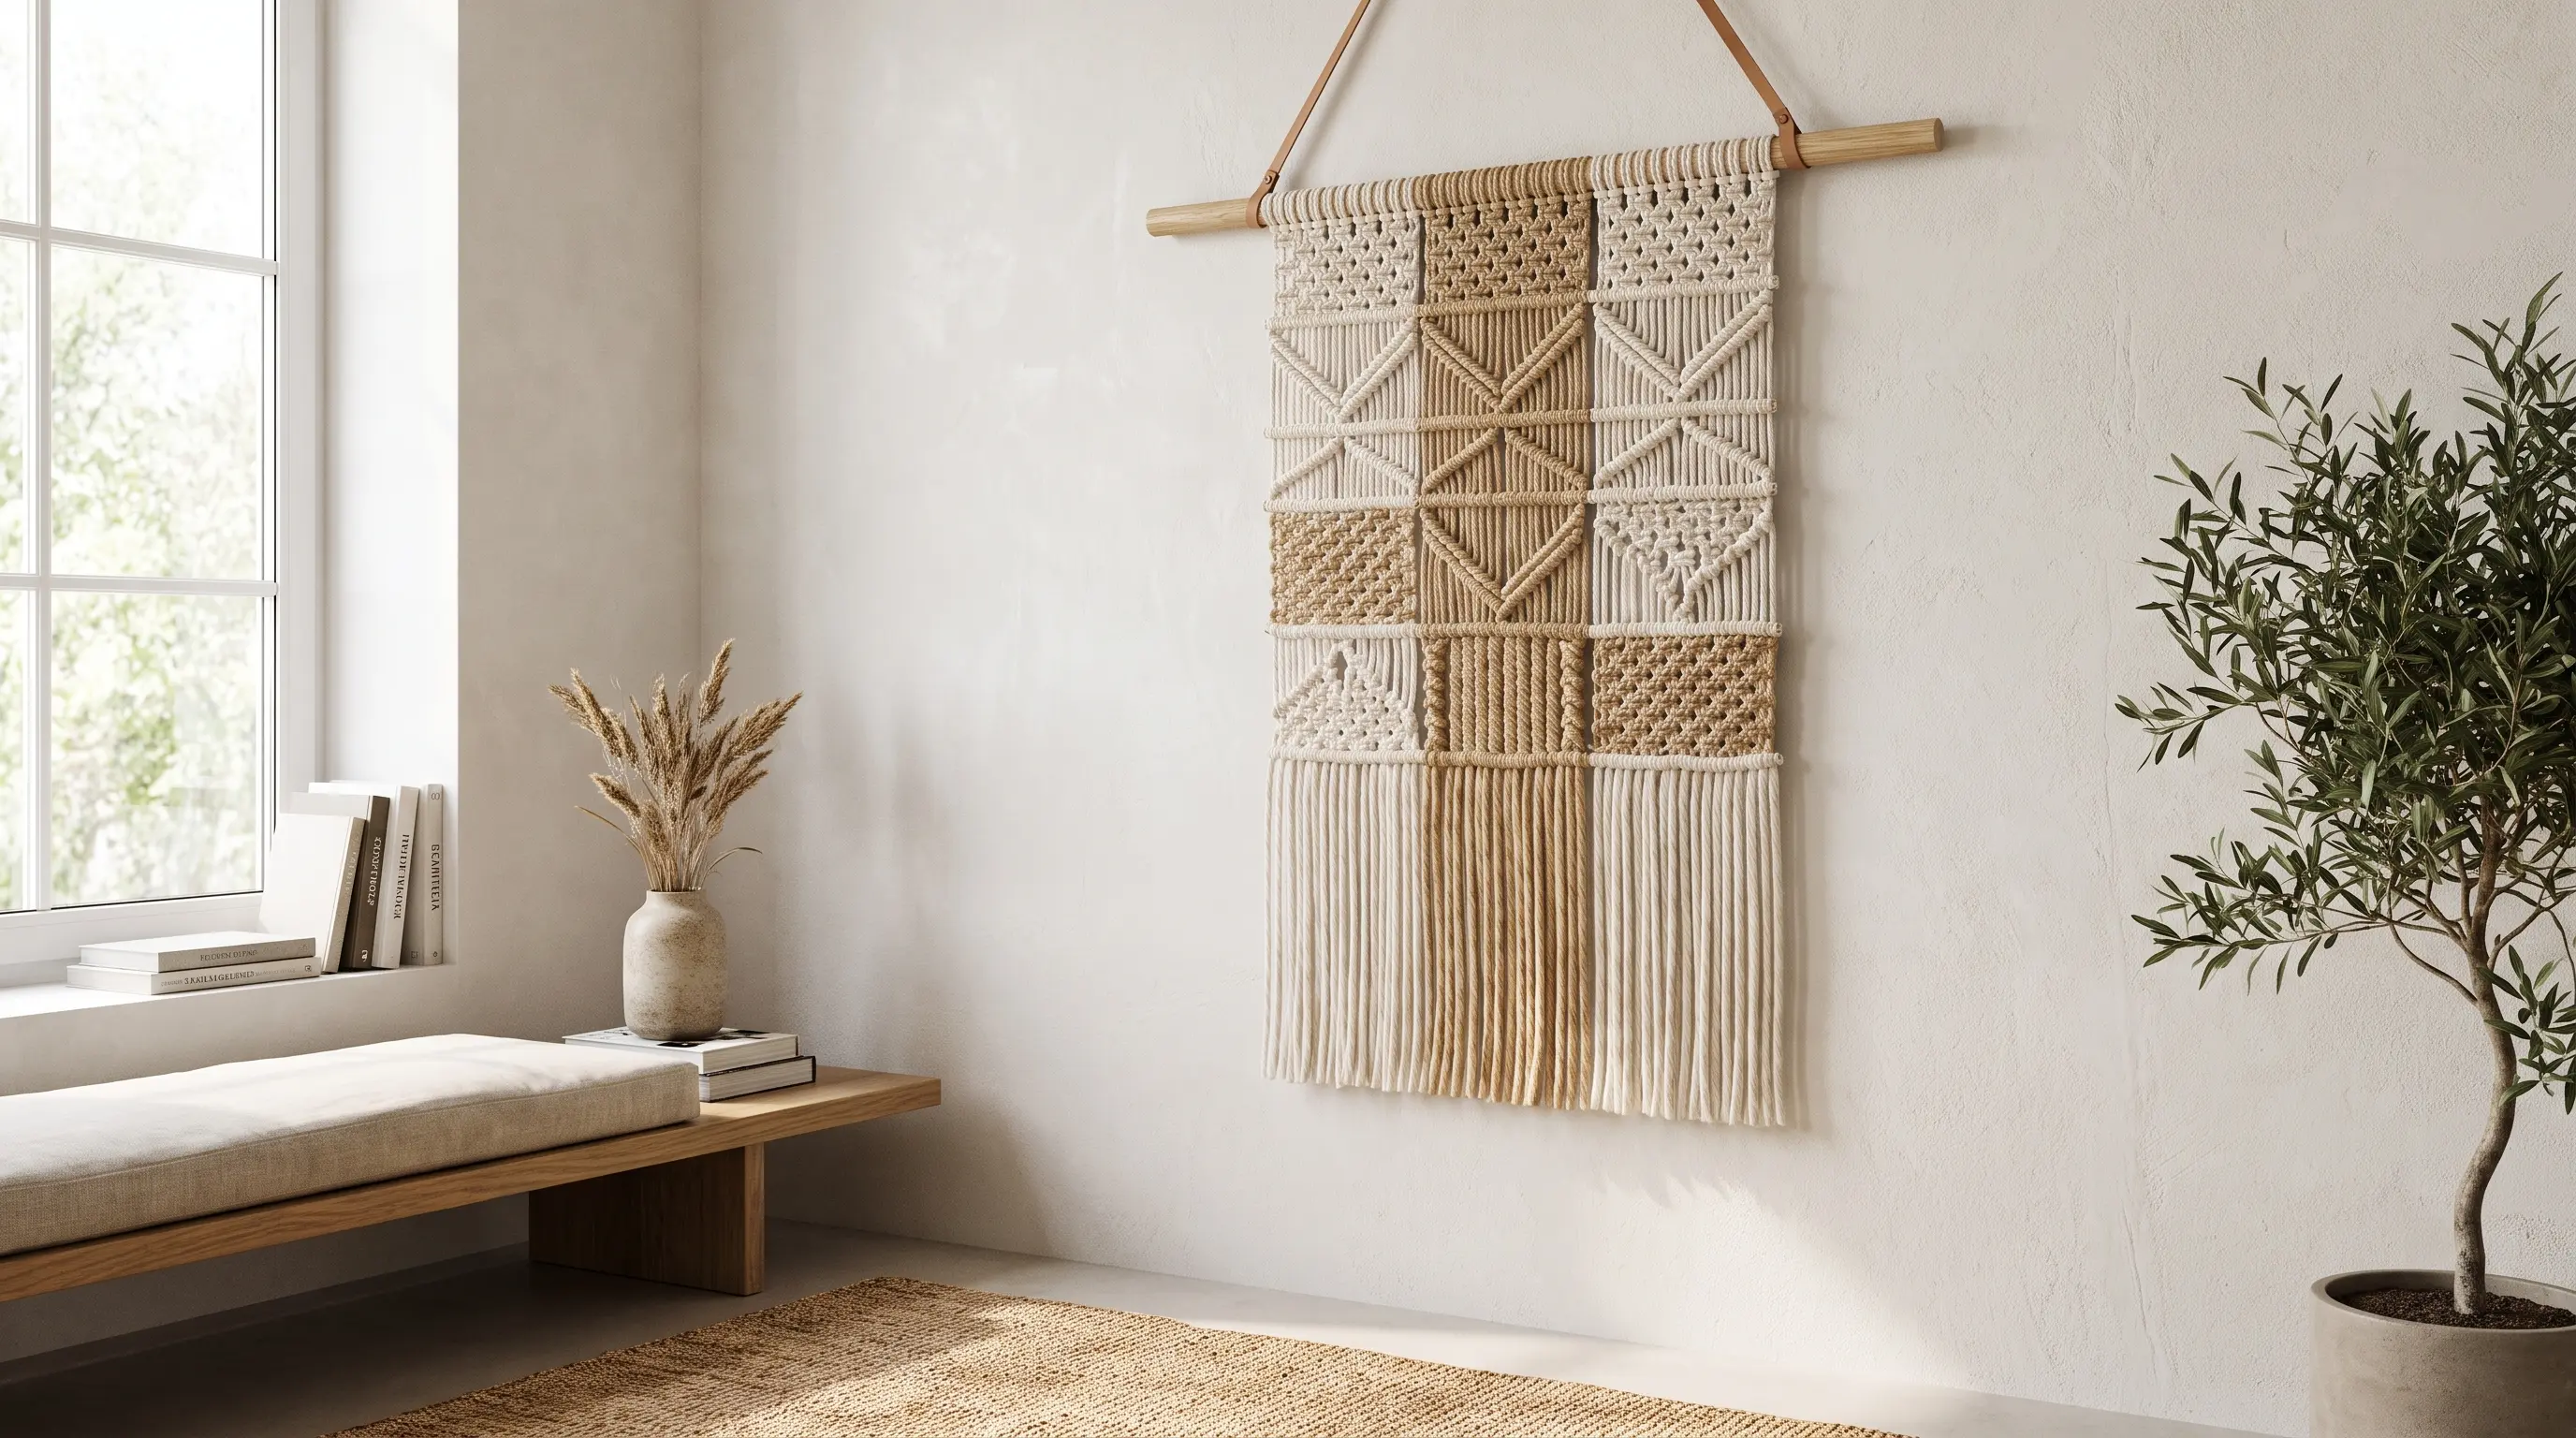
Use rope, yarn, or thread to add soft texture above a bed, desk, or reading area. A small design is a good place to start before making a larger wall piece.
| Cost | $5 to $25 |
| Skill level | Beginner- friendly |
| Material Required | Rope or cord, yarn, and a support bar |
How to make it: Cut equal lengths of cord and attach them to a support bar. Use a few basic knots to form the design, then trim the ends so they sit at the length you want.
19. Beaded Branch Hanging
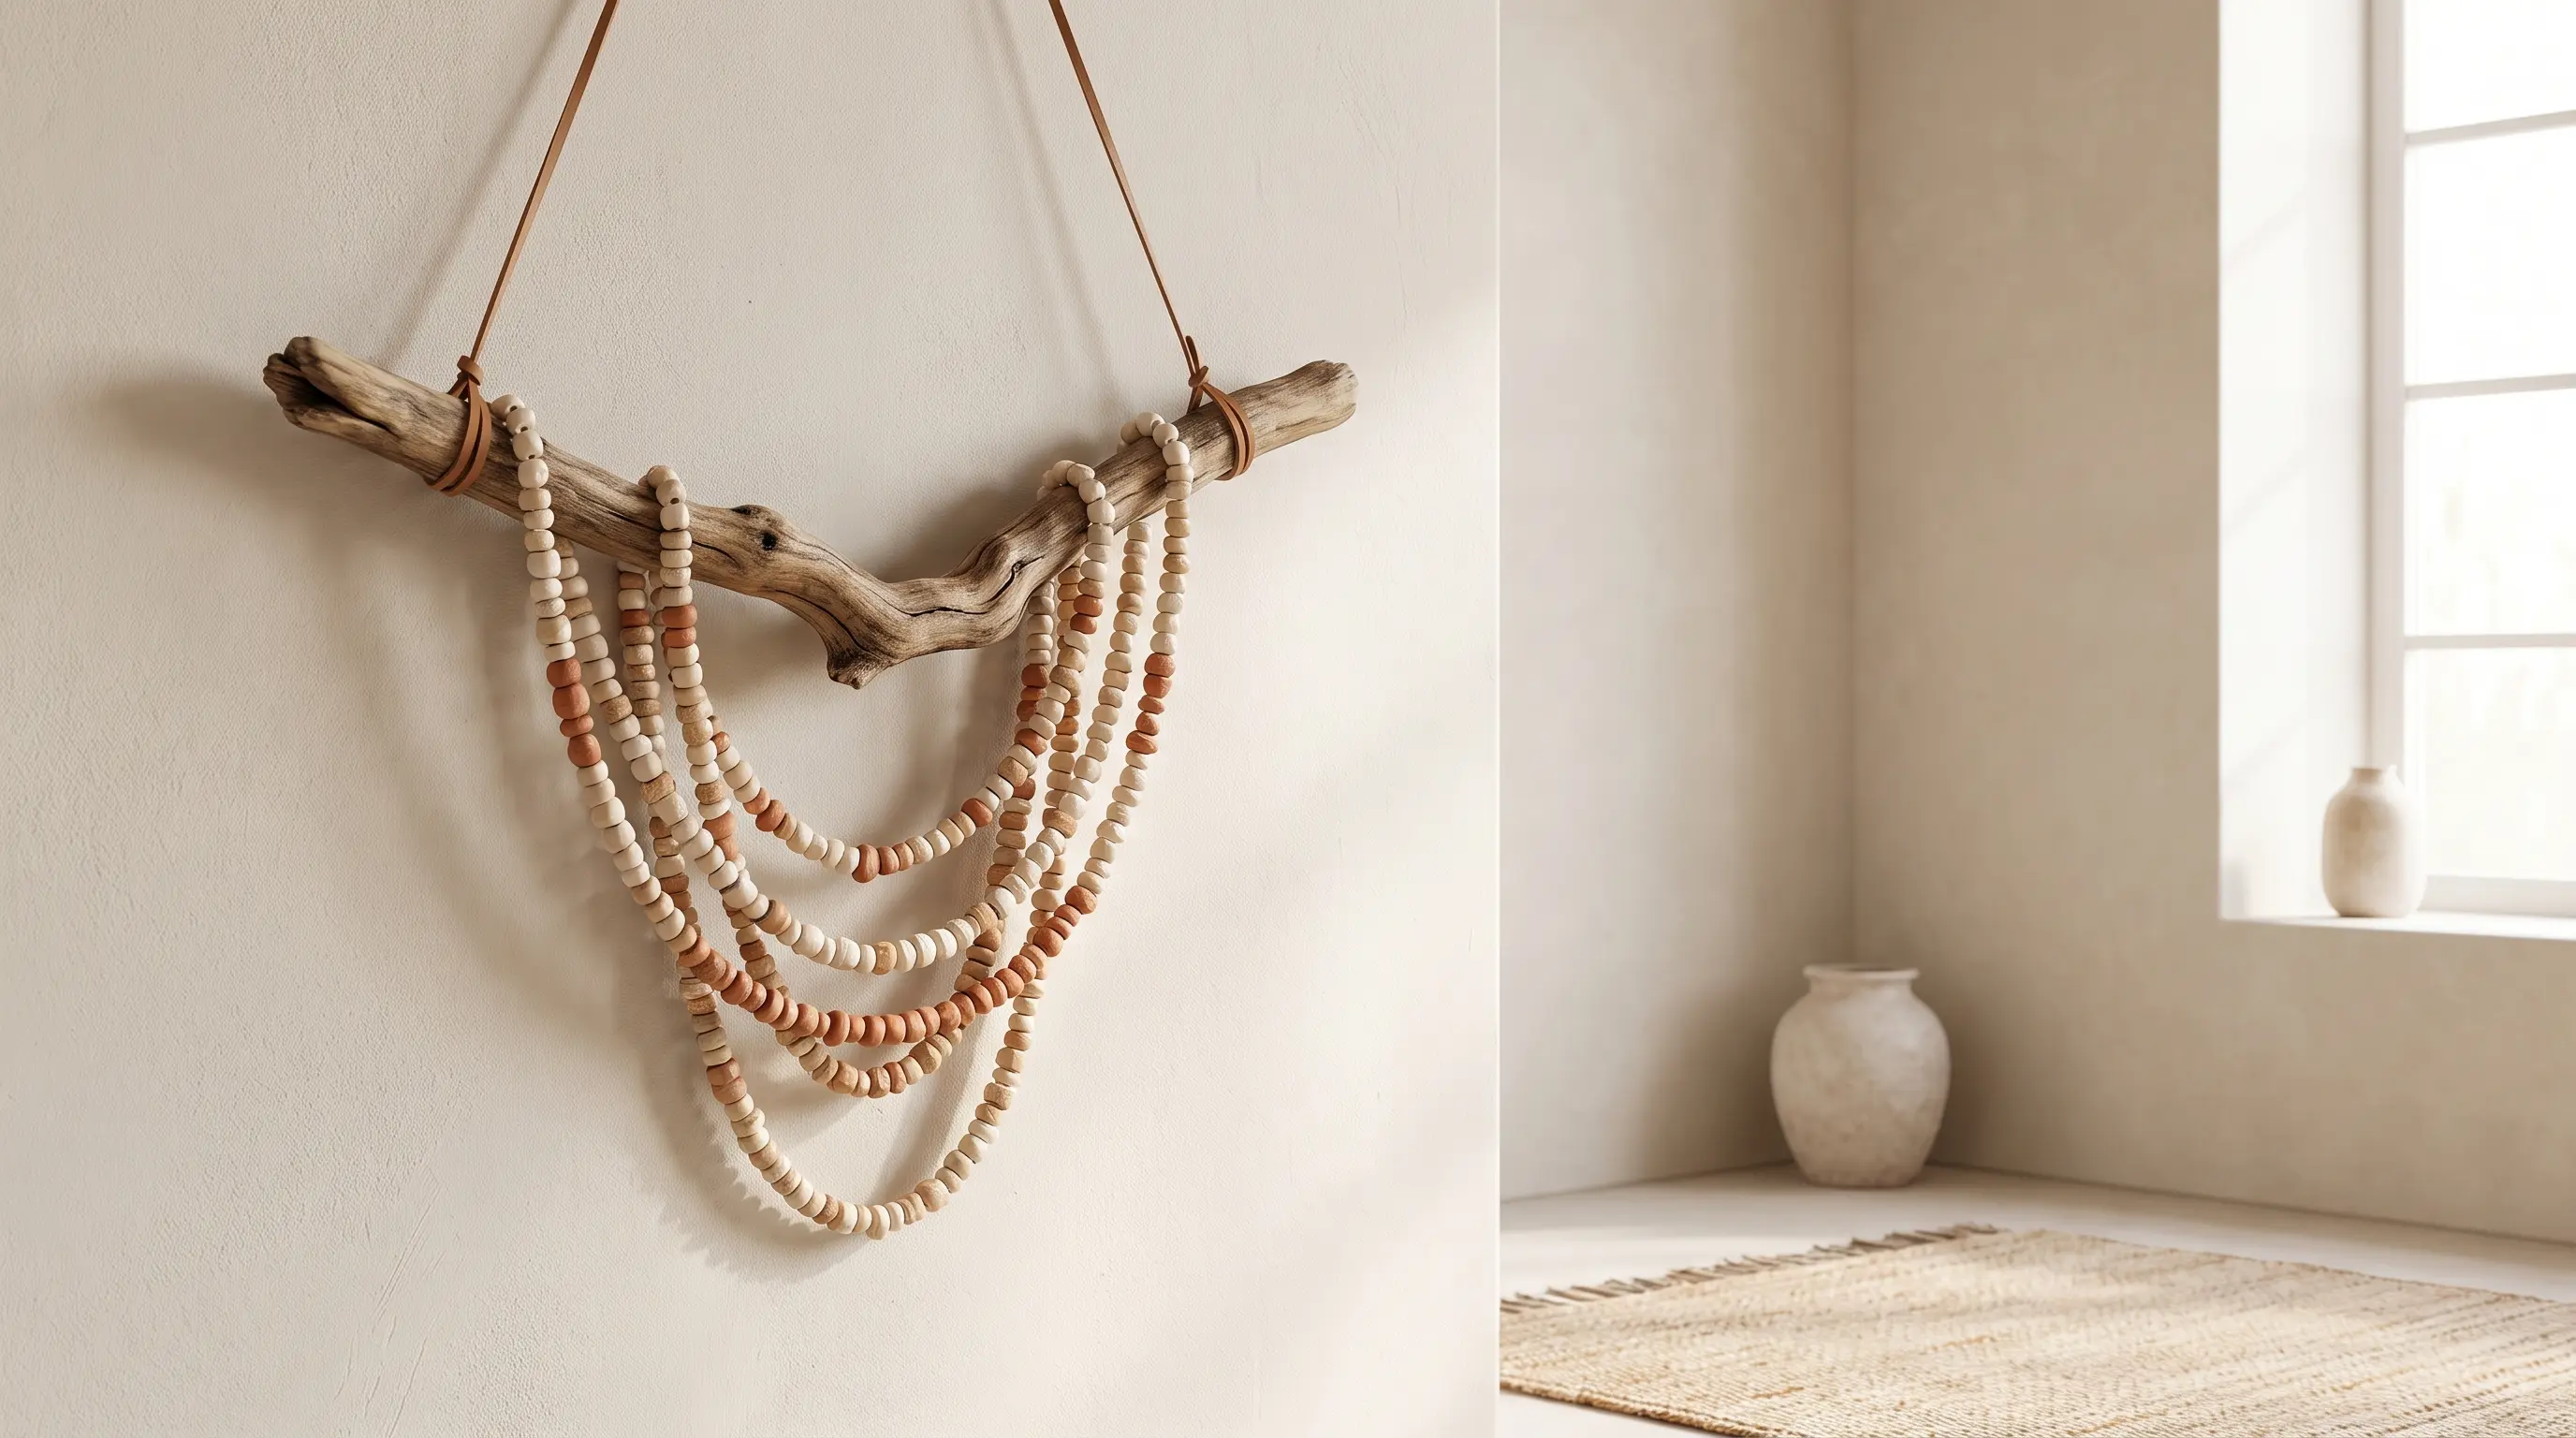
Combine a natural branch with beads to make a light wall hanging. An uneven layout can give the finished piece a relaxed and playful look.
| Cost | $5 to $25 |
| Skill level | Beginner- friendly |
| Material Required | Branches, beads, cord, and hanging string |
How to make it: Thread beads onto several pieces of cord and tie each strand to the branch. Use different strand lengths, then add string to both ends of the branch for hanging.
Photo & Memory Wall Art
Photo-based wall art can make a room feel more personal without using costly store-bought prints. Family photos, instant prints, children’s drawings, and saved memories can all become simple wall displays.
20. Oversized Family Portrait Gallery
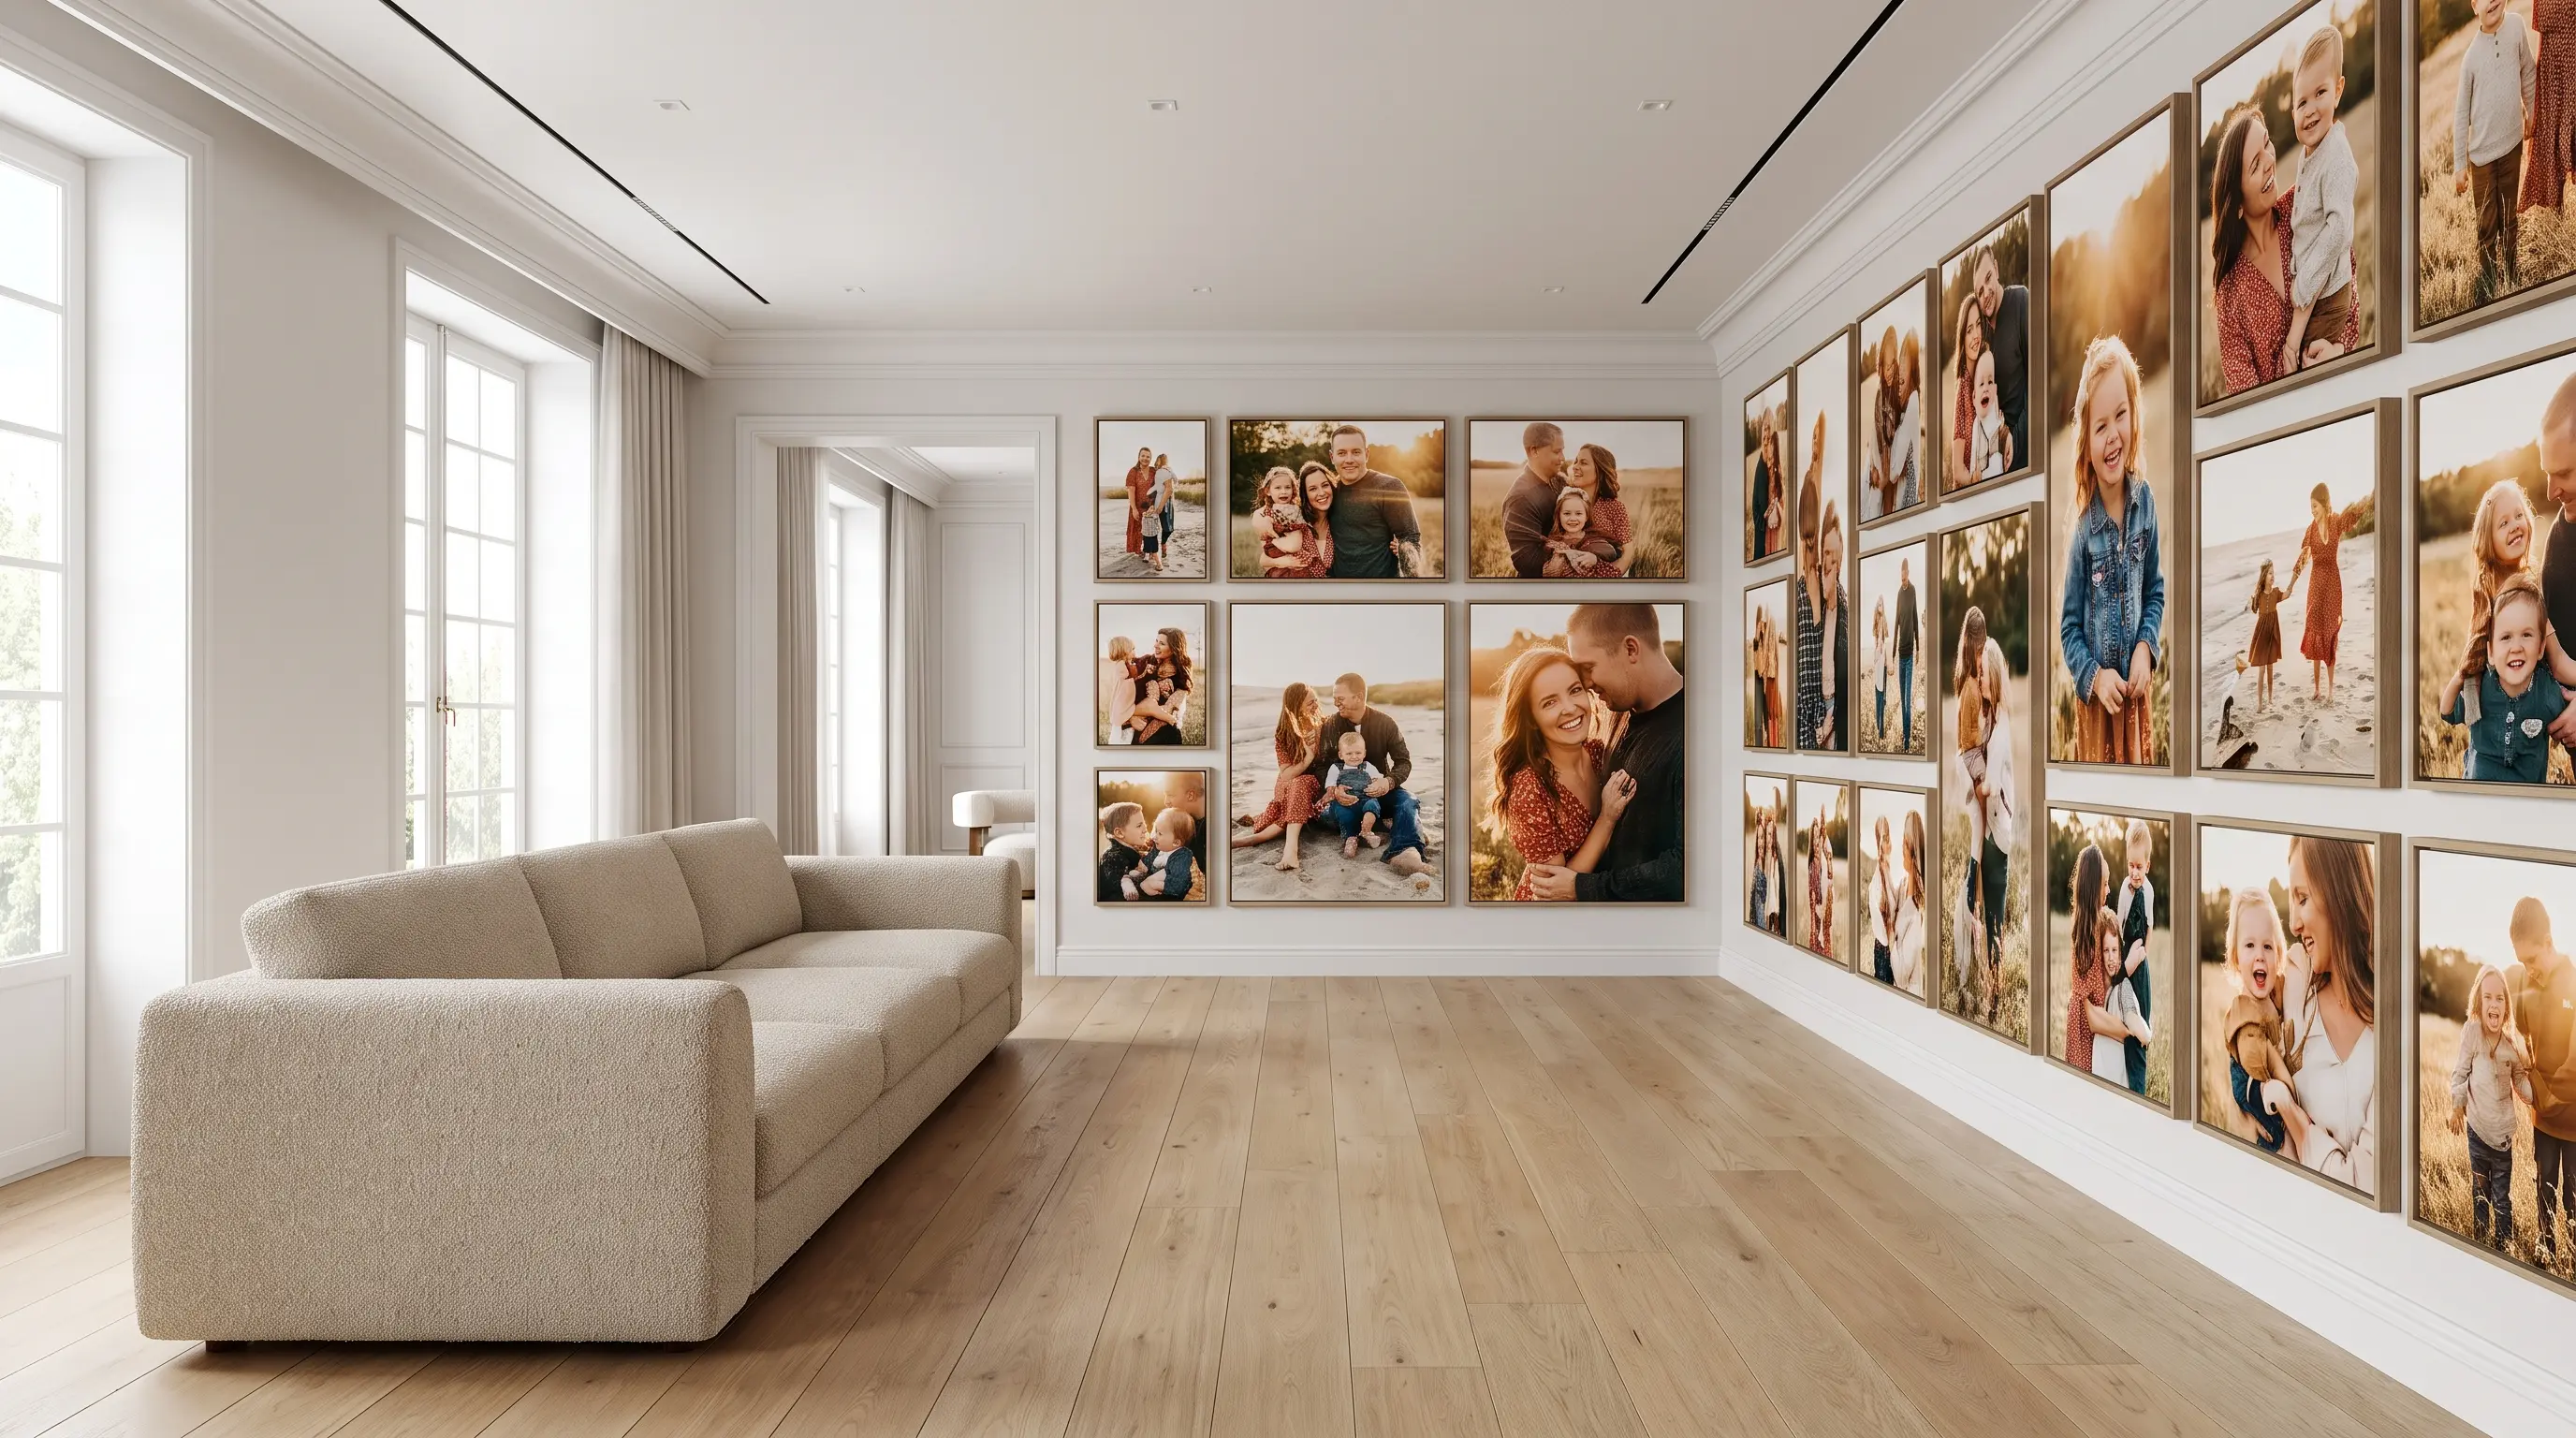
Turn family photos into a main wall feature by printing them on large canvases and hanging them as a group. Matching sizes and even spacing can help the display feel neat and planned.
| Cost | $50 to $150 |
| Skill level | Beginner- friendly |
| Material Required | Family photos, large canvas prints, and hanging hardware |
How to make it: Choose a small group of clear family photos and edit them in the same style. Print them on large canvases, plan the spacing on the wall, and hang each piece at the same height.
21. Black-and-White Photo Wall
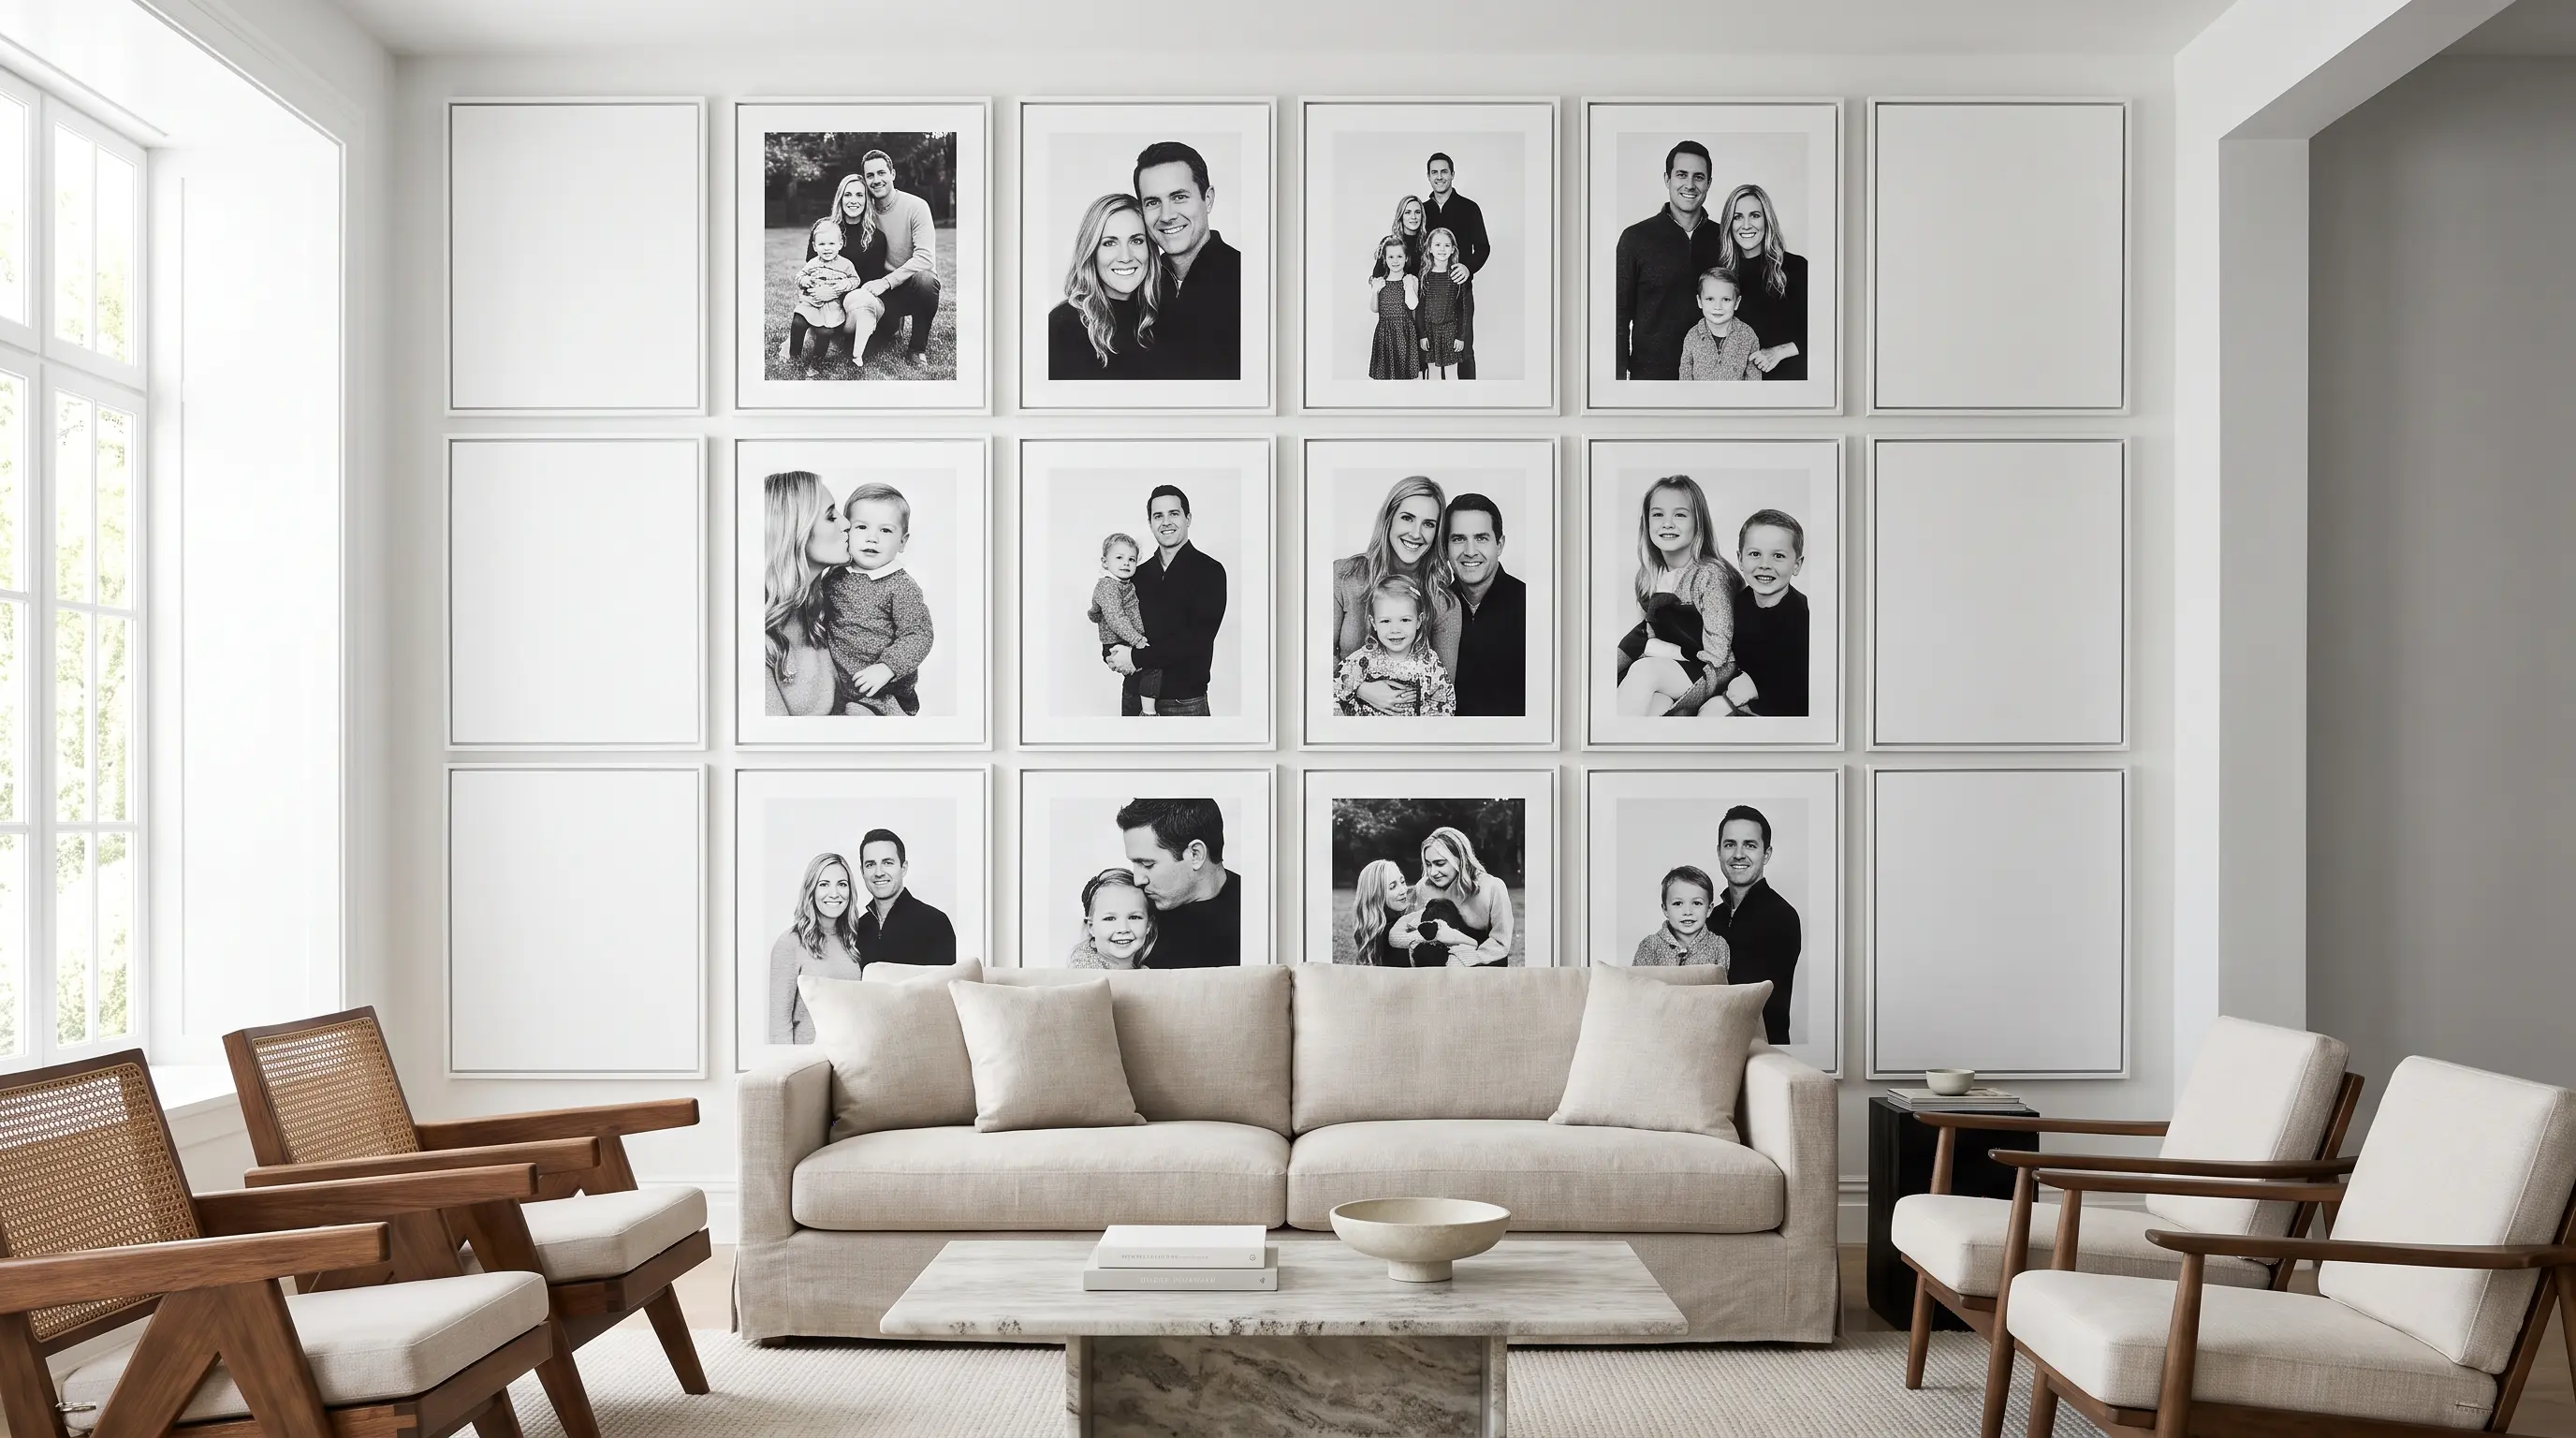
A black-and-white photo wall gives mixed photos a more connected look. Bright tape adds a small pop of color and lets you attach the prints without using frames.
| Cost | $30 to $100 |
| Skill level | Beginner- friendly |
| Material Required | Printed photos, editing software, glossy paper, and colored tape |
How to make it: Change your chosen photos to black and white, then print them in different sizes. Mix upright and wide prints, arrange them on the wall, and secure them with colored tape.
22. Color-Coded Instant Photo Grid
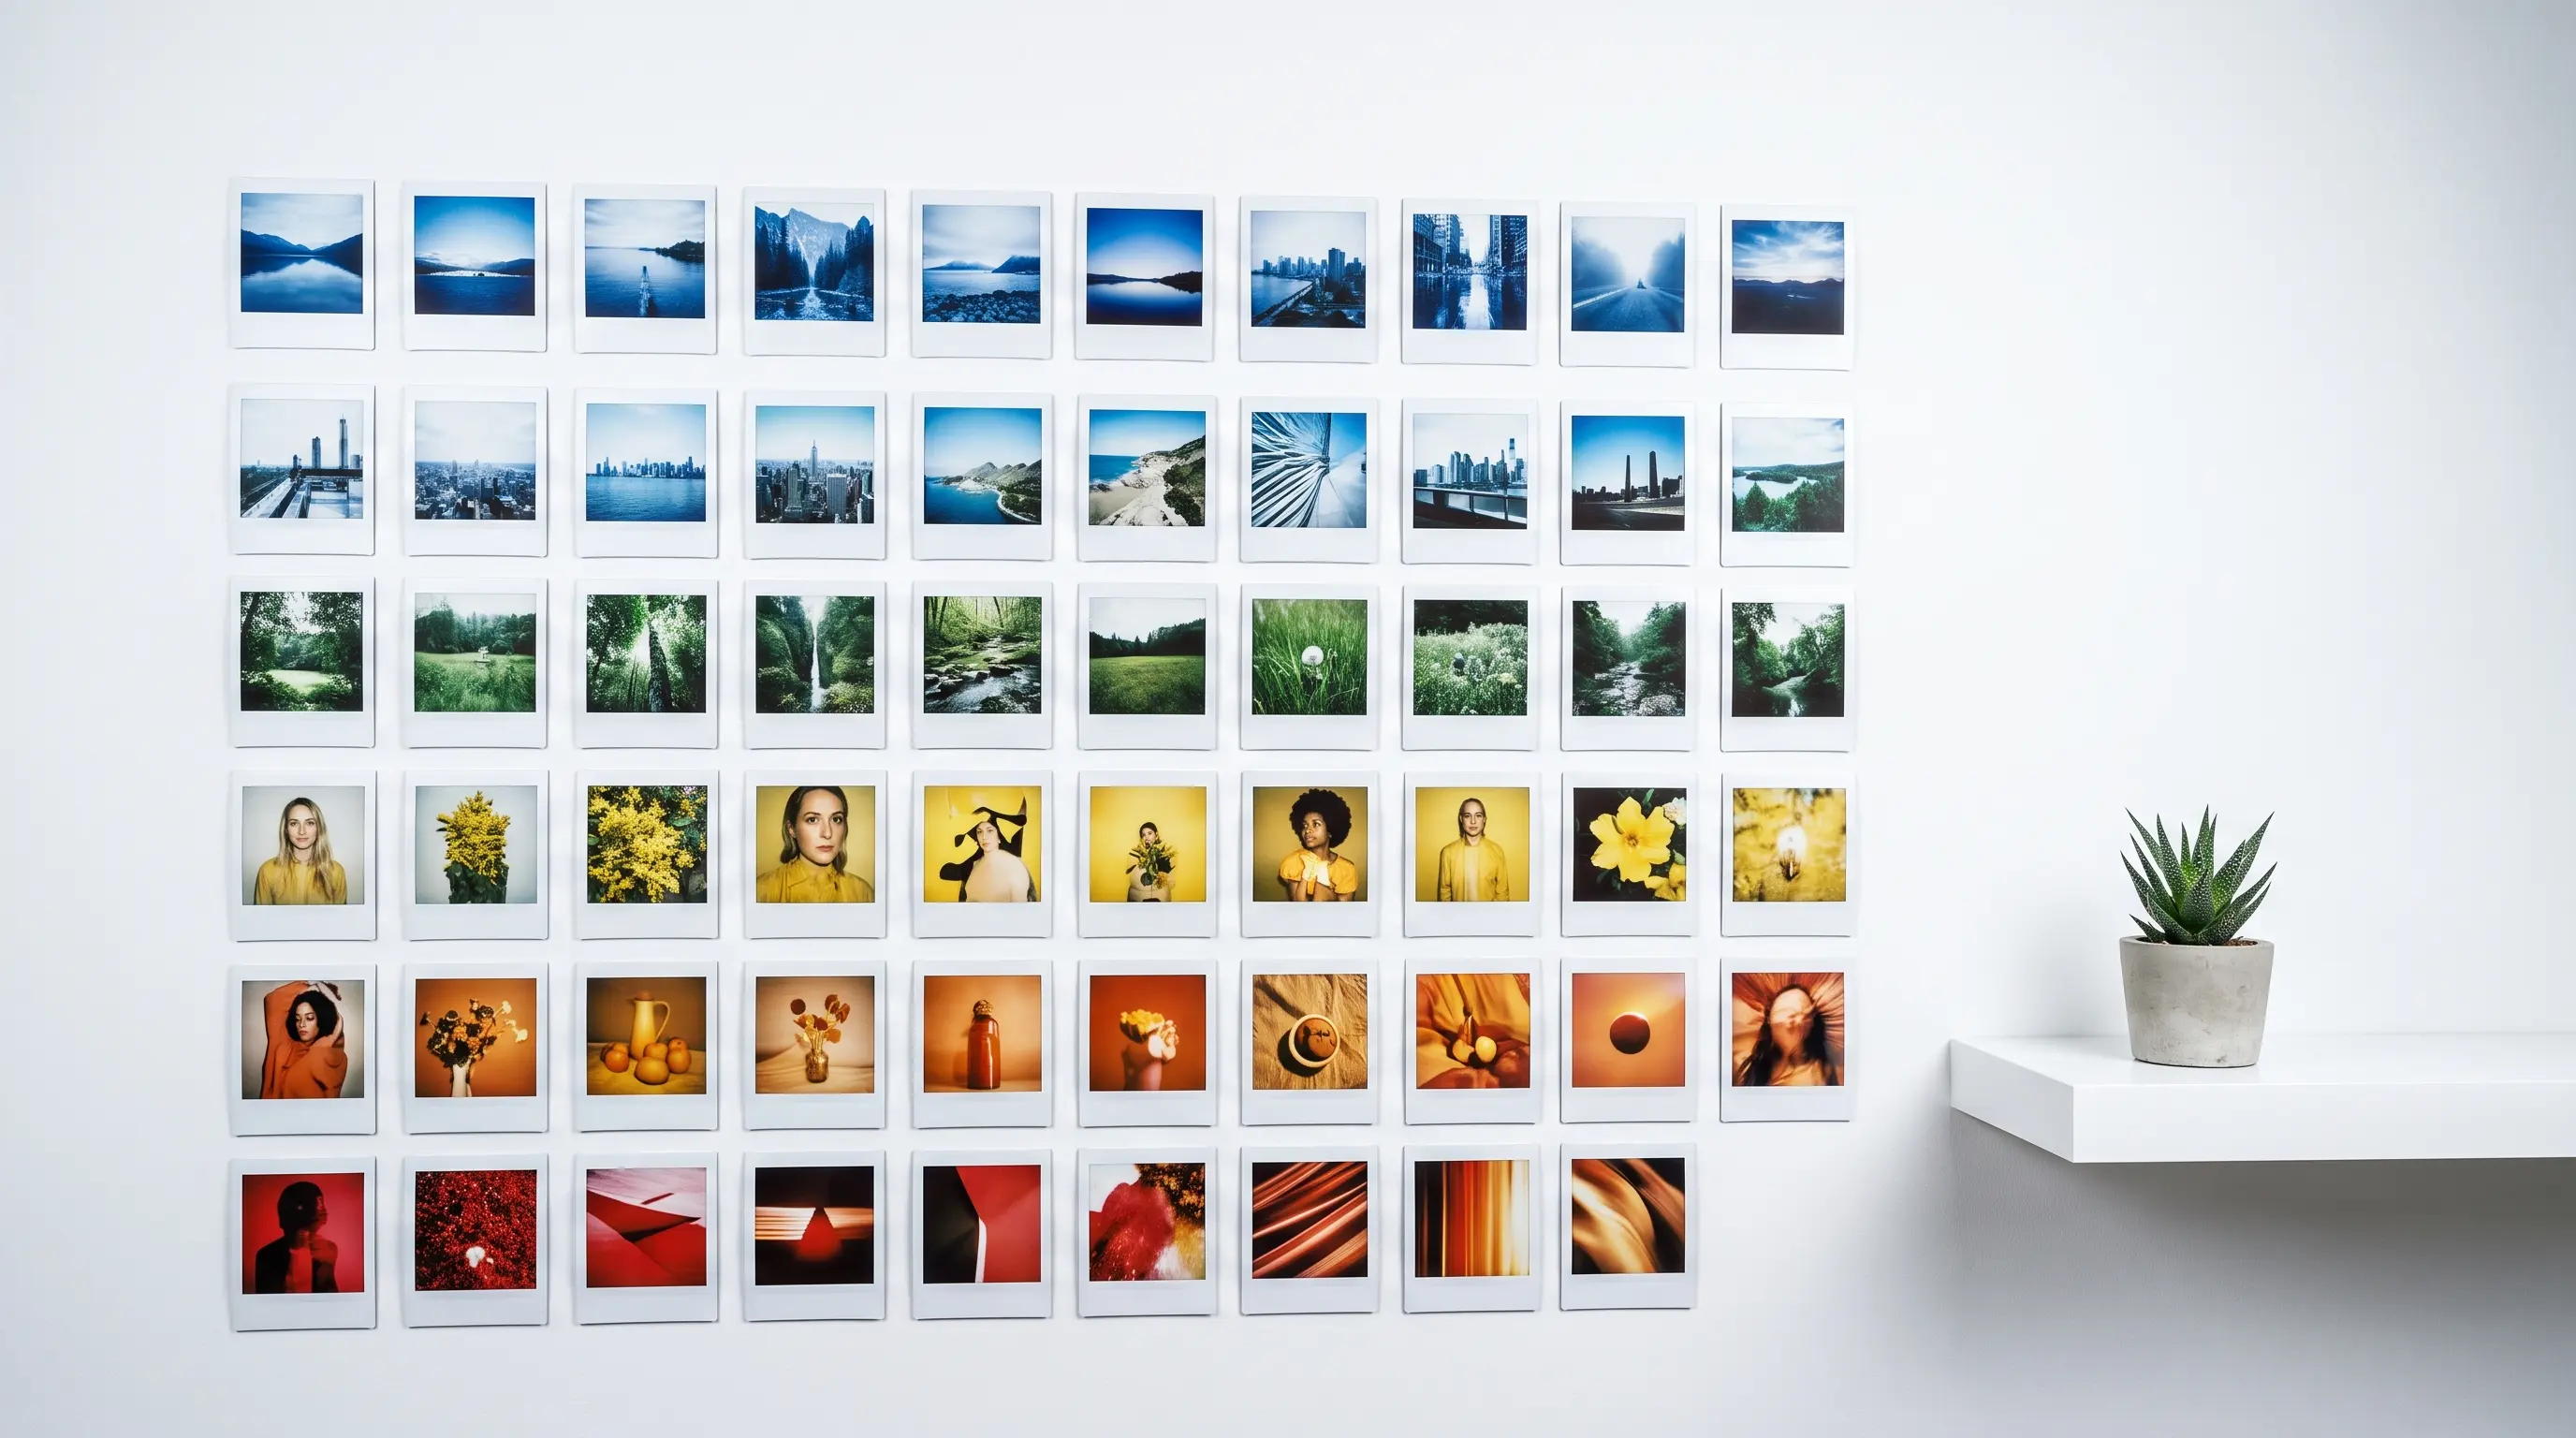
Group instant photos by their main colors to form a neat wall display. A clear acrylic frame helps the colors stand out while keeping the layout clean.
| Cost | $15 to $40 |
| Skill level | Beginner- friendly |
| Material Required | Instant photos and a clear acrylic frame |
How to make it: Sort your photos by color or tone. Place them in rows inside the clear frame, keeping the gaps even. Close the frame and hang it once the layout feels balanced.
23. Photo Collage Wall
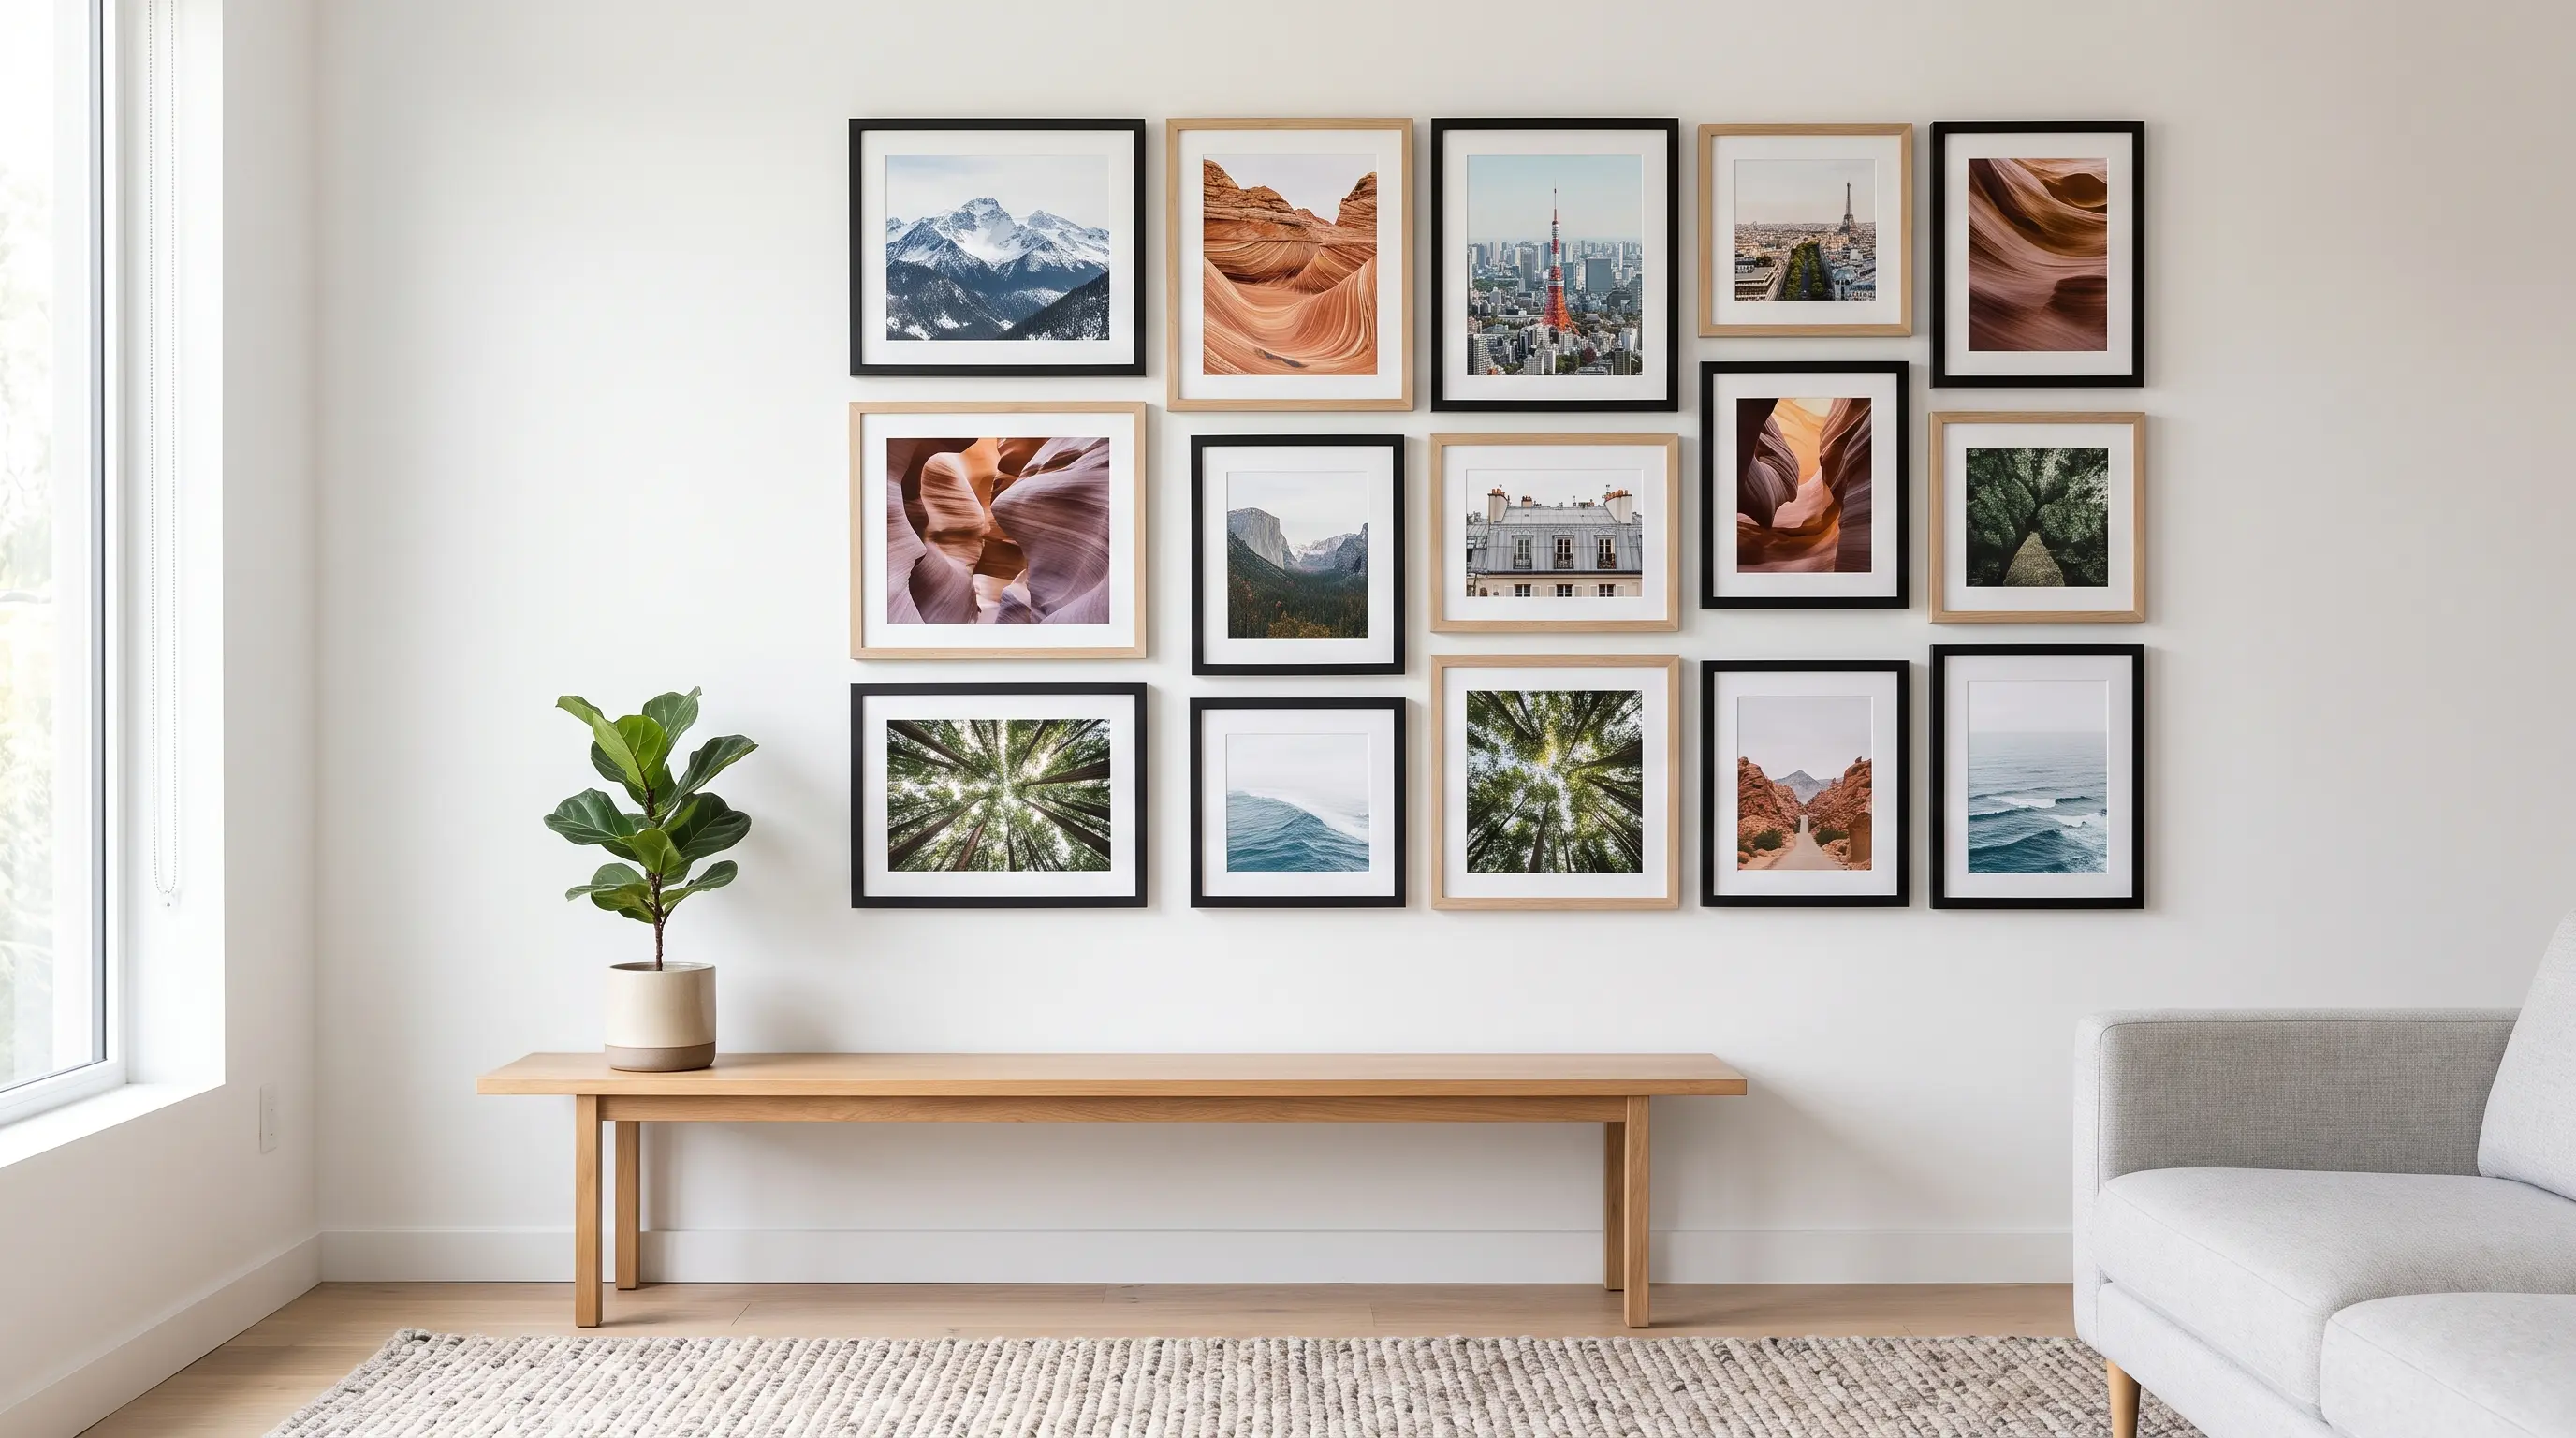
Use a group of favorite small photos to form a large letter, number, heart, or other simple shape. This idea works well for family rooms, bedrooms, and small home work areas.
| Cost | $15 to $110 |
| Skill level | Beginner- friendly |
| Material Required | Small printed photos and wall-safe adhesive |
How to make it: Mark the outer shape lightly on the wall. Place the photos inside the outline, starting with the edges, then fill the middle. Keep the gaps small and even.
24. Personalized Photo Mural
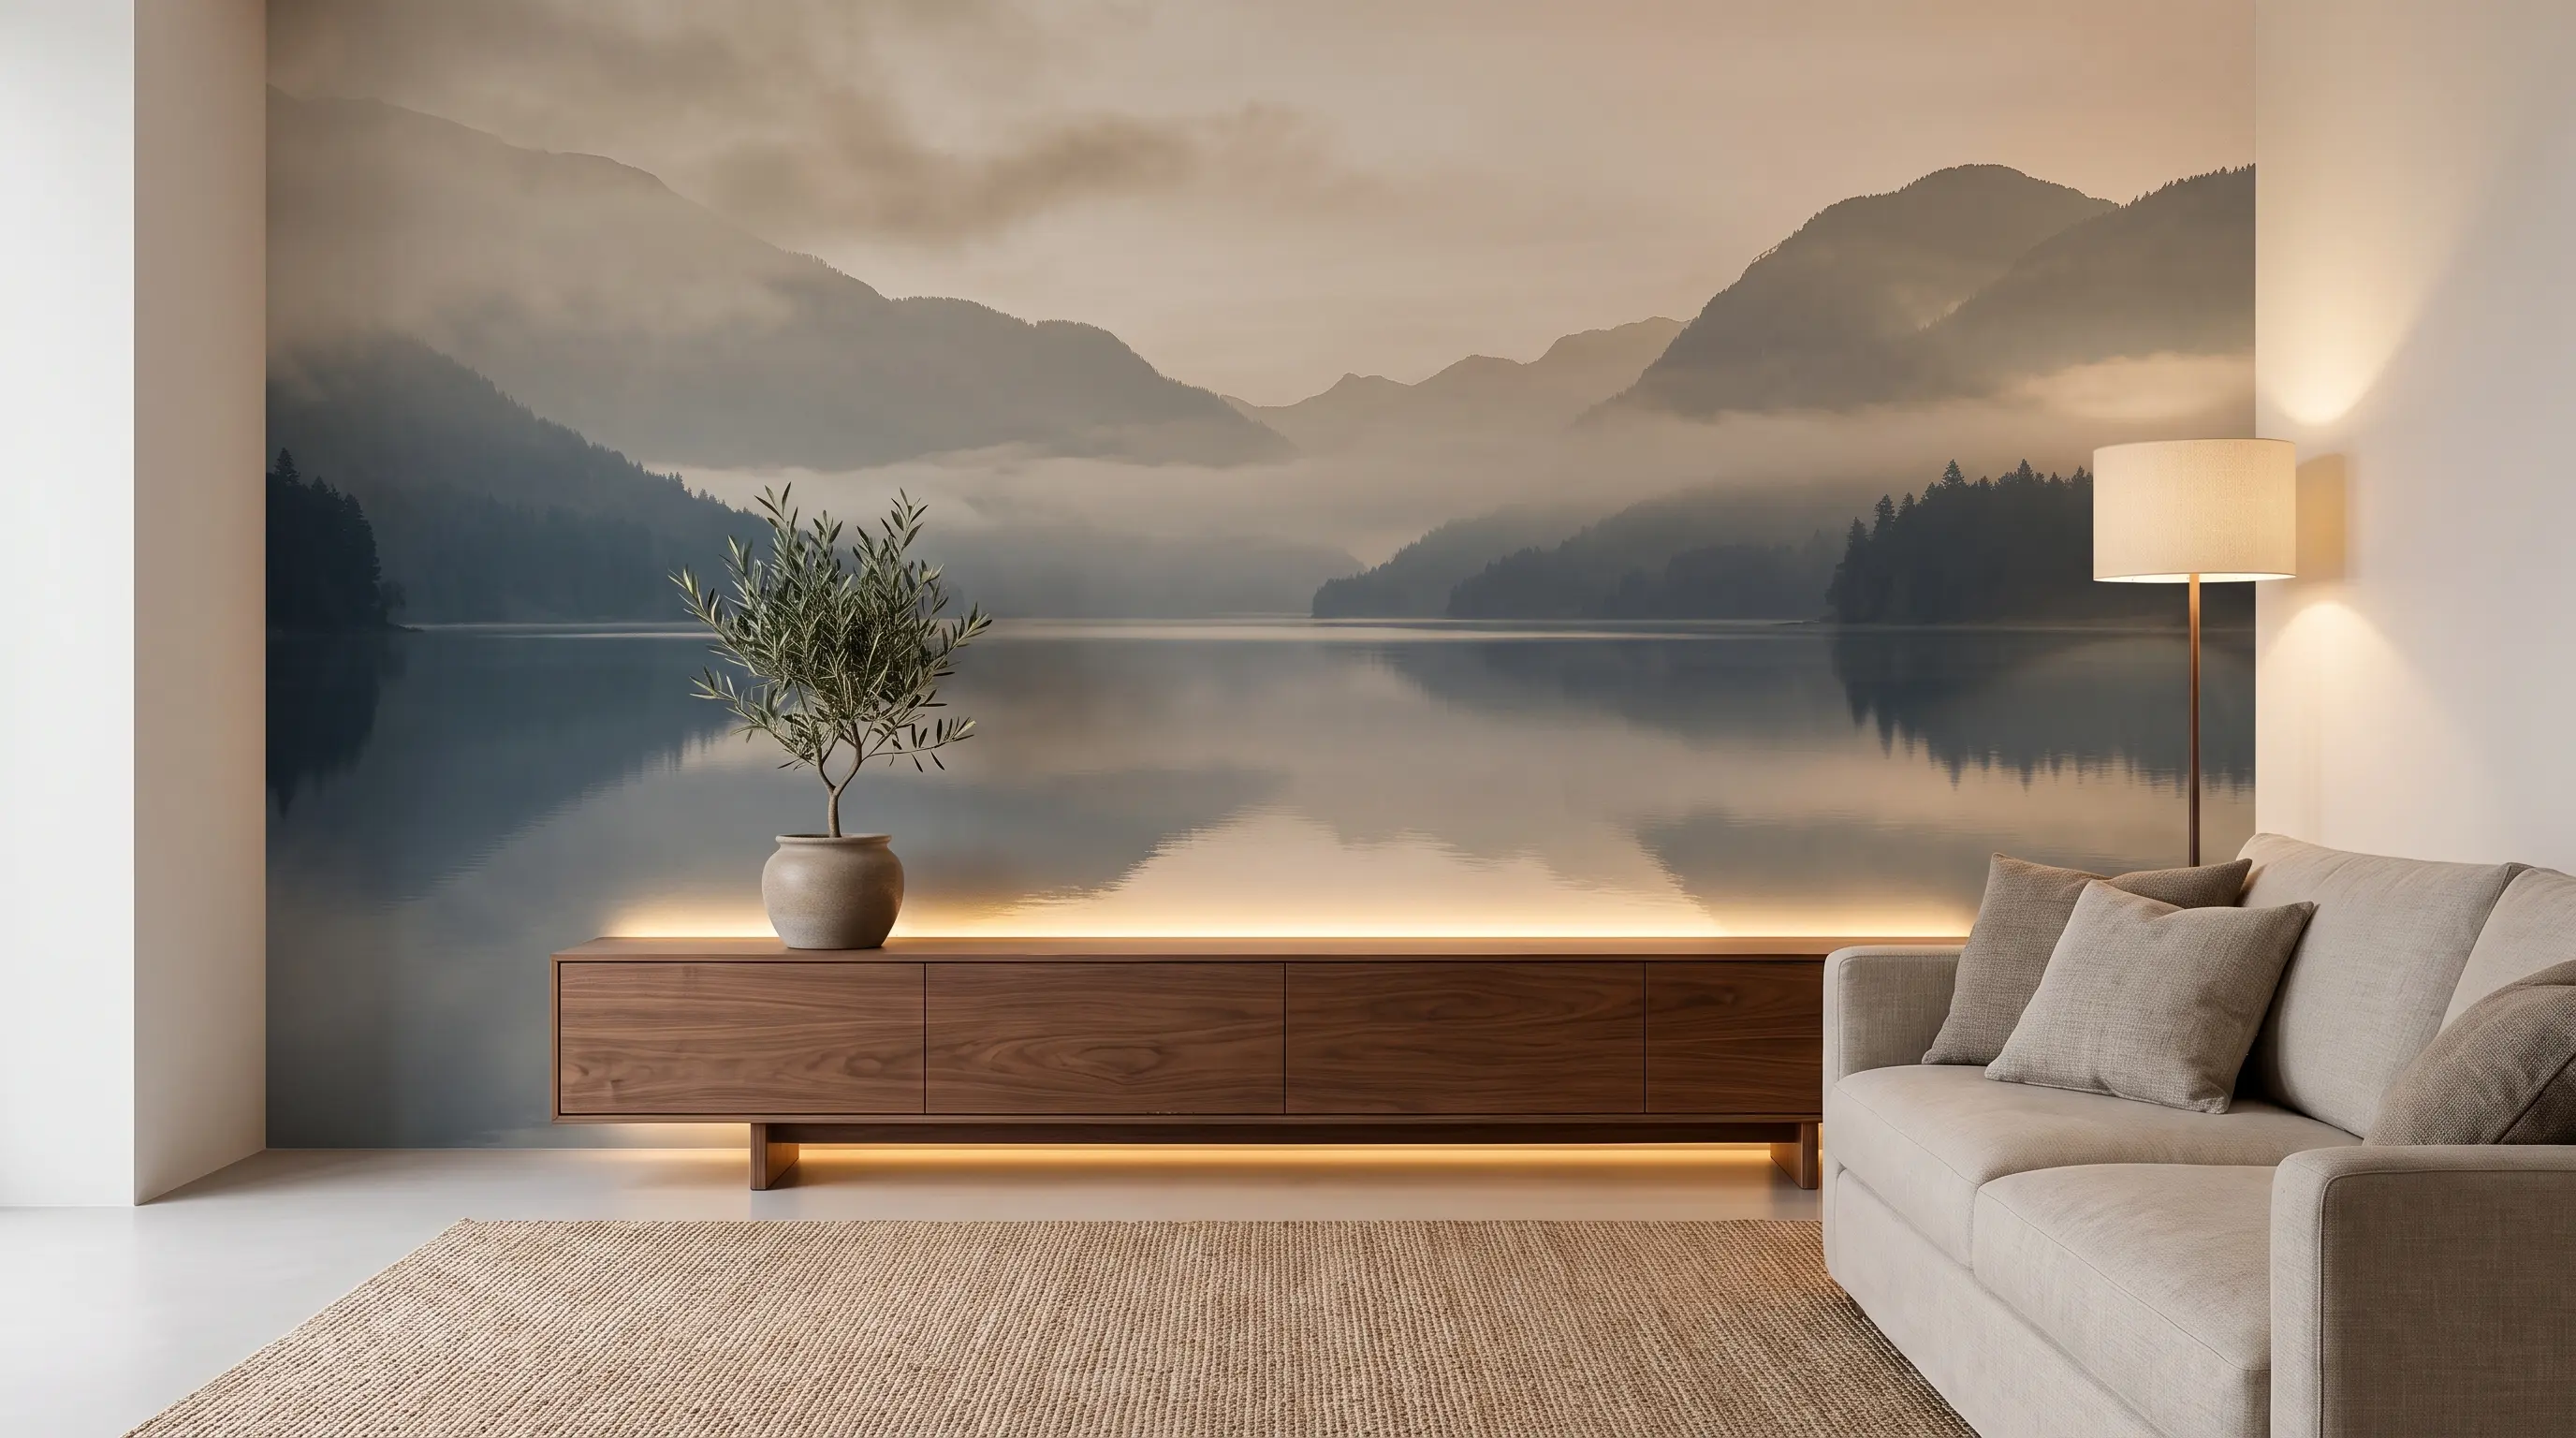
A large photo mural can fill a blank wall without paint or wallpaper. It is also a useful choice for rental homes where temporary decor is needed
| Cost | $18 to $25 |
| Skill level | Beginner- friendly |
| Material Required | A chosen photo and a printable mural |
How to make it: Select a clear photo that suits the size of the wall. Have it printed as a mural, line up the sections, and attach them carefully so the edges meet.
25. Framed Kids’ Art Gallery
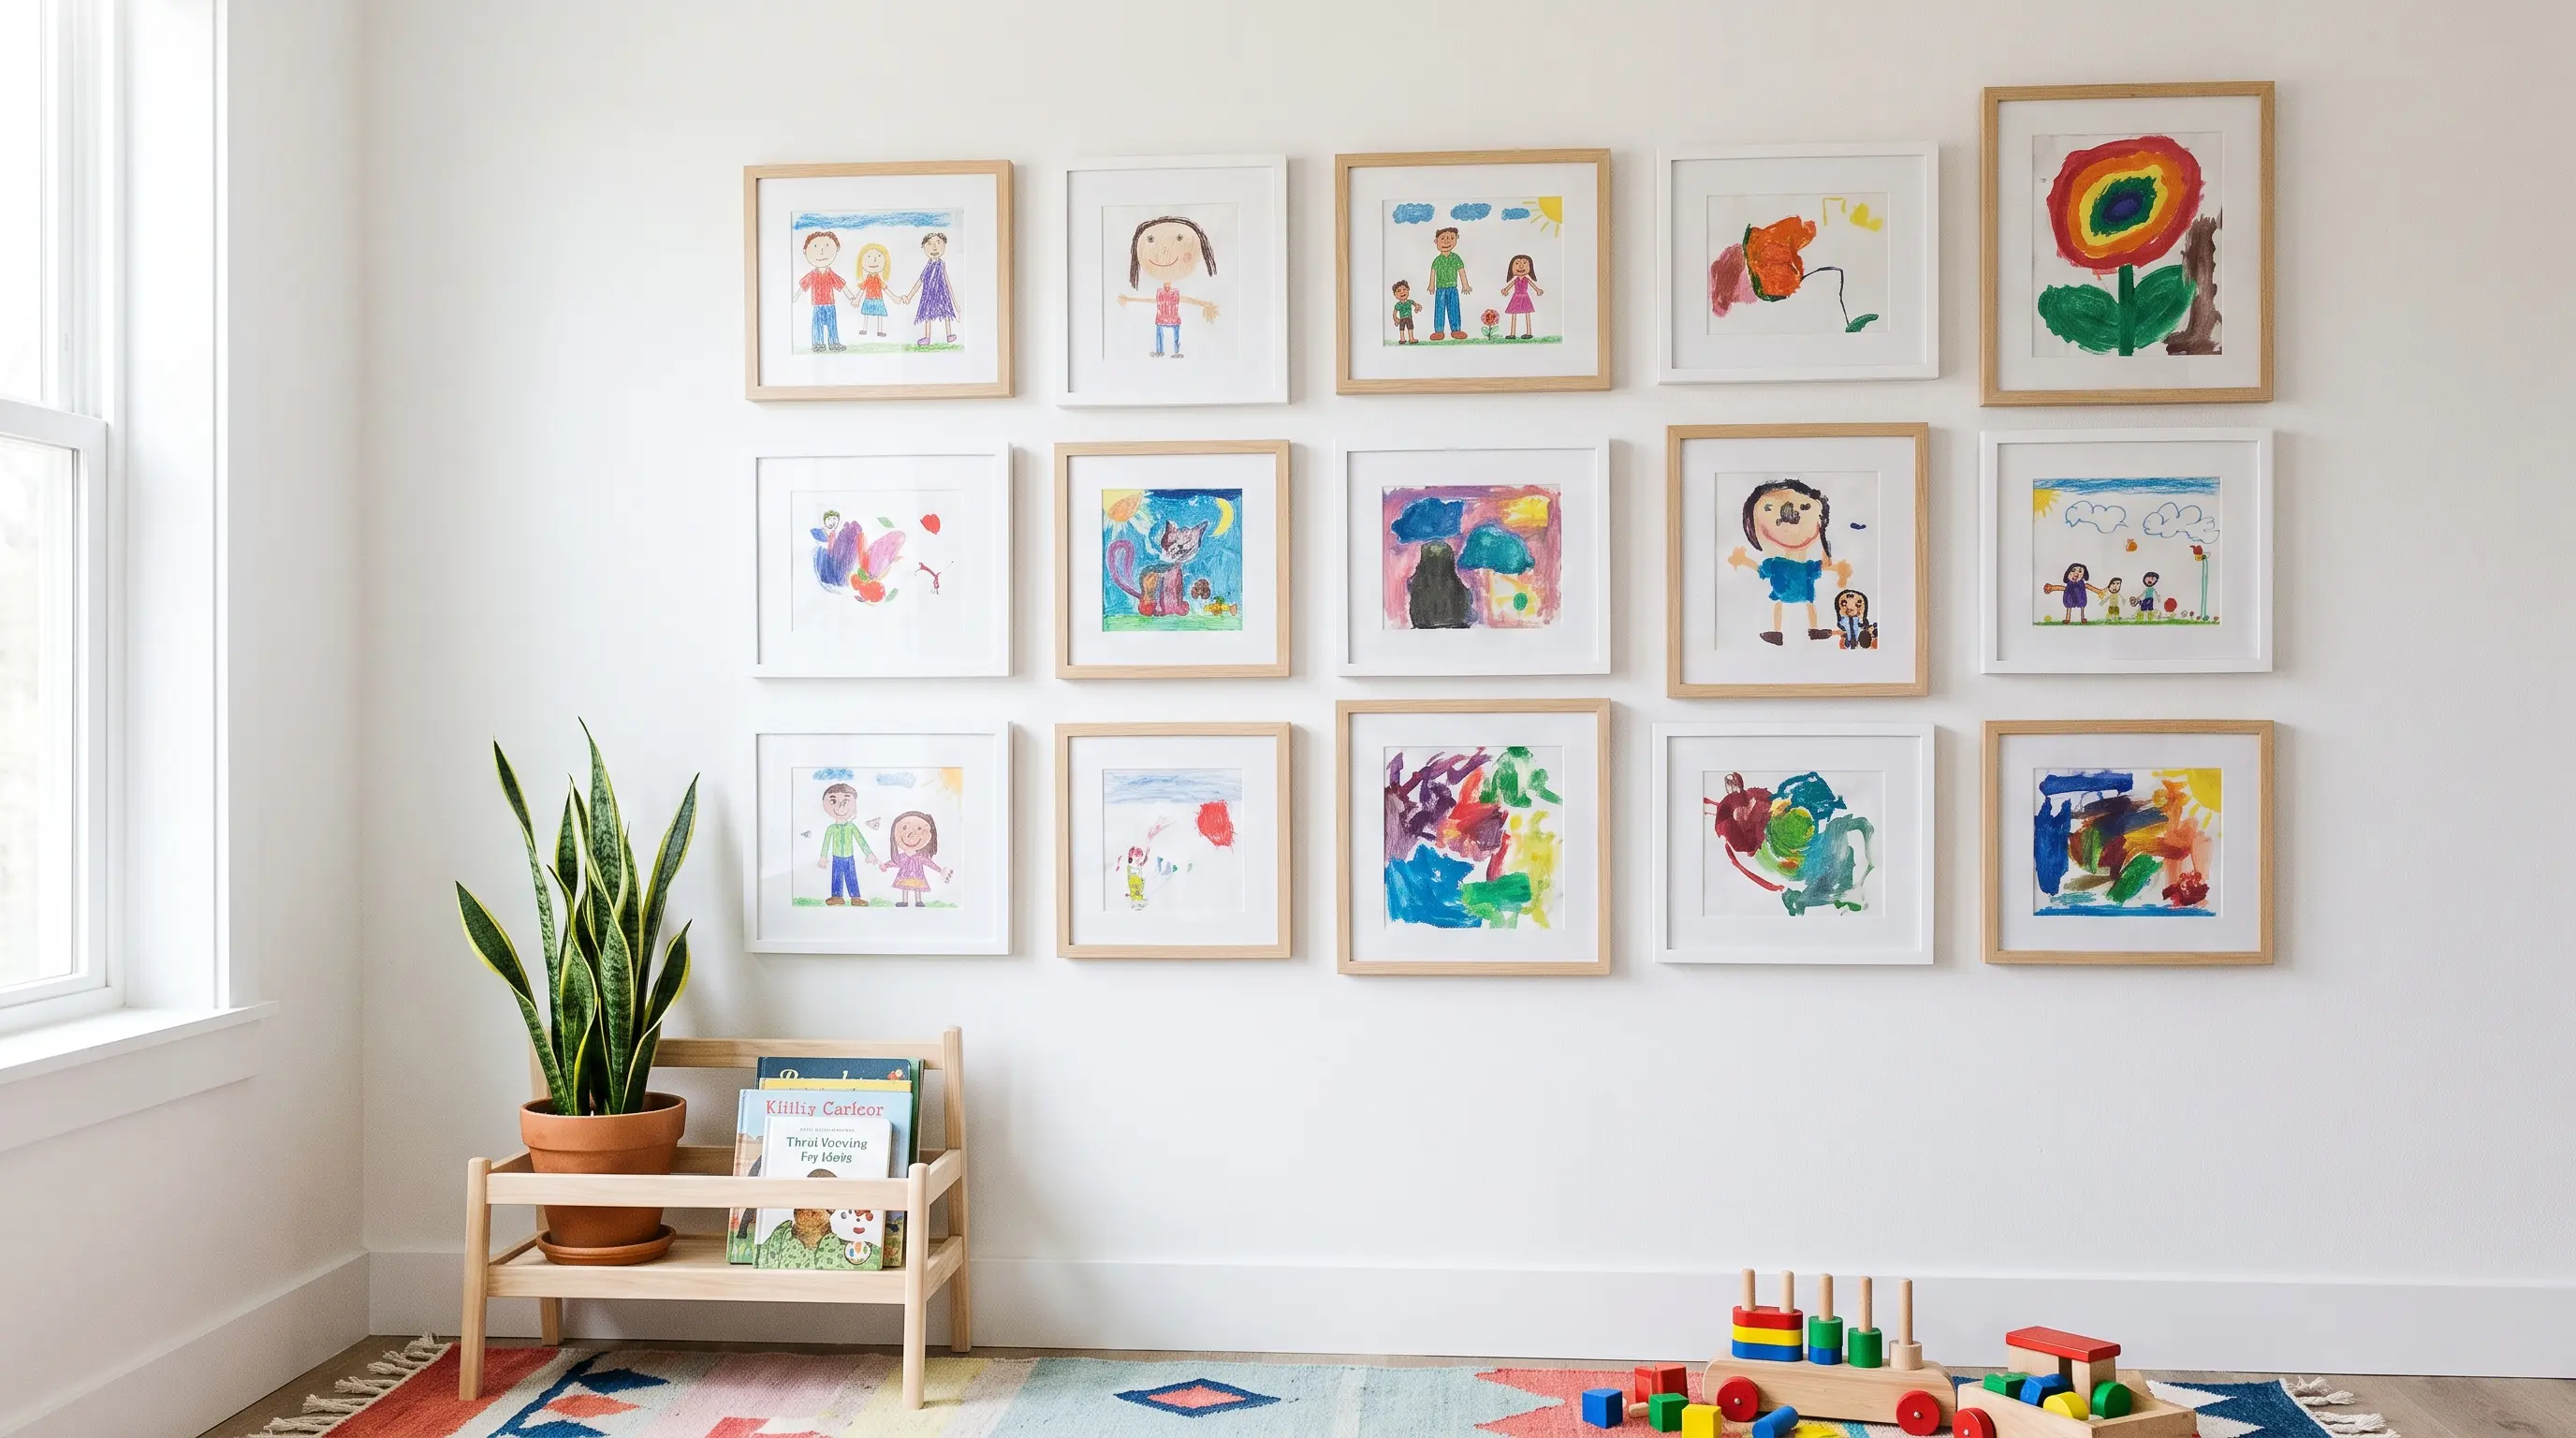
Save your children’s best drawings and place them in clean matching frames. Hanging the frames in a floor-to-ceiling grid can make the group feel neat while giving their work a special place in the home.
| Cost | $10 to $50 |
| Skill level | Beginner- friendly |
| Material Required | Children’s artwork, matching frames, and hanging hardware |
How to make it: Choose a set of drawings with similar sizes or colors. Place each one in a clean frame, mark an even grid on the wall, and hang the frames with equal space between them.
Repurposed & Upcycled Wall Art
Old corks, paint samples, plates, books, flowers, and office items can become low-cost wall decor. These projects help you reuse items instead of buying new art.
26. Wine-Cork Wall Art
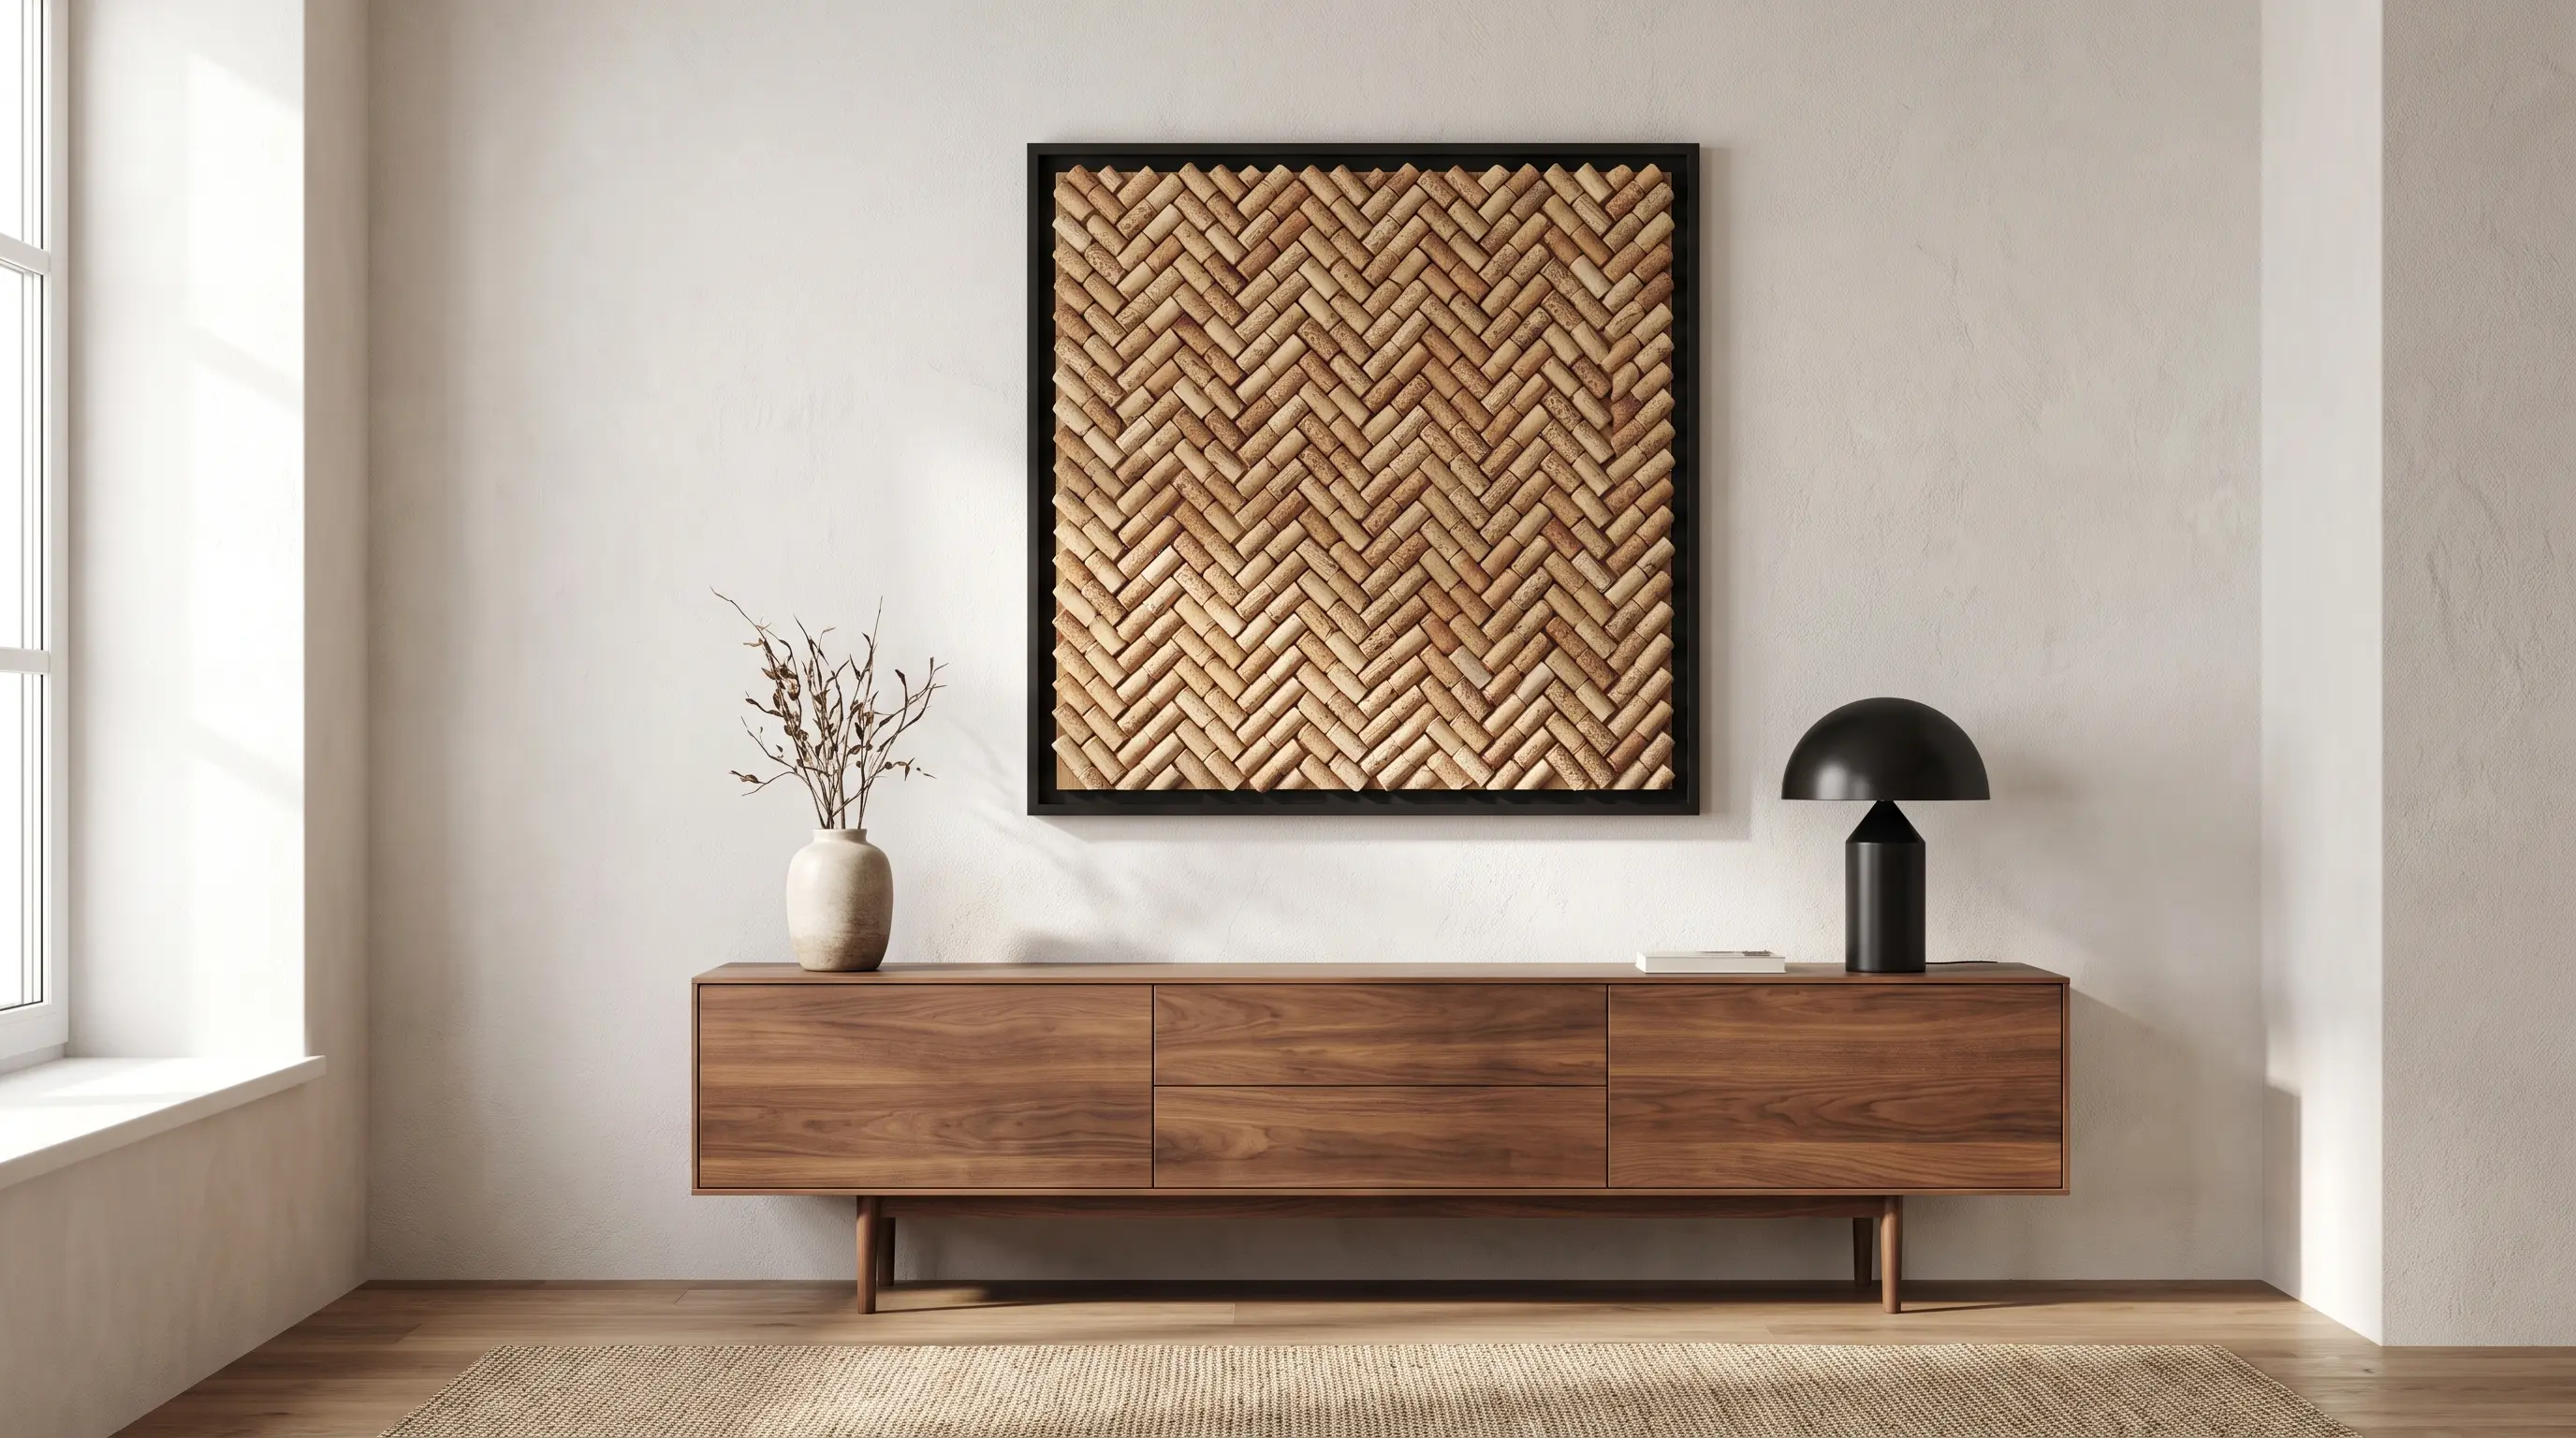
Save used wine corks and turn them into a recycled memo board. The cork surface adds texture and gives you a spot to pin notes or small keepsakes.
| Cost | $15 to $50 |
| Skill level | Beginner- friendly |
| Material Required | Saved wine corks, hot-glue gun, and backing board |
How to make it: To make wine-cork wall art, sketch a design on a backing board. Then, hot-glue your collection of wine corks onto the board to fill the shape.
27. Paint Chip Geometric Art
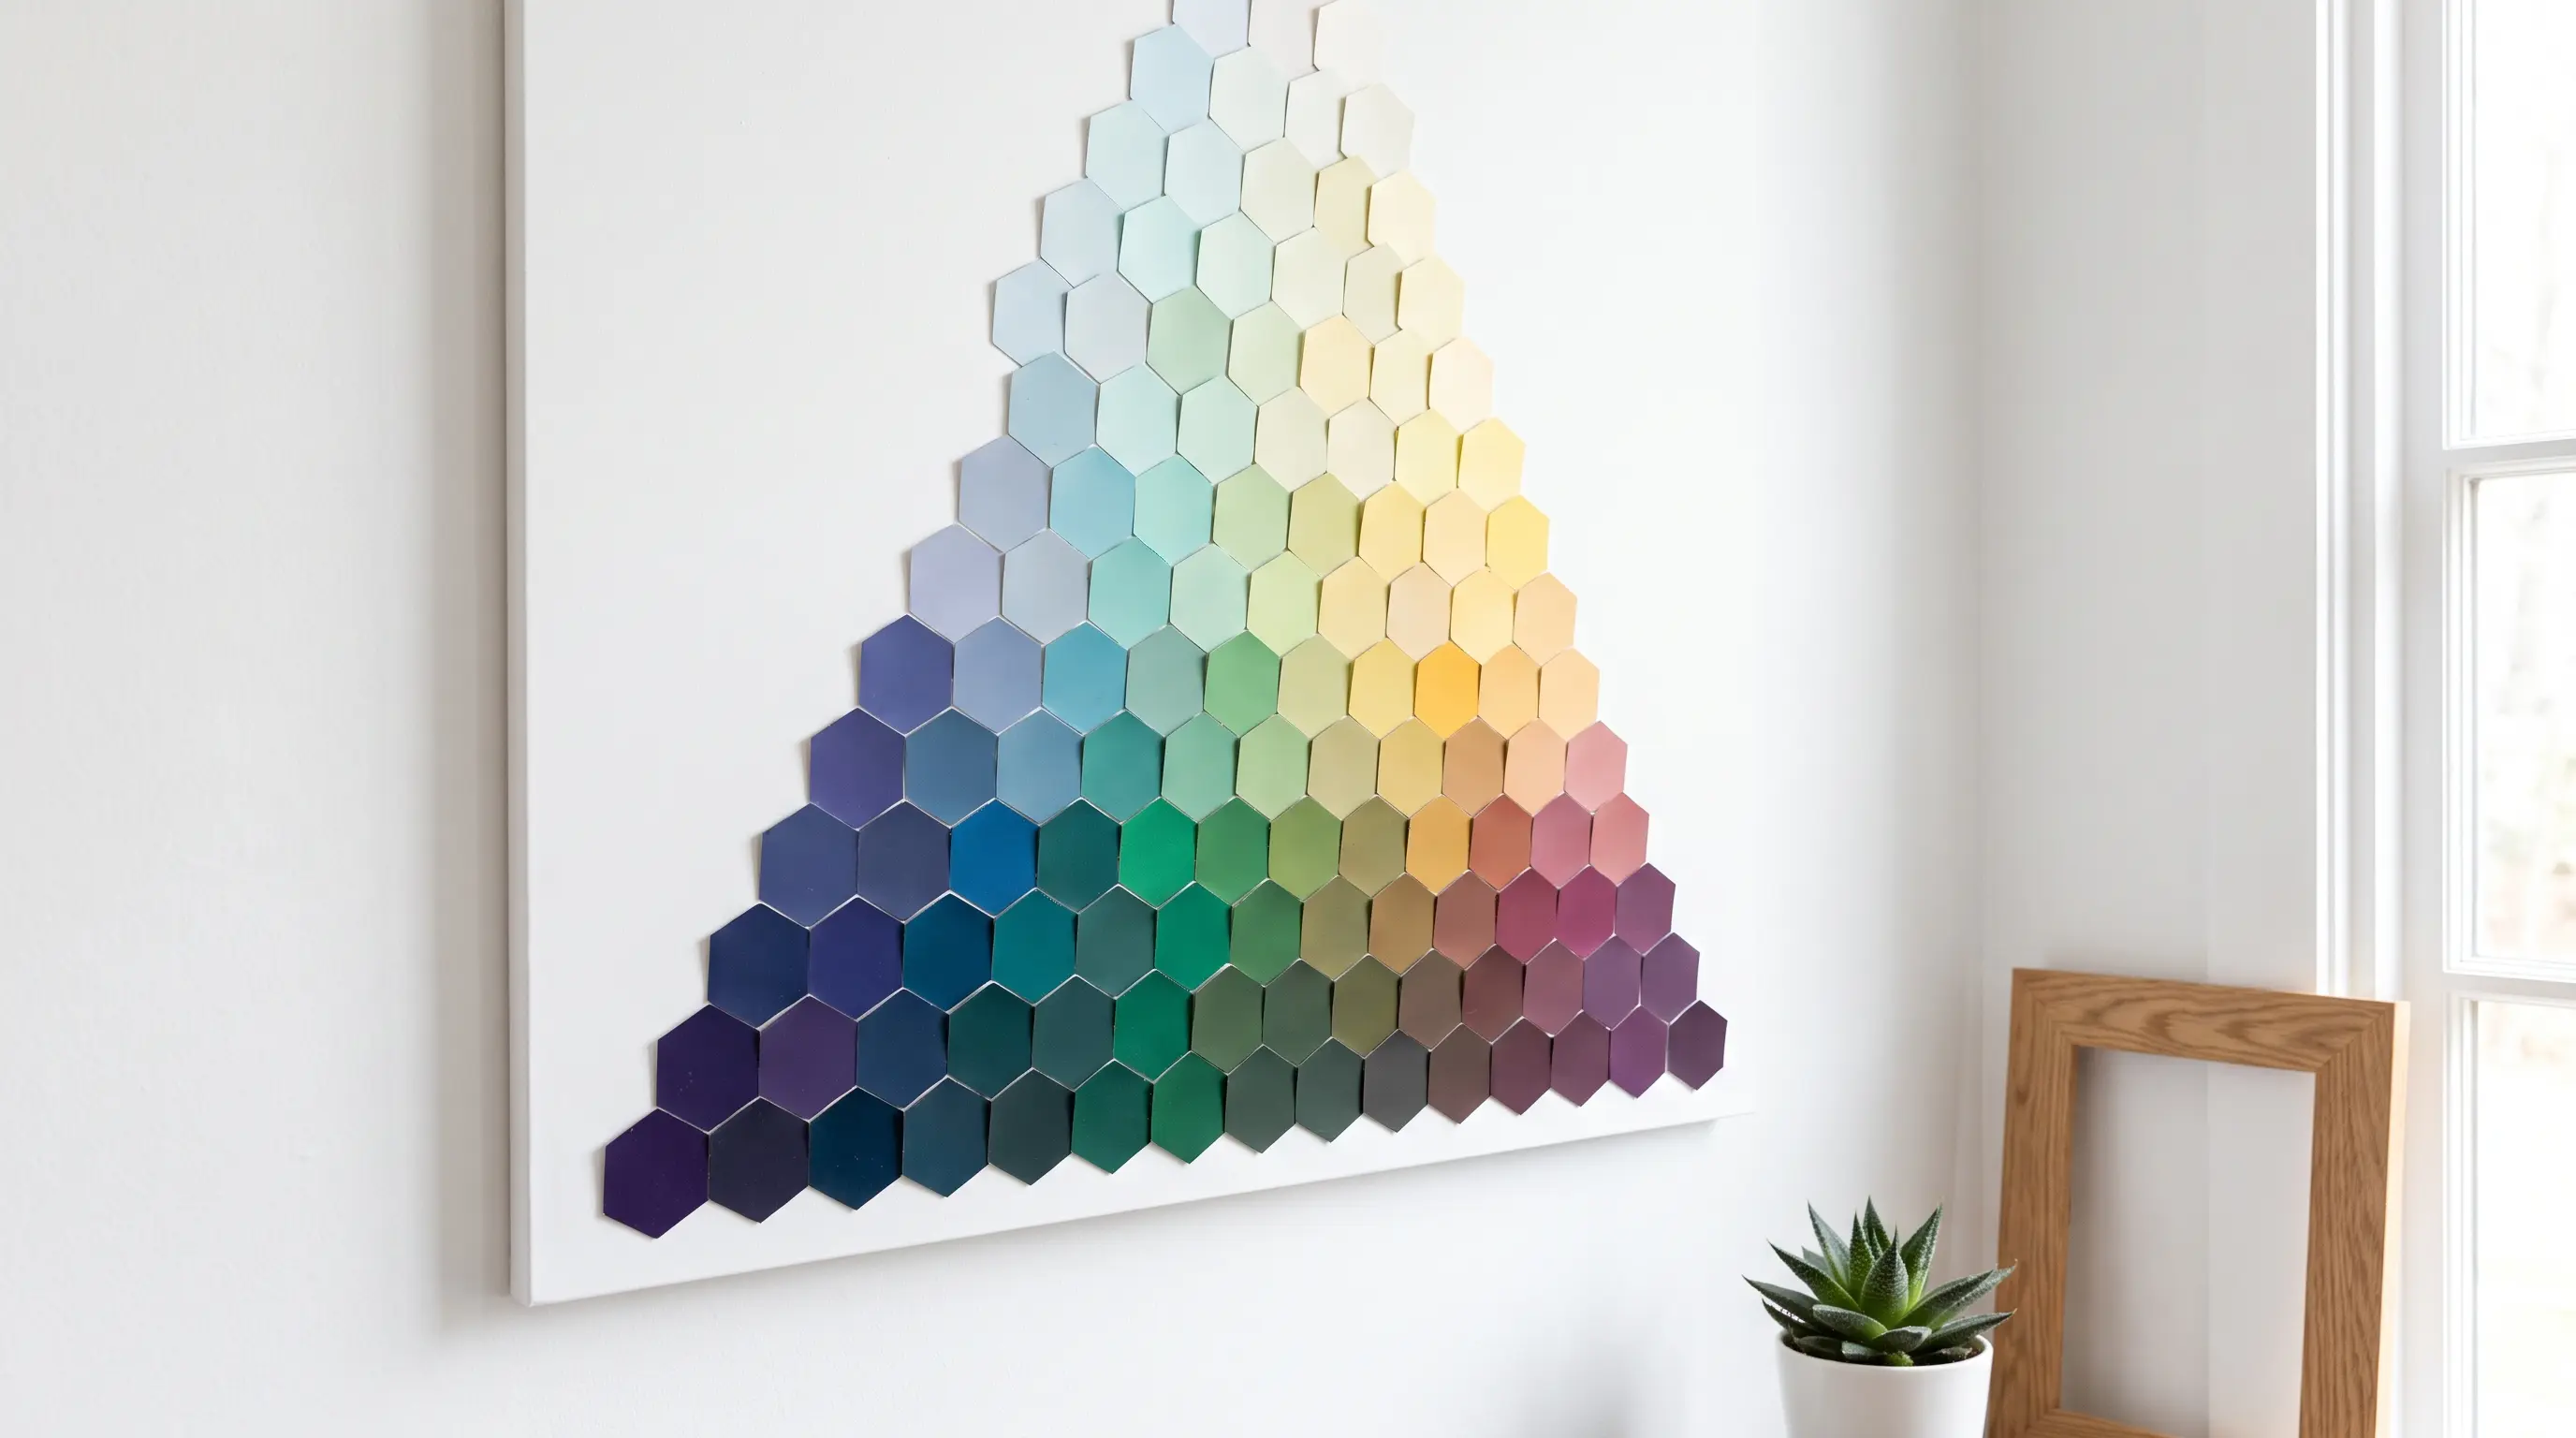
Turn leftover paint samples into colorful wall art that matches your room. Arrange them by shade, cut them into equal shapes, and place the finished design in a frame.
| Cost | $5 to $15 |
| Skill level | Beginner- friendly |
| Material Required | Paint samples, craft scissors, poster board, double-sided tape, mat, and frame |
How to make it: Sort the samples by color, then cut them into the same shape. Arrange them in a row, grid, or color fade, attach them to poster board, and place the design in a frame.
28. Floral China Plate Wall
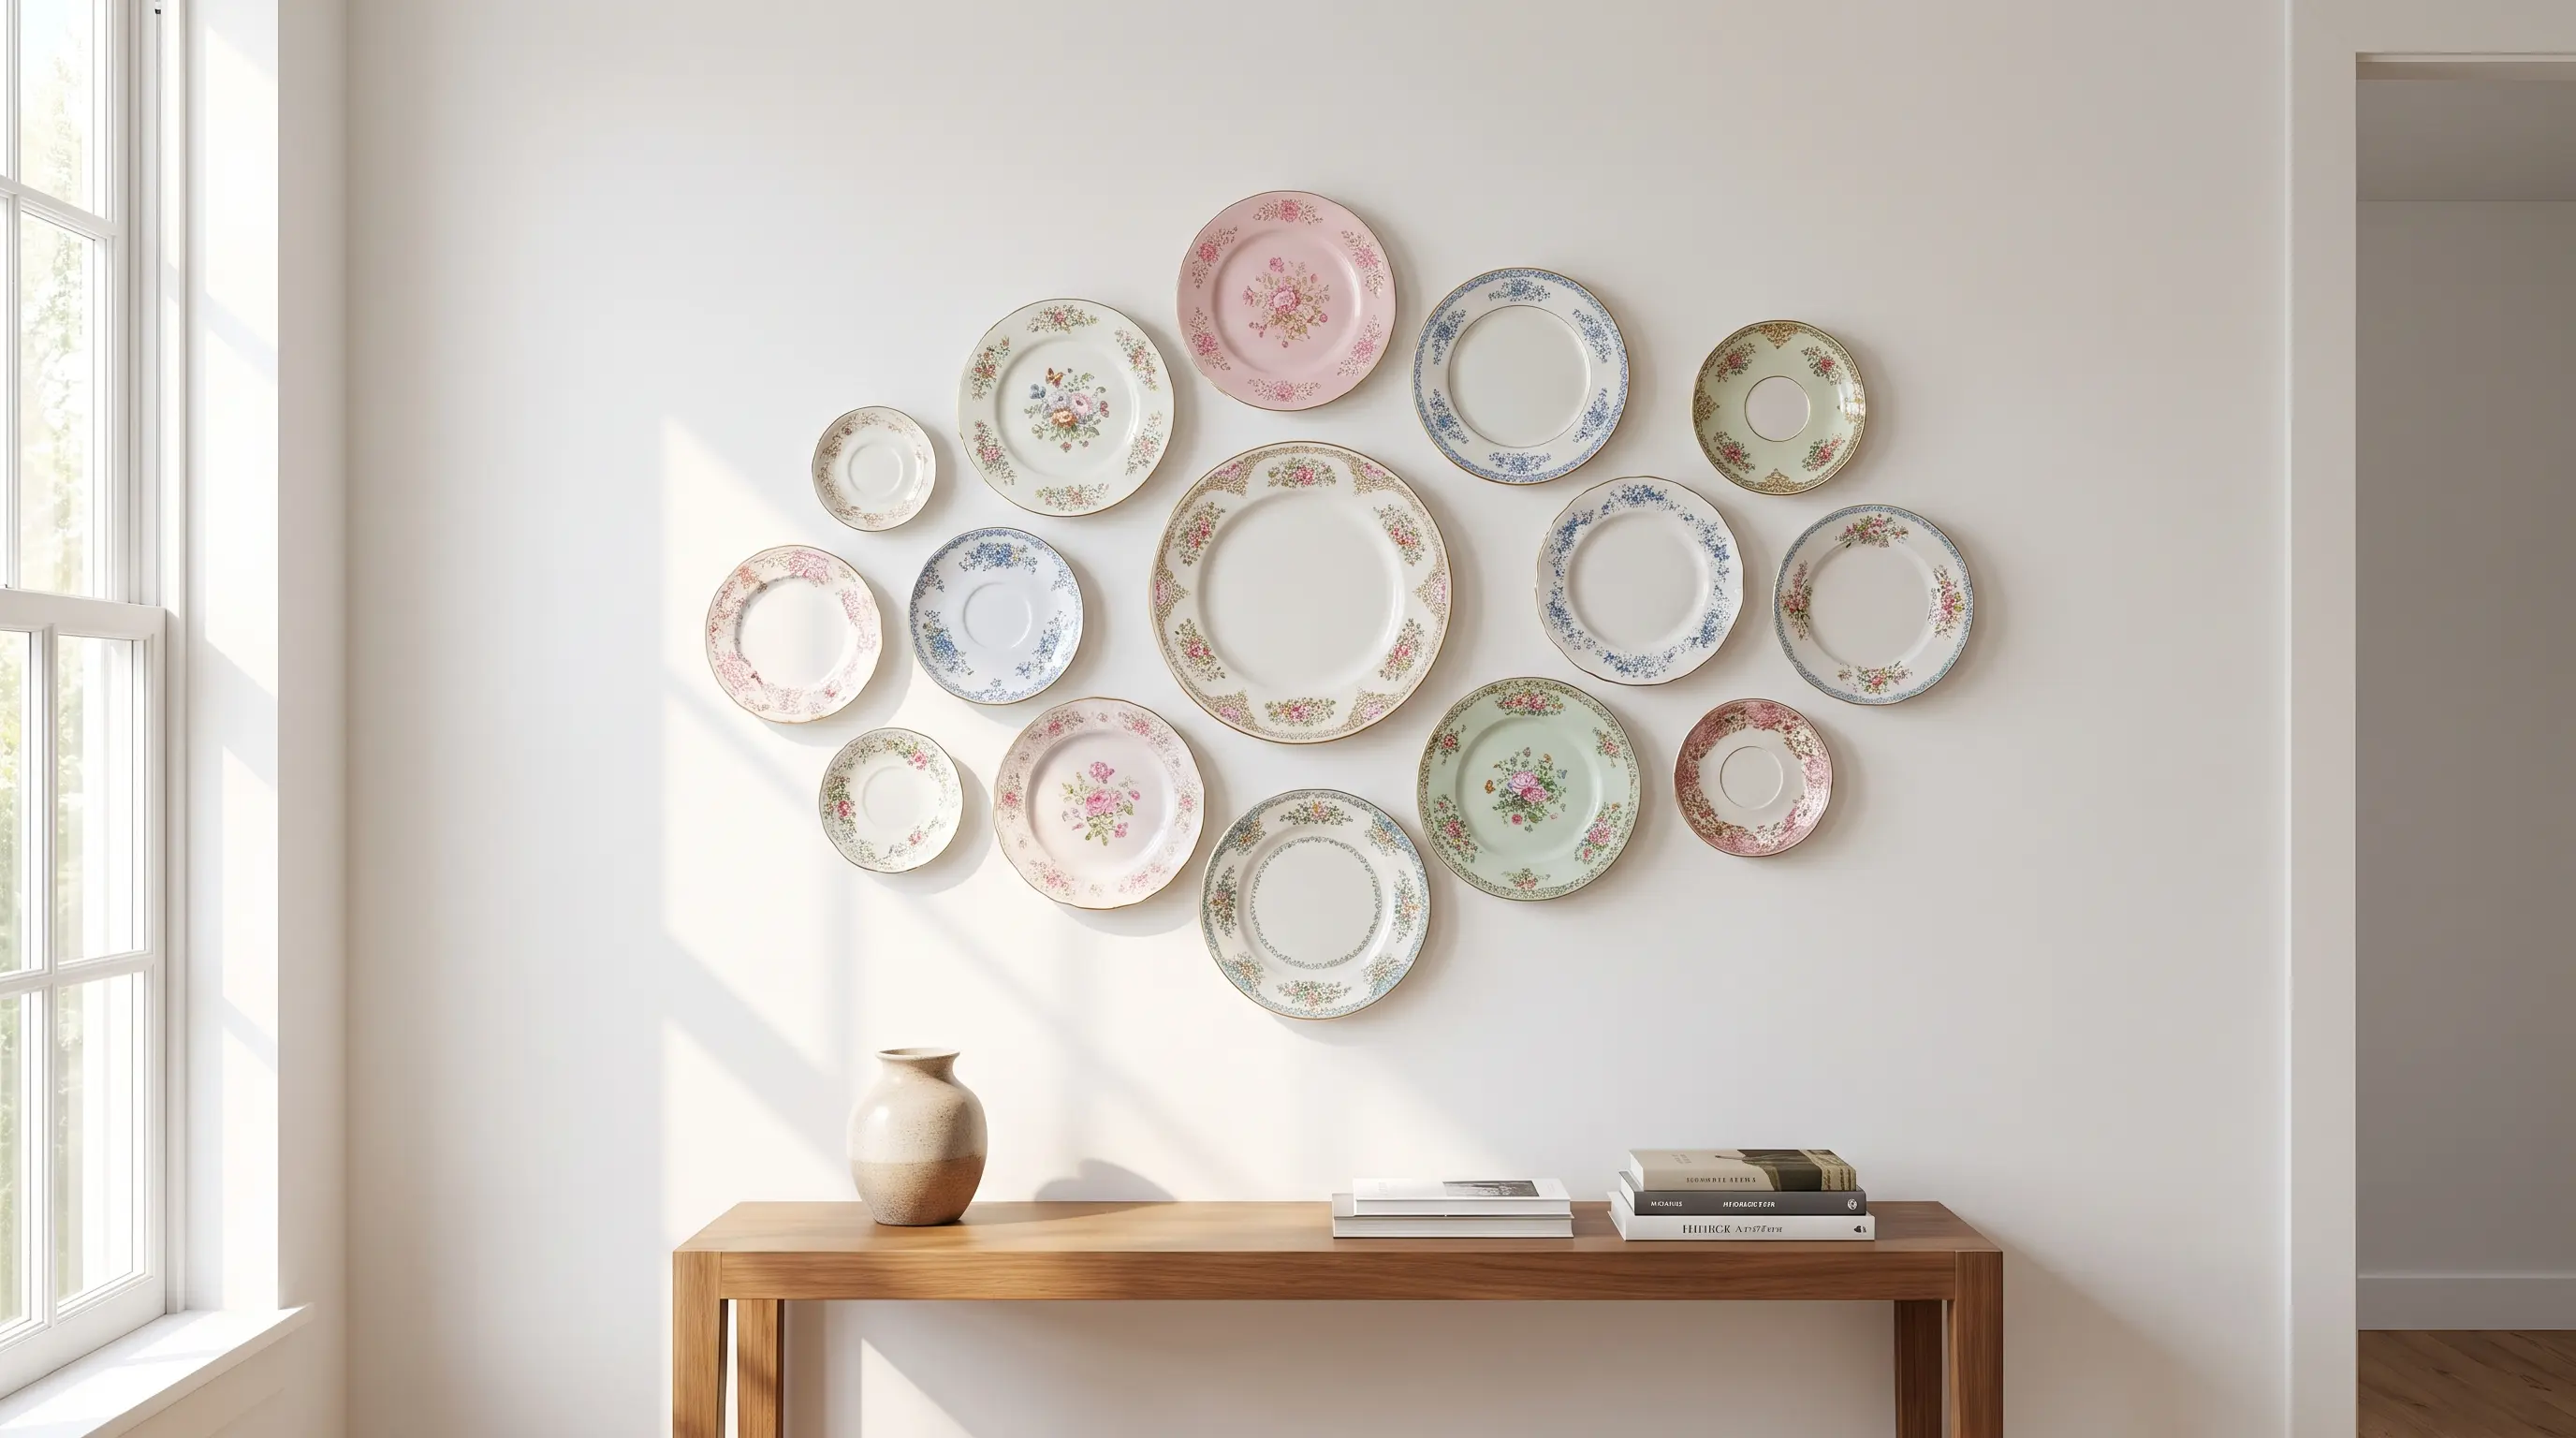
Give old plates a fresh use by adding numbers, letters, or a small stencil. Group the finished plates on the wall for a low-cost display with color and pattern.
| Cost | $15 to $75 |
| Skill level | Beginner- friendly |
| Material Required | Thrifted china plates, stencil, and plate hangers |
How to make it: Clean the plates, add a stencil design, and let it dry. Plan the layout on the floor first, then hang the plates with safe plate hooks.
29. Open Book Wall Sculpture
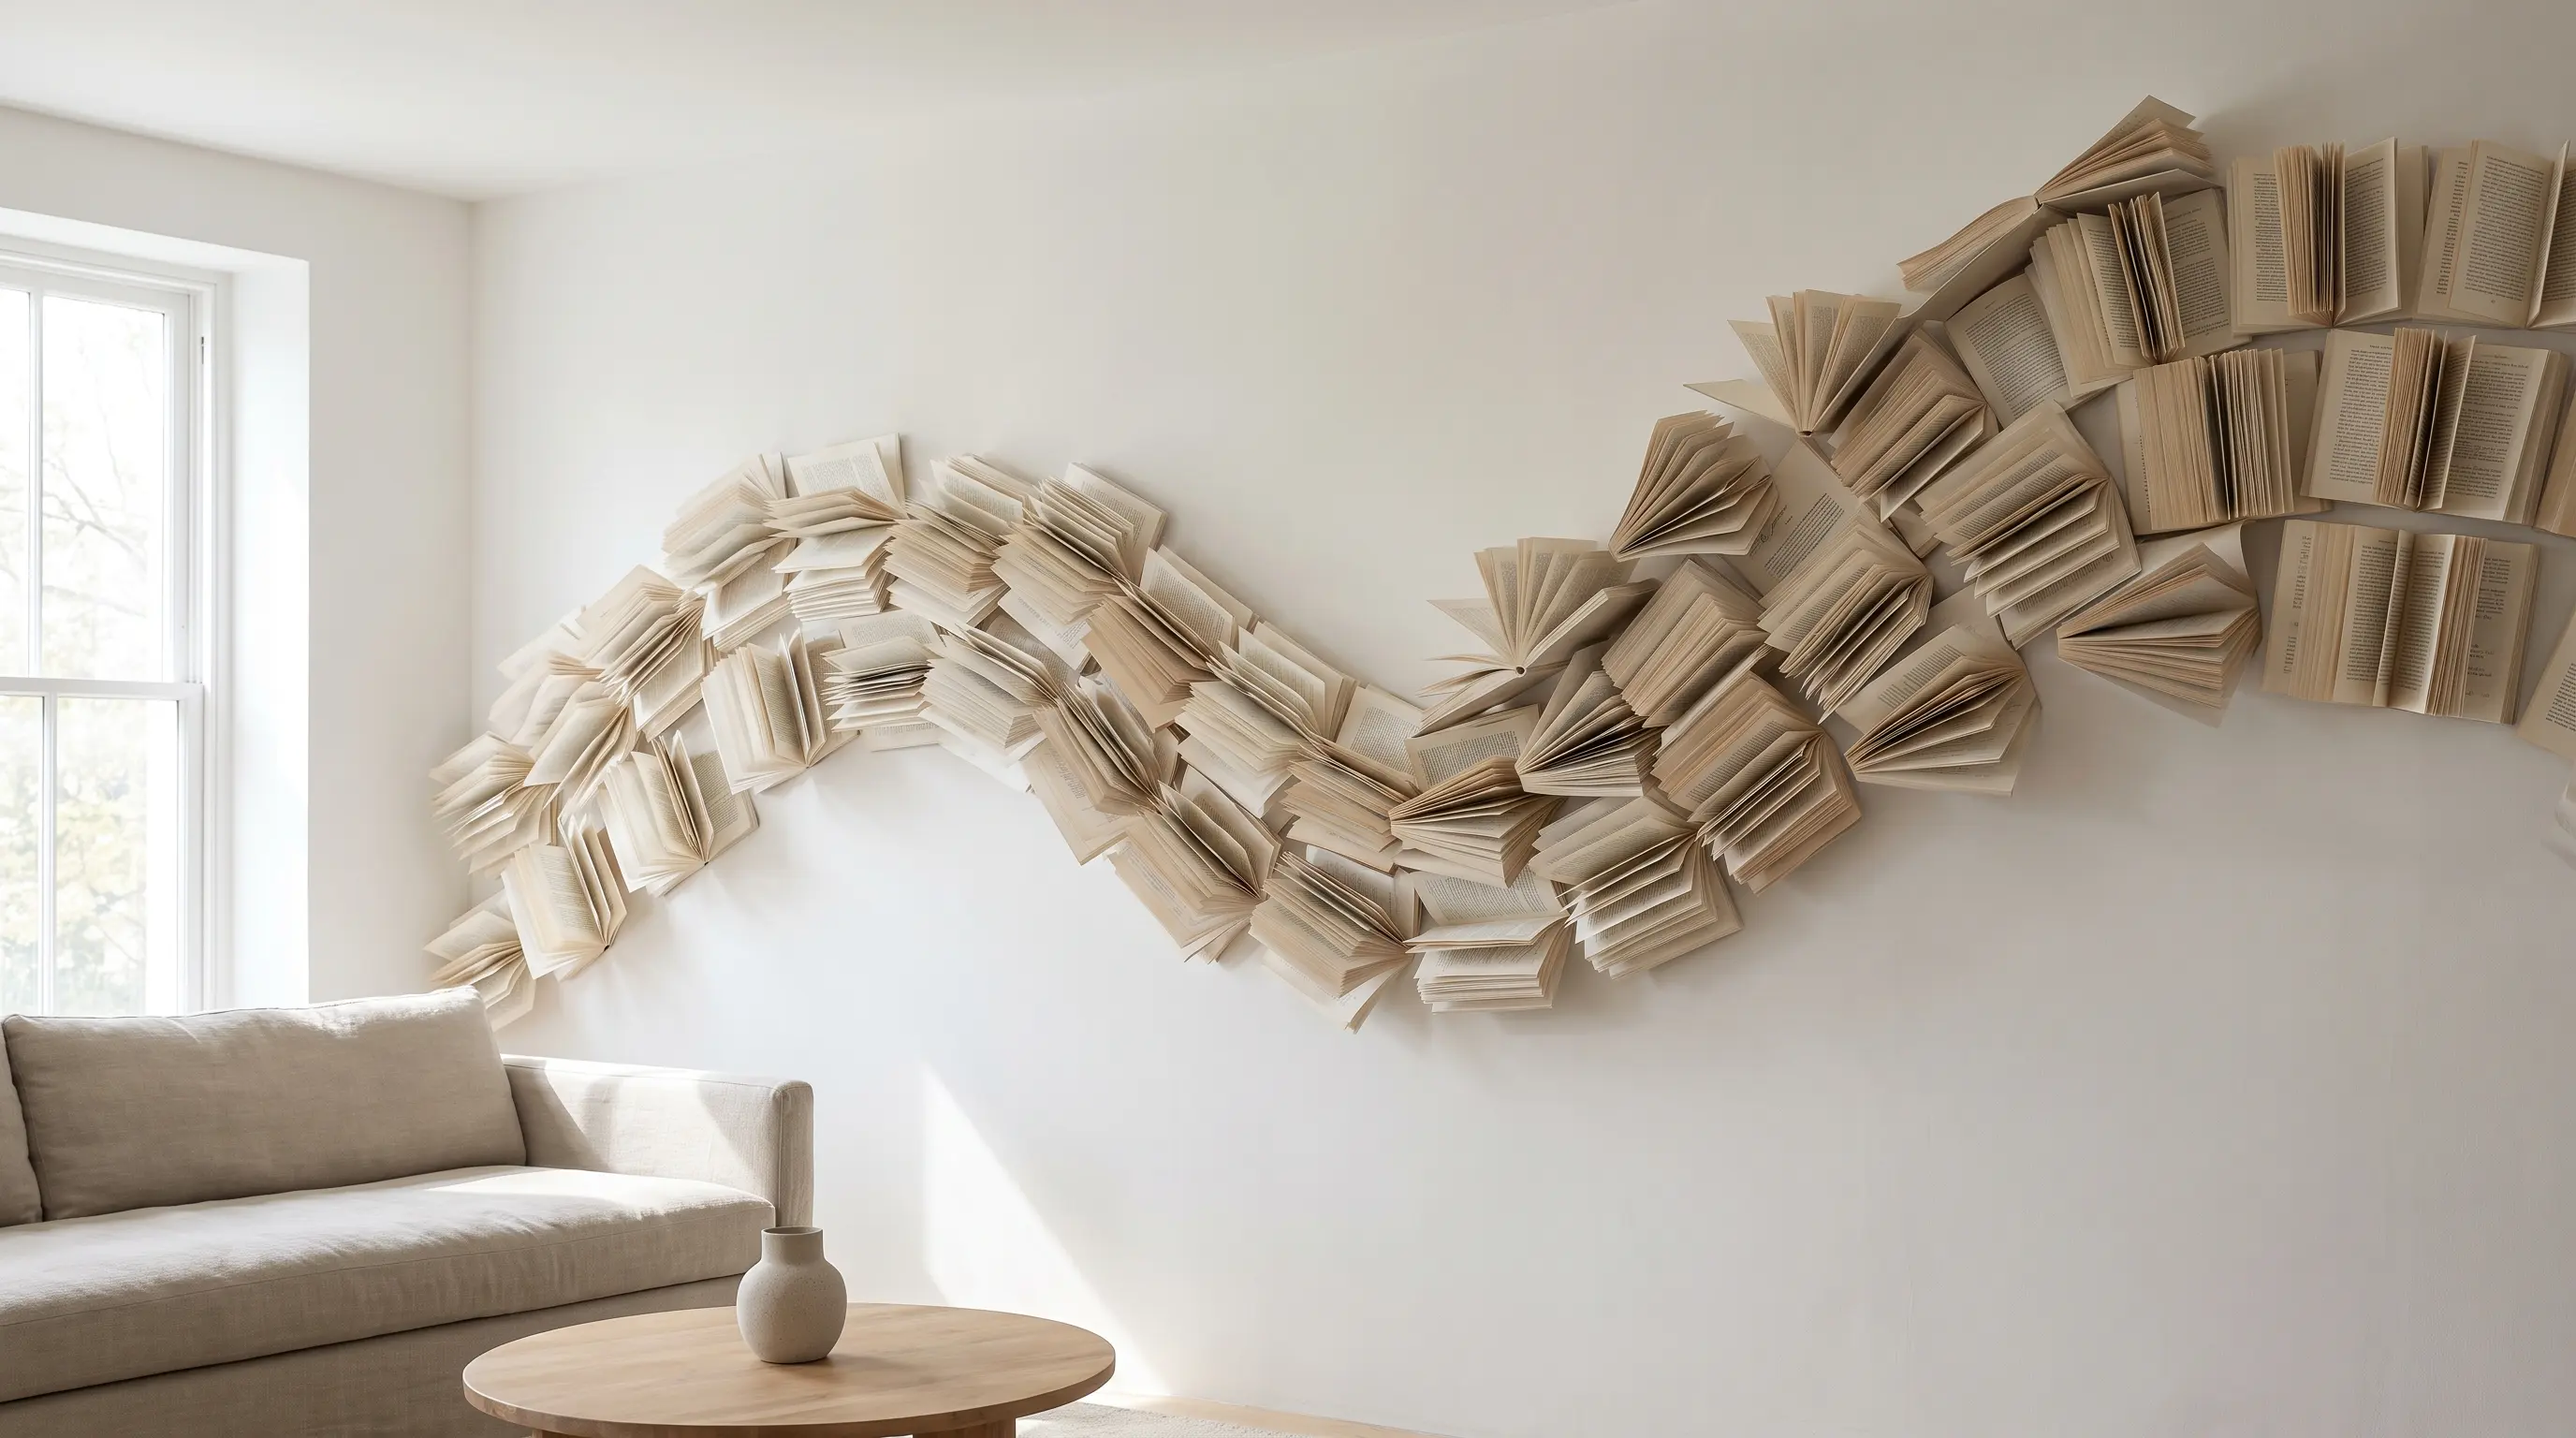
Old books can form a wall piece that looks as if the pages are moving. Glue selected pages together, then group several open books on the wall.
| Cost | $15 to $40 |
| Skill level | Beginner- friendly |
| Material Required | Old books, hot glue, drywall screws, and basic tools |
How to make it: Add hot glue between the open pages to hold them in place. Once dry, group the books and secure each one through the back cover with suitable screws.
30. Collected Autographs Display
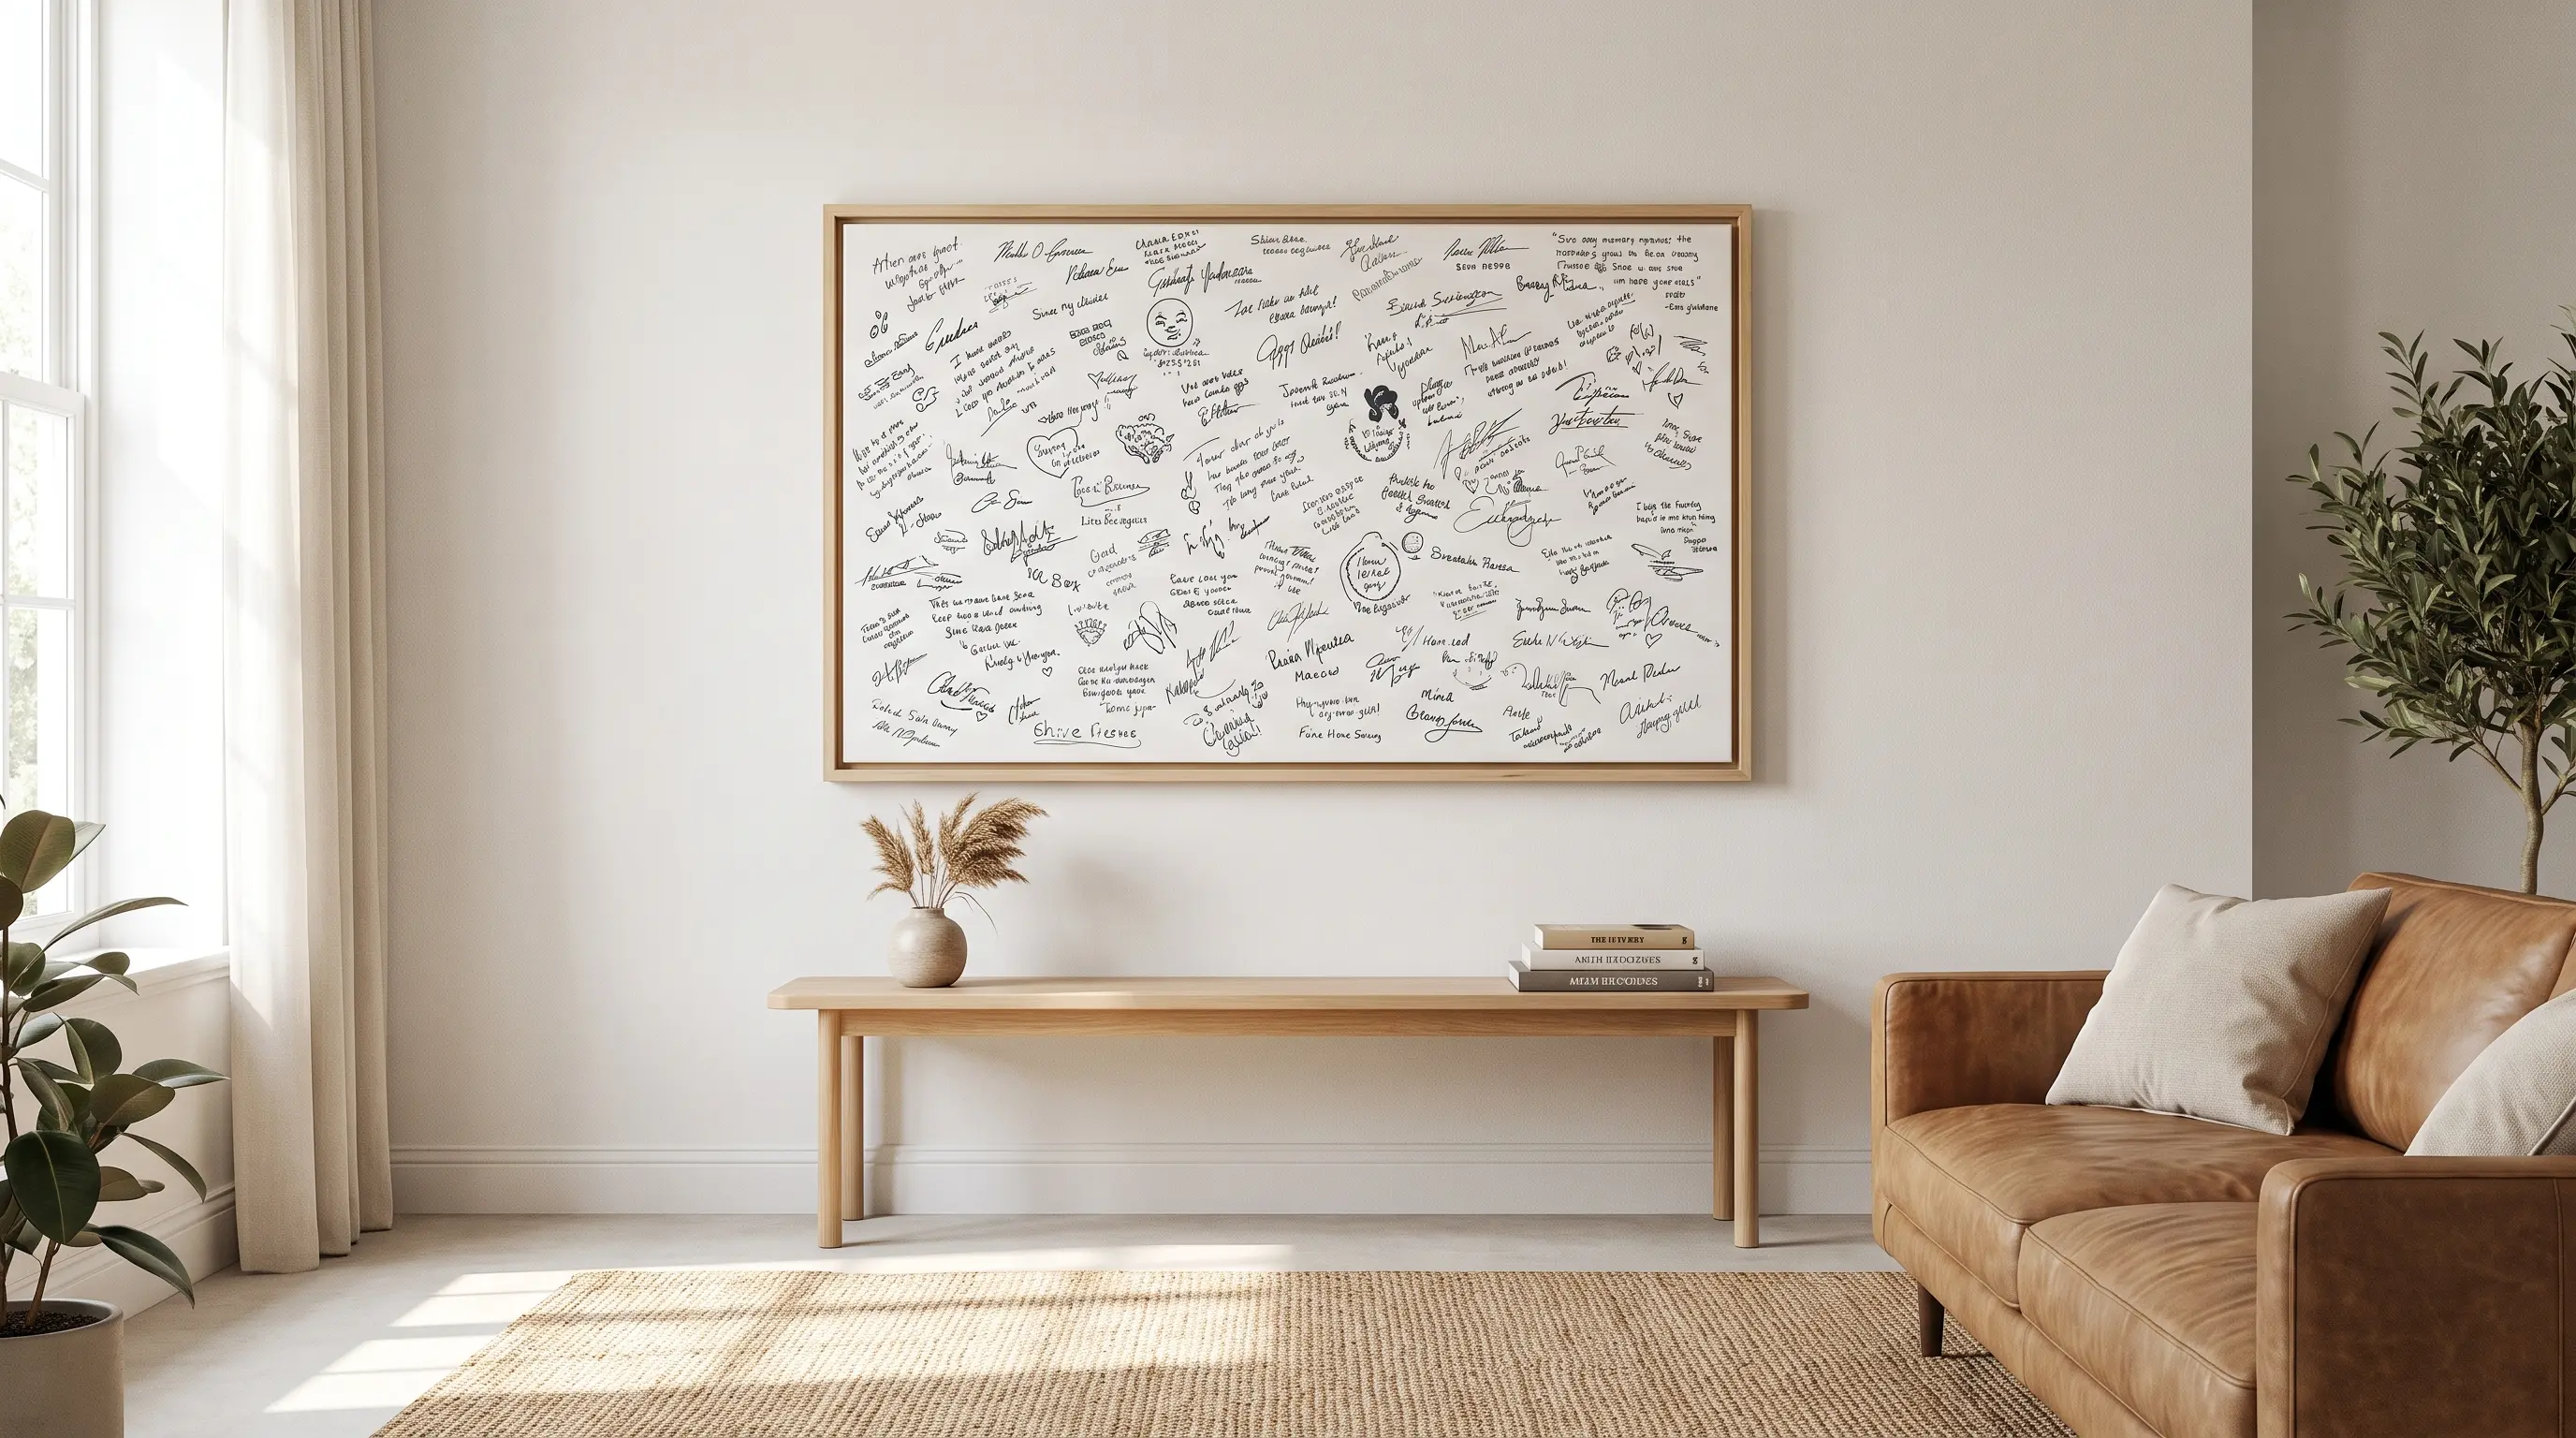
Turn guest signatures into personal wall art. Over time, the random names and messages form a bold design that looks different from near and far.
| Cost | $20 to $50 |
| Skill level | Beginner- friendly |
| Material Required | Blank canvas, wood trim, nails or screws, and marker |
How to make it: Add wood trim around the canvas to form a frame. Hang it in a busy area, keep a marker close, and ask guests to add their names or short notes.
31. Framed Dried Flowers
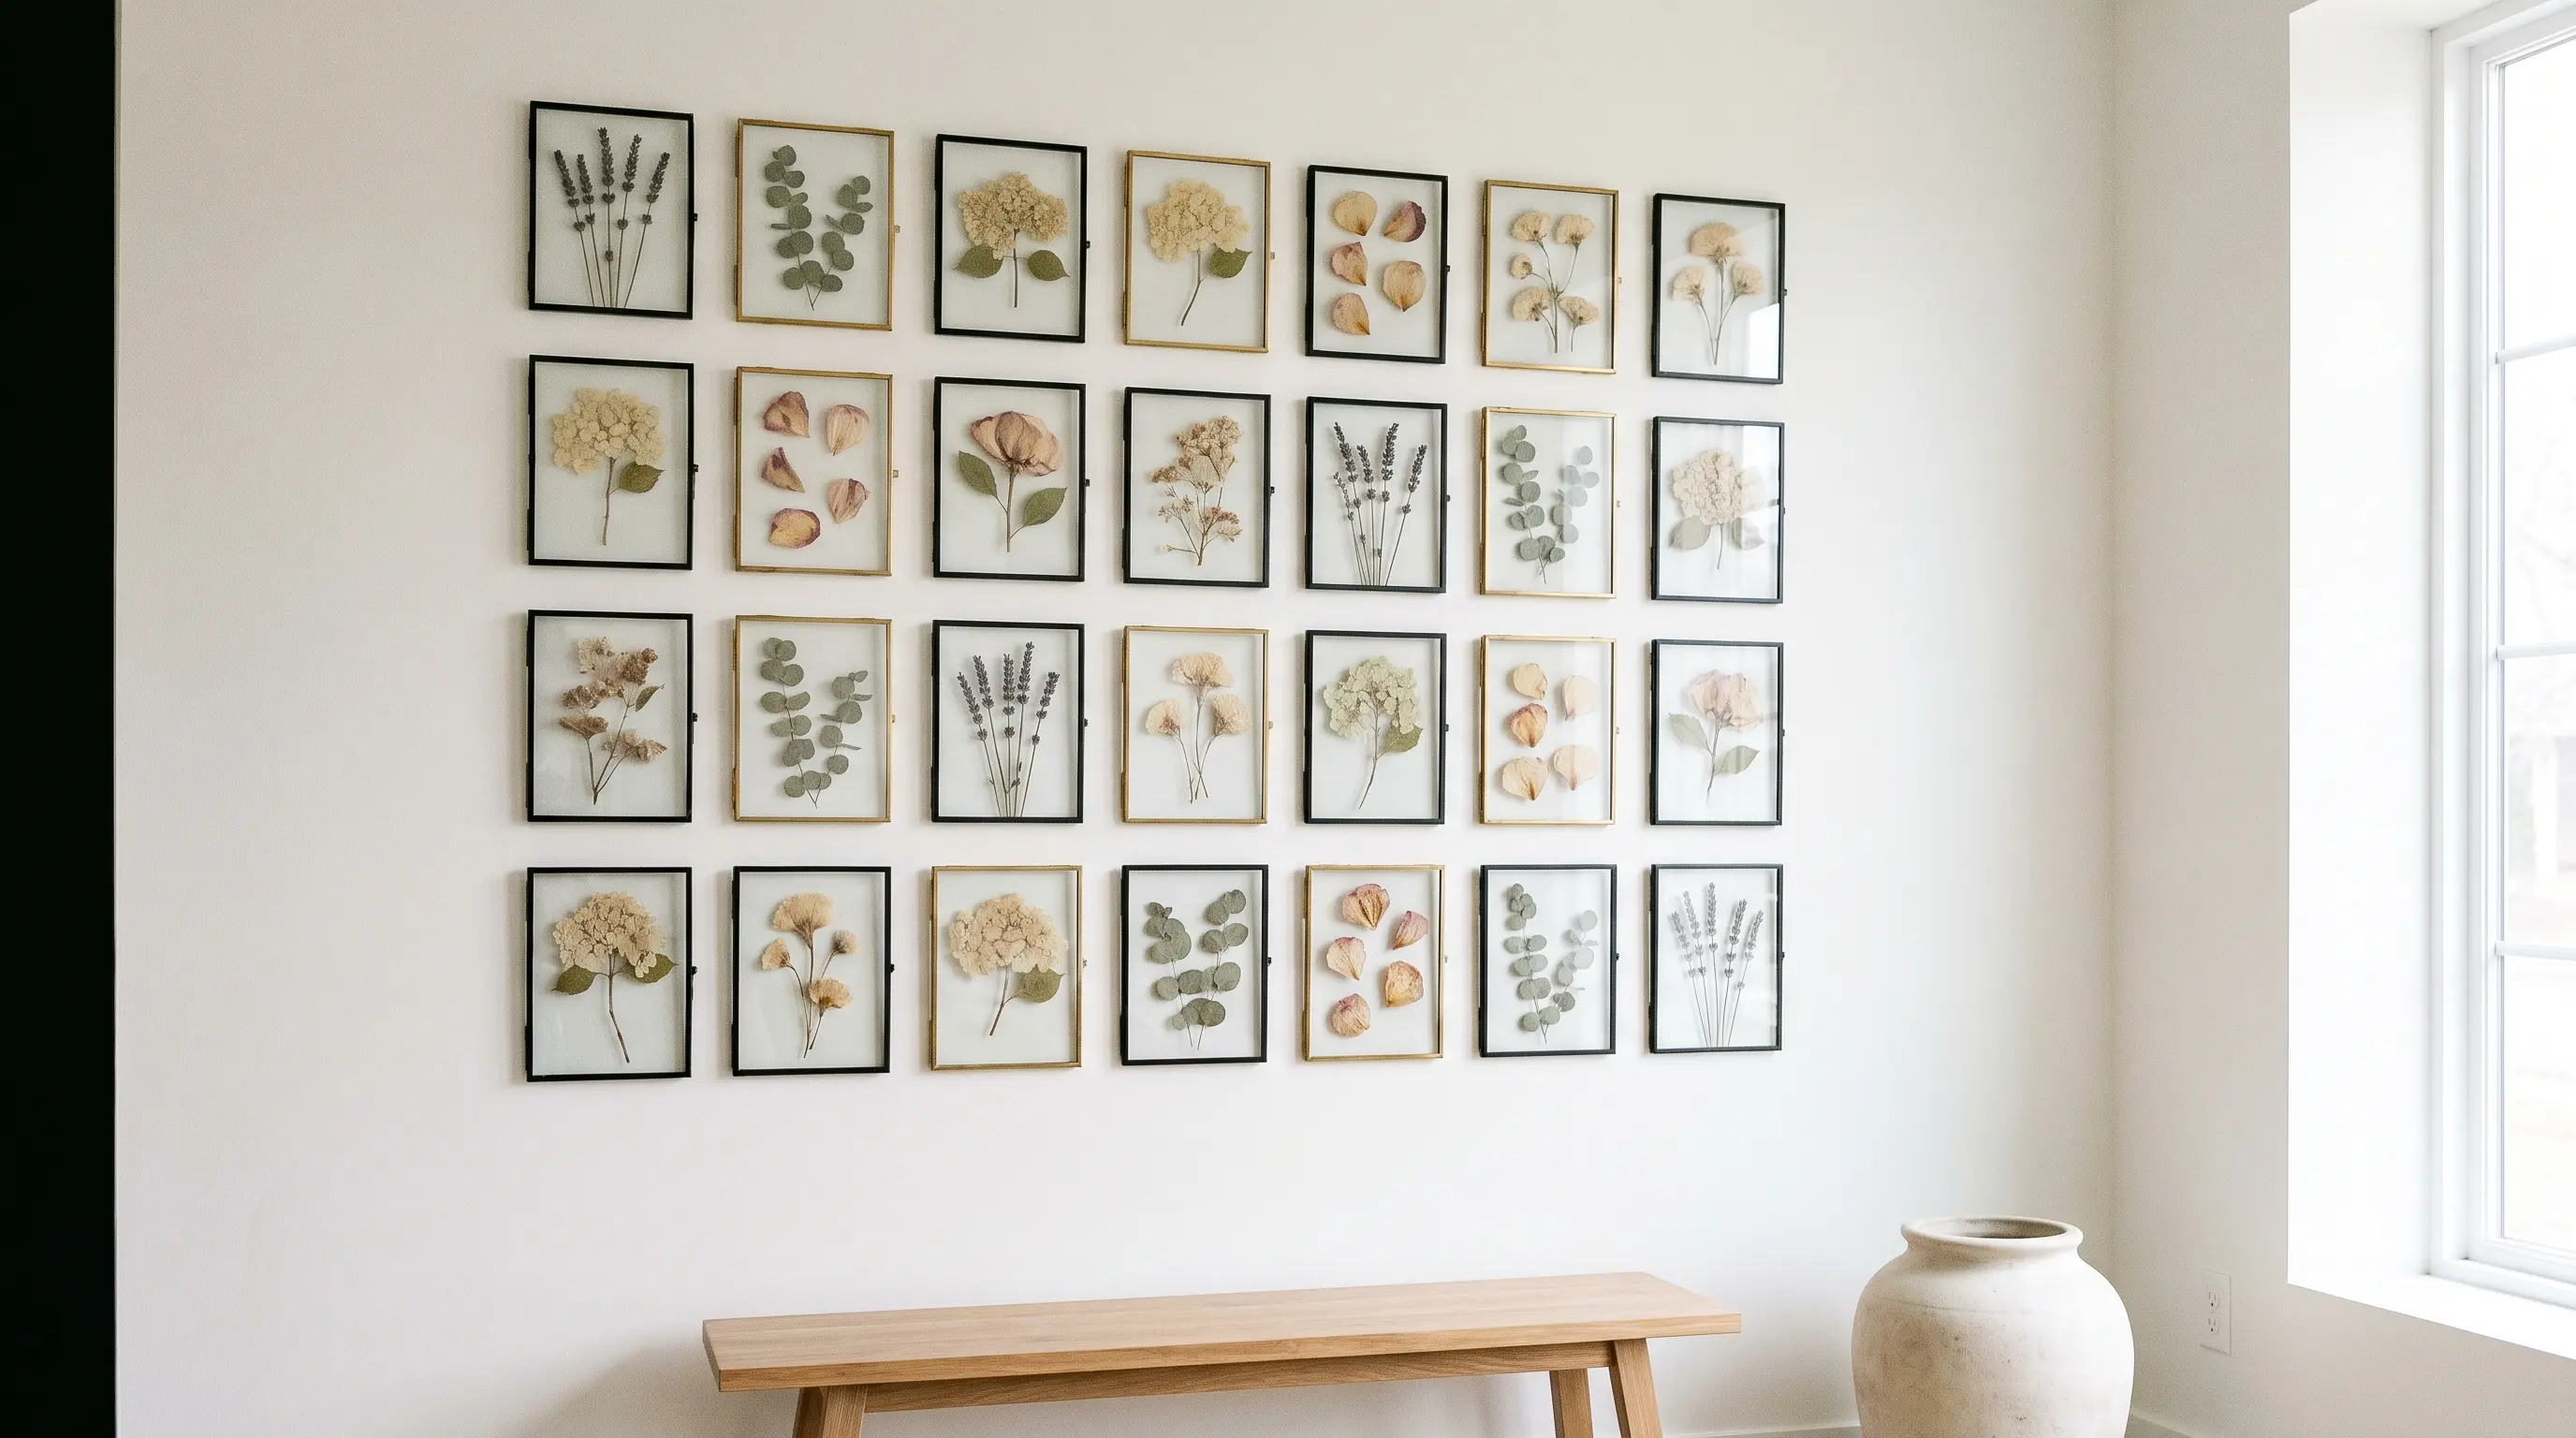
Press fresh flowers and place them in frames to save a bouquet or special bloom. This can also be a simple craft for children.
| Cost | $10 to $40 |
| Skill level | Beginner- friendly |
| Material Required | Fresh flowers and frames |
How to make it: Press the flowers until flat and dry. Arrange them inside the frames, leave some open space around each stem, and close the frames carefully.
Geometric & Pattern Wall Art
Lines, shapes, tape, and metal details can turn plain walls into simple handmade decor. These projects work well when you want a neat design with clear forms and a limited color palette.
32. Washi Tape Herringbone Pattern
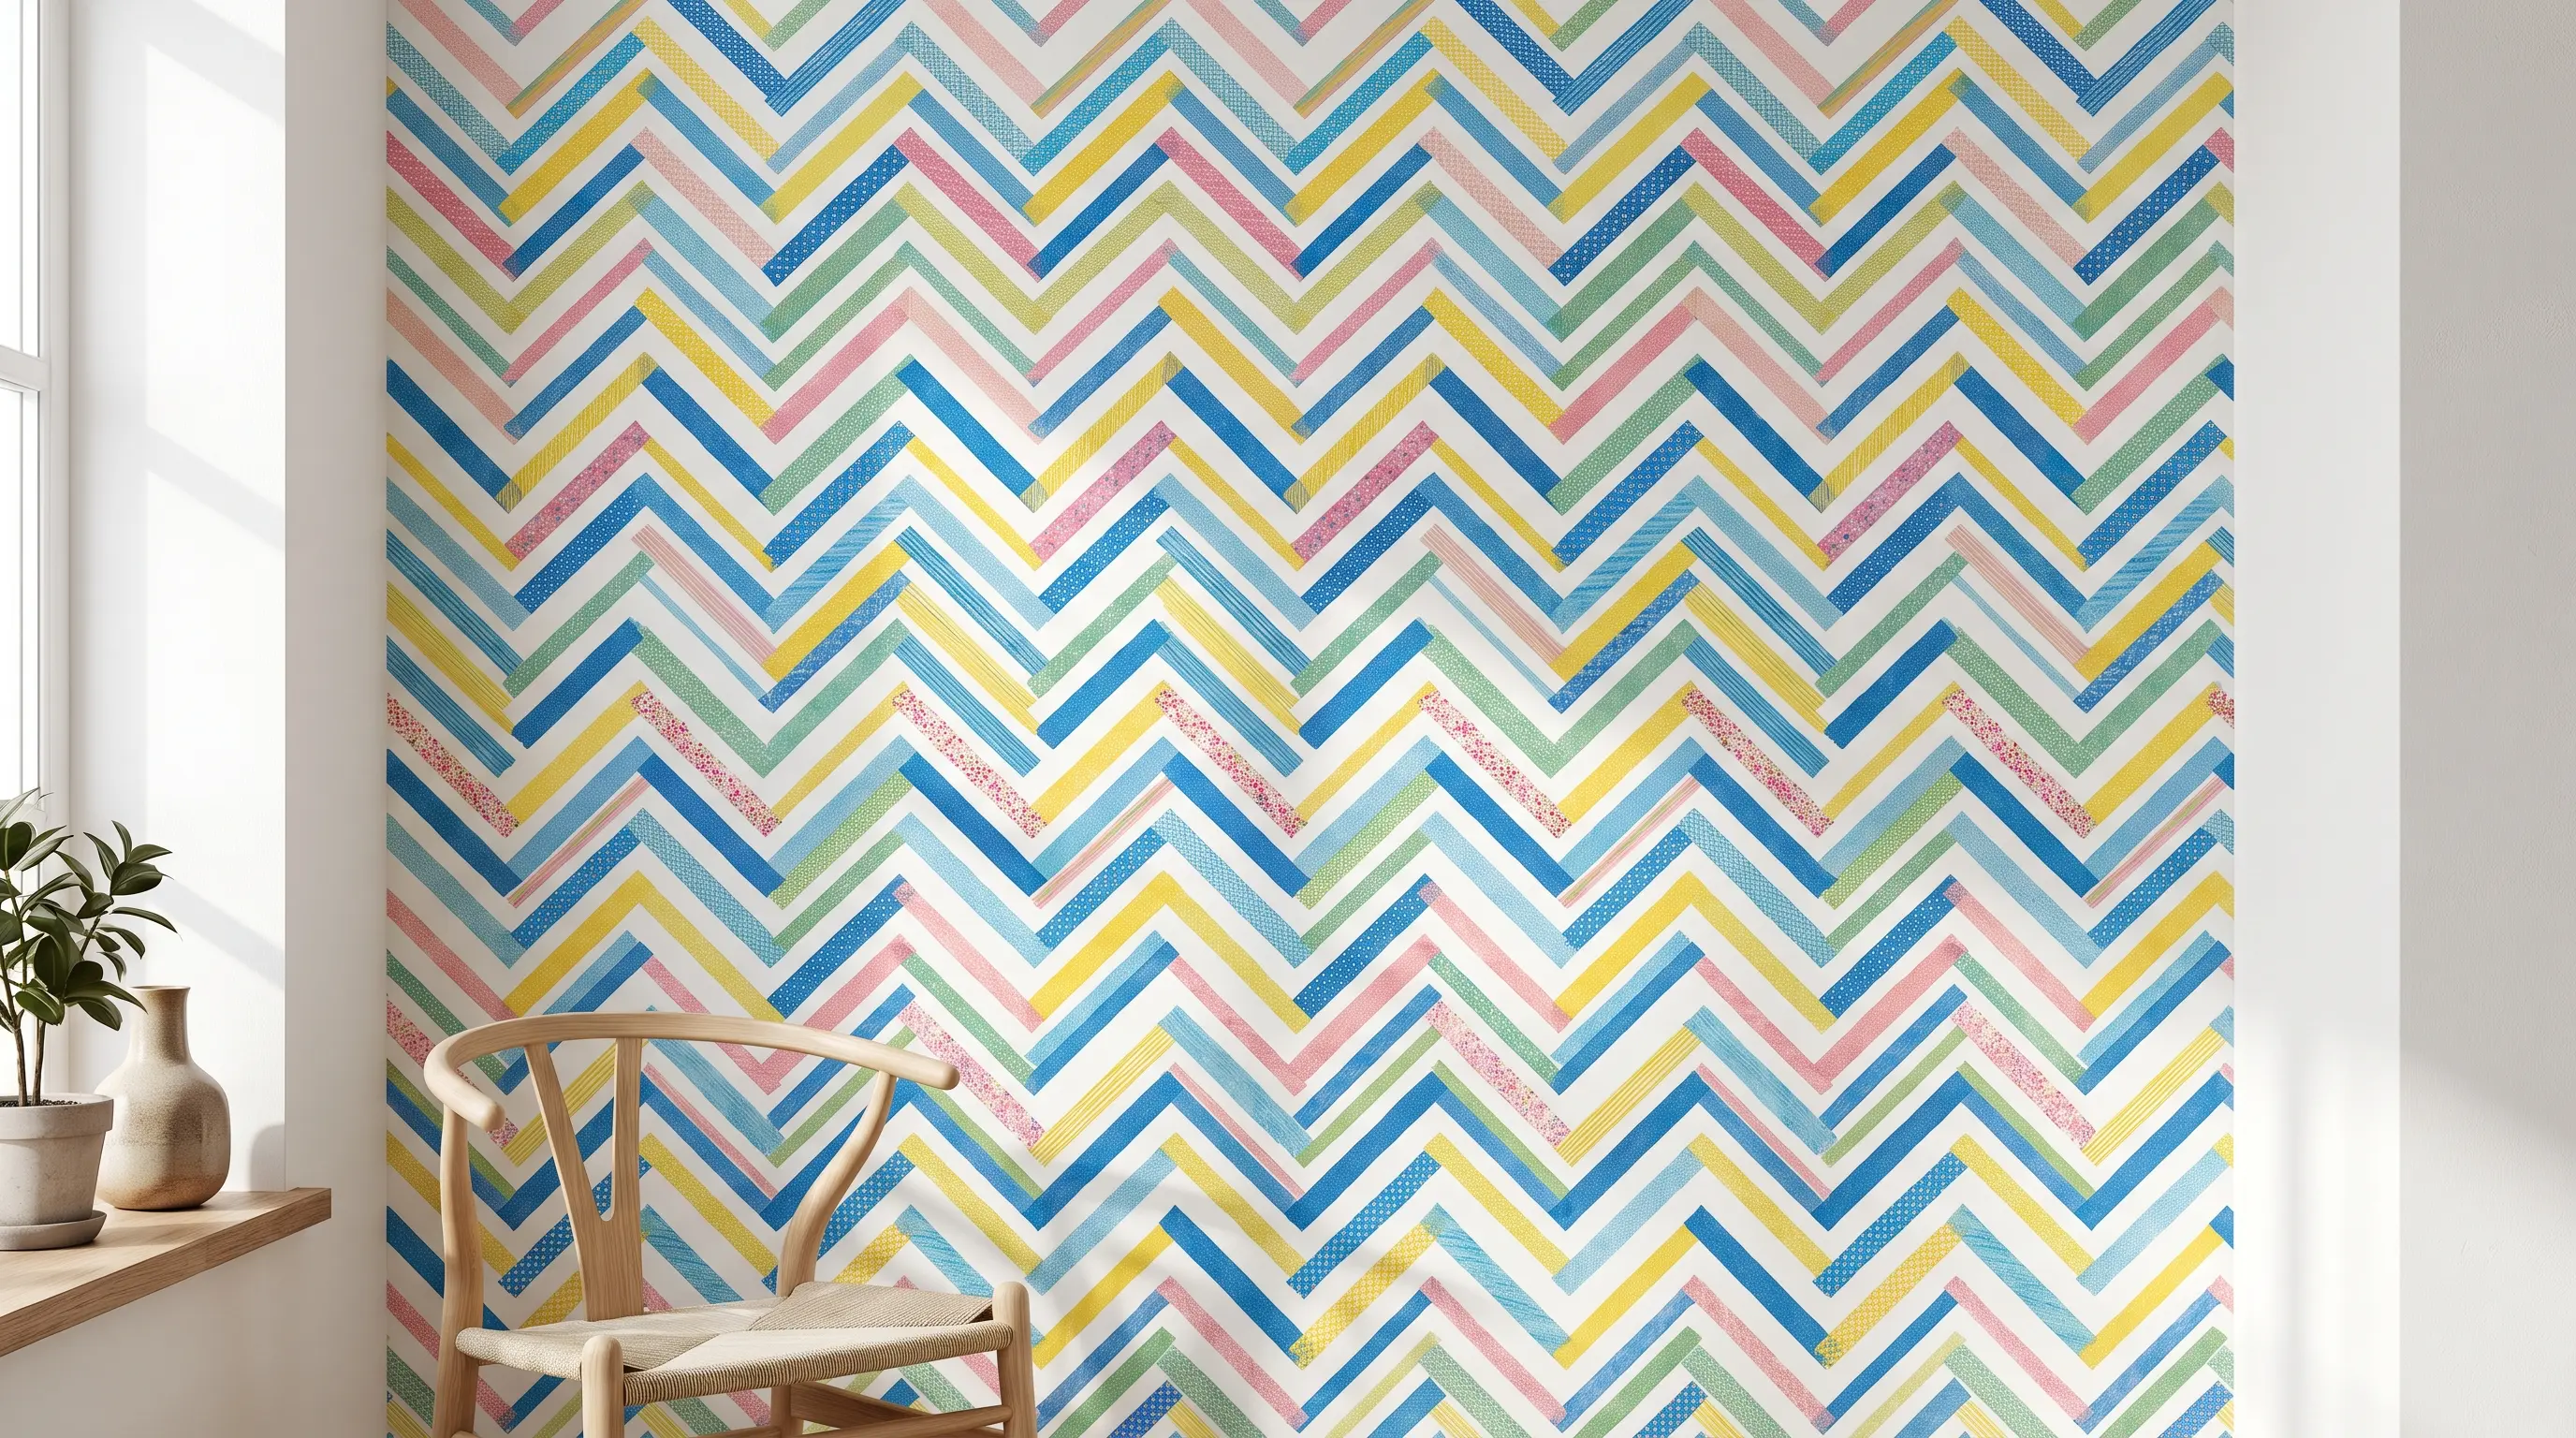
Use colored paper tape to form a herringbone pattern right on the wall. The tape is removable, so this idea works well in rental homes and children’s rooms.
| Cost | $5 to $15 |
| Skill level | Beginner- friendly |
| Material Required | Colored paper tape |
How to make it: Mark a simple herringbone layout, then place strips of tape along each line. Press the tape down well and trim the ends for clean edges.
33. Copper Tape Line Art
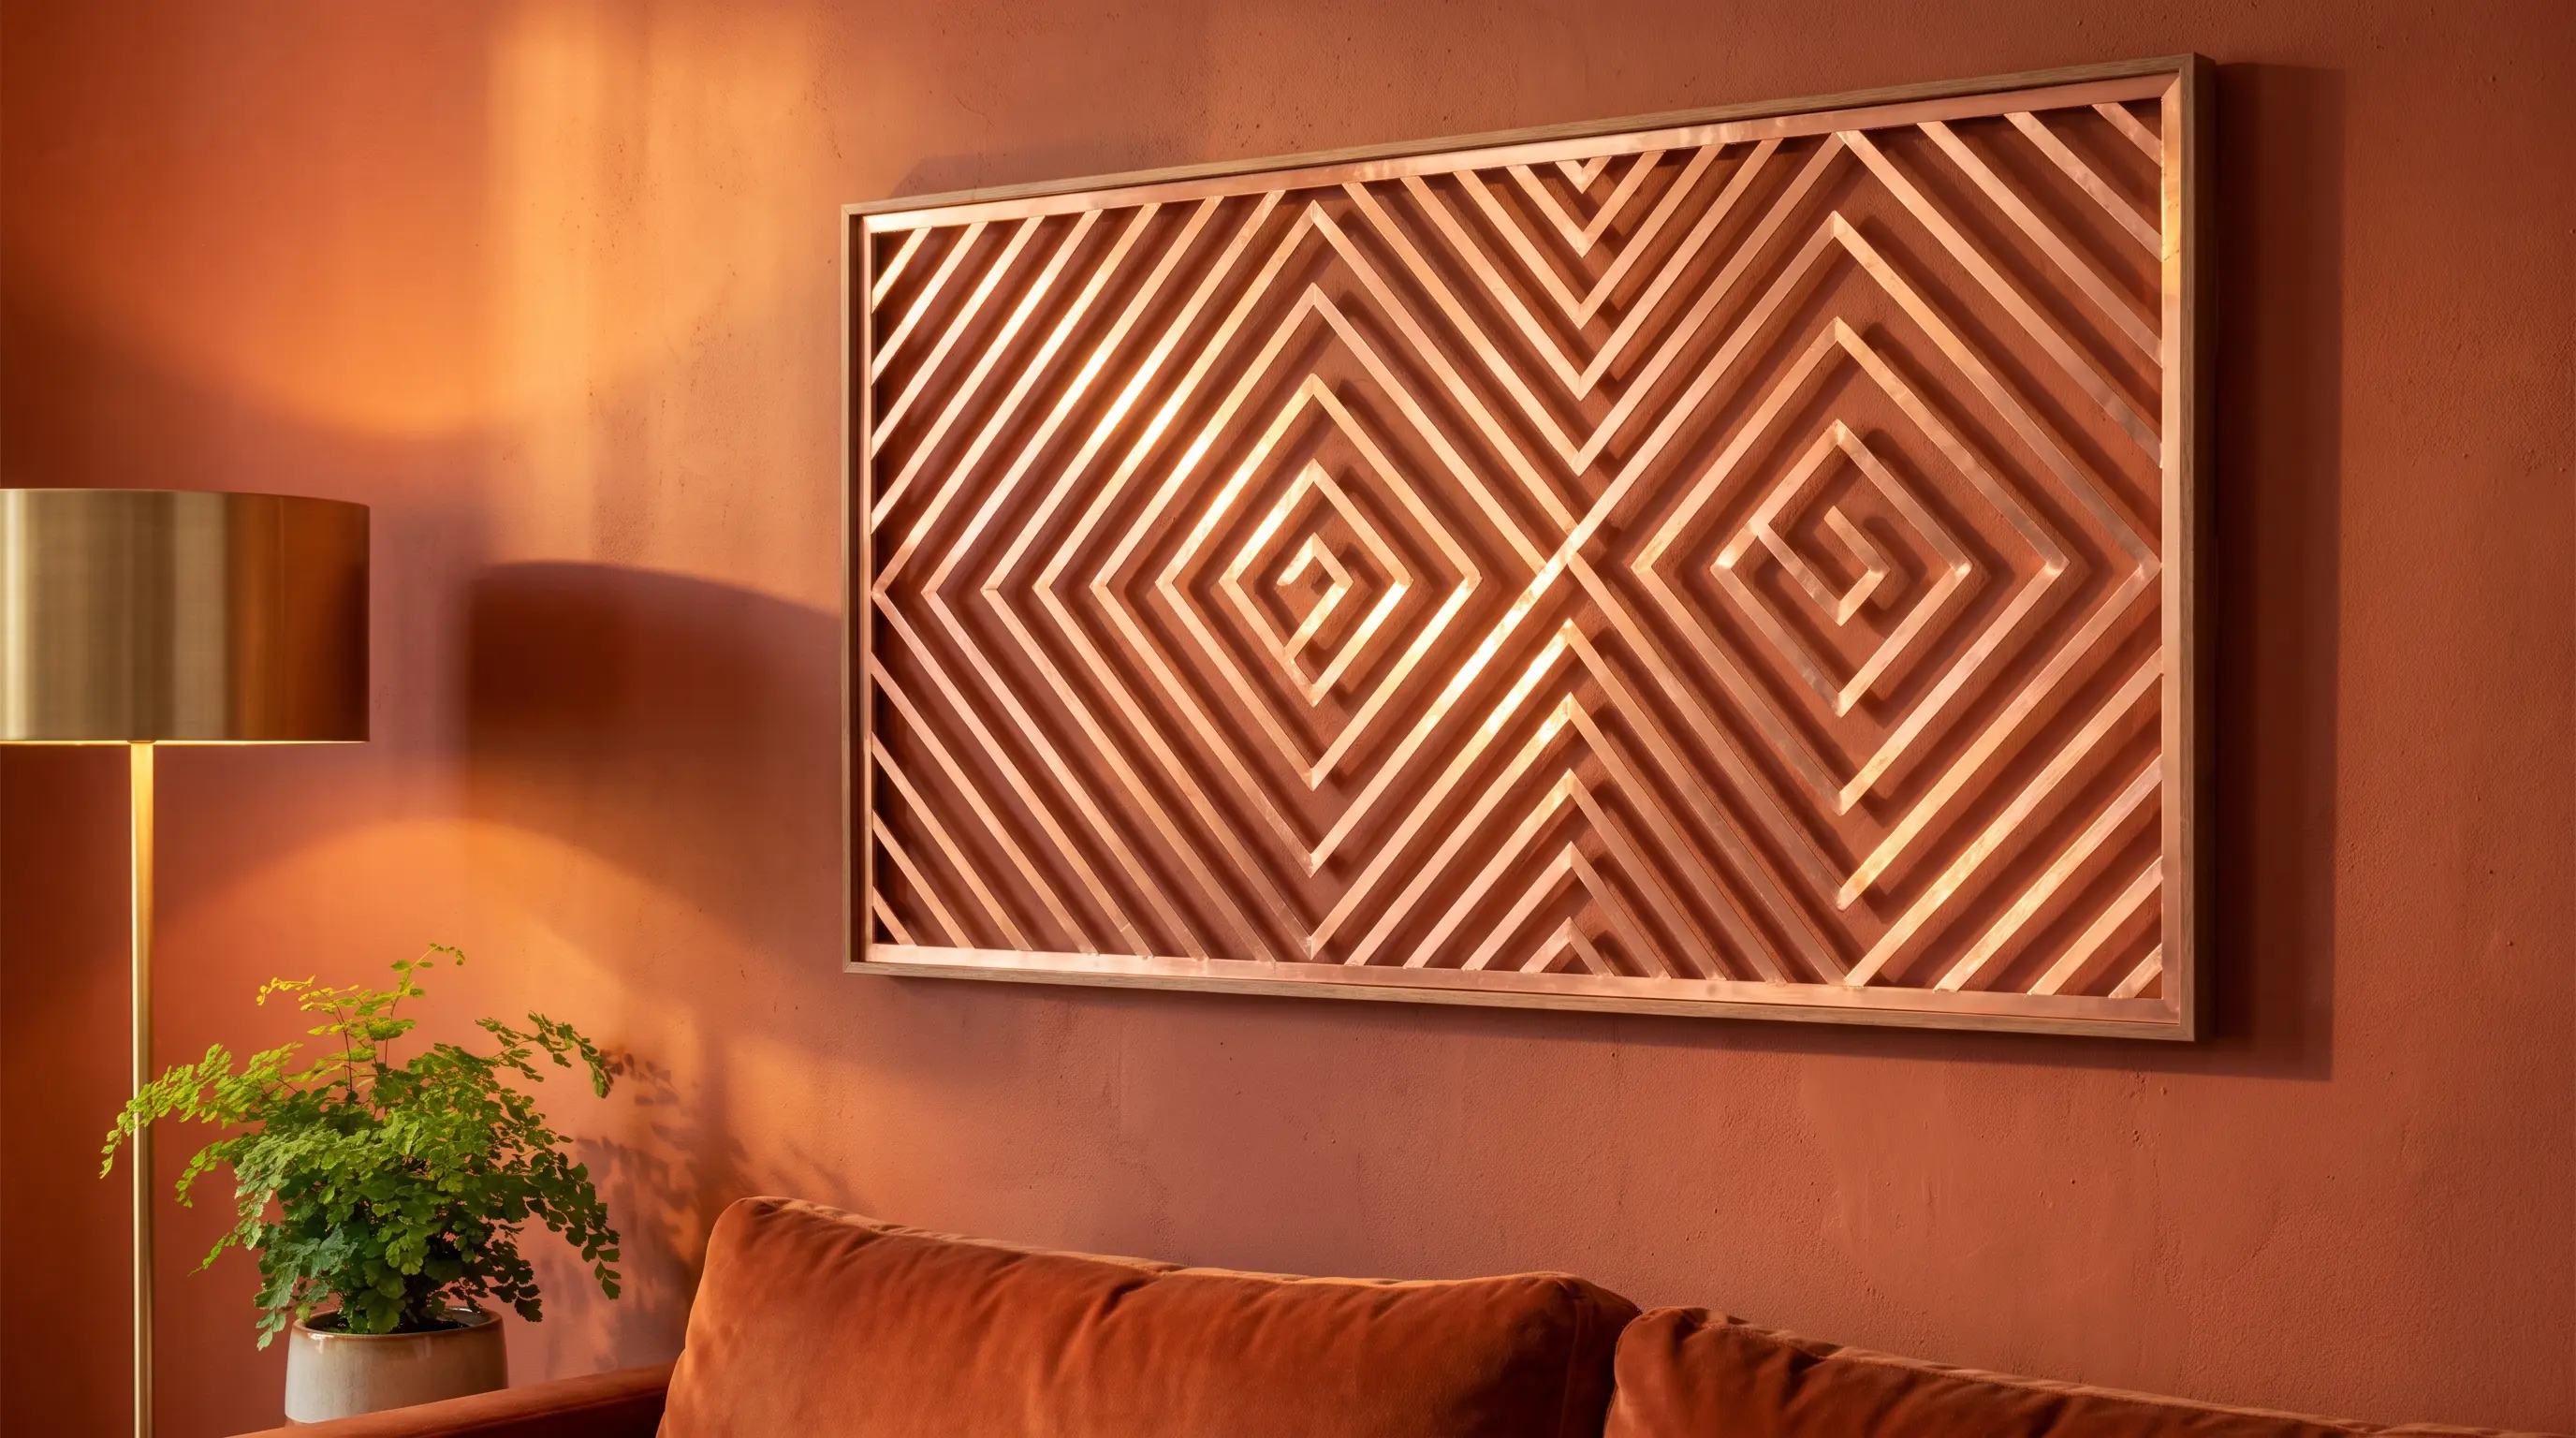
Copper tape can form a sharp starburst or line pattern in just a few minutes. The thin metal tape adds shine without needing paint or a long list of supplies.
| Cost | $10 to $25 |
| Skill level | Beginner- friendly |
| Material Required | Copper tape and a flat art surface |
How to make it: Plan the line pattern first, then place the copper tape one strip at a time. Smooth each strip as you work to keep it flat.
34. Copper Flake Abstract Art
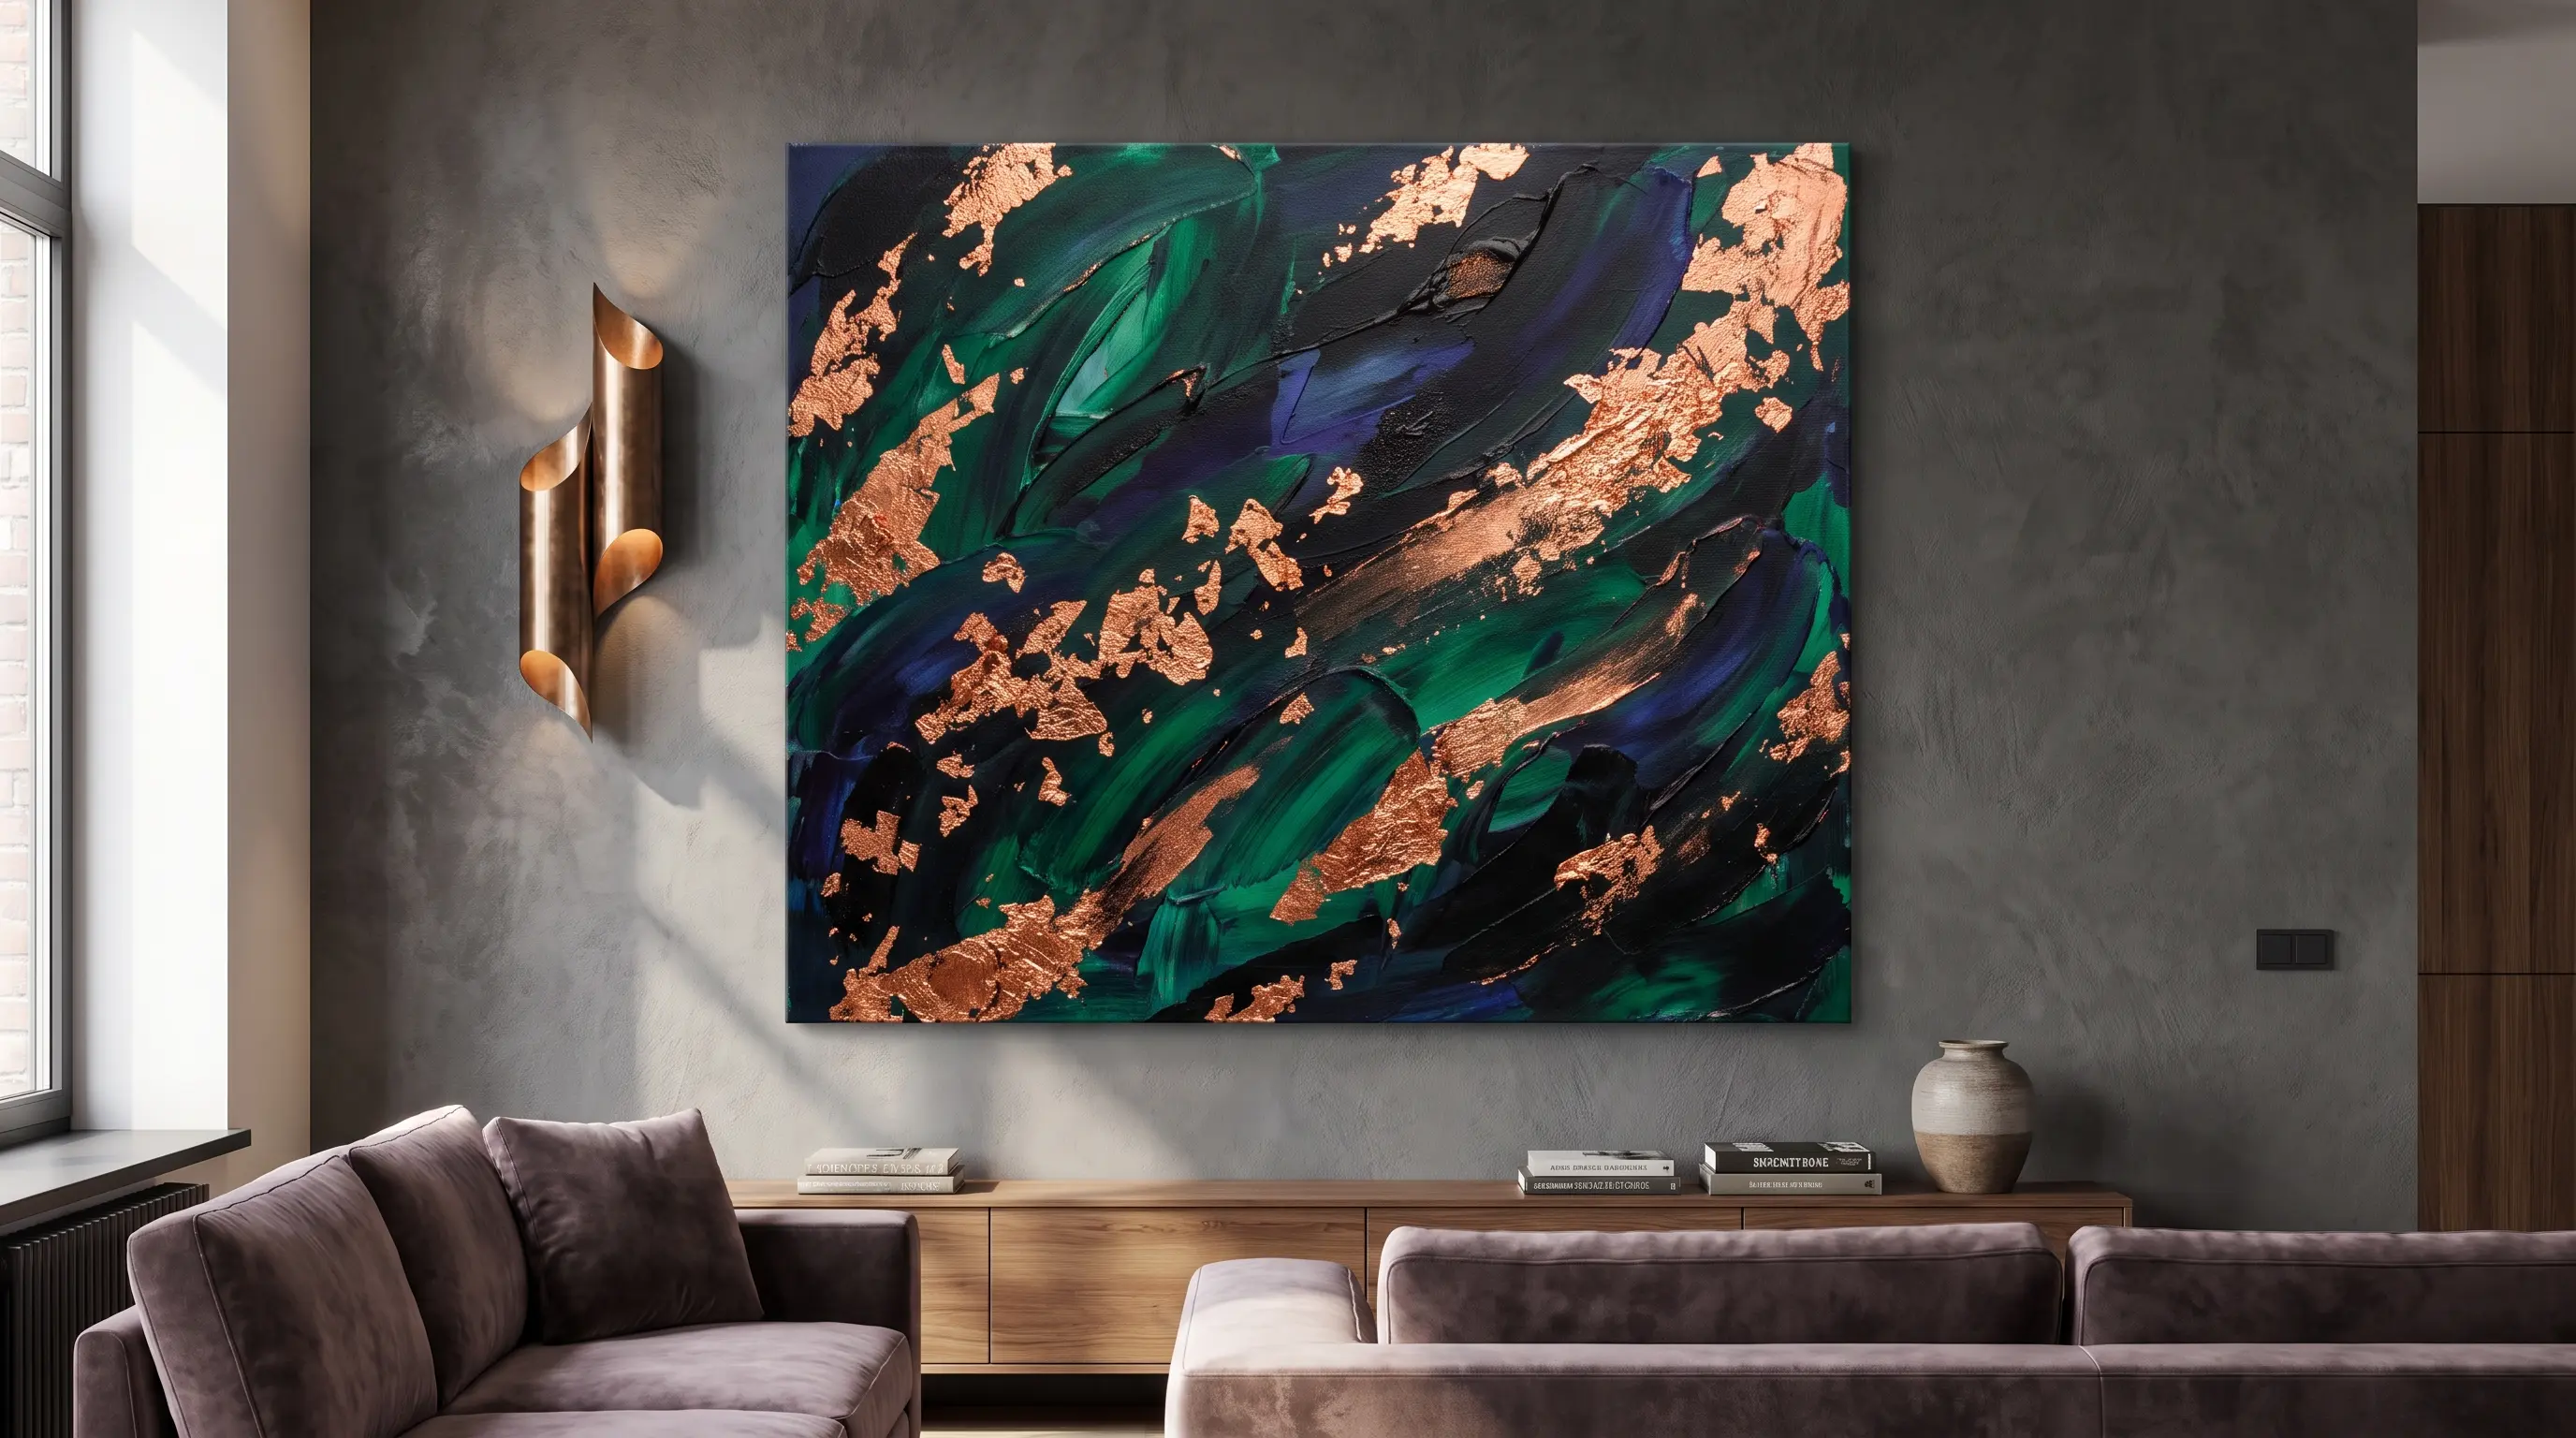
Copper flakes and paint can add small metal details to an abstract design. This project can stay small or be made larger to fit more wall space.
| Cost | $25 to $60 |
| Skill level | Beginner- friendly |
| Material Required | Copper flakes, abstract base, and paint |
How to make it: Paint a loose abstract base, then place copper flakes in a few areas before the finish is complete. Keep the metal details spaced out so the design does not feel too busy.
35. Scandi-Style Minimalist Art
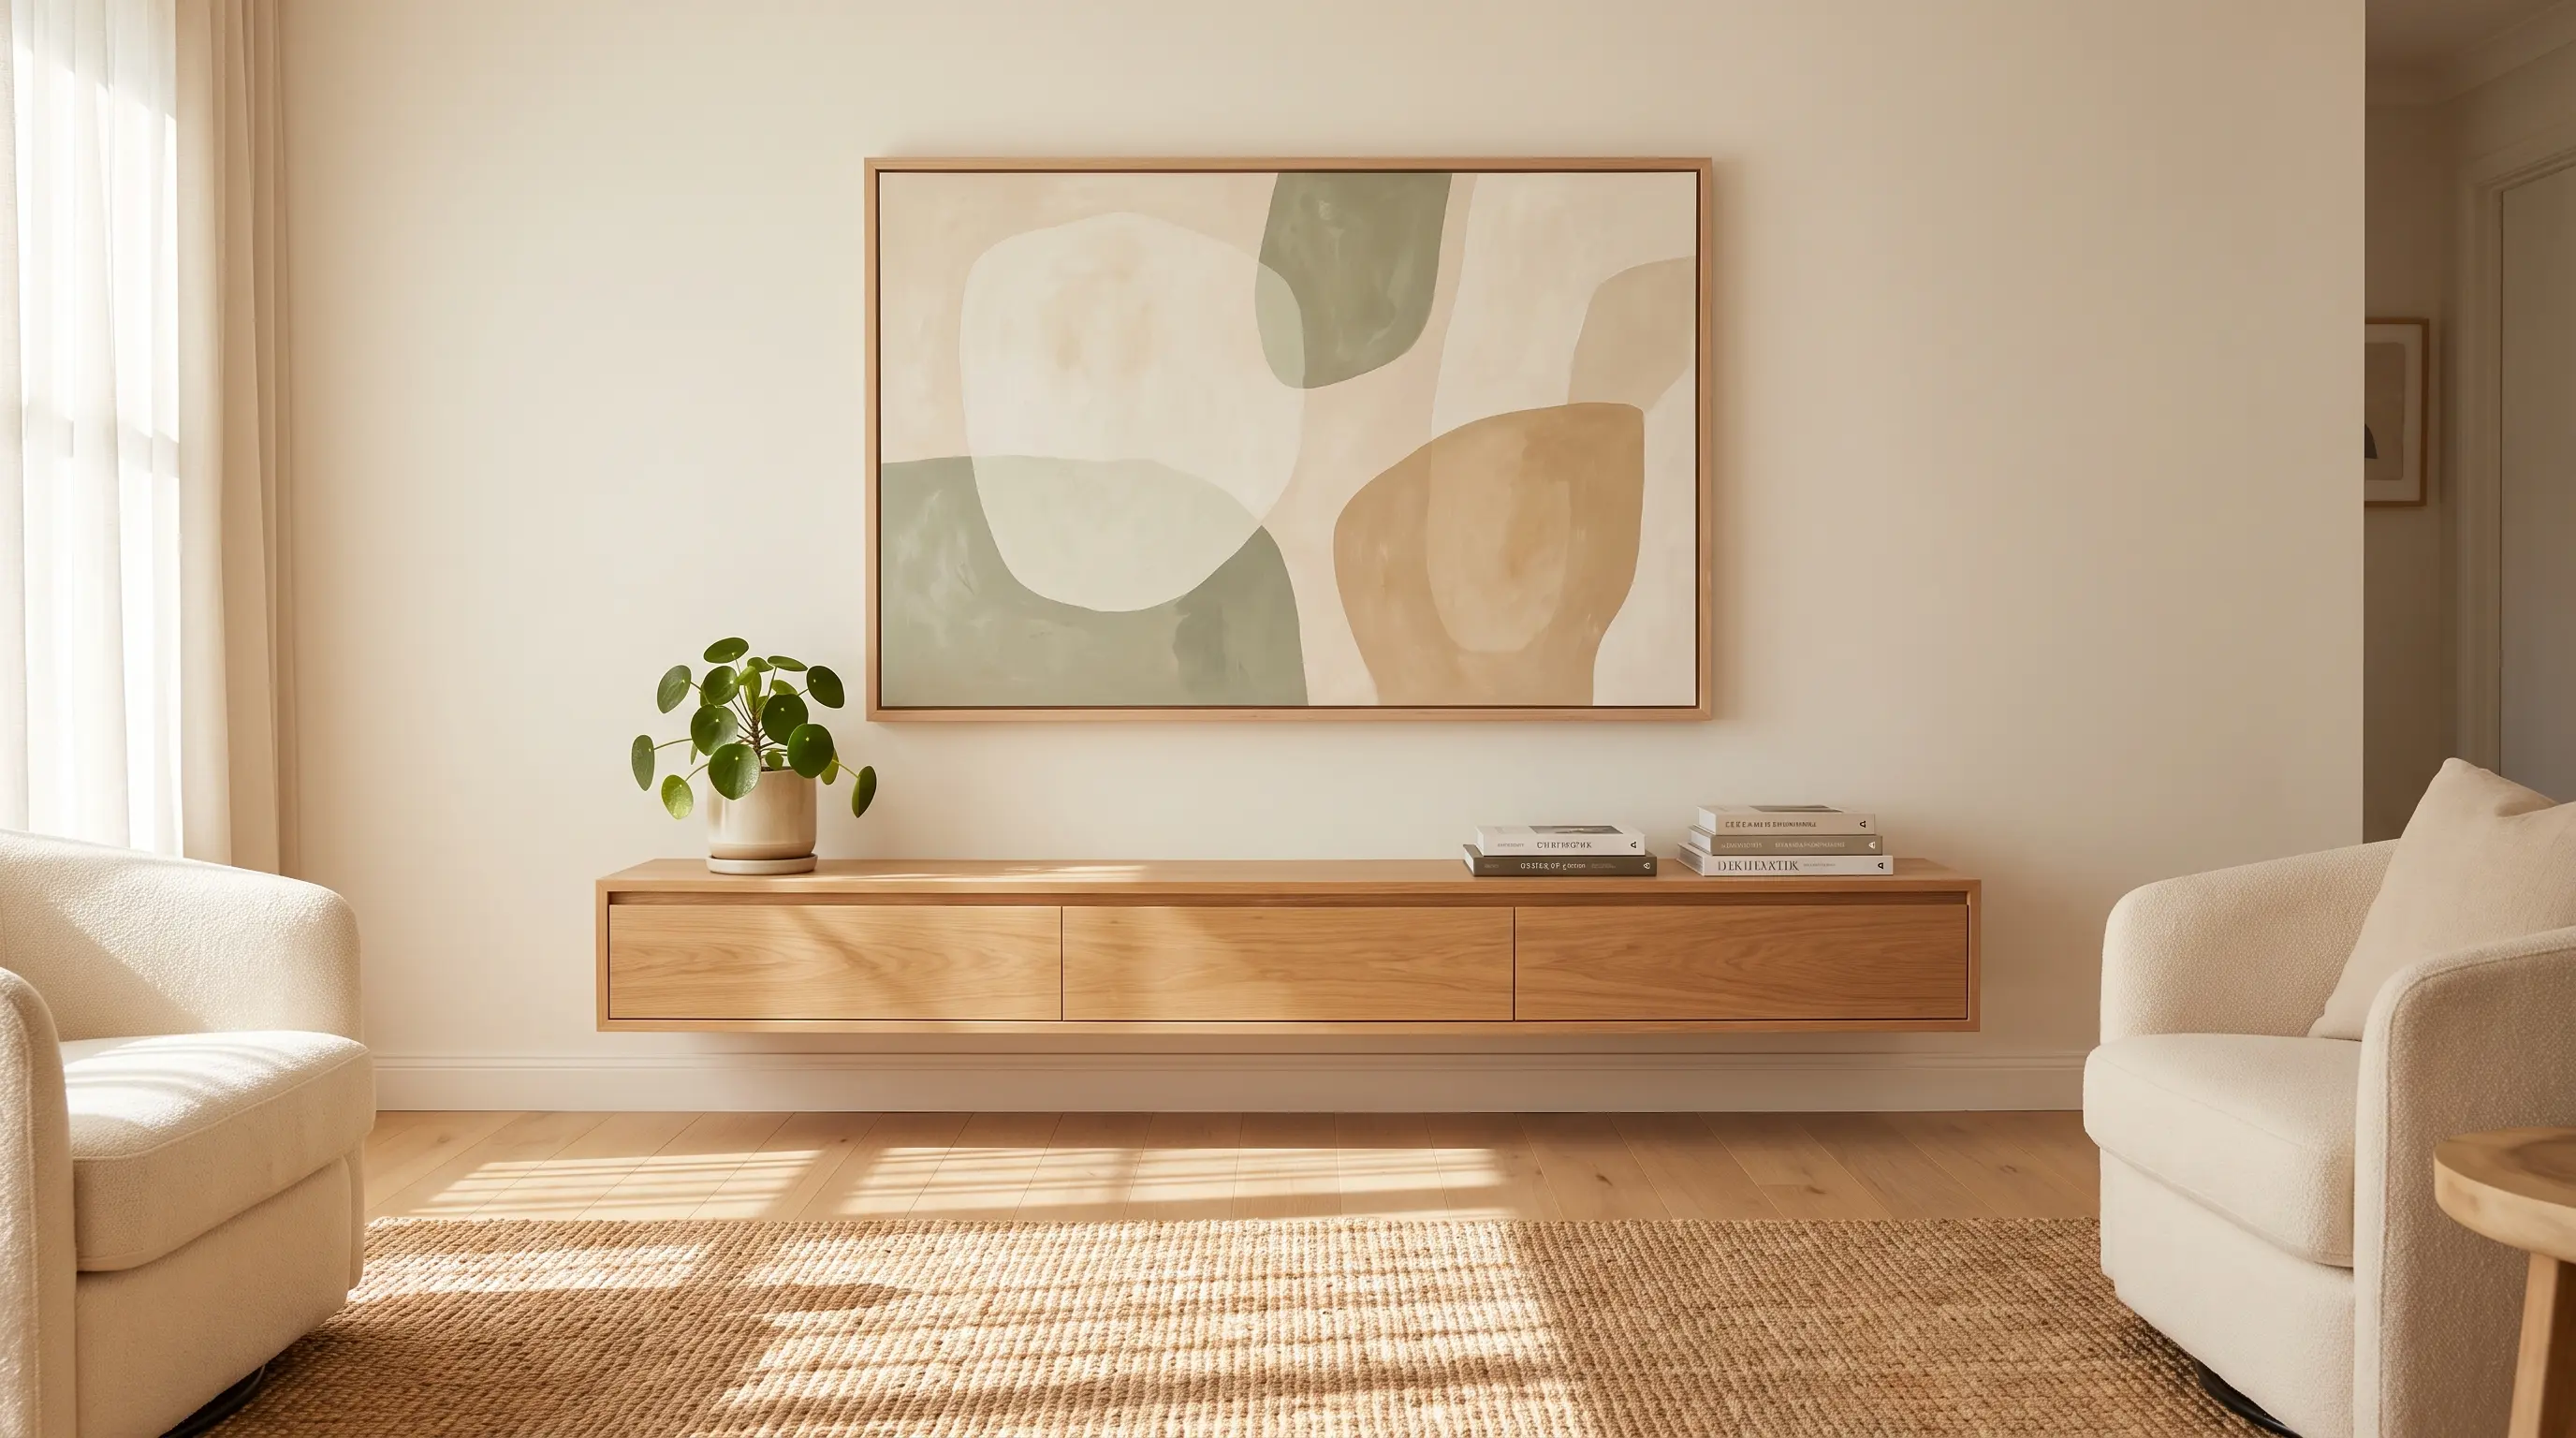
A wood hoop, beads, yarn, and small brass details can form a simple wall hanging with a light, open look. You can change the yarn color to suit the room.
| Cost | $5 to $75 |
| Skill level | Beginner- friendly |
| Material Required | Wood embroidery hoop, brass details, cowhide strip, wooden beads, and cotton yarn |
How to make it: Attach the yarn and other parts to the hoop, then place the beads and brass details where they feel balanced. Hang the finished piece from a simple loop.
Statement & Functional Wall Pieces
These projects add interest to an open wall while also holding art, words, notes, or everyday items. Some are quick display ideas, while others need a few basic tools.
36. Magnetic Acrylic Frame Display
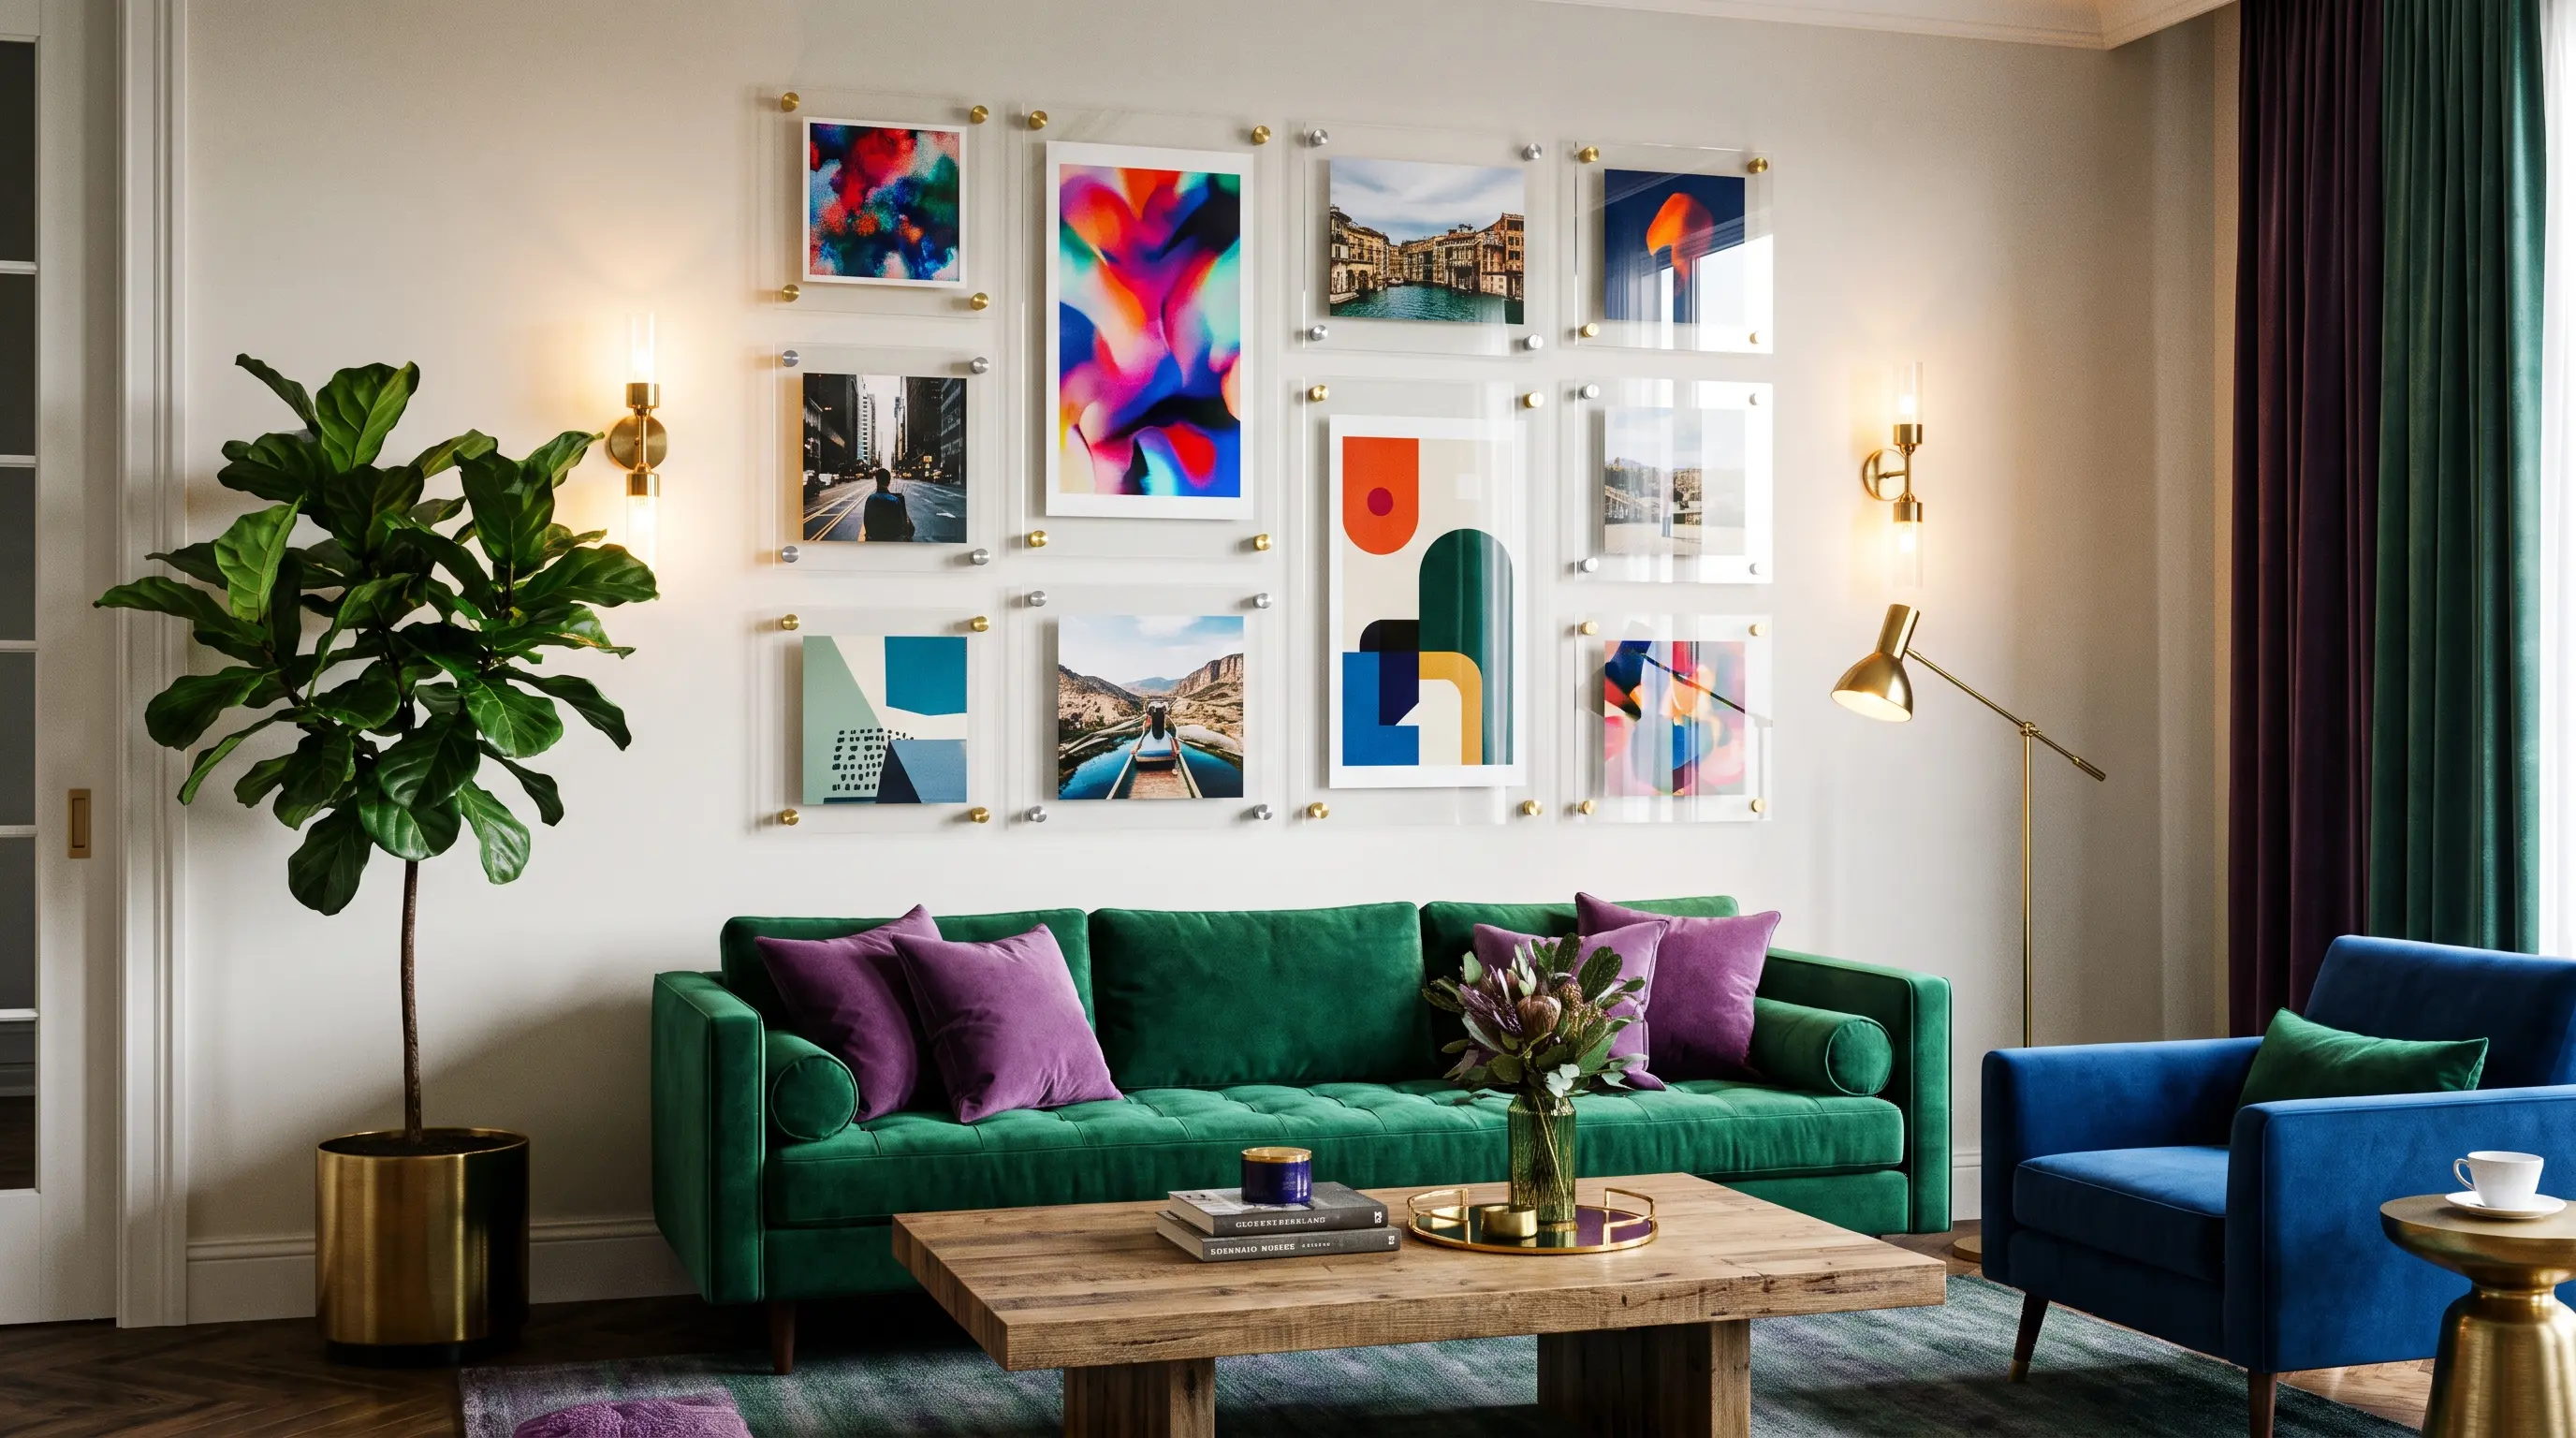
A magnetic acrylic frame gives printed art a clean display and makes it easy to change the item inside. The source also suggests adding a rustic finish to the frame.
| Cost | $15 to $50 |
| Skill level | Beginner- friendly |
| Material Required | Magnetic acrylic frame, chosen print, and finishing supplies |
How to make it: Place your chosen print between the acrylic panels and close the magnetic frame. Add the rustic finish used in the project, then hang the frame in your chosen spot.
37. Nail-Head Word Art
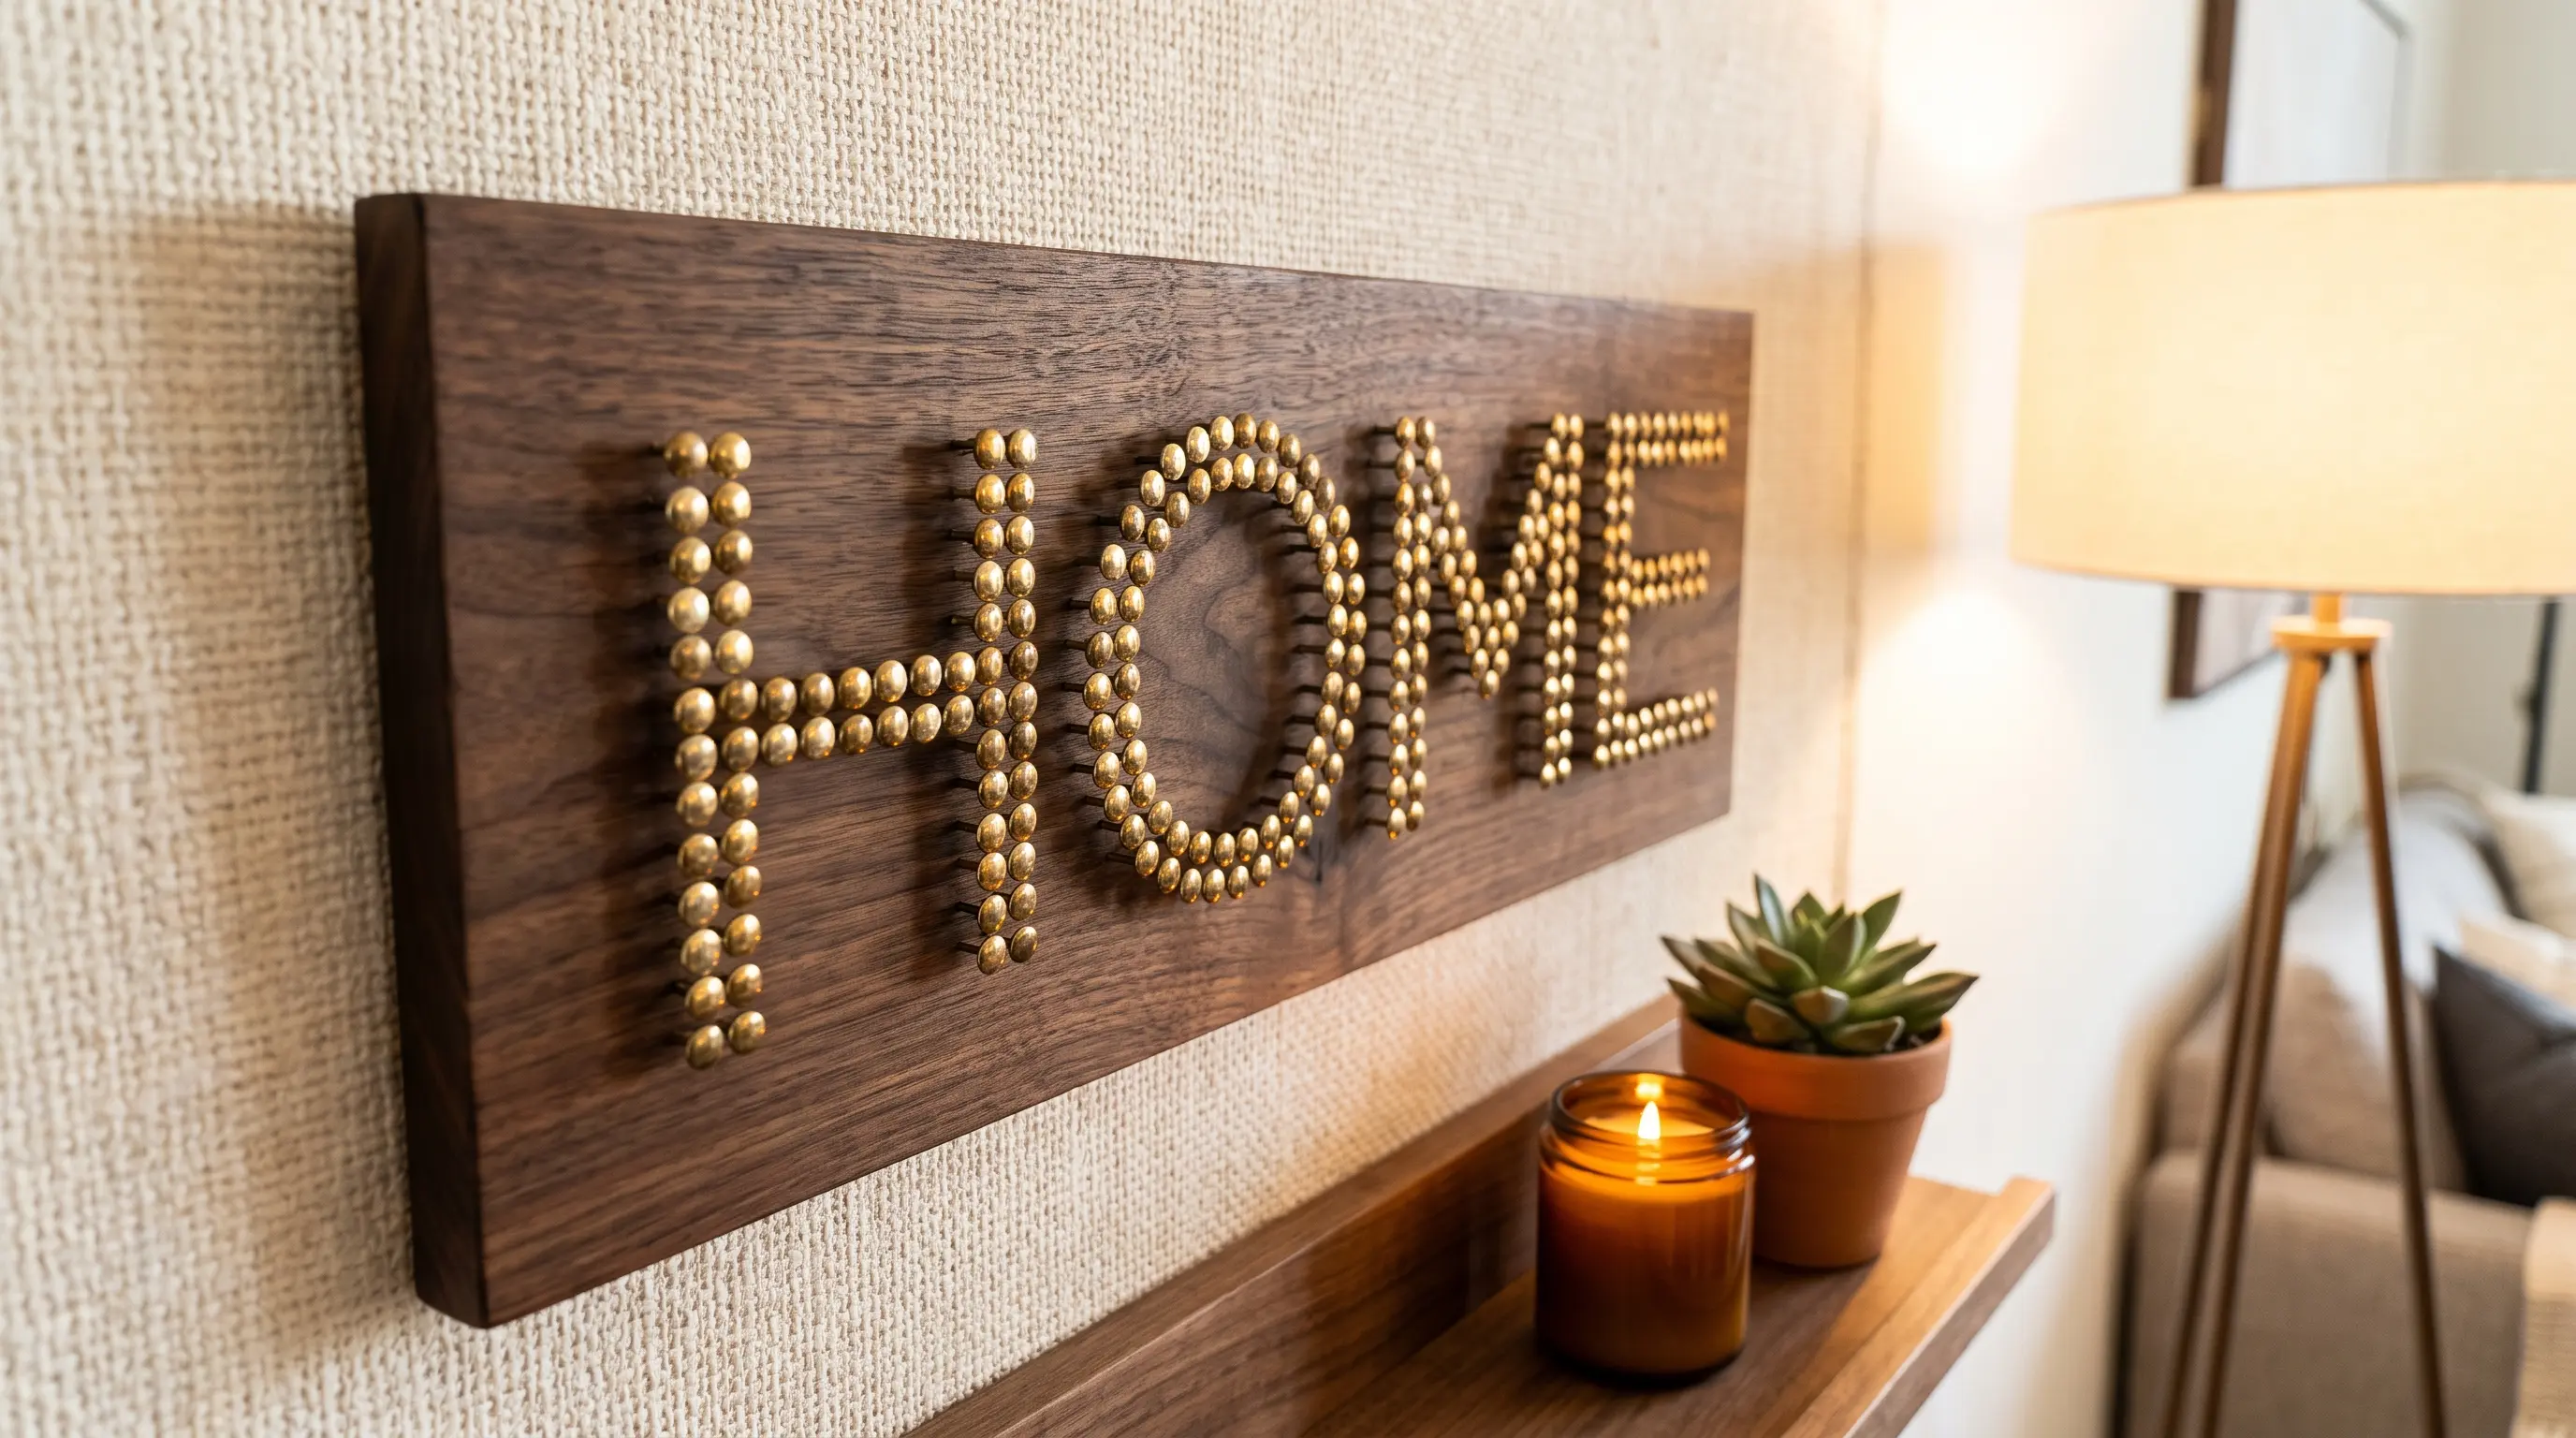
Turn a name, short message, or group of words into wall art with nail heads or brass tacks. Foam core keeps the piece light, while a frame gives it a neat finish.
| Cost | $15 to $35 |
| Skill level | Beginner- friendly |
| Material Required | Corrugated foam core, pencil, nail heads or brass tacks, hammer or rubber mallet, and frame |
How to make it: Draw the word on the foam core with a pencil. Place nail heads or brass tacks along the lines, then tap them into place. Put the finished foam core inside a frame.
38. Monogrammed String Art
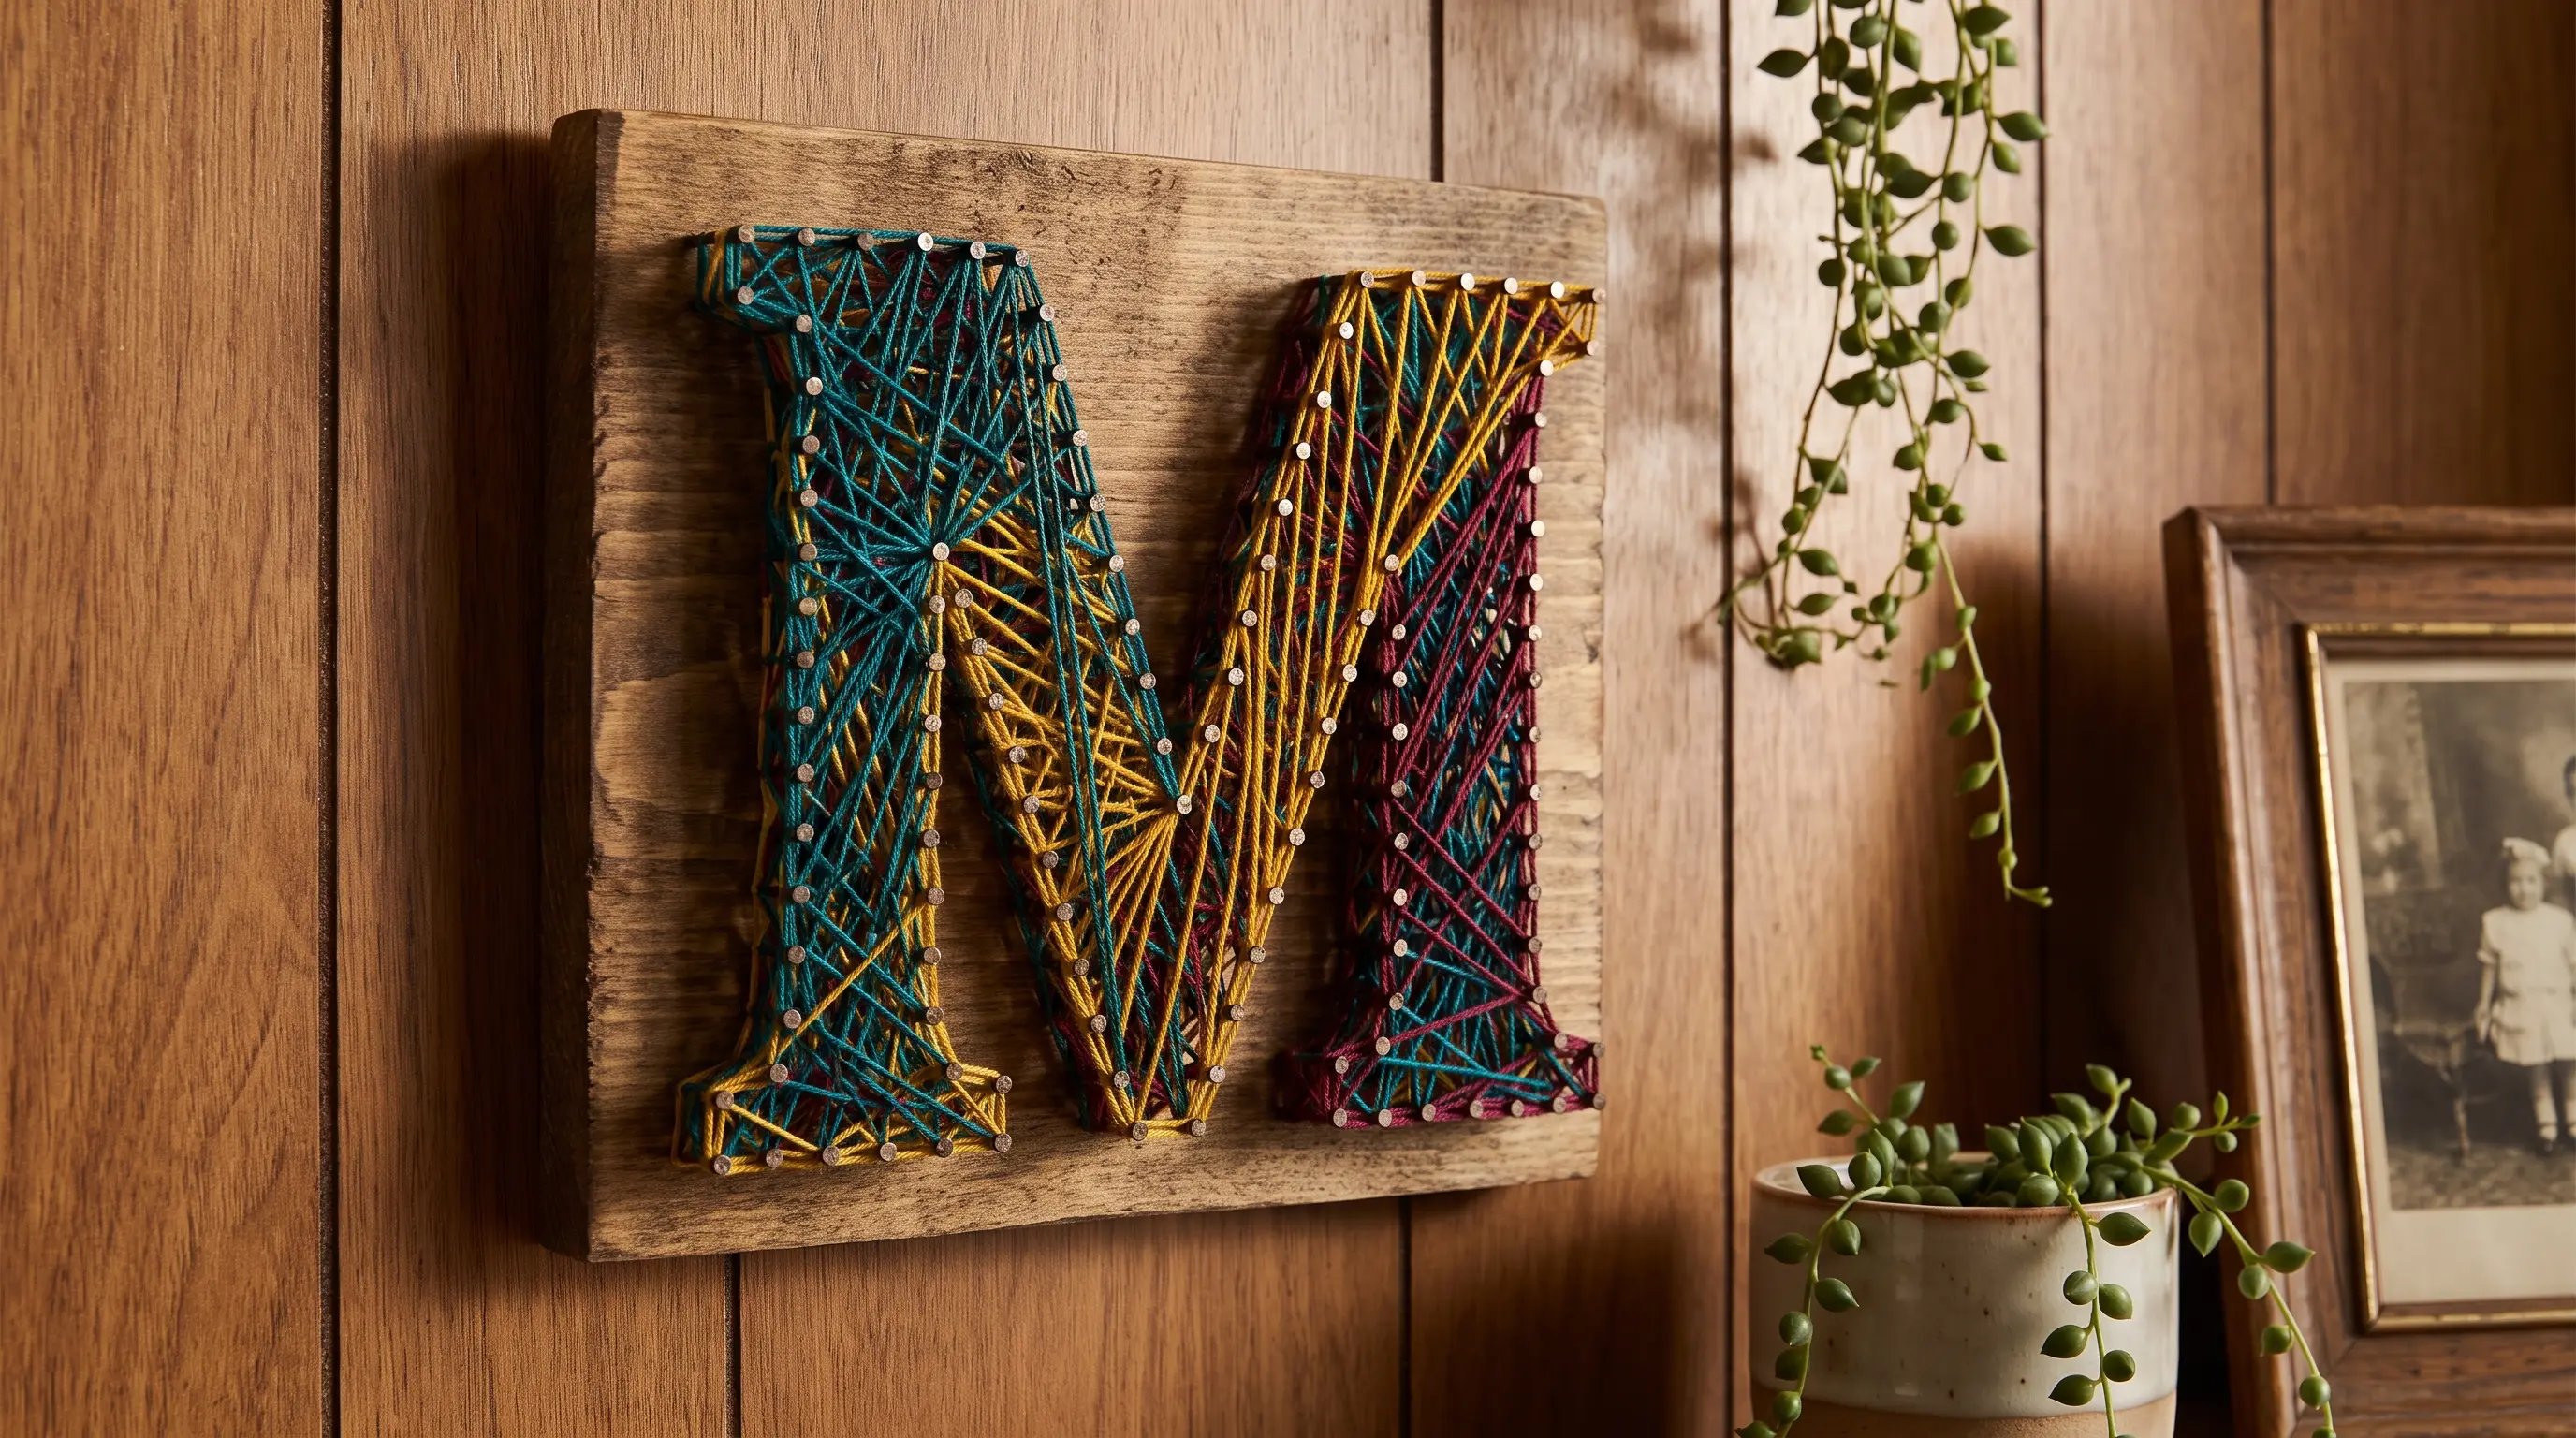
Monogrammed string art adds a personal touch to a bedroom, entry area, or family room. The source describes it as a modern project that can be made in a few easy steps.
| Cost | $15 to $60 |
| Skill level | Beginner- friendly |
| Material Required | String art supplies; the full list is not stated |
How to make it: Choose a letter for the monogram and mark its shape on the base. Form the outline, then wrap string across the letter until the design is filled.
39. Scrabble Letter Art
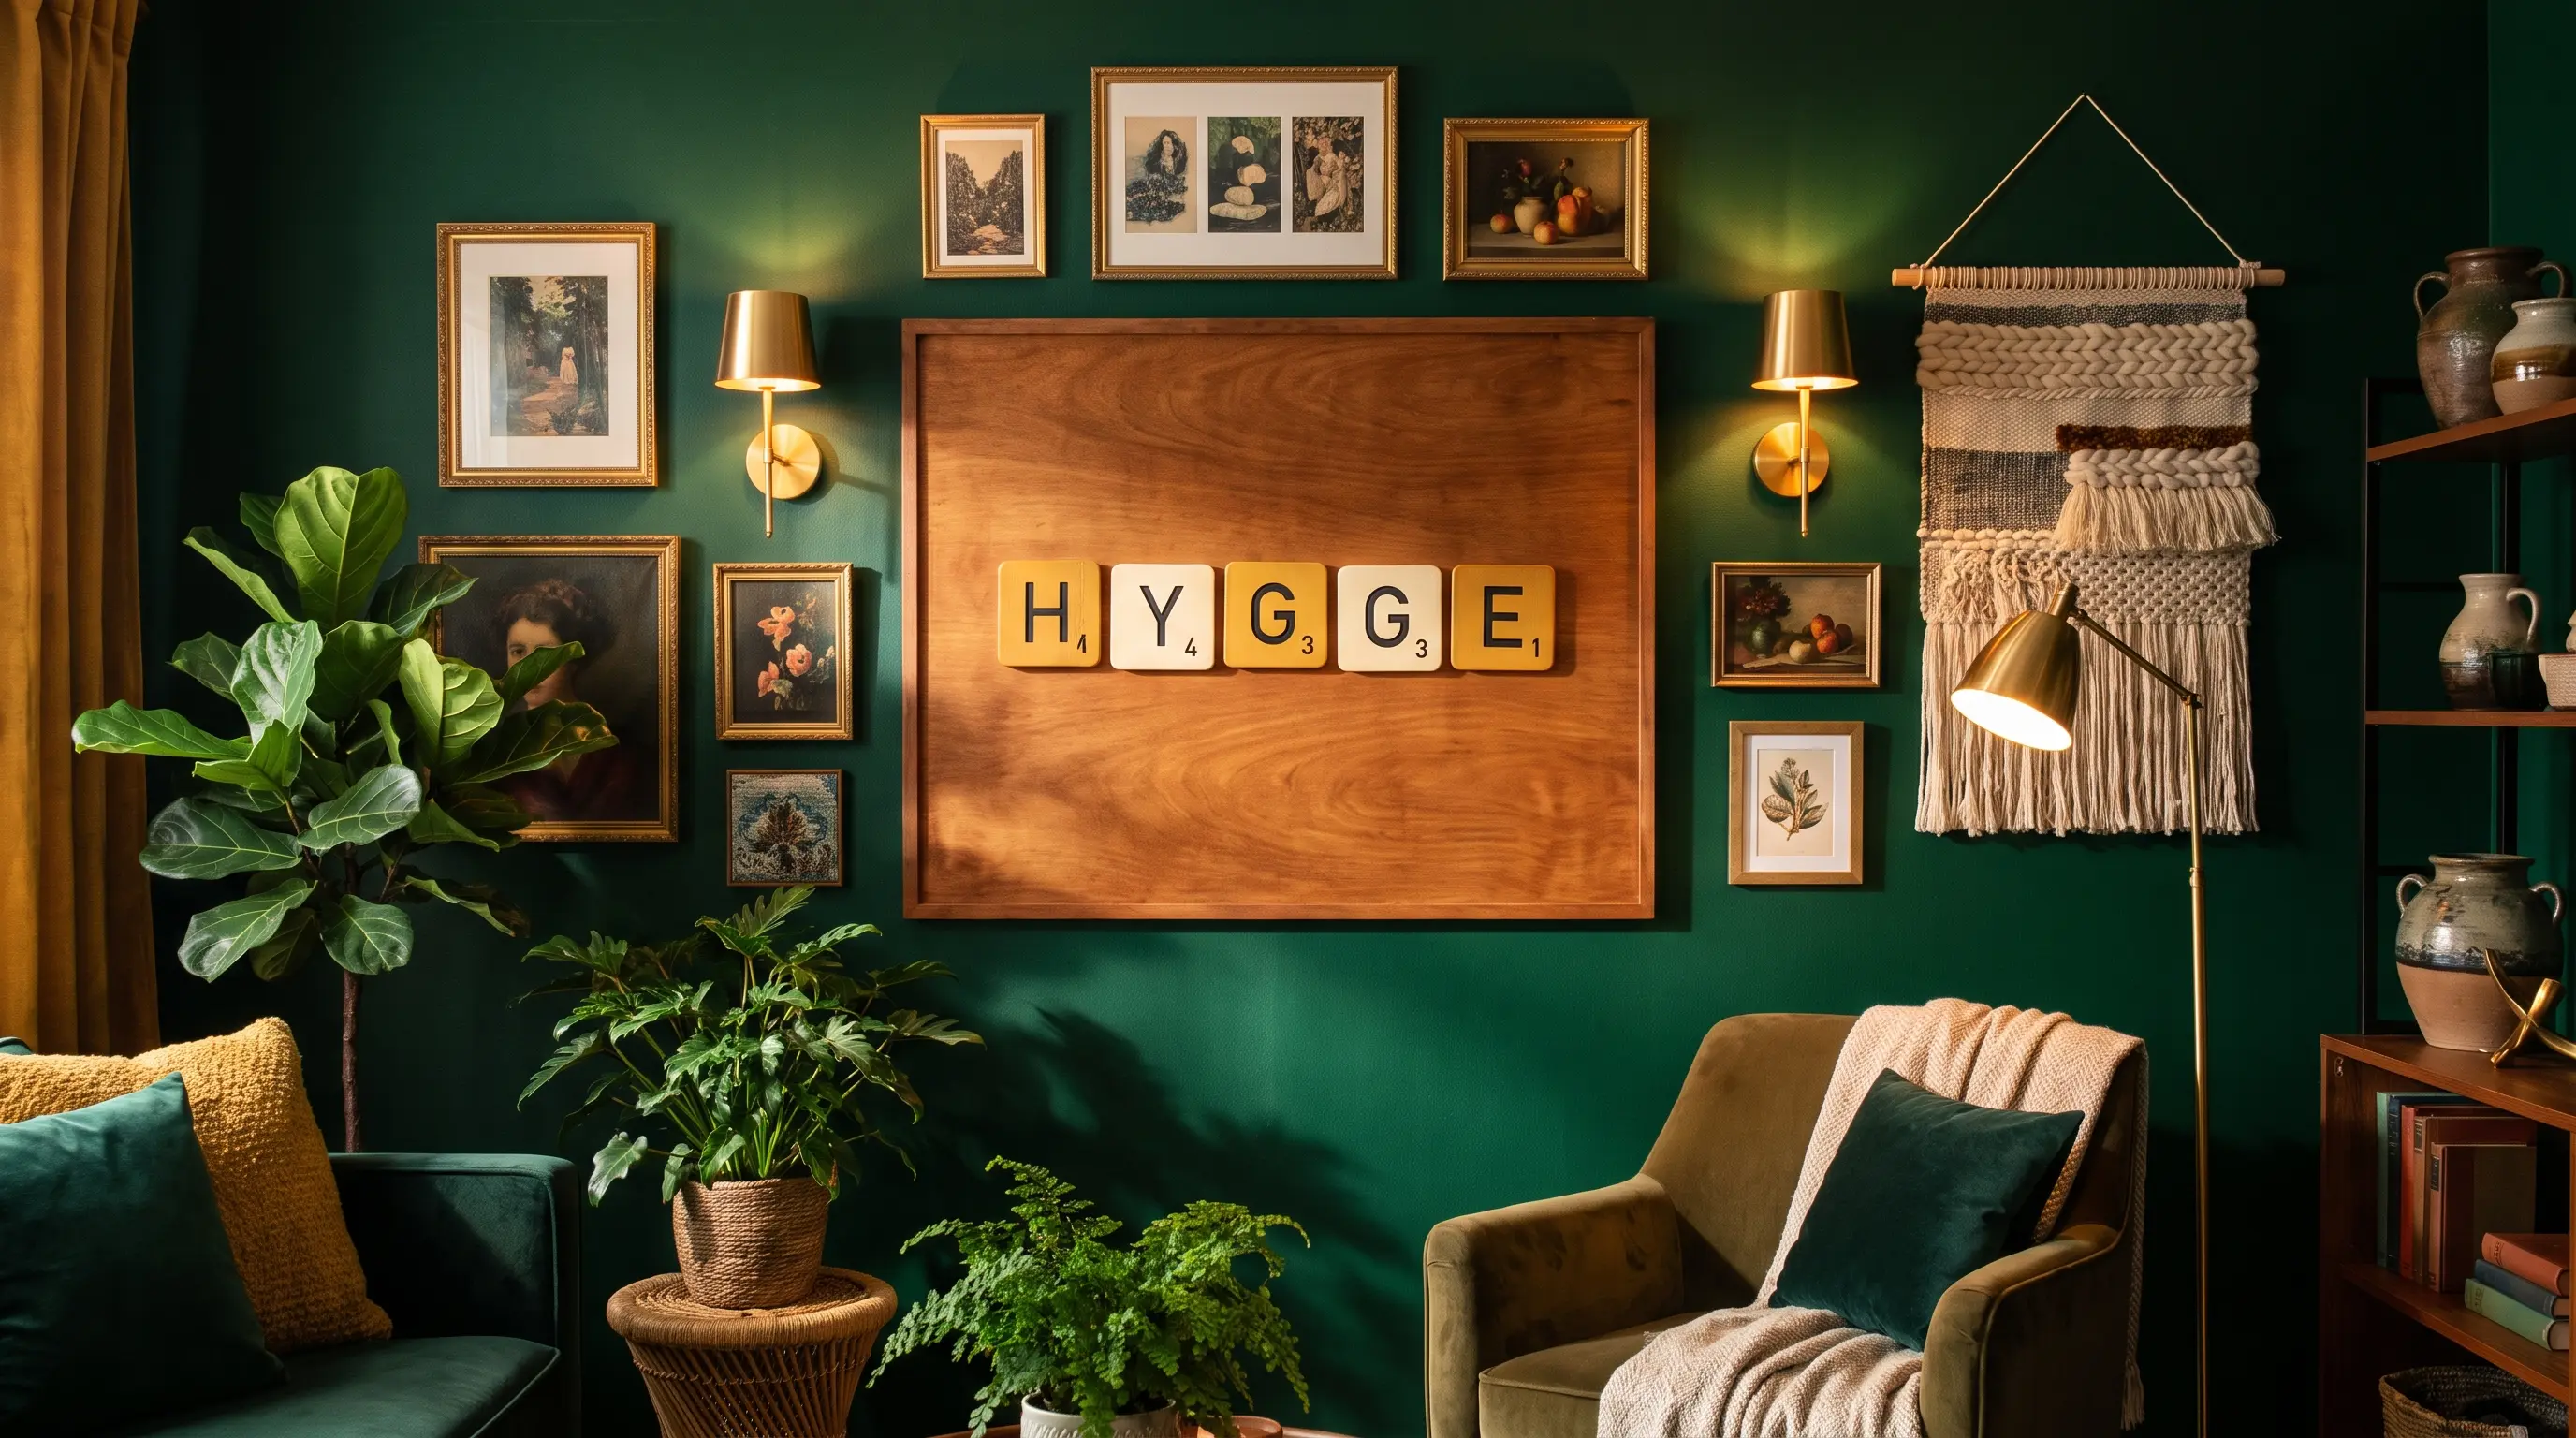
Large board-game letters can form names, initials, or short words on a wall. This project works well when you want decor that feels personal and easy to read.
| Cost | $15 to $35 |
| Skill level | Beginner- friendly |
| Material Required | Large board-game letter pieces and wall fixings |
How to make it: Choose the word or name you want to show. Arrange the letters on the floor first, check the spacing, and then attach them to the wall.
40. Pegboard Display Wall
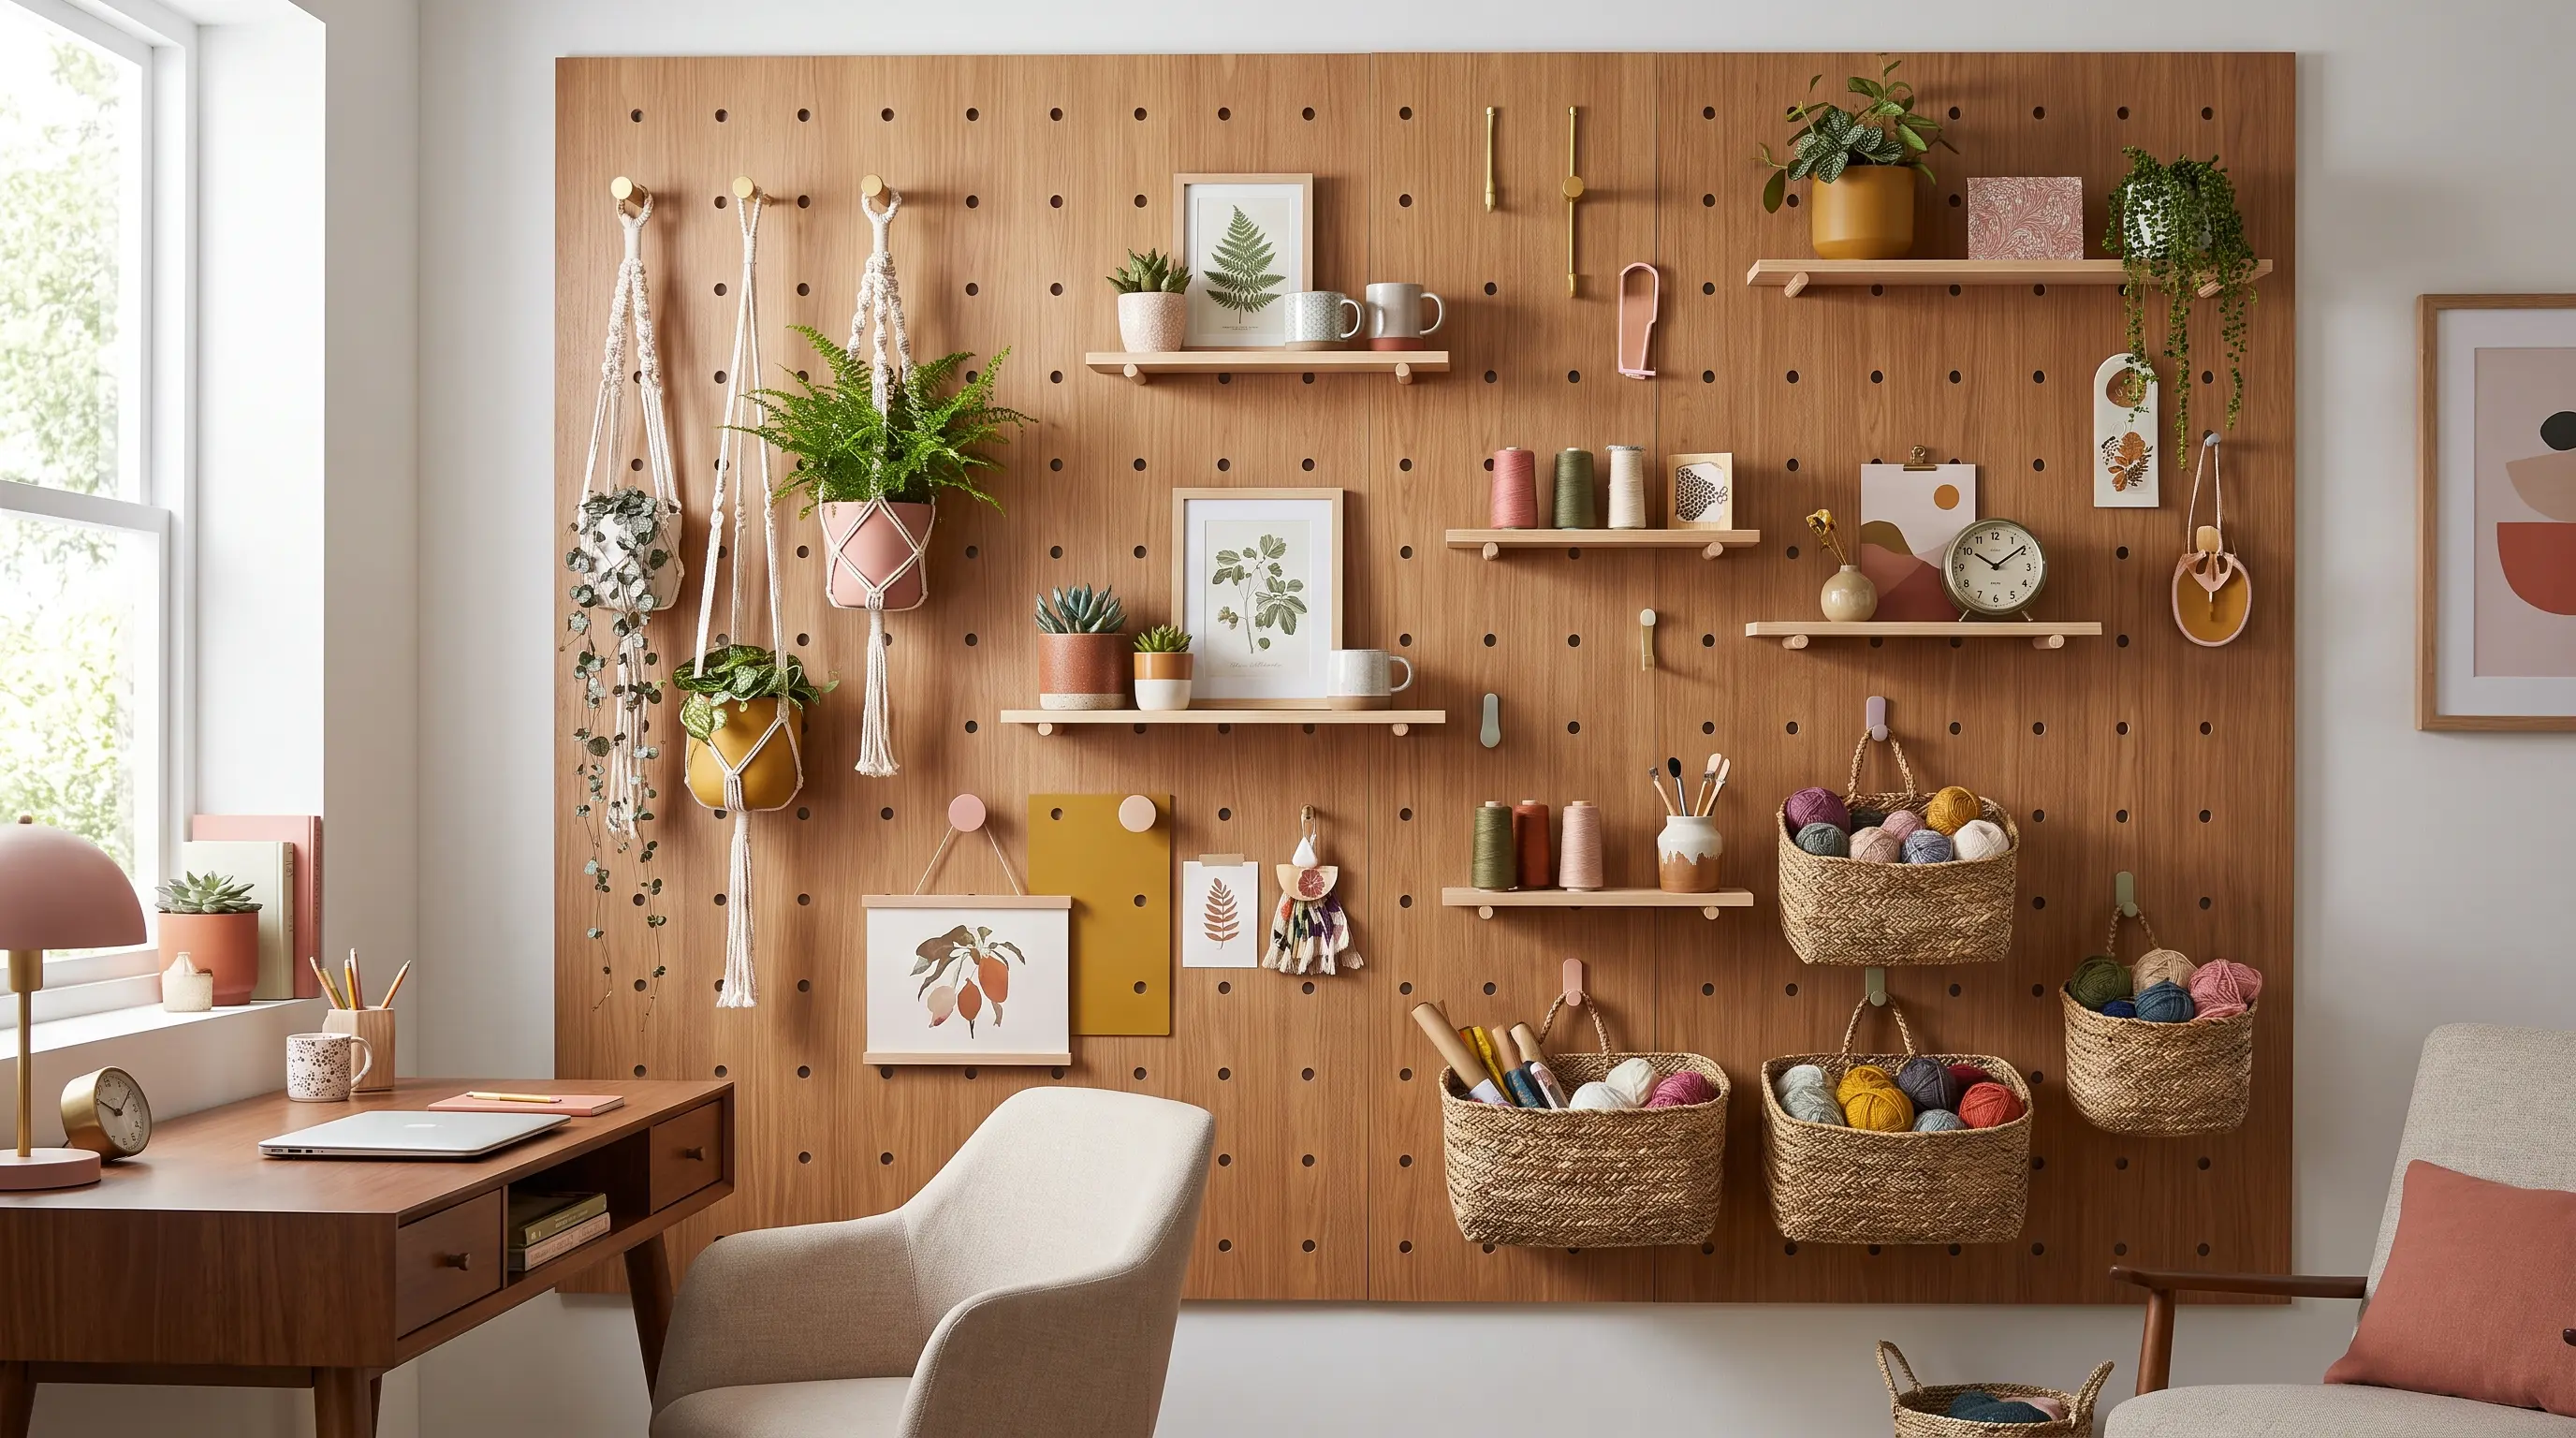
A pegboard can add storage and wall decor in the same space. It can be adjusted to hold items suited to a work area, a craft room, a kitchen, or a bedroom.
| Cost | $25 to $150 |
| Skill level | Beginner- friendly |
| Material Required | A pegboard panel, mounting spacers with screws, and specialized hanging hooks |
How to make it: Fix the pegboard to the wall using the method given with your board. Add hooks or holders based on the items you plan to store or show.
41. Hat Wall Display
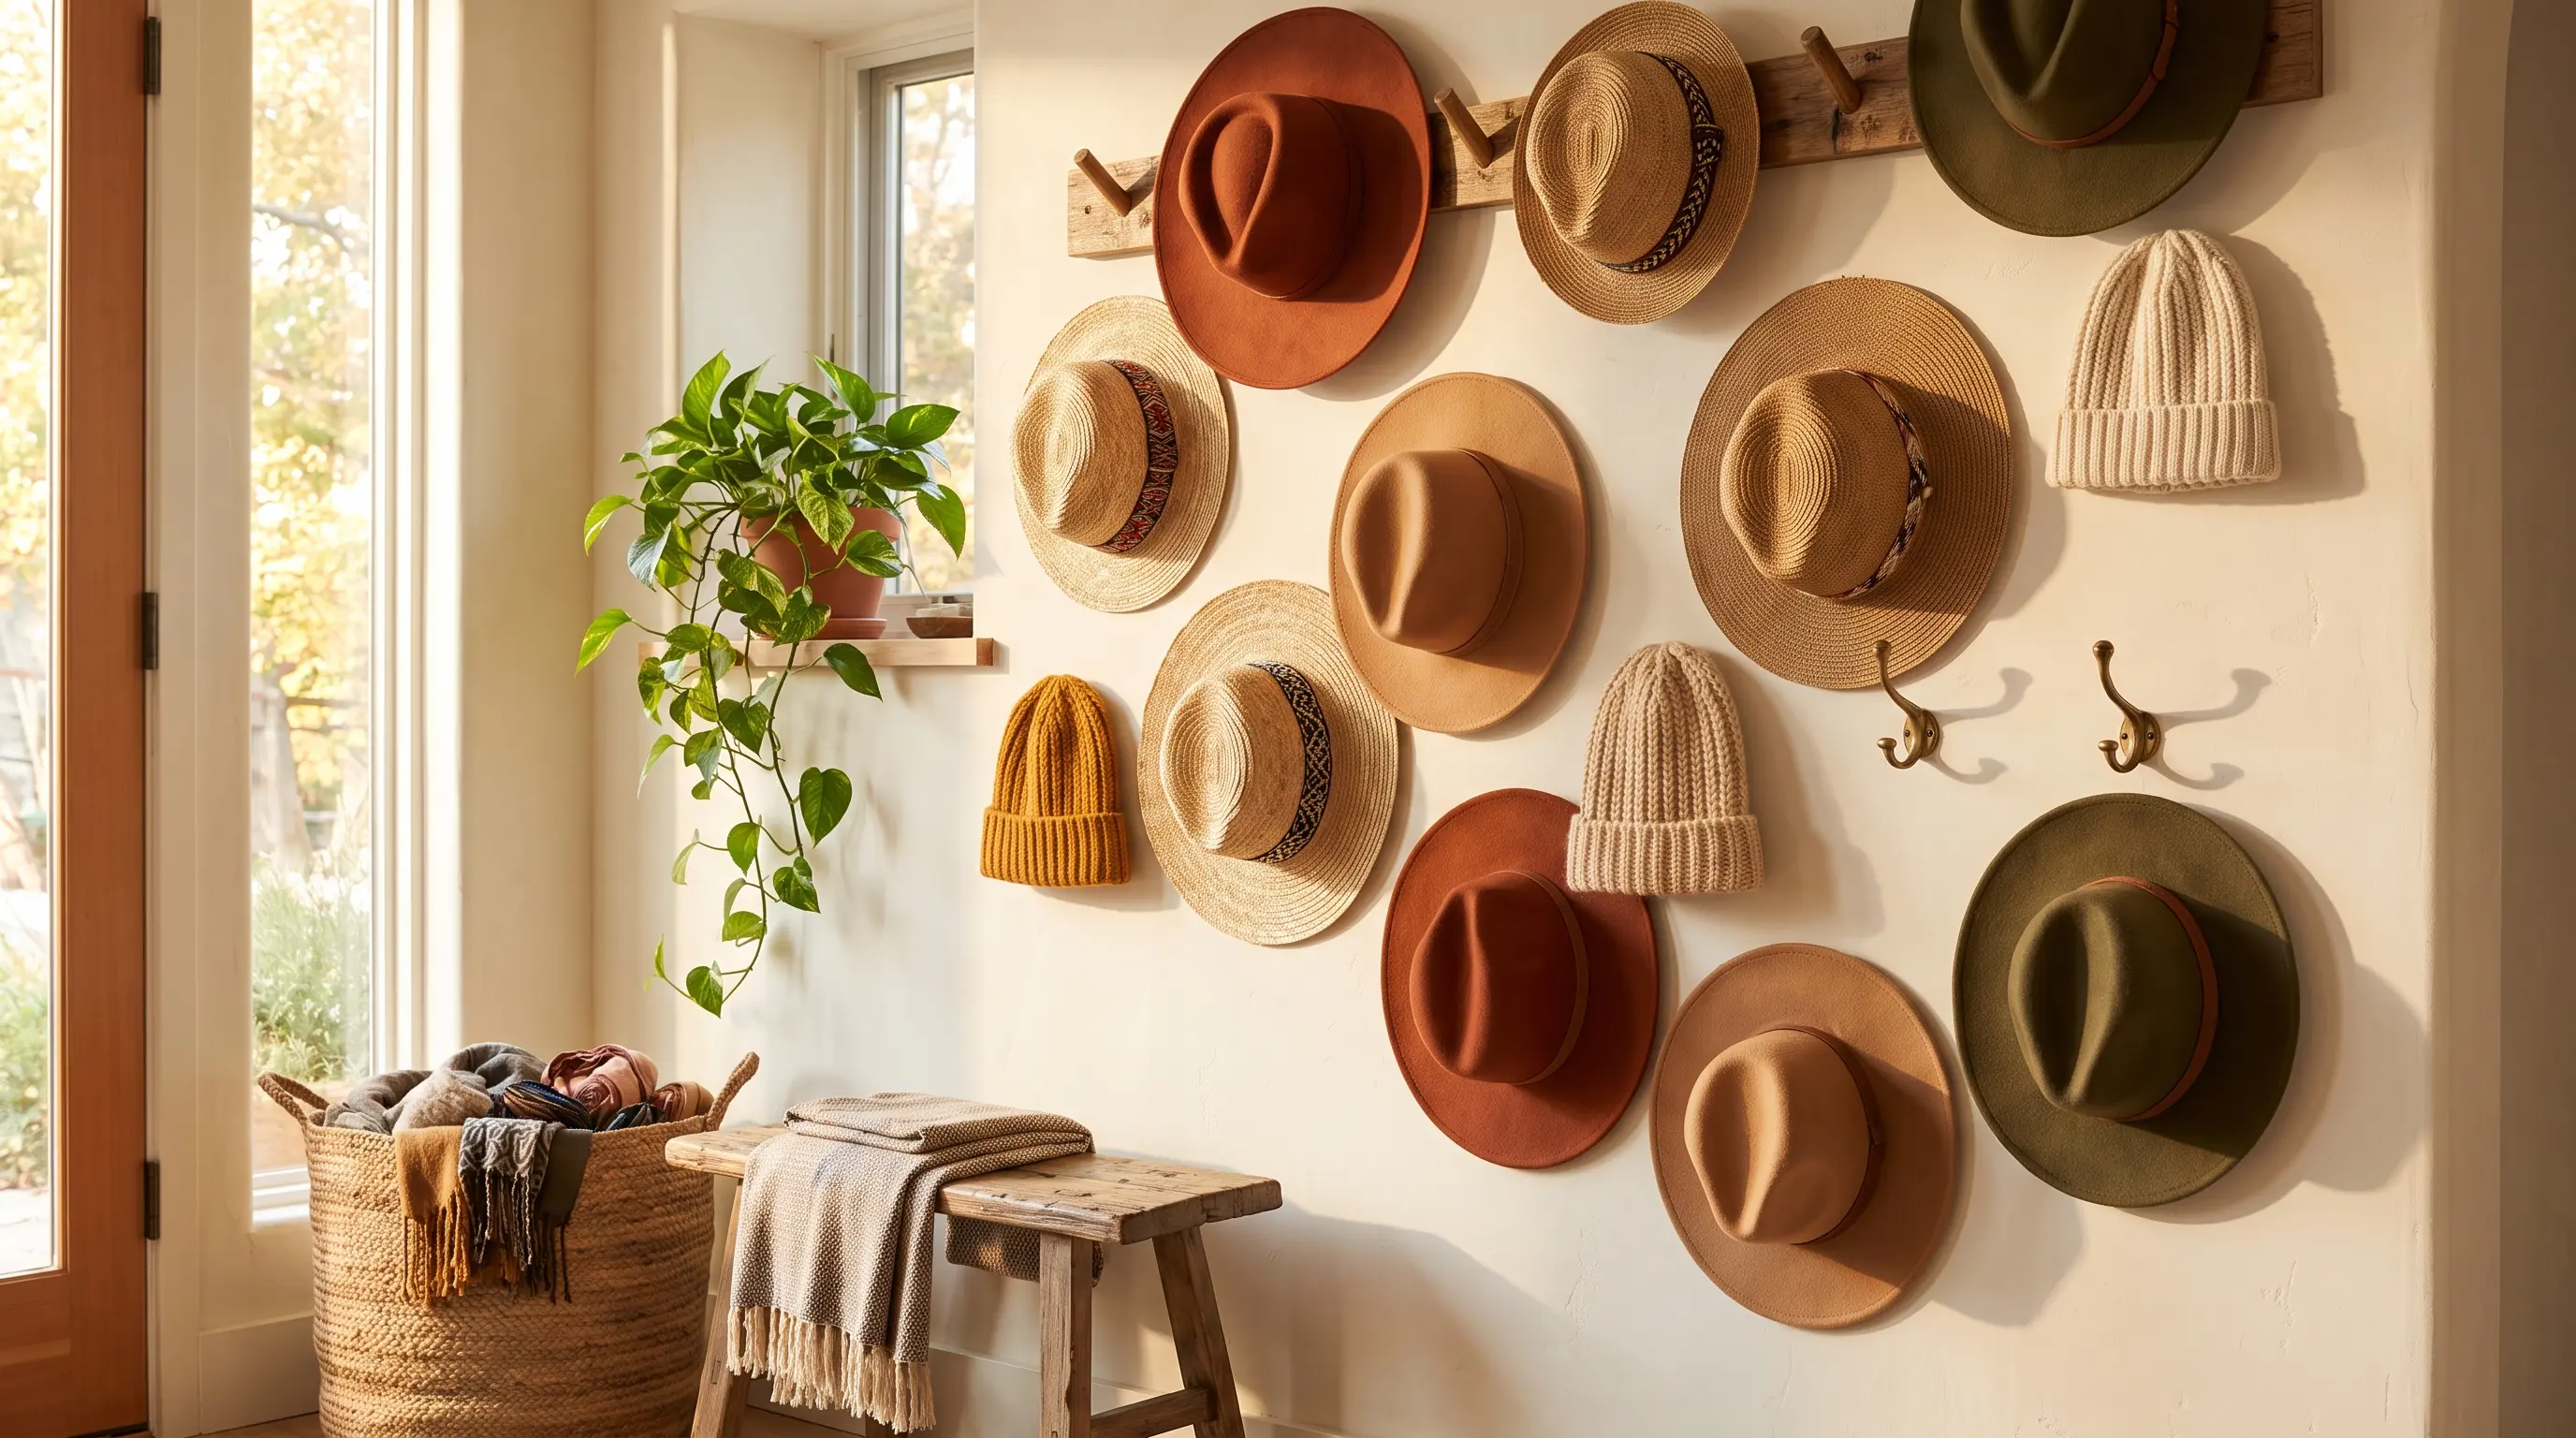
A hat wall uses open wall space for storage while adding shape and depth to the room. It is a useful choice when closet space is limited.
| Cost | $15 to $50 |
| Skill level | Beginner- friendly |
| Material Required | Hat hooks or clips, measuring tape, and a pencil |
How to make it: Lay the hats out on the floor and test a loose group. Move them until the spacing feels even, then hang them in the same order on the wall.
Tips for Selecting Your Perfect DIY Wall Art
The right wall art should fit your room, reflect your taste, and work with the space you have. A few simple choices can help separate items look like one planned display.
Once your wall art is up, many of these builds pair naturally with greenery nearby; a floating shelf or a leaning ladder shelf from these cozy plant corner ideas can round out an empty spot next to your new piece.
- Pick pieces that share a color or shape: When choosing smaller items like paint swatches or fabric scraps, stick to one color family and cut them into matching shapes so they come together as one piece, not scattered parts.
- Choose a mix of sizes and orientations: For photo-based art, pick a blend of vertical and horizontal photos in different sizes instead of uniform ones, so the display feels more dynamic.
- Select large pieces to anchor the space: When choosing canvas prints, such as a set of family portraits, go for oversized pieces that can serve as a single focal point rather than several small accents.
Before hanging anything, test the arrangement on the floor or mark the wall with paper shapes. This small step helps you check the spacing and make changes without extra holes.
Frequently Asked Questions
What is the cheapest DIY wall art to make?
Paper art, paint-chip art, clipped prints, and projects made with items already at home are often the lowest-cost choices.
How can I decorate a large wall on a small budget?
Use one large canvas, fabric panel, photo mural, or a group of one to three large pieces. This can look less crowded than many small items.
What materials can I use to make DIY wall art?
You can use canvas, paper, paint, fabric, yarn, cork, wood, photos, baskets, plates, branches, and reused household items.
What wall art works well in a rental home?
Removable tape designs, clipped prints, lightweight paper art, fabric hangings, and temporary photo murals are useful for rental spaces.
How can I make DIY wall art look more costly?
Use a small color group, clean frames, even spacing, and larger pieces. Matching materials or repeated shapes can also help the display feel planned.
Final Splash
You do not need a large budget or special skills to create wall art that feels at home in your space. A thrifted canvas, scrap fabric, old paper, family photos, cork, cardboard, or leftover paint can become a piece with real meaning.
Look at the room first, then choose one idea that matches its size, colors, and mood. Start with a small project if you are new to DIY. Test the layout on the floor before hanging anything, and reuse shades already present in the room so the piece feels connected.
Small flaws are not a problem. Diy wall art should feel personal, useful, and pleasant to see each day, not perfect or expensive. Drop a comment below and let me know which idea you think best suits your home.