A dull mower blade tears grass instead of cutting it cleanly. This leaves brown tips and can make your lawn look uneven.
Learning how to sharpen a lawn mower blade helps you restore a cleaner cut without replacing a usable blade. The job is simple when the blade is straight, solid, and only mildly worn. You can sharpen it with a hand file, drill attachment, angle grinder, or bench grinder.
Each method offers a different mix of speed, control, cost, and effort. The best option depends on the blade’s condition and your comfort with tools.
A file suits light upkeep, while grinders handle deeper nicks faster. You’ll find a clear comparison of each method, plus the full safety process for removing, sharpening, balancing, and reinstalling the blade.
Why a Sharp Mower Blade Matters
A sharp mower blade cuts grass cleanly instead of tearing it. Clean cuts heal faster and help the lawn stay green and healthy. A dull blade leaves rough, brown tips that can make the lawn look dry. It may also force you to mow the same area twice.
Check the grass after each mowing session. Ragged tips, uneven rows, and missed patches often show that the blade needs sharpening.
A sharp blade also helps the mower work with less strain. This can improve cutting results and reduce extra wear on the machine. Sharpen blades with light wear or small nicks.
Replace any blade with cracks, deep bends, missing metal, or severe thinning. Good blade care is just one part of mowing your lawn like a professional, alongside proper cutting height and timing.
Best Ways to Sharpen a Lawn Mower Blade
Sharpening a lawn mower blade restores a clean, even edge that cuts grass cleanly, and the right method depends on the blade damage, available tools, and your overall experience level.
Method 1: Use a Drill Attachment
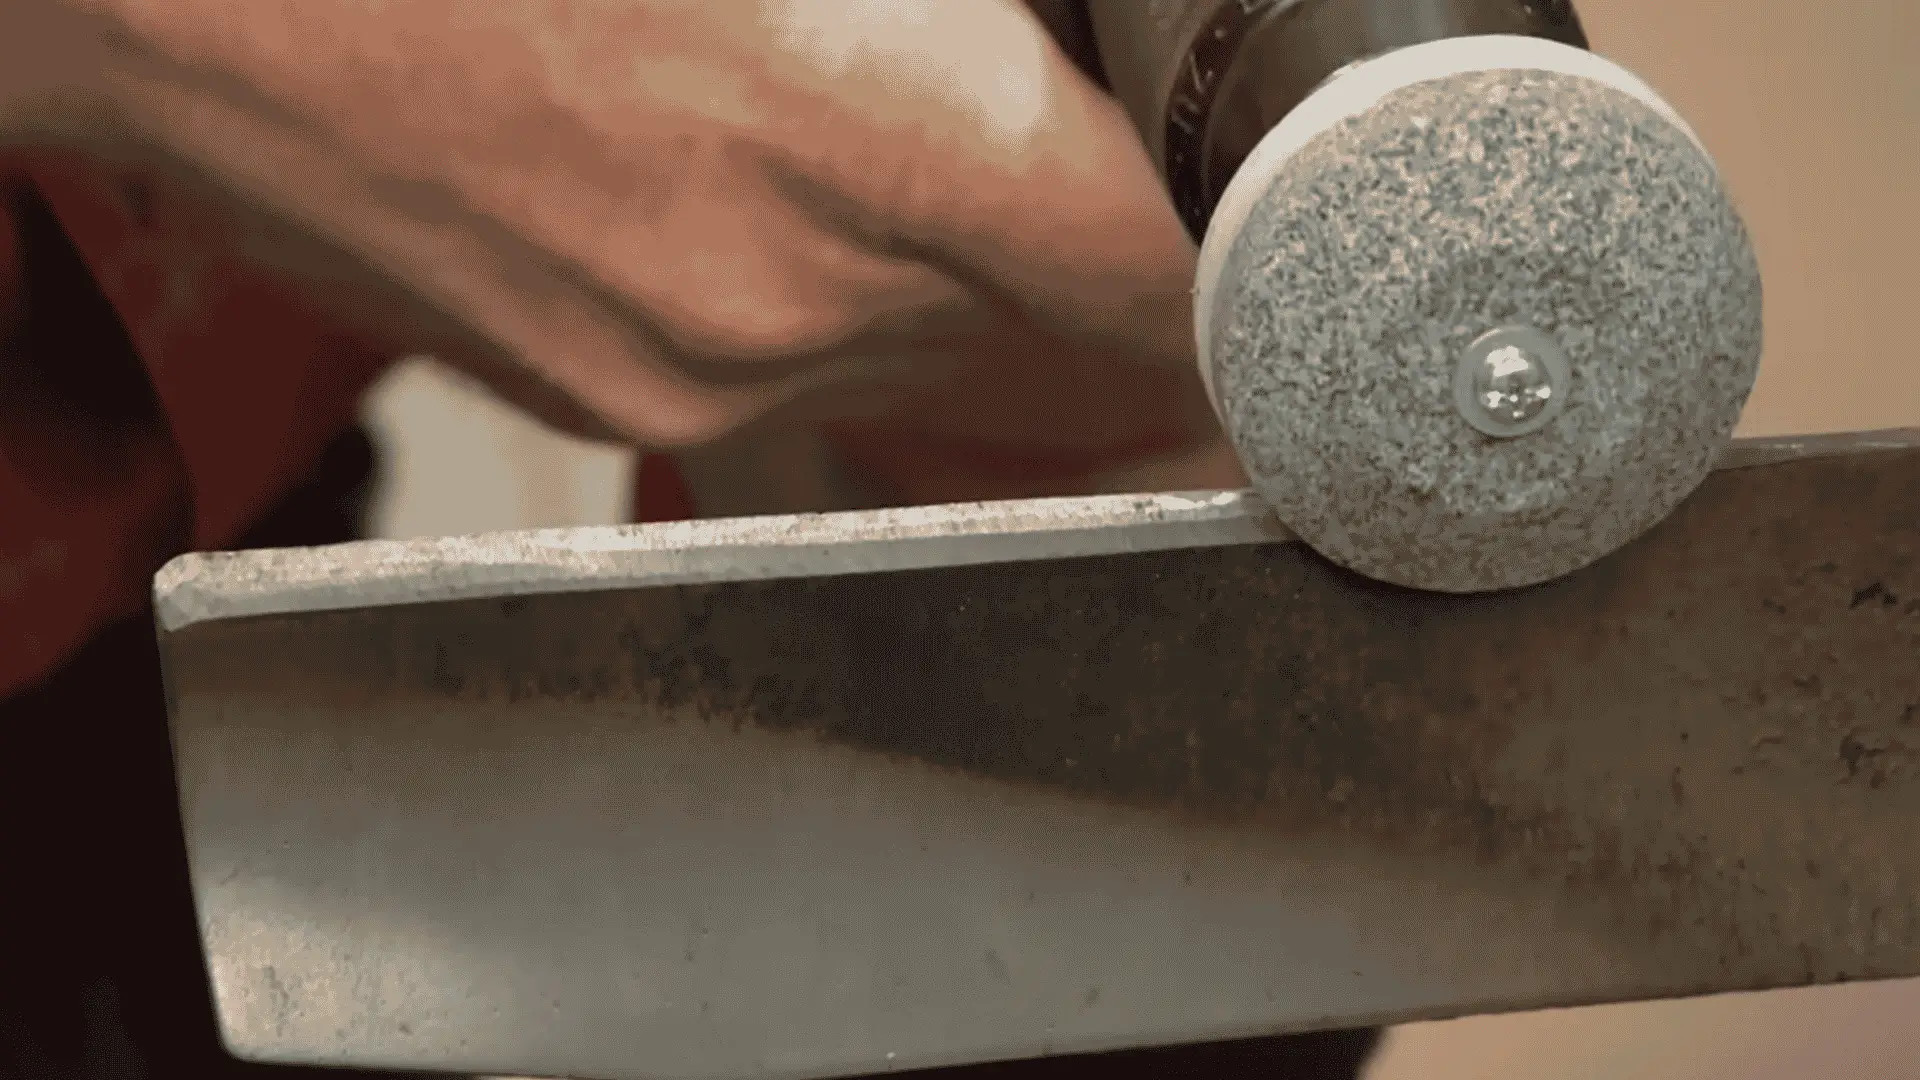
A drill attachment is a quick choice for blades with light wear or small nicks. The attachment keeps the stone aligned with the existing bevel.
- Clamp the blade firmly in a vise or clamp so it cannot shift while you work
- Move the spinning stone steadily across each cutting edge, following the original angle
- Apply light, even pressure the whole time instead of pressing down hard in one spot
- Stop every few passes to check your progress and compare both cutting edges
This method takes less effort than filing and works well for routine upkeep, though it may struggle with deep chips or badly worn edges.
Method 2: Use an Angle Grinder
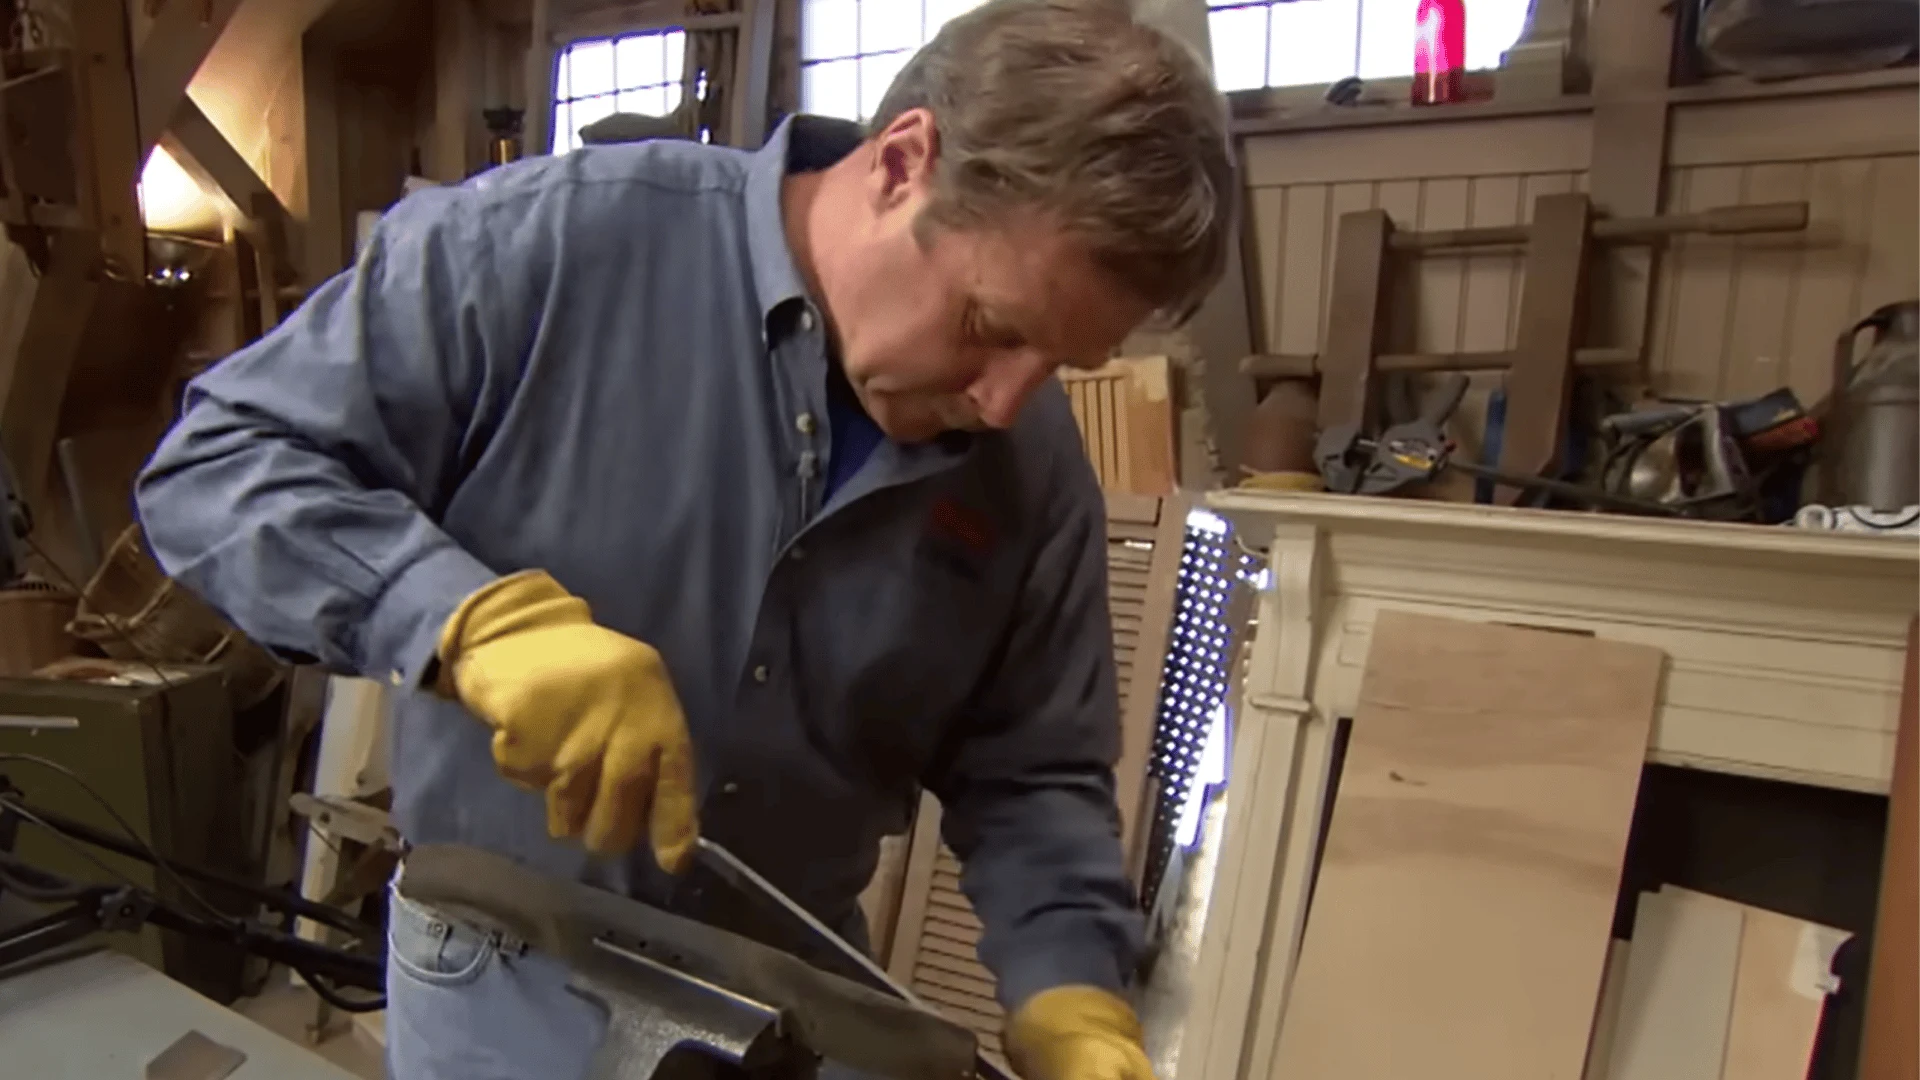
An angle grinder removes metal quickly, making it useful for rough edges, deeper nicks, and badly worn blades. It offers good control during repairs.
- Clamp the blade securely to a stable workbench before starting the grinder
- Follow the existing bevel and keep the grinder angle consistent
- Use short, controlled passes with steady movement instead of holding the grinder in one place
- Check both ends often to prevent overheating and to keep the metal removal even
This method is fast and portable, but it can remove too much metal quickly, so keep both ends even as you work.
Method 3: Use a Bench Grinder
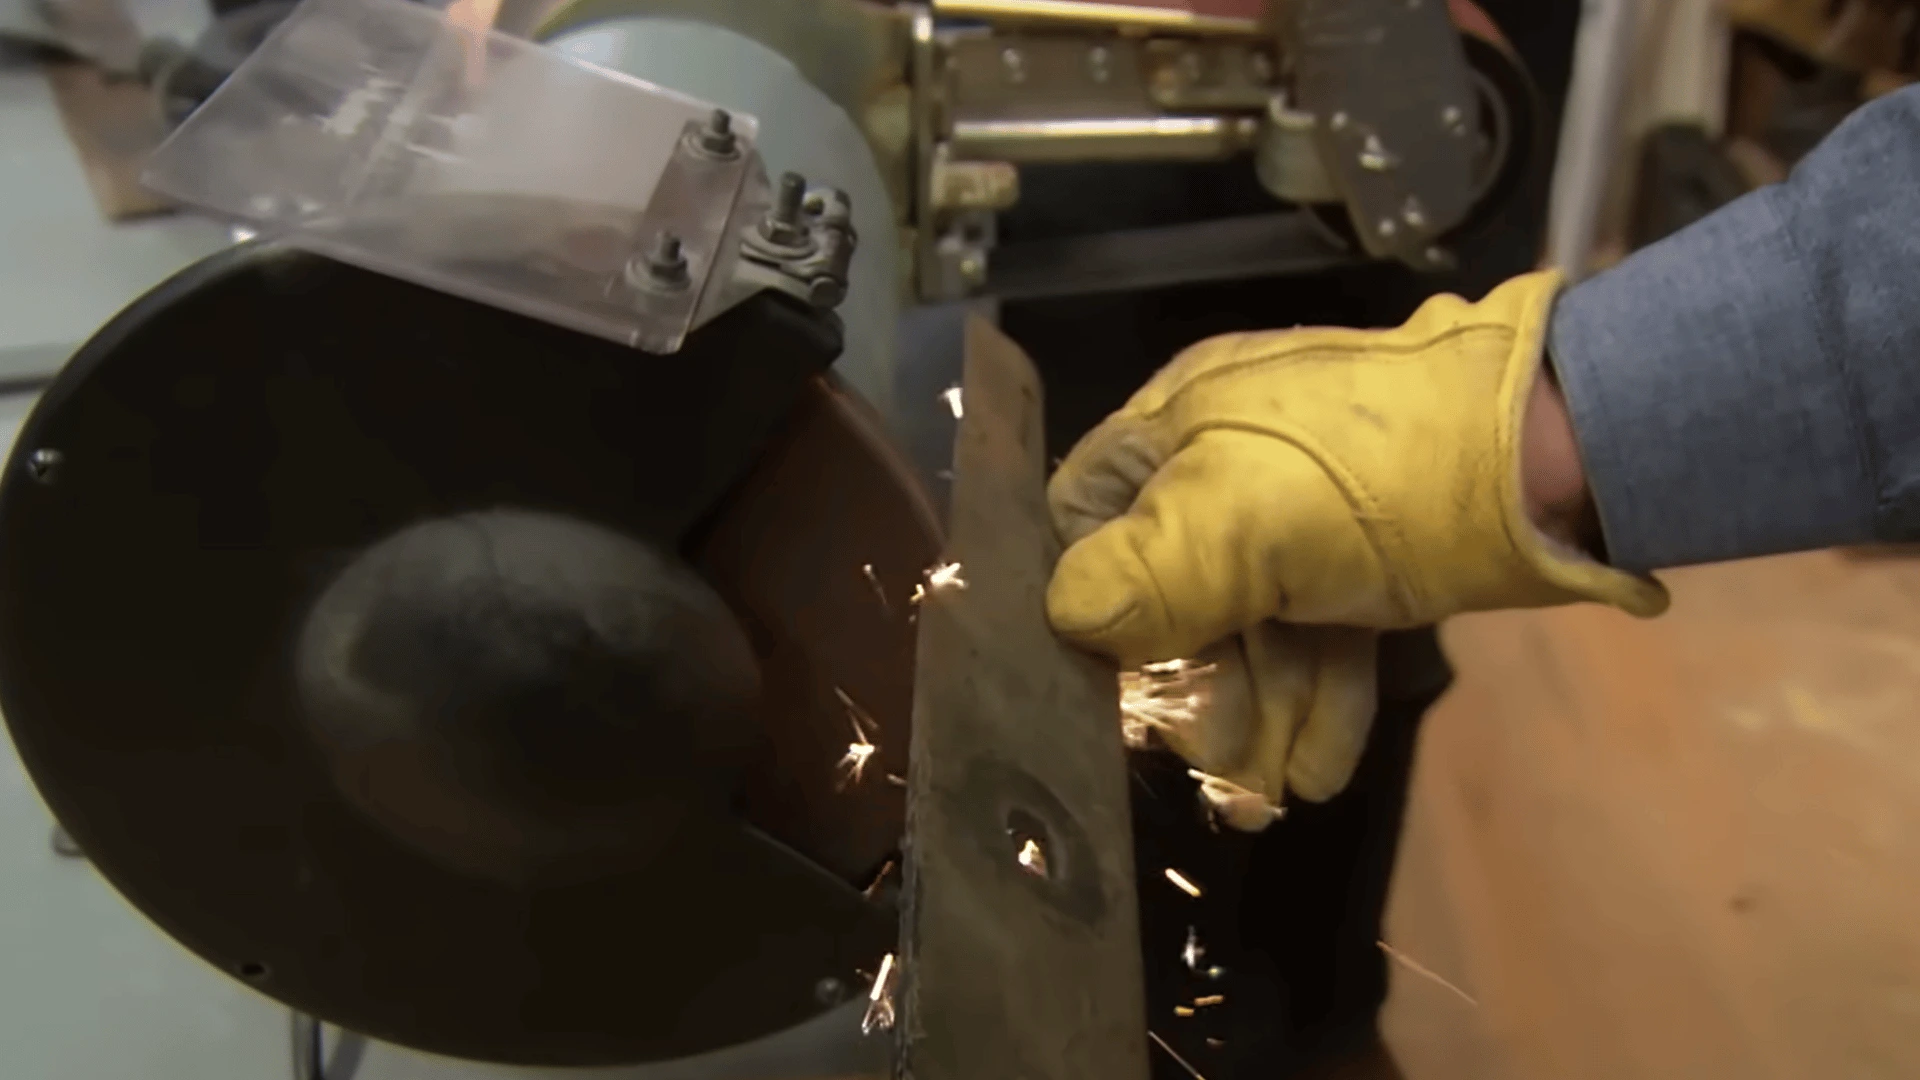
A bench grinder is the fastest option for heavy wear, deep nicks, or regular blade maintenance. Its fixed wheel makes smooth passes easier.
- Hold the blade firmly against the wheel, keeping your grip steady throughout the pass
- Match the factory bevel so the new edge mirrors the original angle
- Grind each cutting end in small stages rather than trying to finish in one pass
- Inspect the edge after every pass to track how much metal you have removed
This method handles stubborn damage well, but uneven grinding can cause balance problems, so remove similar amounts from both sides before testing the blade.
Check out the video for a step-by-step demonstration:
File vs Drill Attachment vs Grinder
The fastest method is not always the best choice for your situation, since speed alone does not guarantee a clean, even edge on the blade. Compare control, effort, and blade damage carefully, and factor in how often you plan to sharpen before settling on the right tool for the job.
| Method | Speed | Control | Best For | Main Drawback |
|---|---|---|---|---|
| Hand file | Slow | High | Light wear and beginners | Takes more effort |
| Drill attachment | Medium | Medium | Quick seasonal upkeep | Limited on deep nicks |
| Angle grinder | Fast | Medium | Damaged or rough edges | Removes metal quickly |
| Bench grinder | Very fast | Medium | Heavy repair and repeated use | Needs practice |
A hand file offers the easiest learning curve, making it a solid pick if you are new to blade sharpening and want steady, predictable results with less risk of ruining the edge.
A grinder saves time when the blade has damage that filing cannot remove easily, though it takes a bit more practice to use safely and keep the edge even on both sides of the blade.
How to Sharpen a Lawn Mower Blade Safely: Step-by-Step
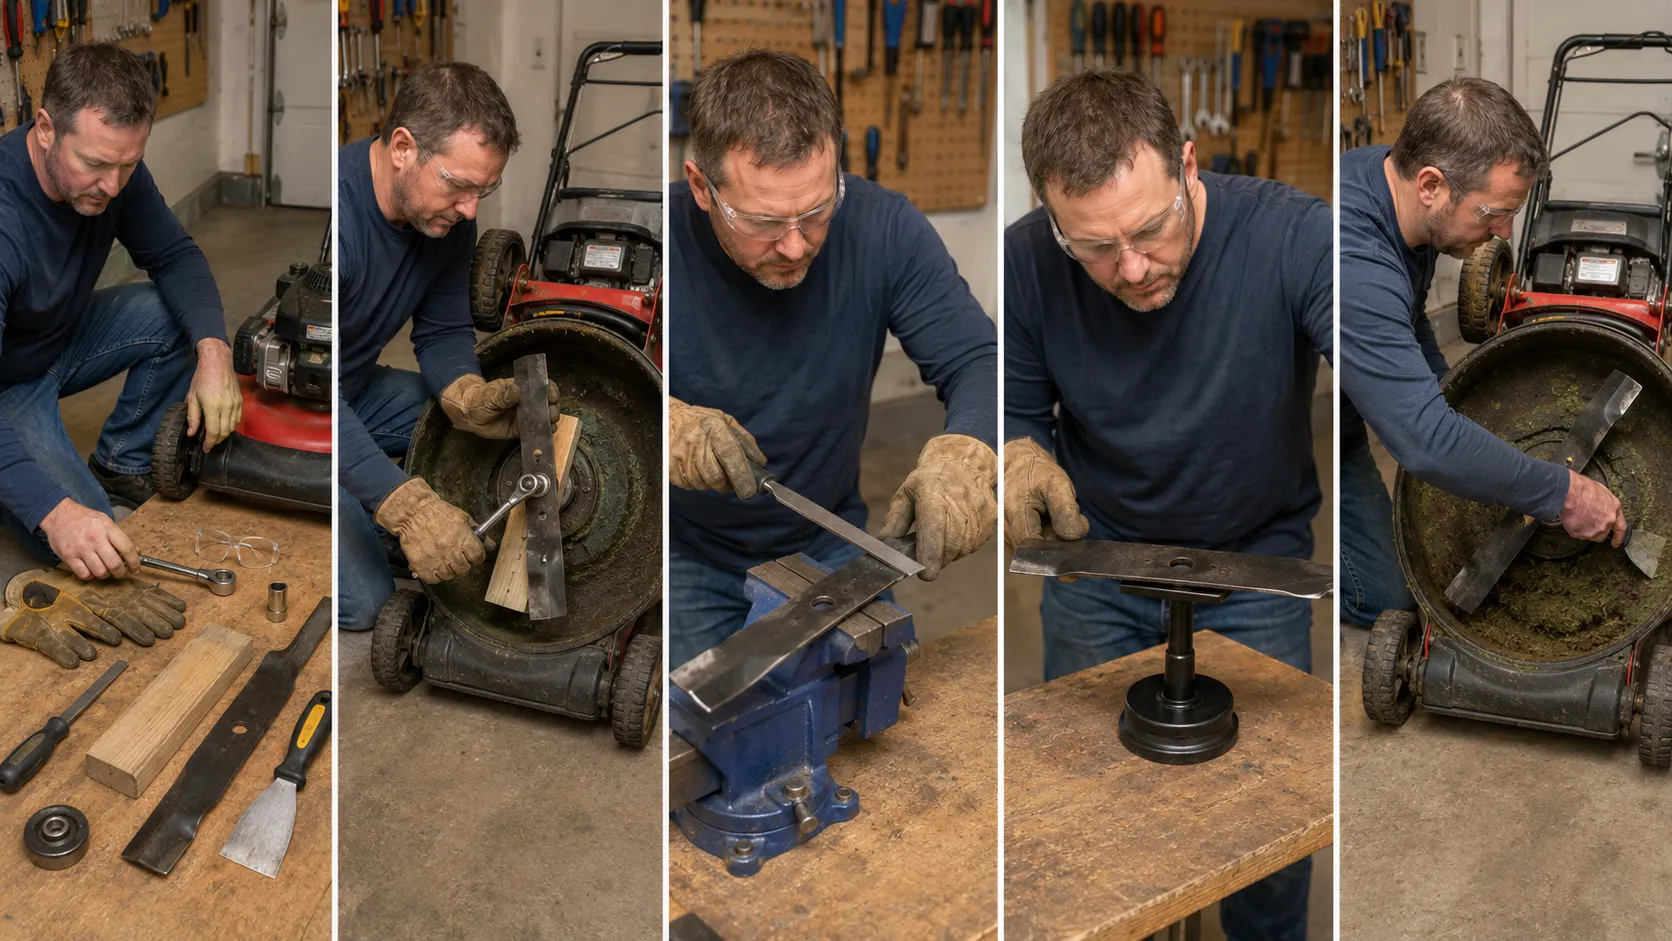
Whichever tool you use, the process around the actual sharpening stays the same. These five steps cover the full sequence, from gathering your gear to reinstalling a balanced blade.
Step 1: Gather Your Tools and Safety Gear
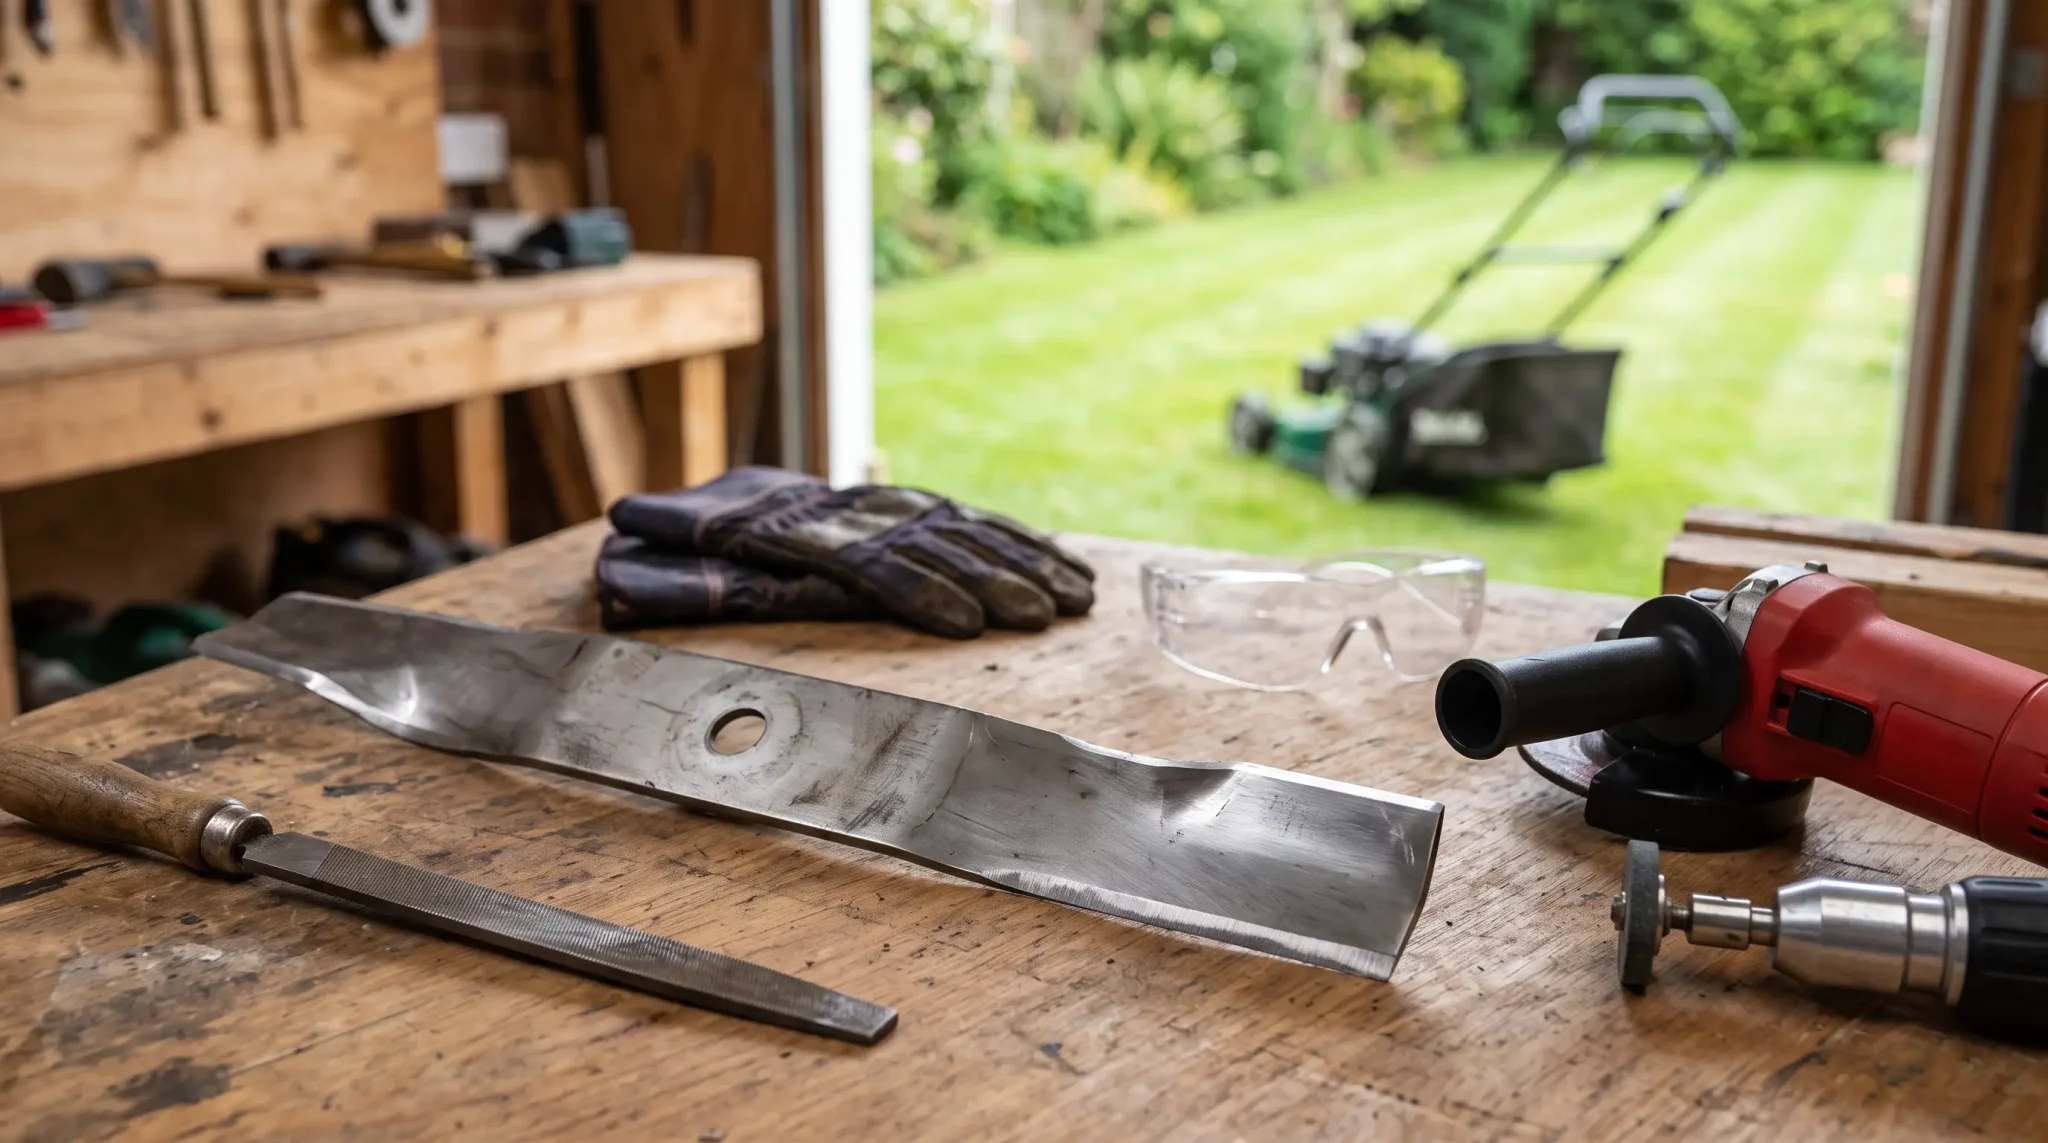
Prepare everything before you tilt the mower or reach near the blade. Wear leather gloves and safety glasses, then gather a socket, ratchet, scrap wood, bench vise, sharpening tool, blade balancer, and putty knife.
A secure setup reduces slips and rushed movements. These items also appear in a lawn mower maintenance checklist, where blade care supports safe mower upkeep.
Step 2: Remove the Blade Safely
Disconnect the spark plug before placing your hands beneath the mower deck. Wear gloves, mark the grass-facing side, wedge scrap wood against the blade, and loosen the center bolt with the correct socket.
Keep washers and hardware in order for safe reassembly. Purdue University Turfgrass Science highlights spark plug disconnection as a basic step for injury prevention during blade removal.
Step 3: Sharpen to the Correct Angle
Follow the blade’s factory bevel and keep the cutting angle near 30 degrees unless your mower manual says otherwise. Use light, even passes to remove dull spots and nicks without reshaping the blade.
Aim for a strong, smooth edge rather than a razor finish. Check both cutting ends for matching shape, then remove any rough burrs with careful filing.
Step 4: Balance the Blade
Place the sharpened blade on a balancer or support it through the center hole. If one end drops, that side is heavier and needs a small amount of metal removed. Repeat the check until the blade rests level.
Never grind the lighter end. Colorado State University Extension recommends this simple balance check to reduce mower vibration and protect the crankshaft.
Step 5: Clean the Deck and Reinstall the Blade
Keep the spark plug disconnected while you scrape grass, soil, and debris from beneath the deck with a putty knife. Refit the blade with the mark facing down, then replace washers and bolt in their original order.
Tighten it to the listed torque. Reconnect power, start the mower in an area, and check for secure mounting and unusual vibration.
Common Blade Sharpening Mistakes
Small mistakes can shorten blade life, harm the mower, or leave an uneven cut. Watch for these common problems before you consider the job finished:
- Skipping spark plug removal: The engine could start unexpectedly.
- Changing the bevel: A new angle can weaken the cutting edge.
- Making a razor edge: Thin metal chips and wears faster.
- Grinding one end more: Uneven weight creates harmful vibration.
- Skipping balance checks: A blade may look even but remain heavy.
- Installing it upside down: The cutting edges cannot meet the grass correctly.
Checking for these mistakes only takes a minute, but doing so can save the blade, protect the mower, and keep every future mowing session clean, even, and reliably safe overall.
Frequently Asked Questions
Can sandpaper sharpen a mower blade?
Sandpaper can remove a small burr, but it is slow for restoring a worn cutting edge. A coarse mill file offers better control and removes metal more evenly.
Can mulching blades be sharpened at home?
Many mulching blades can be sharpened when their cutting edges remain accessible. Follow the original bevel and avoid reshaping curved lifting sections or damaged blade surfaces.
Do new mower blades need sharpening?
Most new mower blades arrive with a strong working edge. Check the blade and manufacturer instructions before filing, since unnecessary sharpening can affect its balance.
Can a sharpening service balance the blade?
Many mower shops sharpen and balance blades together. This option suits damaged edges, limited tools, or anyone who prefers not to handle grinders and mower parts directly.
Final Blade
Knowing how to sharpen a lawn mower blade helps you choose the right method and avoid removing too much metal. A hand file gives you steady control and suits light wear, while a drill attachment speeds up routine touch-ups, and grinders handle deeper nicks faster.
Whichever tool you pick, the same safety steps still apply: disconnect the spark plug, wear gloves, keep the original bevel angle, and check the balance before reinstalling the blade. Skipping these steps is often where common mistakes start.
Follow the safety steps outlined above for each sharpening session, and your mower will reward you with a cleaner cut and a healthier lawn all season long. Drop a comment below and let me know if your mower became as sharp as you.