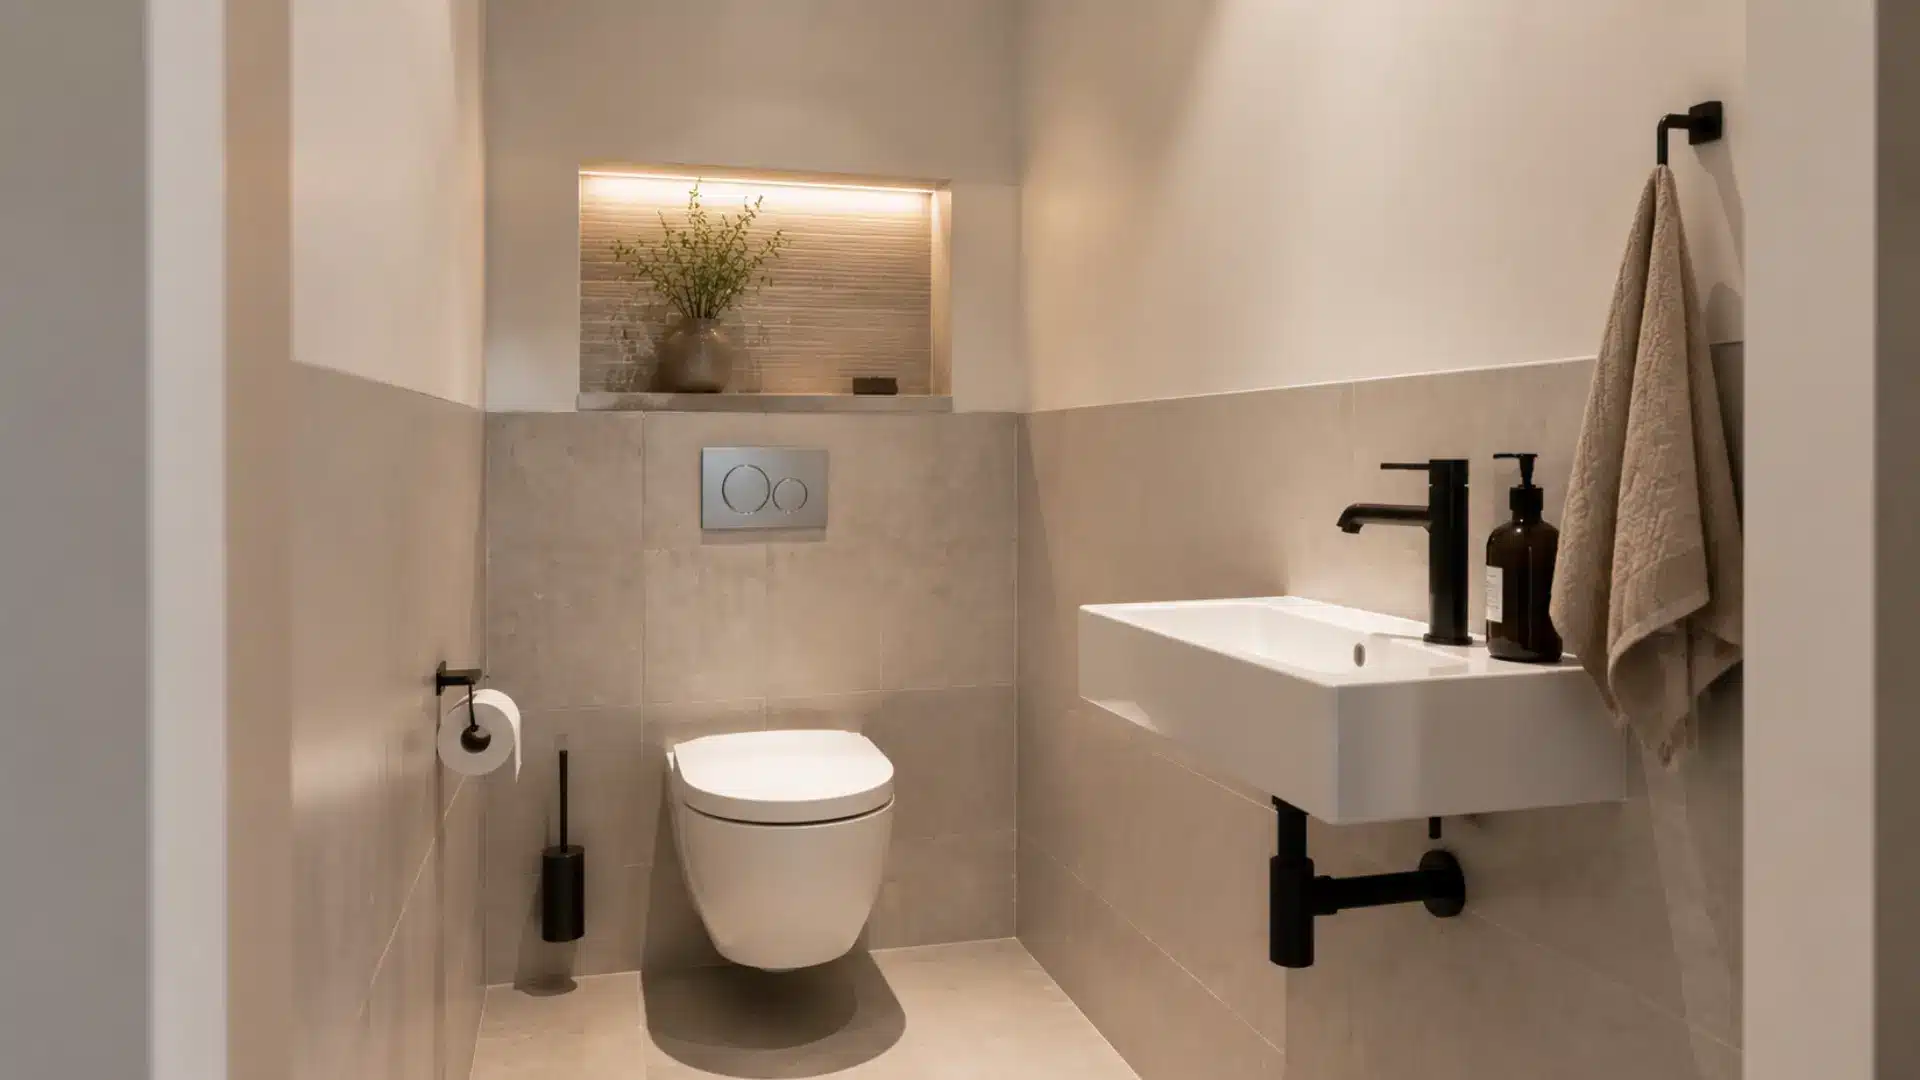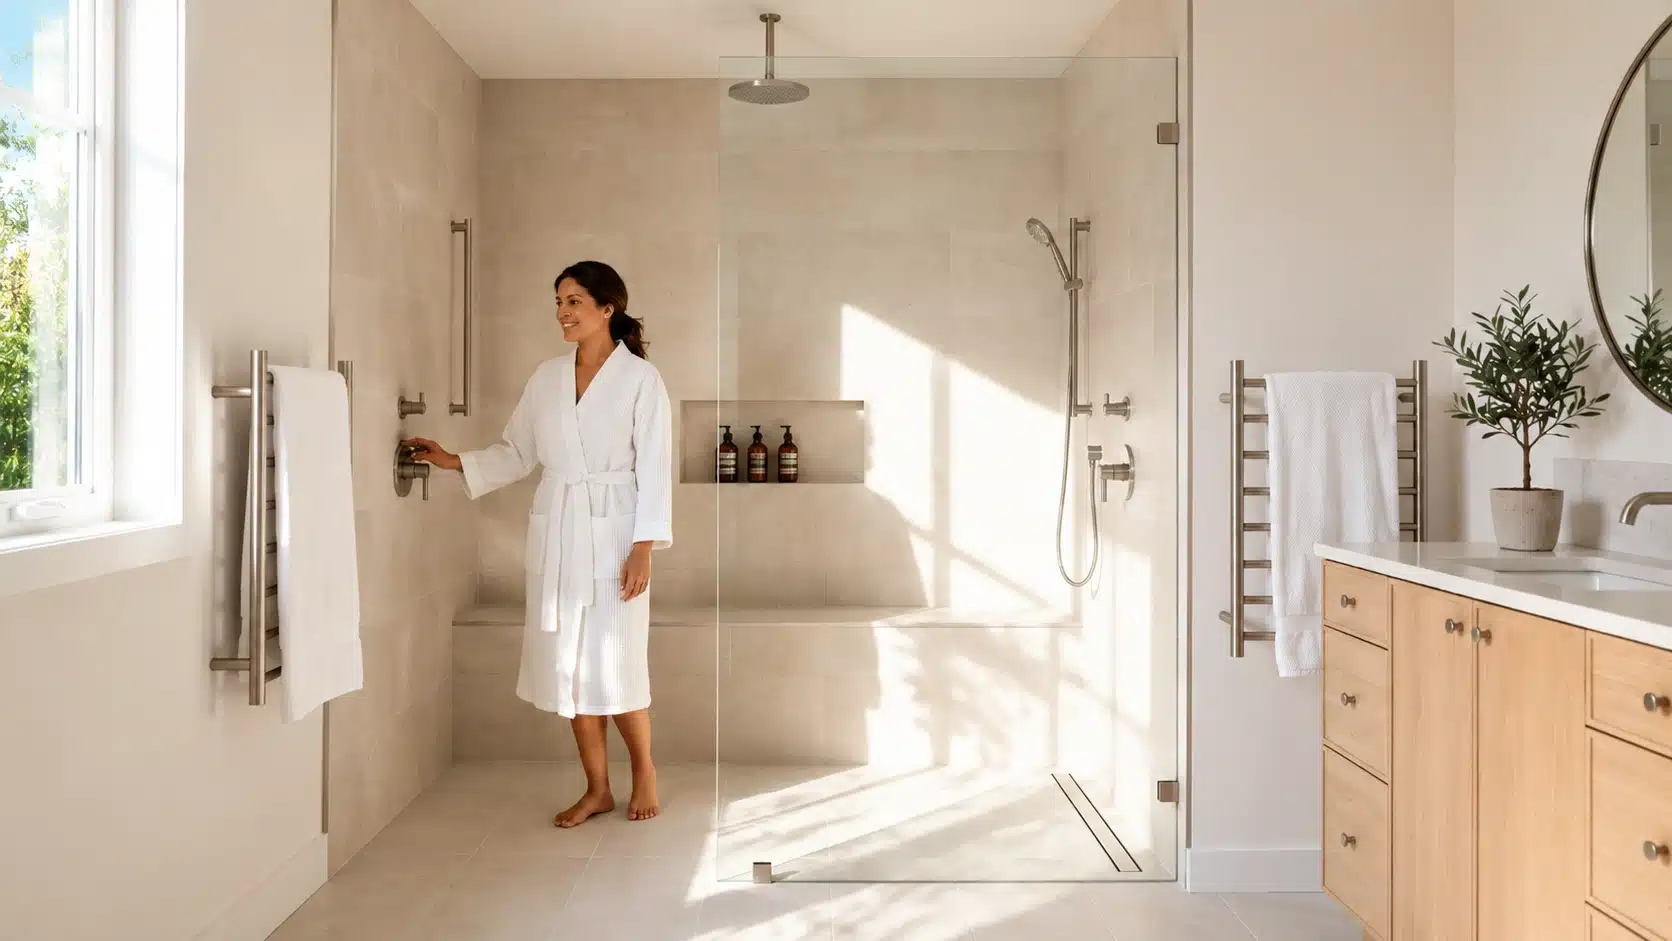
Doorless walk in shower ideas can have an open entrance without a hinged or sliding door. It may also be curbless, with a level floor transition, but the two features are not the same.
The doorless walk-in shower can make a bathroom feel larger, bring in more light, showcase tile and fixtures, and make entry easier.
The main concern is keeping water off the bathroom floor. Shower depth, floor slope, drain position, showerhead direction, and a glass panel or half-wall should work together to control water spray.
These doorless walk-in shower ideas cover small bathrooms, wet rooms, primary suites, privacy needs, materials, seating, storage, lighting, and access, helping you compare which setup may suit your space best.
How to Choose the Right Doorless Shower Layout
The room shape should guide the layout. Choose an arrangement that keeps the entry clear, meets your privacy needs, and sensibly separates wet and dry areas.
| Room shape | Suggested arrangement | Water-control reminder | Privacy level |
|---|---|---|---|
| Small bathroom | Corner shower or deep alcove with one fixed panel | Point the showerhead inward | Clear glass, frosted glass, half-wall, or alcove |
| Long or narrow bathroom | Side entry or shower across the far wall | Protect nearby fittings with one fixed panel | Clear or frosted glass |
| Large primary bathroom | Wet room, double shower, or tub-and-shower zone | Plan the whole wet area before work begins | Open layout or separate private area |
| Privacy-first layout | Half-wall, private glass, or deep alcove | Place the barrier beside the main spray area | Medium to high privacy |
Expert note: Start with the showerhead position and likely splash zone, then place the entry, drain, and privacy barrier around them.
The right layout should suit the room shape, daily routine, and number of people sharing the bathroom.
How to Keep Water Inside a Doorless Shower
Water control comes down to a few linked choices. Shower depth, floor slope, drain position, showerhead direction, and a well-placed barrier should all be planned together.
- Give the shower enough depth: A deeper shower gives water more distance to fall before it reaches the opening. There is no single size that suits every room, so check the final depth, showerhead position, and local requirements with your installer.
- Slope the floor towards the drain: The floor needs a steady pitch so water moves away from the entrance. Full waterproofing below the tile is also vital. Low spots can leave standing water, which is why curbless floors often need skilled planning and fitting.
- Choose the drain position carefully: A center drain can suit a balanced floor pitch, while a side drain often works better in a long room. Wall and linear drains may also be possible, but the floor build-up should be checked before work starts.
- Aim the showerhead away from the opening: Place a wall-mounted head on the far or side wall. An overhead rain head sends water down rather than out, which can help reduce spray near the entry.
- Add a barrier where the spray is strongest: a fixed glass panel, a tiled half-wall, a narrow entrance, or a return wall can block water without enclosing the full shower. Place it between the spray and the nearest vanity, toilet, or walkway.
- Use a suitable floor finish and good airflow: Choose flooring made for wet areas, and keep the room aired with an extractor fan or open window where suitable. Heated flooring can add comfort in an open shower. The EPA’s guide to mold and moisture notes that running a bathroom fan during and after a shower helps keep indoor humidity down.
Expert note: Plan the floor slope and drain position together. A drain cannot correct a floor that sends water toward the opening, and poor placement can still leave puddles.
A good layout should guide water back to the drain before it reaches the main bathroom floor.
Doorless Walk In Shower Ideas for Your Bathroom
Use these ideas to compare layouts, materials, fixtures, privacy options, and access features.
Each idea focuses on a different physical design choice, with a quick summary of who it suits, its main benefit, and the feature that sets it apart. Ultimately, the right setup depends on your room size, daily needs, and preferred level of privacy.
1. Keep It Minimal with One Frameless Glass Panel
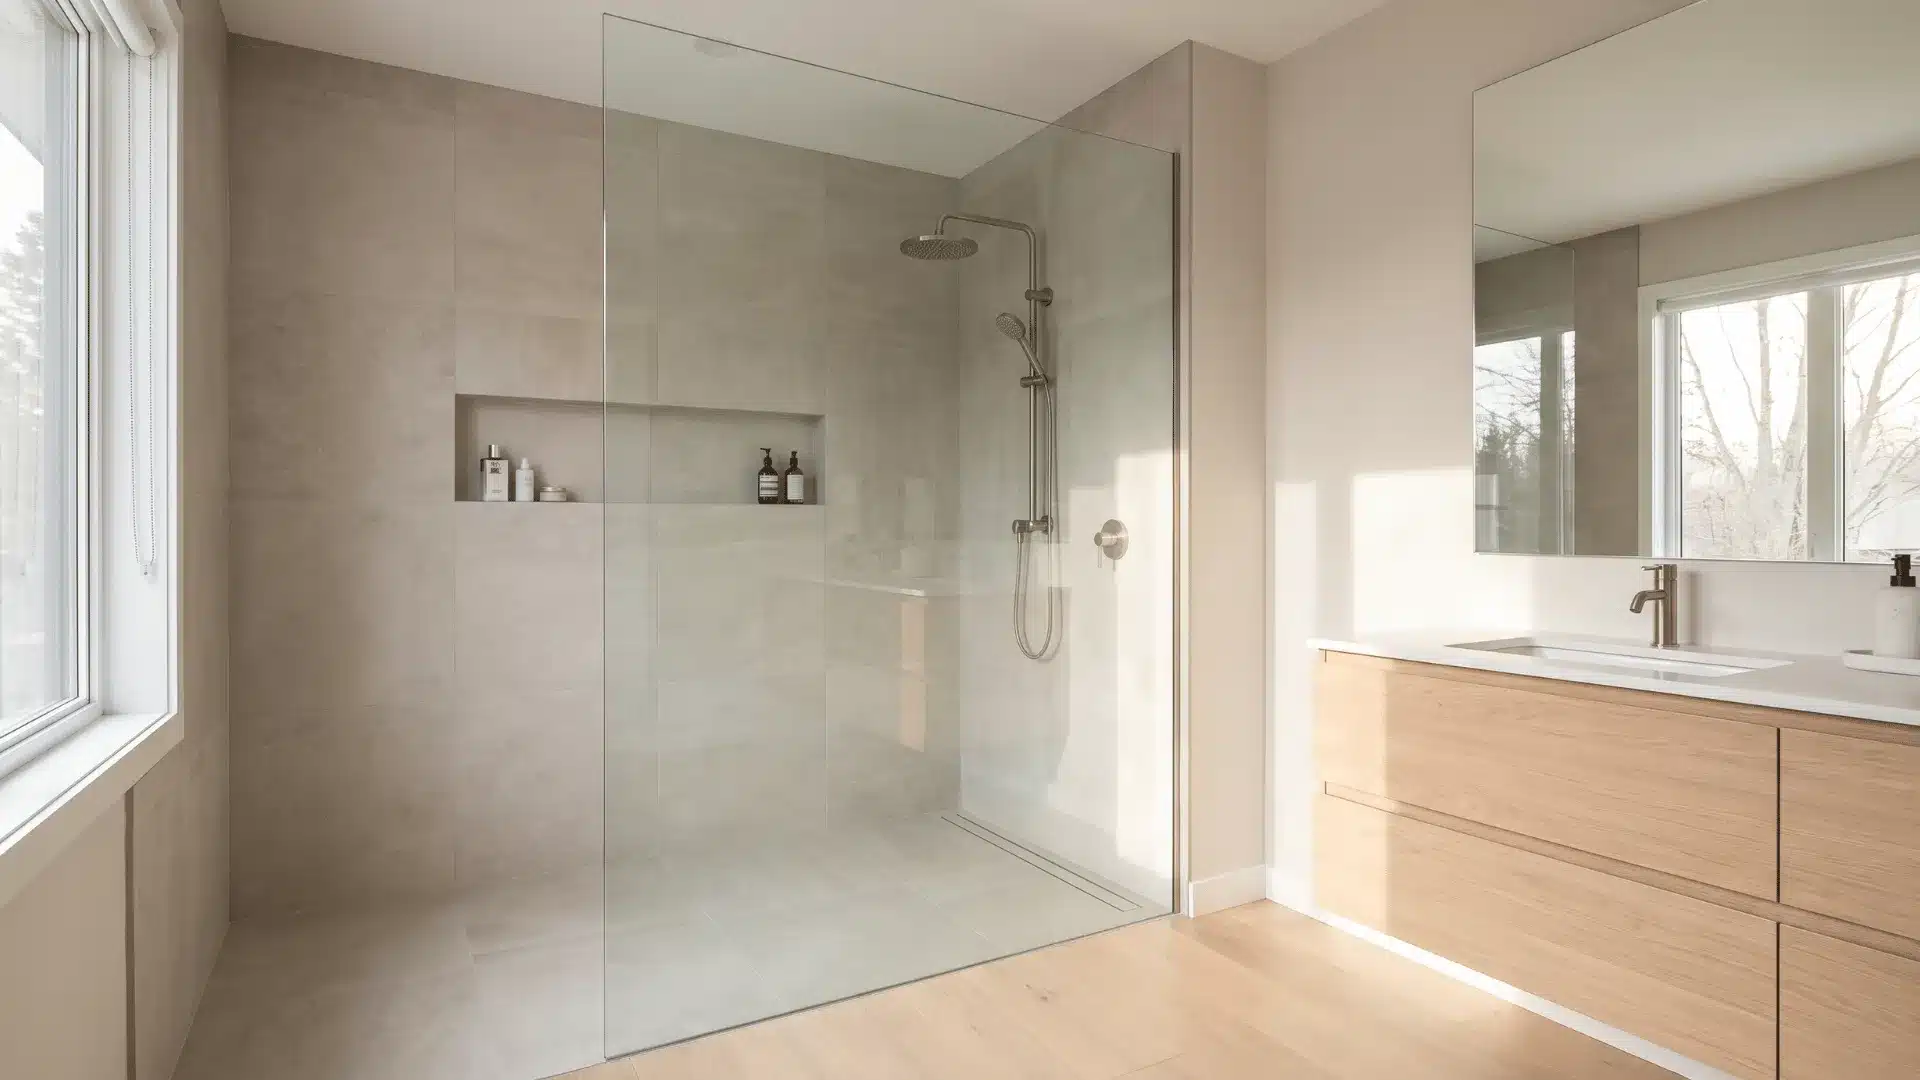
One fixed glass panel can control spray without making the shower feel closed in. It keeps the tile and fittings in view and protects nearby surfaces. This works best when the panel sits between the showerhead and the area most likely to get wet.
| Best for | Medium-size bathrooms |
| Main benefit | Keeps the room open while helping control spray |
| Defining feature | One clear frameless fixed glass screen |
2. Create a Completely Open Wet Room
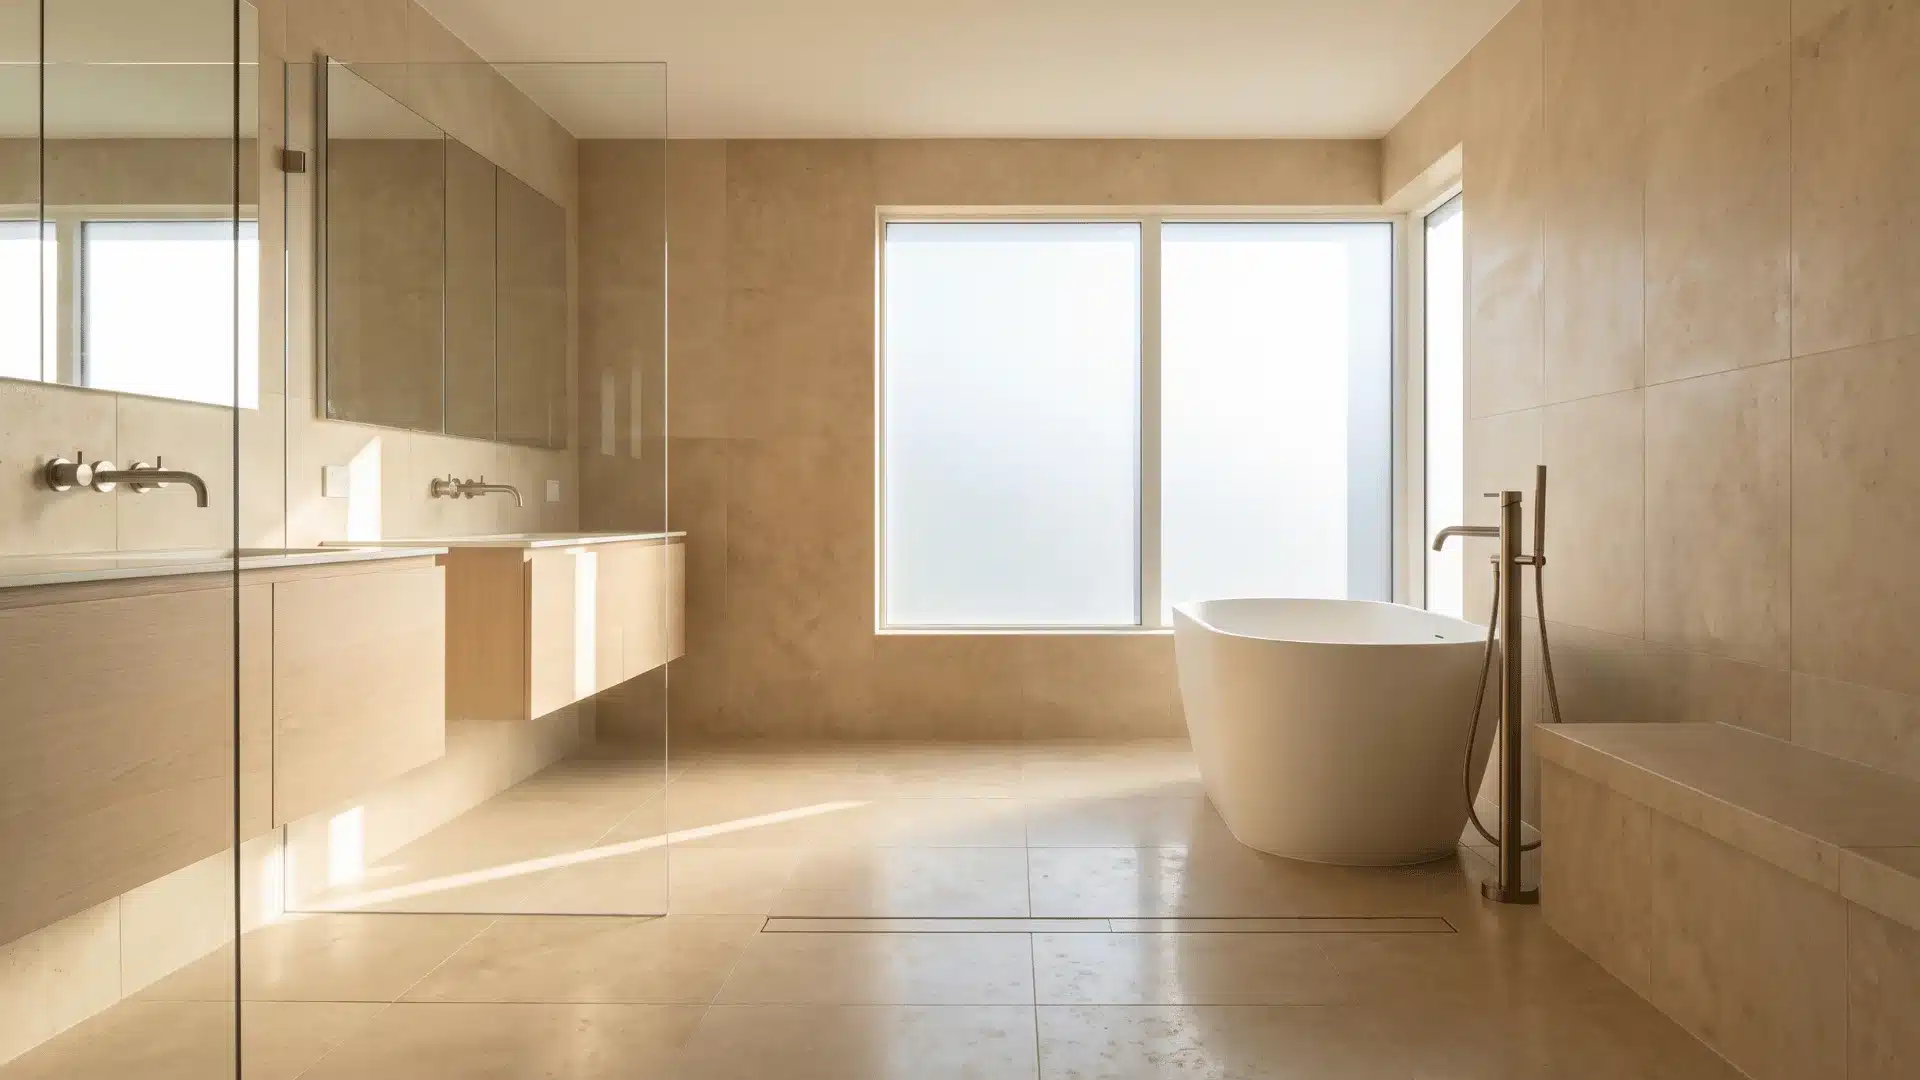
A full wet room treats the entire bathroom as a single water-safe space, rather than limiting waterproofing to the shower alone.
The open shower may sit beside other fittings, with careful floor slope and slim glass used only where nearby surfaces need protection. This approach pairs well with other small bathroom remodel ideas built around tight floor plans.
| Best for | Large bathrooms and full remodels |
| Main benefit | Creates one open, water-safe bathing area |
| Defining feature | The wider room forms one waterproofed area |
3. Tuck the Shower Into a Corner
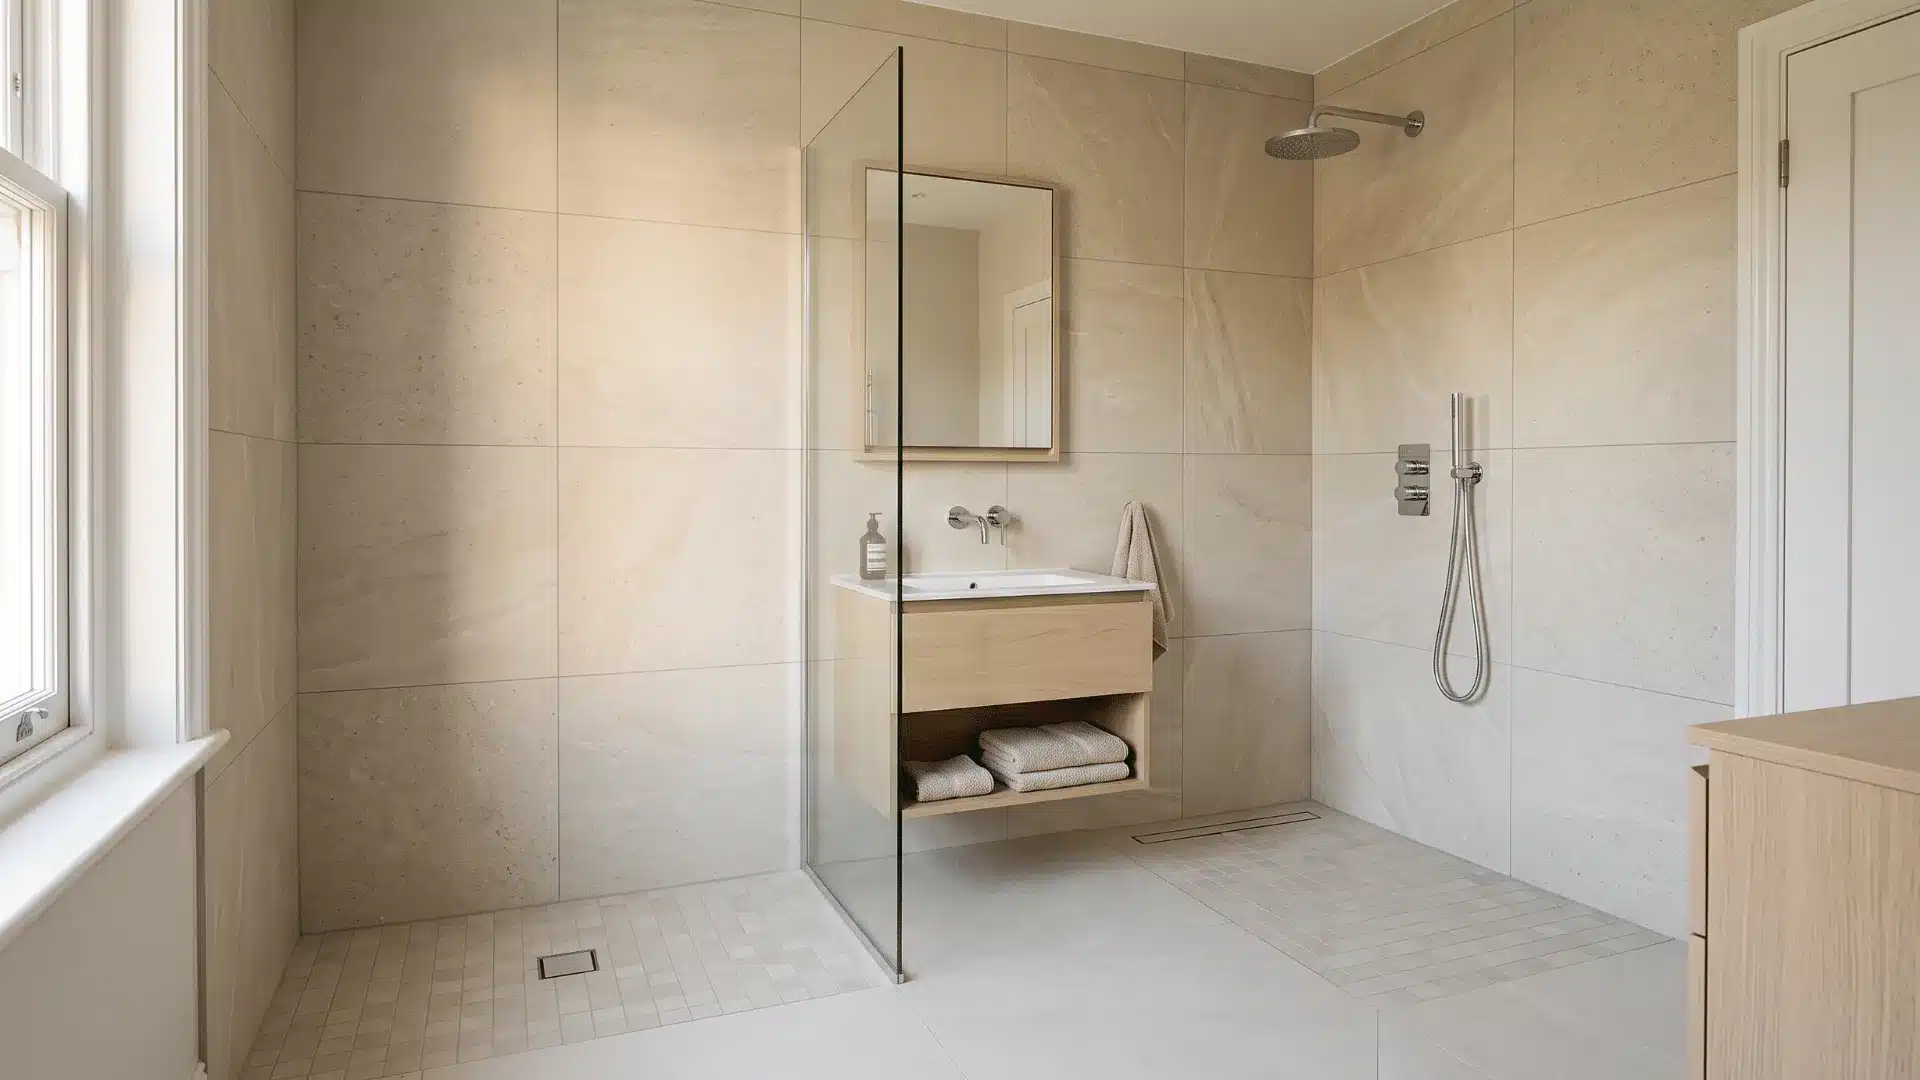
A corner shower makes good use of space that might otherwise go unused. A short glass panel between the shower and sink can help limit spray. Light wall colors and simple finishes can also help the corner feel less tight or heavy.
| Best for | Small and medium bathrooms |
| Main benefit | Uses limited floor space well |
| Defining feature | The shower occupies two joining walls |
4. Build a Deep Doorless Shower Alcove
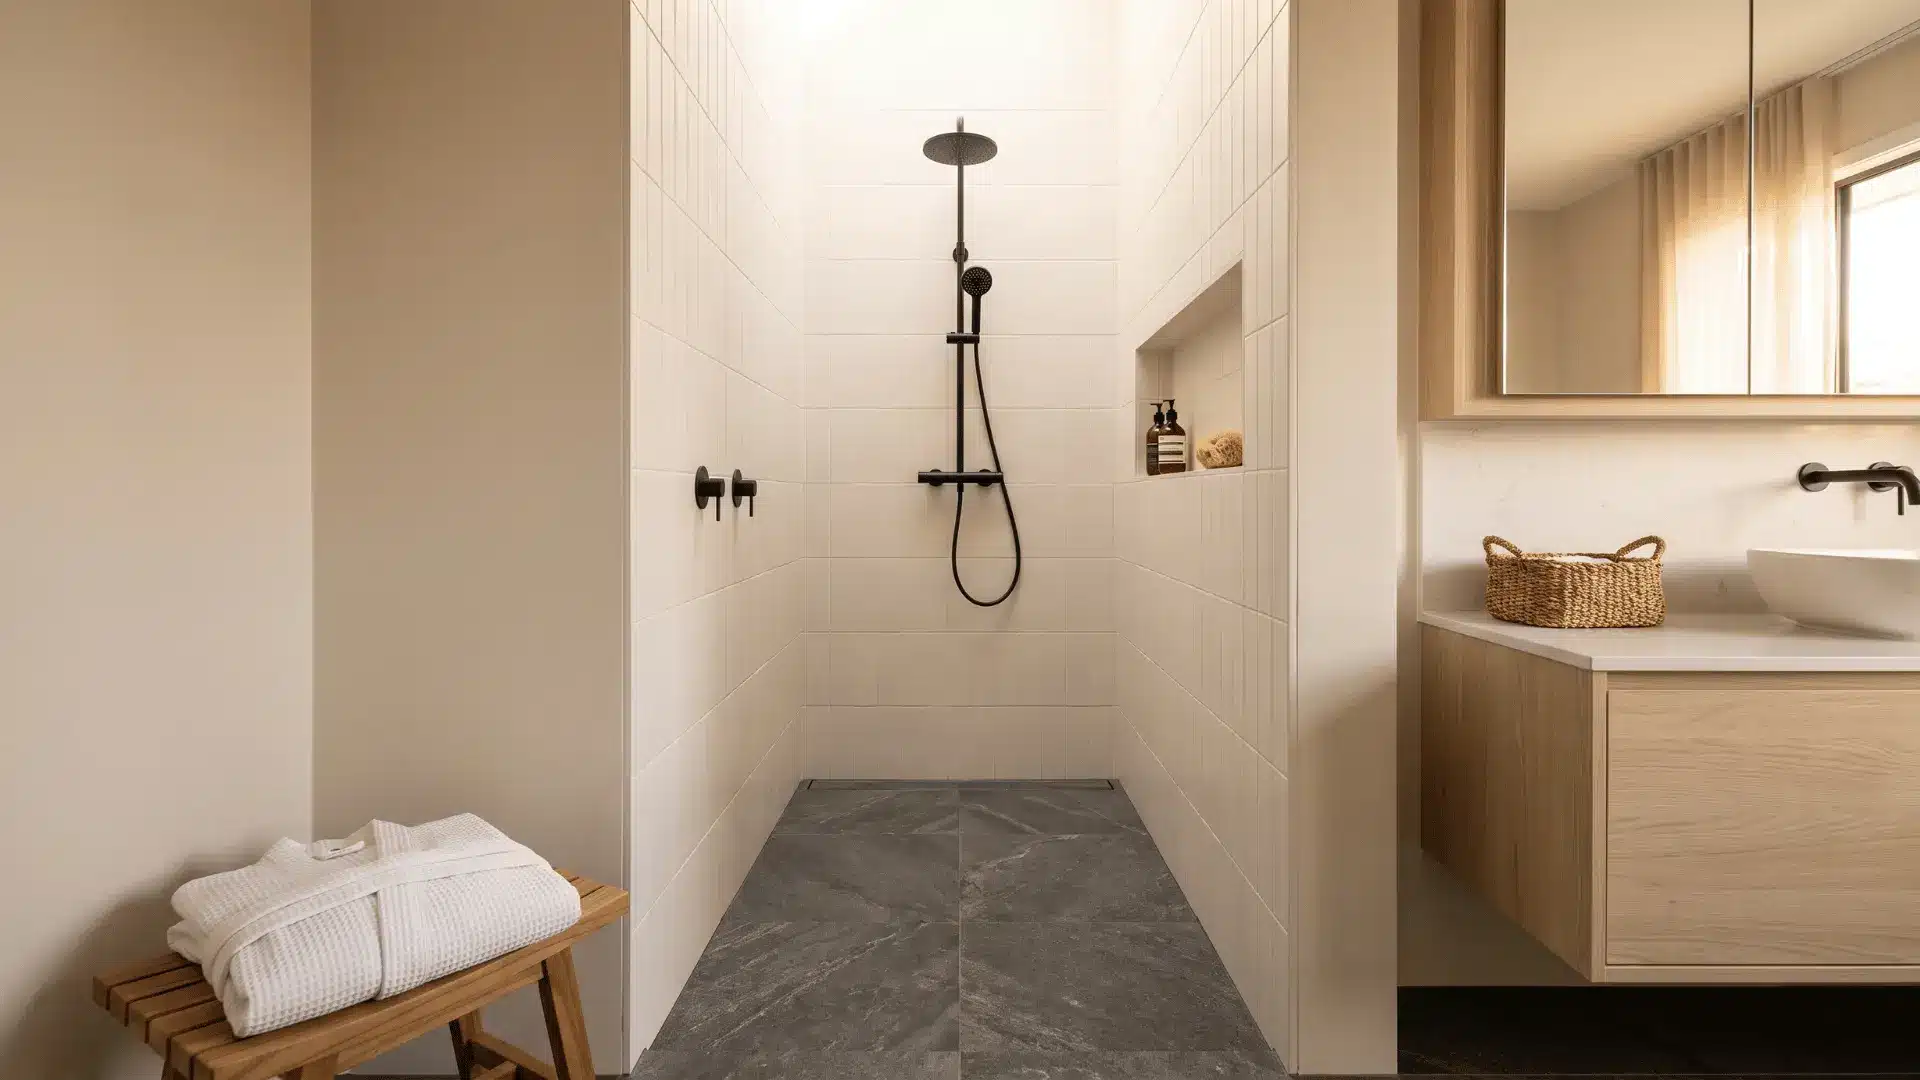
A deep alcove uses three solid walls and leaves one side open. The wall depth gives more privacy and helps keep water inside the shower. It is also a useful choice when you prefer tile walls over a large glass panel.
| Best for | Bathrooms where glass is not wanted |
| Main benefit | Adds privacy and helps contain spray |
| Defining feature | Three solid walls form a recessed shower |
Takeaway: Set the showerhead well inside the alcove and away from the entry.
5. Add a Tiled Privacy Half-Wall
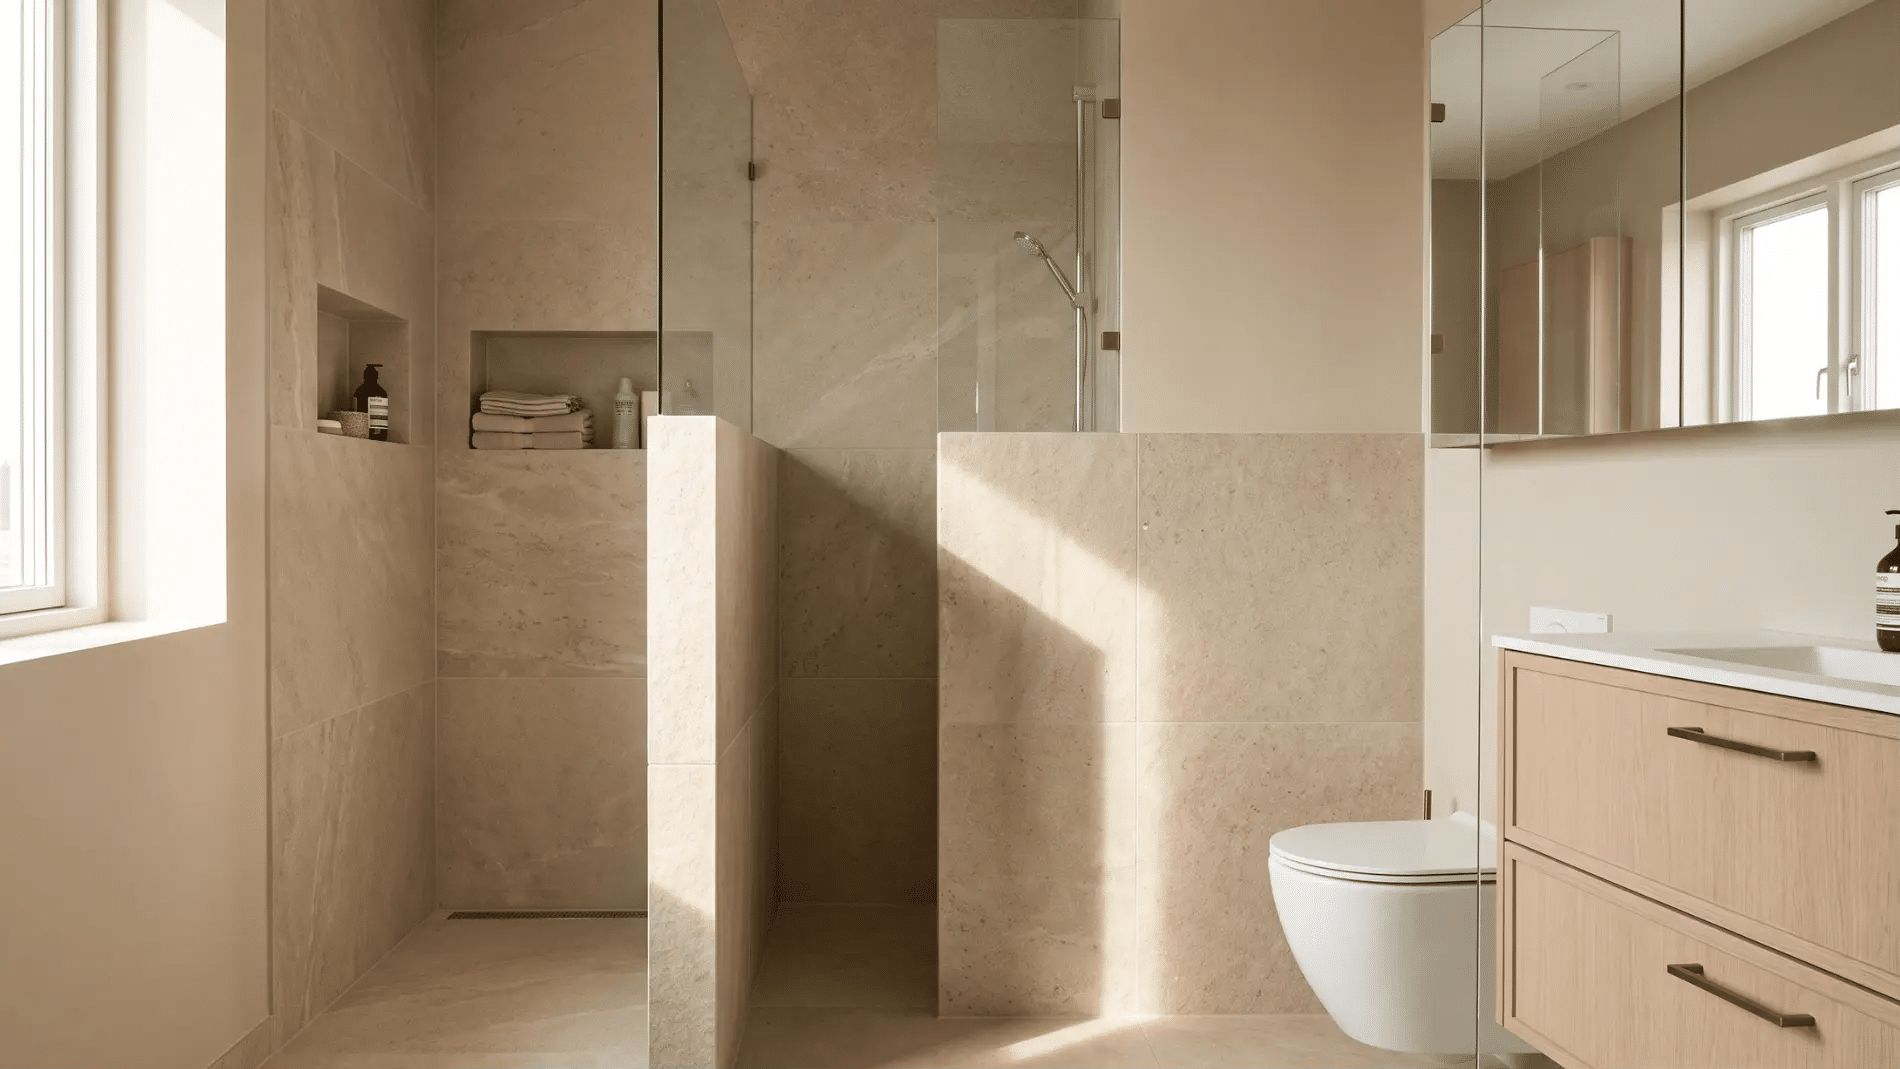
A tiled half-wall provides solid cover between the shower and a toilet, vanity, or doorway. Unlike privacy glass, it fully blocks the view through its lower section. It may also hide plumbing or a recessed niche while leaving the upper room open.
| Best for | Shared bathrooms |
| Main benefit | Adds solid privacy without building a full-height wall |
| Defining feature | A solid partial-height tiled divider |
6. Use Frosted or Patterned Glass for Privacy
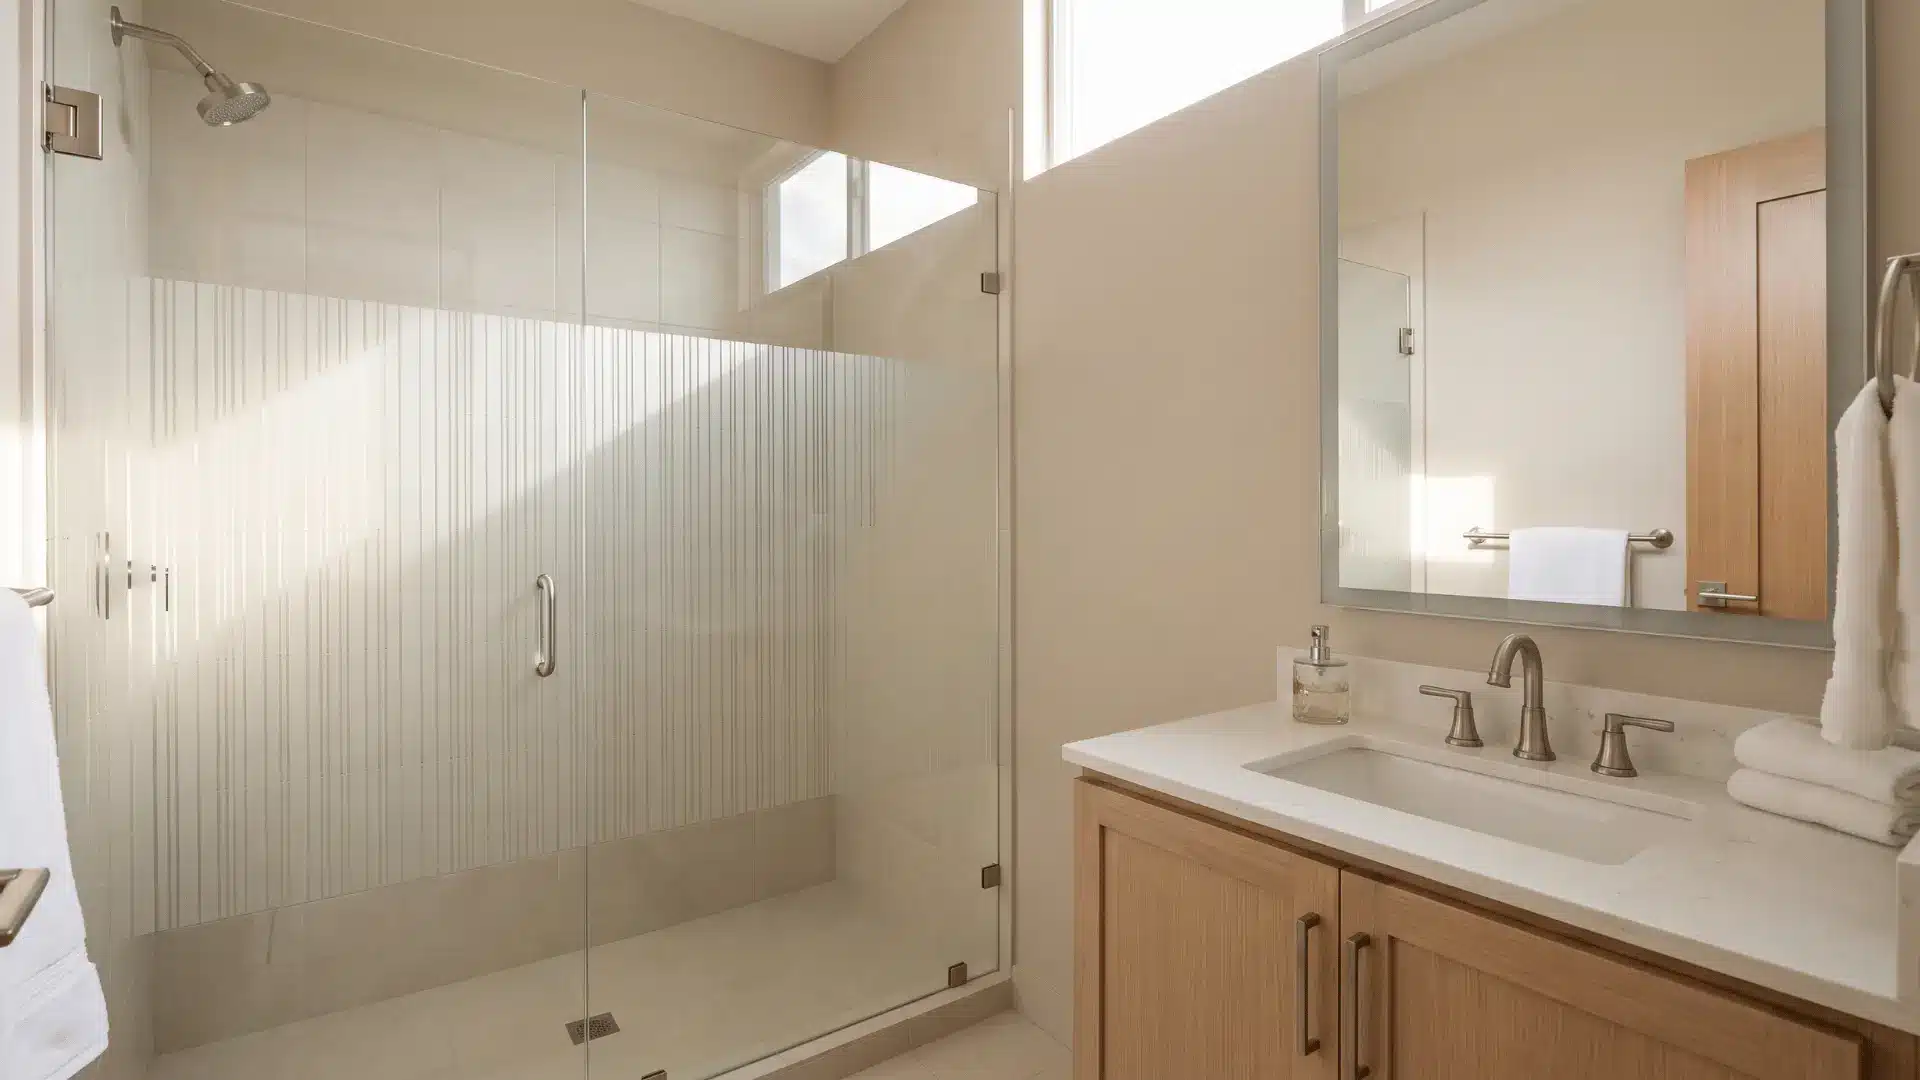
Frosted or patterned glass screens the bathing area without creating a solid visual block. It still allows light to pass through, which makes it useful in compact bathrooms. Partial frosting can cover the main showering area while leaving the upper glass clear.
| Best for | Compact and shared bathrooms |
| Main benefit | Adds privacy while keeping light in the room |
| Defining feature | A translucent sheet-glass screen |
7. Define the Shower With a Black Grid Panel
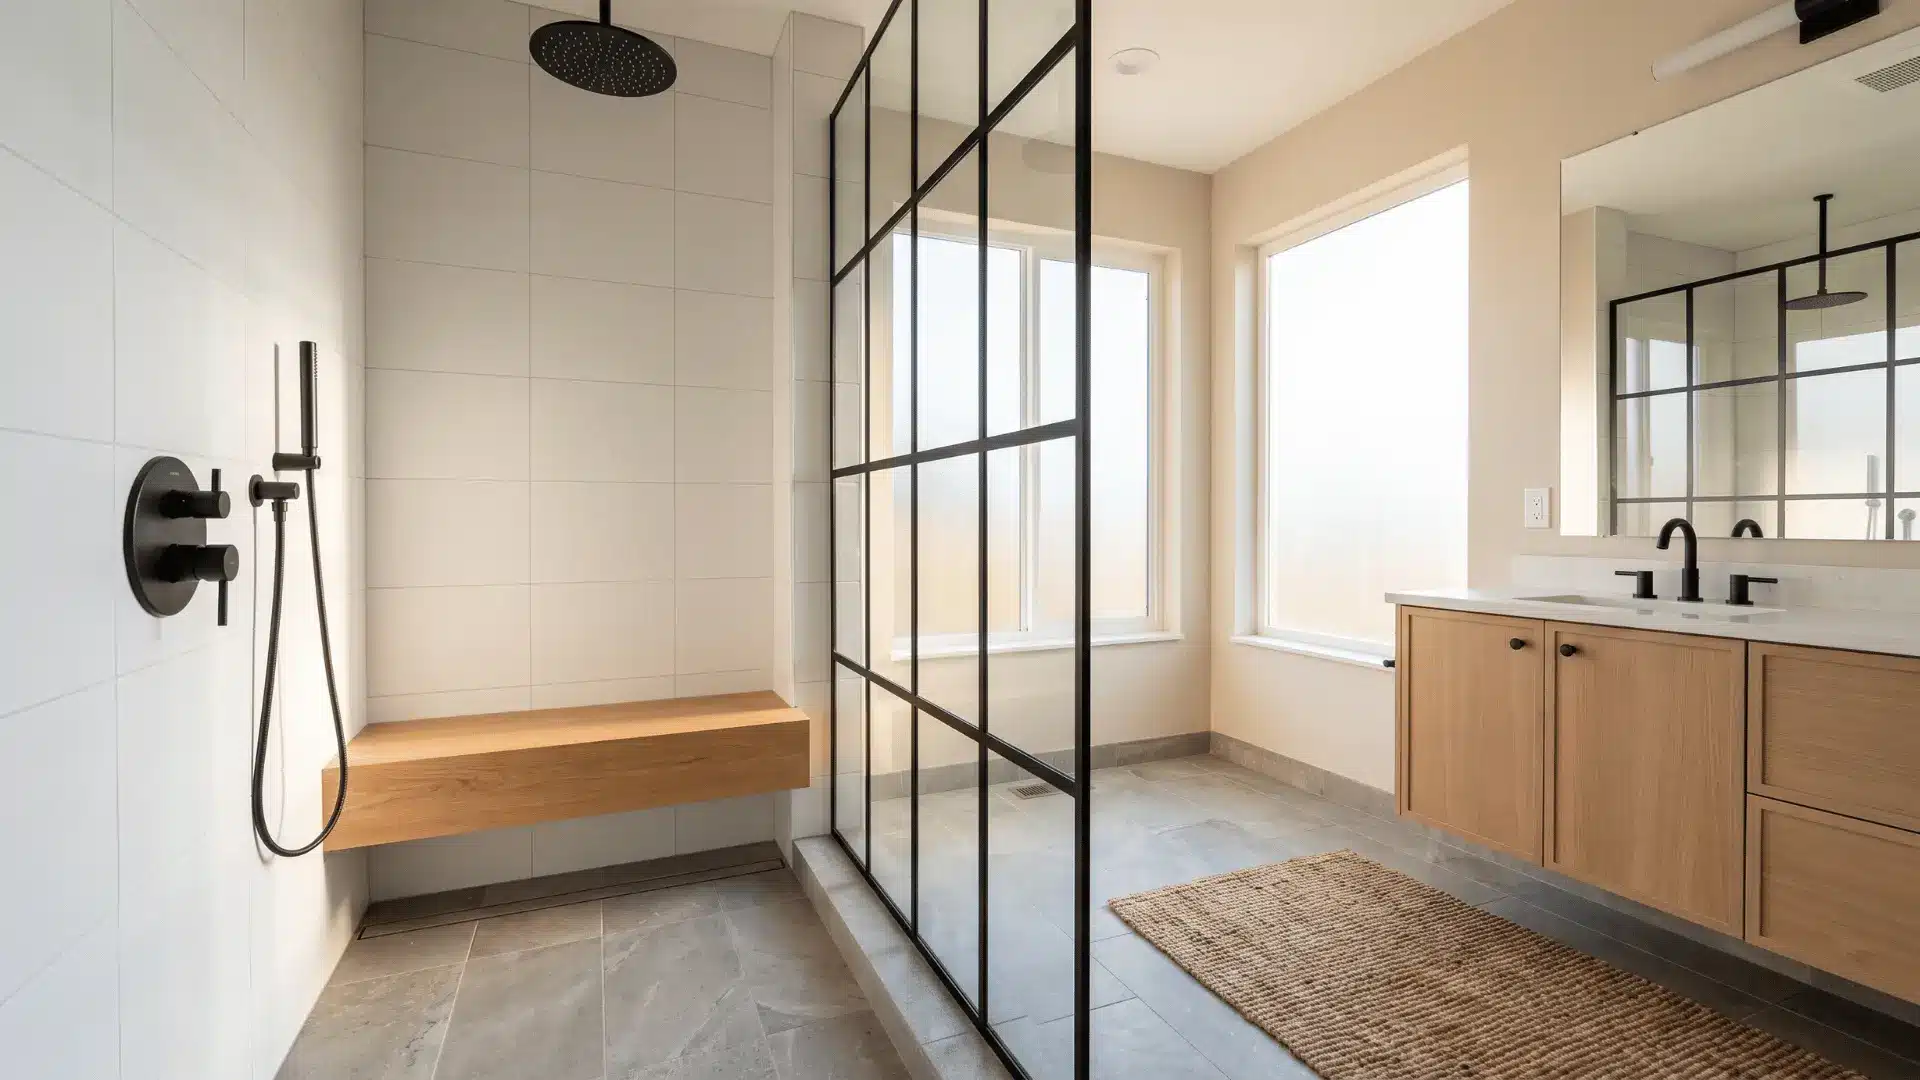
A black grid panel is defined by its visible frame rather than the glass itself. Use the dark lines to outline the shower and repeat the finish on taps, mirrors, or lighting so it reads as a planned design feature.
| Best for | Industrial and modern bathrooms |
| Main benefit | Adds structure without blocking the room |
| Defining feature | A fixed glass screen with dark grid framing |
8. Leave a Doorless Center Entry
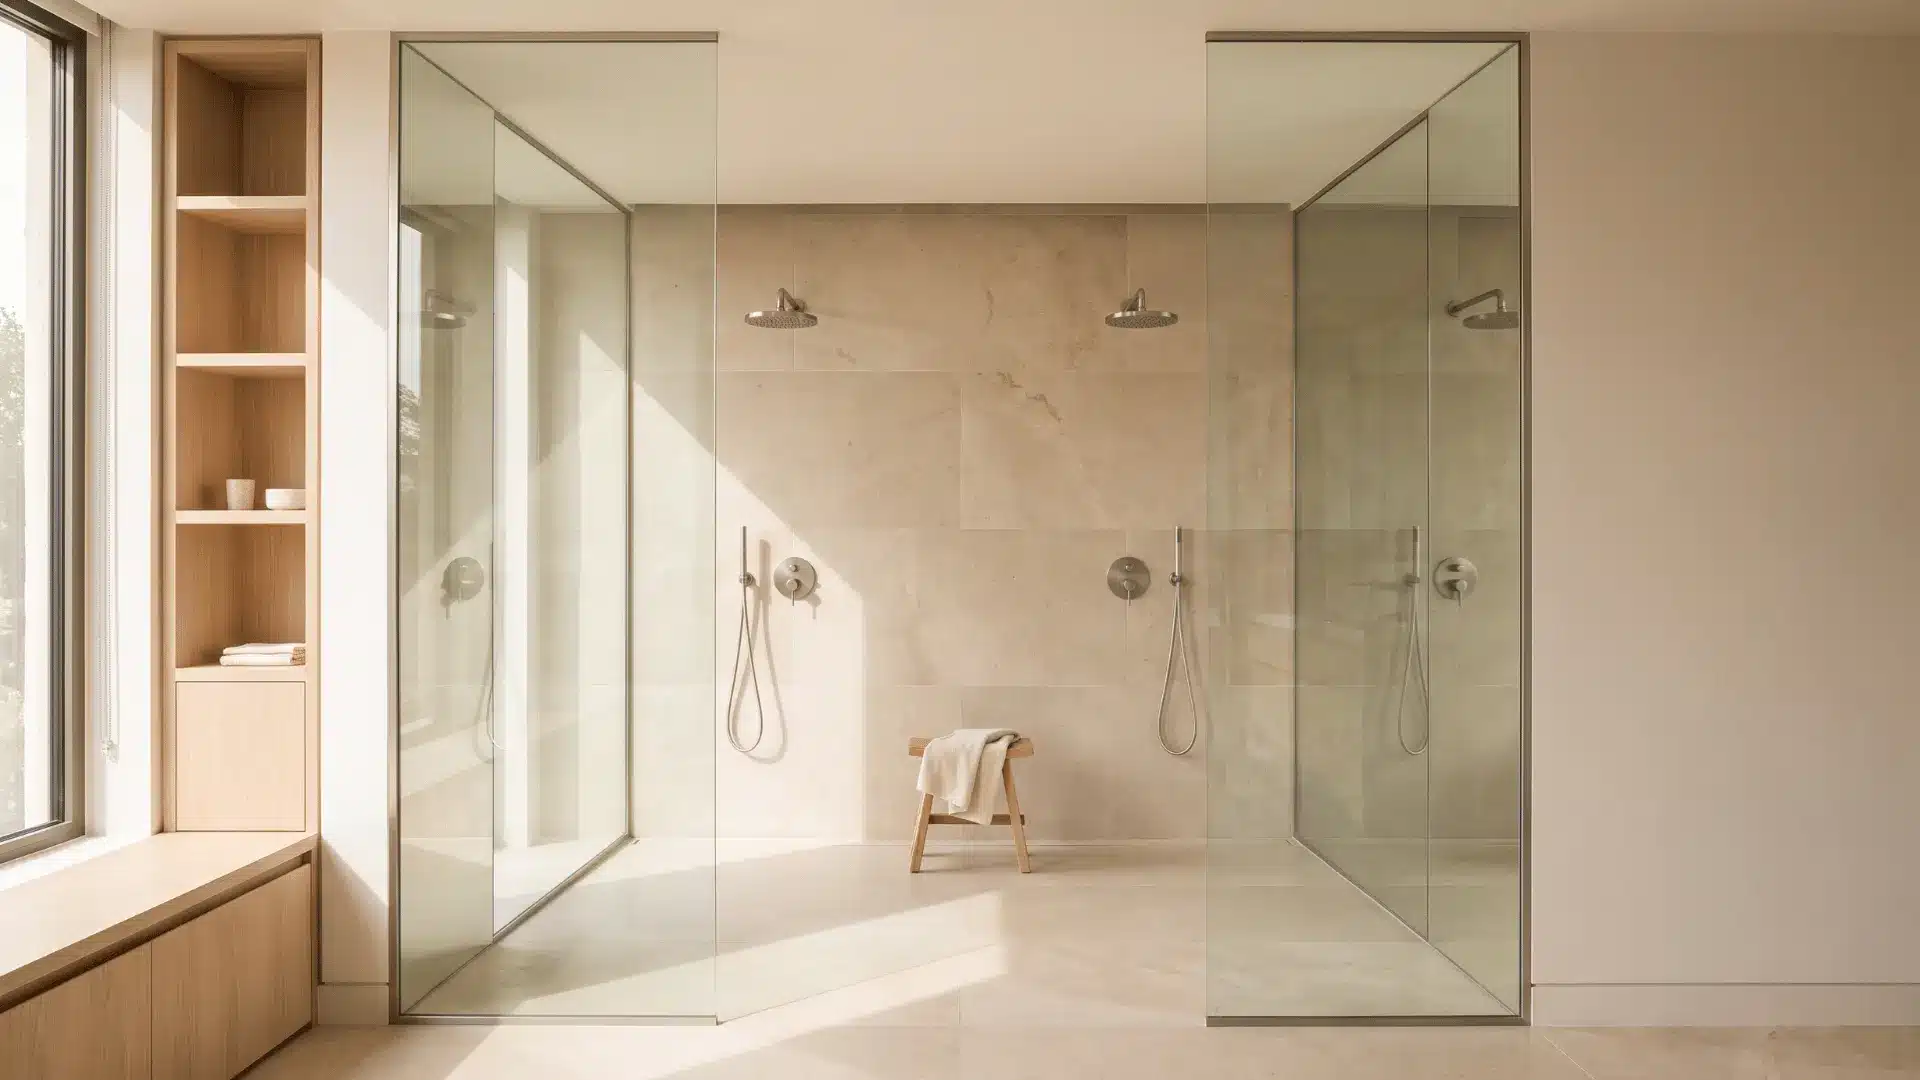
Two fixed glass panels can create a balanced opening in the middle of a wide shower. Unlike a single-side panel, this layout protects both sides of the entrance and provides the shower with a clear central access point.
| Best for | Balanced wet-room plans |
| Main benefit | Gives easy access while helping control water |
| Defining feature | Two fixed panels create a central opening |
9. Combine the Tub and Shower in One Wet Zone
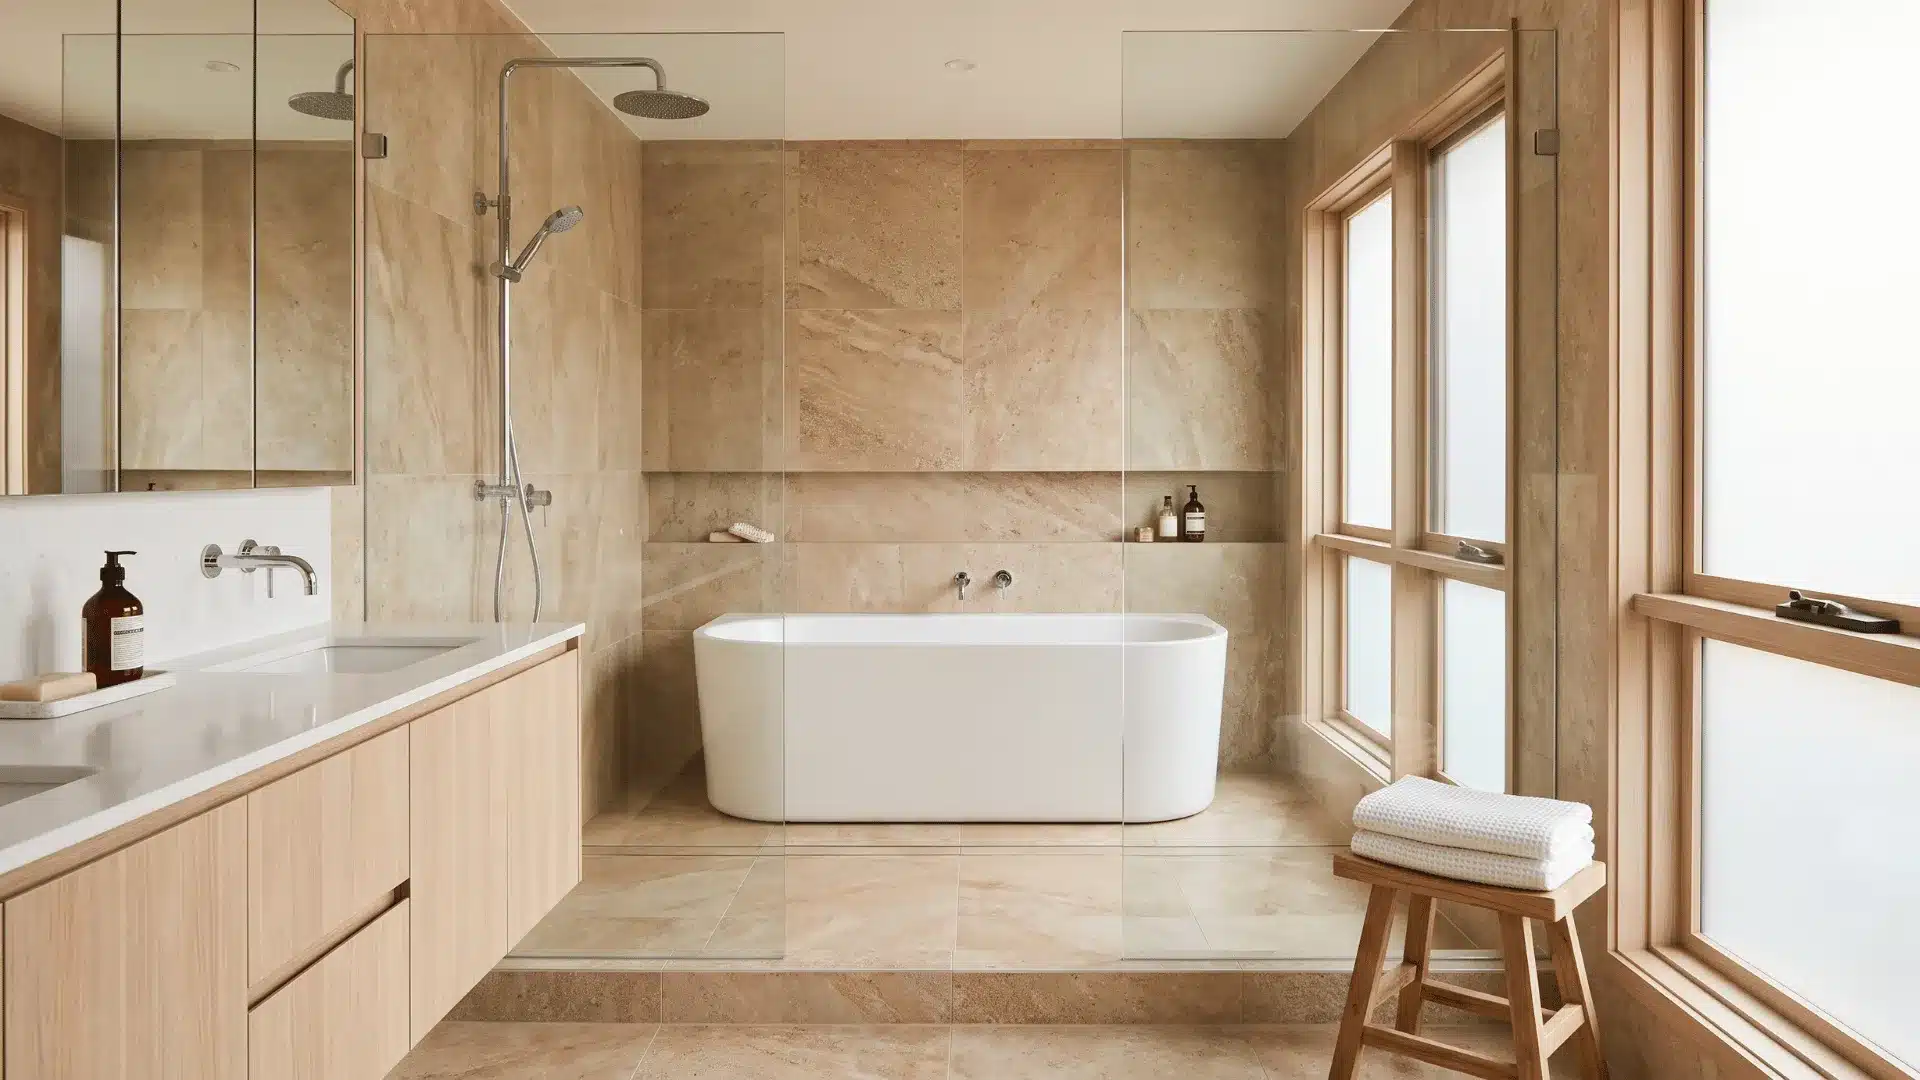
This layout places the tub and shower inside the same waterproofed zone, rather than treating the whole bathroom as a wet room. Repeating the wall and floor finishes helps the two features feel connected. Leave clear space around the tub for movement and cleaning.
| Best for | Primary bathrooms with both a tub and shower |
| Main benefit | Combines two bathing features in one protected zone |
| Defining feature | The tub and shower share one waterproofed area |
10. Design a Double Doorless Shower
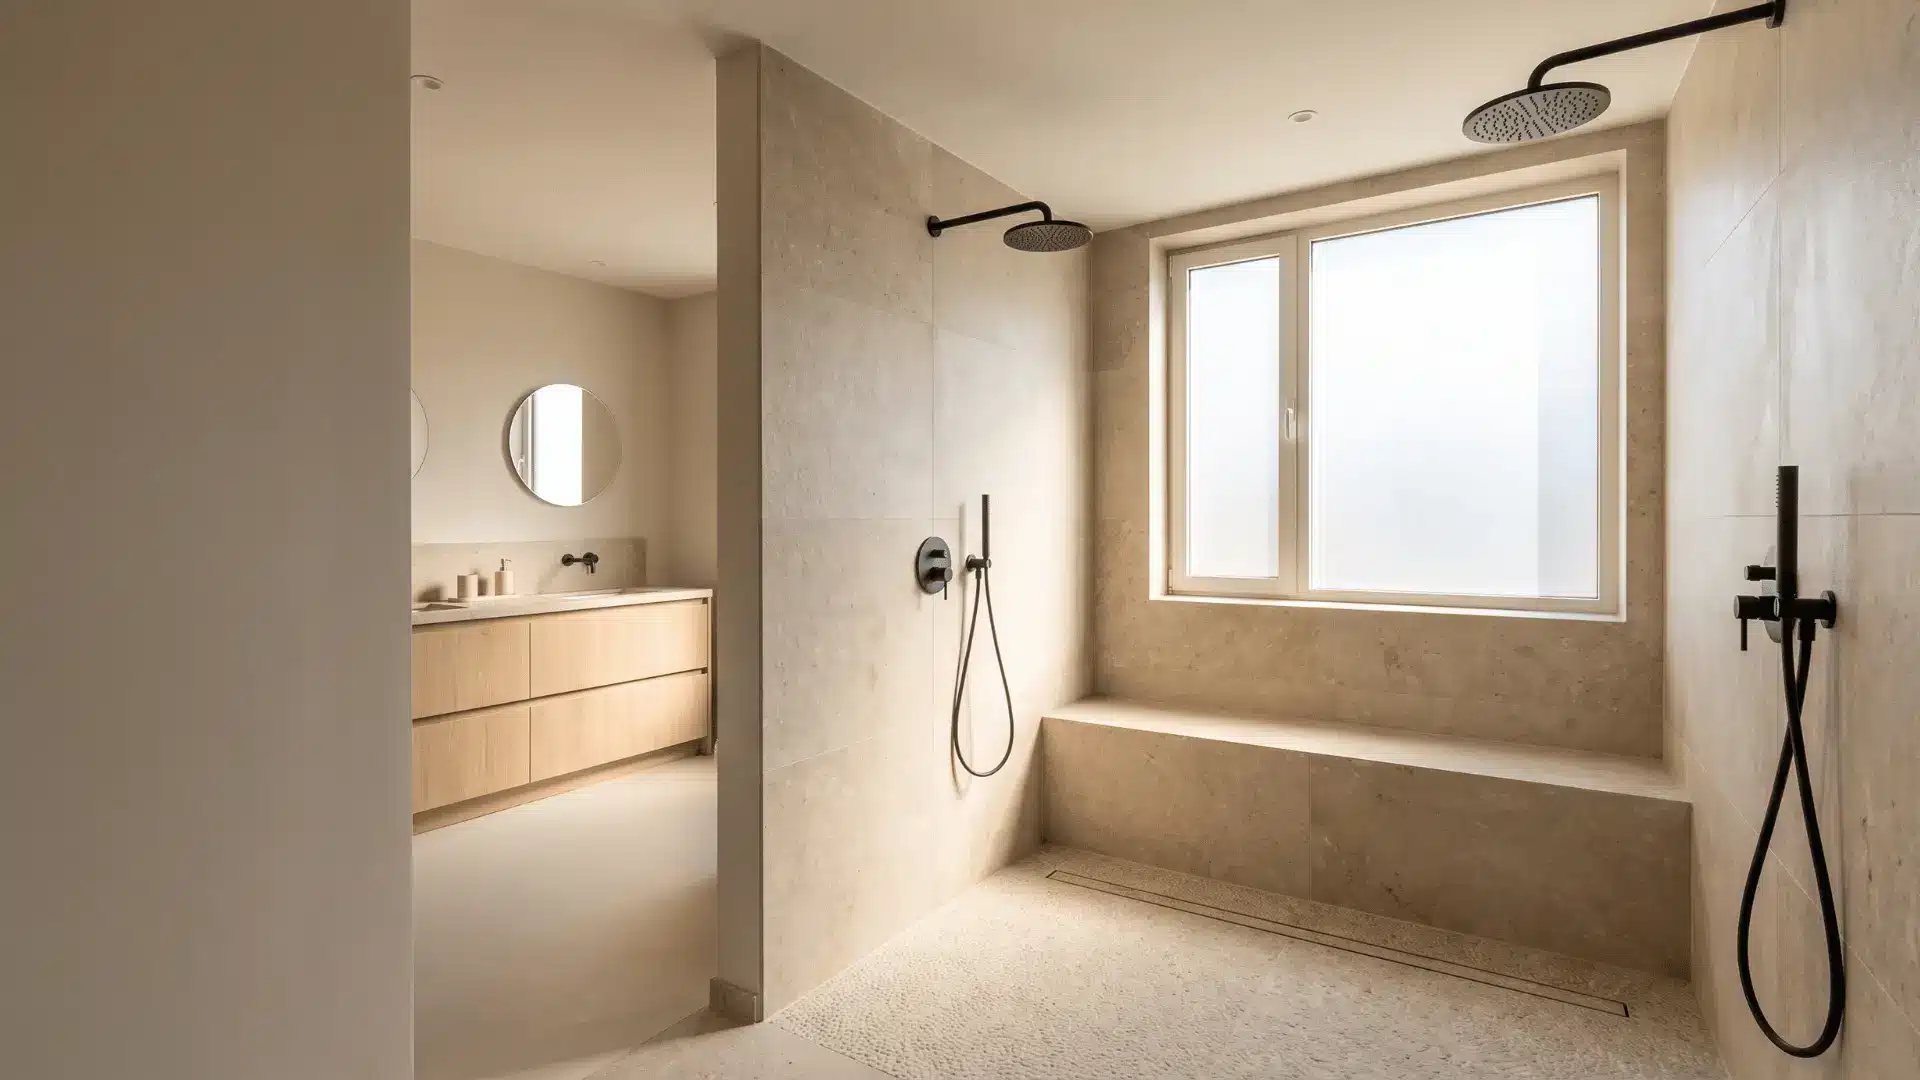
A double shower provides two spray points in one shared area. The two sides can sit around a central tub or along one wide wall. Separate controls give each person more comfort, while the open entry keeps the full bathing area easy to reach.
Homeowners planning a full primary suite update often look at wider master bathroom remodel ideas before settling on a double shower layout.
| Best for | Couples and large primary suites |
| Main benefit | Allows two people to shower at the same time |
| Defining feature | Two separate showering stations share one open area |
11. Place the Shower Across the Far Wall
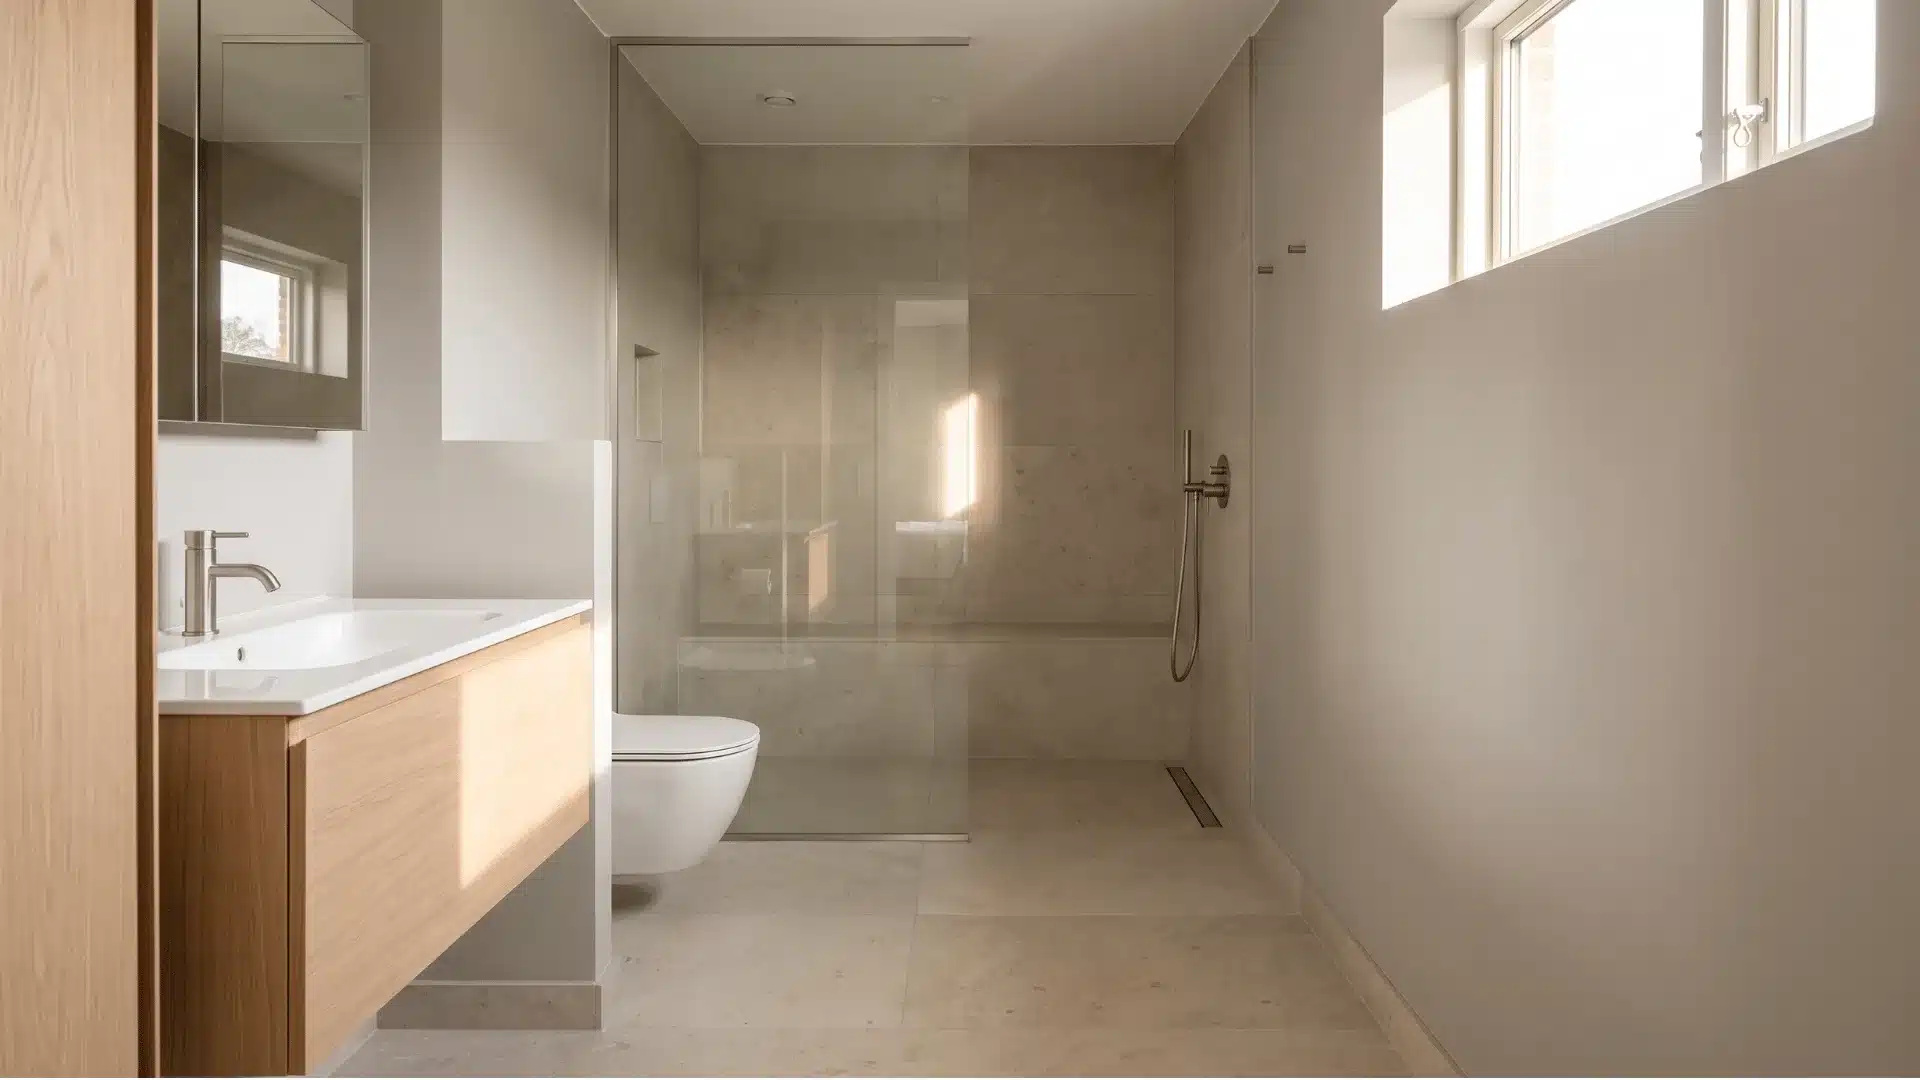
In a long bathroom, placing the shower across the far wall can use the room’s width well. A clear panel protects the toilet or vanity while allowing light to move through the space. This setup may also make the far end feel less narrow.
The U.S. Access Board’s guide to bathing rooms outlines clearance and seat details that many accessible shower designs follow.
| Best for | Long, narrow bathrooms |
| Main benefit | Uses the full width without blocking light |
| Defining feature | The shower spans the room’s end wall |
12. Make It Curbless and Accessible
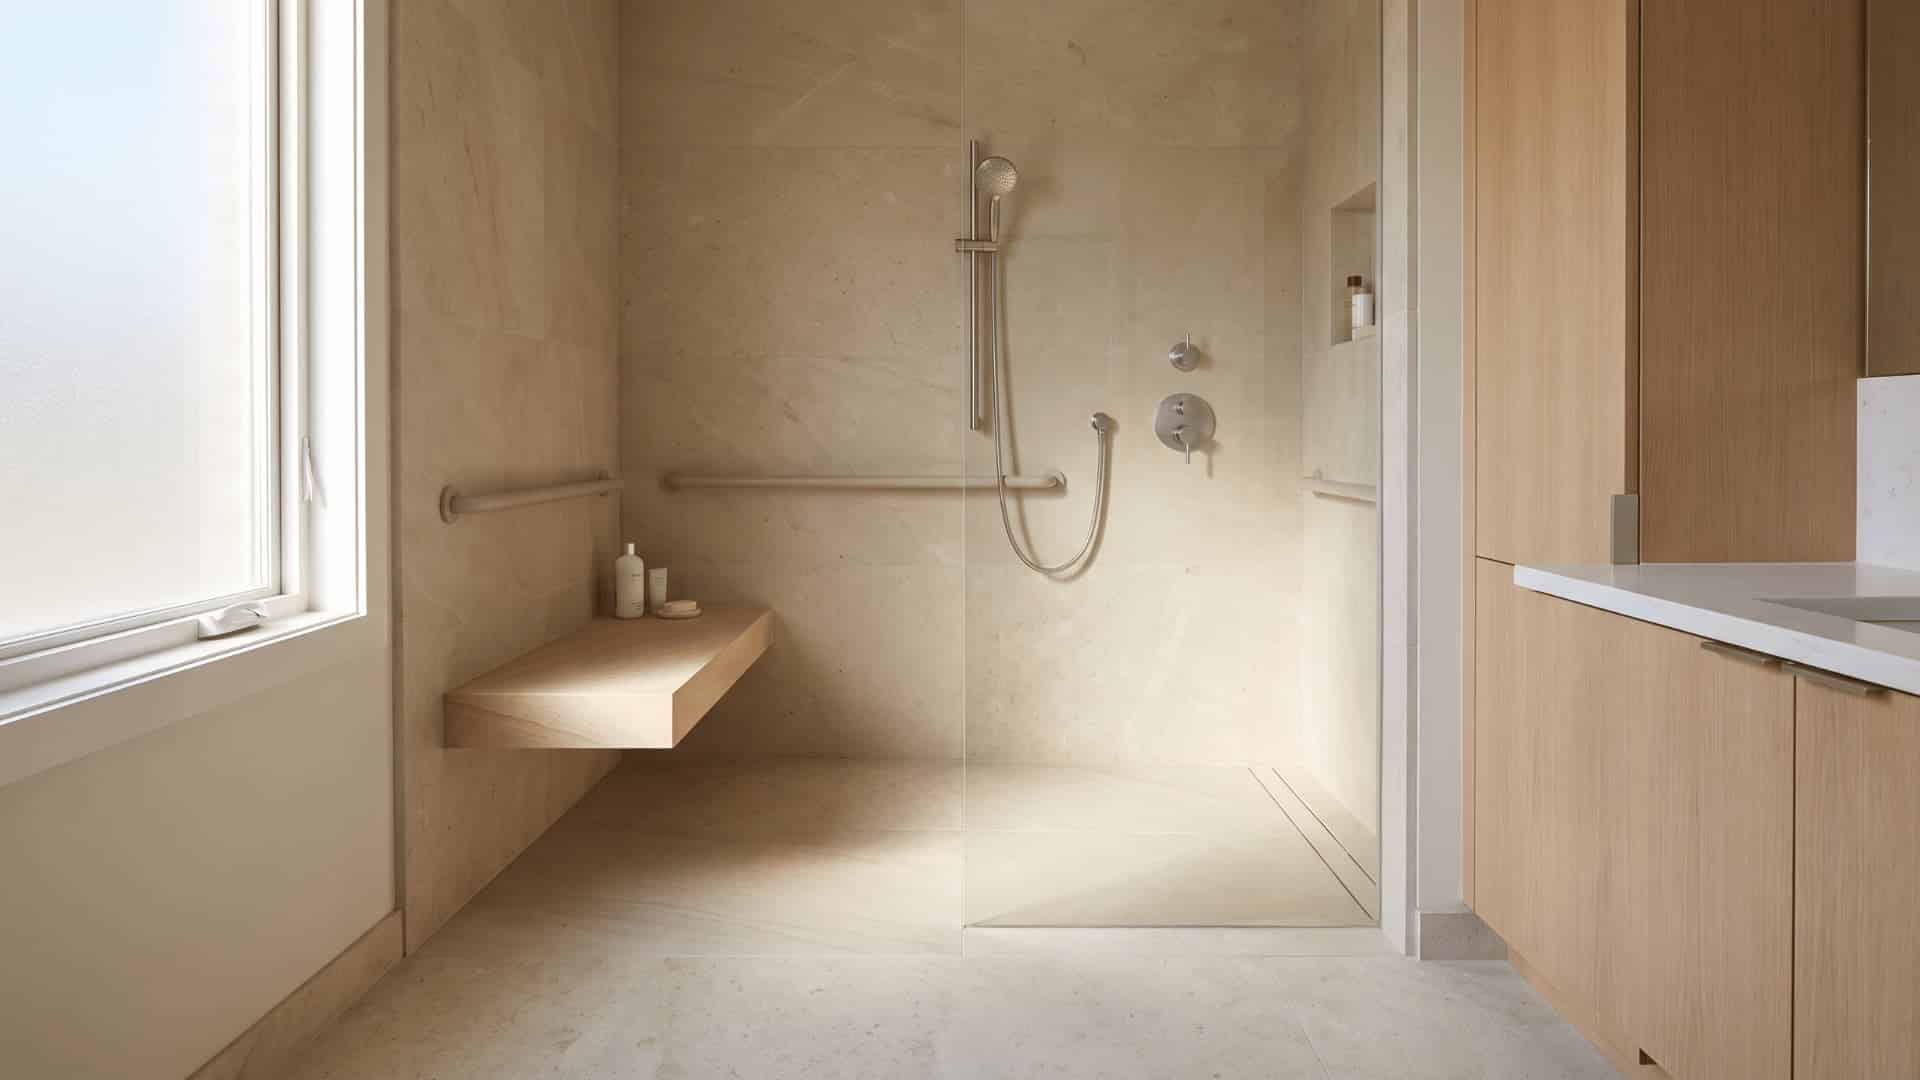
A curbless shower removes the raised step between the bathroom and shower. This can make entry easier for people with limited movement. A wide opening, reachable controls, a bench, and suitable floor tile can make the space safer and easier to use.
| Best for | Aging in place and mobility needs |
| Main benefit | Removes the entry step and supports easier access |
| Defining feature | A level floor transition with no raised threshold |
Takeaway: Add support inside the wall before the final finish, even if grab bars come later.
13. Add a Built-In or Floating Bench With a Shower Niche
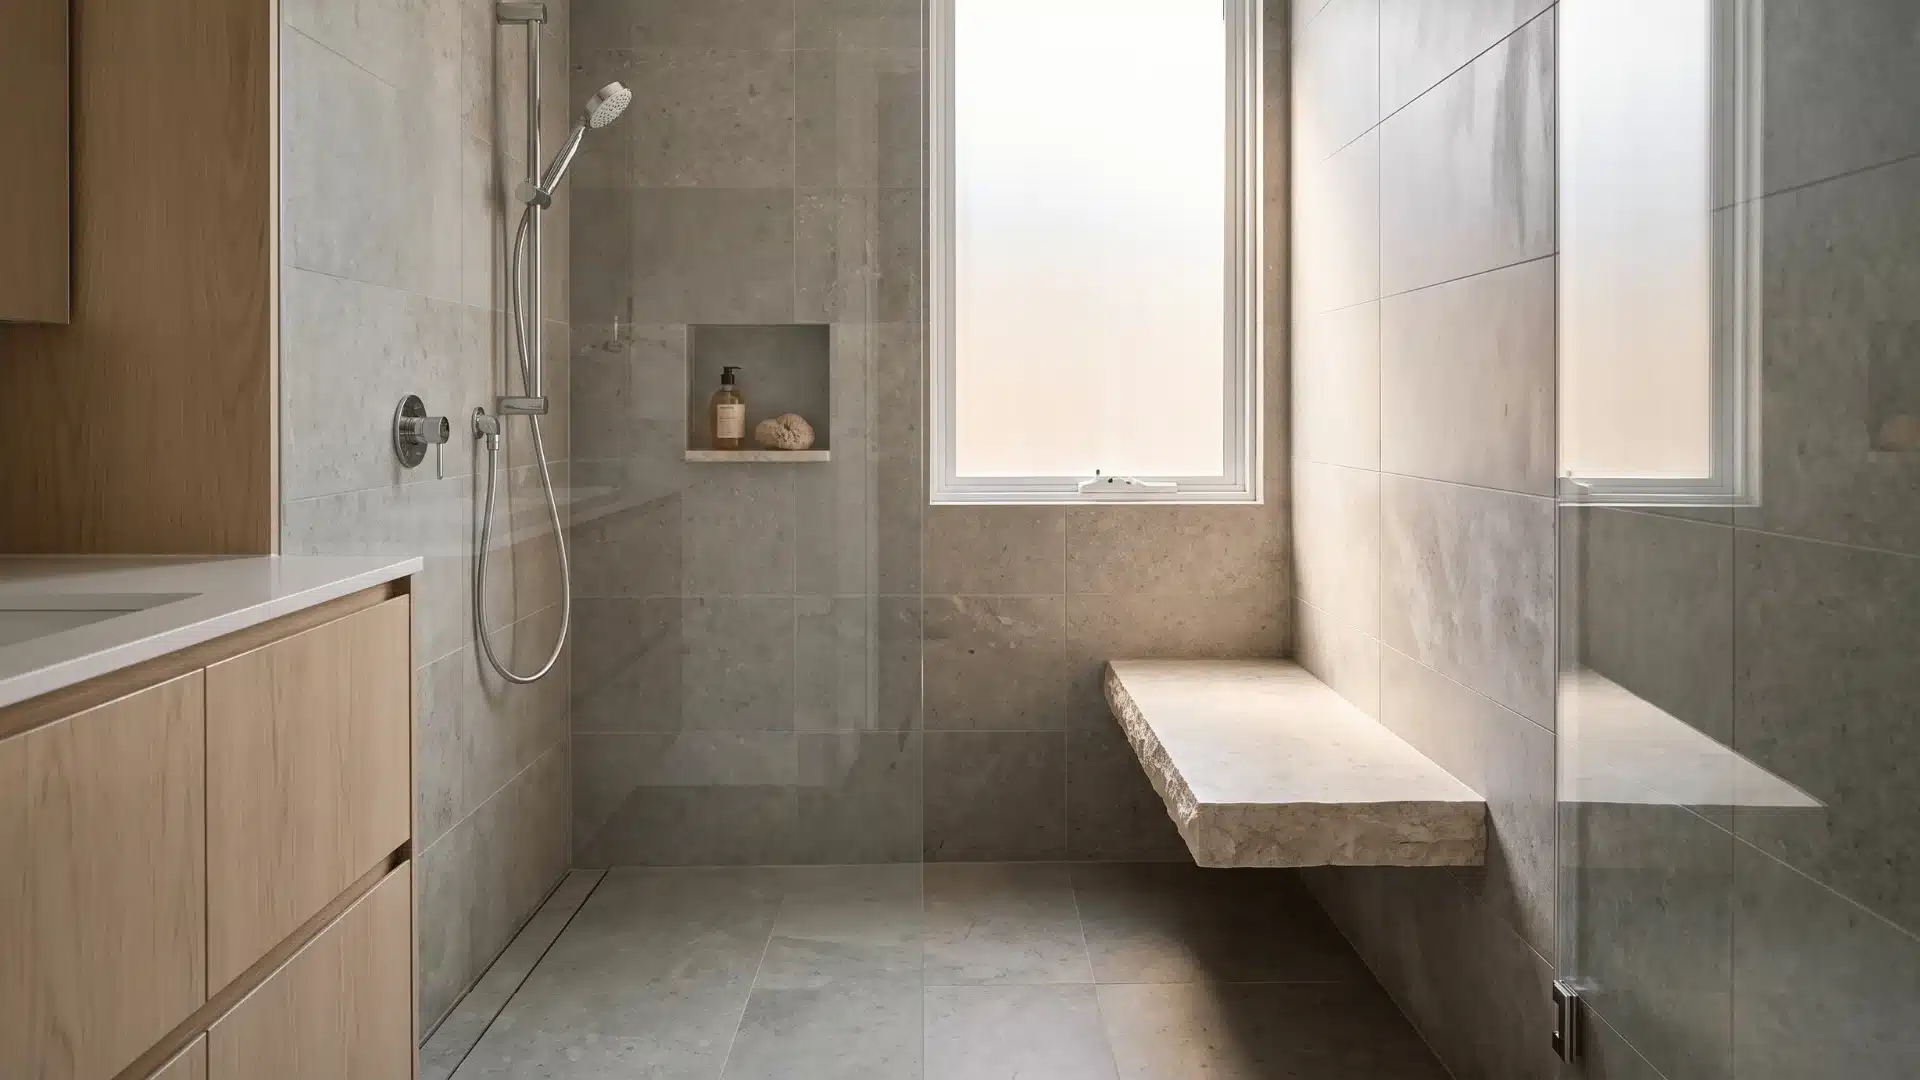
A full built-in bench provides permanent seating, while a recessed niche adds storage within the same wall area. This works best where the shower has enough depth for both features without reducing the entry space.
In a tighter shower, a floating bench offers a smaller seating area without extending to the floor. Its open underside suits compact showers where a full built-in bench would occupy too much floor space.
| Best for | Showers needing seating and built-in storage, or compact showers with less floor space |
| Main benefit | Keeps seating and toiletries in one planned area, with a lighter option for tighter footprints |
| Defining feature | Permanent or wall-mounted seating combined with recessed storage |
14. Add a Slim Curb at the Entrance
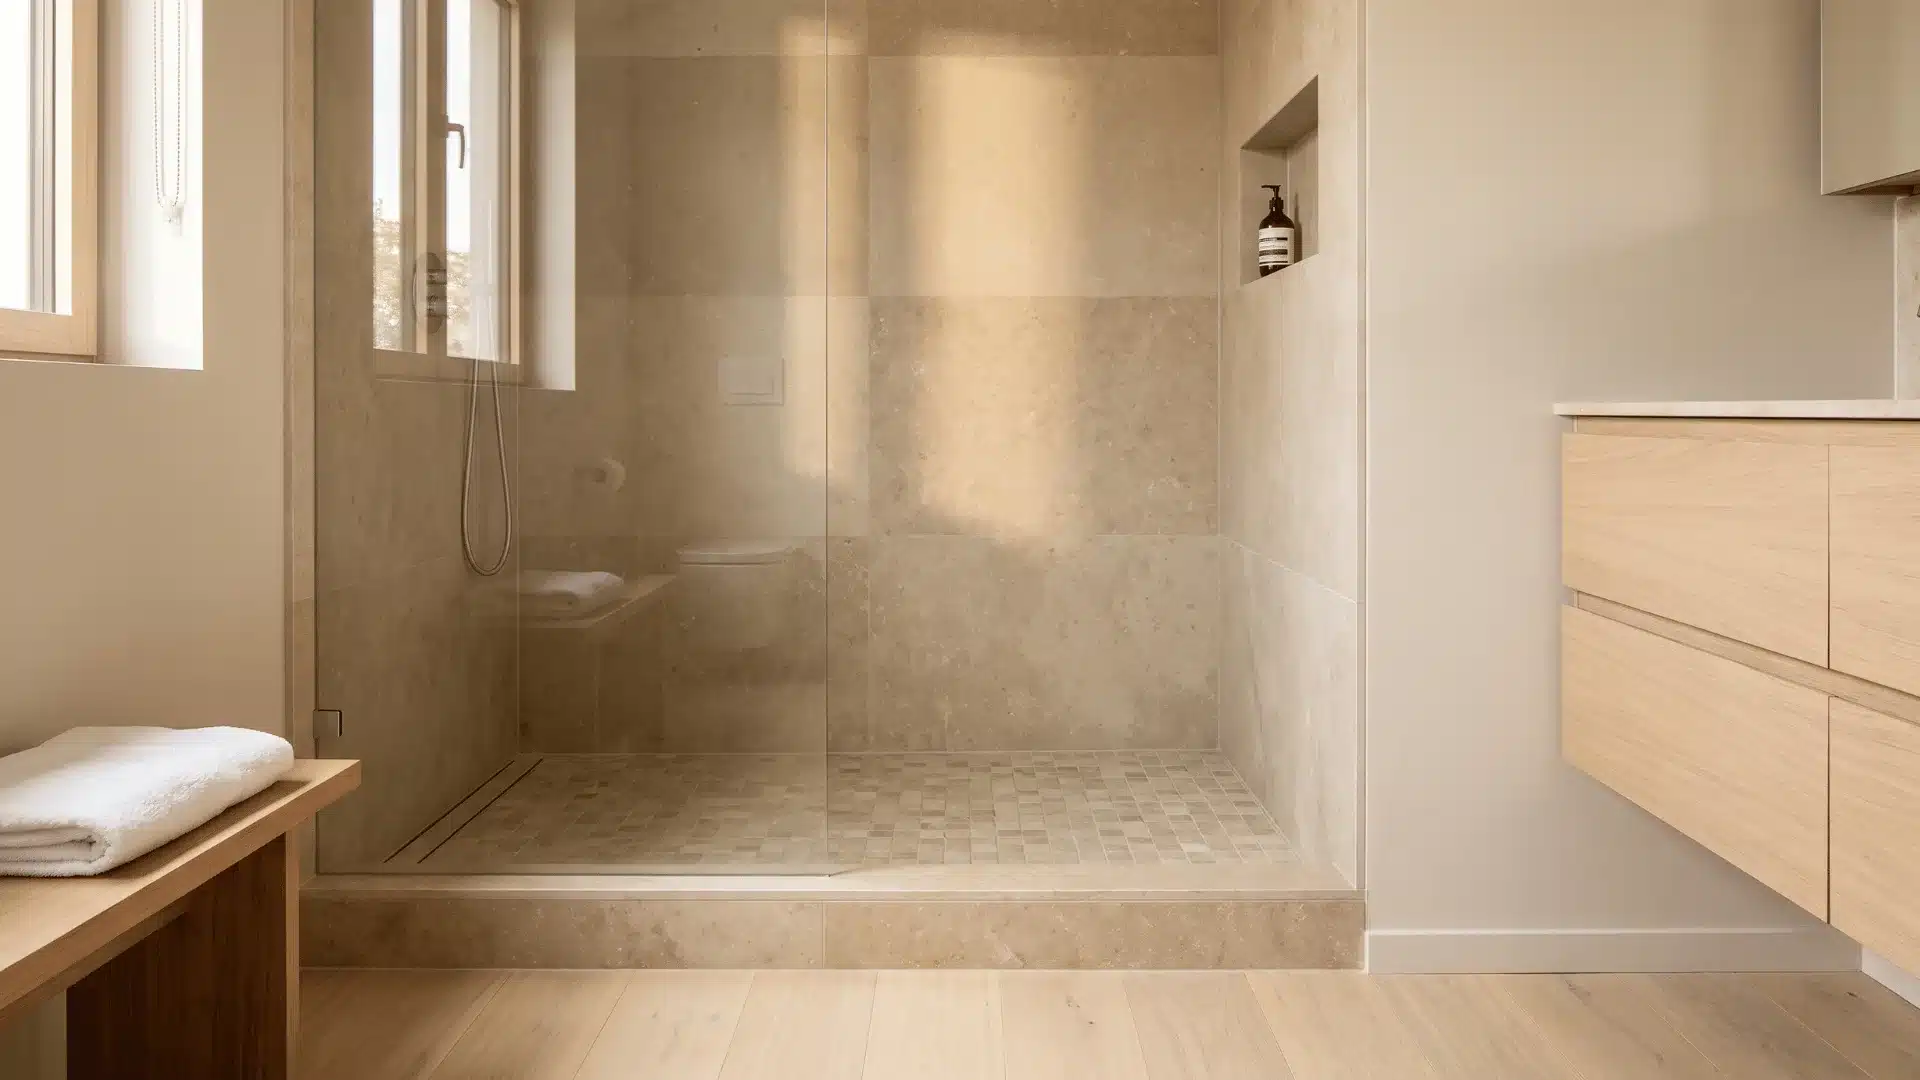
A low curb can help hold water inside when a level floor is not possible. It may suit a remodel with plumbing limits or a tighter budget. Keep it low enough for comfortable entry, but remember that it will reduce step-free access.
| Best for | Remodels with floor limits |
| Main benefit | Helps contain water when a level entry is not practical |
| Defining feature | A low raised threshold at the shower opening |
15. Move the Drain Against a Side Wall
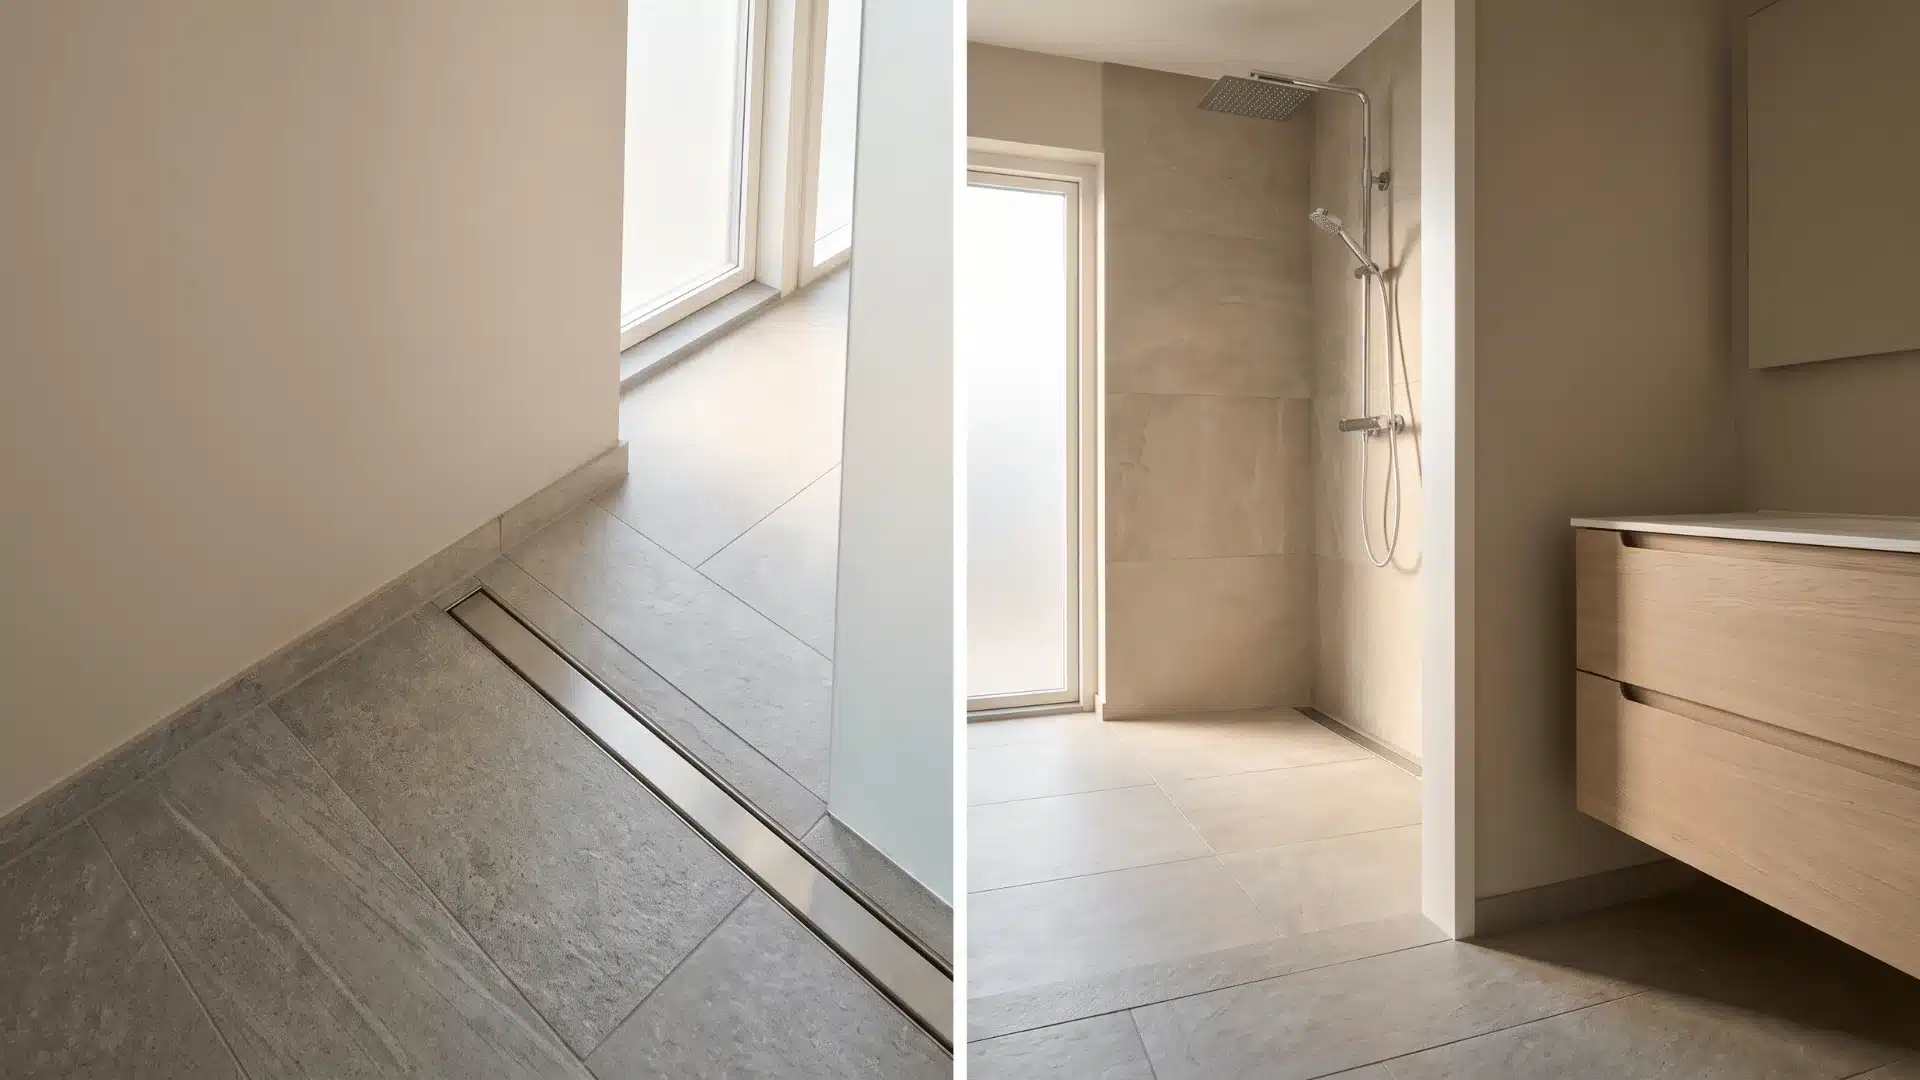
A side drain can suit a long shower and keep the center floor free from a visible drain. It also supports a cleaner tile pattern. The floor still needs the right angle, so water moves toward the drain instead of the opening.
| Best for | Narrow showers |
| Main benefit | Keeps the center floor clear |
| Defining feature | The drain runs beside one shower wall |
Takeaway: Choose the drain position to suit the room shape and water path.
16. Position a Rain Showerhead Overhead, With an Optional Handheld Spray
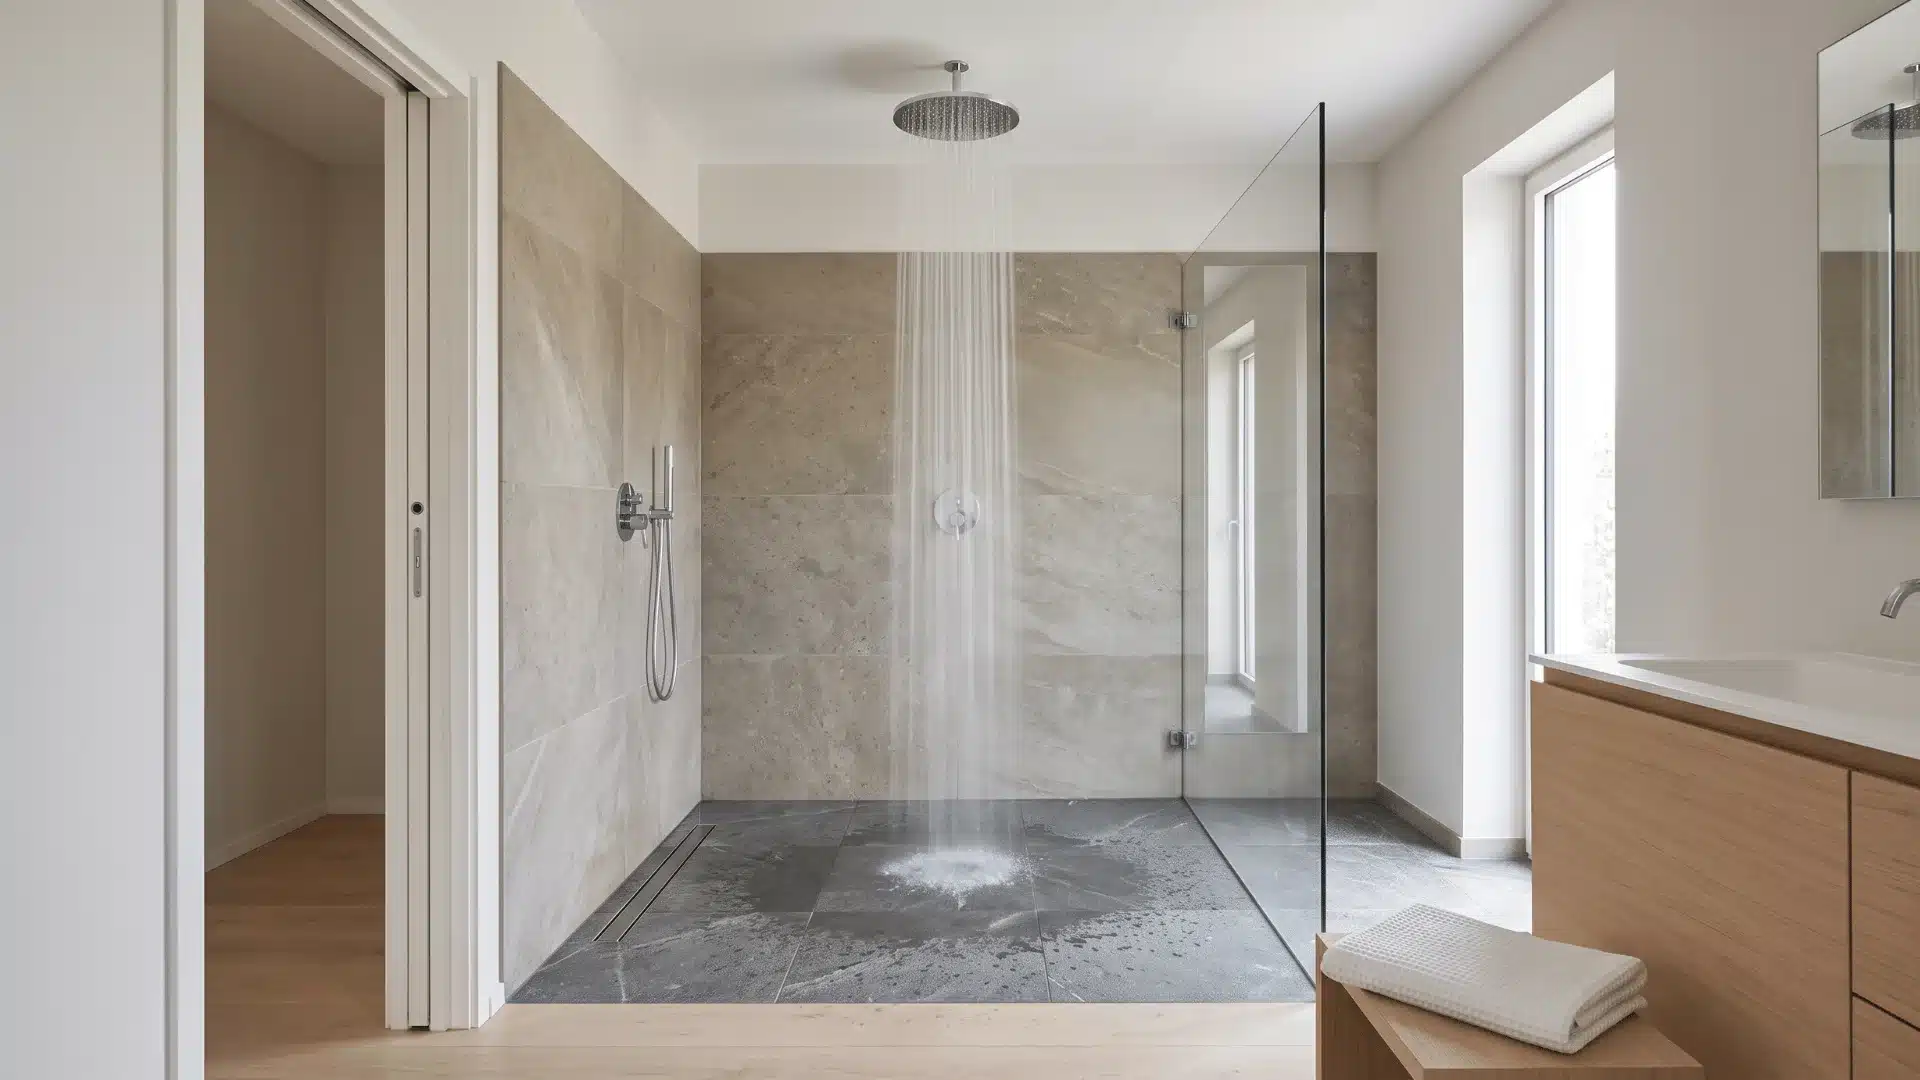
A ceiling-mounted rain head directs the main water flow downward. Place it deep inside the shower so the spray lands away from the entrance and surrounding dry surfaces. Add a handheld spray alongside it when the shower needs more flexible rinsing.
It is useful for seated showering, children, pets, cleaning, and directing water to a specific area without relying solely on the overhead.
| Best for | Open showers where spray control matters, and families with different rinsing needs |
| Main benefit | Directs the main spray down and away from the entry, with flexible rinsing on hand |
| Defining feature | A ceiling-mounted showerhead paired with an optional handheld spray |
Expert Tip: For lower water use, consider a WaterSense-labeled model. The US Environmental Protection Agency says standard showerheads use 2.5 gallons per minute, while WaterSense-labeled models use no more than 2.0 gallons per minute.
17. Run Large-Format Tile From Floor to Ceiling
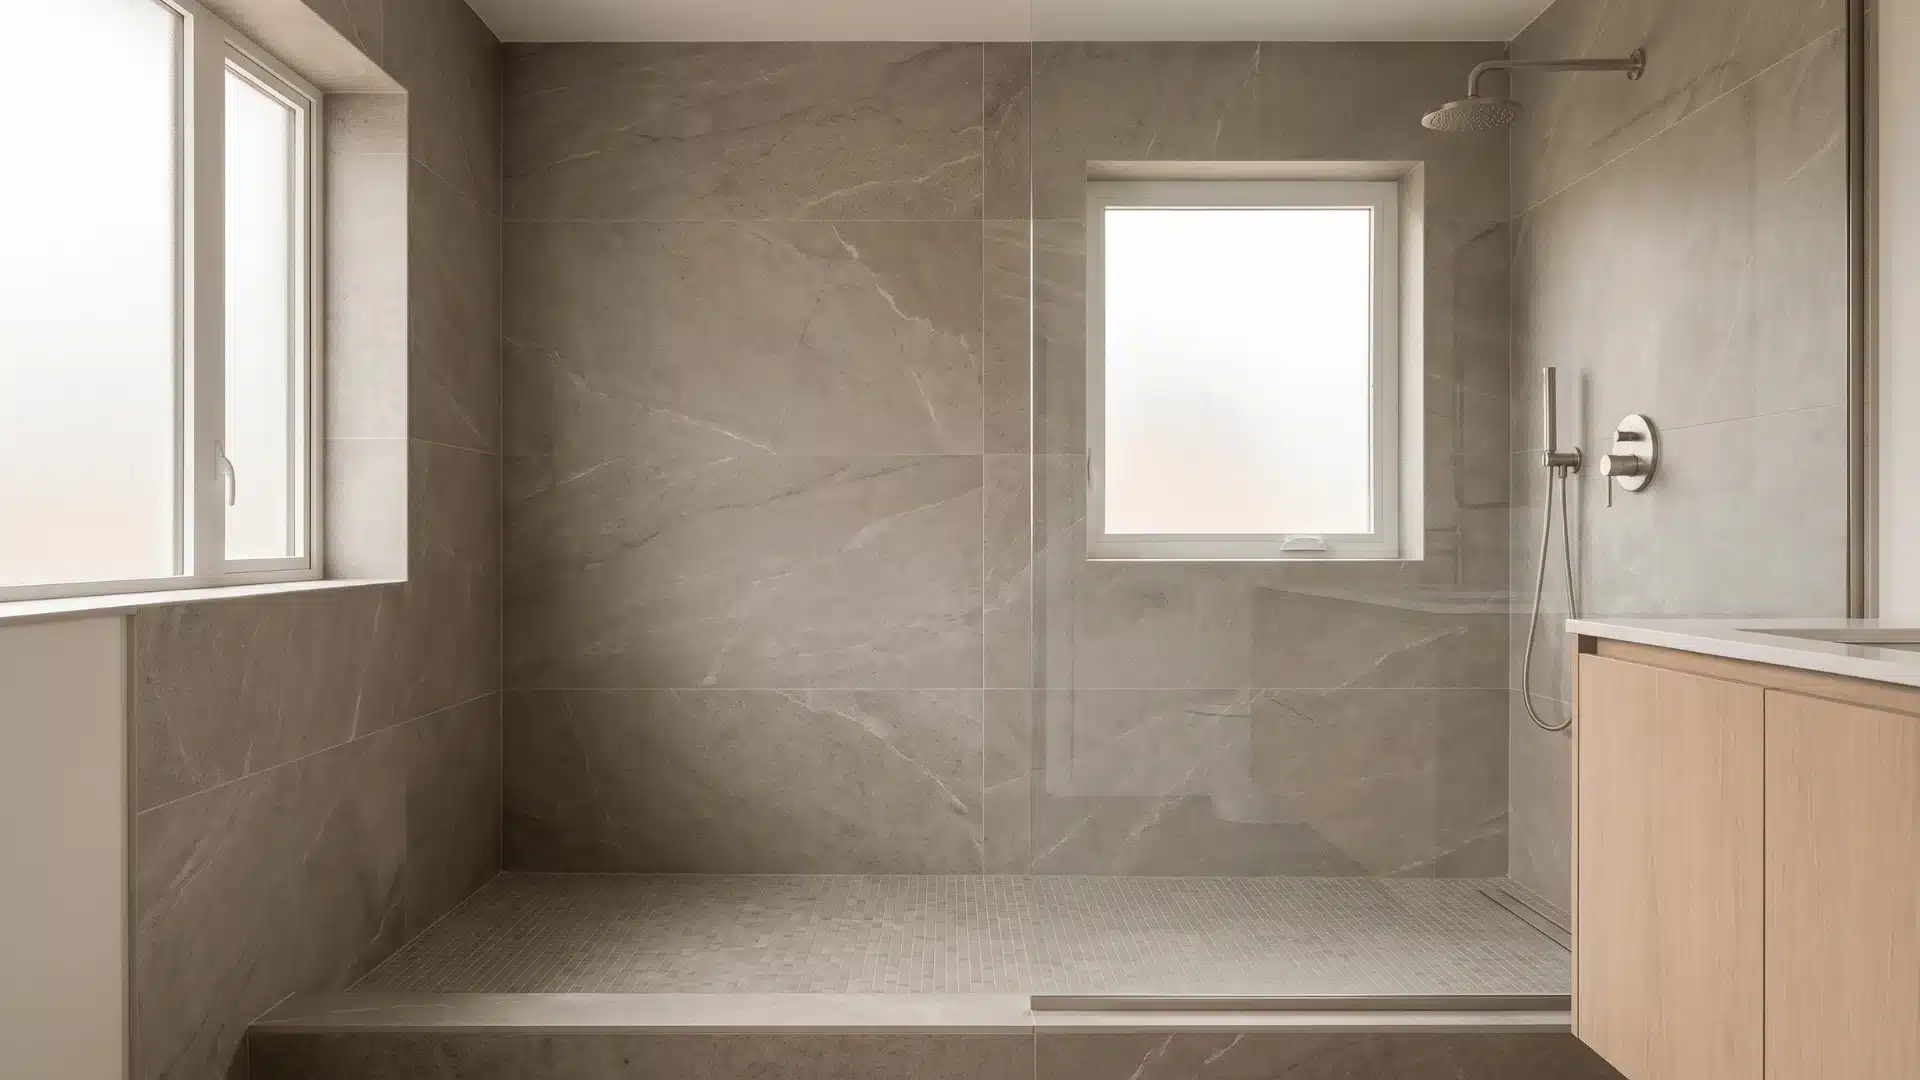
Large wall tiles reduce grout lines and make the shower feel calmer. Carrying the same tile beyond the shower can also make the bathroom feel wider. Use a floor finish suited to wet feet rather than placing a smooth wall tile underfoot.
| Best for | Minimal bathrooms |
| Main benefit | Reduces visual breaks and joins the room |
| Defining feature | Oversized tiles create fewer visible grout lines |
18. Create a Marble or Marble-Look Spa Shower
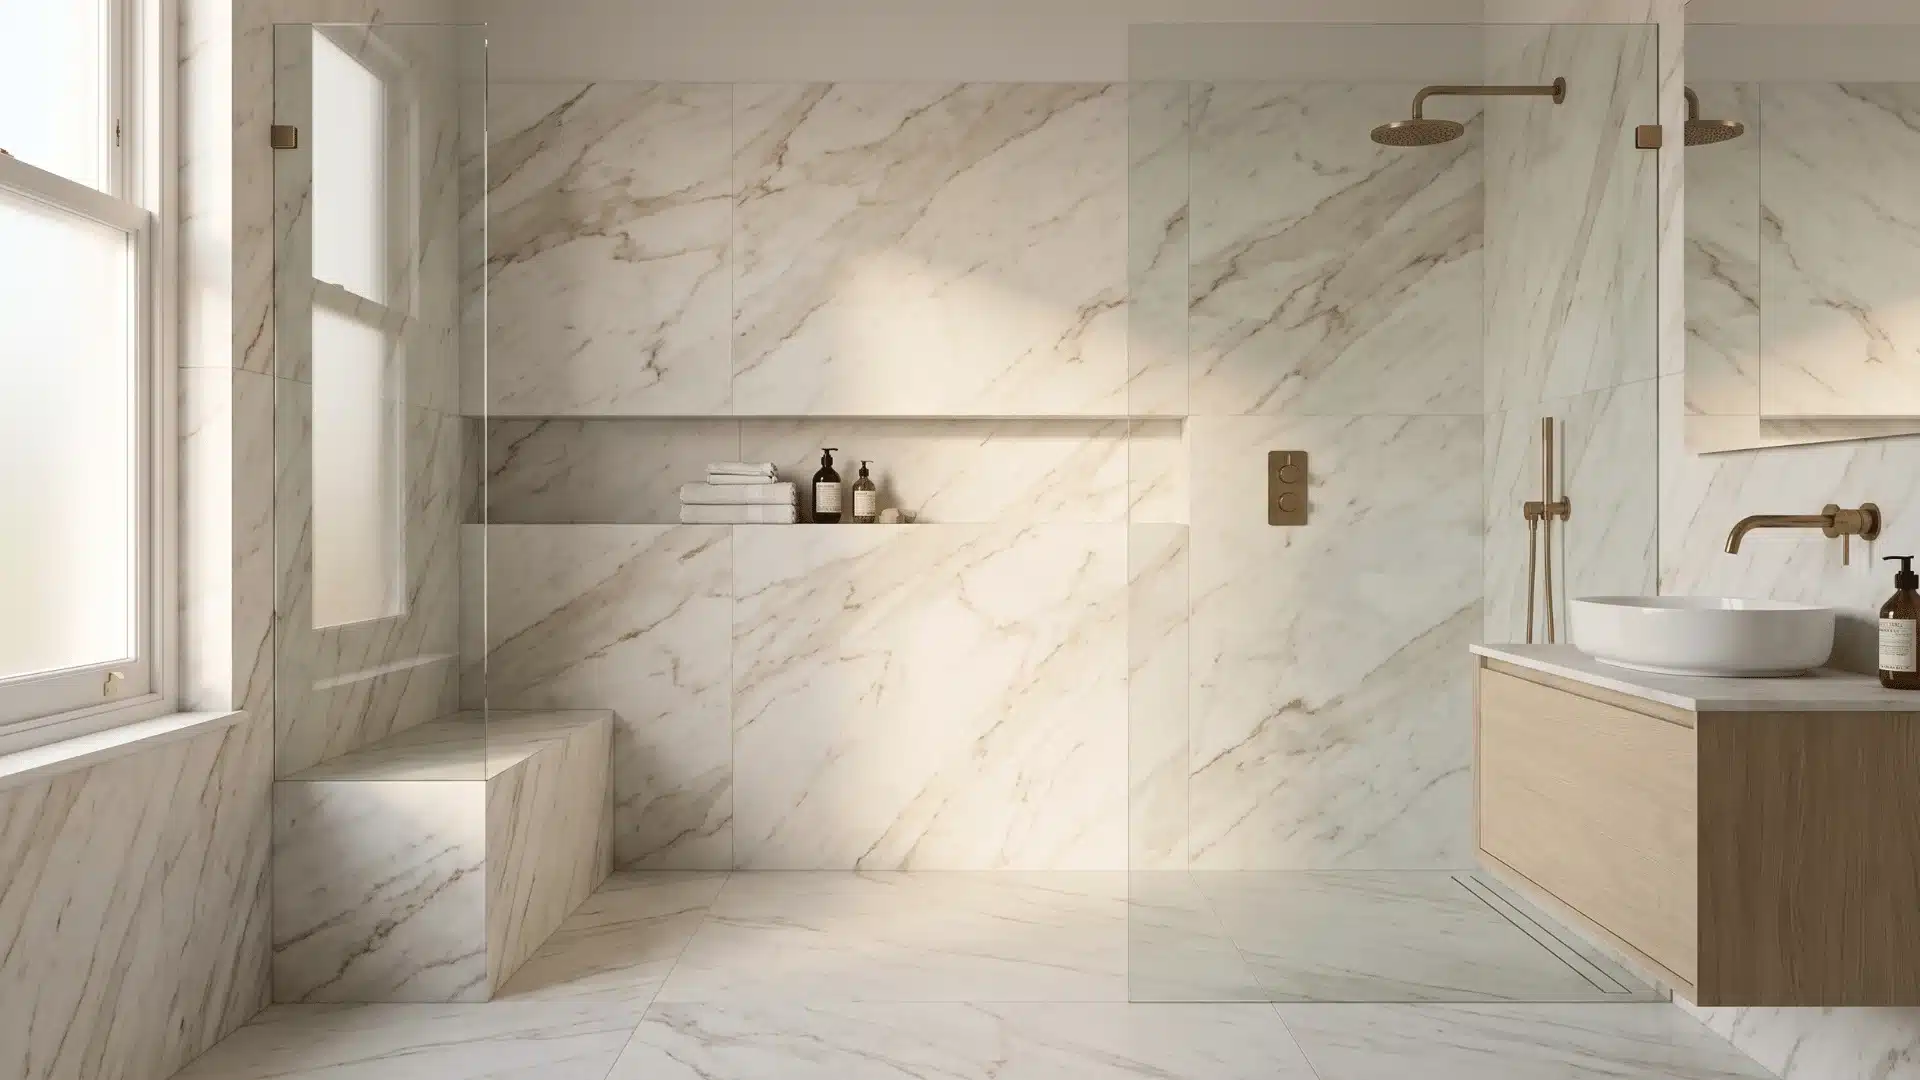
Marble or marble-look porcelain can cover the walls, bench, and niche for a joined finish. Simple taps keep the stone pattern in focus. Real stone may need more care, so compare it with porcelain before making the final choice.
| Best for | High-end bathrooms |
| Main benefit | Creates one strong material theme |
| Defining feature | One stone pattern continues across several surfaces |
19. Add Terrazzo or Mosaic Flooring
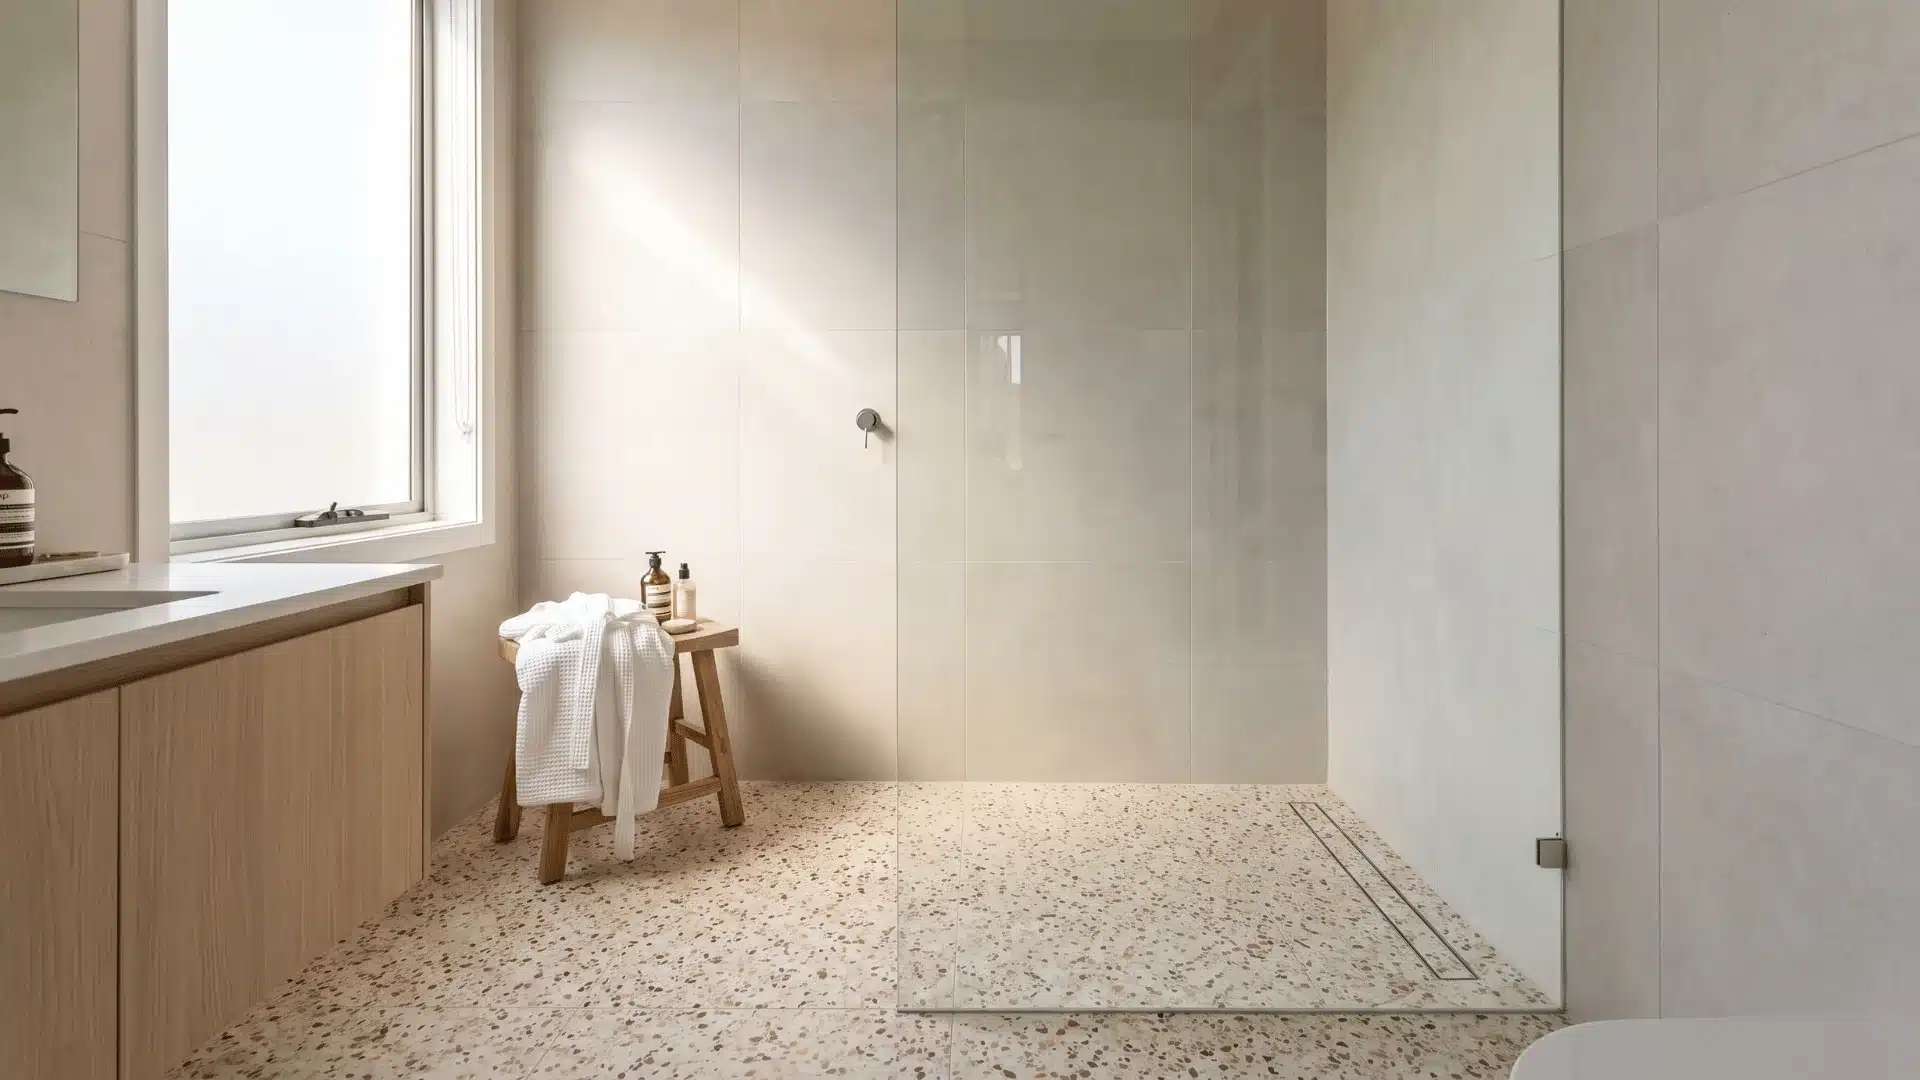
Terrazzo or small mosaic tile can bring pattern and movement to a compact shower. Smaller pieces can follow a sloped floor more easily than large tiles. Pair a busy floor with plain walls so the room does not feel crowded.
| Best for | Small showers needing pattern |
| Main benefit | Adds detail and suits shaped shower floors |
| Defining feature | Small-format pieces cover the sloped shower floor |
20. Design a Statement Tile Wall or Custom Mural
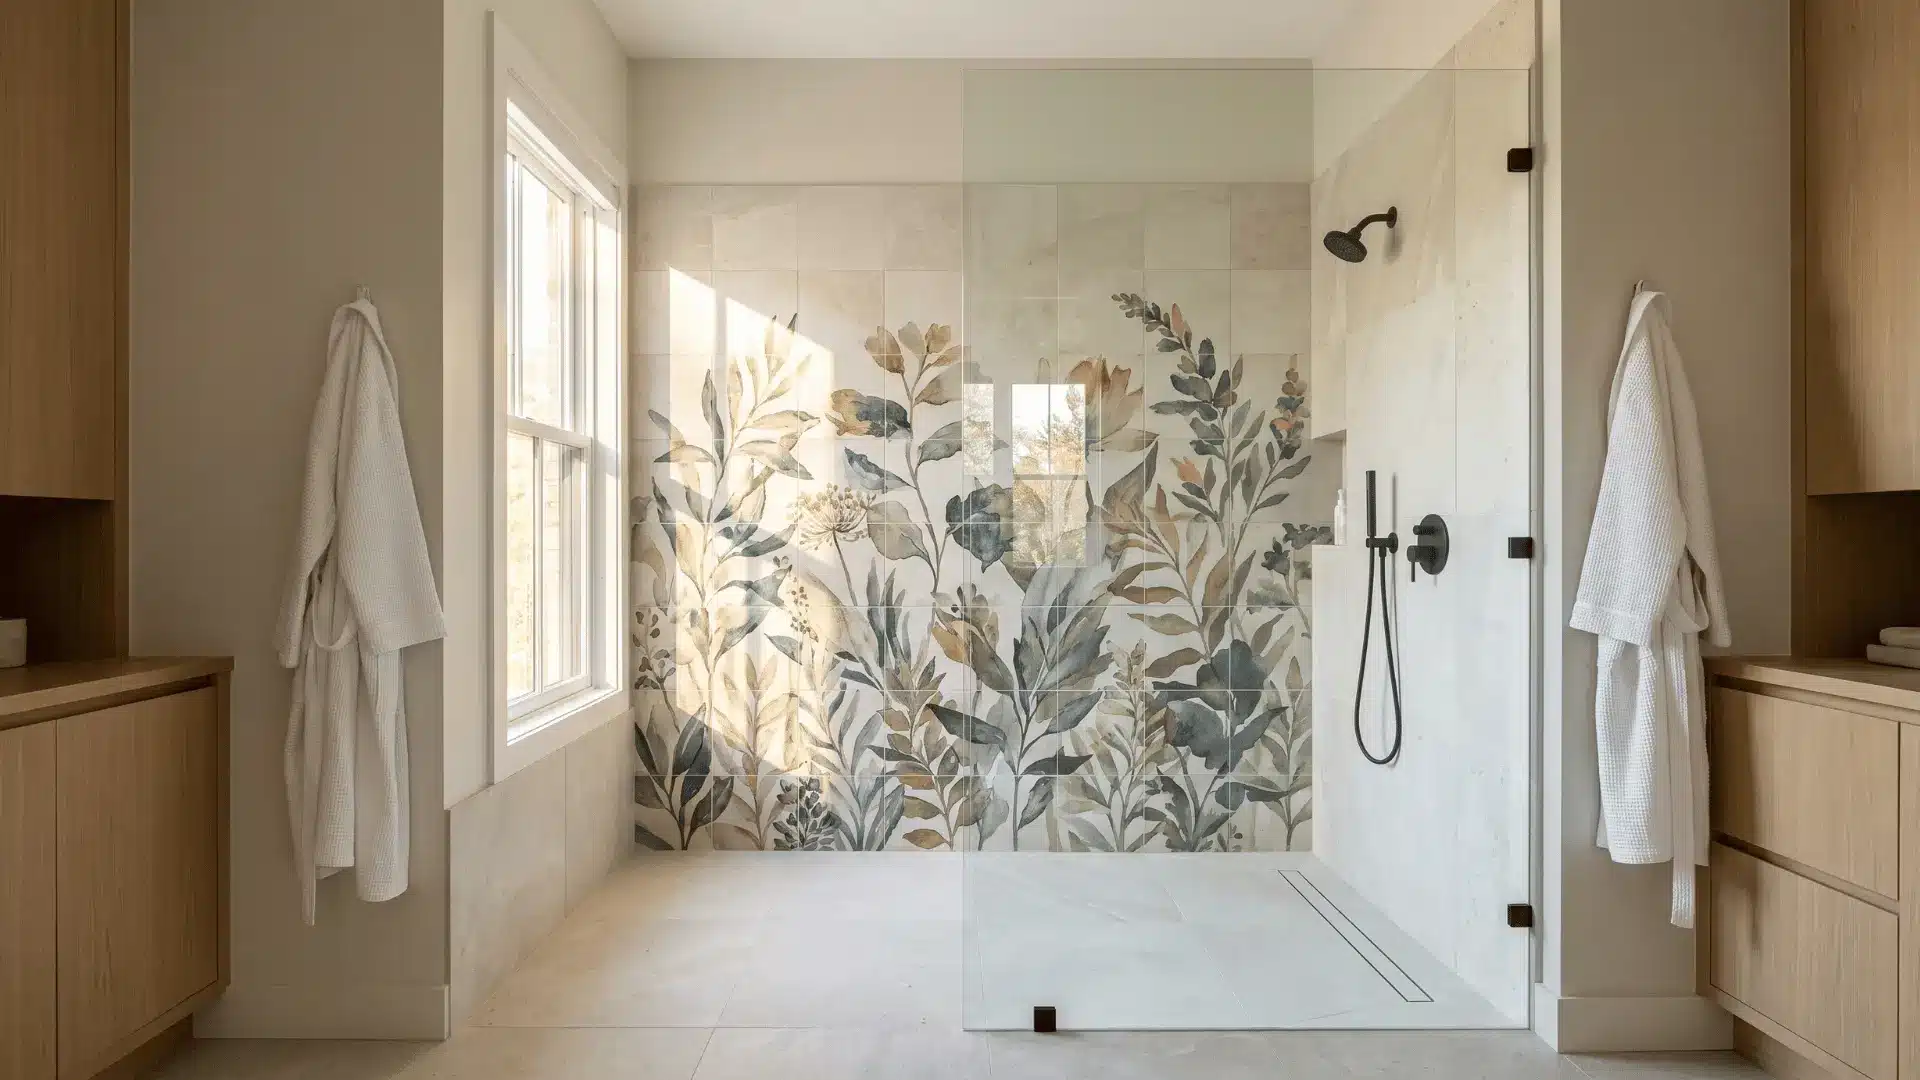
Use patterned, geometric, striped, or contrasting tile to make one shower wall stand out. The open entry keeps the feature in view from the rest of the bathroom. Keep nearby walls quiet so the main pattern has room to stand out.
For a more personal statement, a custom-painted treatment, a printed tile scene, or an art-led panel can create a one-off shower wall that reads as a complete piece of artwork rather than a standard tile feature.
Takeaway: Ask how the surface should be sealed and cleaned before work begins.
| Best for | Bathrooms with a strong personal style, or art-led and personal bathrooms |
| Main benefit | Creates a clear focal wall, whether patterned tile or a one-off artwork |
| Defining feature | A patterned or custom-designed surface forms one feature wall |
21. Warm the Shower With Earth-Tone Materials
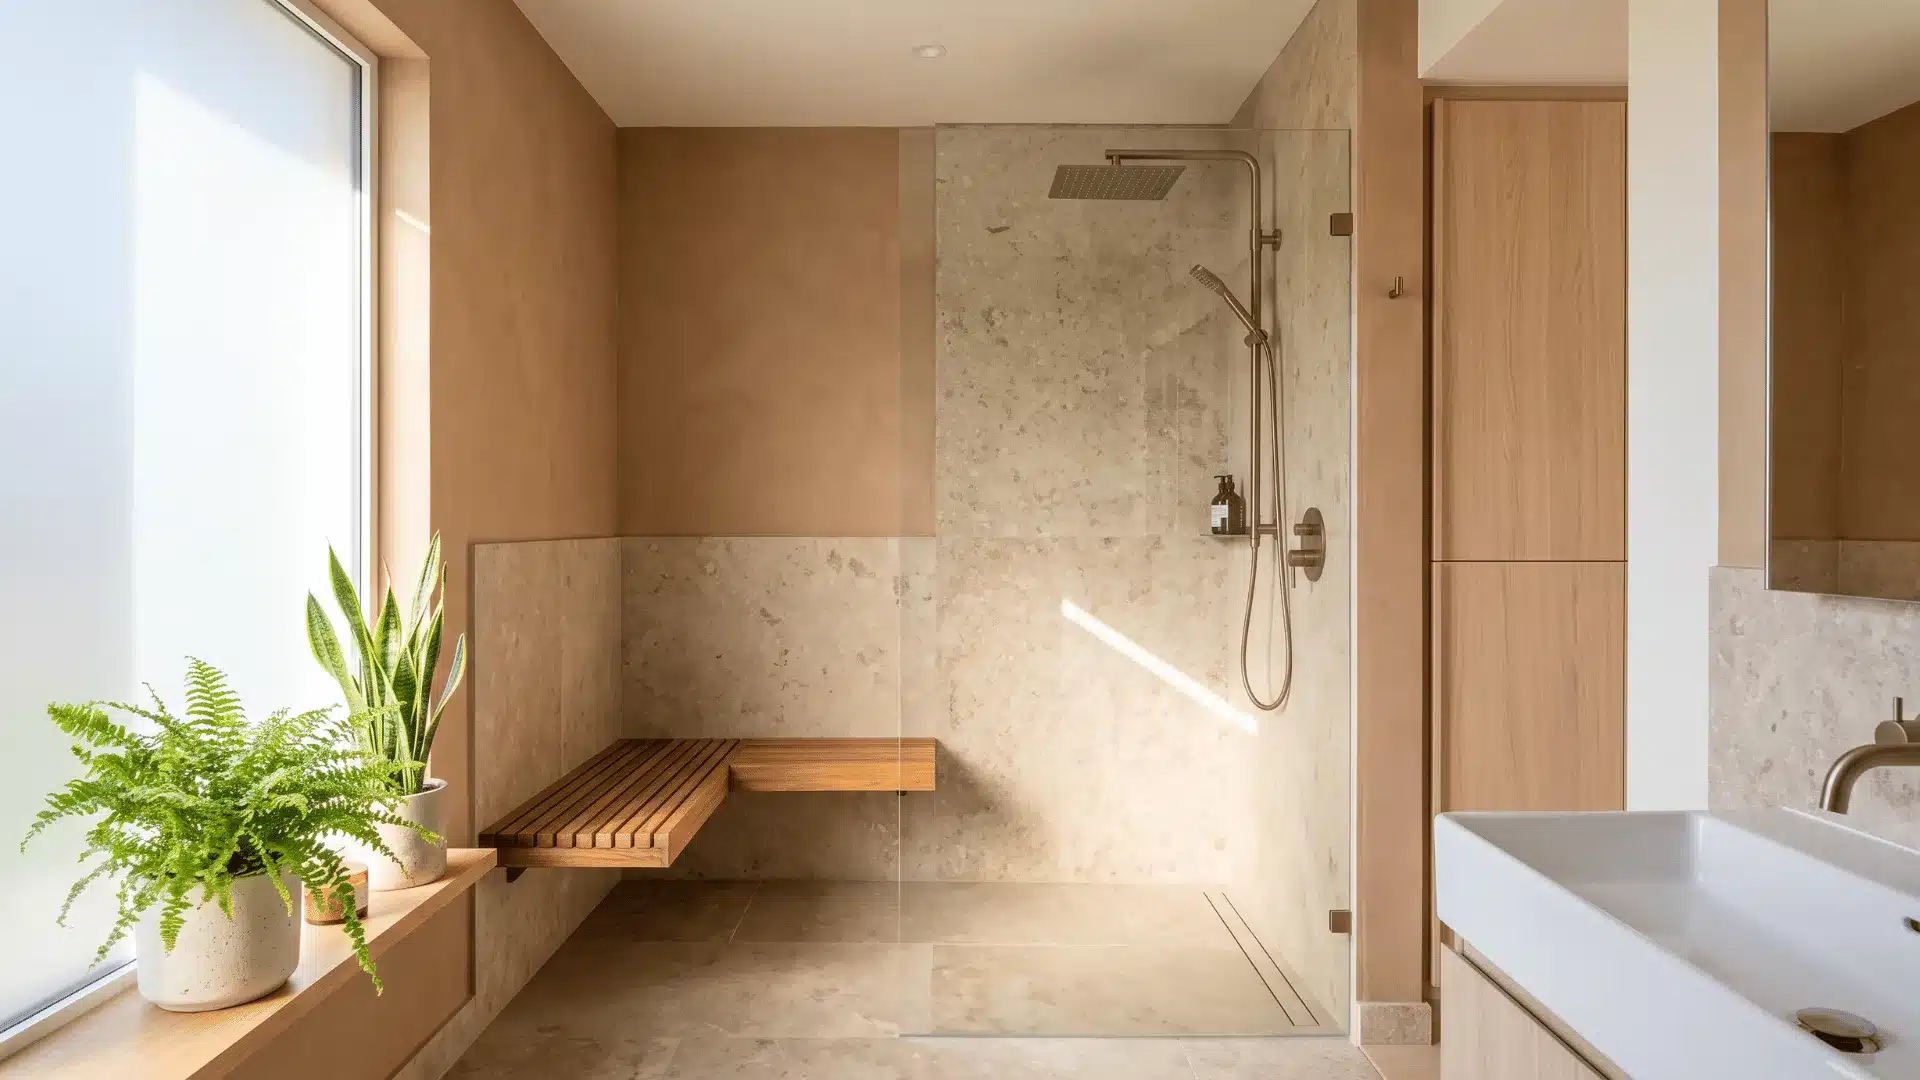
Beige tile, stone, plaster, wood details, and plants can soften the hard surfaces in an open shower. Water-safe plaster and teak can also work in a wet area. Check the care needs of each material before making a final choice.
| Best for | Nature-inspired interiors |
| Main benefit | Adds warmth and texture |
| Defining feature | Warm stone, plaster, and wood finishes shape the room |
22. Preserve Natural Light With a Window
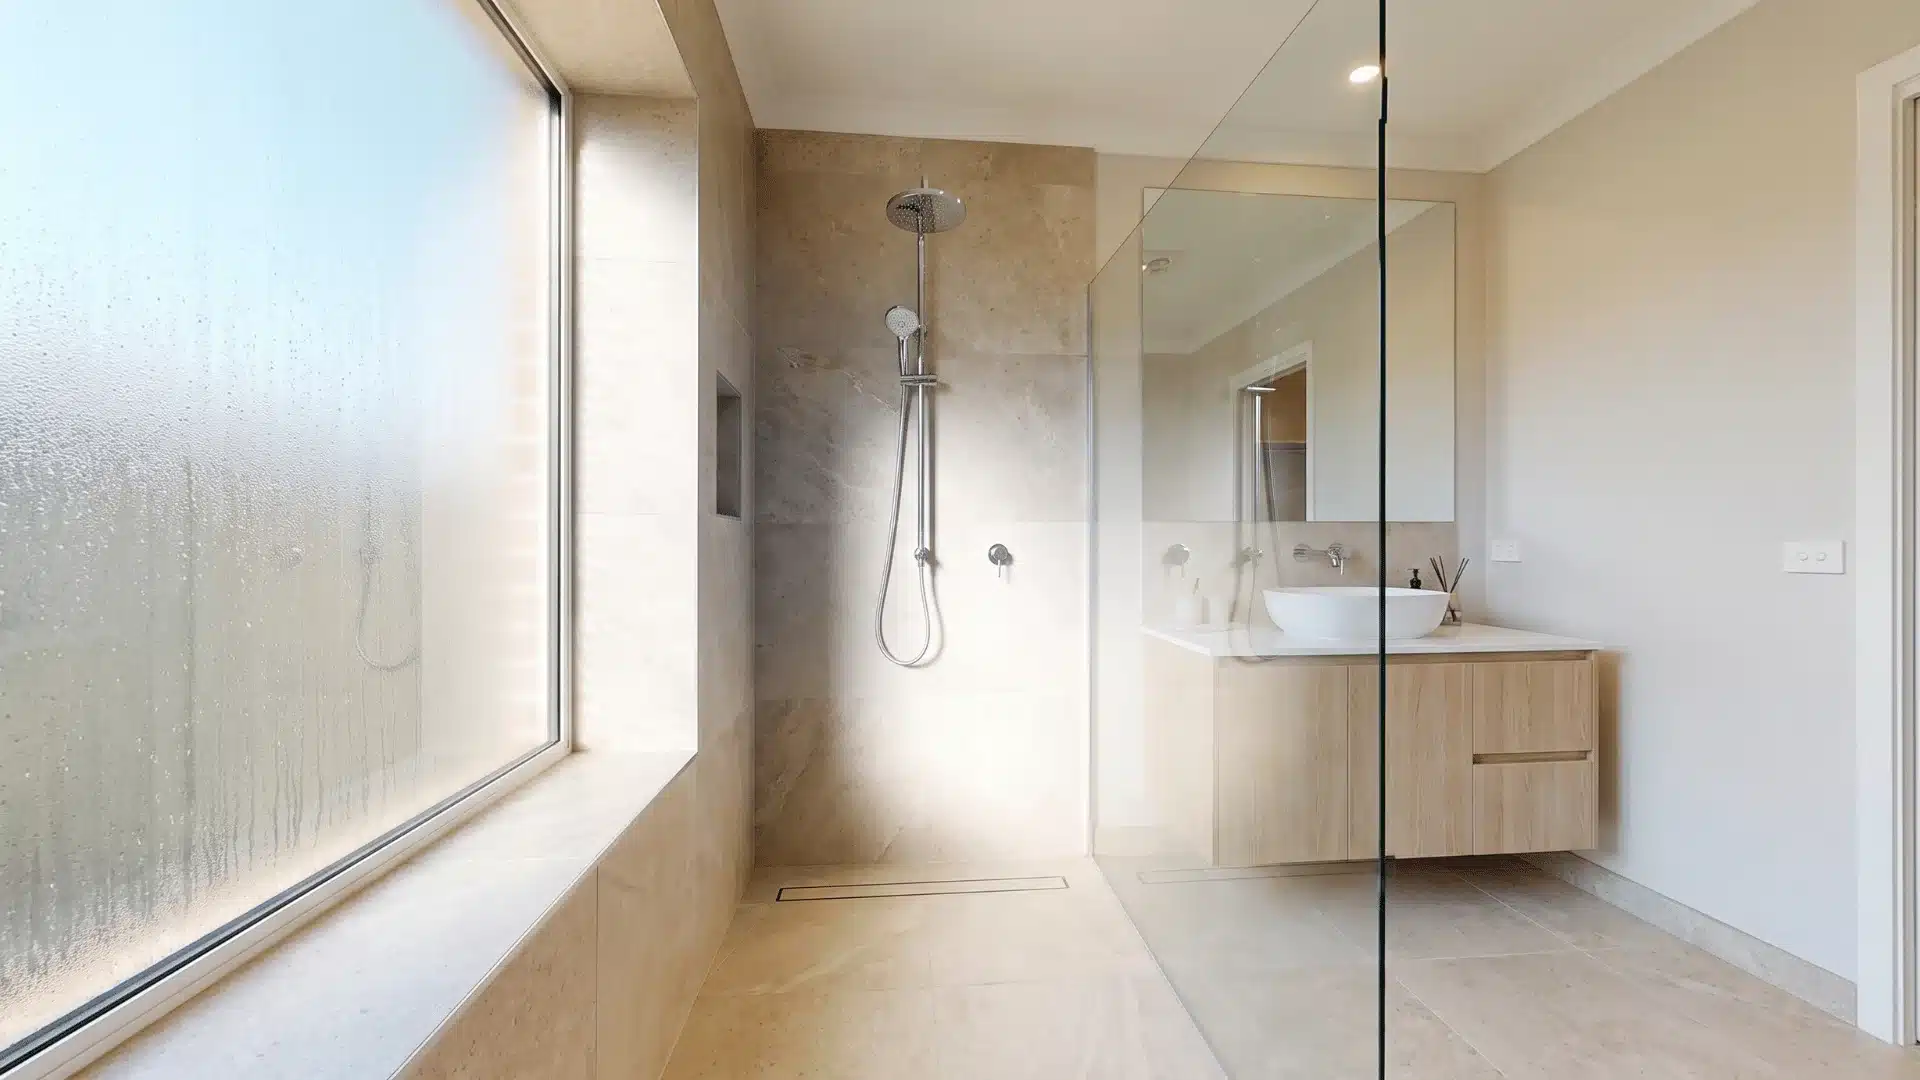
A shower window can brighten the whole bathroom, especially in a long or narrow room. A clear glass panel can protect nearby fittings without blocking the light. Use privacy glass when needed, and make sure the frame and sill can handle regular moisture.
| Best for | Long or dark bathrooms |
| Main benefit | Brings daylight into the shower and room |
| Defining feature | Daylight enters through an exterior wall window |
23. Add a Skylight Above the Shower
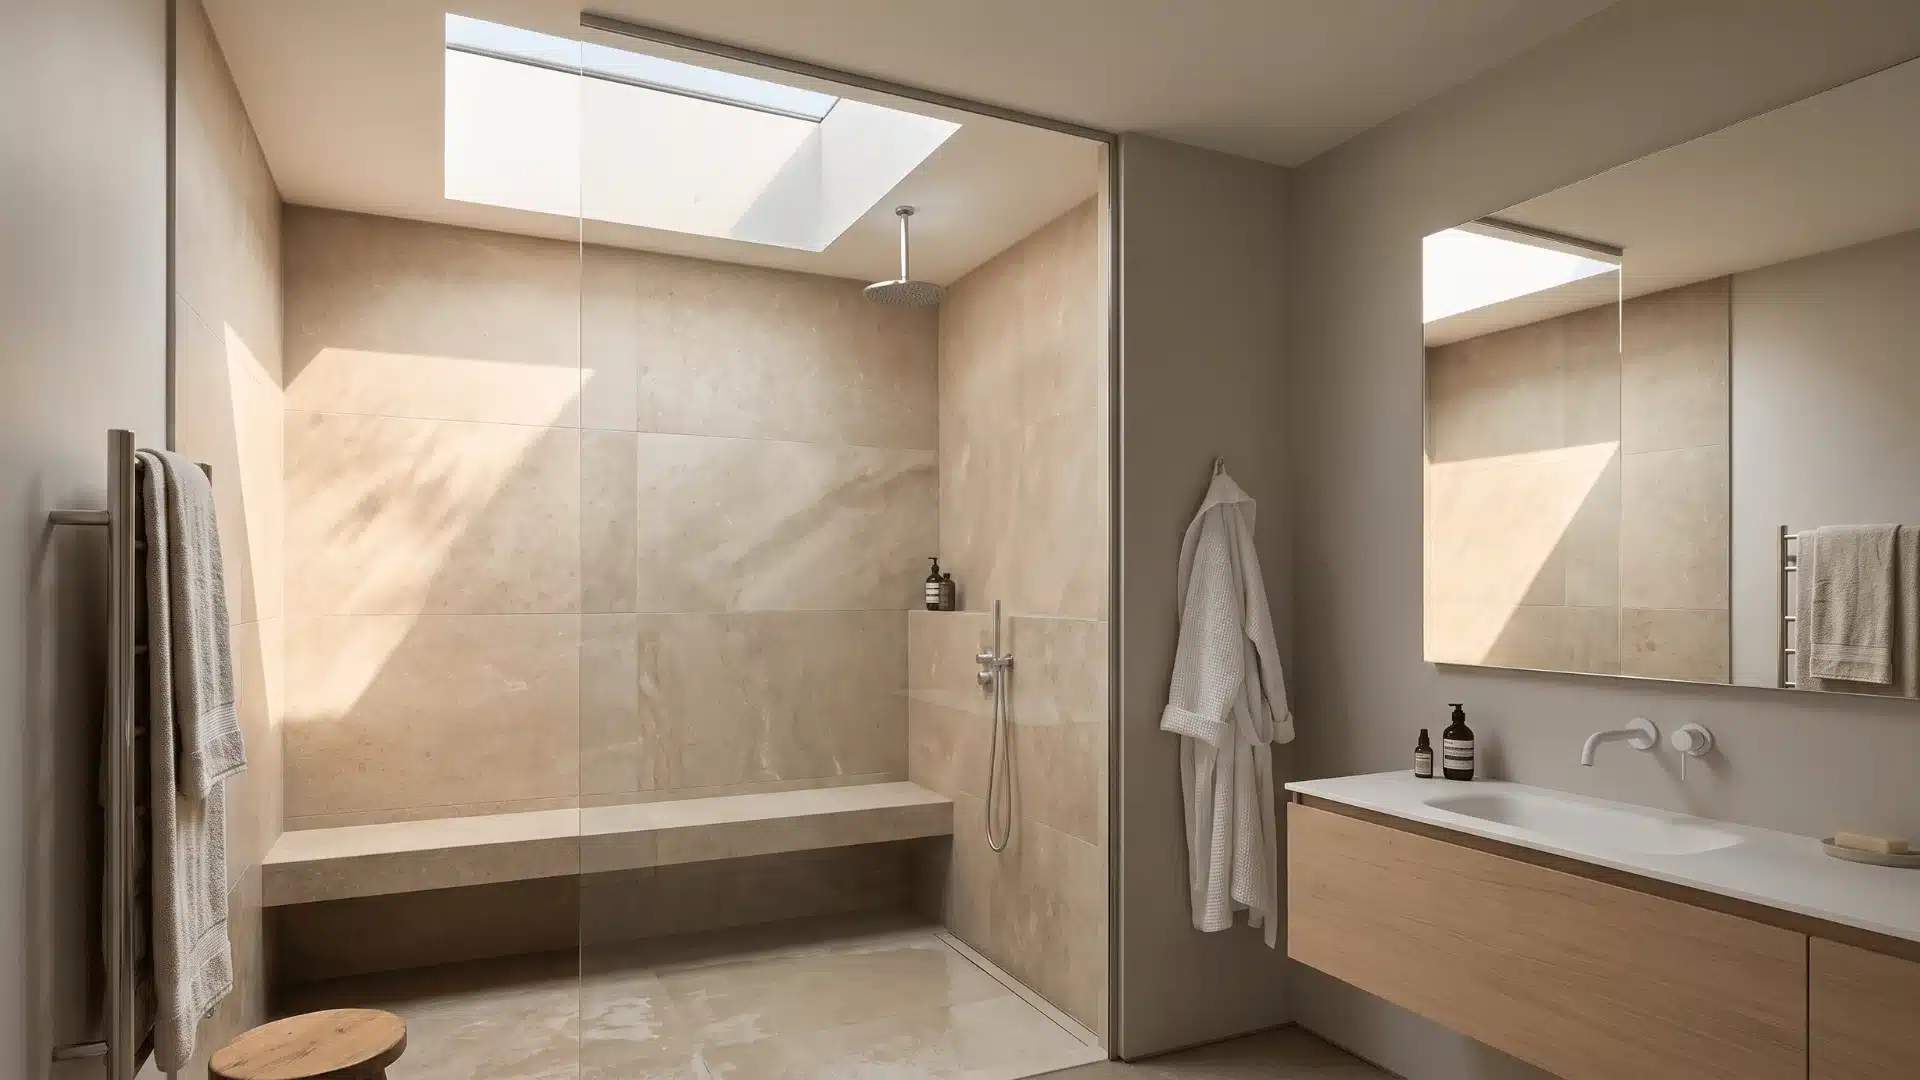
A skylight can bring daylight into a bathroom with little room for wall windows. It works well above a wet room that includes both a tub and open shower. Repeating the same wall tile can help the bathing area feel more connected.
| Best for | Bathrooms with limited wall windows |
| Main benefit | Adds light from above without using wall space |
| Defining feature | Daylight enters through an opening in the roof |
24. Frame the Shower With an Arched Entry
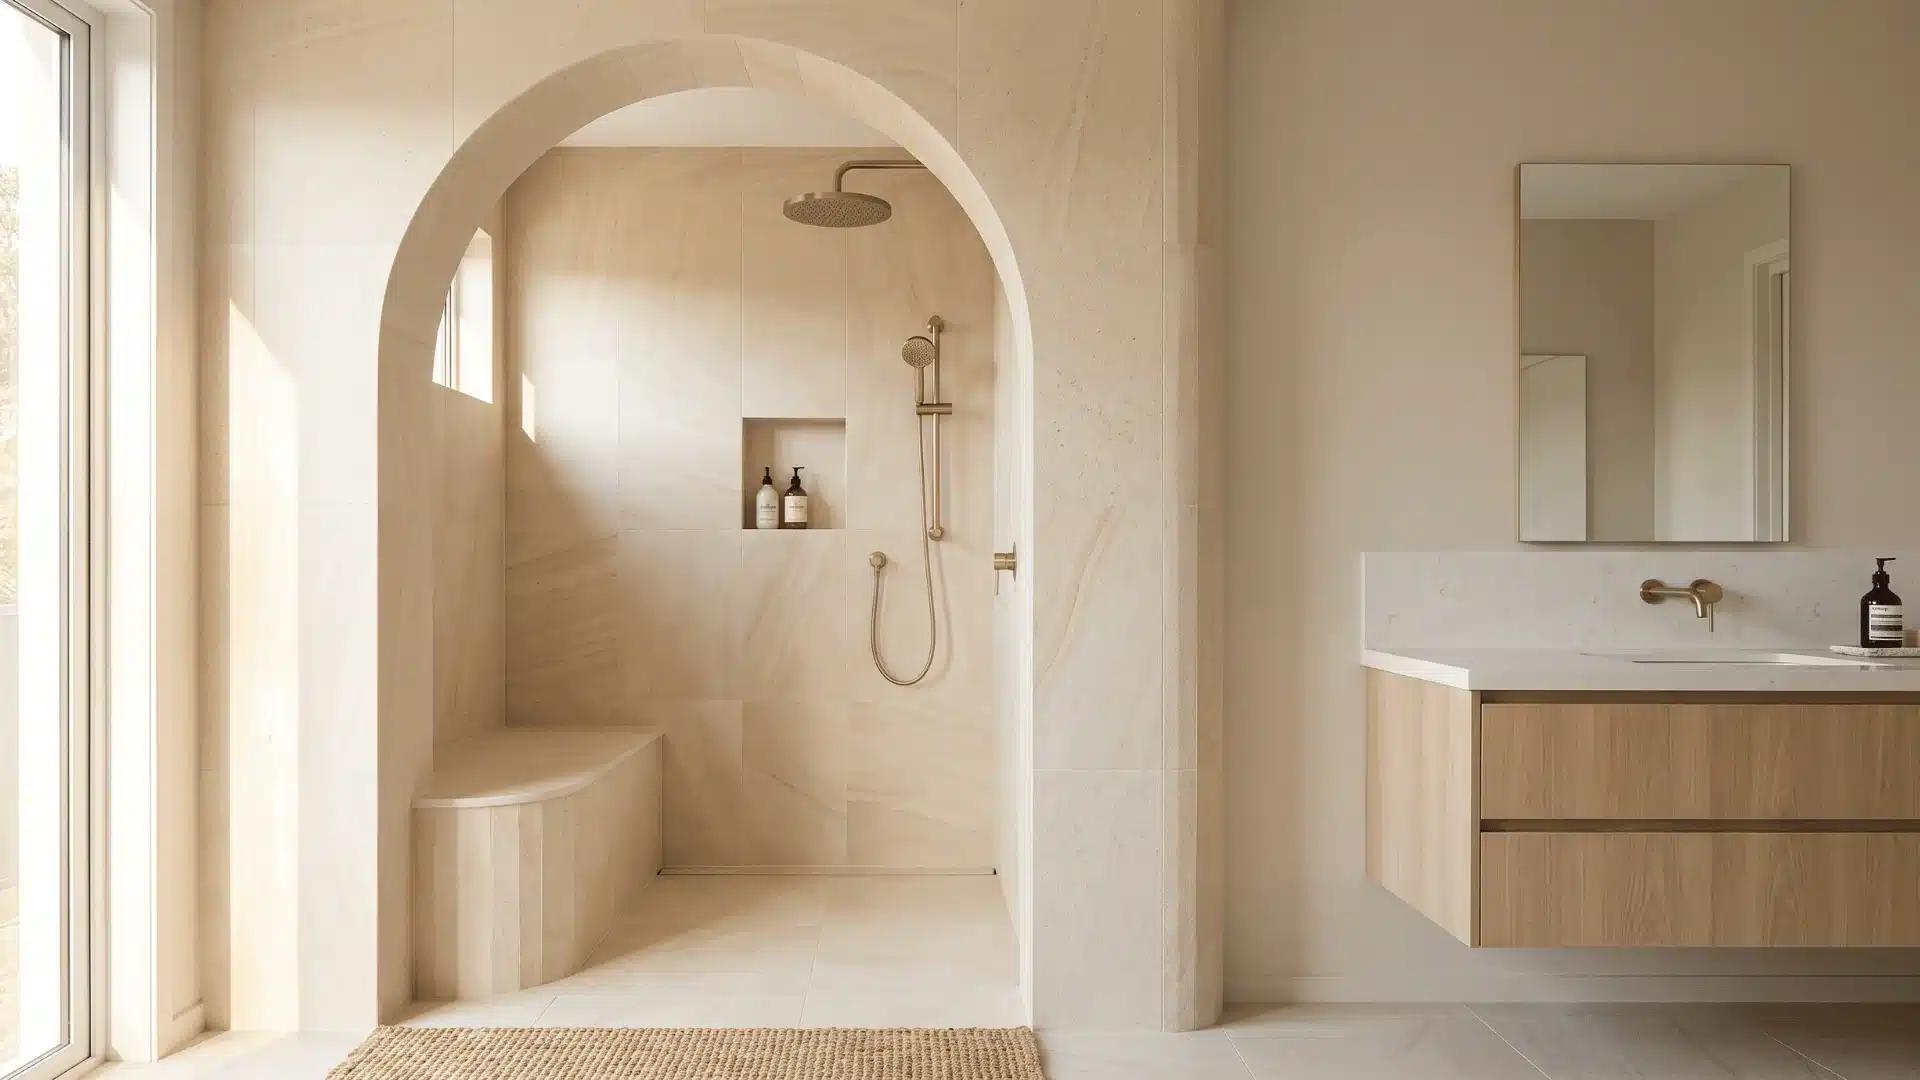
A tiled arch can mark the shower as a separate area without adding a door. It works well with subway tile, penny tile, brass fittings, or a curved bench. The shape provides more cover for the shower while keeping the entrance open.
| Best for | Mediterranean, classic, and mixed-style bathrooms |
| Main benefit | Defines the entry without a glass panel |
| Defining feature | A curved tiled opening frames the shower |
25. Use a Slanted Wall or Attic Ceiling
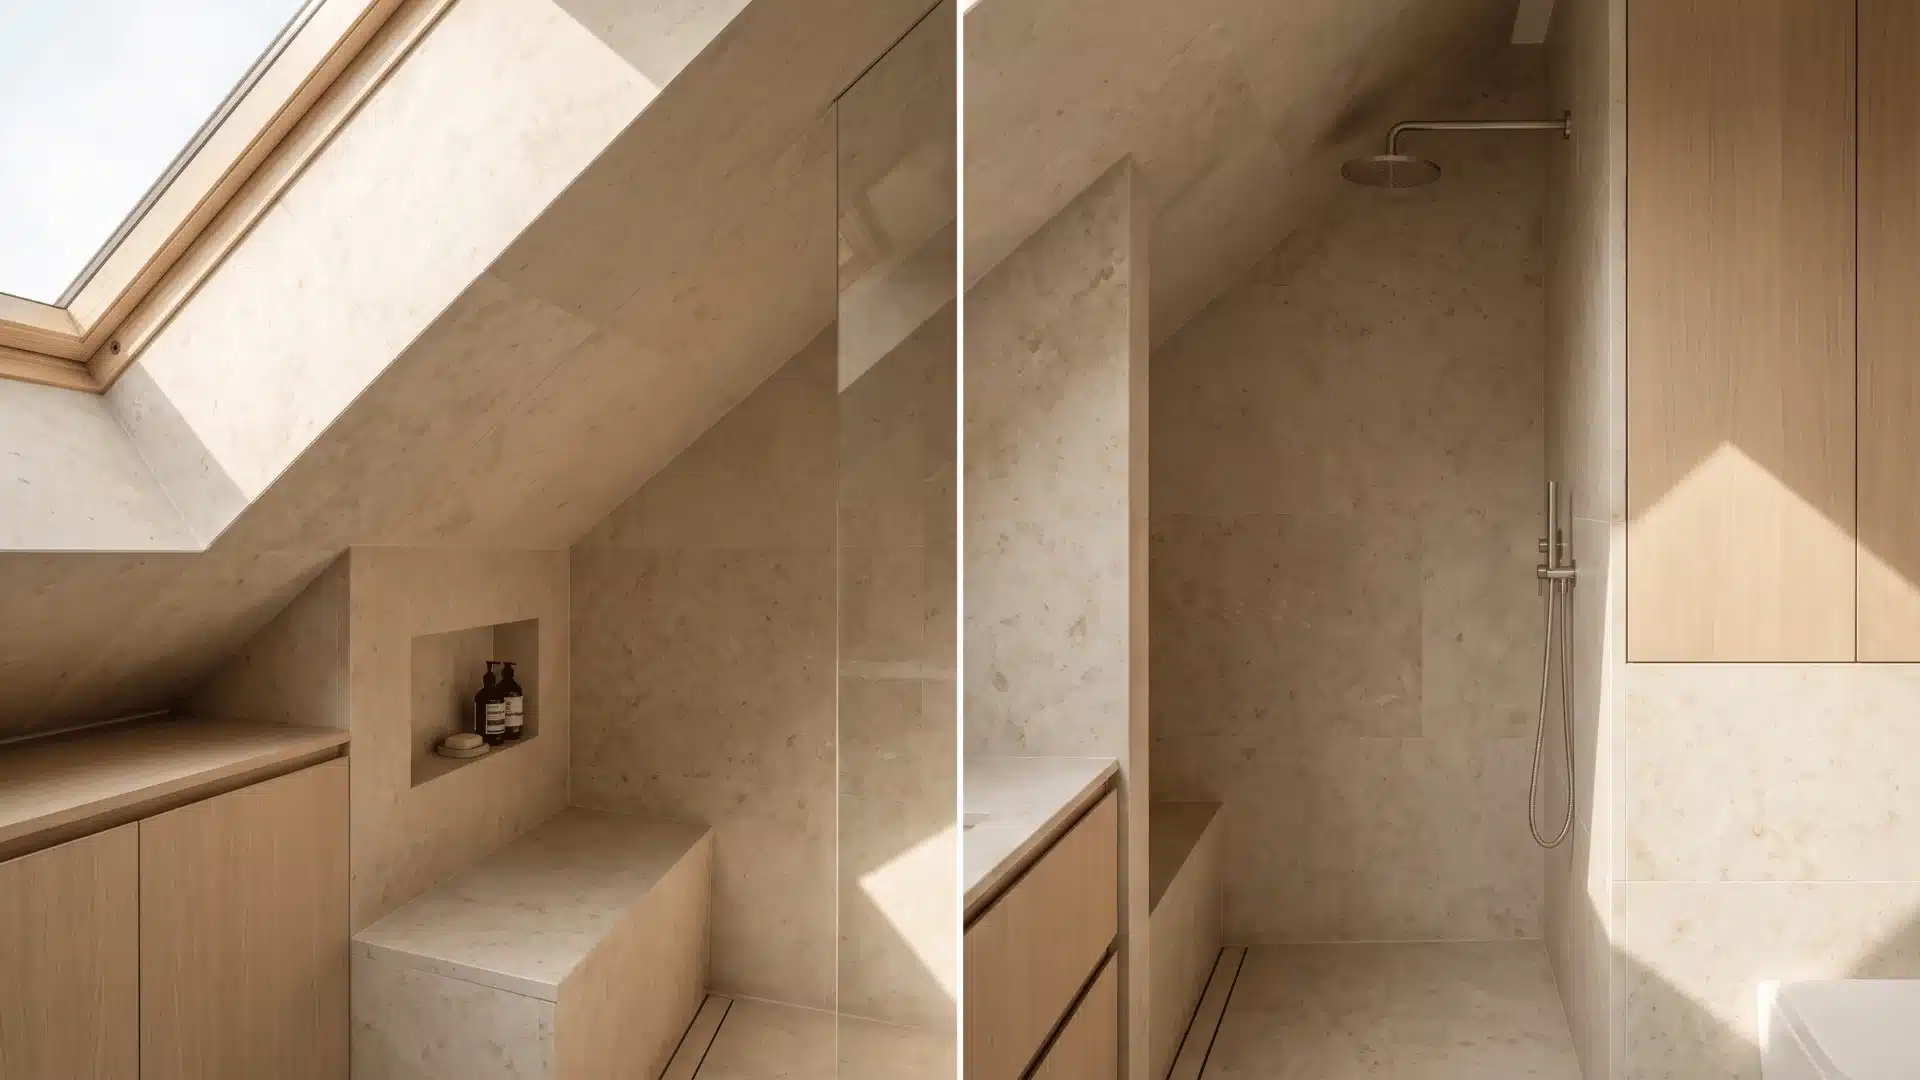
A slanted wall can become part of the shower rather than be hidden. Covering it with the same tile as the other walls makes the shape feel planned. Set the showerhead at the highest useful point and check headroom before work begins.
| Best for | Attic and loft bathrooms |
| Main benefit | Makes use of an angled roof or wall |
| Defining feature | The shower follows the existing sloped roofline |
26. Bring Back a Glass-Block Divider
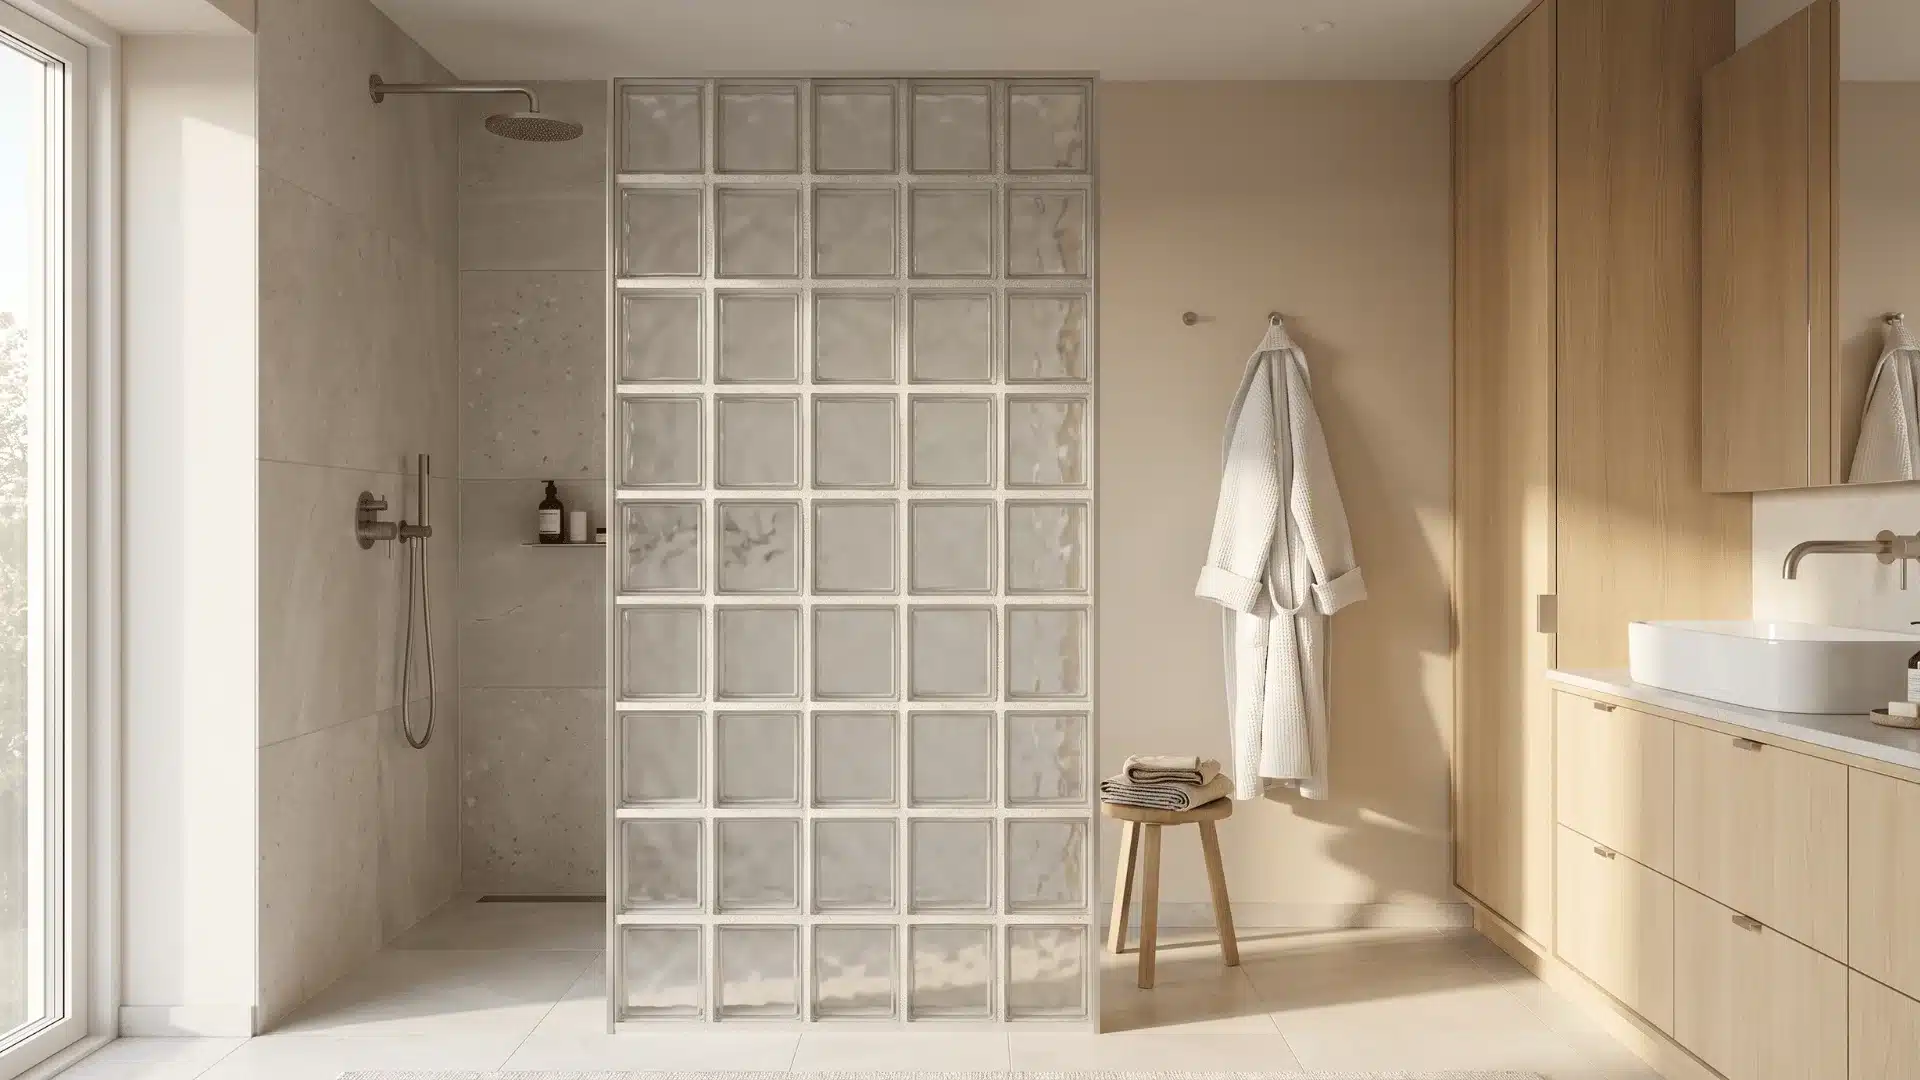
A glass-block divider works more like a built wall than a thin glass panel. It provides privacy and splash control while still allowing light through the blocks. Its weight, texture, and repeating form give it a stronger presence than frosted sheet glass.
| Best for | Bathrooms needing privacy and a firm divider |
| Main benefit | Combines light, cover, and splash control in one wall |
| Defining feature | A built divider is formed from translucent glass blocks |
27. Repeat Patterns Across the Glass and Tile
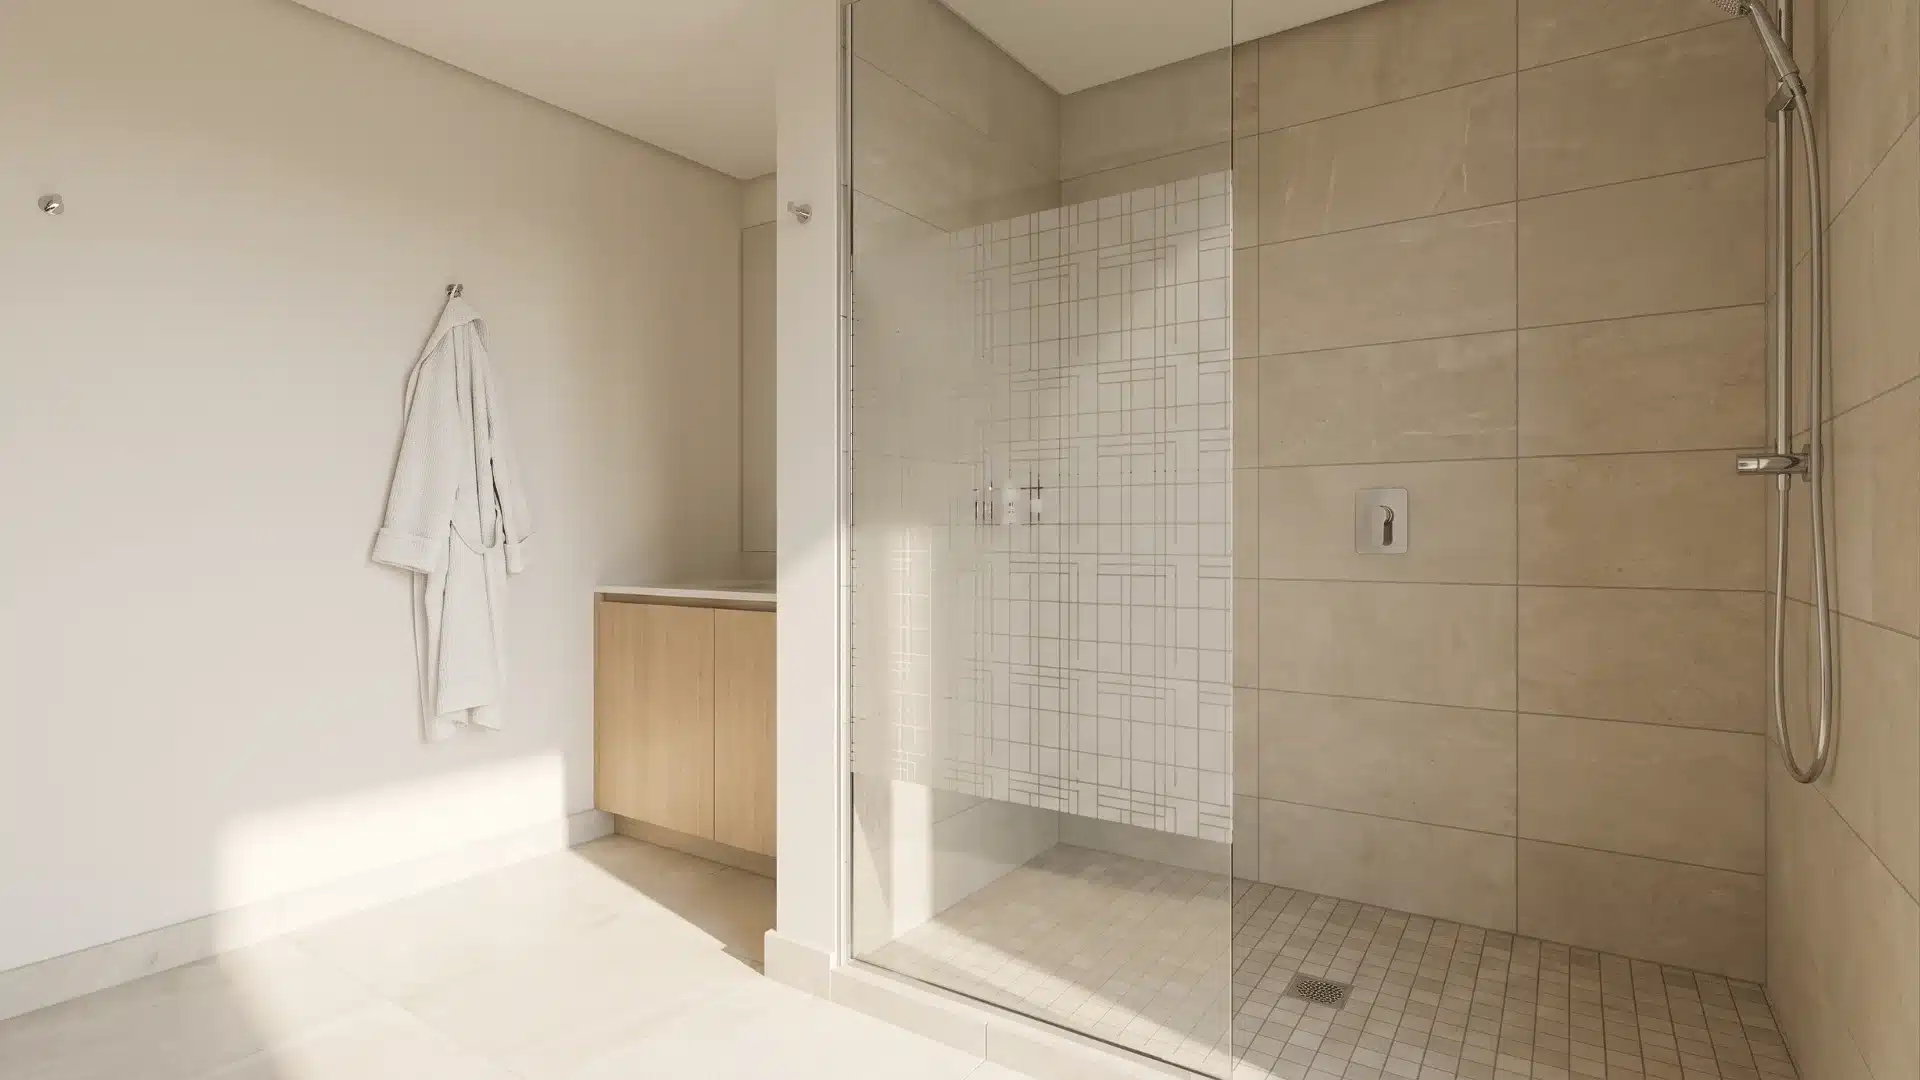
This idea links surfaces with repeated lines and shapes, rather than creating a separate privacy wall. Matching patterns across glass, tile, or flooring can make the shower feel more connected to the room. Keep the color range limited to avoid visual clutter.
| Best for | Bathrooms with patterned glass or tile |
| Main benefit | Connects separate surfaces through repeated shapes |
| Defining feature | Matching lines or shapes appear across different surfaces |
28. Cover the Shower in One Bold Color
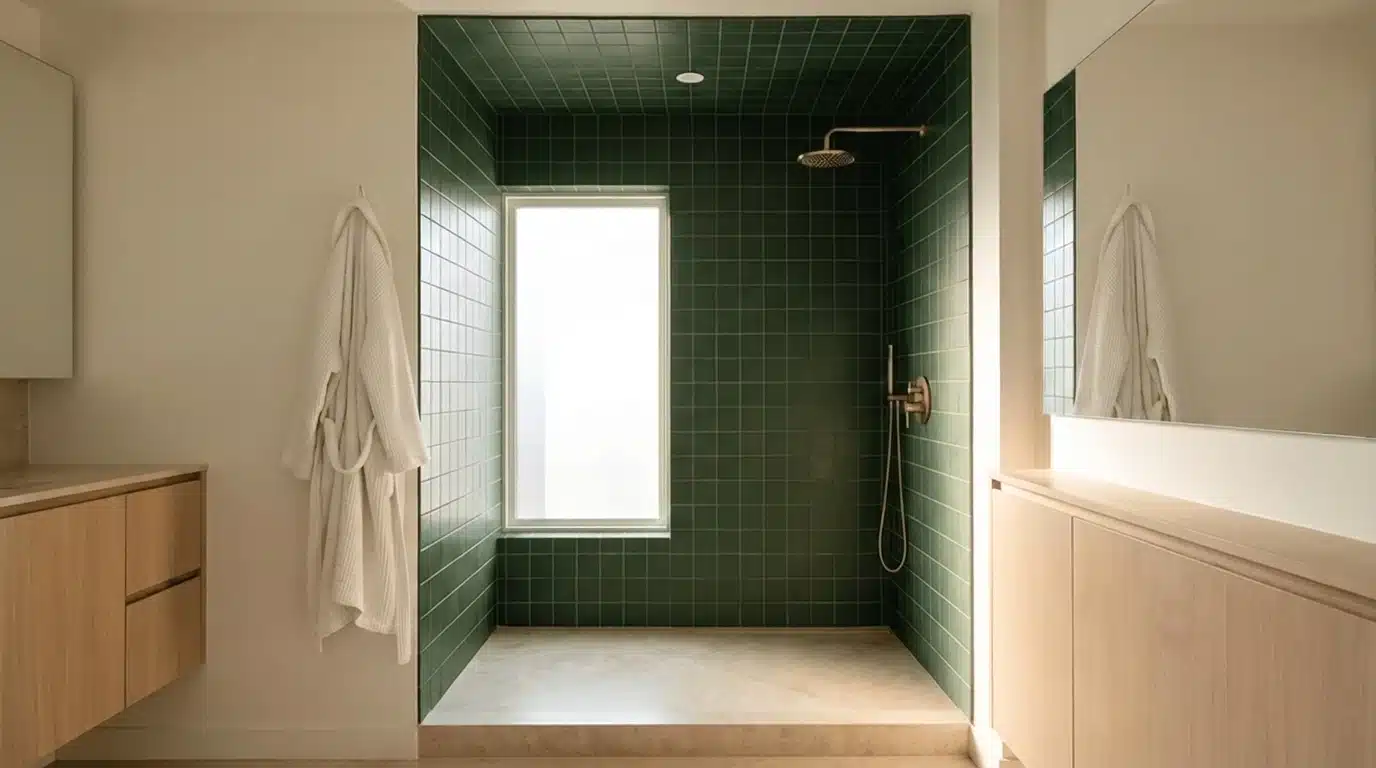
Using one rich shade across the shower walls and ceiling gives the open area a clear identity. Deep green tile can work well with warm metal fittings. Keep the floor or nearby walls quieter so the color does not take over the room.
| Best for | Colorful modern bathrooms |
| Main benefit | Gives the shower a strong, clear look |
| Defining feature | One rich shade covers most of the shower surfaces |
29. Create a Freestanding Shower Column
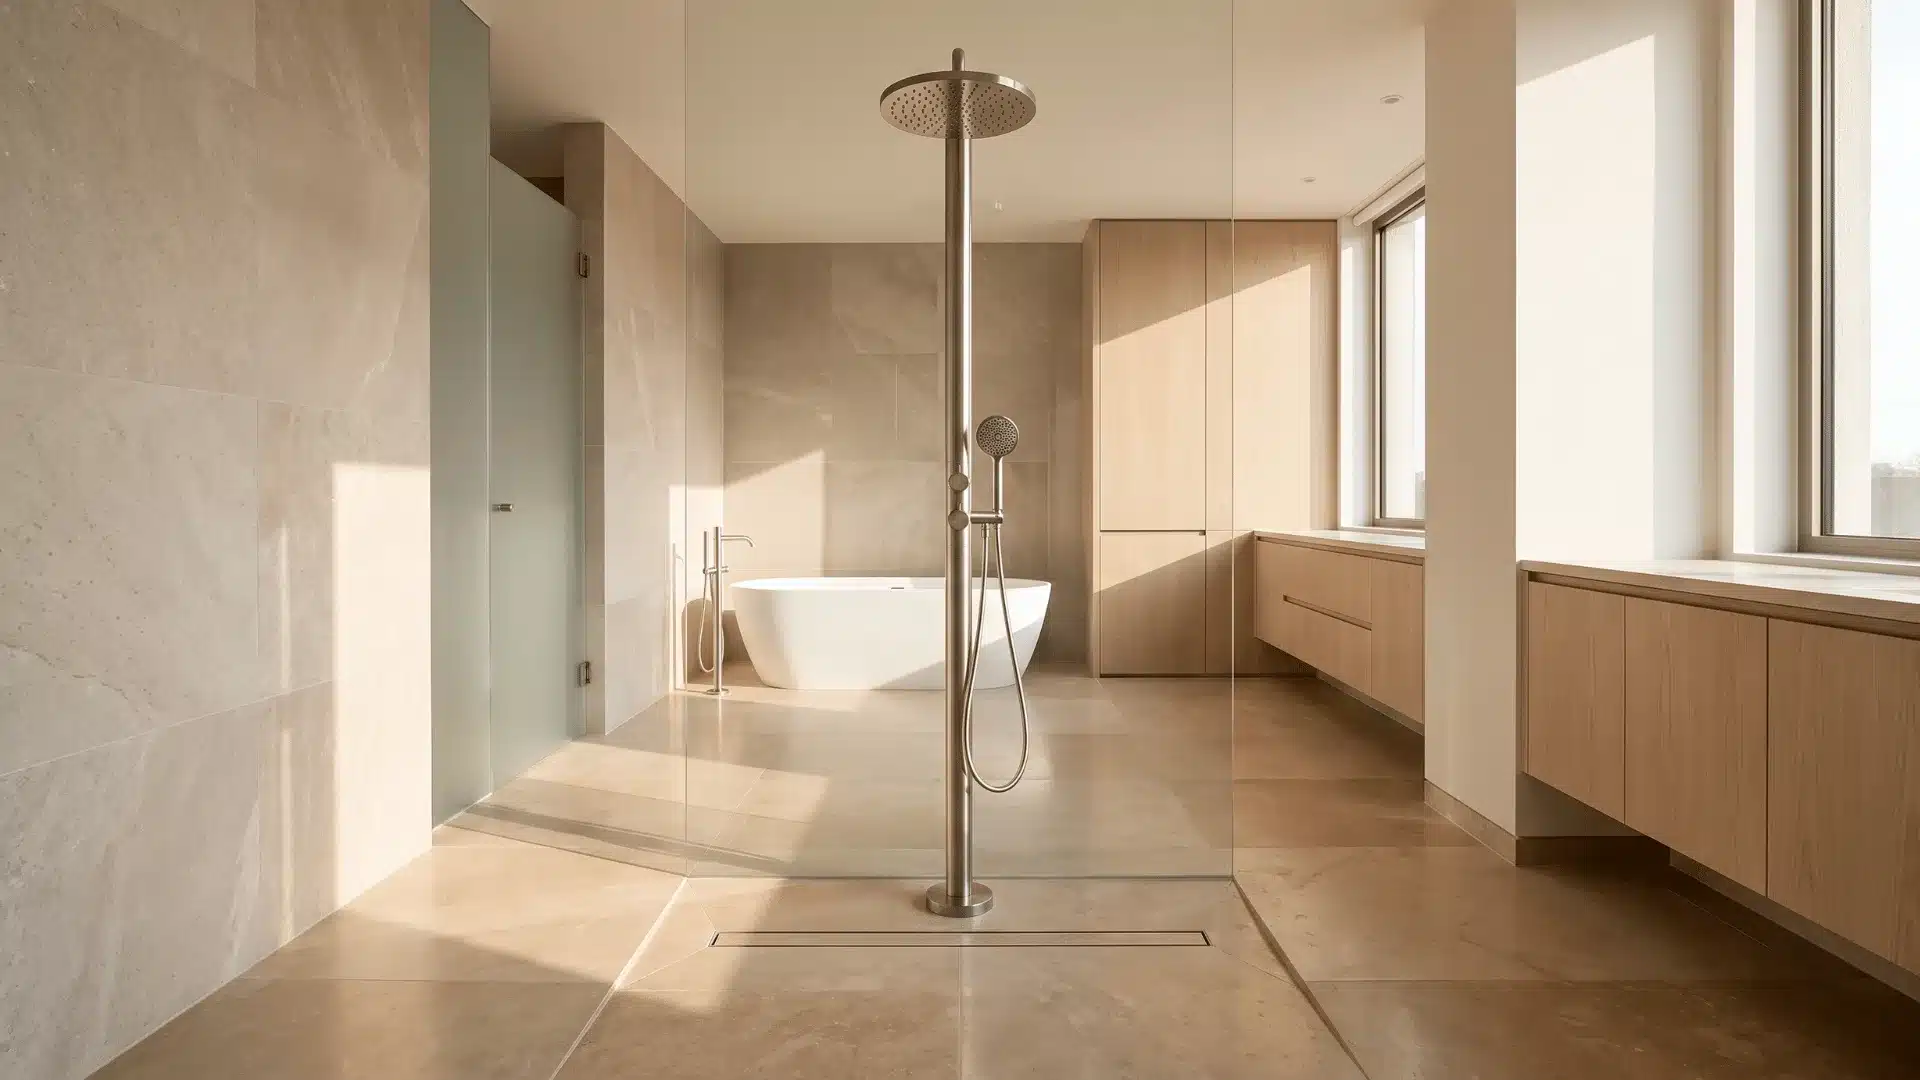
A freestanding column moves the shower fittings away from the wall and places them on a central structure. This makes the plumbing feature itself the focus and clearly separates the idea from a standard open wet room.
| Best for | Large open-plan bathrooms |
| Main benefit | Creates an open shower without a standard wall enclosure |
| Defining feature | Shower fittings sit on a central freestanding structure |
Takeaway: Keep furniture, towels, and storage outside the main spray area.
Tips to Improve a Doorless Walk-In Shower
Add a bench, built-in storage, reachable controls, a handheld spray, a clear entry, and wall support for future grab bars to make an open shower easier to use every day. Plan these features before the walls and tile are finished.
- Add Comfortable Seating: A full bench gives more room to sit and store products, which works well in a larger shower. A corner seat suits smaller layouts, while a floating seat keeps more floor open and visible. Place the seating where it stays easy to reach without blocking entry or water flow.
- Plan Storage Before Tiling: A recessed niche keeps bottles off the floor and out of the way, while a long ledge can hold items for more than one person using the space. Storage may also sit behind a tiled half-wall, staying out of view from the main entry.
- Make Controls Easy to Reach: Controls placed near the entrance let you start and adjust the water without stepping beneath the spray. A handheld showerhead adds flexibility for rinsing, cleaning the shower itself, washing children or pets, and use while seated.
- Add Accessibility Features Early: Early accessibility planning matters for older adults. The CDC reports that more than 1 in 4 adults aged 65 and older falls each year, which supports attention to floor grip, seating, lighting, and clear entry space.
A curbless entry and wide opening can make movement easier. A bench, handheld showerhead, and floor with good wet-area grip can also improve daily use. Plan a comfortable control height and support inside the wall for future grab bars before the wall finish is added.
Important: Test the control position with the people who will use the shower before installation. Plan wall support for future grab bars before the walls are closed, then confirm placement with a qualified installer.
Best Materials for a Doorless Walk-In Shower
Porcelain tile is the most practical all-around choice, while natural stone, mosaics, glass, and waterproof plaster suit different styles and care needs. Choose wall and floor finishes separately, since a good wall surface may be too smooth underfoot.
| Material | Best use | What to know |
|---|---|---|
| Porcelain tile | Walls and floors | Porcelain is durable, moisture-resistant, and available in many finishes. Large wall tiles reduce grout lines and keep the room calm. For the floor, choose a smaller or more textured finish made for wet areas. |
| Natural stone | Feature walls, benches, and ledges | Marble, travertine, and limestone add color and natural pattern. Stone and tiled shower surfaces may need sealing and regular care. Ask how the chosen finish handles water marks and which cleaner is safe to use. |
| Mosaic and terrazzo | Floors and accent areas | Small pieces can add pattern and suit compact showers or shaped floors. More grout lines mean more cleaning, so these materials often work better as a floor or accent than as a full wall treatment. |
| Glass panels | Splash control and privacy | Clear glass keeps views open. Frosted, reeded, or patterned glass gives more cover, while black-framed panels add stronger lines. Glass tile and panels may show water spots, so regular wiping can help. |
| Waterproof plaster and tadelakt | Wet-room walls | These finishes offer a softer alternative to full tile coverage. Tadelakt can be used in wet areas, but the waterproofing layer and installation must be done correctly. |
A good material plan should balance appearance with cleaning, water exposure, and long-term care.
Expert note: Choose the floor for safe footing first, then select wall materials for color and upkeep. Do not assume one finish suits every surface.
What Should You Include in a Doorless Shower Remodel Checklist?
Include full-room measurements, splash-zone planning, showerhead choice, drainage, waterproofing, floor material, privacy, and ventilation before you choose the final tile or glass material for your remodel.
- Measure the whole bathroom, not only the old shower area.
- Mark the likely splash zone based on the opening and showerhead position.
- Select the showerhead before setting the final layout.
- Decide between a raised curb and a curbless entry.
- Plan the drain position and floor slope together.
- Confirm how the floor and walls will be waterproofed.
- Choose floor tile made for wet areas with reliable grip.
- Decide how much privacy each household member needs.
- Plan lighting, ventilation, niches, towel storage, and seating.
- Add wall support for future grab bars where needed.
- Check that controls and storage are easy to reach.
- Ask a qualified installer to review the plan before work begins.
Important: Do not rely on one national price estimate. Costs can change with plumbing moves, structural work, waterproofing, tile, custom glass, drainage, and local labor.
A careful review at this stage can prevent water problems and costly changes once construction has started.
What Are the Pros and Cons of A Doorless Walk-In Shower?
The main benefits are a more open room, easier entry, and fewer door parts to clean. The main drawbacks are possible splashing, reduced privacy, heat loss, and more detailed floor work. This comparison covers the main trade-offs to consider before remodeling.
| Advantages | Possible drawbacks |
|---|---|
| Makes the bathroom feel visually open and allows light to move through the room | Water may reach the main floor if the shower is too shallow or the spray points towards the opening. |
| Has no door tracks or hinges that collect dirt and need regular cleaning | The open entrance can let warm air escape so that the shower may feel cooler |
| Offers easier entry, especially with a curbless floor and wide opening | It provides less privacy than a fully enclosed shower |
| Keeps wall tile, benches, niches, and fittings visible | The floor slope and waterproofing may require more detailed work |
| Suits compact, traditional, modern, and wet-room layouts | Custom glass, drainage changes, and floor work may increase the cost |
A doorless shower is a good fit when the room has enough space, and the construction details are carefully planned. It may not suit a household that needs strong privacy, better heat retention, or greater protection from frequent splashing.
Frequently Asked Questions
Can you install a doorless shower in a small bathroom?
Yes. A corner or alcove layout can work well. Place the showerhead away from the entry, add a fixed glass panel or half-wall, and allow enough depth for spray to fall inside the wet area.
Are doorless showers harder to maintain?
No, not necessarily. Doorless showers have fewer tracks and hinges to clean, but grout, glass, drains, and natural stone still need regular care. Maintenance depends more on the materials you choose than on the open entrance.
How do you stop water from splashing out?
Plan the shower depth, floor slope, drain, showerhead direction, and splash barrier as one system. A fixed panel can provide added protection when the opening is close to a vanity, toilet, or walkway.
What is the difference between curbless and doorless?
Doorless describes an open entrance without a shower door. Curbless describes a level floor transition without a raised threshold. A shower may be doorless, curbless, both, or neither.
Do doorless showers feel cold?
They can. An open entrance lets warm air escape. Heated flooring, good room heating, an overhead rain head, and a partial glass panel can make the shower feel more comfortable.
Wrapping Up
Good doorless walk in shower ideas should be selected based on how they suit the room, support daily use, offer enough privacy, and keep wet and dry areas apart.
These practical choices affect daily comfort more than any single tile or fitting choice. The right doorless walk-in shower balances layout, water control, material care, and comfort features so the space works well for everyone who uses it.
Save your favorite designs and compare them with your bathroom’s size, daily routine, entry space, and likely splash zone.
Then review the options with a contractor or bathroom designer before you choose the final layout. That review can help you avoid costly changes and move forward with a shower that works well every day.
Drop a comment below and tell me which one you would install.