Curtains can change the whole feel of a room when they are hung the right way. They can make a window look taller, soften the room, and give the space a more finished look.
I always look at curtains as more than fabric because the height, width, length, and hardware all affect the final result.
My goal with this curtain hanging guide is to make the process easier before you start drilling. Once you understand the basic rules, curtain installation becomes much less confusing and much easier to get right.
The Basic Rules of Hanging Curtains
The best curtain setups start with proper rod height. The rod should be positioned above the window frame, not directly on top of it, to make the window appear taller and create a more open feeling in the room.
In rooms with low ceilings, hanging the rod closer to the ceiling can enhance this effect.
Next, consider rod width; it should extend beyond both sides of the window to allow curtains to open fully without covering too much glass, which increases natural light and makes the window look wider.
Curtains should have appropriate fullness; fuller panels with more fabric produce softer folds and a polished look.
The length should be intentional; full-length curtains should hover slightly above the floor or lightly touch it, while shorter curtains are suitable for specific functions.
Finally, hardware must match the curtain’s weight: lightweight sheers need simple rods, whereas heavy or blackout curtains require sturdy brackets and anchors.
Choose the Right Curtain Size

Curtains should be wider than the window so they look soft and full when closed. If the panels are too narrow, they can look flat even if the fabric is beautiful.
Use the rod width, not just the window width, when calculating curtain fullness.
For the Width
| Curtain Fullness | Best For | How It Looks |
|---|---|---|
| 1.5x rod width | Simple rooms, light fabrics, casual spaces | Clean and relaxed |
| 2x rod width | Living rooms, bedrooms, and everyday drapes | Full and balanced |
| 2.5x rod width | Formal rooms, rich fabrics, decorative panels | Luxurious and gathered |
Length matters too. Full-length curtains usually look more finished than panels that stop awkwardly above the floor.
For the Length
| Curtain Length | Best For | What to Know |
|---|---|---|
| Floating | Daily-use curtains | Stops slightly above the floor and is easy to clean |
| Touching | Tailored rooms | Just meets the floor for a neat, polished look |
| Soft break | Relaxed spaces | Adds slight fabric movement at the floor |
| Café or still-length | Kitchens, bathrooms, counters, radiators | Works only when the shorter length is intentional |
Avoid short curtains unless the window or room function calls for them. Full-length panels usually make the window and wall feel taller.
Choose the Right Rod Size
The rod should be wider than the window frame. A good rule is to extend it 6 to 12 inches past the frame on each side. This gives the curtains space to open without covering too much glass.
A wider rod helps with:
- More daylight: Curtains can stack on the wall rather than hang over the window.
- Wider windows: The window looks larger because the fabric frames it from the outside.
- Cleaner folds: Panels have more space to fall naturally when open.
- Better balance: The window treatment looks planned instead of squeezed in.
For tight spaces, use the widest rod that the wall allows. For wide windows, choose a stronger rod and add a center support bracket if needed.
Choose the Right Hardware
Hardware should match the curtain weight and the frequency with which the curtains will move. A light sheer curtain does not need the same support as a heavy blackout or lined panel.
| Curtain Type | Best Hardware Choice |
|---|---|
| Sheer curtains | Slim rod, light brackets, simple rings, or pocket style |
| Cotton or linen panels | Standard rod, medium brackets, rings, or hooks |
| Blackout curtains | Stronger rod, sturdy brackets, secure anchors |
| Velvet or heavy drapes | Thick rod, heavy-duty brackets, center support |
| Wide windows | Extended rod, extra brackets, strong wall anchors |
| Ceiling-mounted curtains | Track system or ceiling brackets |
Use wall studs when possible because they give the strongest hold. If the brackets do not land on studs, use wall anchors that can support the curtain and rod weight.
A good curtain setup should look beautiful, but it should also feel secure, open smoothly, and suit the way the room is used.
How to Hang Curtains Step by Step
Once you have chosen the curtain size, length, rod, and hardware, the actual installation is straightforward. Take your time with measuring and marking because that is where most curtain mistakes happen.
Tools You Need for Curtain Installation
You do not need complicated tools, but you do need the basics. Keep the following things ready before you start.
- Tape Measure
- Pencil
- Level
- Drill
- Screws
- Wall Anchors
- Screwdriver
- Step Ladder
- Curtain Rod
- Brackets
- Rings, Hooks, or Clips
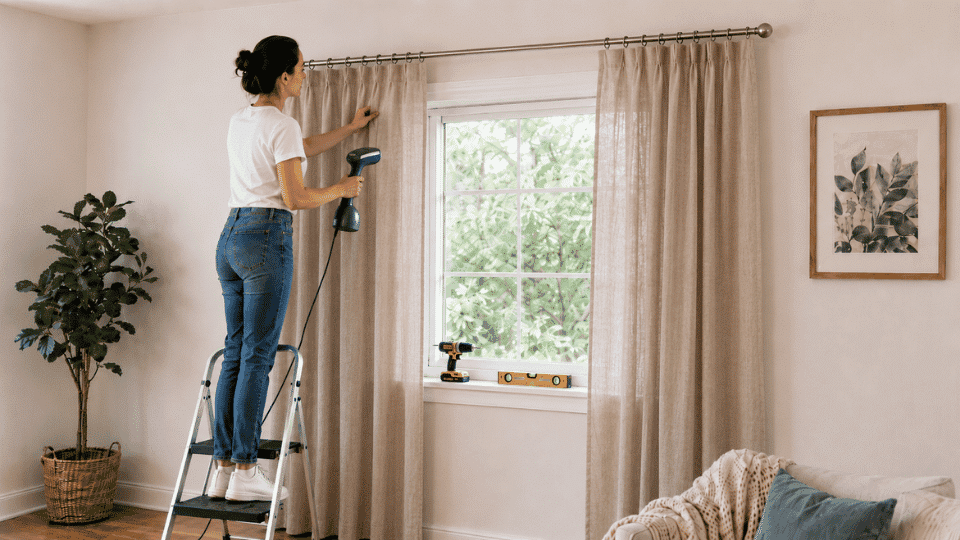
Step 1: Measure and Mark the Curtain Placement
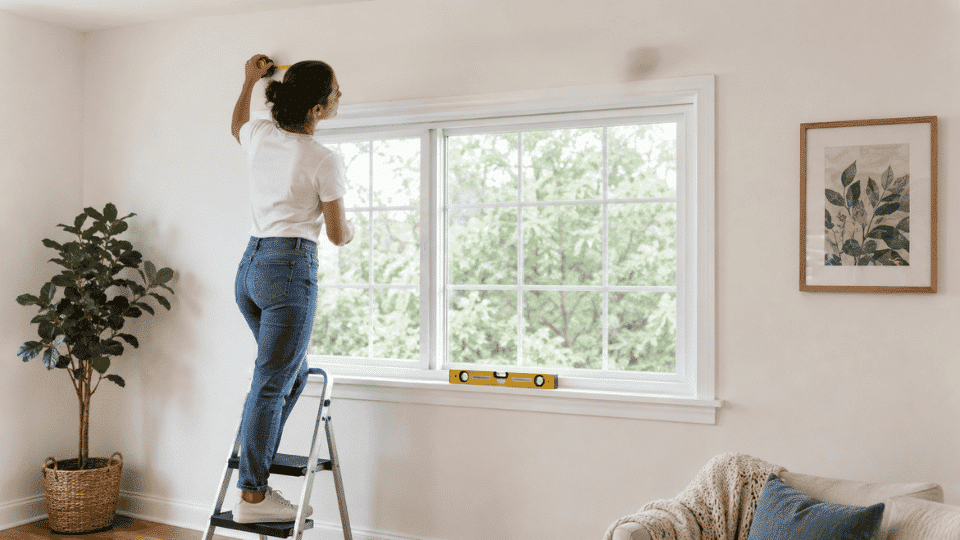
Start by measuring the outside width of the window frame. Then check how much wall space you have on both sides.
Decide how high the rod should sit and how far it should extend beyond the frame. Mark the rod height with a pencil, then mark the bracket positions on both sides.
Use a level before drilling so the rod does not end up tilted. Also, measure from the planned rod height to the floor so the curtain length works.
Step 2: Install the Brackets
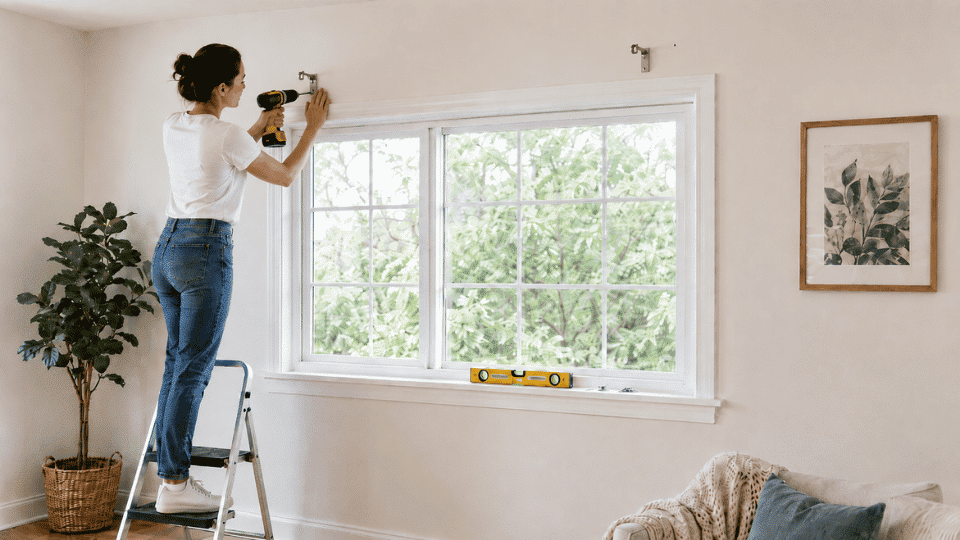
Before installing brackets, check if your marks line up with studs. If they do, screw the brackets directly into the studs for stronger support.
If they do not, use proper wall anchors. Drill pilot holes first so the screws go in cleanly. Attach the brackets and check again with a level before fully tightening them.
For wide rods or heavy curtains, add a center support bracket. This prevents the rod from bending in the middle over time.
Step 3: Hang the Curtains
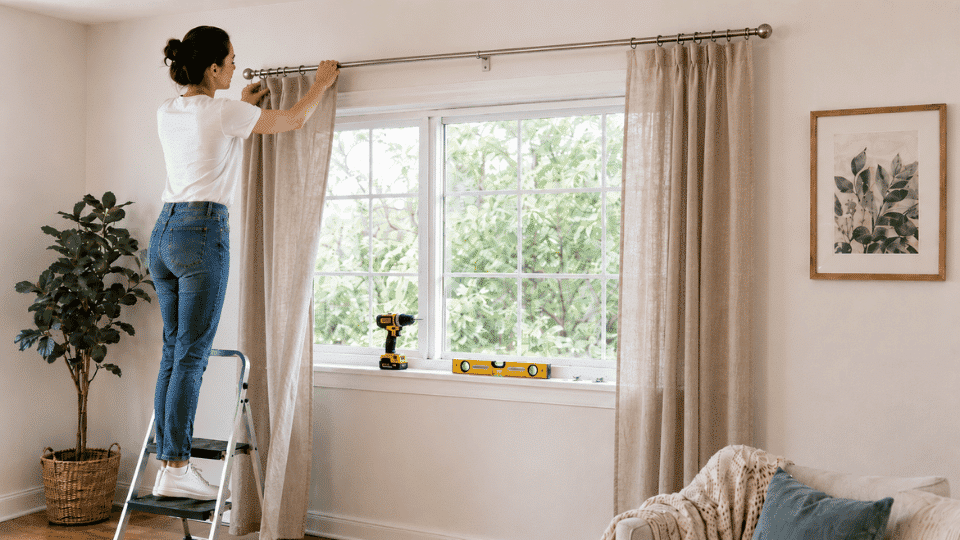
How you hang the curtains depends on the style of the curtains. For rod pocket or grommet curtains, slide the panel directly onto the rod. For ring clips, attach the clips to the fabric first, then slide the rings onto the rod.
For pinch pleat curtains, attach the hooks and connect them to the rings. For track systems, attach the curtain hooks to the carriers. Once the curtains are on the rod or track, secure the rod in the brackets.
Step 4: Adjust the Finish
After the curtains are up, step back and check the overall look. Make sure both sides feel even, and the bottom hem sits where you planned. Steam or iron the fabric if it looks wrinkled.
Shape the folds by hand, so they fall evenly from top to bottom. Open and close the curtains a few times to make sure they move smoothly.
These small finishing steps make a big difference, especially if you want the curtains to look intentional and polished.
Curtain Hanging Styles

The curtain style you choose affects how the curtains hang, move, and feel in the room. Some styles are better for casual spaces, while others give a more tailored designer finish.
1. Rod Pocket Curtains
Rod pocket curtains have a sewn pocket at the top where the rod slides through. They create a soft, gathered look and are simple to hang.
They work best for decorative curtains that do not need to open and close often. The downside is that they do not glide very smoothly across the rod.
Use them in guest rooms, low-use spaces, or rooms where the curtains mostly stay in one position.
2. Grommet Curtains
Grommet curtains have metal rings built into the top of the fabric. The rod passes through the rings, creating even folds.
They are easy to hang and suit casual, modern, or simple rooms. They also move better than rod pocket curtains.
However, they can feel less custom than pleated styles. Use grommet curtains when you want something clean, practical, and easy to install without extra hooks or rings.
3. Ring Clip Curtains
Ring clip curtains are a good option for quick DIY hanging. The clips attach to the top of the fabric, and the rings slide across the rod.
They are useful when you want to adjust the curtain length slightly because the clips add a little extra drop. This style works best with lighter fabrics and casual interiors.
It may not be the best choice for formal rooms or heavy curtains because the clips can look less refined.
4. Pinch Pleat Curtains
Pinch pleat curtains have sewn pleats at the top, giving them a structured and polished look. They are usually hung with hooks and rings.
This style works well in living rooms, dining rooms, bedrooms, and any space where you want a more finished designer feel.
Pinch pleats also help the fabric fall in neat vertical folds. They usually look more custom than grommet or rod pocket curtains, but they may cost more.
5. Track Curtains
Track curtains hang from a wall-mounted or ceiling-mounted track. They are great for modern rooms, wide windows, sliding doors, and ripple-fold curtains.
Tracks let the curtains move smoothly and can create a clean, almost built-in look. Ceiling-mounted tracks are especially helpful when you want to make the room feel taller.
They are also useful for layering sheers and blackout curtains because each layer can move separately.
6. Layered Curtains
Layered curtains combine two types of window treatment, usually sheers with heavier drapes.
Sheers soften daylight and add daytime privacy, while lined or blackout curtains give stronger privacy and light control at night.
This style works especially well in bedrooms, nurseries, living rooms, and rooms with strong sunlight.
Layering also adds depth to the window, making the room feel more finished. Use a double rod or double track for the cleanest setup.
Designer Tips for a Better Curtain Finish
Once the curtains are installed, these finishing details help them look styled rather than simply hung.
- Steam panels: Remove packaging creases so the fabric hangs cleanly from top to bottom.
- Shape folds: Arrange the fabric by hand so the folds fall evenly on both sides.
- Check hems: Step back and make sure the bottom edge looks even across the floor.
- Balance sides: Keep the left and right panels sitting at the same visual width.
- Hide gaps: Adjust the panels so the center and side edges do not expose unwanted light.
- Style tiebacks: Use tiebacks only when they suit the room, not just to hold fabric aside.
- Tuck returns: Let the outer curtain edge turn slightly toward the wall for a cleaner side view.
- Clear floors: Keep puddled fabric neat so it looks intentional, not messy.
Conclusion
A good curtain setup starts before you hang anything. Measure the window, check the wall space, choose the right curtain length, and make sure the rod and hardware can support the fabric.
This curtain hanging guide keeps the process simple: hang high, hang wide, use enough fullness, and finish the fabric properly after installation.
I always think curtains look best when they feel connected to the whole room, not just the window. My best advice is to plan the size and placement first, then handle the curtain installation once all measurements feel right.