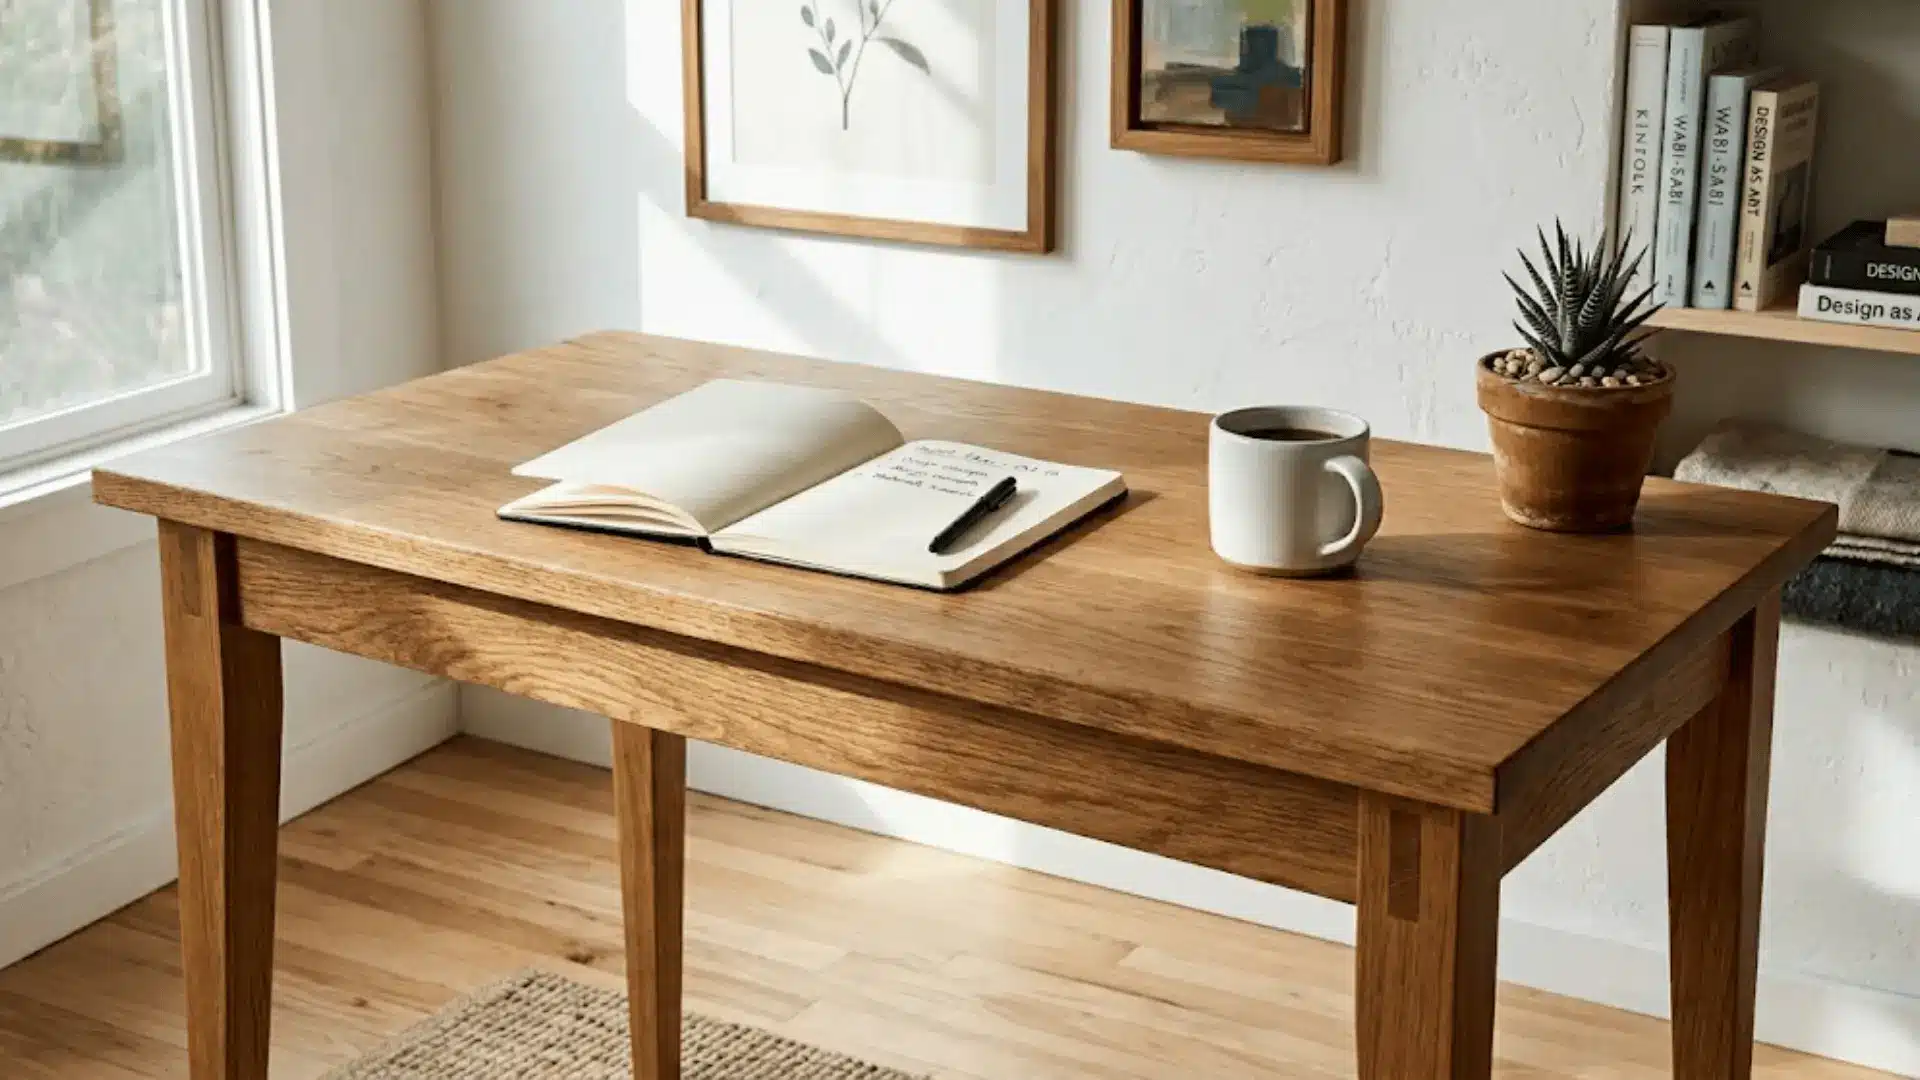
That dream desk you keep saving to your Pinterest board? You can actually build it yourself, and it’s so much more doable than it sounds.
A DIY desk lets you choose every detail, from the wood finish to the exact width that fits your space, without the compromise of settling for something close enough.
It costs a fraction of what furniture stores charge for something half as good, and the result feels genuinely yours.
Everything you need, from materials to design ideas to real building tips, is waiting right here.
Why Build a DIY Desk Instead of Buying One?
Furniture stores give you two options: pay a lot or compromise on quality. Building your own desk sidesteps both.
DIY desks cost significantly less than retail alternatives, and every penny goes toward materials you actually chose.
Got an awkward corner or a tiny room? You build around it.
The desk fits your space, not the other way around. You also get full creative control over materials and style, whether that’s warm wood tones, sleek metal, or something entirely your own.
The result is a piece that looks intentional because it genuinely was.
Planning Your Desk Build
A little planning upfront saves a lot of fixing later. Before you buy a single board, get clear on what you actually need.
- Measure your space first and decide whether standard dimensions work or if custom sizing makes more sense.
- Choose a desk style that matches your use, whether that’s a simple writing desk, a computer setup, or a standing desk.
- Think about your layout, a straight desk, L-shape, or corner build; each suits different rooms differently.
- Factor in weight capacity based on what sits on top, monitors, equipment, and storage add up fast.
- Sketch a rough plan before shopping so your material list is accurate from the start.
Getting these decisions locked in early makes everything else fall into place naturally.
Tools and Materials You’ll Need
Getting your tools and materials sorted before you start makes the whole build smoother.
Here’s a quick overview of everything you’ll want to have on hand.
| Category | Items | Options | Approx. Cost |
|---|---|---|---|
| Wood | 2×4 pine boards, birch plywood | Pine, birch, oak | ₹800 – ₹3,500 |
| Sheet Goods | ¾ inch plywood, ¼ inch plywood | MDF alternative works too | ₹600 – ₹2,000 |
| Hardware | Pocket screws, wood screws, and wood glue | Steel or zinc-coated | ₹200 – ₹600 |
| Drawer Parts | Ball bearing slides, drawer boxes | 16-inch slides recommended | ₹500 – ₹1,500 |
| Trim & Finish | 1×2 boards, cove molding, half-round molding, clear poly | Matte or gloss finish | ₹300 – ₹1,200 |
Step-by-Step: How to Build a Desk?
Building a desk feels far less overwhelming once you break it down into simple stages. Follow these steps, and you’ll have a solid, beautiful workspace without second-guessing yourself once.
Step 1: Cut and Glue the Legs

Start by laminating two pieces of 2×4 lumber together for each leg. Trim them to length before gluing, then clean up the edges once dry for a true, square post.
For a cleaner finish, add a subtle taper by angling your miter saw to cut two sides inward. This small detail makes the whole desk look noticeably more polished.
Step 2: Build and Assemble the Frame
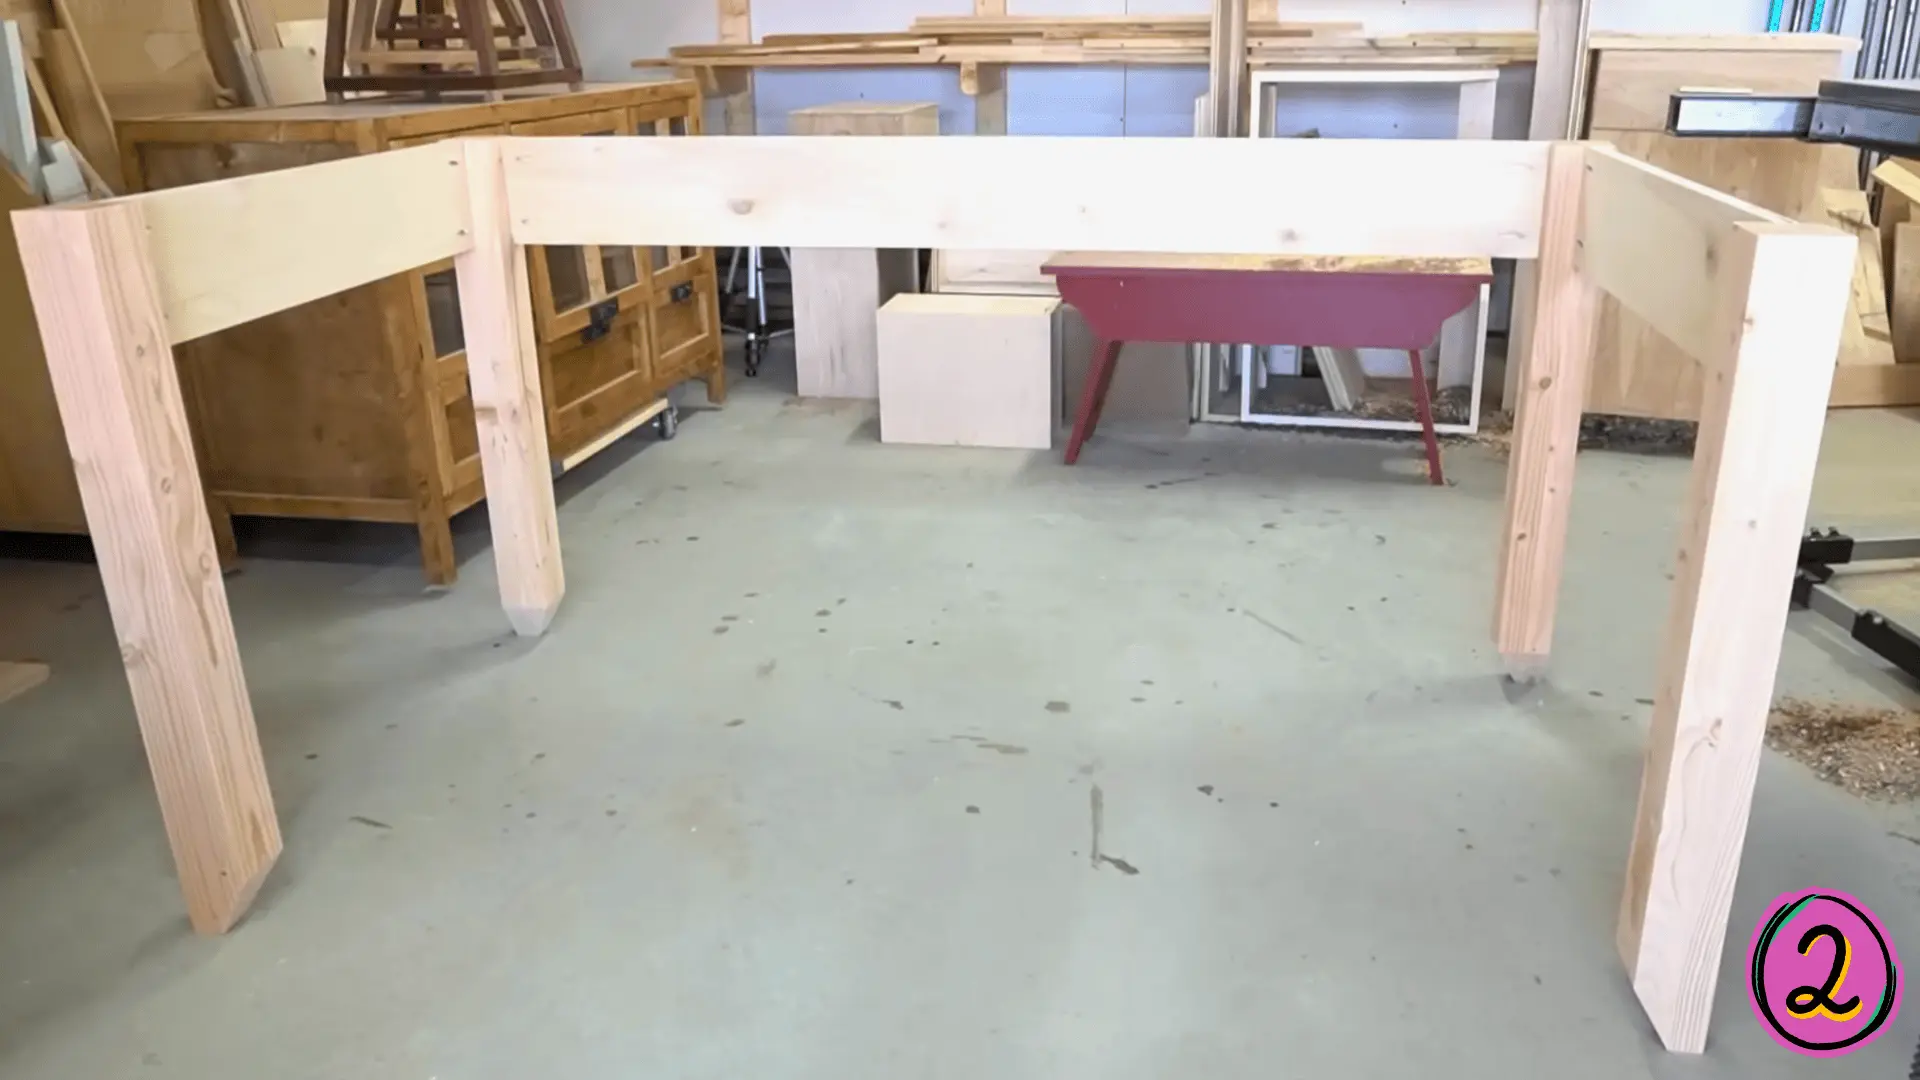
Rip your plywood strips down to six inches wide for the side and back aprons, then trim them to length.
Drill pocket holes into the ends and attach them three-quarters of an inch inset from the outer edge of the legs. This offset matters because it leaves room for trim later, keeping everything flush on the outside.
Step 3: Add Drawer Bracing and Slides
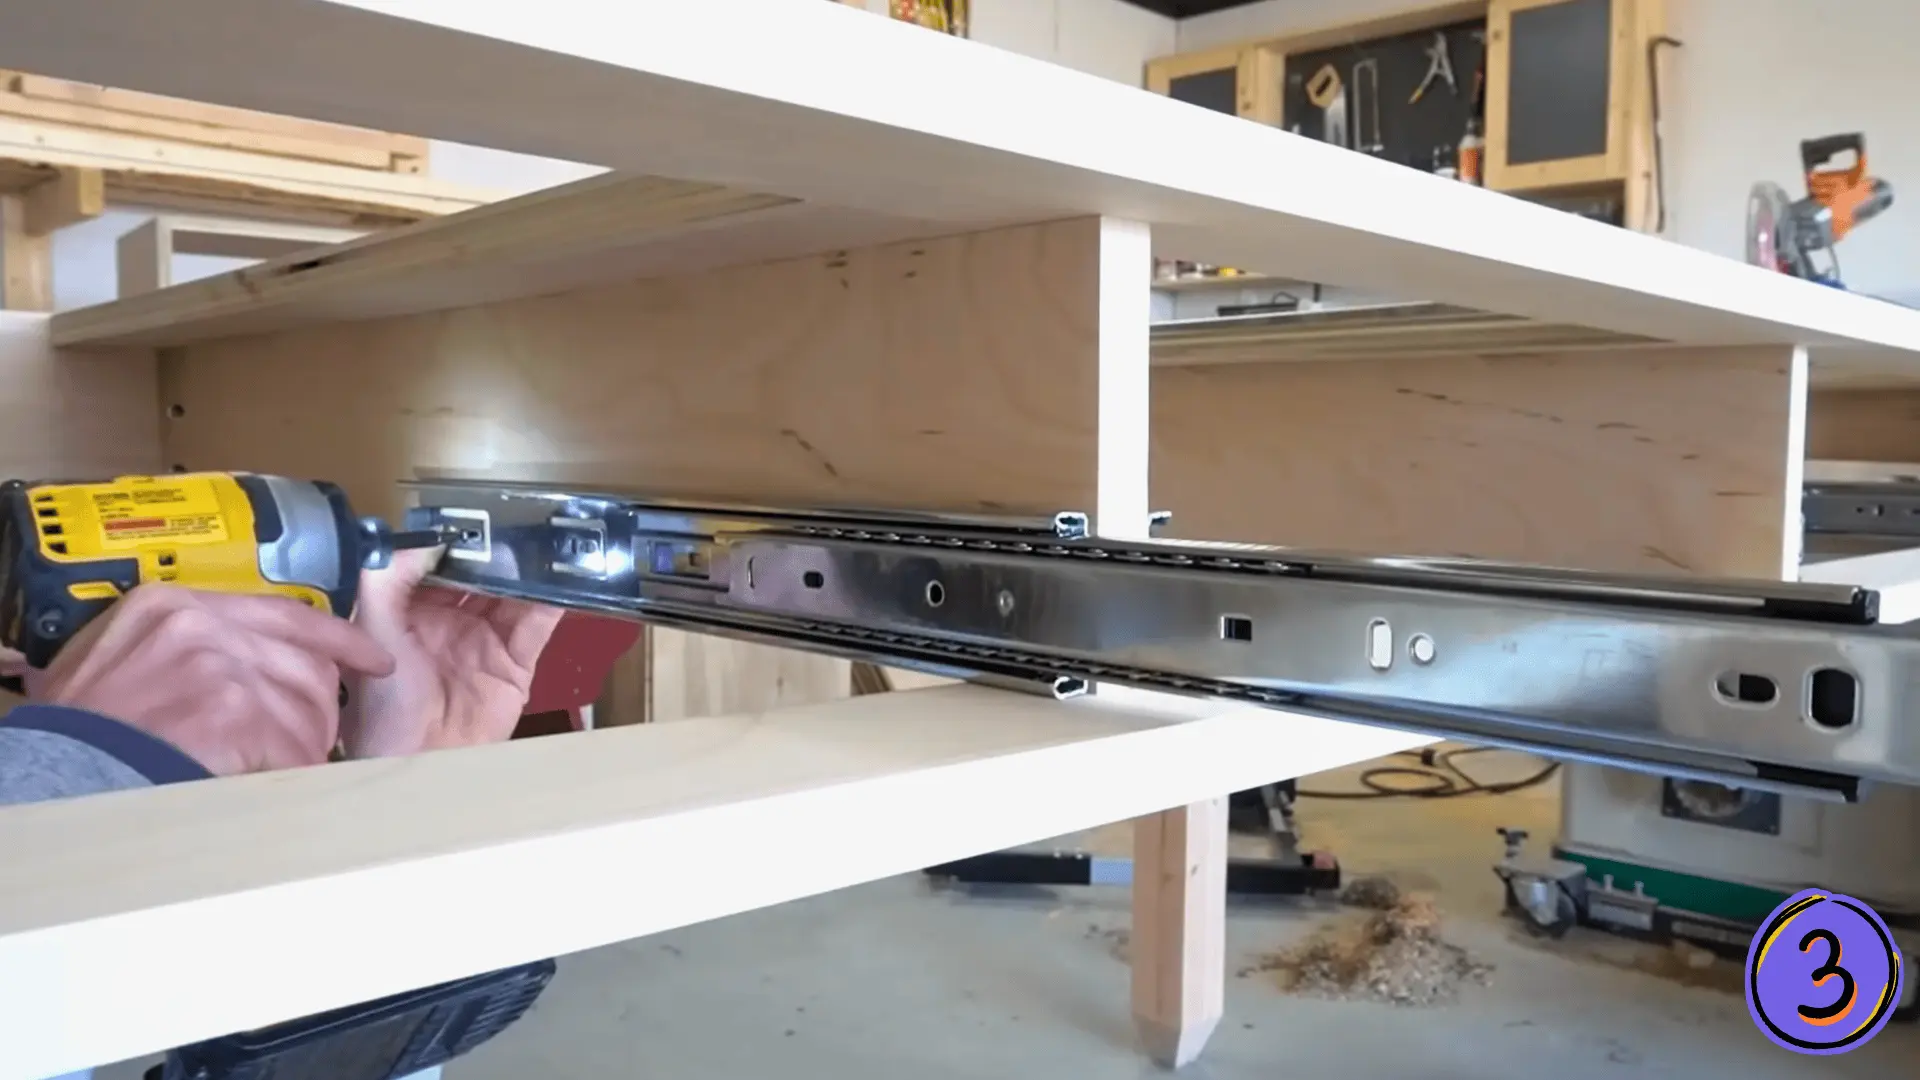
Since the front skips a solid apron to make room for drawers, install two narrower plywood strips at the top and bottom instead.
Add interior bracing across the frame, spacing the middle pieces to match your drawer width exactly. Then mount your ball bearing drawer slides an inch and a half inset from the front edge.
Step 4: Build the Drawer Boxes and Attach the Top
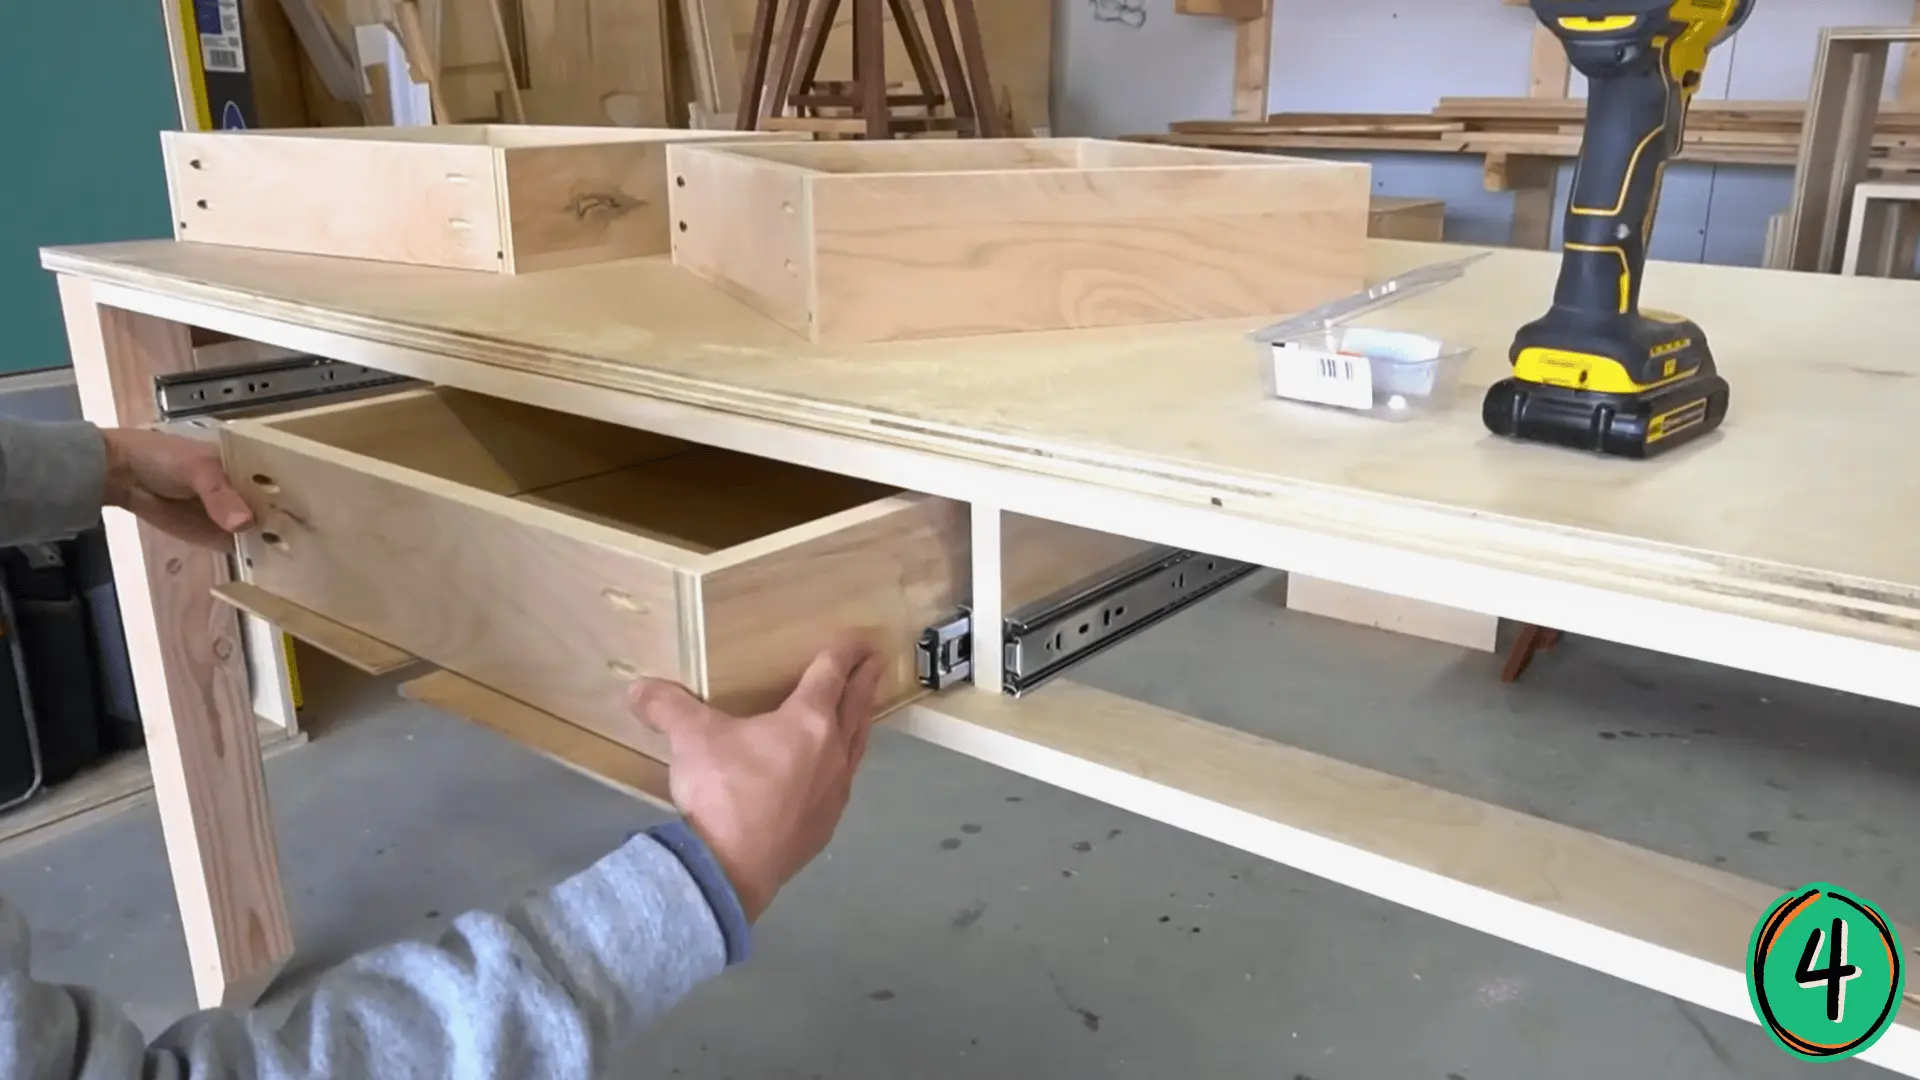
Rip plywood pieces to about four inches wide, cut a dado along the bottom for the base panel, and assemble each box using pocket holes and screws.
Once the drawers are in, cut your desktop from three-quarter-inch plywood, apply iron-on edge banding to all exposed edges, and secure it from underneath through the top supports.
Step 5: Add Trim and Apply Finish
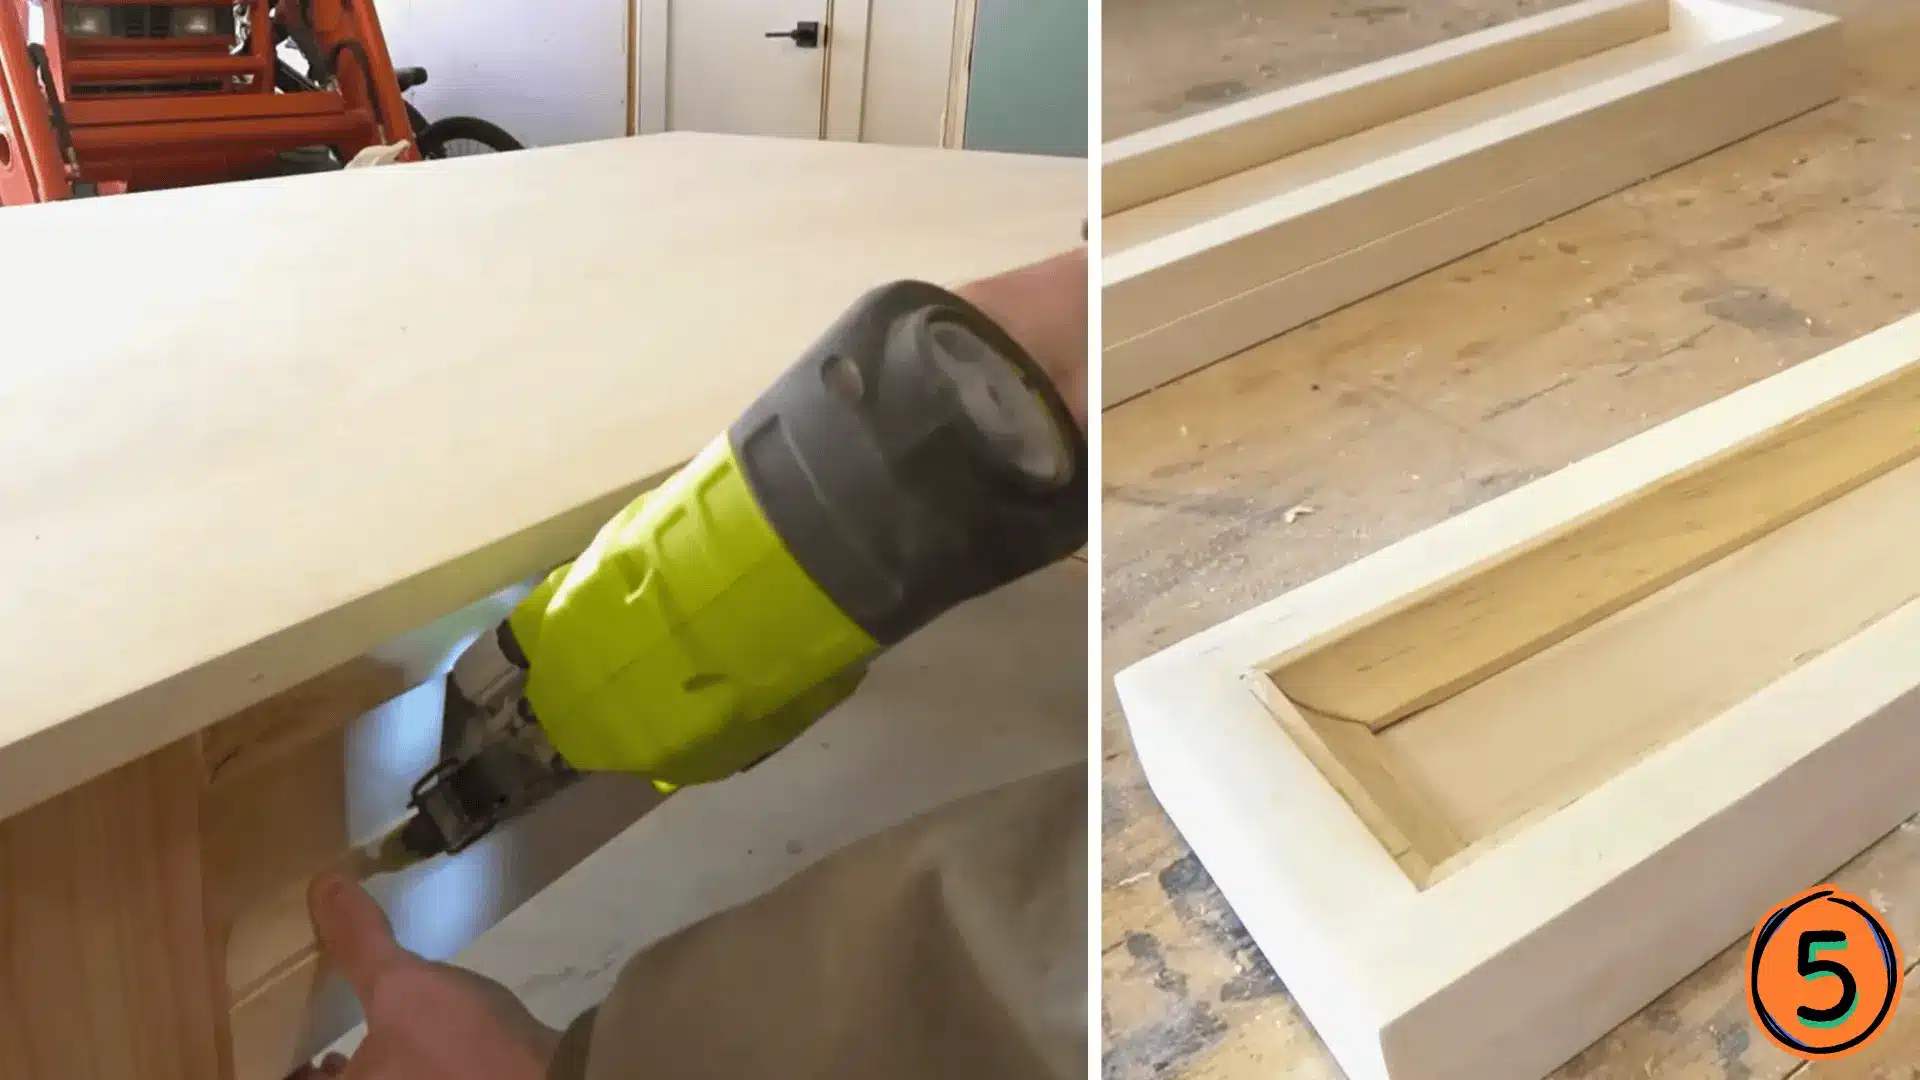
Glue and nail 1×2 boards along the top and bottom edges of the sides and back, then line the inside of each frame with cove molding for a refined look.
Match the drawer fronts to the sides by framing them with dowels and cove molding. Finish with a few coats of clear polyurethane to seal and protect the wood.
For a more detailed walkthrough of the process, check out the complete video tutorial below by Shara Woodshop Diaries
Popular DIY Desk Designs
Not every desk looks the same, and that’s exactly the point of building your own.
Here’s a quick look at the most popular styles to help you find the one that fits your space and workflow.
| Desk Style | Ideal Space | Standout Feature |
|---|---|---|
| Simple Wooden Desk | Any room, any budget | Beginner-friendly build with minimal tools |
| Floating Wall Desk | Small or narrow rooms | Mounts to the wall, keeps the floor clear |
| L-Shaped Corner Desk | Home offices and open corners | Wraps around your space for maximum surface area |
| Standing Desk | Dedicated workstations | Supports fixed or adjustable height for flexible use |
Real DIY Tips From Experienced Builders
Sometimes the best advice doesn’t come from a manual; it comes from someone who already made the mistakes so you don’t have to.
Here’s what the DIY community swears by:
- Pre-drill your holes before driving screws in; it takes an extra minute but saves the wood from splitting.
- Clamp every piece into position before you screw anything down; alignment is so much easier to fix before it’s permanent.
- Don’t rush the sanding stage; a smooth, well-sanded surface is what separates a homemade-looking desk from a polished one.
- Go for thicker wood if sturdiness matters to you; the extra weight and solidity is worth every bit of the cost difference.
For more builder insights and honest project breakdowns, this r/woodworking thread is a great place to see how real builders approach their desk builds and what the community has to say about it.
Finishing Your DIY Desk
The finish is what takes your desk from a wooden build to an actual furniture piece.
If you want to show off the natural grain, wood stain is your best friend. If you’re going for something more modern or colorful, paint gives you far more flexibility.
Either way, never skip the protective coating step.
A clear polyurethane or lacquer sealant shields the surface from daily scratches, spills, and wear, and it’s the difference between a desk that ages beautifully and one that looks tired within a year.
Maintenance Tips for Your Desk
A well-built desk can last for years, but only if you treat it right. A little routine care goes a long way.
- Wipe the surface down with a damp, lint-free cloth and skip anything with harsh chemicals.
- Use a desk mat or padding under laptops, monitors, and heavy objects to prevent surface dents.
- Reapply a thin coat of sealant once a year to keep the protective layer intact.
- Avoid placing hot mugs or wet glasses directly on the wood; a coaster saves the finish.
- Tighten screws and check joints every few months; catching loose hardware early prevents bigger damage.
Treat it well, and it’ll hold up through every late night, every project, and every coffee cup along the way.
Wrapping Up
Building your own desk is one of those projects that stays with you, not just as a piece of furniture but as something you actually made with your hands.
Every scratch you sand, every joint you clamp, every coat of finish you apply adds up to a workspace that’s completely yours.
First-timers and seasoned builders alike find something deeply satisfying about knowing how to build a desk from scratch.
Drop your questions, progress pics, or finished builds in the comments; would love to see what you create.