A smoky fireplace can ruin a calm night fast. If ash keeps falling into the firebox or the room smells burnt before you light a fire, your flue may need a careful clean.
You can clean a chimney yourself when the buildup is light, the fireplace is cold, and the setup feels safe. Basic chimney cleaning can remove loose soot, cold ash, and some flaky creosote, but the job works best when you check first and move slowly.
I’ll keep the process clear, so you know what to inspect, what to use, how to seal the room, and when to stop before the job gets risky without making a soot cloud at home.
Check the Chimney Before the Brush Comes Out
Before you pick up a tool, shine a bright flashlight inside the firebox, around the damper, and up into the lower flue. This quick look tells you if the chimney is ready for a light DIY clean or if the job needs a sweep.
Dry soot and thin flakes are usually easier to brush out. Thick black buildup, sticky residue, glossy creosote, cracked masonry, rust, water stains, or nest material are warning signs. If smoke has been backing into the room, do not start brushing.
You can usually clean light buildup yourself when the fireplace is fully cold, the damper moves, and the lower flue looks clear enough for a basic brush-out. If the buildup looks hard, shiny, or sticky, stop there. A few minutes of checking can save you from a bigger mess later.
Should You Clean It Yourself or Call a Sweep
A DIY clean makes sense when the chimney has light soot, safe access, and no signs of damage. It does not make sense when the buildup looks heavy or the roof work feels unsafe.
| Situation | Best Move |
|---|---|
| Light dry soot | DIY cleaning may be fine |
| Flaky buildup | Brush slowly and inspect after |
| Shiny or sticky creosote | Call a sweep |
| Smoke enters the room | Stop using the fireplace |
| Cracks, rust, or water stains | Get an inspection |
| Nest material or blockage | Do not light a fire |
If you feel unsure, stop before brushing. A chimney is not the place to guess, especially when smoke, fire, and airflow are involved.
How to Clean a Chimney Step by Step
Read through the full process before you start. Keep the tools nearby, make sure the fireplace is fully cold, and choose whether you are cleaning from inside the house or from the roof before the brush goes in.
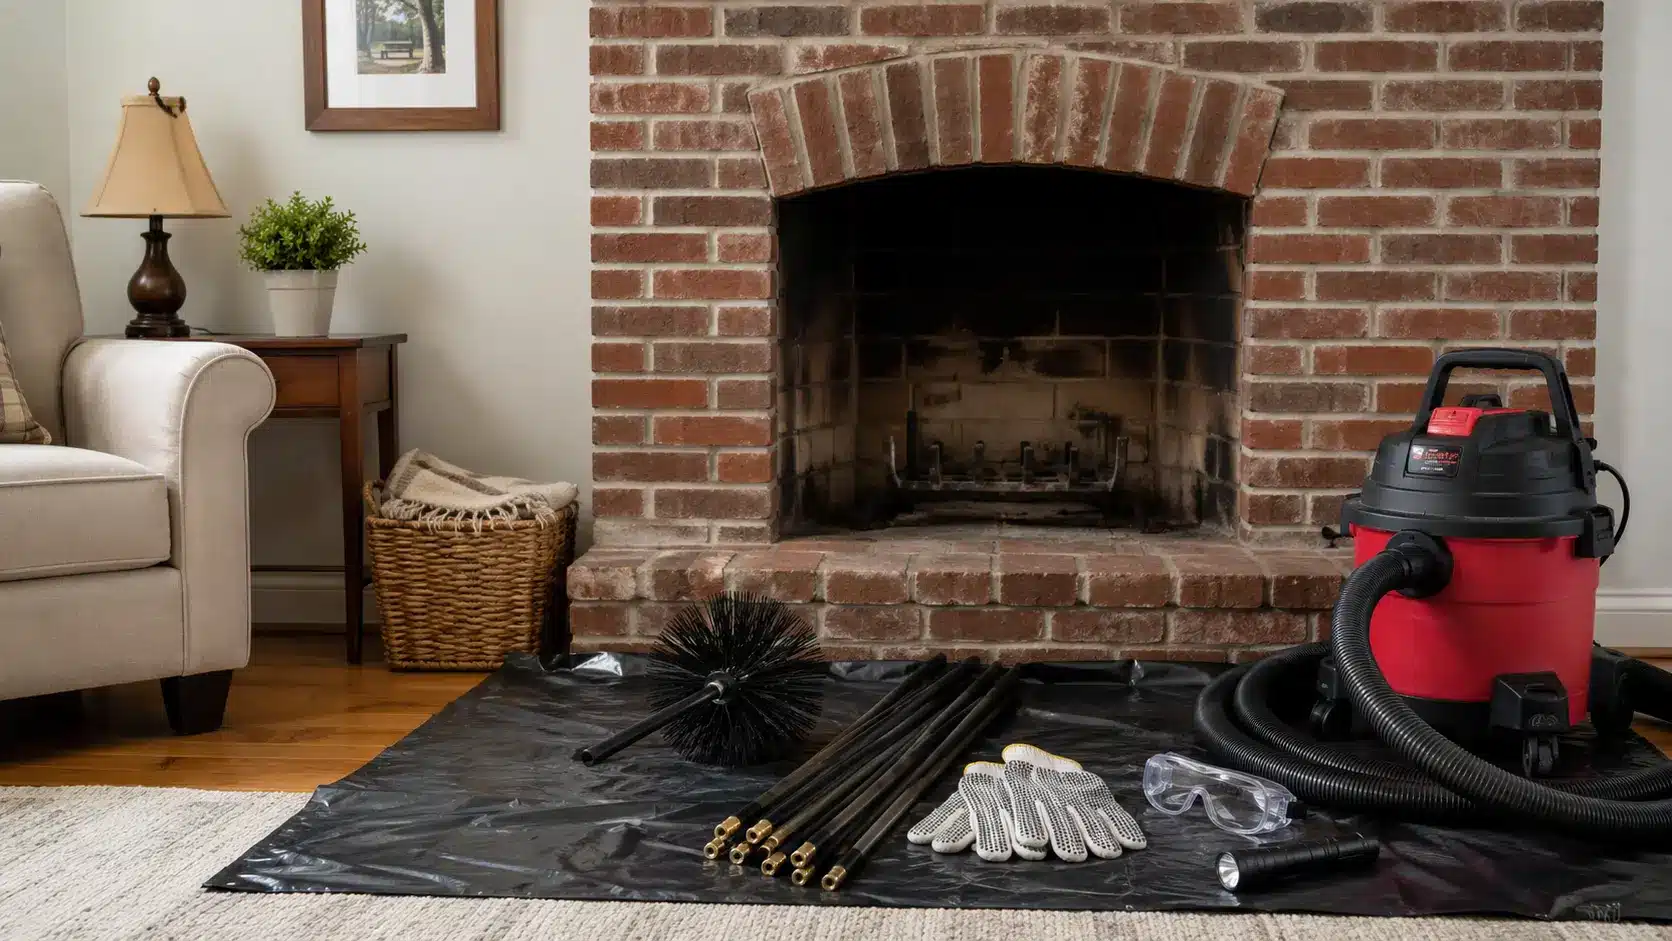
Tools and Materials Required
- Chimney brush
- Flexible rods
- Plastic sheeting
- Painter’s tape
- Drop cloth
- Flashlight
- Small hand brush
- Trash bags
- Shop vacuum with a fine-dust filter
- Gloves
- Safety glasses
- Dust mask or respirator
- Stable ladder if roof work is needed
Use a brush that matches your flue shape and material. Bottom-up cleaning starts inside the house and works well if you want to avoid roof work. Top-down cleaning starts from the roof and only makes sense when the roof is safe.
Step 1: Cool, Clear, and Prep the Fireplace
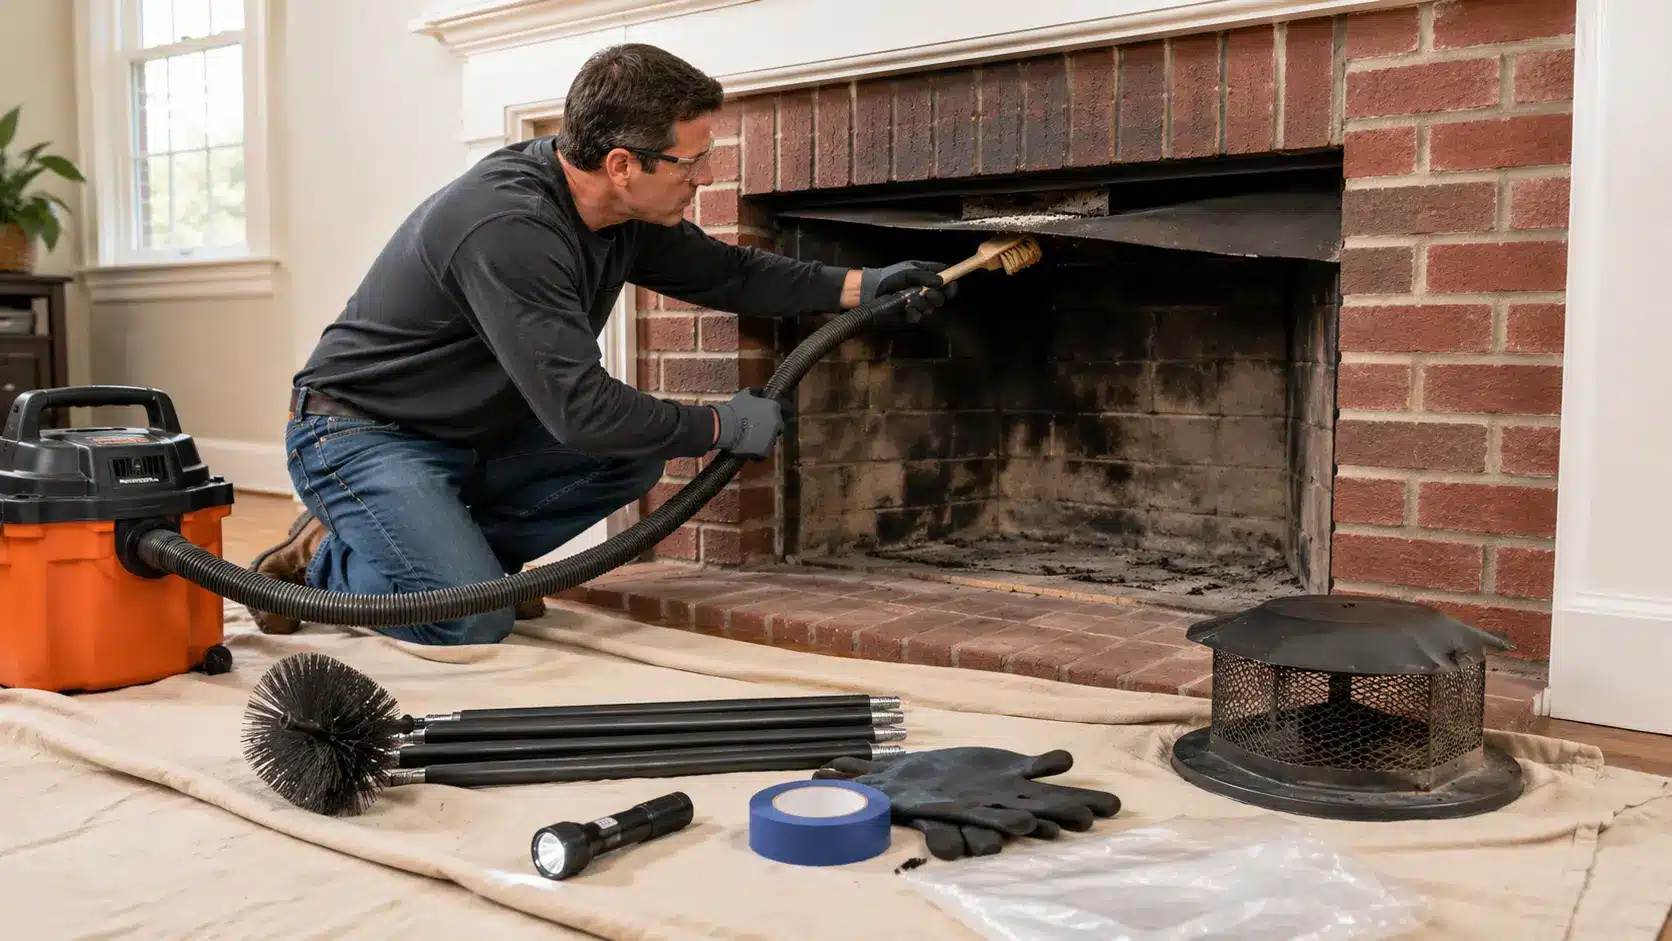
Make sure the fireplace, ash, grate, and flue are fully cold before you start. Do not clean after a recent fire, even if the flames have been out for a while.
Remove old wood, cold ash, and the grate. Use a small shovel or hand brush to clear loose debris from the firebox.
Lay a drop cloth in front of the fireplace and keep your tools on it. Cover a little extra floor space because soot stains fast.
Step 2: Seal the Opening and Set Up Dust Control
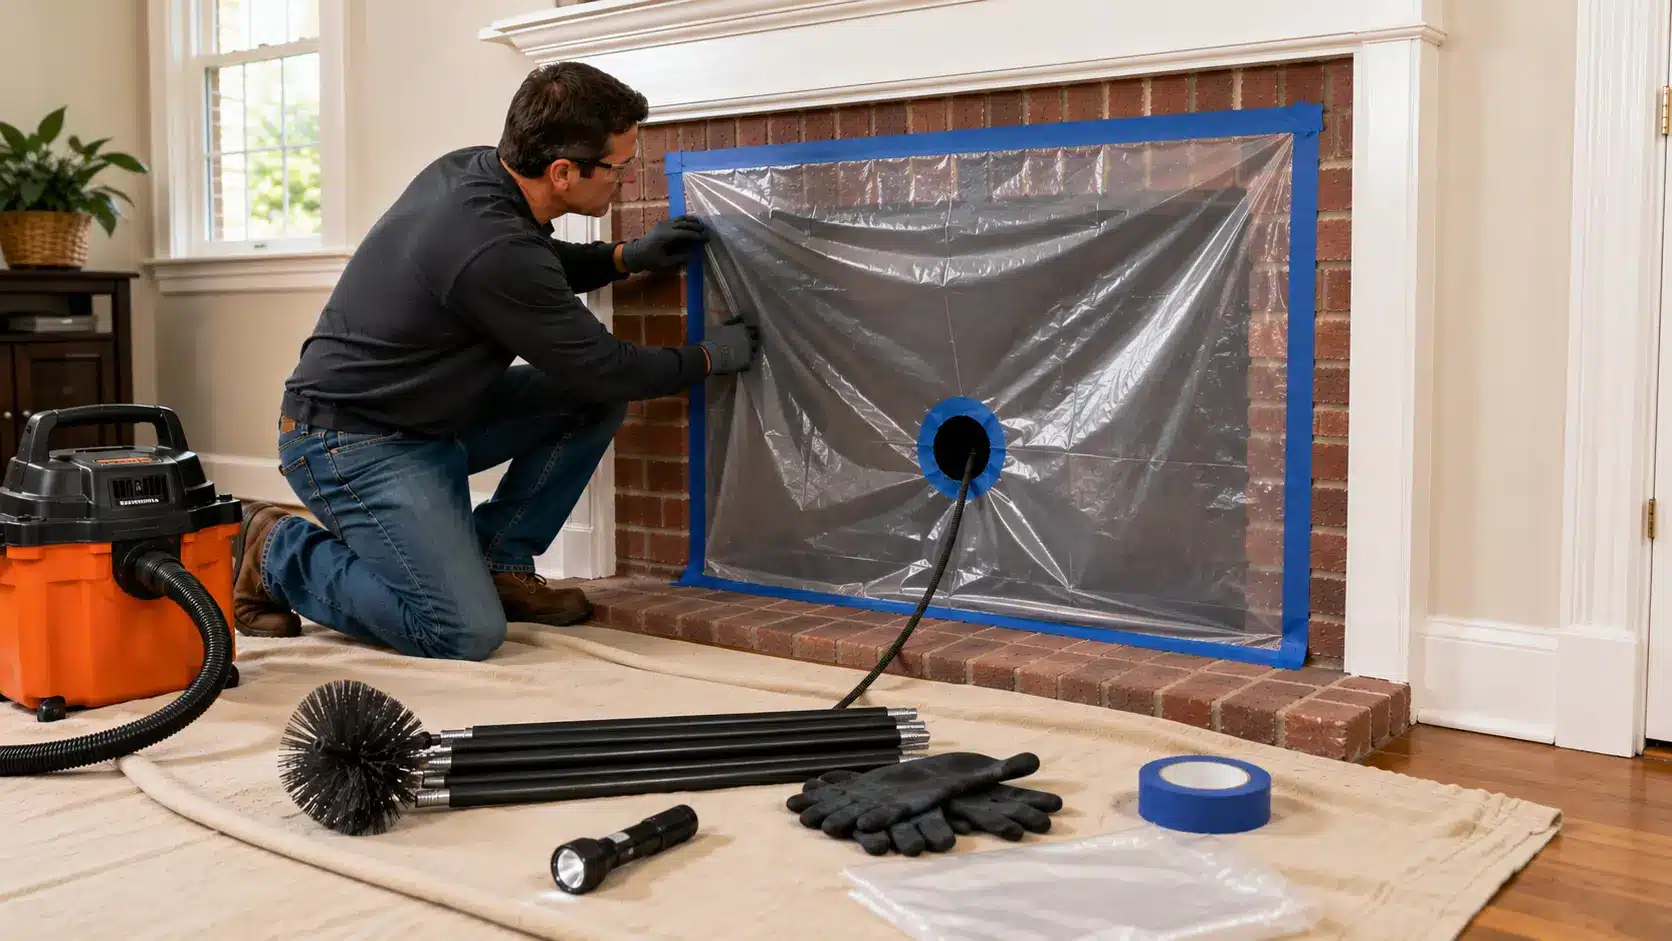
Tape plastic sheeting over the fireplace opening before brushing. Leave only a small hole for the rod if you are cleaning from the bottom.
Press tape firmly around the edges, especially near brick gaps or uneven trim. Keep extra tape nearby in case the plastic loosens.
If you are cleaning from the roof, seal the fireplace opening from inside first. Soot will still fall as you brush.
Step 3: Start the Brush From the Right Access Point
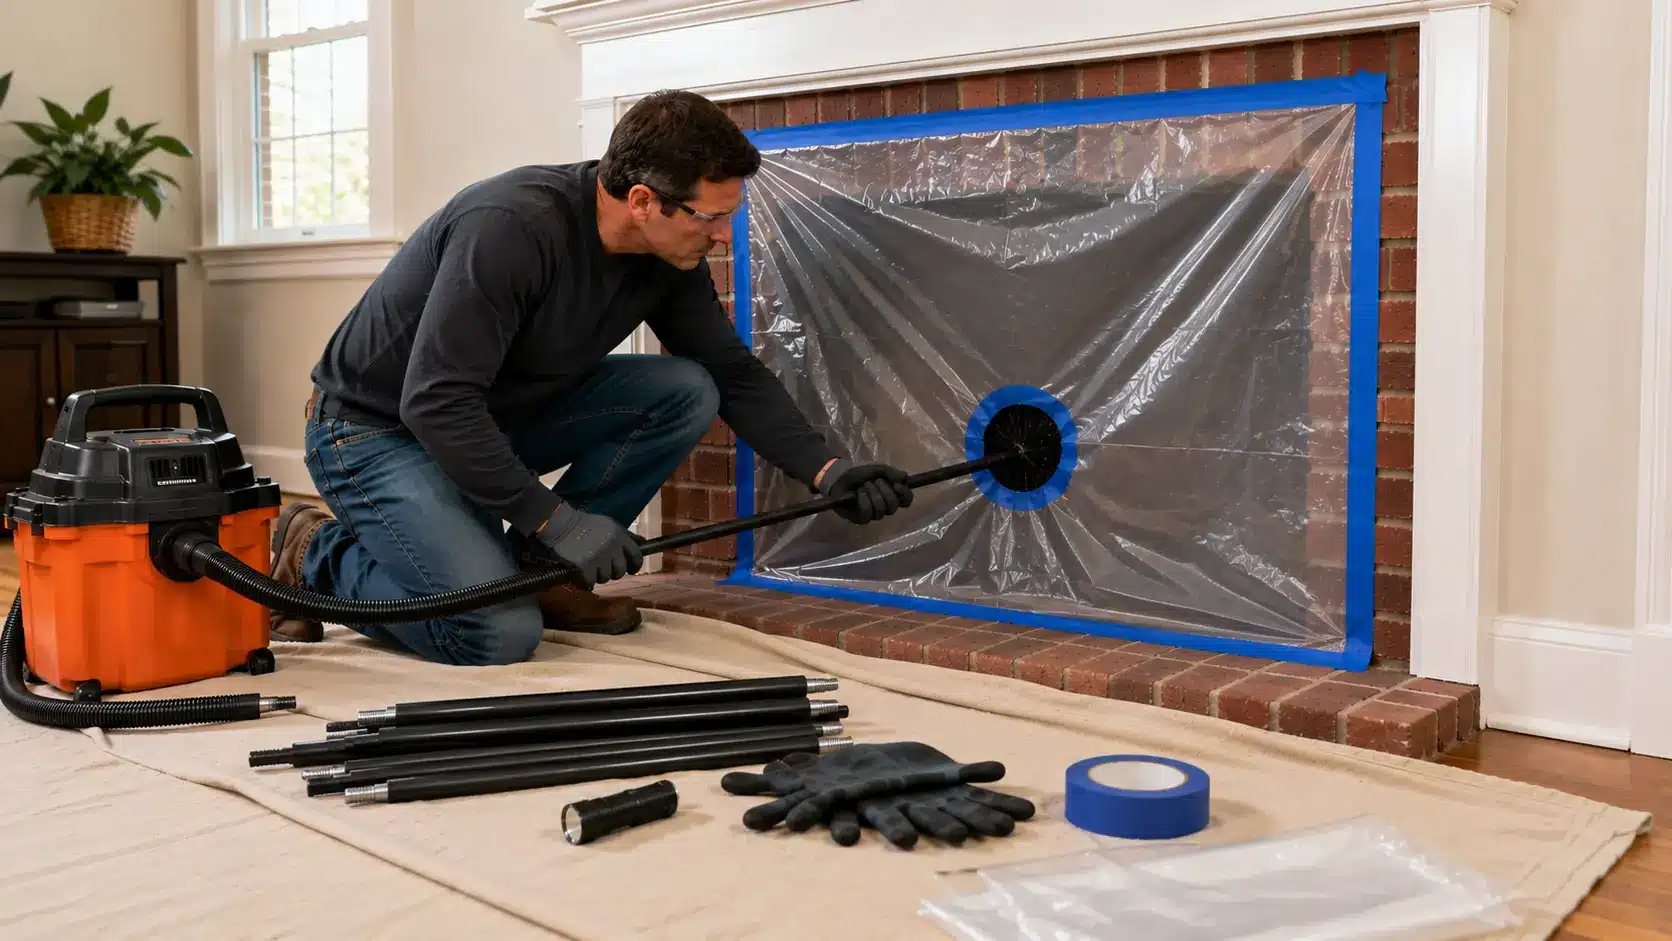
For bottom-up cleaning, push the chimney brush through the small opening in the plastic and guide it into the flue from inside the fireplace.
For top-down cleaning, remove the chimney cap and lower the brush into the flue from the roof. Only do this if the roof is safe to stand on.
If the brush feels too tight, do not force it. Pull it back and check the size before trying again.
Step 4: Add Rods and Scrub the Full Flue
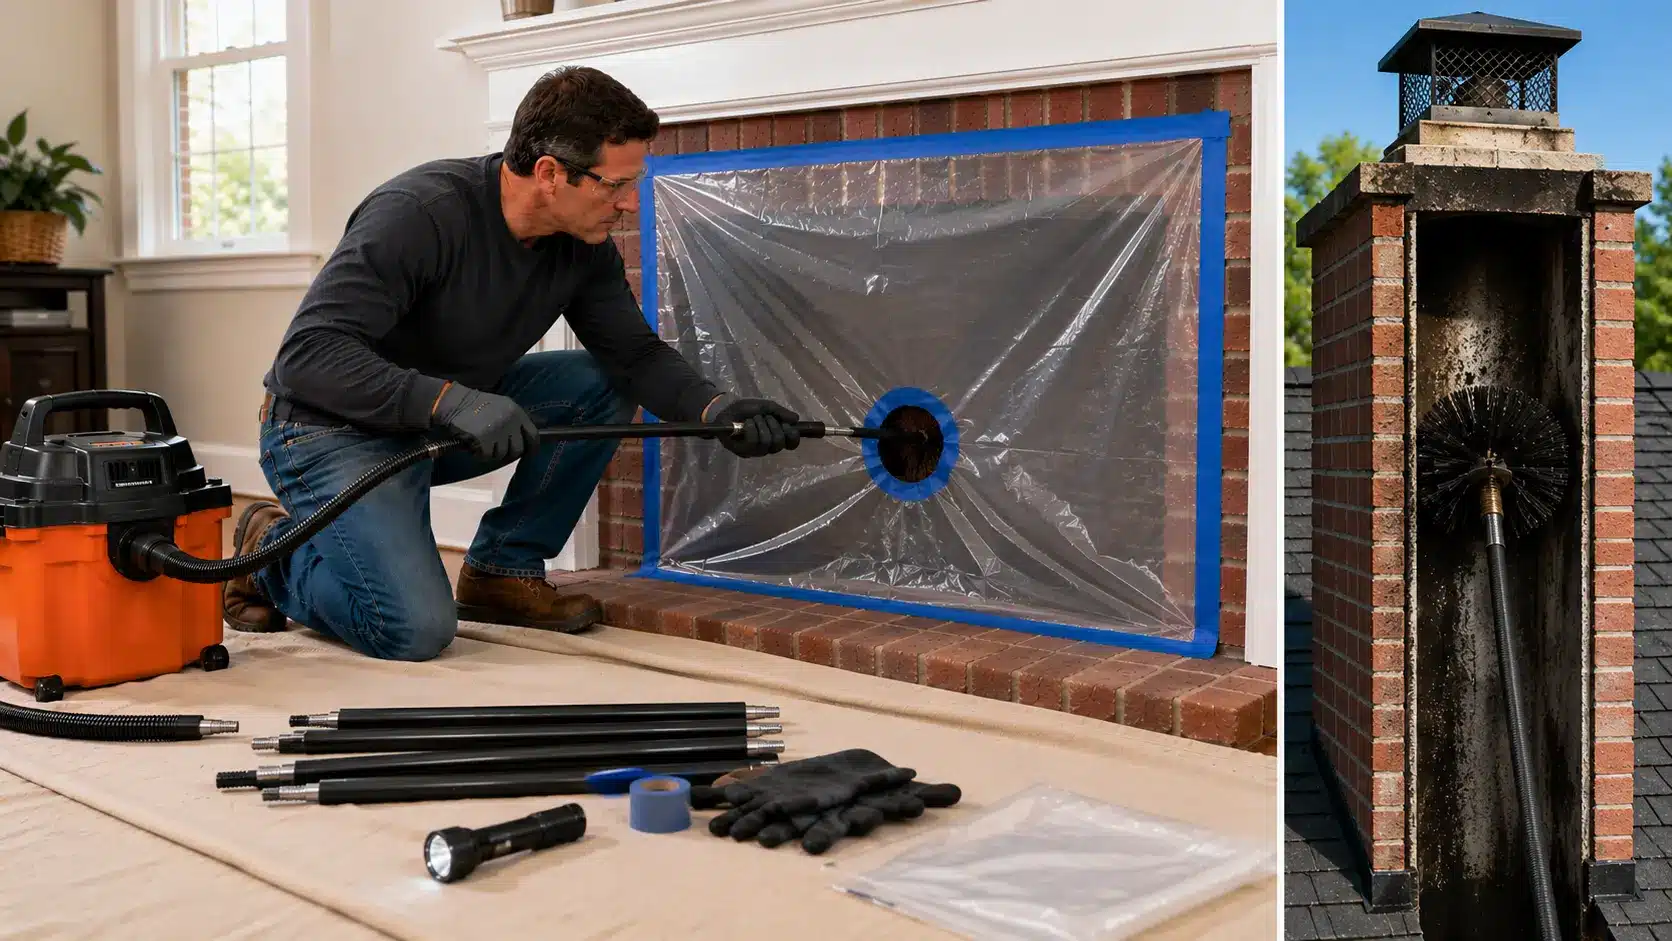
Attach rods one at a time as the brush moves farther into the chimney. Tighten each connection so a rod does not loosen inside the flue.
Move the brush up and down with steady pressure. The goal is even scrubbing from one end of the flue to the other.
Keep adding rods until you reach the full chimney length. If the brush catches, ease it back instead of forcing it.
Step 5: Remove the Brush and Let Soot Settle
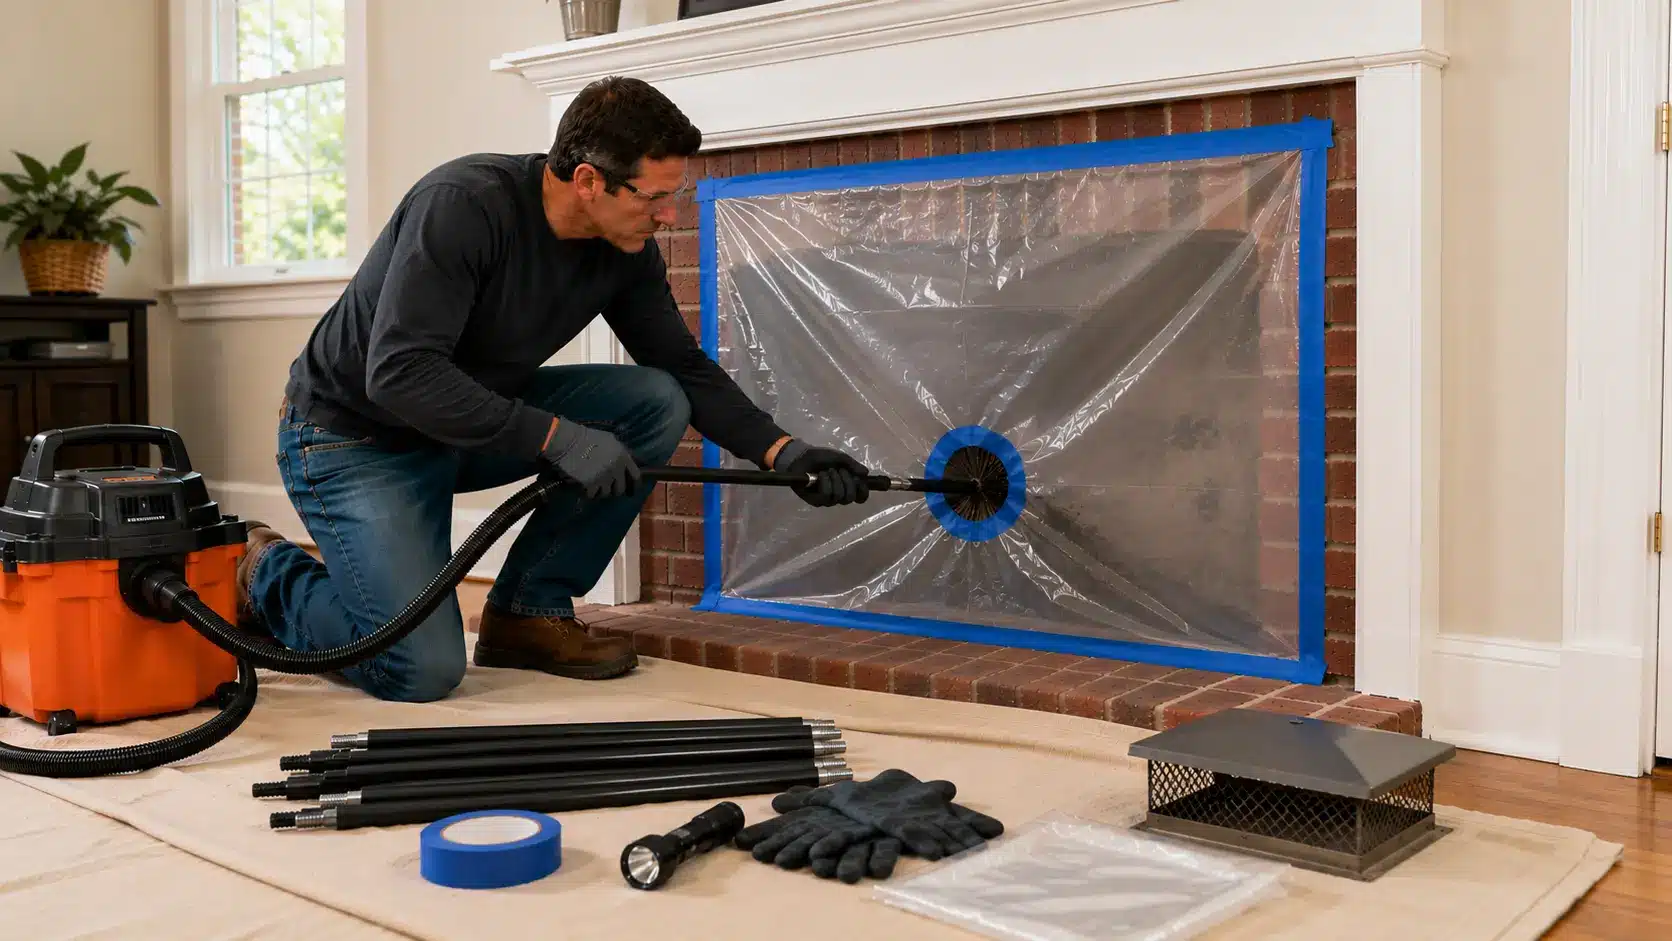
Pull the brush back out slowly. Fast movement can shake soot loose and push dust toward the room.
Keep the fireplace sealed until the brush and rods are fully removed. Wait a few minutes before opening the plastic.
If you cleaned from the roof, remove the rods carefully and keep the cap nearby for the final check.
Step 6: Clean the Smoke Shelf, Damper, and Firebox
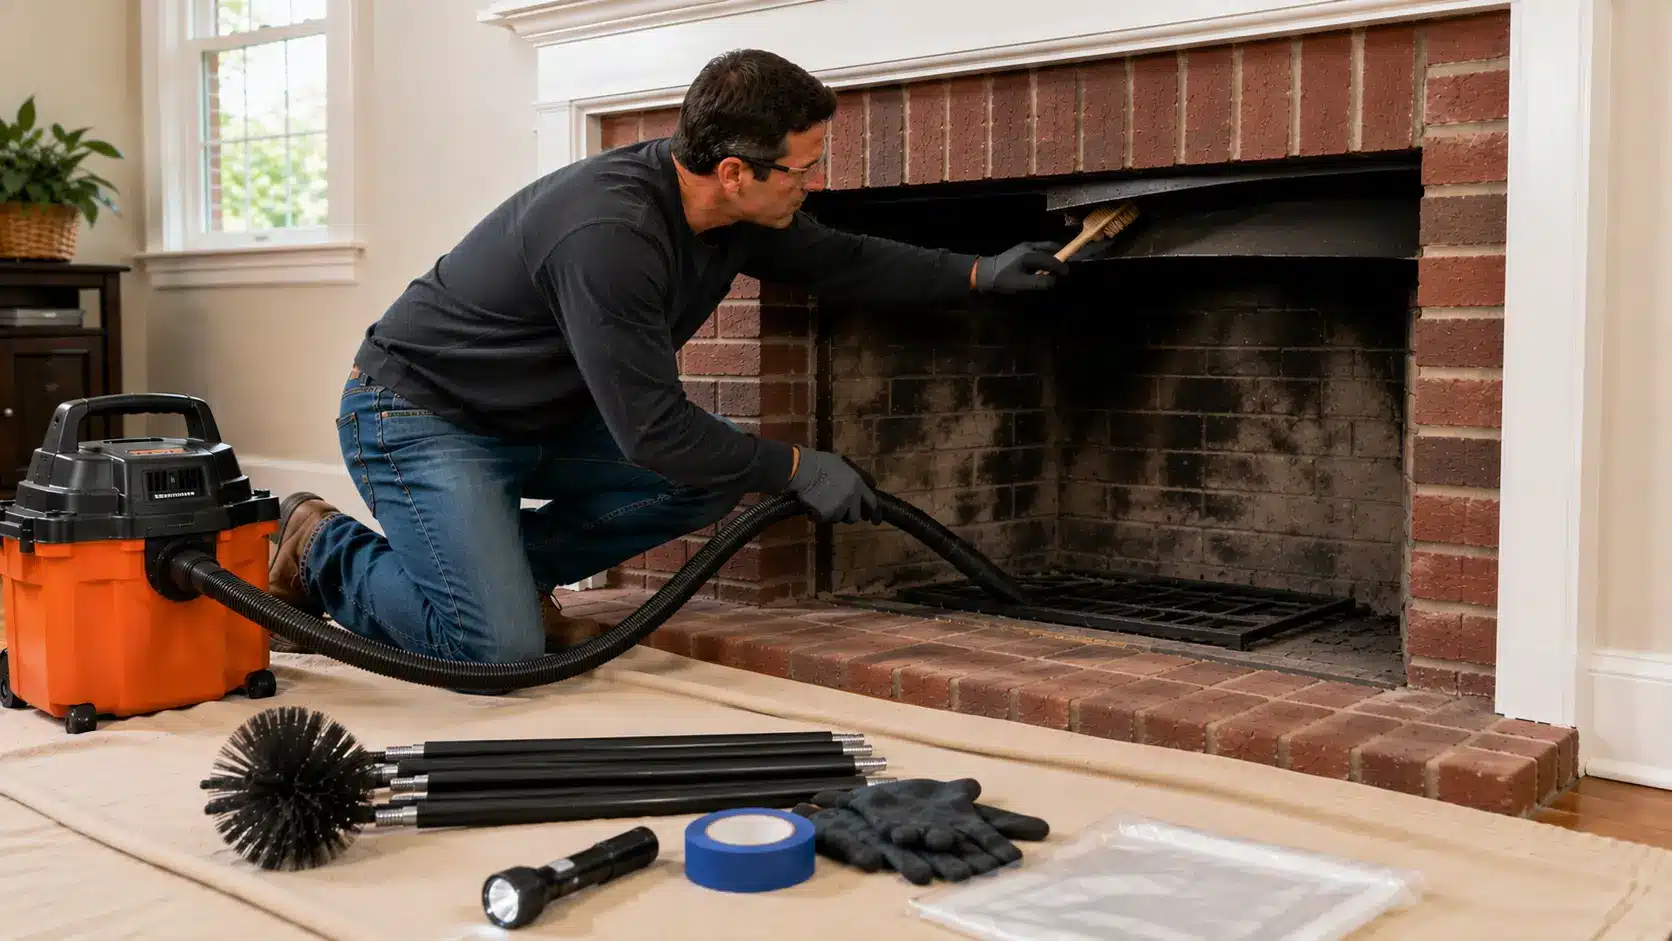
Open the damper and brush loose soot around the edges. The smoke shelf behind the damper often holds fallen debris.
Use a shop vacuum with a fine-dust filter to clean the firebox, damper area, and smoke shelf.
Work in small passes so fine soot does not kick back into the air.
Step 7: Check the Cap, Draft Path, and Fireplace Area
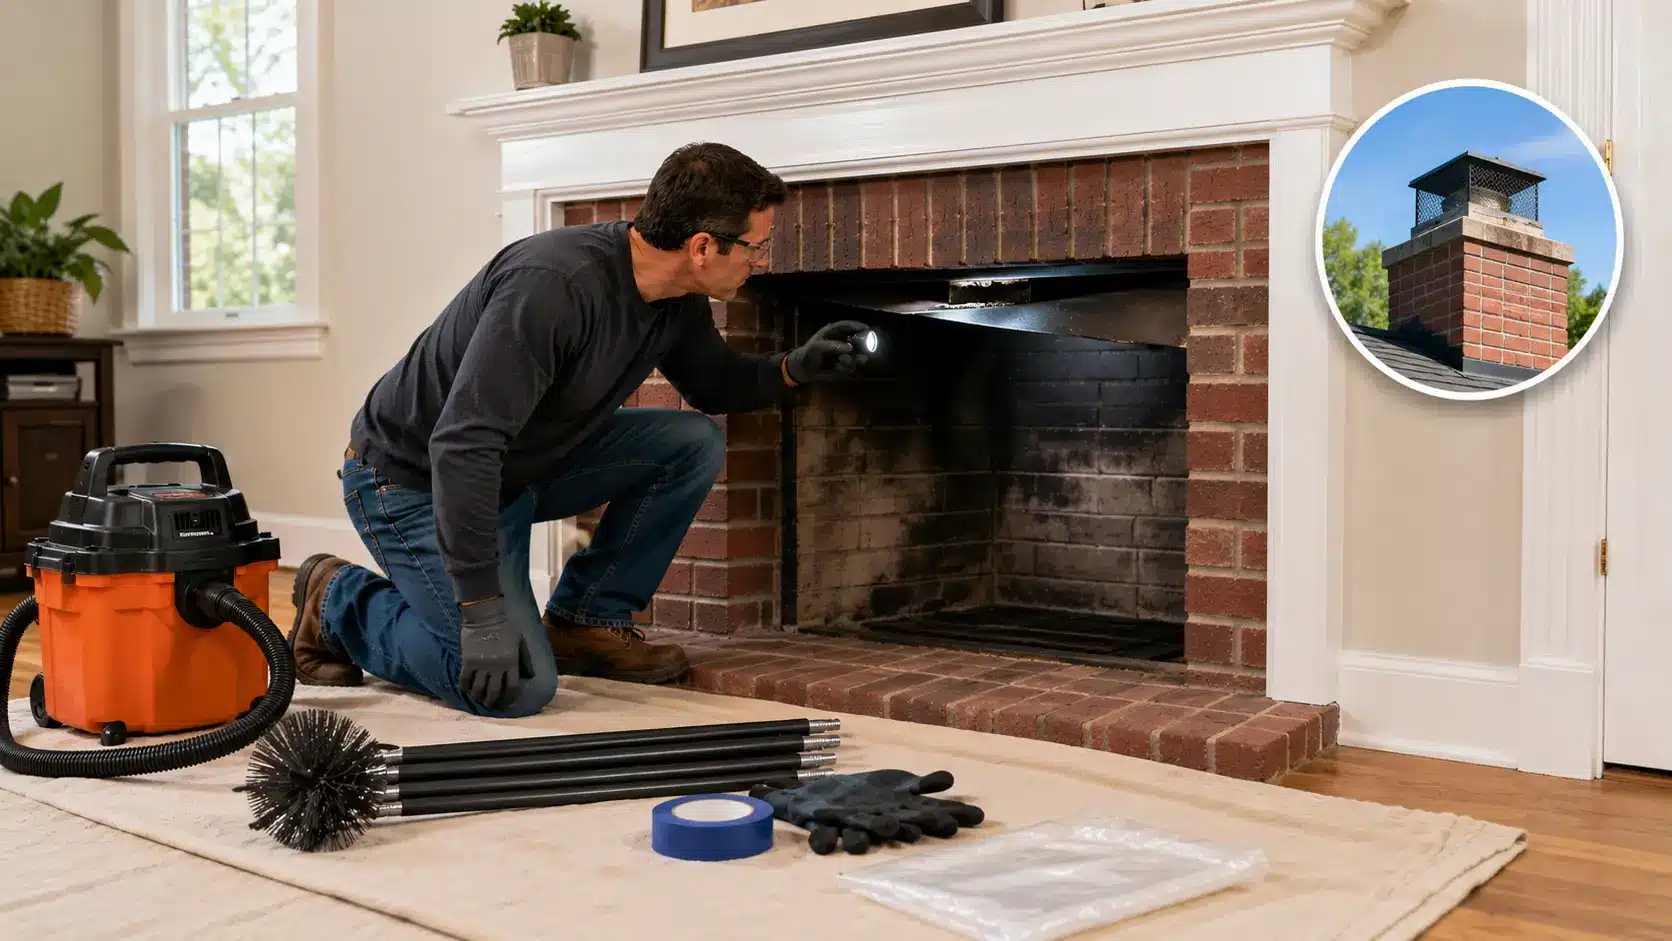
Before lighting another fire, check that the damper opens and closes, the firebox is clear, and the smoke shelf is clean.
If you cleaned the roof, make sure the chimney cap is brushed, clear, and secured. If you cleaned from inside, check the cap from outside only when safe.
Do not use the fireplace if you see cracks, loose parts, glossy black buildup, blocked mesh, or anything that looks unsafe.
Bottom-Up vs Top-Down Cleaning
Both methods clean the flue, but they fit different homes. Pick the method that gives you the safest access and the best control over soot.
| Method | Best For | Keep in Mind |
|---|---|---|
| Bottom-up | Avoiding roof work | Seal the fireplace well |
| Bottom-up | Steep or high roofs | Use extra tape to control dust |
| Top-down | Cleaning the cap too | Use only with safe roof access |
| Top-down | Straight chimneys | Keep tools secure on the roof |
| Rotary kit | Long or bendy flues | Go slowly and avoid high speed |
| Rotary kit | Light buildup in tight areas | Stop if the rods twist or catch |
For most DIY users, bottom-up cleaning is the safer place to start. You can work from inside, control the plastic seal, and avoid climbing unless the cap needs direct attention.
Know When Creosote Is Too Much for DIY
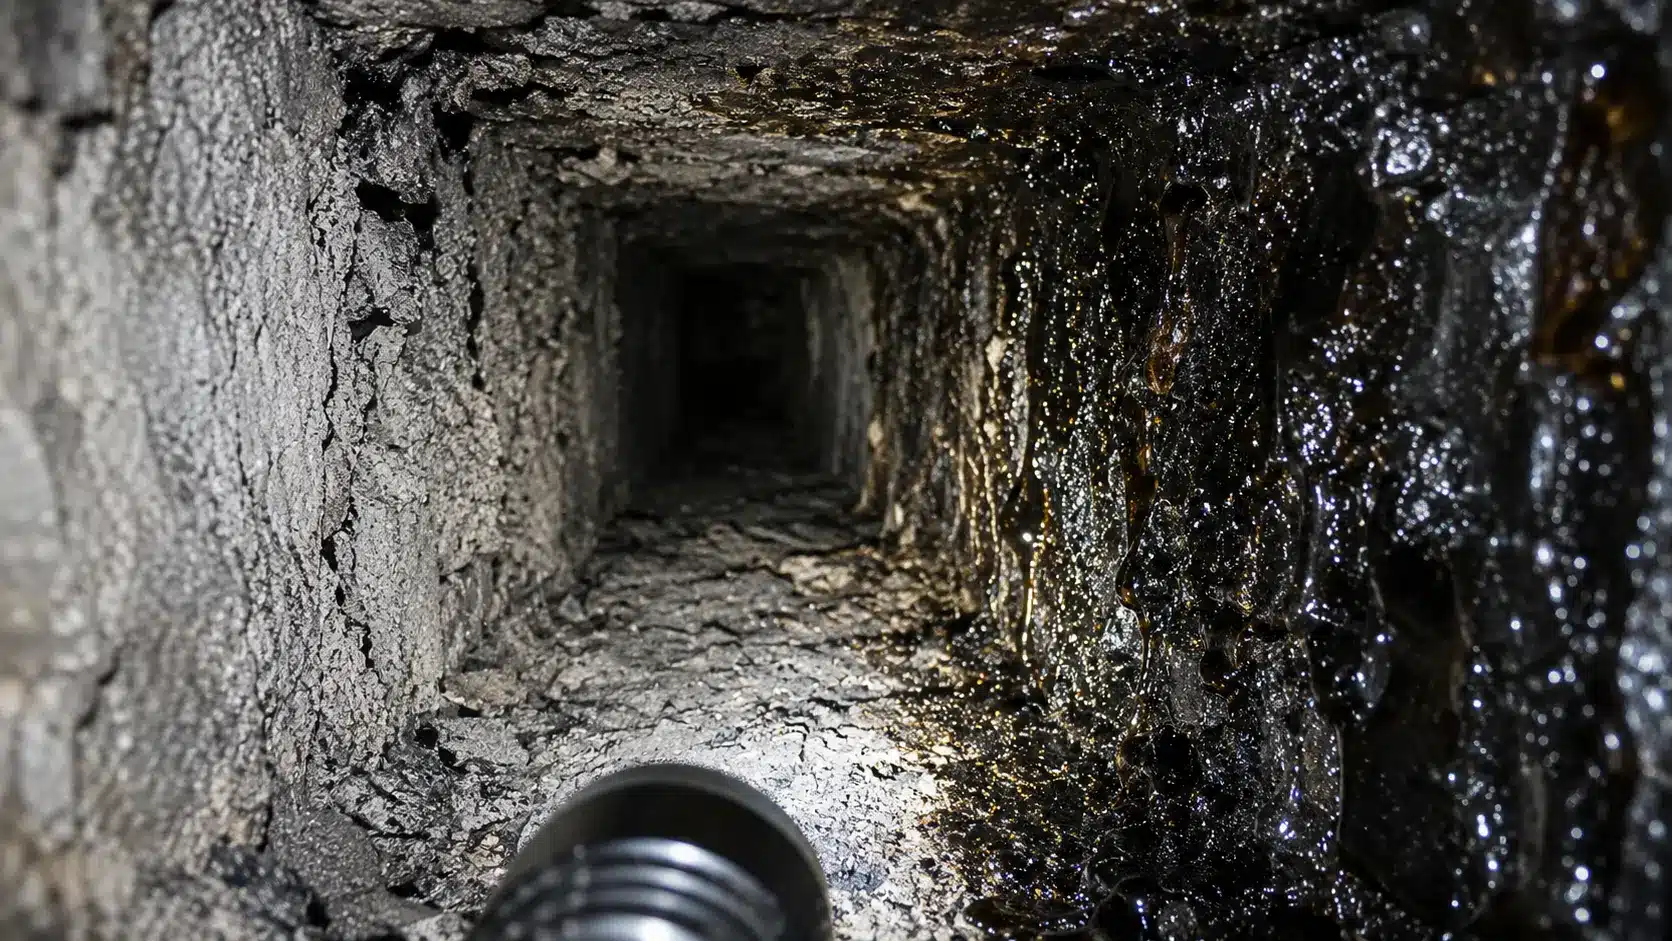
Creosote is the residue left by wood smoke. Light soot and thin flakes can often be brushed out. Hard, sticky, or glossy buildup is different and may need a sweep.
| Warning Sign | What to Do |
| Glossy or sticky buildup | Call a sweep |
| Smoke is entering the room | Stop using the fireplace |
| Cracks, rust, or water stains | Get an inspection |
| Nest material or blockage | Do not light a fire |
| The brush gets stuck | Stop and get help |
If you see more than one warning sign, don’t try to push through the job. The safer move is to stop and have the chimney checked before using it again.
Tips for Safer and Cleaner Chimney Cleaning
Put these tips to use while you clean. They help control soot, protect your tools, and make the job safer without adding extra steps.
- Keep the rod hole small so that less soot escapes
- Tape loose plastic edges before brushing
- Move the brush slowly through the flue
- Let the dust settle before opening the plastic
- Empty the vacuum outside
- Wear eye and lung protection
- Stop if the brush gets stuck
- Keep kids and pets away from the room
These small steps make the cleanup easier and help you spot problems before the fireplace is used again.
Common Mistakes to Avoid
Most DIY chimney cleaning problems happen when the setup is rushed or the fireplace is not checked closely enough before use.
Avoid these:
- Starting while ash or soot may still be warm
- Using a regular home vacuum for fine soot
- Forcing rods through a tight bend
- Skipping the smoke shelf during cleanup
- Forgetting to check the chimney cap
- Lighting a fire before the final inspection
A slow final check can help you catch loose soot, blocked airflow, or unsafe buildup before the fireplace is used again.
Special Notes for Different Fireplace Types
Not every fireplace system should be cleaned the same way. A standard wood-burning fireplace, wood stove, and gas fireplace can have different parts, different build-ups, and different safety limits.
- Wood-burning fireplaces: These usually need the main DIY steps above. Focus on the firebox, damper, smoke shelf, flue, and chimney cap. Stop if you see glossy buildup, cracks, loose masonry, or smoke stains.
- Wood stove chimneys: Buildup often collects near elbows, joints, stovepipe sections, and caps. Let the stove cool fully, check the manual before removing parts, and use flexible rods with care.
- Gas fireplace chimneys: Gas fireplaces produce less residue than wood-burning units, but vents can still collect dust, debris, or nesting material. Do not open sealed gas parts unless the manual says it is safe.
- Shared warning signs: Smoke backing up, blocked caps, strong odors, rust, water stains, nesting material, and weak draft all need attention before the fireplace is used again.
- When to call a technician: If the gas fireplace glass turns black, the flame looks weak, or you smell gas, stop using it and contact a professional.
These notes help you avoid using one cleaning method for every setup. When the system has sealed parts, tight bends, gas lines, or signs of damage, it is safer to stop and get help.
Tips to Keep the Chimney Cleaner Afterward
A few small habits can slow buildup and make the next cleaning easier. They also help you catch draft or smoke problems before they get worse.
| Habit | Why It Helps |
|---|---|
| Burn dry wood | Creates less smoke |
| Keep the damper open | Helps smoke leave properly |
| Check the cap after storms | Clears leaves and debris |
| Remove cold ash often | Keeps the firebox cleaner |
| Watch for smoky odors | Spots issues early |
Stick with these habits during fireplace season, and the next chimney cleaning should feel easier, cleaner, and less rushed.
Frequently Asked Questions
What should I do with the ash and soot afterward?
Place cold ash and soot in a metal container with a tight lid. Keep it outside, away from wood, paper, and trash. Do not bag it until everything is fully cold.
Can I use the fireplace the same day?
Yes, if the flue is clear, the damper moves, the cap is secure, and no warning signs remain. If you see cracks, sticky buildup, smoke stains, or blockage, wait for a sweep.
What if the rods do not reach the top?
Stop and add more compatible rods before continuing the job. Brushing only part of the flue can leave soot above the cleaned area. If the chimney is too tall or awkward, call a sweep.
How can I tell airflow improved?
After cleaning, the damper should open easily, and smoke should move upward without drifting into the room. If smoke still rolls back or odors stay strong, stop using the fireplace and get it checked.
Wrapping Up
Learning how to clean a chimney is easier when the job stays simple. Check the fireplace first, keep the tools ready, seal the opening, brush slowly, and clean the fallen soot before lighting another fire.
Good chimney cleaning is not about rushing through the flue. It is about using the right brush, clearing the smoke shelf, checking the cap, and knowing when buildup is too risky for DIY. If the chimney looks damaged, blocked, sticky, or unsafe to reach, call a sweep instead of forcing it.
Save this checklist, gather your tools, and clean before heavy fireplace season starts so your next fire feels steady and safe and less stressful.