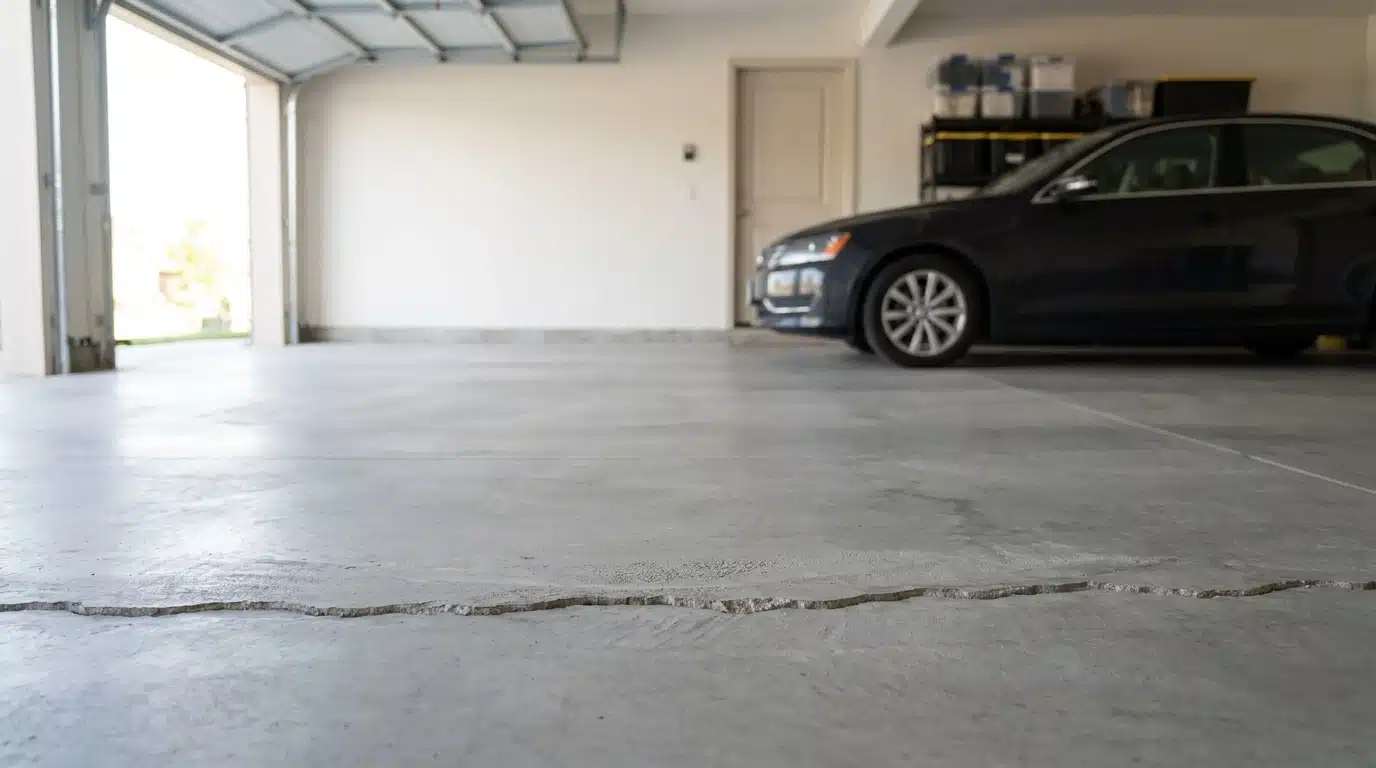
You walked into your garage and saw it: a crack running across the floor. Now you’re wondering if it’s serious or just normal wear and tear.
Here’s the good news: most cracks in garage floors are harmless. They’re often just part of how concrete settles over time. But some cracks do point to bigger problems. Things like soil movement, poor drainage, or a shifting foundation.
Ahead, you’ll learn how to tell the difference. We’ll cover what causes cracks, how to check if yours is serious, and simple ways to fix or prevent them. By the end, you’ll know exactly what to do next.
Understanding Cracks in Garage Floor
A garage floor crack is simply a break in the concrete slab, and it can sit close to the surface or run much deeper than it looks.
Some cracks show up as the concrete cures and shrinks naturally over time. Others come from soil movement, water working underneath the slab, or a loss of proper support below the surface.
Width offers one clue about what’s going on, but it’s not the full picture.
Depth, how fast the crack is growing, and any damage nearby all matter just as much as the width itself. Catching a crack early gives you a much better shot at picking the right repair before the problem grows into something bigger and more expensive to fix.
Is a Cracked Garage Floor Something to Worry About?
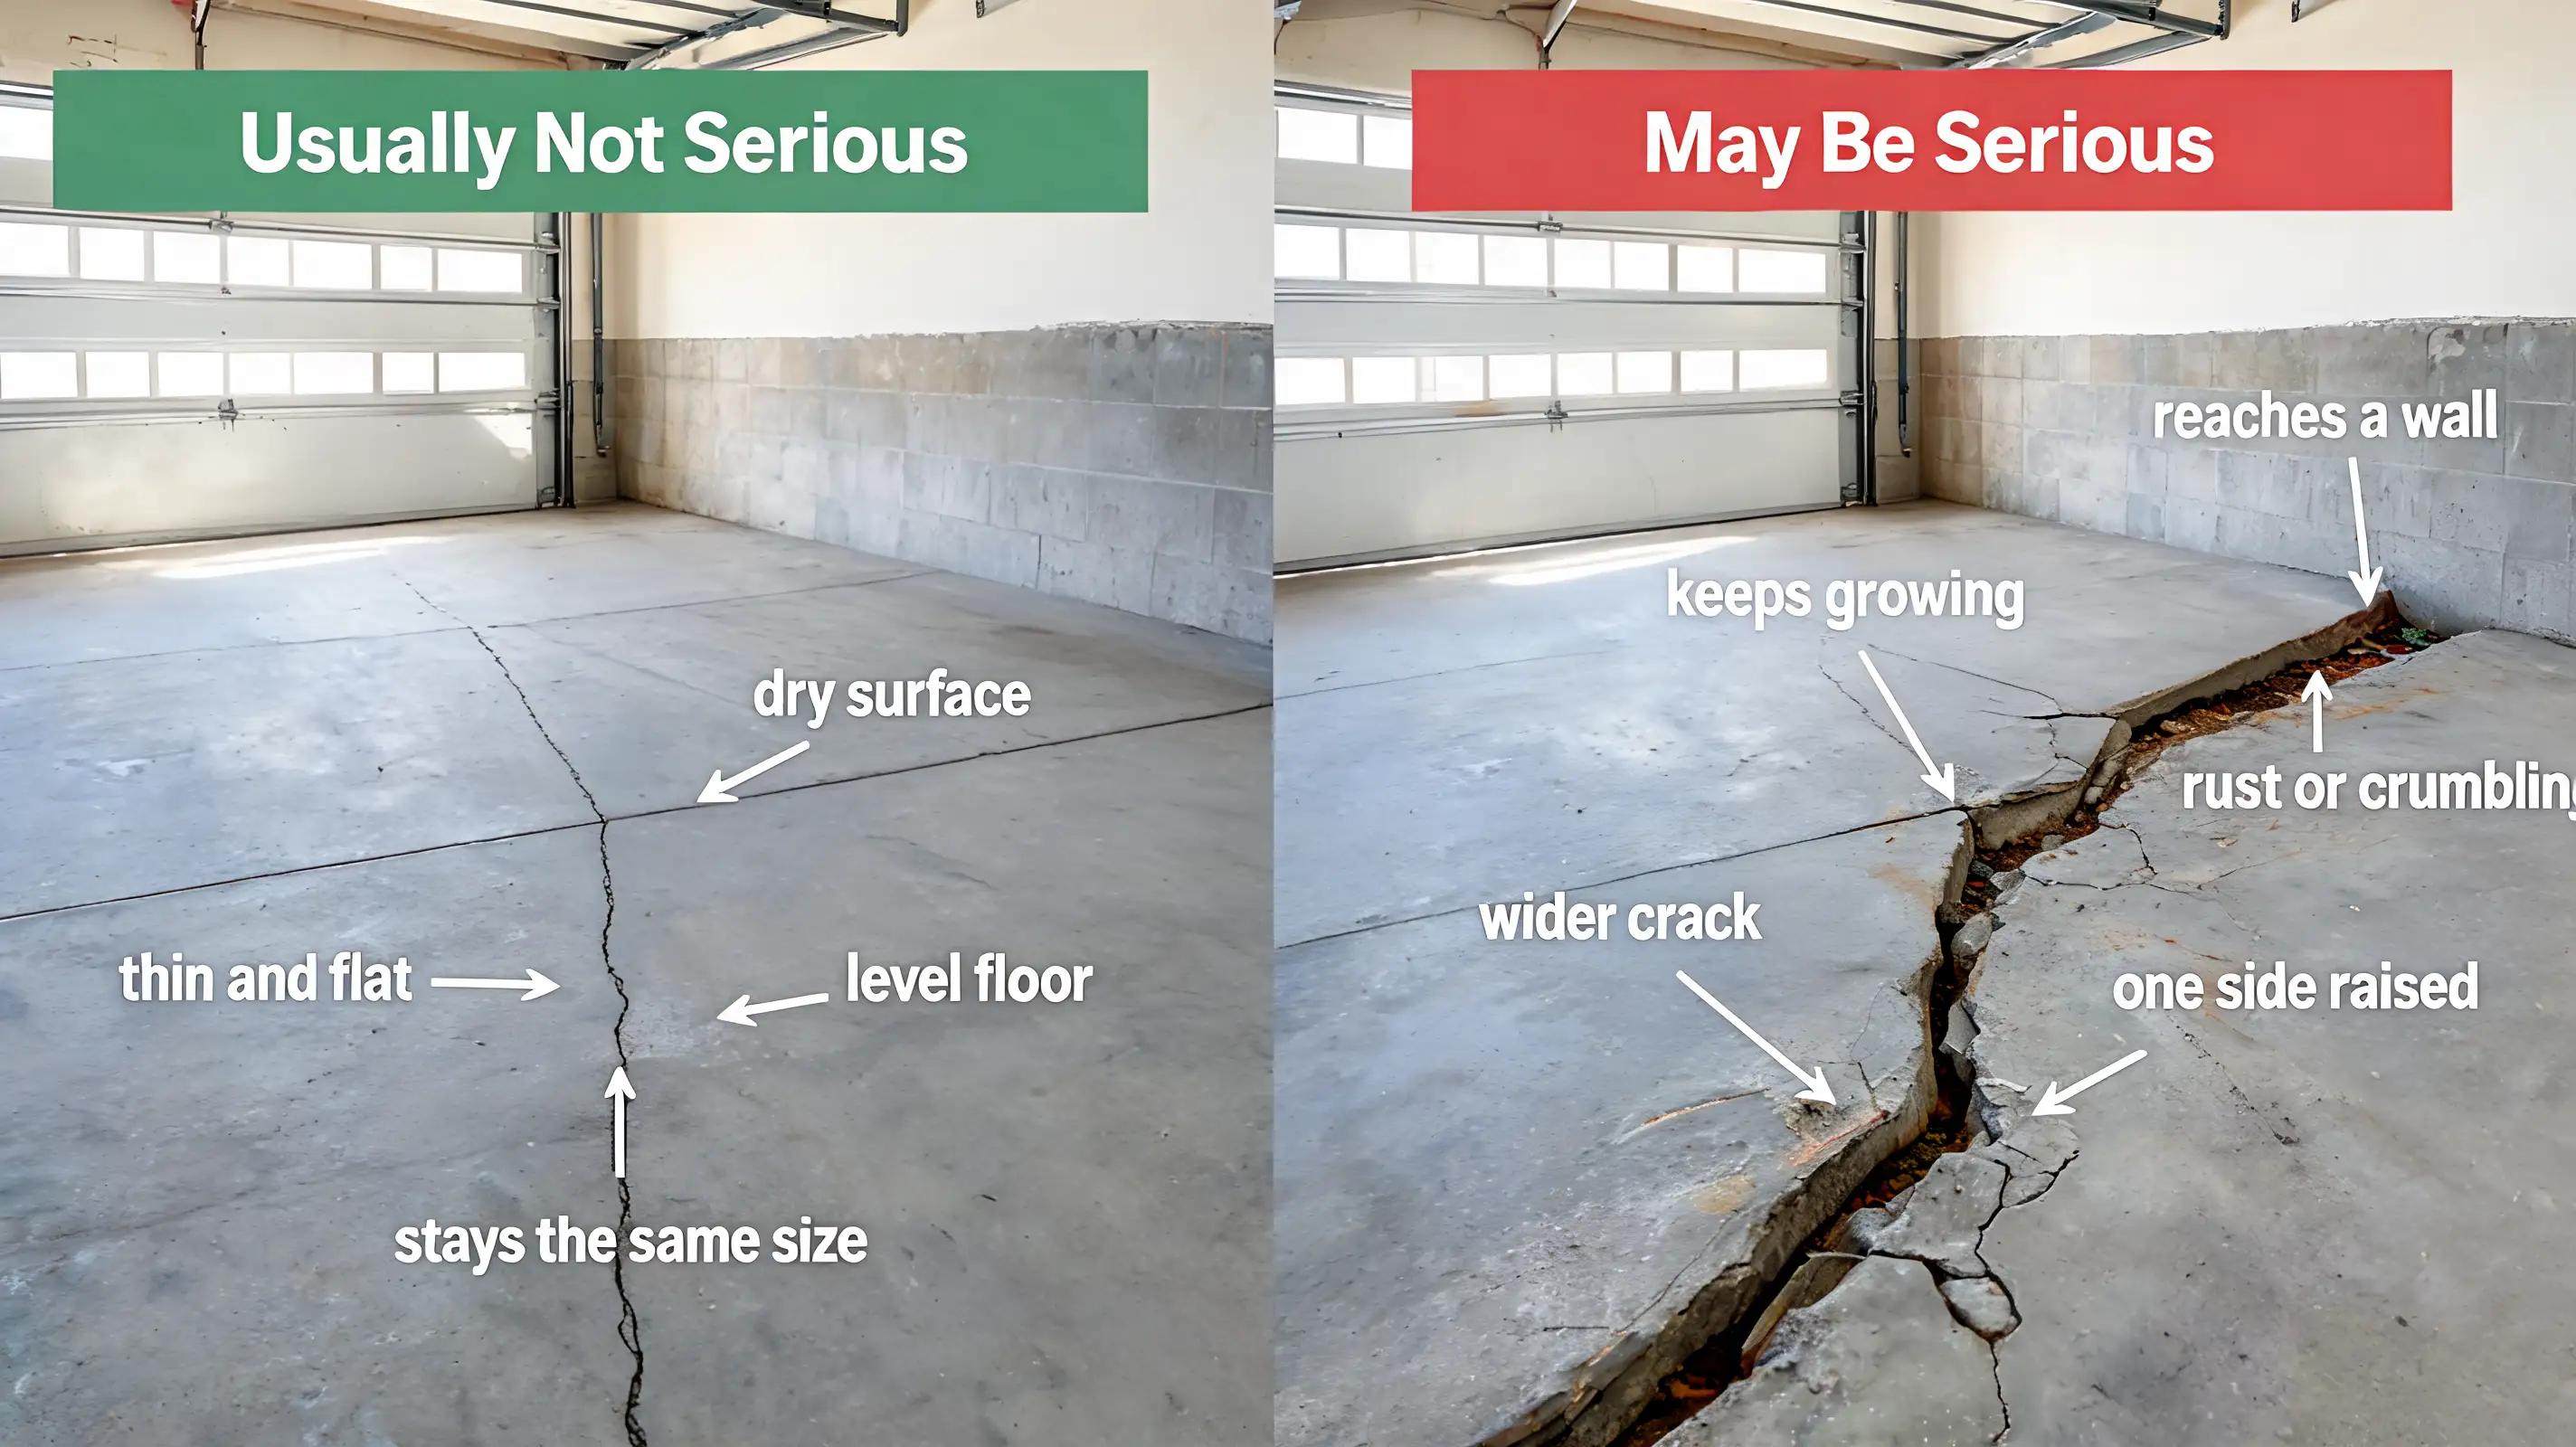
Start by checking the crack’s width, height, movement, and location because these signs show whether it is minor or needs closer attention. Not every sign means the same thing. Use the table below to check where your crack falls.
| Sign | Usually Not Serious | May Be Serious |
|---|---|---|
| Width and shape | Thin and flat, both sides level | Wider than 1/8 inch, uneven sides |
| Size over time | Stays the same over several months | Keeps growing |
| Location | Follows a straight, planned joint | Reaches a nearby wall |
| Level | Floor stays level, no raised or sunken spots | One side sits higher than the other |
| Surface condition | Dry, no rust, flaking, or crumbling | Shows rust, flaking, or crumbling |
| Drainage | No change in floor slope | Slope changes, water collects near walls |
A single sign rarely tells the full story. If several signs from the “may be serious” column show up together, it’s worth arranging an inspection.
What Causes Garage Floor Cracks
Concrete may crack from curing, temperature swings, ground movement, water, or poor construction. Here’s a breakdown of each cause.
- Shrinkage during curing: Concrete loses water as it hardens and shrinks slightly. These cracks often stay visible as the floor ages.
- Age and temperature swings: Concrete expands in heat and contracts in cold. Years of this movement add stress that shows up as cracks.
- Soil movement and settling: Loose soil beneath the slab may shift or compact further. Part of the floor can then sink and crack.
- Moisture, freeze-thaw, and road salt: Water seeps into small cracks and freezes in cold months. Repeated freezing widens the crack, and road salt speeds up the damage.
- Poor construction: Mistakes made before or during the pour can weaken the slab. This includes too few joints, rushed curing, poor soil prep, bad trowelling, and rebar placed too close to the surface.
- Heavy loads: Garage floors hold a set amount of weight. Parking heavy trucks or storing machinery in one spot adds pressure that can crack the slab.
- Foundation movement: Most garage slabs move independently from the home’s foundation. If nearby walls or doors are also shifting, that’s worth a closer look.
Knowing which of these applies to your crack makes it easier to decide whether it’s cosmetic or worth watching closely.
Types of Garage-Floor Cracks and What They Mean
Not all cracks look the same, and their appearance can tell you a lot. Here’s a closer look at the most common types.
1. Hairline Cracks
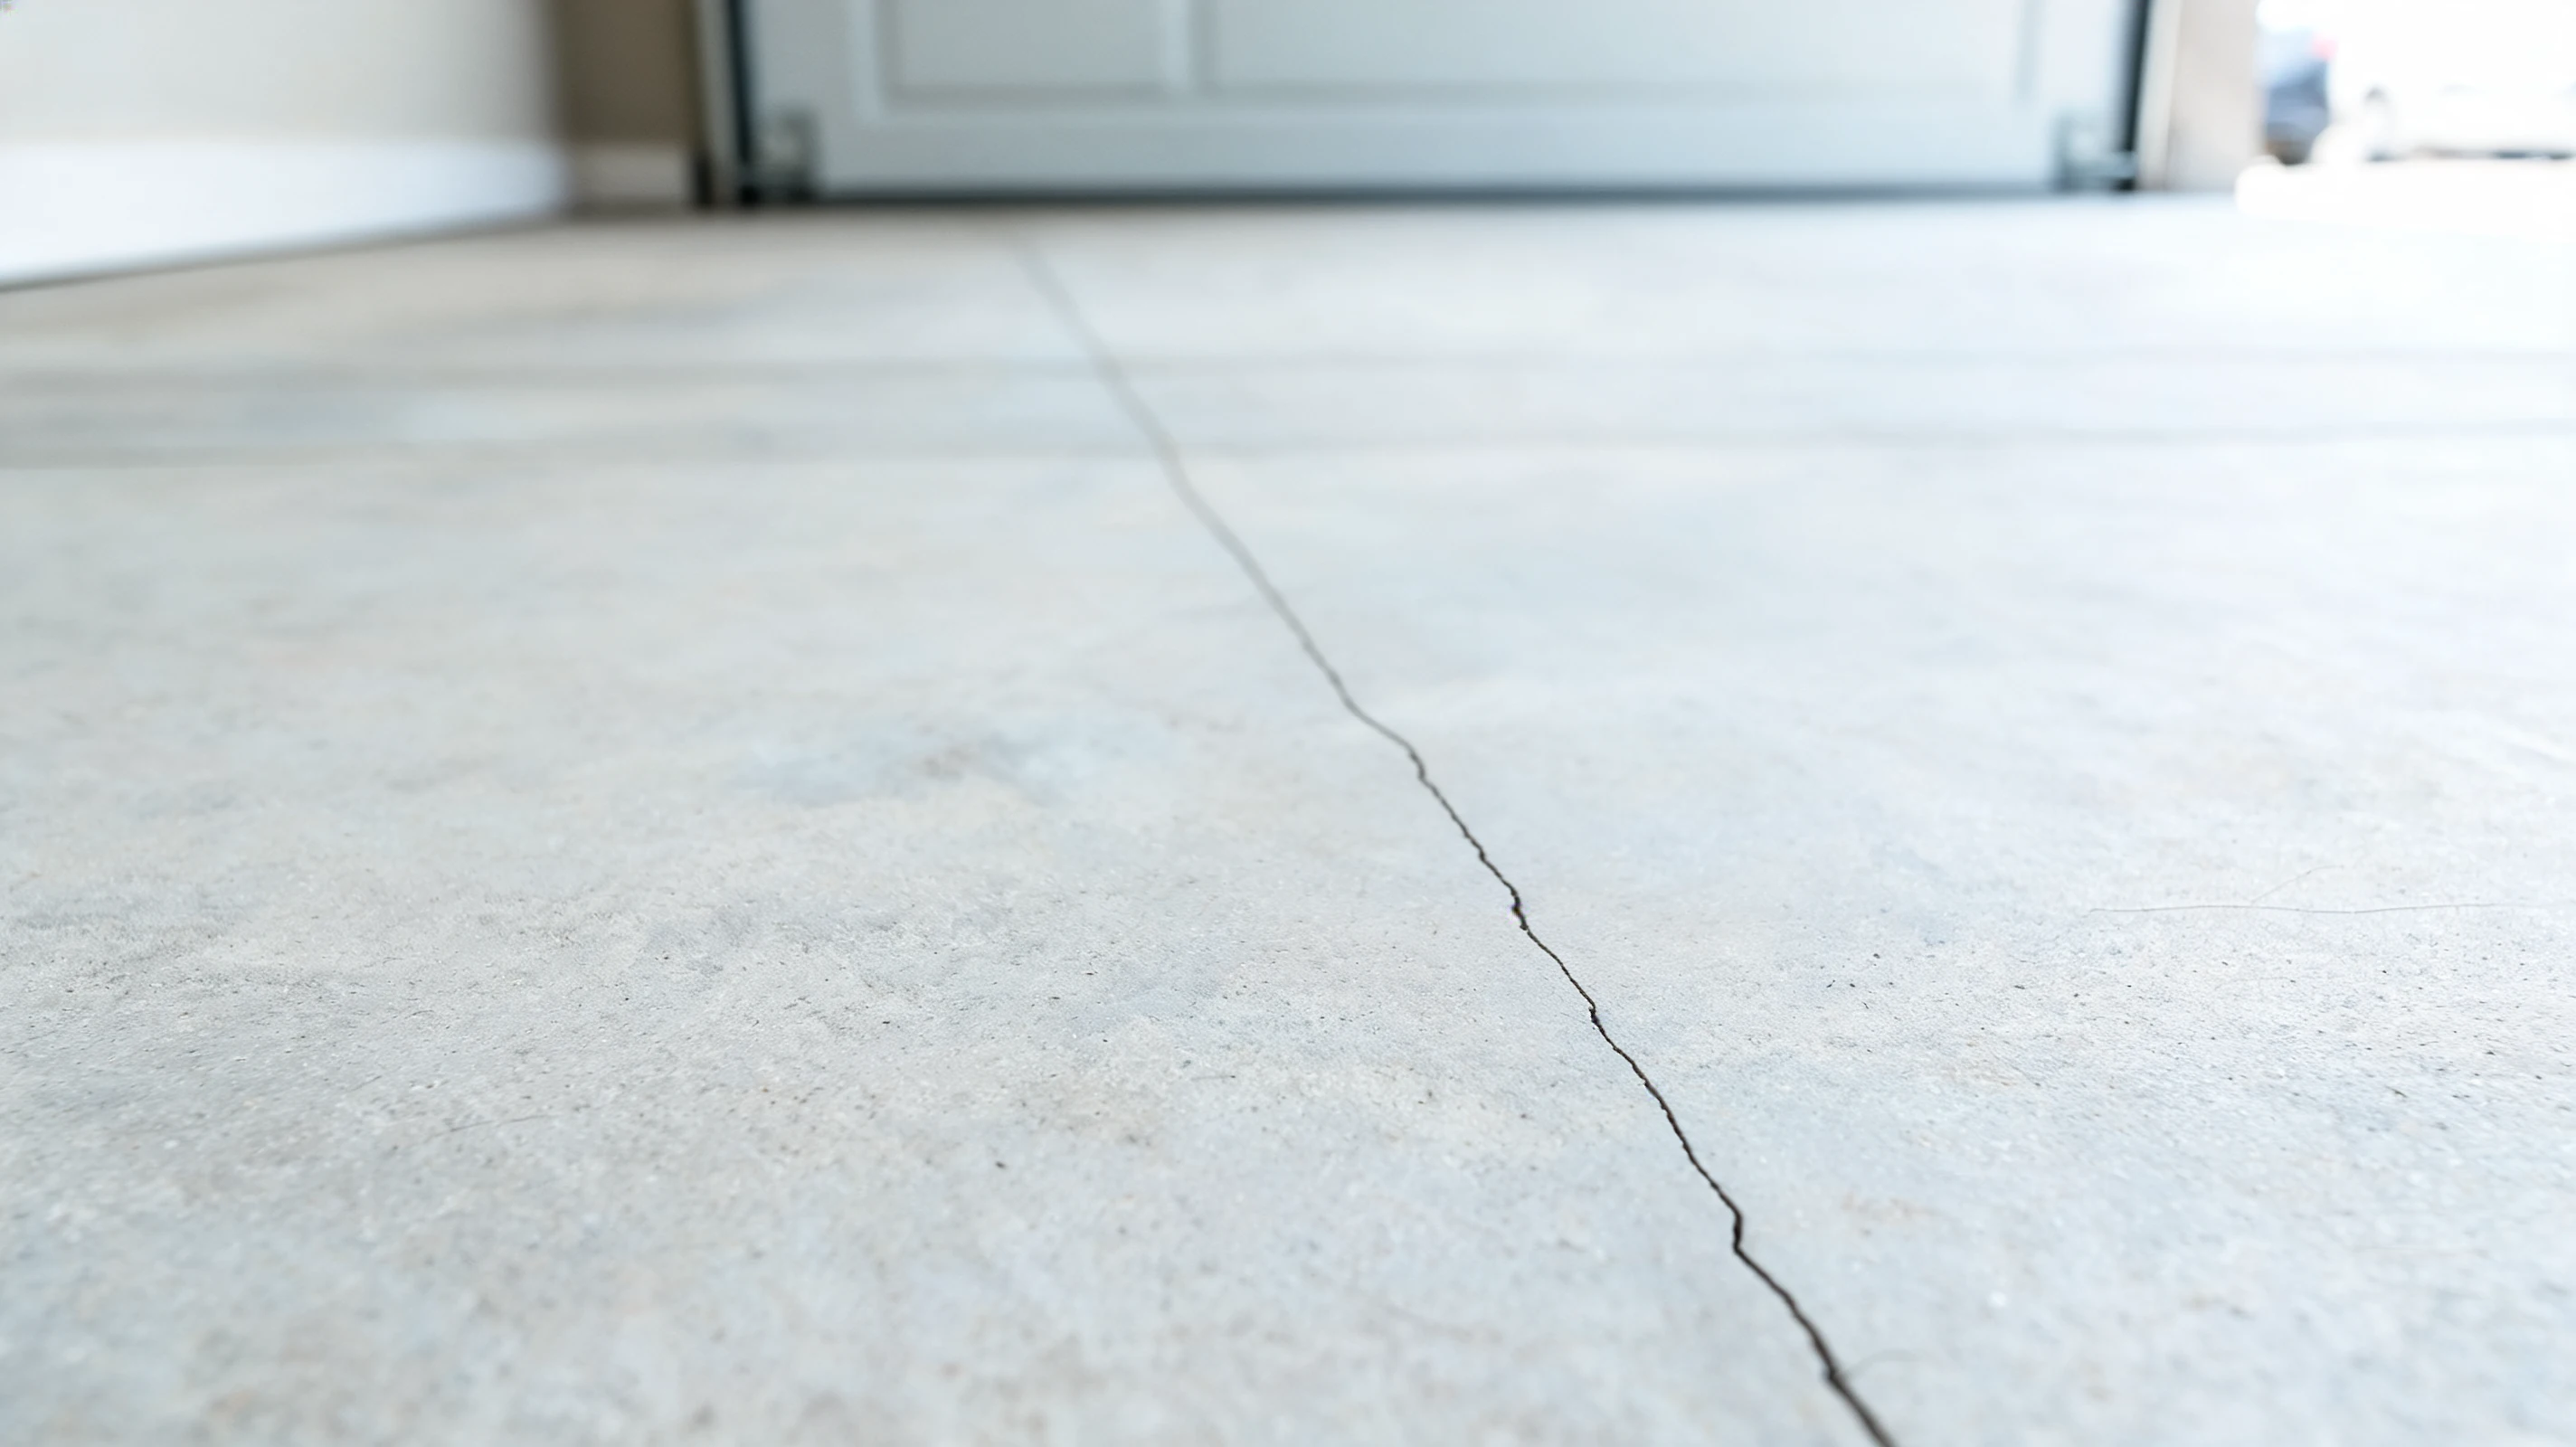
Hairline cracks are thin, usually under 1/8 inch wide. They form as the concrete cures and loses moisture in the first few weeks.
These cracks are almost always cosmetic. They don’t usually grow, and they rarely signal a structural problem. You’ll often see them running in a fairly straight line. If they follow a control joint, that’s a normal part of how the slab was designed to crack.
Federal pavement crack classification guidance draws a similar line between tight hairline cracks and cracks that behave like working joints.
2. Shrinkage Cracks
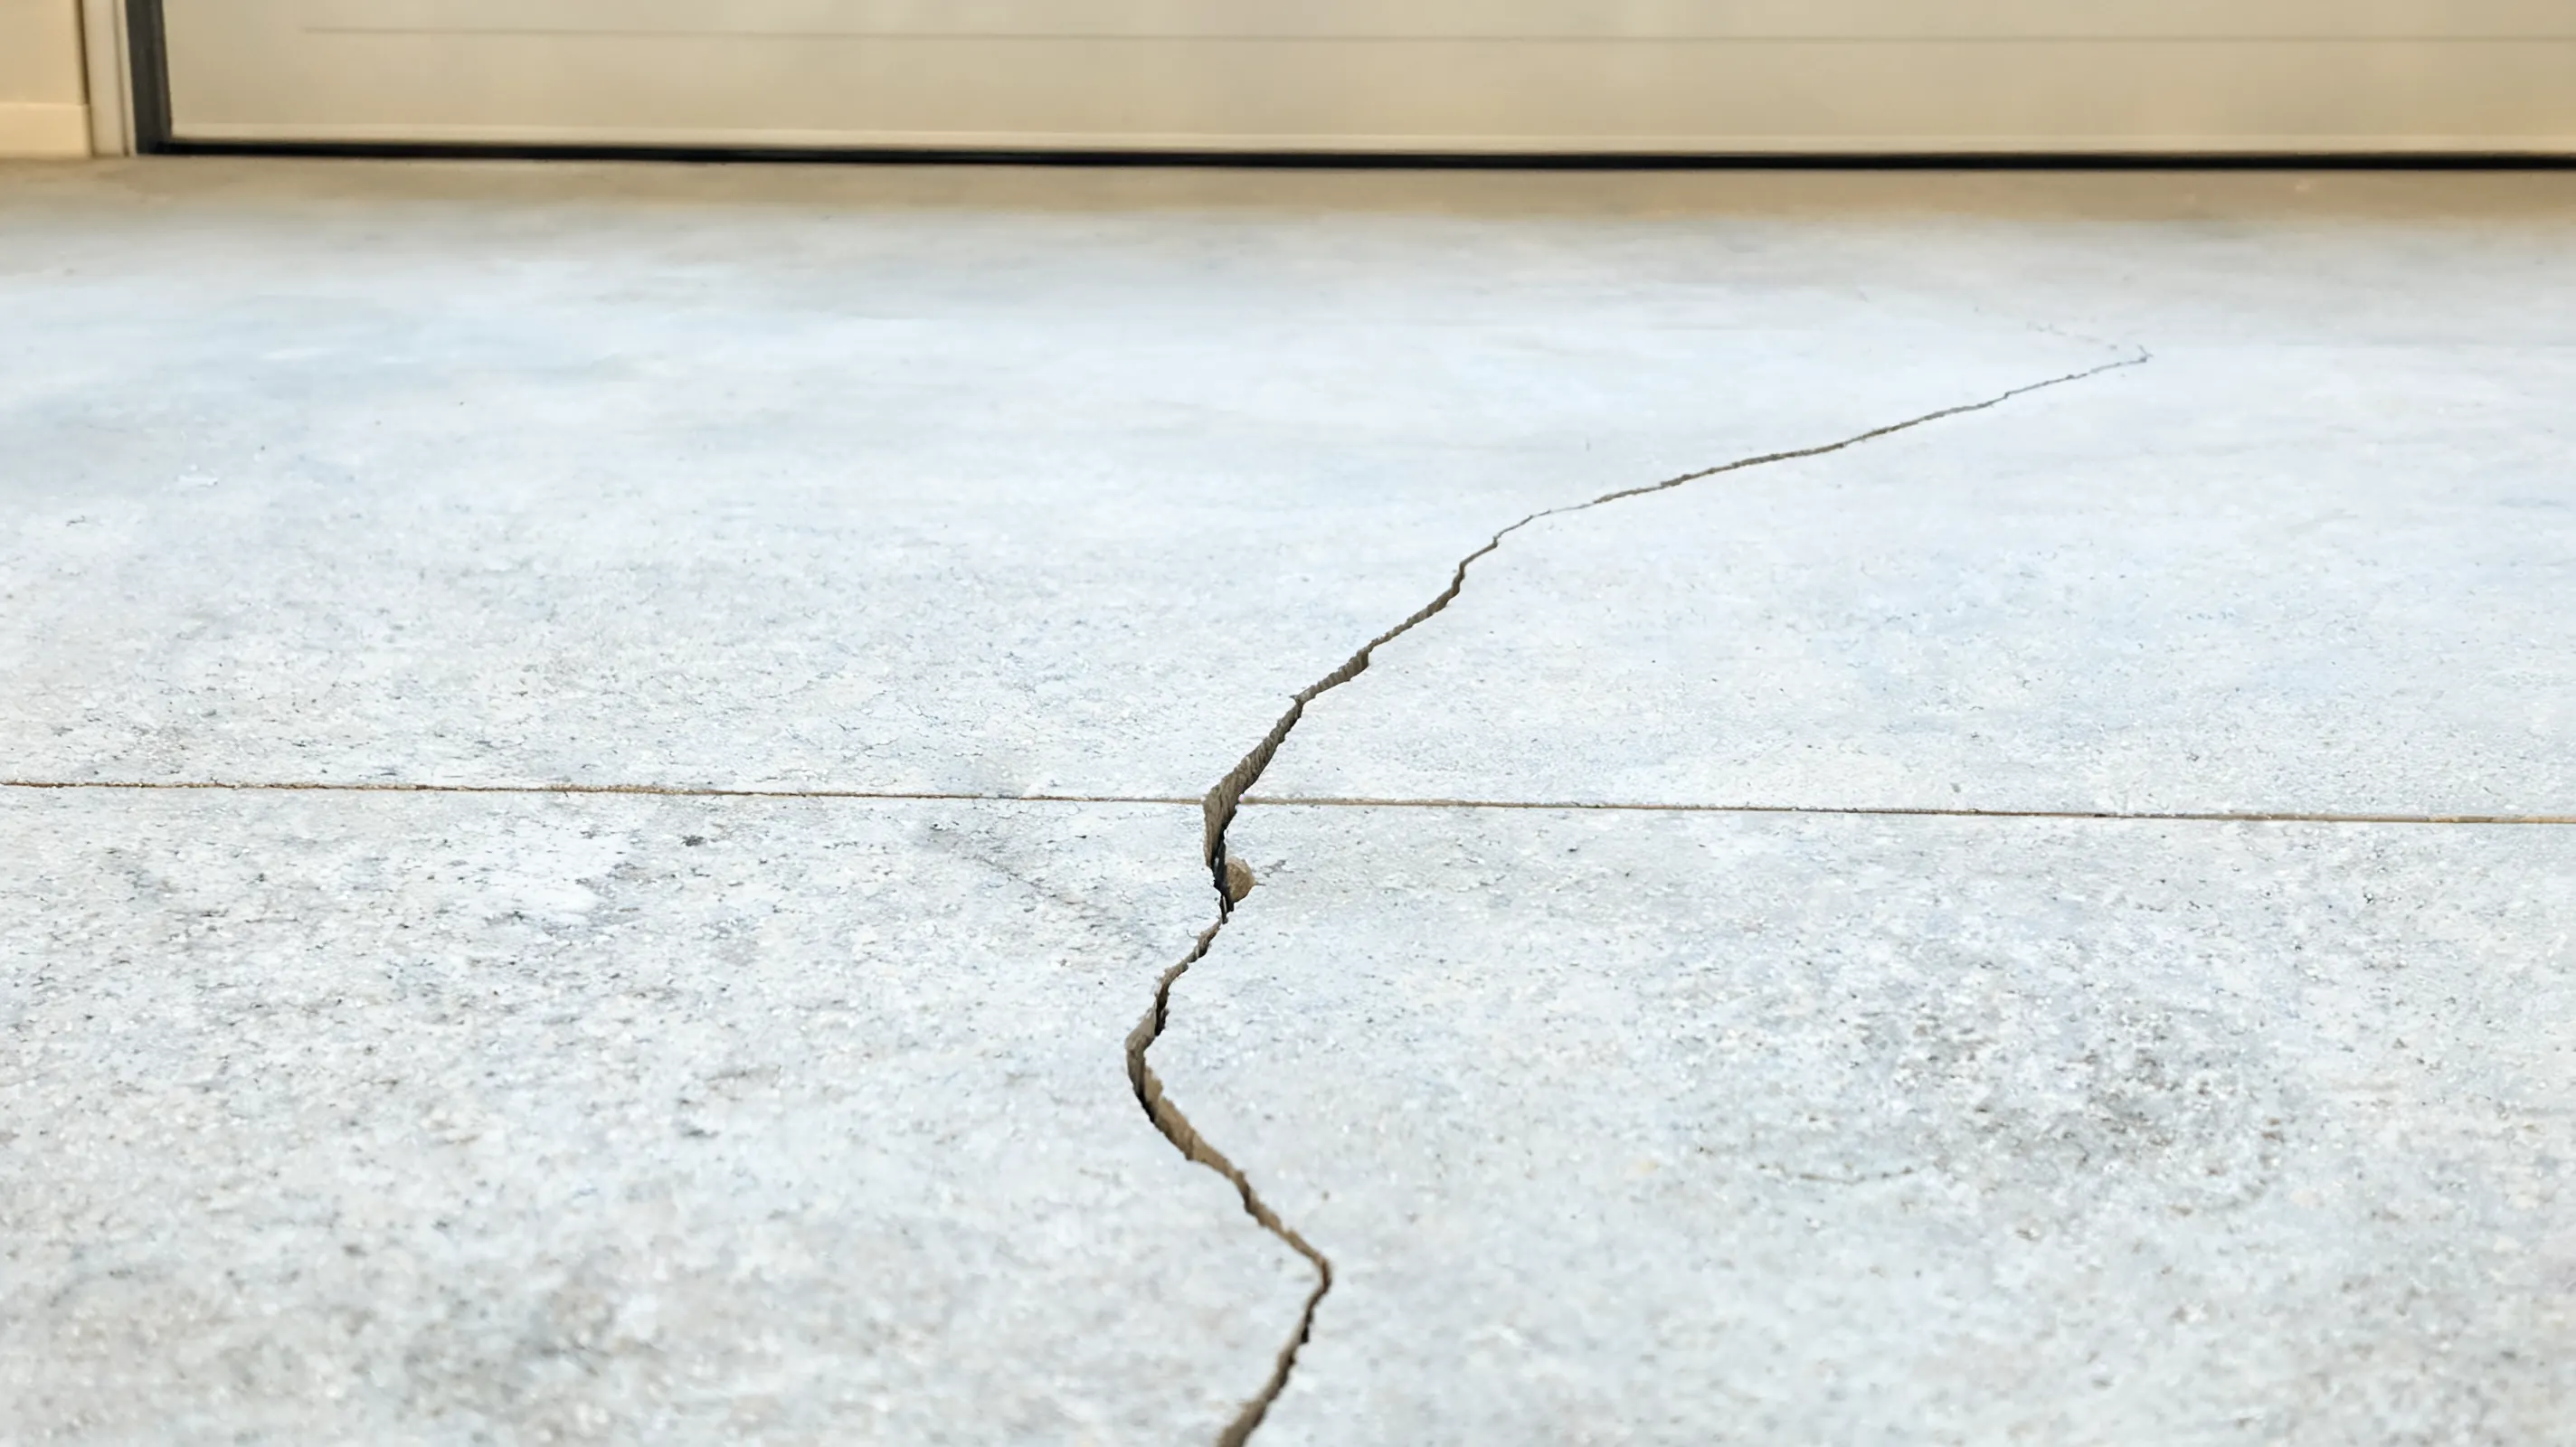
Shrinkage cracks form for a similar reason as hairline cracks, but they tend to be a bit wider. As the slab dries, it pulls inward and creates stress across the surface.
These cracks are common in both new and older garages. Age, weather, and the concrete mix all play a role in how manyyou’lll see.
Like hairline cracks, shrinkage cracks are usually isolated. If one doesn’t connect to a wall or spread across the floor, it’s likely just part of normal curing.
3. Crazing
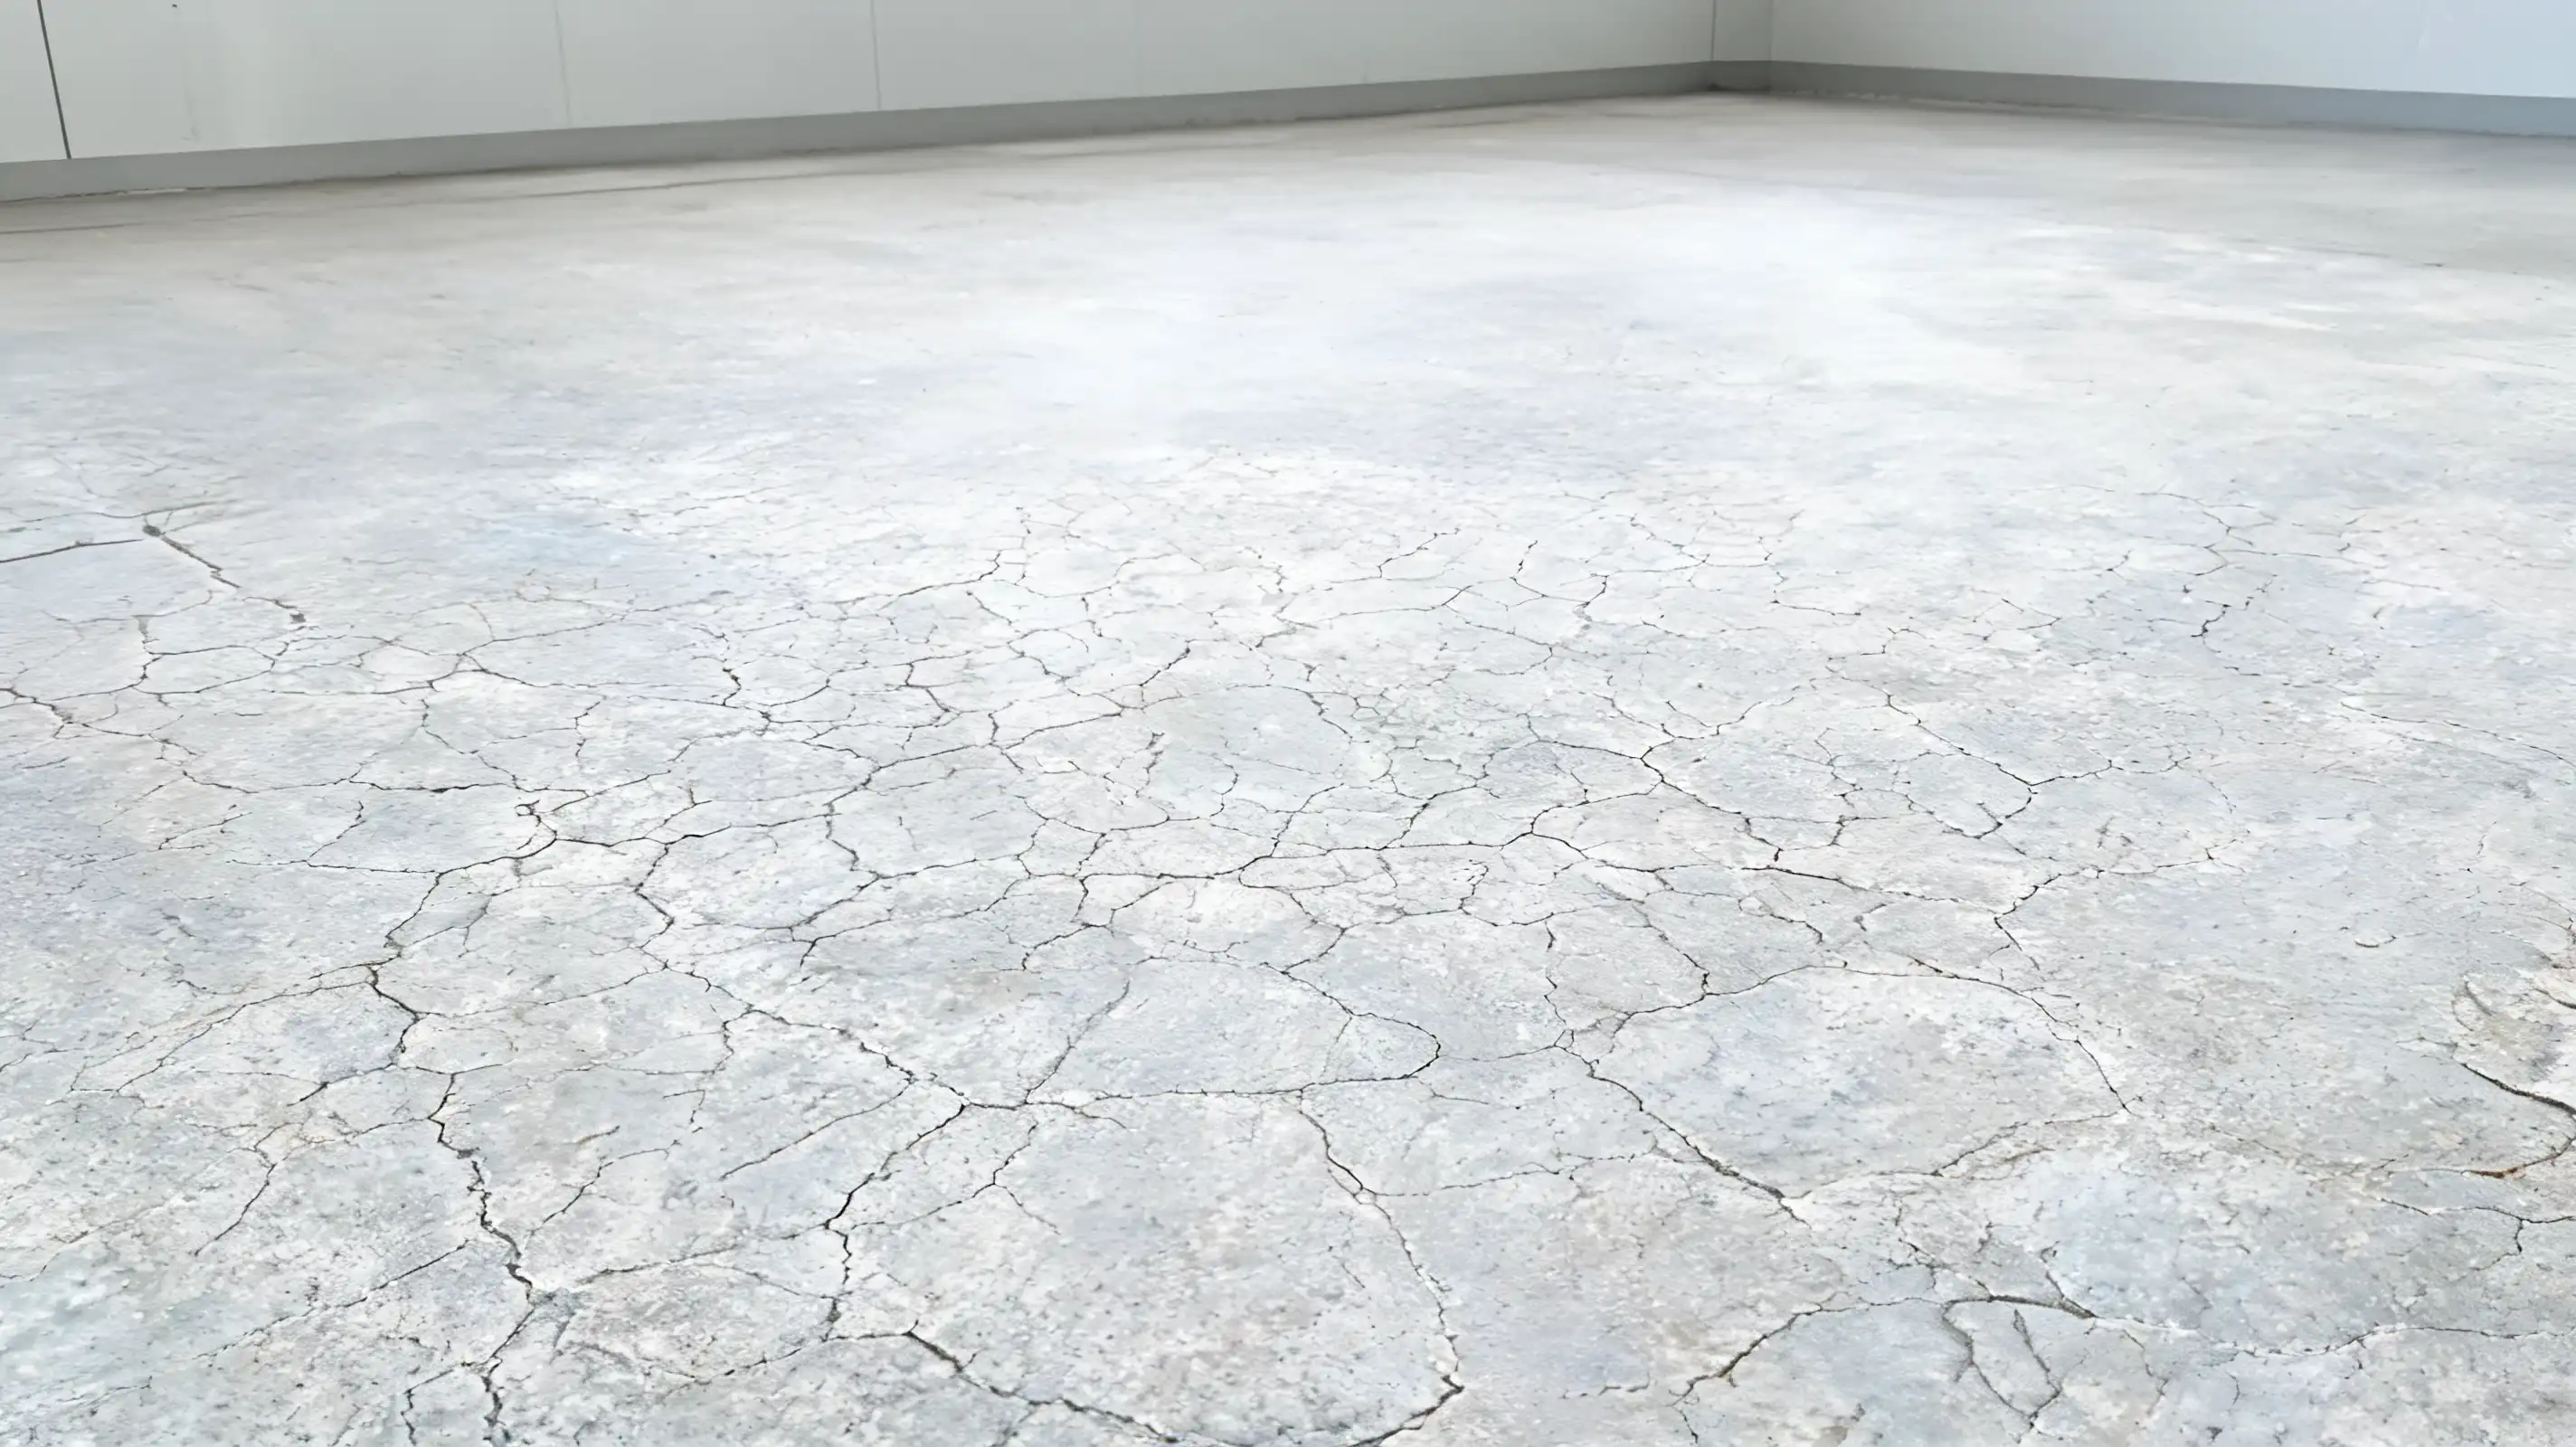
Crazing looks different from a single crack. It shows up as a web of thin lines across the surface, similar to a cracked desert floor.
This pattern usually comes from poor trowelling. If the top layer of concrete dries too fast, it separates slightly from the layer below.
Crazing is almost always cosmetic. It affects only the surface and doesn’t point to any issue with the slab’s strength.
4. Structural Cracks
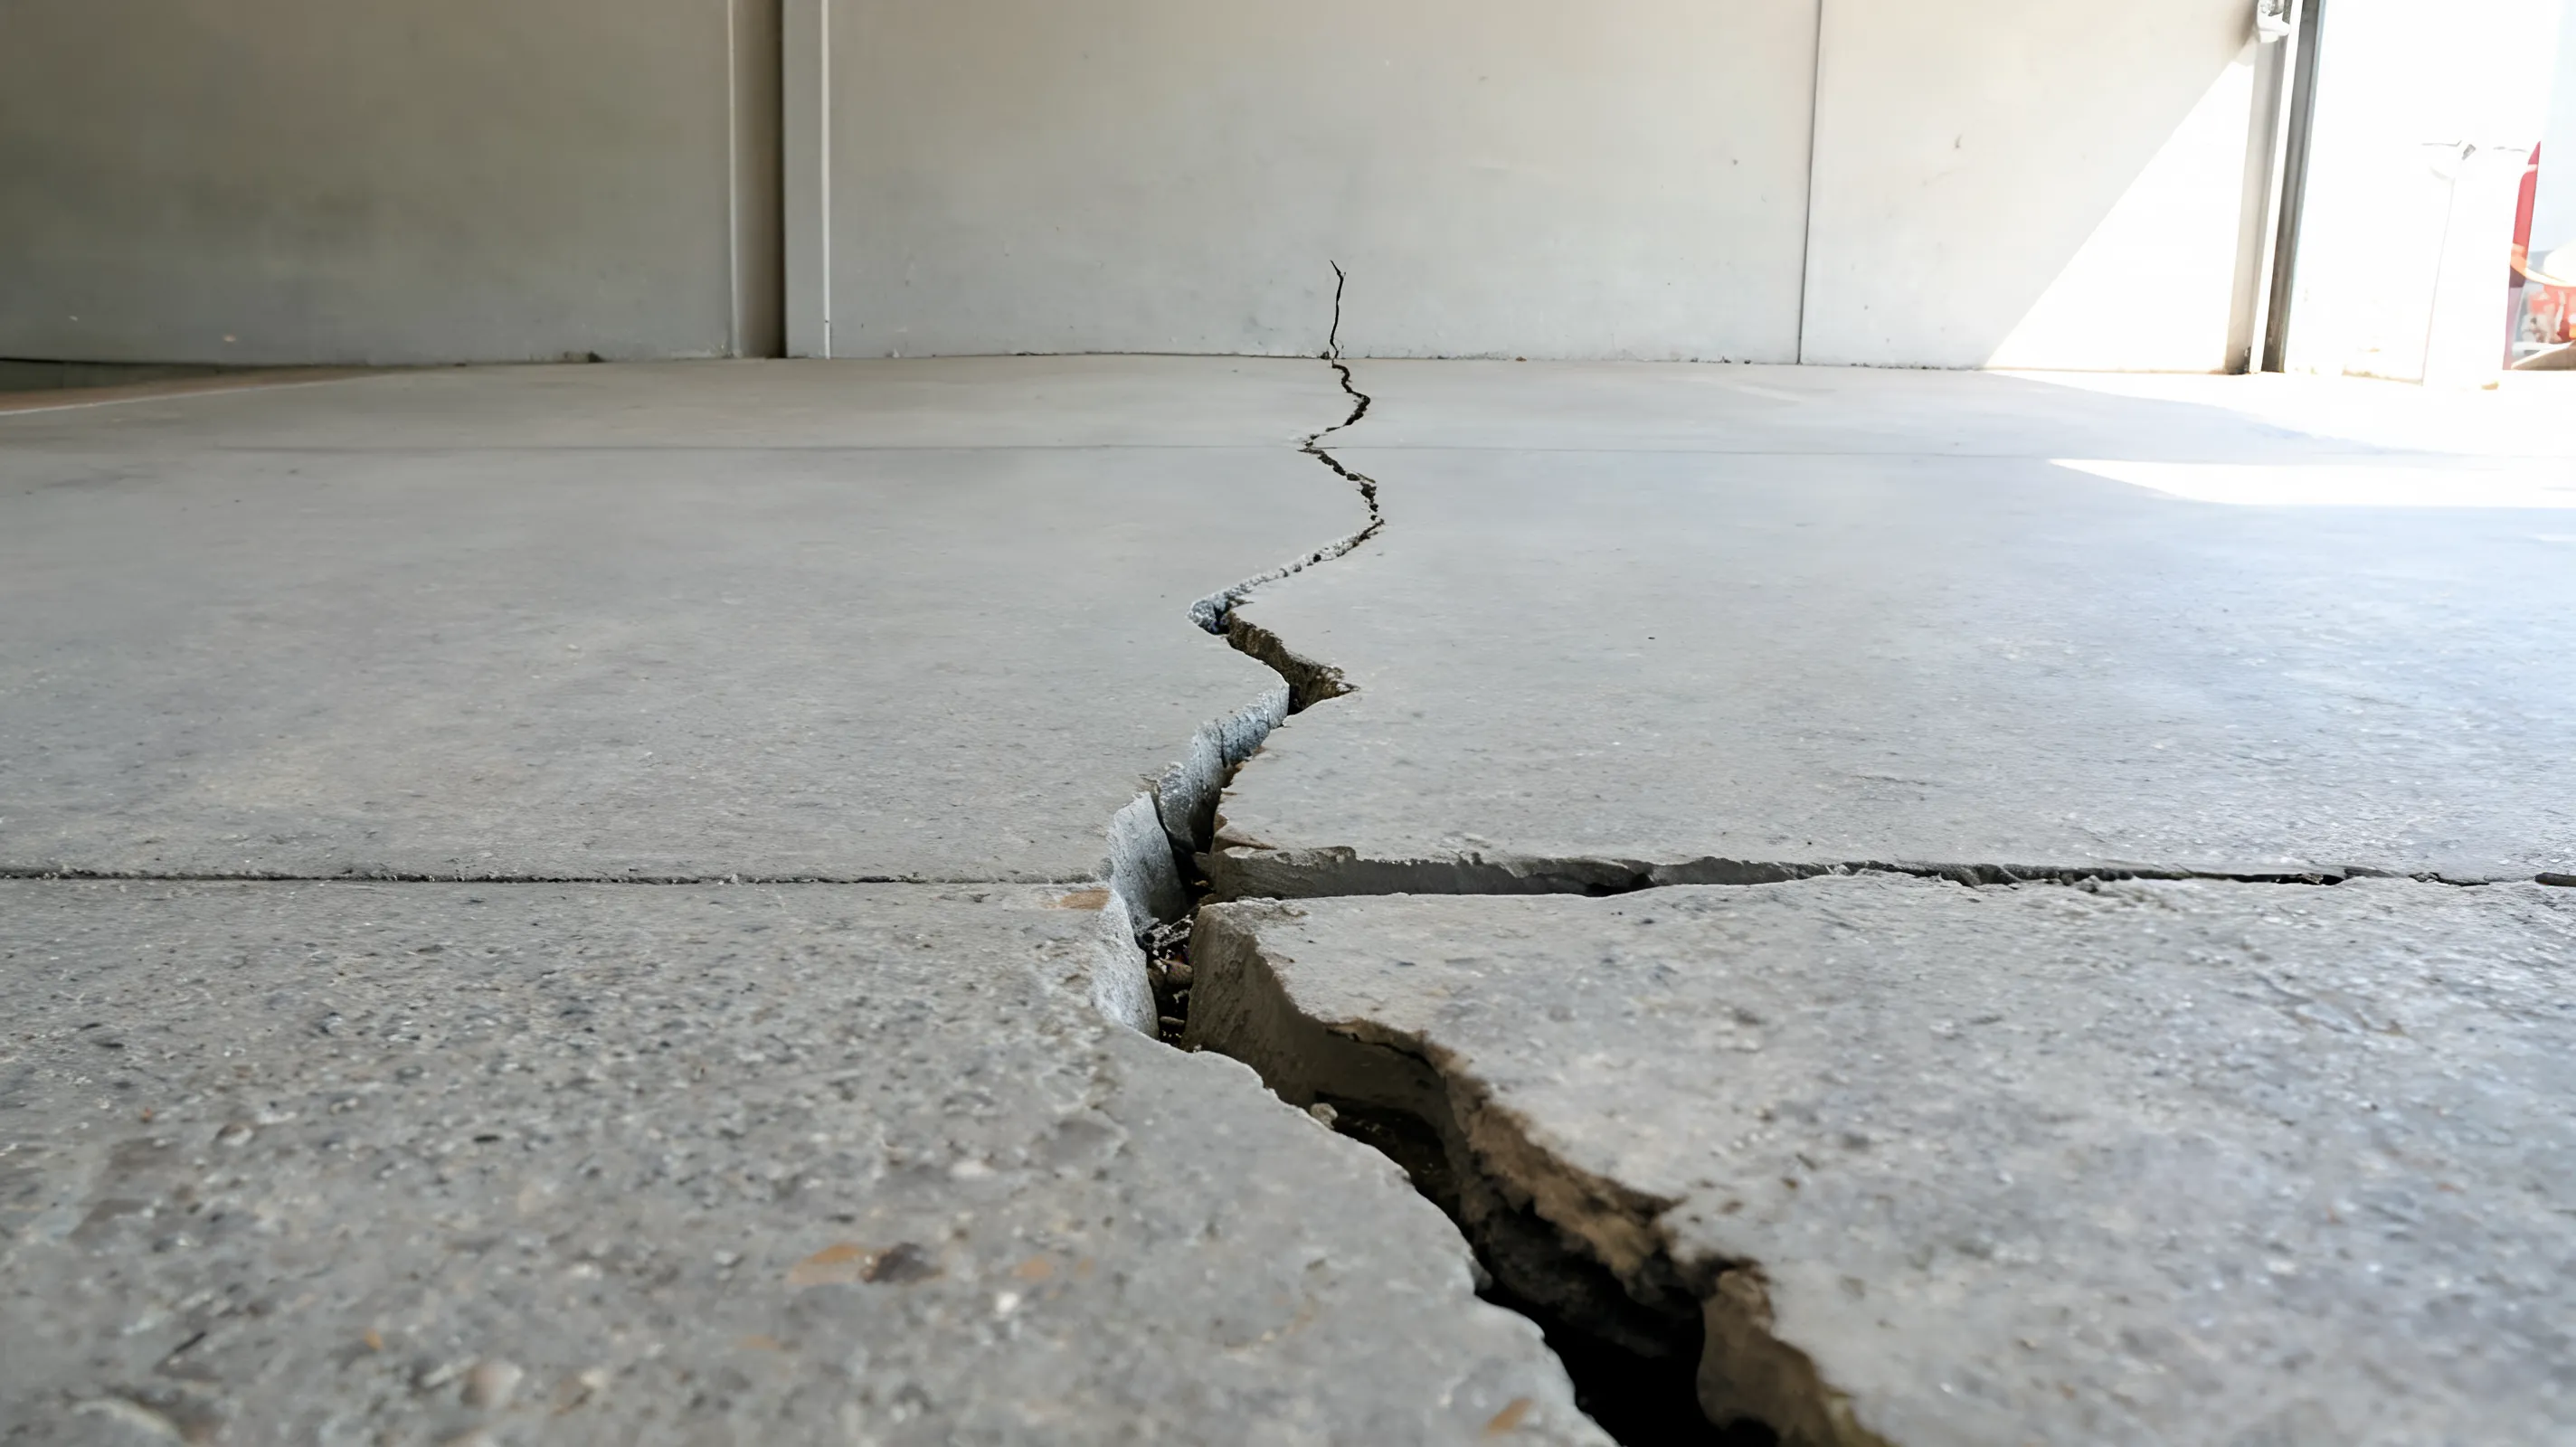
Structural cracks look and behave differently from the types above. They’re wider, often irregular, and may stretch across the entire floor.
Sometimes they extend up a nearby wall. That’s a strong sign the crack isn’t just about the slab, but something happening underneath it.
These cracks often come from soil movement, settling, or a shift in the garage’s foundation. If you see one, it’s worth having a professional take a look.
5. Rebar Cracks
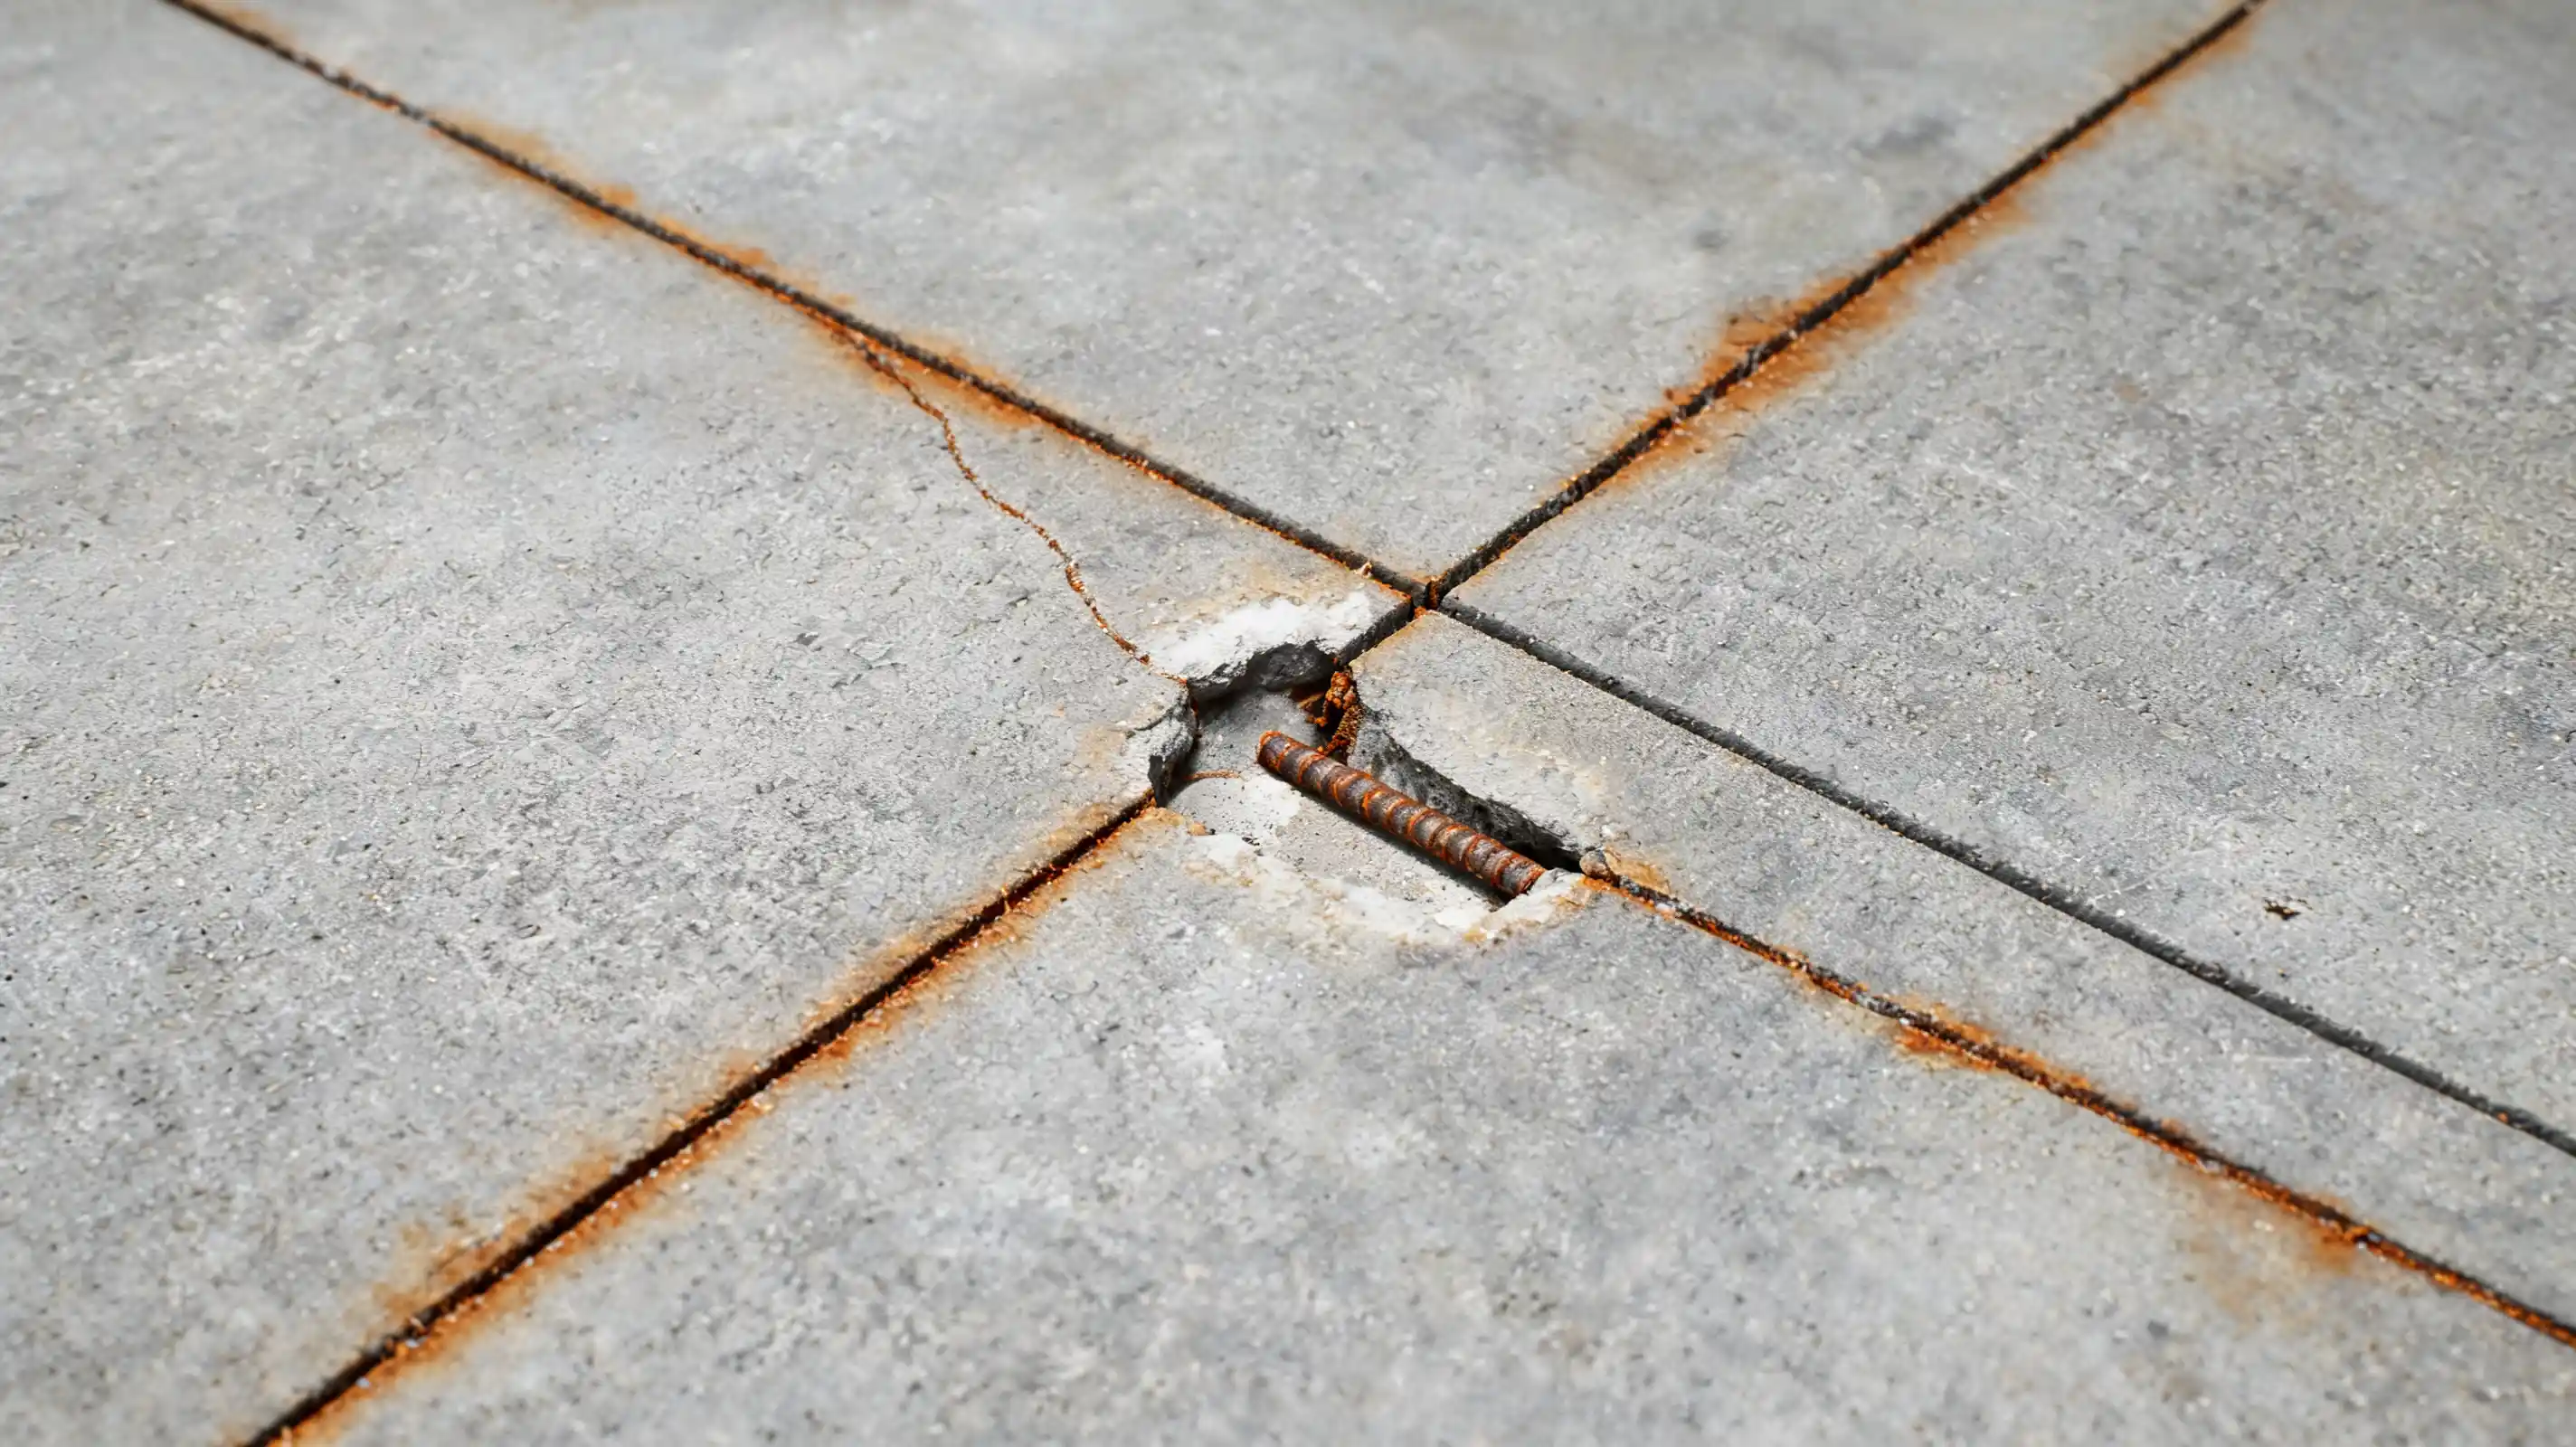
Rebar cracks form when the metal reinforcement inside the slab sits too close to the surface. Over time, moisture reaches the rebar and causes it to rust.
You’ll usually spot these as straight lines, running parallel or perpendicular to each other. Rust staining along the crack is the clearest giveaway.
These cracks usually need repair to stop further rusting and spreading. But on their own, they don’t typically point to a structural problem.
Once you know which type you’re dealing with, it’s easier to match it to a cause and figure out how urgent the fix really is.
Steps to Check a Garage-Floor Crack
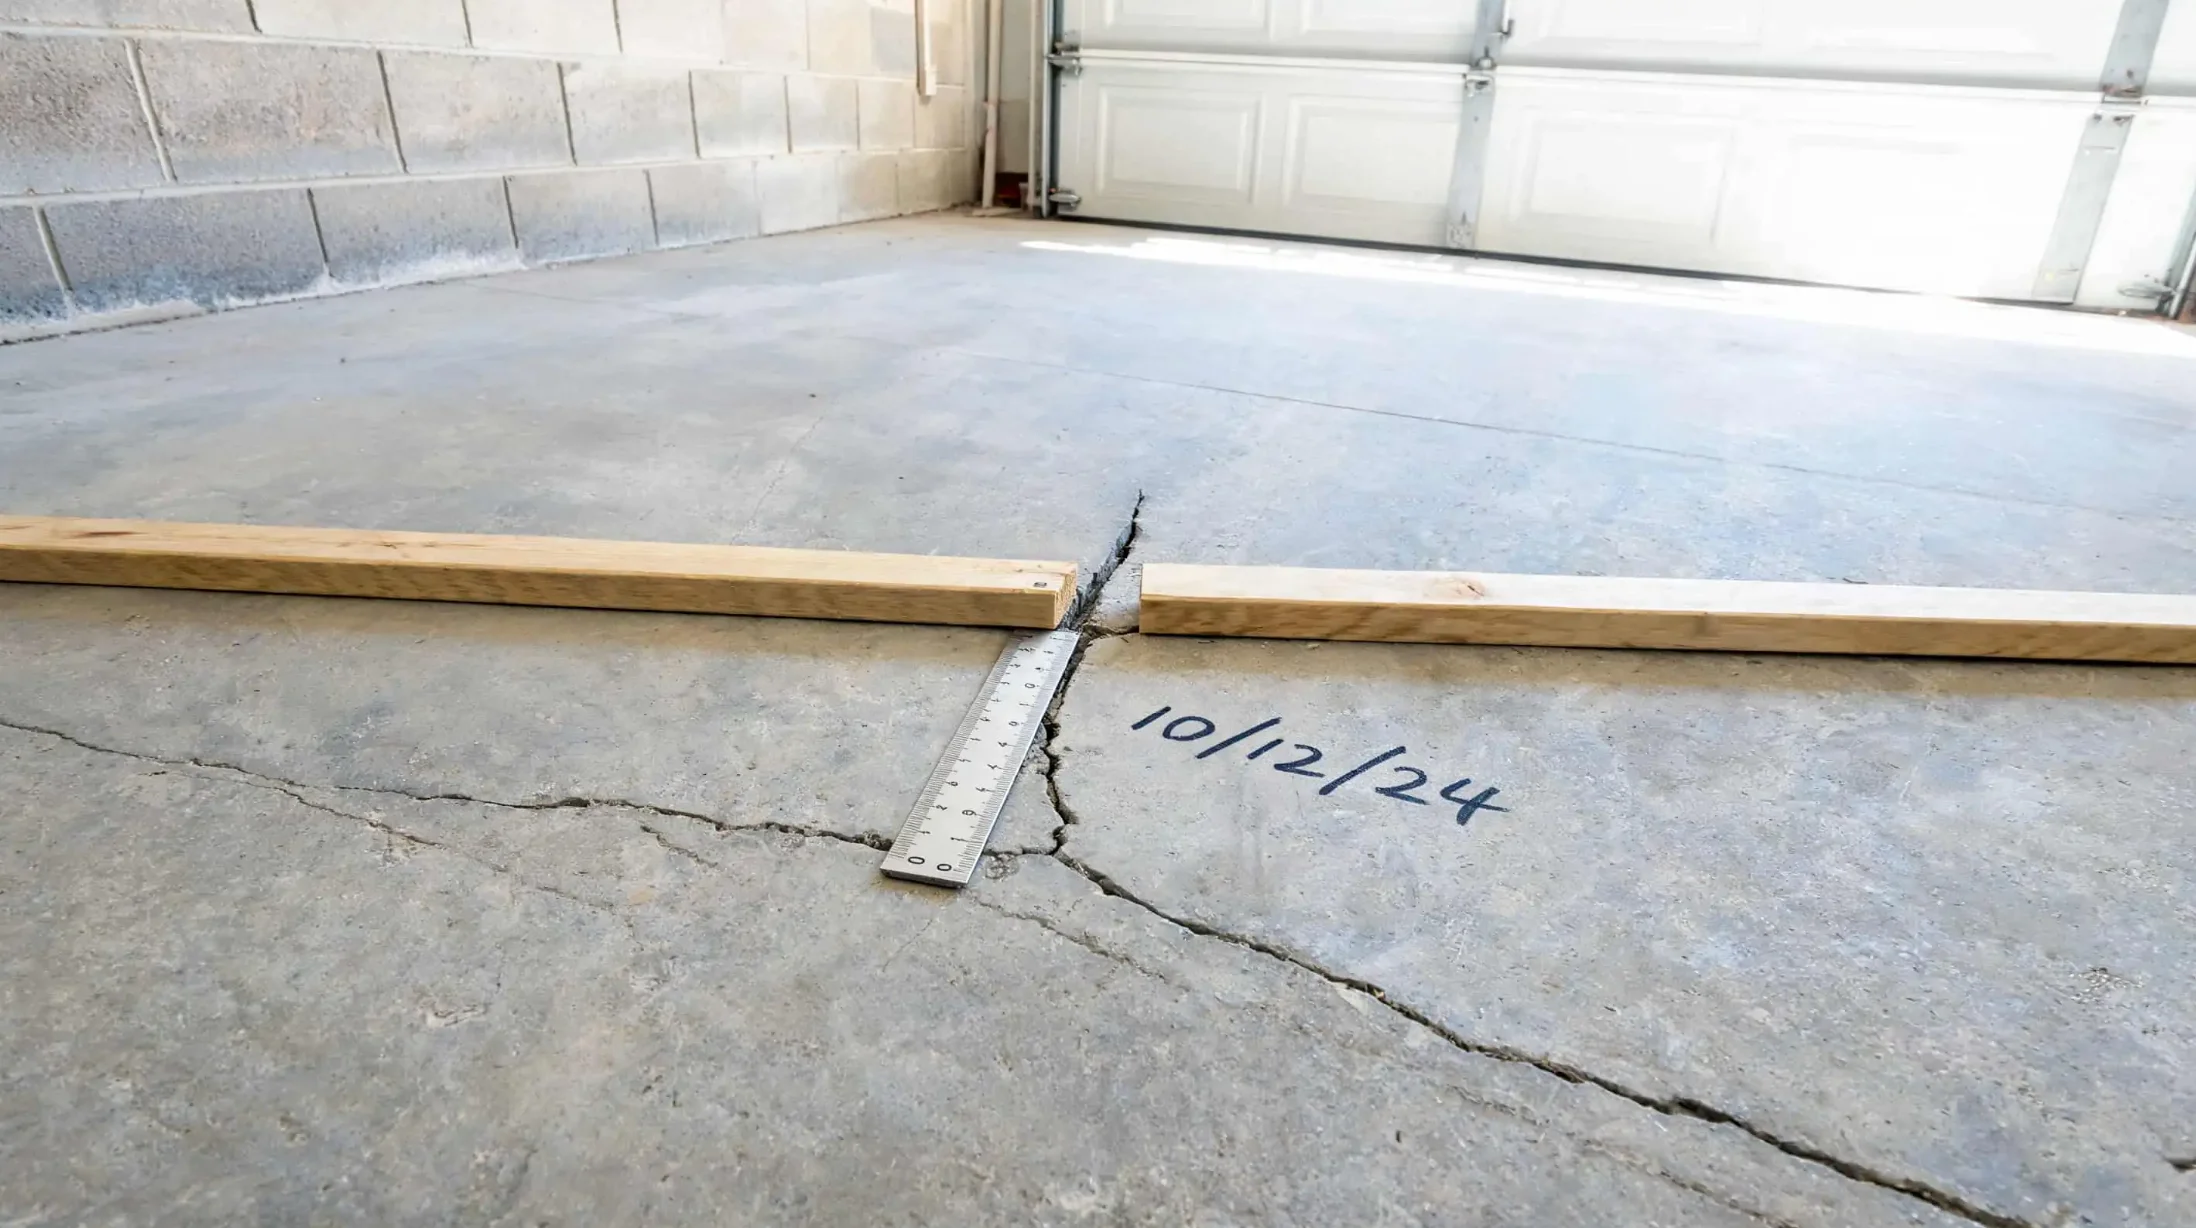
A quick check gives you a record of the crack today. You can use it to spot later changes.
- Measure the crack: Record its width, length,h and widest point
- Check the height: Place a straight board across both sides
- Study the area: Look for water, rust flaking, or sunken concrete
- Mark the date: Take a clear photo and record the date
- Check nearby parts: Look at walls, doors, floor slope, and water flow
Repeat the same checks every few months. Check sooner after heavy rain or freezing weather. In practice, a height difference often matters more than a thin line alone.
How to Repair Garage Floor Cracks
Small, stable cracks are often fine for a careful home repair, while uneven or changing cracks deserve a trained eye first. The right fix depends on how wide the crack is, whether it’s still moving, and what shape the surrounding concrete is in.
A federal concrete repair guide covers similar surface preparation steps used before patching or sealing cracked concrete.
1. Level Cracks, Small to Wide
Level cracks that aren’t shifting can usually be handled with the right filler, matched to how wide and deep the crack actually is.
- Small, level cracks: seal with flexible concrete caulk or crack filler after removing dust, oil, and loose concrete, then let the area dry before applying
- Wider, level cracks: use patching compound, mortar, or epoxy filler, building up deep openings in several thin layers if needed
- Active cracks: skip rigid filler entirely, since continued movement will just break the repair apart
Flexible caulk keeps water and dirt out without adding strength, while epoxy forms a hard fill that can also prep the floor for a coating. Choose the material based on the crack’s width and depth, and check back later for new gaps or movement.
2. Damaged Joints and Broken Edges
Broken edges and joints often need a faster-setting material that can hold up under quicker curing demands.
- Polyurea repairs damaged joints, broken edges, and stable cracks that need faster curing
- It sets quickly and forms a firm repair once cured
- Some products require special tools and careful surface preparation
A concrete repair contractor may be worth calling in when the damaged area is large or difficult to clean properly.
3. Pitted or Worn Surfaces
Surface wear is a different problem from cracking, and it calls for a different kind of fix.
- A bonded overlay can cover pits, rough patches, and general surface wear
- The existing concrete underneath must remain firm and level for the overlay to hold
- An overlay cannot correct settlement, heaving, or lost support below the slab
Repair any active cracks and moisture problems first, before covering the surface with an overlay.
4. Sunken or Badly Damaged Slabs
Once the slab itself has lost support or suffered serious damage, surface repairs alone won’t solve the problem.
- Sunken concrete: needs slab lifting, or mudjacking, where a contractor injects material below the slab to fill empty spaces and raise it back up
- Badly damaged concrete: may need partial or full replacement when warning signs include many active cracks, severe crumbling, broad heaving, or repeated water damage
Crack filler, epoxy, and patching compound can’t raise a sunken floor or fix a failed base. A contractor can assess whether one section or the full slab needs replacing, matching the repair to the crack’s actual condition. Getting a rough sense of concrete slab cost ahead of time makes it easier to compare a full pour against smaller repair options.
Signs You Need a Professional
Some signs point to something bigger going on below the surface, and it helps to know what to watch for. If the crack keeps growing, the slab may still be shifting underneath. If one side sits higher or lower than the other, the support below has likely changed.
A shift in the floor’s slope can mean water is pooling near a wall, and a crack that reaches a wall may signal movement extending beyond just the floor itself.
Past repairs that keep failing are usually a sign the real cause is still sitting below, left unaddressed by the previous fix.
Large crumbling areas can point to a slab that needs full replacement rather than another patch job. On their own, any single one of these signs might not mean much. But when a few of them show up together, that’s a good reason to bring in someone who can take a closer look.
When a DIY Repair Makes Sense
Before grabbing any patching material, it helps to check for a few basic signs that a crack is simple and stable enough to handle on your own.
- The crack stays level: both sides sit at the same height
- The crack stays stable: its width and length haven’t changed
- The area stays dry: no water or dark stains show up nearby
- The damage is small: the concrete edges remain firm
If most of these signs check out, you’re likely looking at a straightforward surface repair. Sealing a stable crack is a manageable weekend task, similar in scope to many other DIY home improvement projects homeowners tackle without hiring outside help.
Clean and measure the crack before you get started, and stop if you notice any movement or damage that looks more serious than expected.
Who Should Inspect It
Once you’ve decided a professional is the way to go, the next step is figuring out which one actually matches your situation, since not every contractor handles the same kind of problem.
| Professional | Best For |
|---|---|
| Concrete repair contractor | Stable cracks and damaged surfaces |
| Concrete leveling contractor | Sunken or uneven slab sections |
| Drainage contractor | Pooling water or soil erosion |
| Structural engineer | Damage affecting walls or foundation parts |
Getting the right person to take a look first can save you from spending money on a repair that never really solves the problem.
How to Prevent More Garage-Floor Cracks
You cannot stop every crack. You can reduce water damage and stress on the slab.
- Maintain gutters: Keep water from collecting near the garage
- Extend downspouts: Send roof water away from the slab
- Correct ground slope: Stop water from flowing toward the garage
- Keep the entrance clear: Let rain and snowmelt drain outside
- Seal stable cracks: Block water, dirt, and salt
- Repair settlement early: Reduce added stress on the slab
- Limit heavy loads: Avoid more weight than the floor can support
- Use less road salt: Reduce pitting, flaking, and surface loss
- Maintain floor joints: Keep planned movement areas clear
Good drainage and early repairs can slow further damage.
Common Mistakes to Avoid
Poor repair choices are one of the biggest reasons cracks come back after being fixed. Before you patch anything, it helps to know which shortcuts tend to cause more trouble down the road. Here’s a quick look at what often goes wrong.
| Common mistake | Why it fails | Better step |
|---|---|---|
| Filling a dirty crack | Dust and oil weaken the bond | Clean and dry the opening |
| Using rigid filler on a moving crack | Movement breaks the repair | Use flexible sealant and find the cause |
| Ignoring water near the slab | Water may erode soil or enter cracks | Fix drainage before repair |
| Covering rust stains | Corrosion keeps expanding below | Repair the steel damage |
| Patching an uneven slab | Filler cannot raise sunken concrete | Inspect the base and consider lifting |
| Coating over active cracks | Movement may pass through the coating | Repair and monitor the slab first |
Good preparation matters just as much as whatever repair product you end up using. Taking the time to do it right the first time saves you from redoing the same job again later.
Frequently Asked Questions
Why Does a Garage Floor Slope Toward the Door?
The slight slope sends water out through the garage door. Settlement can change that slope, leaving water near walls, nearby floor cracks, or stored items.
Why Is Damage Often Worse Near the Garage Entrance?
Snowmelt, water, and road salt often drip from vehicles near the entrance. Repeated exposure may cause pits, flaking, and visible surface loss.
Why Can a Floor Coating Peel?
Moisture vapor and salts can push against a coating from below. Oil, dust, or poor surface cleaning may weaken the bond and cause peeling.
Can New Control Joints Be Added Later?
Yes. A contractor may cut new joints when existing joints are missing or too shallow. This can guide normal slab movement more clearly later on.
Why Can a Crack Repair Remain Visible?
Garage floors often have smooth finishes that are hard to match. Even a sound repair may differ slightly in texture, shade, color, or surface level.
What to Do Next
Cracks in garage floors can show up for all kinds of reasons: drying, water, or ground movement, and the width, depth, and how much they change over time all help point you toward the right next step.
Take a few measurements and photos, and use them to figure out whether your crack is stable or still shifting.
Sort out any moisture or soil issues first before filling anything in. If a crack keeps growing, shifts, or reaches a wall, it’s worth having a qualified professional take a look.
Have you dealt with cracks in your garage floor before? Share what yours looked like and how you handled it in the comments below.