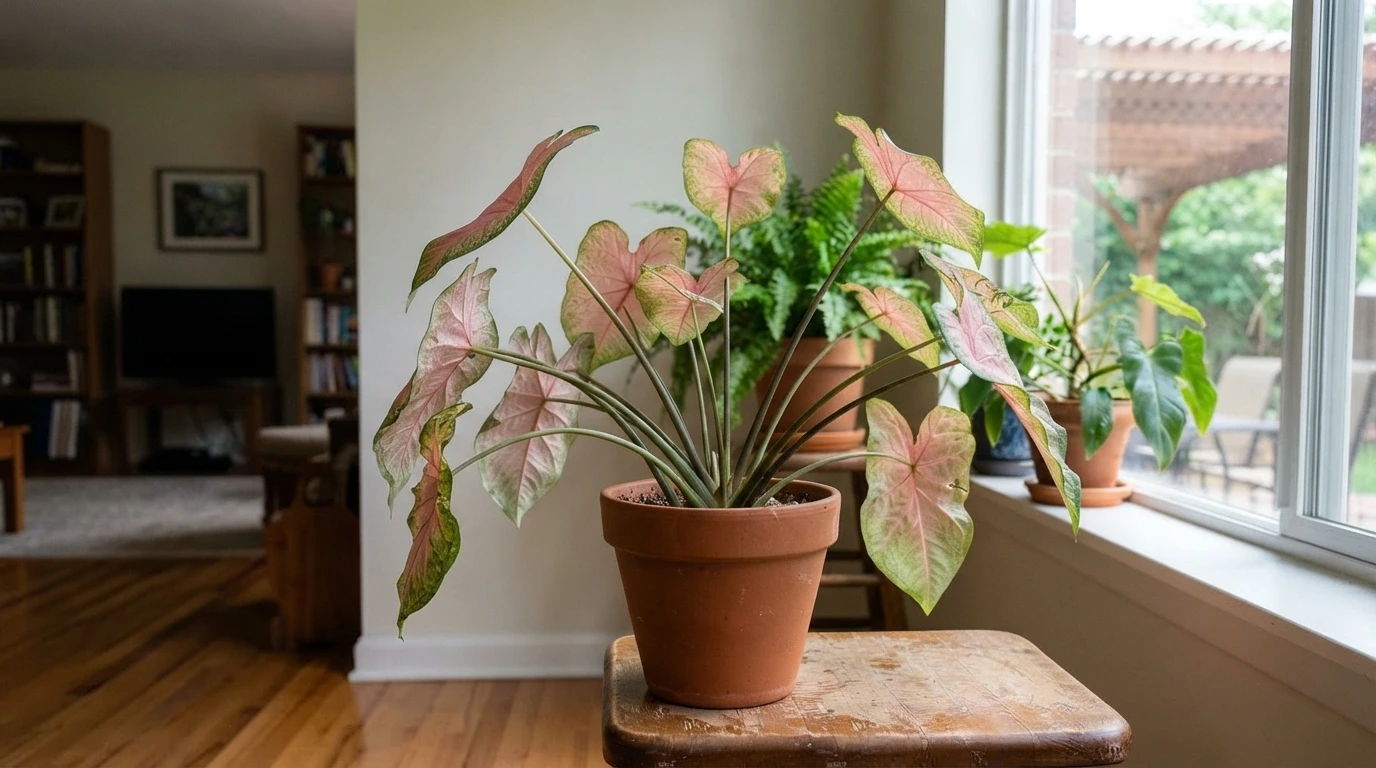
Caladiums are not fussy plants, but they do have real preferences, and good caladium care starts with understanding what this tropical tuber actually wants.
It happens almost every summer, usually to someone whose plant looked perfect at the nursery and then went downhill fast once our Gulf Coast heat and humidity took over.
That means filtered light, steady warmth, moisture that never swings from soggy to bone dry, and a rest period every plant earns.
Some of that advice looks different here than it does up north.
Before I walk you through my routine, let’s start with the kind of caladium you already have growing in your yard or your living room.
Caladium Basics: Tubers, Leaf Types, and Growth Habit
The plant most of us just call caladium carries the scientific name Caladium bicolor (older nursery tags sometimes still use the synonym Caladium x hortulanum), pronounced kuh-LAY-dee-um.
According to the University of Wisconsin-Madison Extension, they are commonly grown as fancy-leaf or strap- and lance-leaf forms, with growth, leaf shape, and sun tolerance influenced by variety, tuber size, and conditions.
|
Feature |
Details |
|---|---|
|
Scientific name |
Caladium bicolor (synonym: Caladium x hortulanum), pronounced kuh-LAY-dee-um |
|
Common names |
Caladium, angel wings, heart of Jesus; also sold as “elephant ear,” a name it shares with Alocasia, Colocasia, and Xanthosoma |
|
Plant family |
Araceae, the aroid family |
|
Origin |
Understory of South and Central American rainforests, centered on the Amazon basin |
|
Types |
Fancy-leaf and strap- or lance-leaf forms |
|
Underground storage part |
Tuber, often sold and referred to as a bulb |
|
Fancy-leaf form |
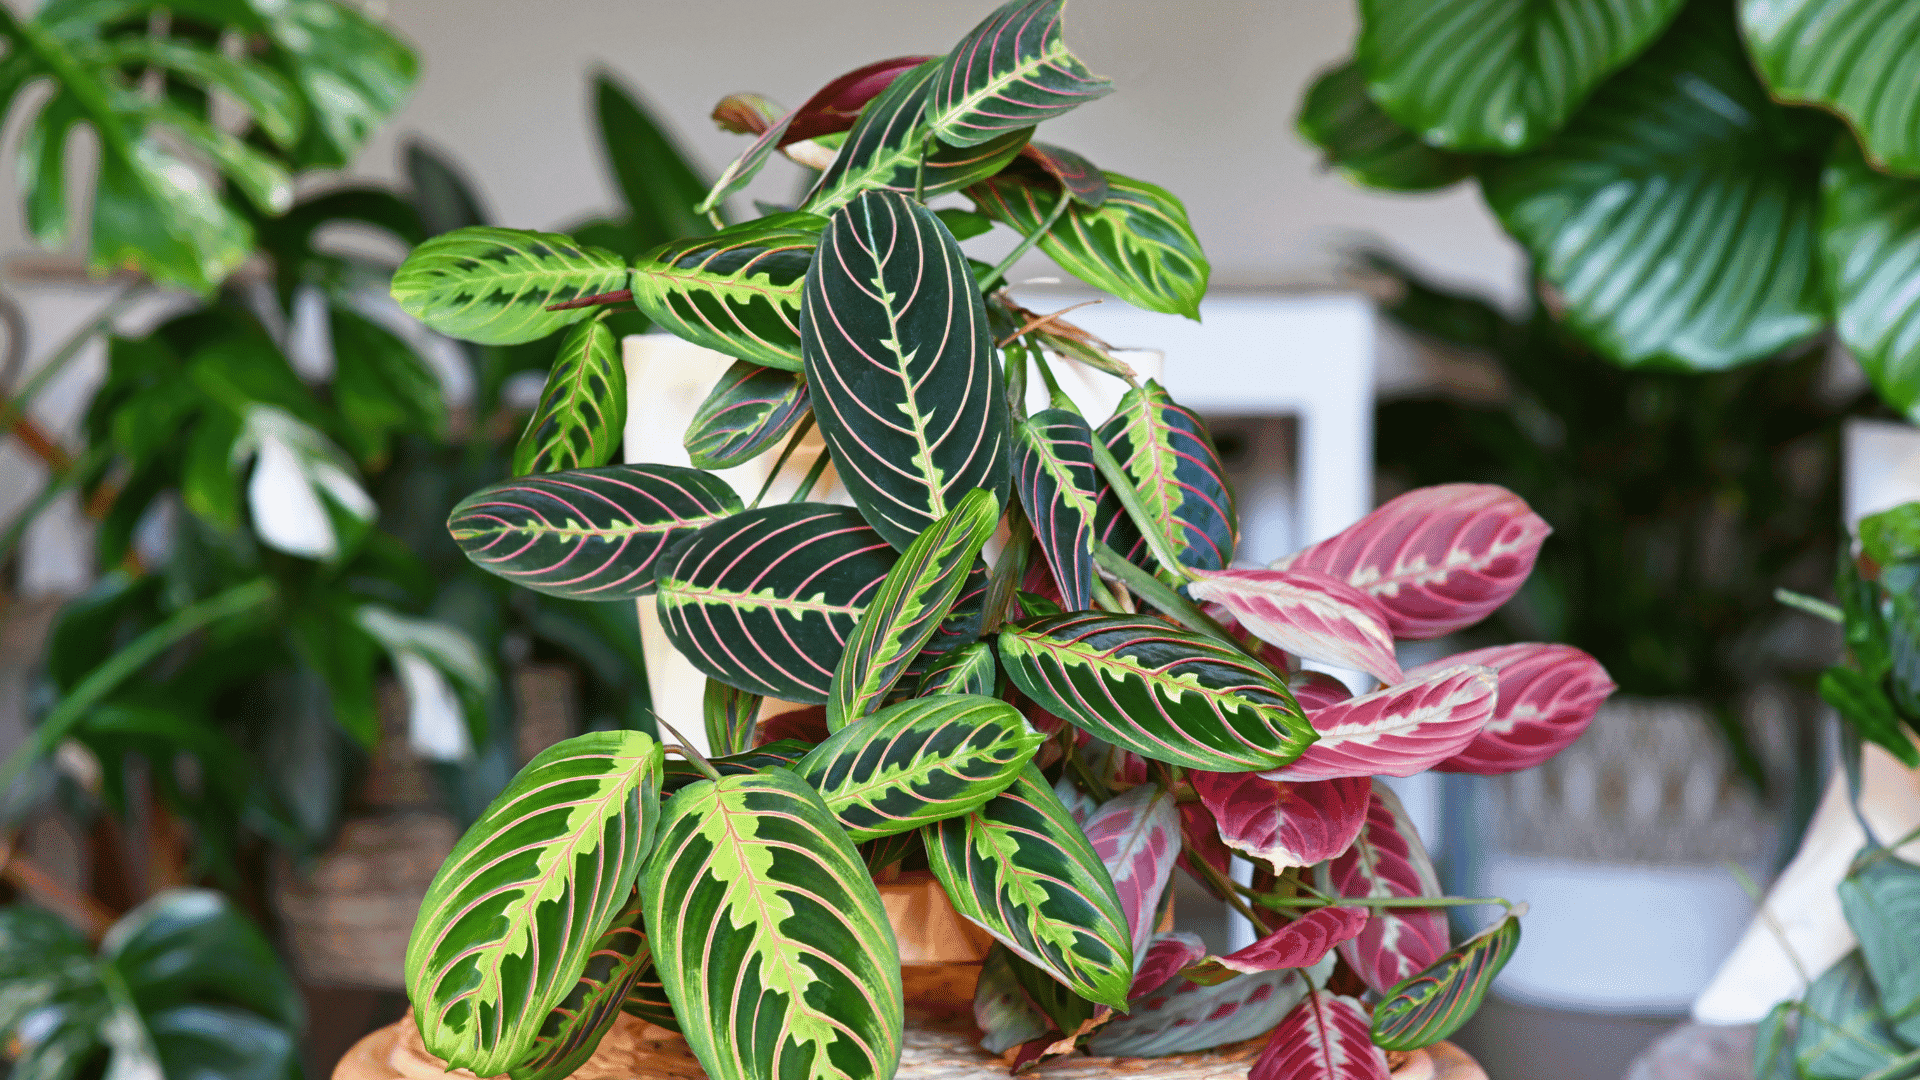
Large, heart-shaped leaves on long stalks, paper-thin and patterned in red, pink, white, and green; taller and more shade-dependent |
|
Strap- or lance-leaf form |
Narrower, arrow-shaped leaves in a shorter, fuller habit; more sun-tolerant and often more prolific per tuber |
|
Mature size |
Varies by variety, tuber size, and growing conditions; larger tubers with more growth buds produce fuller plants |
Nearly every one of those tubers starts life in the same place.
More than 95% of the world’s commercial caladium supply is grown in a single stretch of muck soil near Lake Placid, Florida, according to a University of Florida grower survey.
That is worth knowing, because it means almost every caladium sold at a Houston-area nursery was bred and raised in conditions a lot like ours: hot, humid, and shady.
Because every part of a caladium is mildly toxic if chewed, plant them where pets and small children are not likely to pick at the leaves, and see toxic houseplants for a fuller list of plants worth keeping out of reach.
The Caladium Growth Cycle: Active Growth and Dormancy
Caladium care changes through the year because the plant follows a clear growth and rest cycle. Most leaf growth happens during warm months, while cooler conditions often signal that it is time to slow down.
- Active growth: In warm conditions, caladiums put most of their energy into producing fresh leaves and building a full canopy.
- Growth slows: As dormancy approaches, new leaves appear less often, and the plant starts using less energy.
- Leaves fade: Older leaves naturally turn yellow, weaken, and die. Over time, most or all of the visible foliage may disappear.
- Dormancy begins: The plant may look empty above the soil, but the underground tuber can remain alive during this resting period.
- Growth returns: When warmth and other growing conditions improve, the tuber can produce fresh shoots and leaves again.
Expert tip: Don’t remove fading leaves too early. Let them yellow and dry on their own so the tuber can store as much energy as possible before the plant rests.
How to Take Care of Your Caladium
Good caladium care comes down to matching the plant’s tropical needs without keeping it too wet. Focus on suitable light, steady warmth, balanced moisture, good drainage, enough humidity, and light feeding during active growth.
1. Give Caladiums Bright, Filtered Light
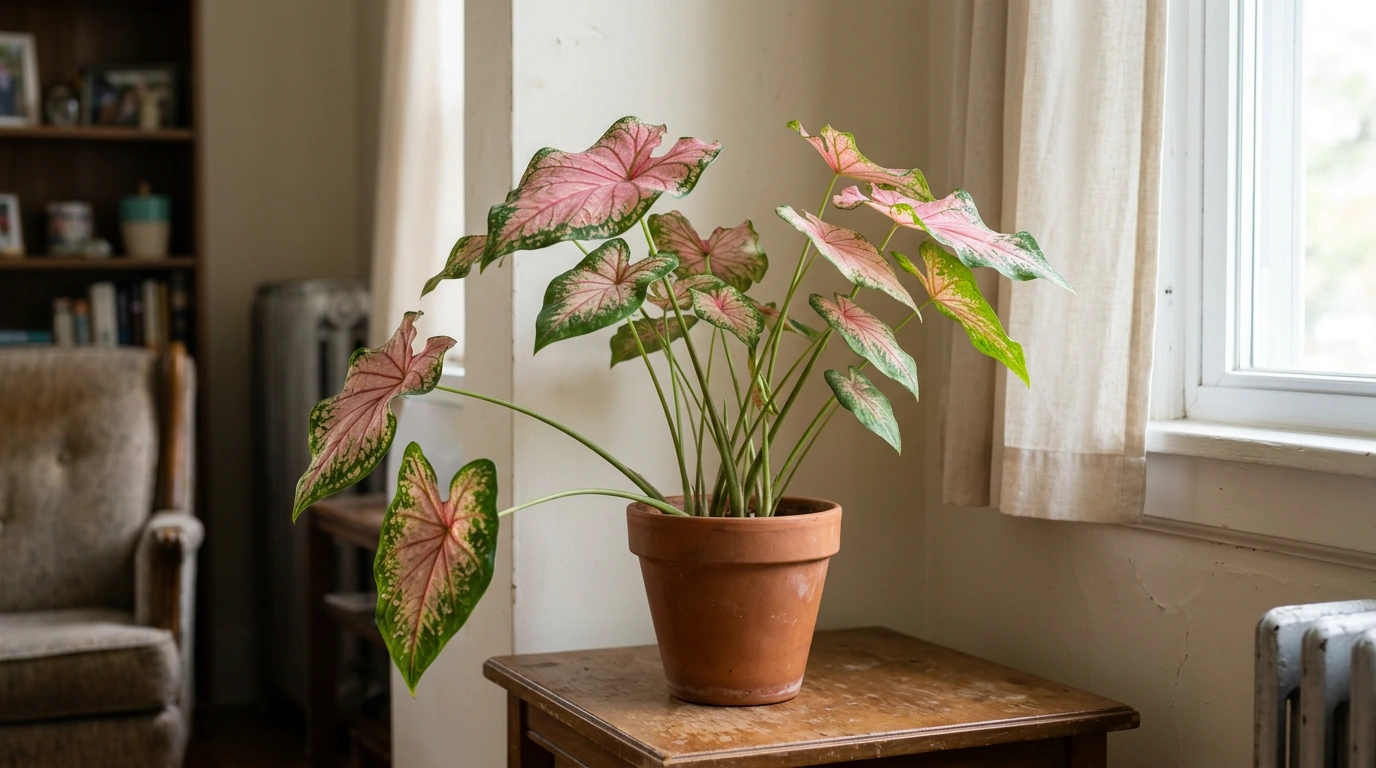
The right light helps caladiums grow strong leaves while keeping their colors clear.
- Indoors: Place the plant where it receives plenty of bright, indirect light. Too little light can lead to weaker growth and faded leaf colors.
- Outdoors: Choose bright shade, dappled light, or gentle morning sun. Strong afternoon sun can burn the leaves. Many strap-leaf and newer varieties can handle more sun.
2. Water for Even Moisture, Not Constant Wetness
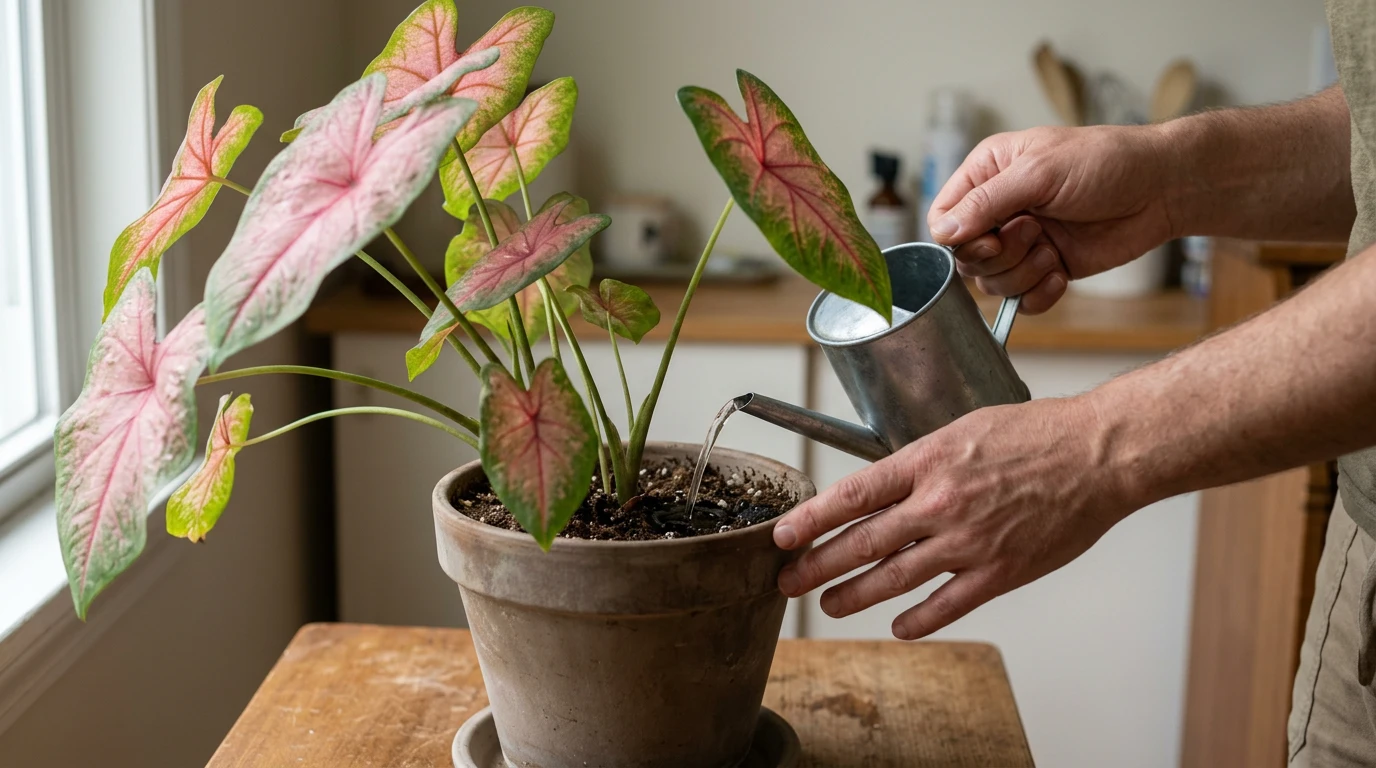
Caladiums grow best when moisture stays fairly steady without soaking the roots.
- Check first: Feel the upper layer of soil before watering instead of following a fixed schedule. Water well once it begins to dry, then let extra water drain.
- Adjust as needed: Hot outdoor conditions may require more frequent checks. Cooler or slower-growing plants need less water. Never leave a container sitting in collected water.
During a normal Gulf Coast summer, afternoon storms can do a lot of that watering for you.
Check the soil after a heavy rain before adding more water on top of it, especially if your caladiums are planted somewhere low that tends to hold water.
3. Use Rich, Airy, Well-Draining Soil
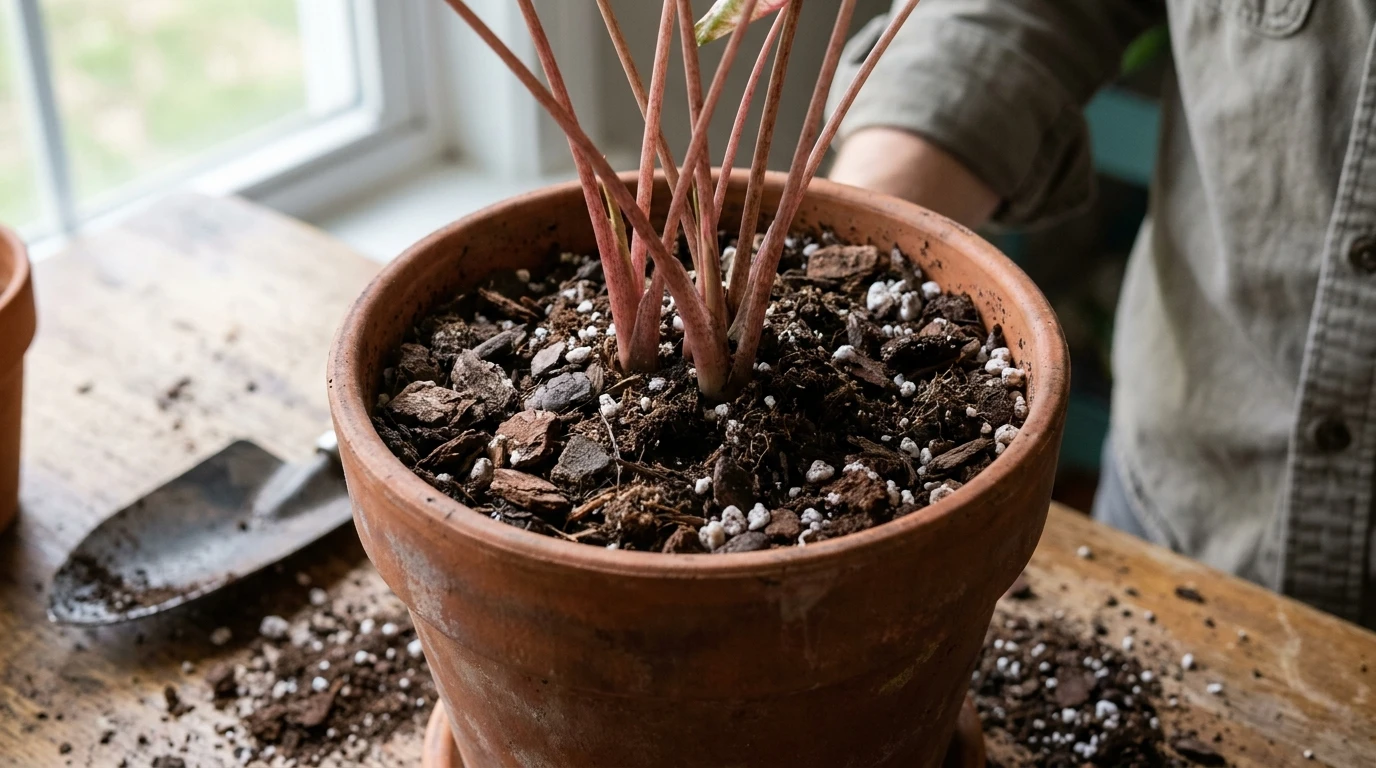
The right potting mix holds enough moisture for growth while still allowing air around the tuber and roots.
- Potting mix: Choose a loose, nutrient-rich mix. Perlite, pumice, or bark can improve airflow and help excess water drain.
- Drainage: Always use pots with drainage holes. Outdoors, avoid heavy soil that stays soaked. Containers or raised beds are useful when garden drainage is poor. Slightly acidic soil works well.
This one matters more here than it does in a lot of the country.
Much of the Houston area sits on heavy clay, and clay holds water far longer than the loose, sandy soil caladiums actually come from.
If your beds stay soggy a day or two after rain, work in compost or plant caladiums in raised beds and containers instead of straight into native clay.
4. Keep Caladiums Warm and Humid

Steady warmth and enough moisture in the surrounding air help caladium leaves stay healthy.
- Temperature: Aim for about 70 to 75°F during the day and 60 to 65°F at night. Keep the plant away from cold drafts and sudden temperature drops.
- Humidity: Aim for at least 50% humidity, with higher levels often suiting caladiums well. A humidifier or nearby plants can help indoors. Regular misting is not needed, and keeping leaves mostly dry may lower the chance of leaf spots.
Summer air often sits well above that 50% target on its own, so outdoor caladiums usually need no help there at all.
Indoors with the air conditioning running hard, though, humidity can drop more than people expect.
5. Fertilize Lightly During Active Growth
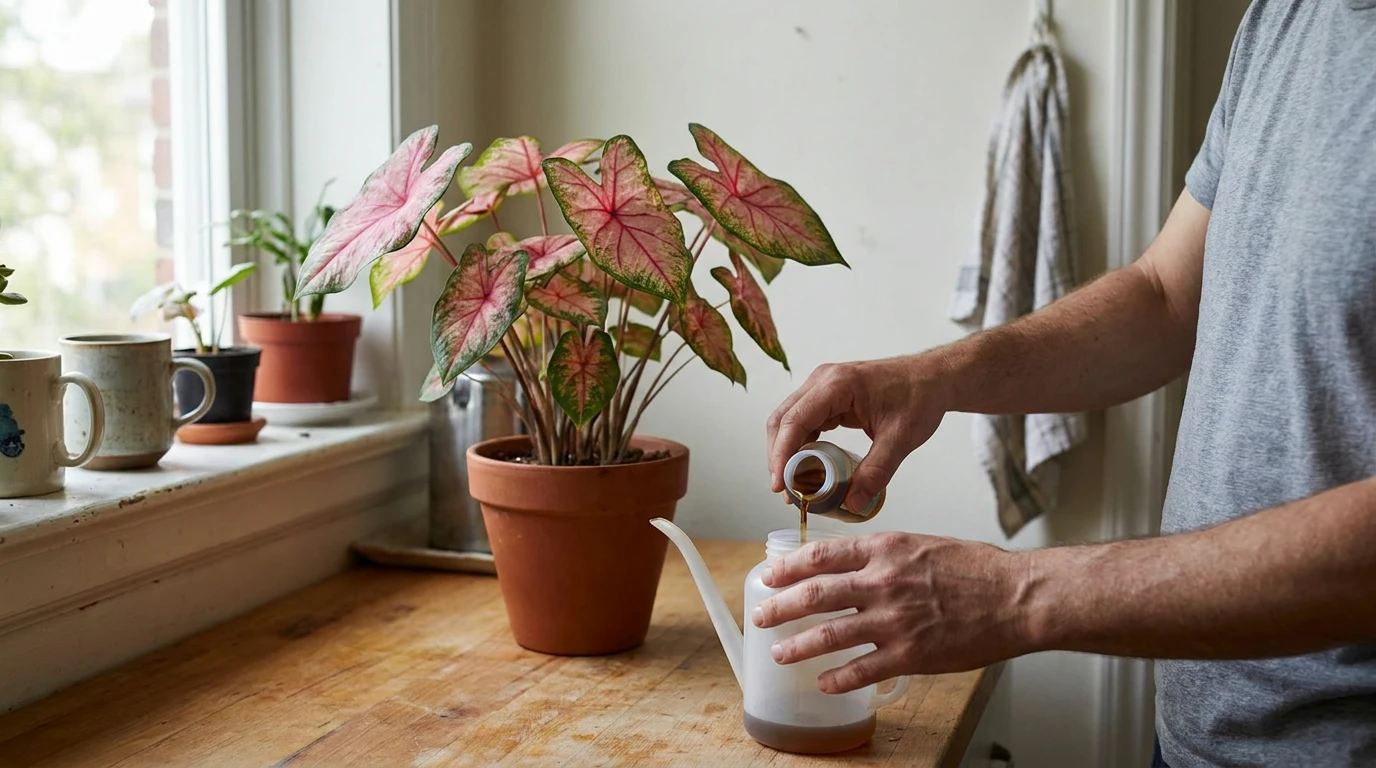
Caladiums benefit from feeding while producing new foliage, but too much can cause damage.
- When to feed: Begin once new leaf growth is clearly underway. Use a diluted balanced liquid fertilizer at regular intervals or a suitable slow-release product according to its label.
- When to stop: Stop feeding as growth begins to slow. Excess fertilizer can harm roots or burn leaf edges, while dormant tubers need no fertilizer.
6. Caladium Indoor Care vs. Outdoor Care

Indoor and outdoor plants face different conditions, so you may need a few small care changes.
Indoors: Watch for slow soil drying, dry air from heating or cooling systems, cold windows, and drafts.
Outdoors: Watch for strong afternoon sun, wind, heavy rain, and faster drying during hot weather. Containers can make these changes easier to manage because you can move the plant when conditions become unsuitable.
If you are new to growing in pots, our container gardening basics cover drainage and potting mix choices that apply directly to caladiums, whether they live on a patio all summer or move indoors once the weather turns.
Expert tip: If your caladium begins showing stress, change only one care factor at a time. You will have a better chance of finding the cause without creating another problem.
What are Common Caladium Problems and How to Fix Them
Caladium problems are easier to correct when you check the timing, soil, temperature, and leaf pattern before making changes. One damaged leaf may not signal trouble, so look at the whole plant before deciding what needs attention.
1. Yellow or Drooping Caladium Leaves
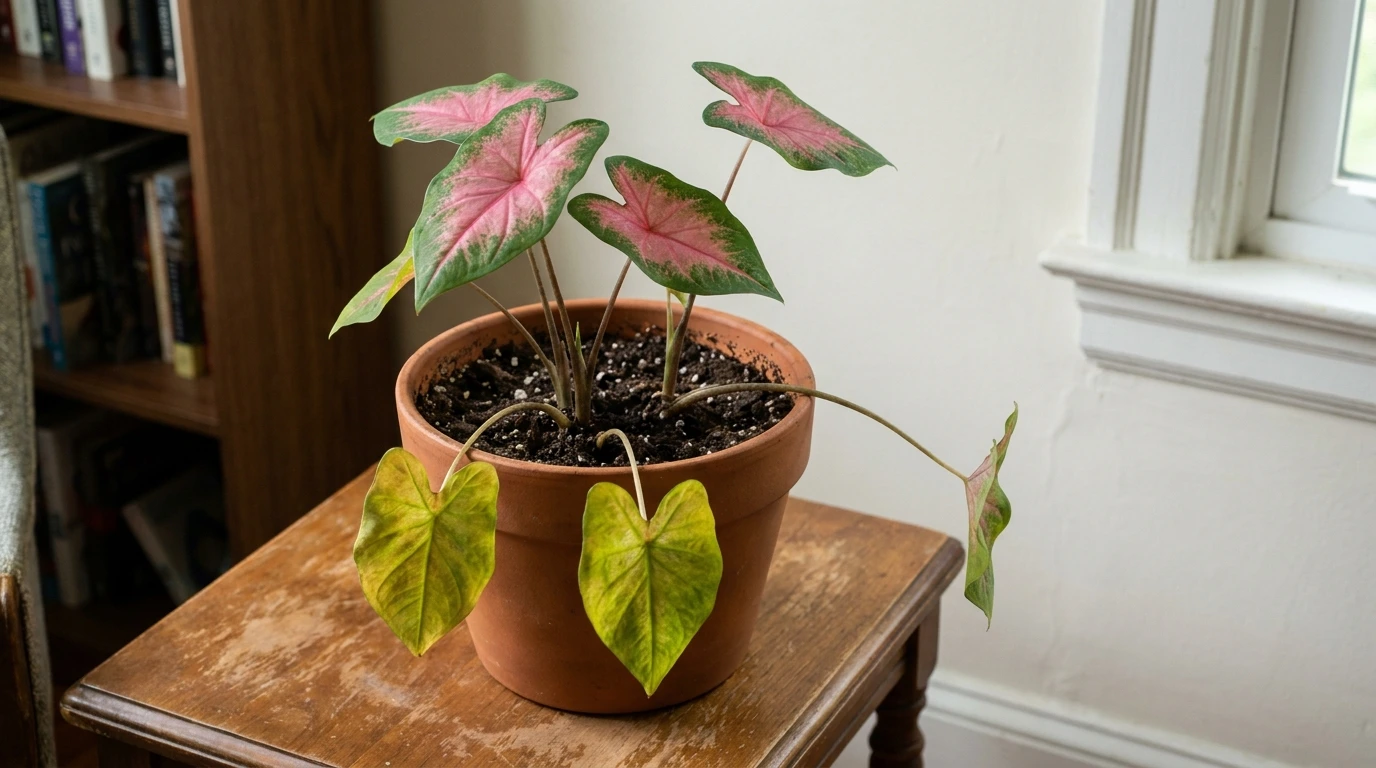
Yellowing or drooping can have several causes, so start with the season and then check growing conditions.
If dormancy is near, gradual yellowing may be normal. During active growth, check whether the soil is too wet or too dry, then consider cold stress or root problems.
One older leaf dying is usually normal. Several leaves declining together are a stronger sign that care or growing conditions need attention.
2. Brown Edges, Crispy Tips, or Scorched Leaves
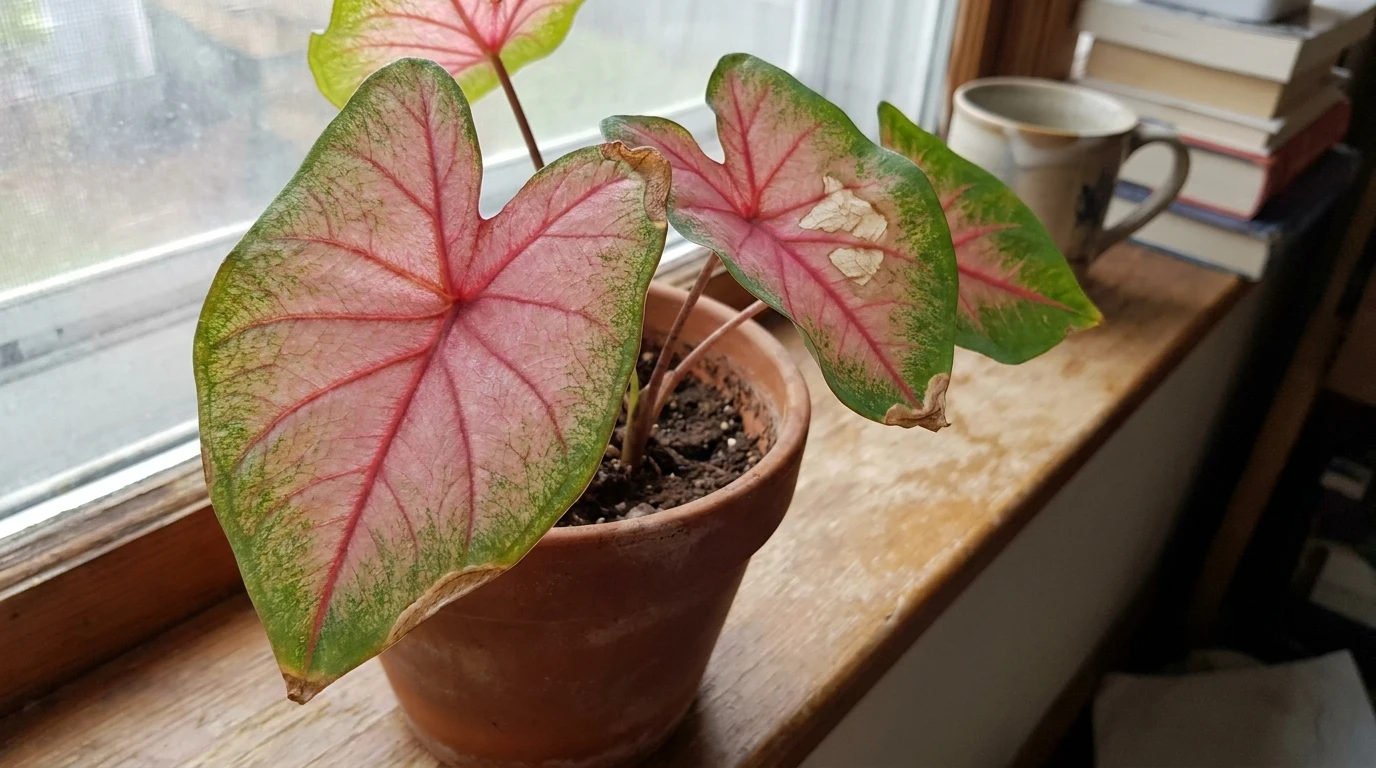
The location and shape of brown areas can help you narrow down what caused the damage. Crispy edges may come from uneven moisture, dry air, or excess fertilizer salts. Larger brown or pale patches on exposed leaves often point to too much direct sun.
If symptoms started after moving the plant outside, sun shock may be involved. Damaged areas will not turn healthy again, so judge recovery by new leaves.
3. Root and Tuber Rot
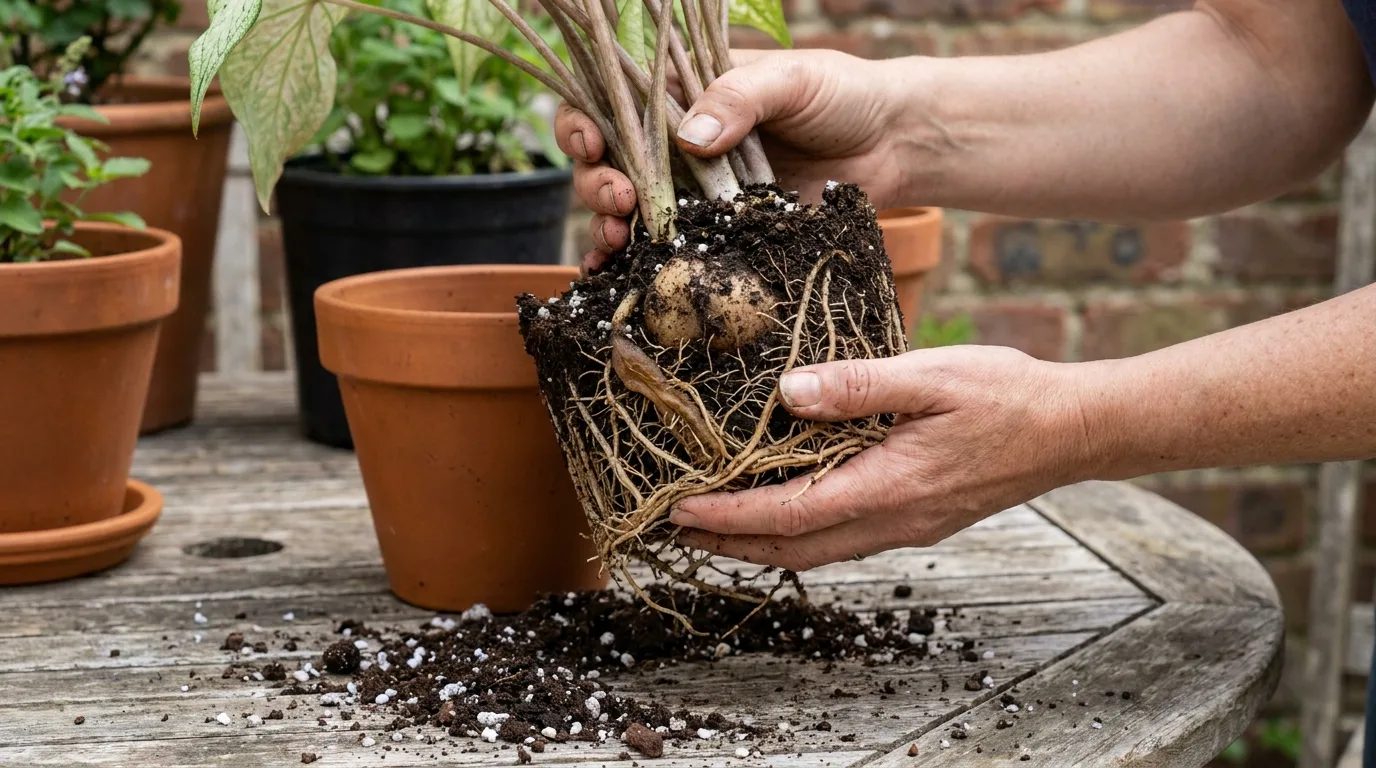
A wilting caladium with wet soil needs quick attention because the problem may be below the surface. Warning signs include soil that stays soaked for days, mushy roots, a soft tuber, an unpleasant smell, or sudden collapse.
Cool, waterlogged soil with little air around the roots raises the risk of rot. Stop watering and inspect the roots and tuber. Remove badly rotted parts when possible, then repot into fresh, airy soil in warm conditions.
This is the single most common problem I hear about from callers with heavy clay soil after a wet spring, so if you garden on clay, this is the section to bookmark.
4. Leaf Spots and Common Pests
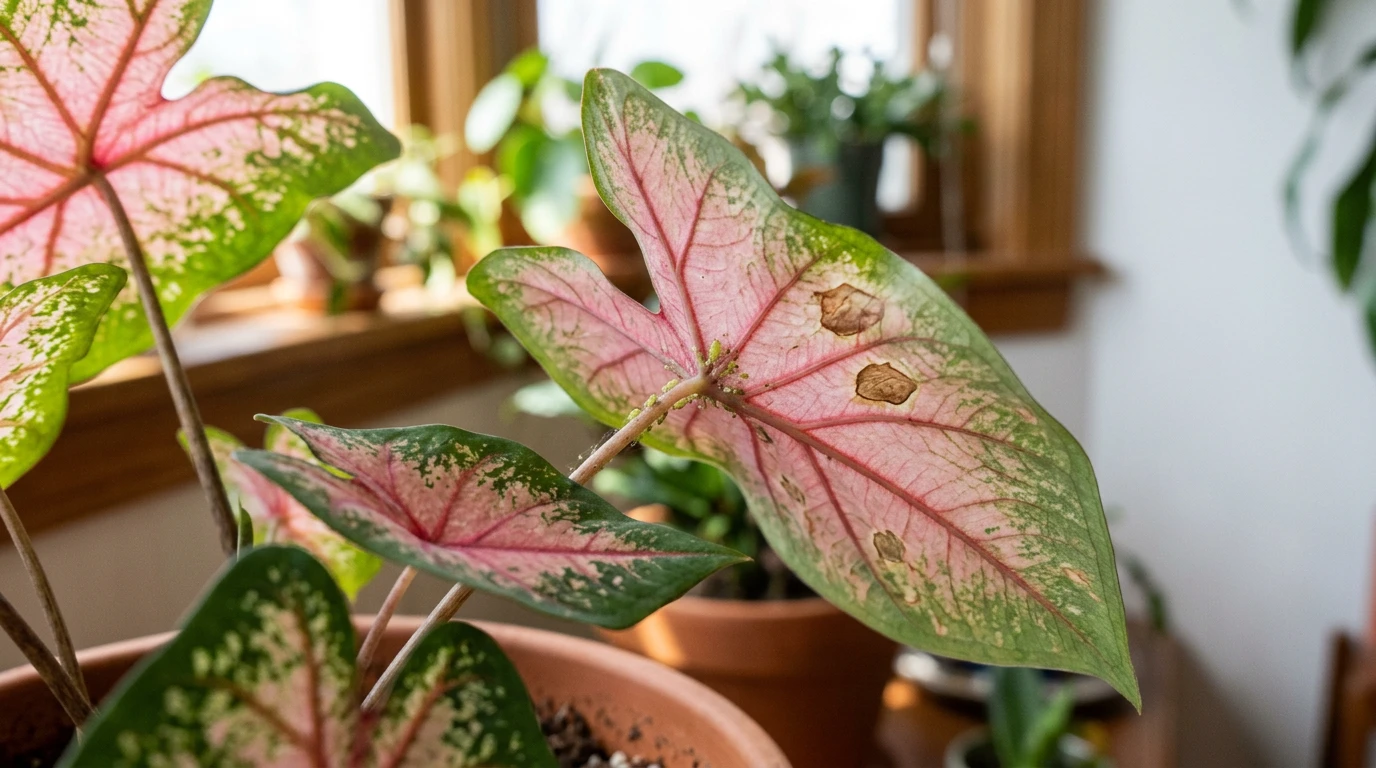
Regular leaf checks can help you catch pests and spreading spots before much of the plant is affected. Look under leaves for aphids, spider mites, mealybugs, thrips, and other sap-feeding pests. Isolate affected indoor plants to limit spread.
Crowded plants and leaves that stay wet can also support leaf spots. Remove badly affected foliage, improve airflow, and keep leaves mostly dry. If pests remain, use a suitable treatment according to its label.
Expert tip: Treat the cause rather than removing every marked leaf right away. Watching how the next few leaves grow will give you a clearer sign that your changes are working.
Planting and Routine Maintenance

Caladiums need little hands-on maintenance once planted correctly. Warm planting conditions, the right pot size, and careful leaf removal help protect the tuber and support steady growth without disturbing the plant more than needed.
- Plant when warm: Plant outdoors once the soil is about 70°F and conditions remain warm. When you can see the growth eyes on the tuber, place them facing upward.
- Use the right depth: Plant the tuber about 1½ to 2 inches deep. This gives the roots and new shoots enough room to develop.
- Choose the pot carefully: Use a container that suits the tuber size and has drainage holes. An oversized pot can hold excess moisture for longer, increasing the chance of tuber rot.
- Repot at the right time: Repot established plants near the start of their next active growing period. Avoid disturbing the roots and tuber during the middle of active growth unless there is a clear problem.
- Remove old leaves carefully: Remove old, damaged, or diseased leaves with clean scissors or pruners, cutting them near the base.
- Handle flowers wisely: If a spathe appears, you can remove it so more of the plant’s stored energy goes toward leaves and tuber growth. Healthy leaves do not need regular cutting.
Handle the tuber and leaf stalks gently during planting and cleanup. Using clean tools and avoiding cuts or bruises can reduce damage, which helps the plant stay healthy as it continues growing.
How to Handle Caladium Dormancy and Overwintering
As dormancy begins, reduce care rather than trying to keep new leaves growing.
The UF/IFAS Extension recommends gradually cutting back water as the foliage yellows and keeping stored tubers protected from wet winter conditions, helping them rest safely until warm conditions return and growth begins again.
- Reduce feeding and watering: Add fertilizer only during active growth. Cut back watering as the foliage yellows. Once all leaves have died, stop regular watering.
- Let leaves die naturally: Let fading leaves die back naturally before removing them so the tuber can store energy for its resting period.
- Keep potted tubers dry: If the tuber stays in its pot, place it somewhere dry with steady temperatures and protection from cold.
- Prepare and store lifted tubers: Let lifted tubers dry in a warm, shaded place with good airflow, then keep them dry and ventilated during storage.
- Restart in spring: When warm growing conditions return, repot the tuber and water lightly. Increase moisture slowly after fresh shoots and roots begin growing.
Check stored tubers from time to time instead of leaving them untouched all winter. A firm tuber is a good sign, while softness, mold, or an unpleasant smell can point to decay.
Frequently Asked Questions
How fast do caladiums grow?
Growth varies by variety and warmth. In warm conditions, many tubers sprout within a few weeks, and plants can reach full size within one growing season.
How do caladiums multiply?
Caladiums can form new tuber growth. In spring, you can divide mature tubers into sections with at least one eye, let them dry, and plant them separately.
Are caladiums toxic to pets and people?
Yes. Caladiums contain calcium oxalate crystals that can irritate the mouth, and their sap may irritate sensitive skin; they are also toxic to dogs and cats, so keep them away from pets and children.
Final Takeaway
Caladiums reward consistency more than constant attention.
I have seen plants recover surprisingly well once light, moisture, and warmth are brought back into balance, especially when only one care factor is changed at a time.
Good caladium care means giving the plant bright filtered light, steady moisture, loose soil, warmth, and light feeding while it is actively growing.
As the season changes, yellowing leaves and slower growth may simply mean the tuber is preparing for dormancy rather than failing.
Watch the plant instead of following a rigid schedule, and let its soil, leaves, and growth guide your next step.
If you grow caladiums indoors or outside, share what has worked best for yours in the comments.