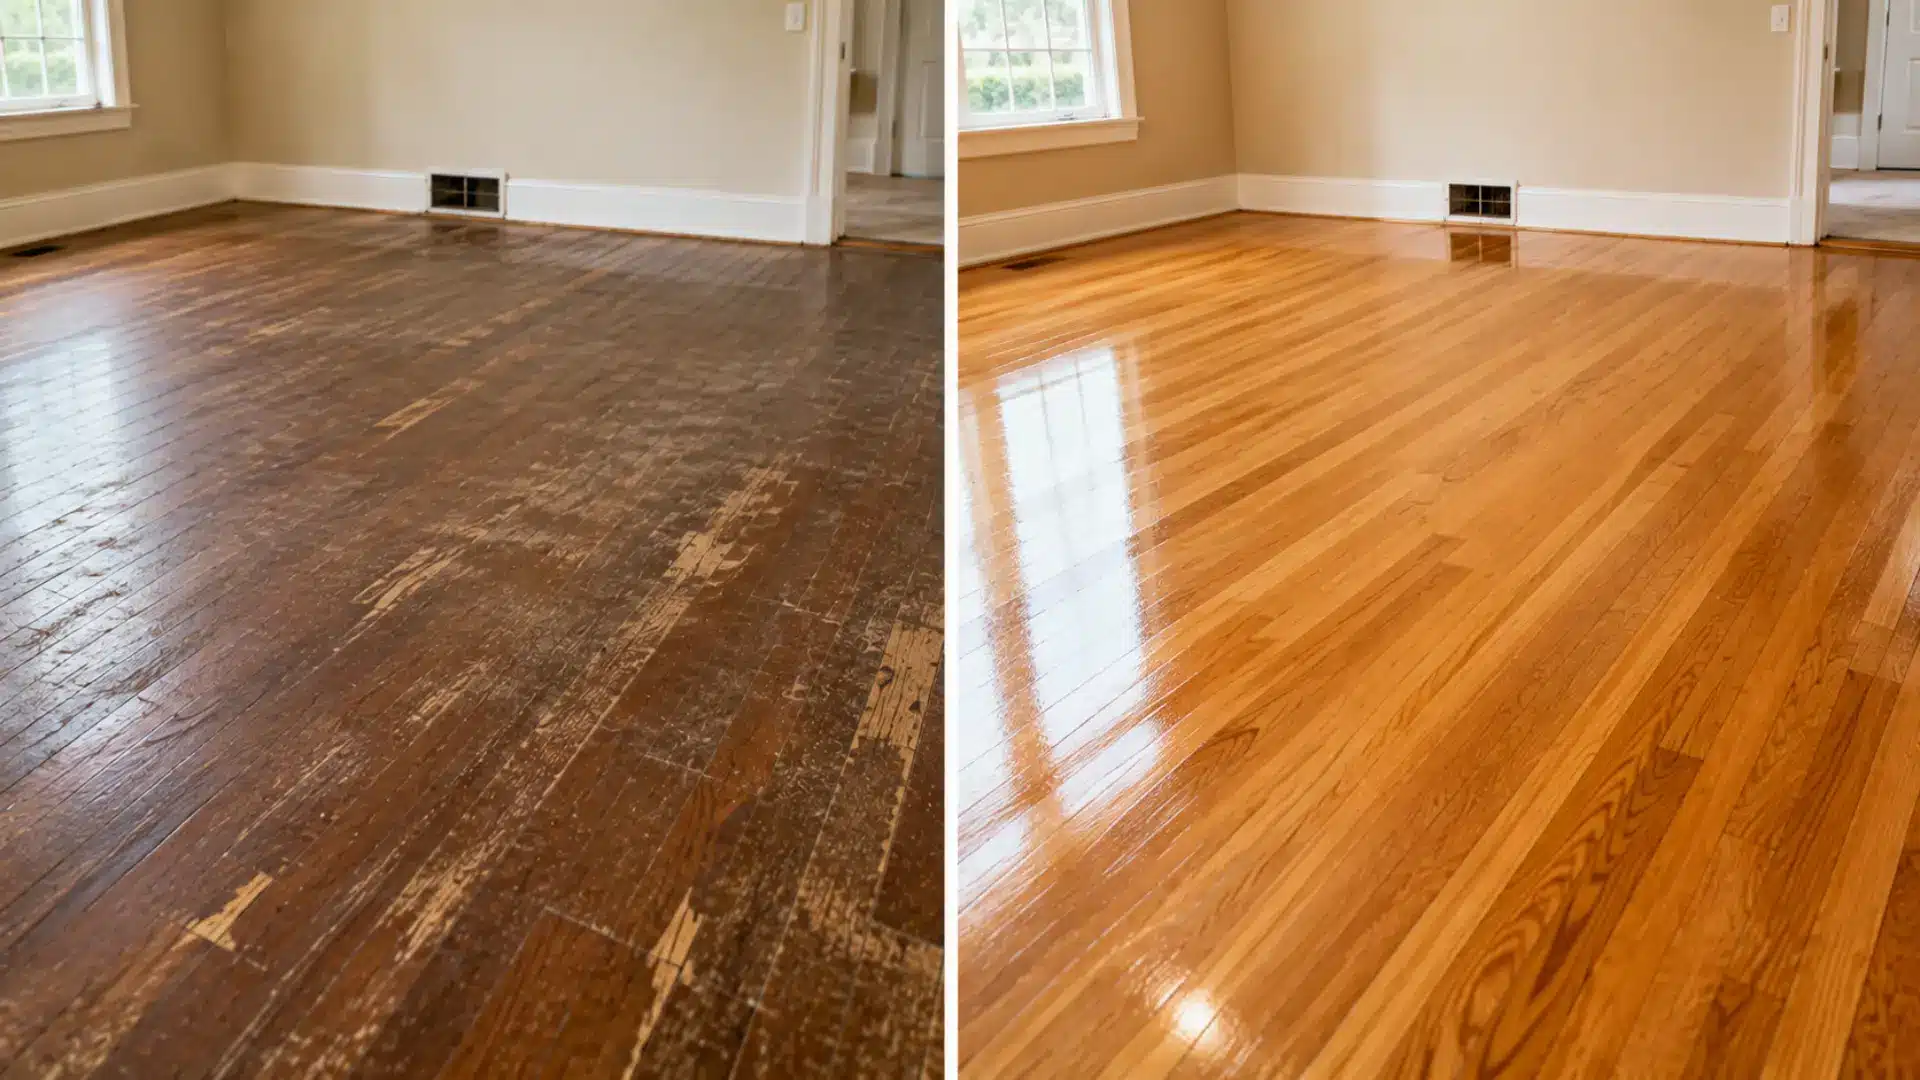
Hardwood floors lose their finish over time from scratches, stains, moisture, and daily wear. Refinishing restores the surface by sanding away the old finish, repairing minor damage, and applying a new protective coat.
The process works best for solid hardwood and some engineered floors with enough wear layer remaining.
Let me help you learn how to refinish hardwood floors, prepare the room, sand safely, apply stain and finish, and avoid common refinishing mistakes.
Refinishing vs. Recoating Hardwood Floors
Refinishing and recoating can both improve how a hardwood floor looks and performs, but they solve different problems. Sanding removes the old finish and damaged wood surface, while refinishing includes sanding plus repairs, staining, and a new protective coat. Recoating, on the other hand, simply refreshes a floor whose existing finish is still mostly intact.
| Feature | Refinishing | Recoating |
|---|---|---|
| What It Involves | Sanding away the old finish and restoring the exposed wood | Cleaning and lightly preparing the surface before adding a new topcoat |
| Best For | Deep scratches, stains, fading, and heavy wear | Dullness, light scratches, and minor surface wear |
| Repairs | Allows small cracks, holes, and damaged areas to be fixed | Does not correct damage that reaches the wood |
| Time and Effort | Takes longer and creates more dust and disruption | Faster, easier, and less disruptive |
| Cost | Usually costs more due to added labor and materials | Generally more affordable than a full refinish |
| Result | Delivers a full restoration and a new protective finish | Restores shine and strengthens the existing surface |
Recoating is the better choice when a floor looks dull but is still protected and free of serious damage. Refinishing makes more sense when scratches, stains, or worn sections have reached the wood and a simple new topcoat would not hold up. Refinished floors are also one of several visible upgrades that can boost a home’s overall appeal, alongside projects like updated exteriors.
Why Do Hardwood Floors Need Refinishing?
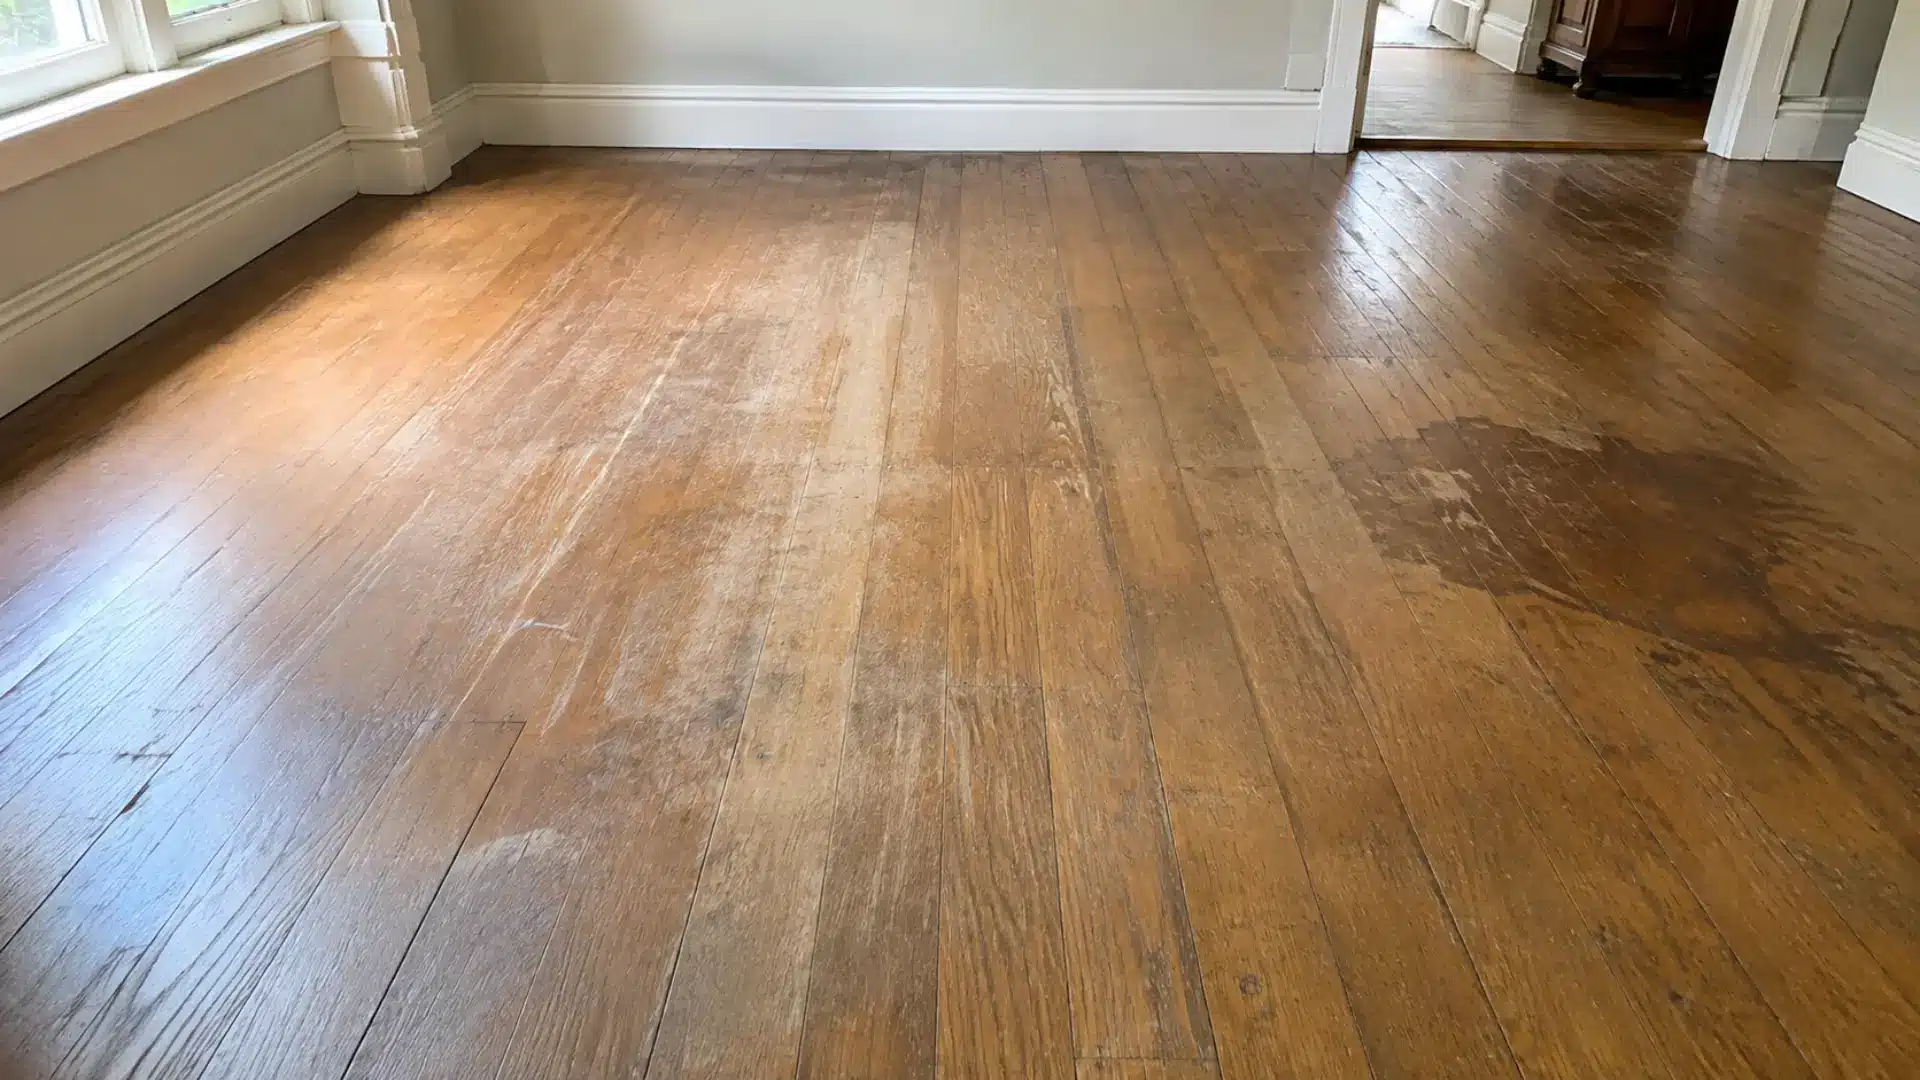
A hardwood floor relies on its protective finish to absorb daily damage from foot traffic, furniture, pets, spills, and cleaning. Over time, that layer wears thin, leaving the wood open to stains, scratches, and moisture.
- Worn protective finish: The coating thins or disappears in high-traffic areas.
- Visible bare wood: Exposed areas are no longer protected from moisture.
- Deep scratches or dents: Marks that cleaning alone cannot remove.
- Water or pet stains: Sanding can lift stains that have set into the wood.
- Faded or uneven color: A fresh stain evens out the tone across the room.
- A tired appearance despite cleaning: Often a sign the finish underneath is failing.
Refinishing does more than improve how a floor looks. It restores the protective layer and helps stop everyday wear from turning into more serious damage to the wood underneath. Persistent water damage on a floor sometimes traces back to a plumbing issue elsewhere in the home rather than the flooring itself, which is worth ruling out before refinishing.
Check Your Hardwood Floor Type Before You Sand
Before you rent a sander, do a quick check. Remove an HVAC floor grate or look at the edge where the wood meets carpet, then examine the end of a plank to see how much real wood remains above the tongue-and-groove joint.
| Floor Type | What to Know | Safer Refinishing Choice | What to Avoid |
|---|---|---|---|
| Solid Hardwood | Made from solid wood with a thick wear layer | Full sanding and refinishing may be possible several times | Removing more wood than needed |
| Prefinished Hardwood | The factory finish can be harder to remove, and the usable wood layer may be thinner | Begin with the finest grit that still removes the finish | Starting with very coarse sandpaper without testing first |
| Engineered Hardwood | Has a thin real-wood layer over other materials and may only be refinished once or twice | Check the wear-layer thickness before sanding | Sanding through the top wood layer |
| Laminate Flooring | Not solid wood, so it cannot be refinished by sanding | Clean or replace damaged planks; sanding and refinishing are not options | Using a drum or floor sander |
| Cupped or Crowned Wood | Raised edges or centers usually point to a moisture problem | Fix the moisture source before deciding to sand | Sanding while the moisture problem is still active |
Moisture is the real trigger behind cupped or crowned boards. Research from the Forest Products Laboratory on how wood exchanges moisture with the surrounding air explains why boards swell unevenly long before any damage becomes visible on the surface.
Once you know your floor type, choose the least aggressive sanding method and grit that can still remove the old finish, and stop if you are unsure how much usable wood remains.
What You Need Before You Start Refinishing
A small tool kit can handle most hardwood floor refinishing jobs. Choose tools based on the floor’s condition, and keep safety gear ready before sanding.
Essential tools:
- Drum or belt sander
- Floor edger
- Sandpaper in different grits
- Vacuum and microfiber cloth
- Hammer and wood filler
- Wood stain and floor finish
- Safety glasses, hearing protection, and a respirator
For heavily worn floors, a floor buffer or orbital sander can help smooth marks and blend the edges with the main floor. With the right tools and safety gear ready ahead of time, you can work more efficiently and get a smoother, more even finish.
Tip: Keep the sanding machine moving at all times once it touches the floor, since stopping in one place can gouge the wood.
How to Refinish Hardwood Floors
Worn, scratched, or faded hardwood floors do not always need to be replaced. With careful sanding, minor repairs, and a fresh protective finish, most floors can look and perform far better without a full replacement.
Step 1: Clear and Prepare the Room
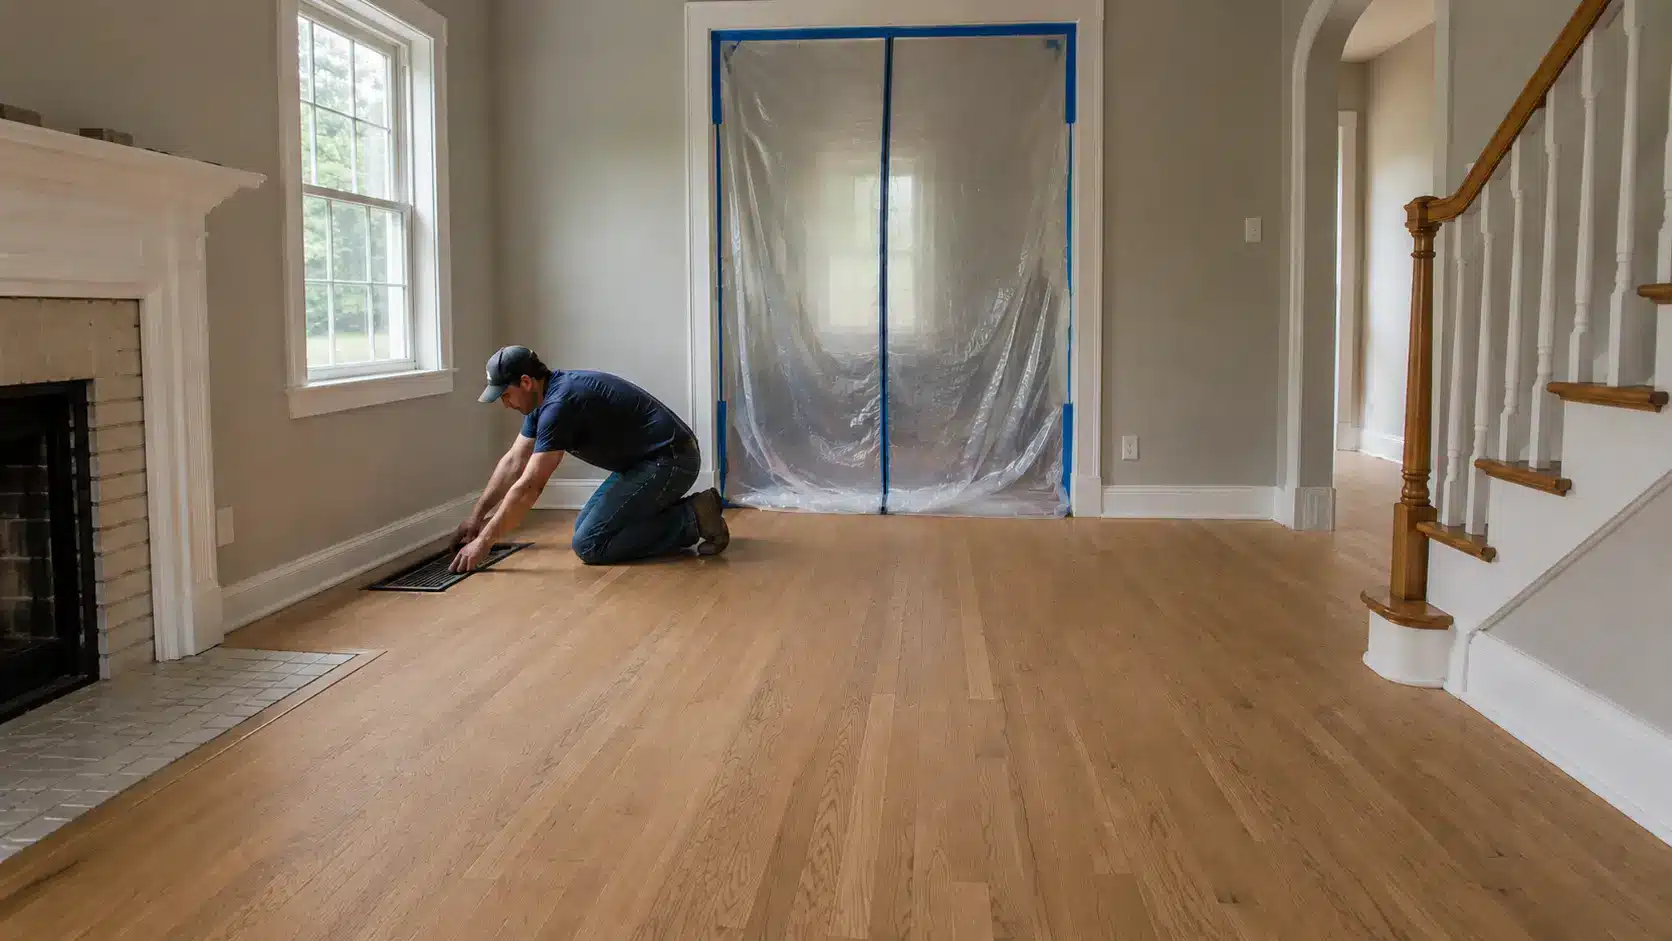
Remove all furniture, rugs, curtains, vent covers, and shoe molding before you begin. Cover doorways and air vents with plastic sheeting to control dust.
Check for raised nails, loose boards, and squeaks, then make repairs as needed. Vacuum the floor thoroughly so dirt and debris cannot scratch the wood during sanding.
Step 2: Sand the Entire Floor
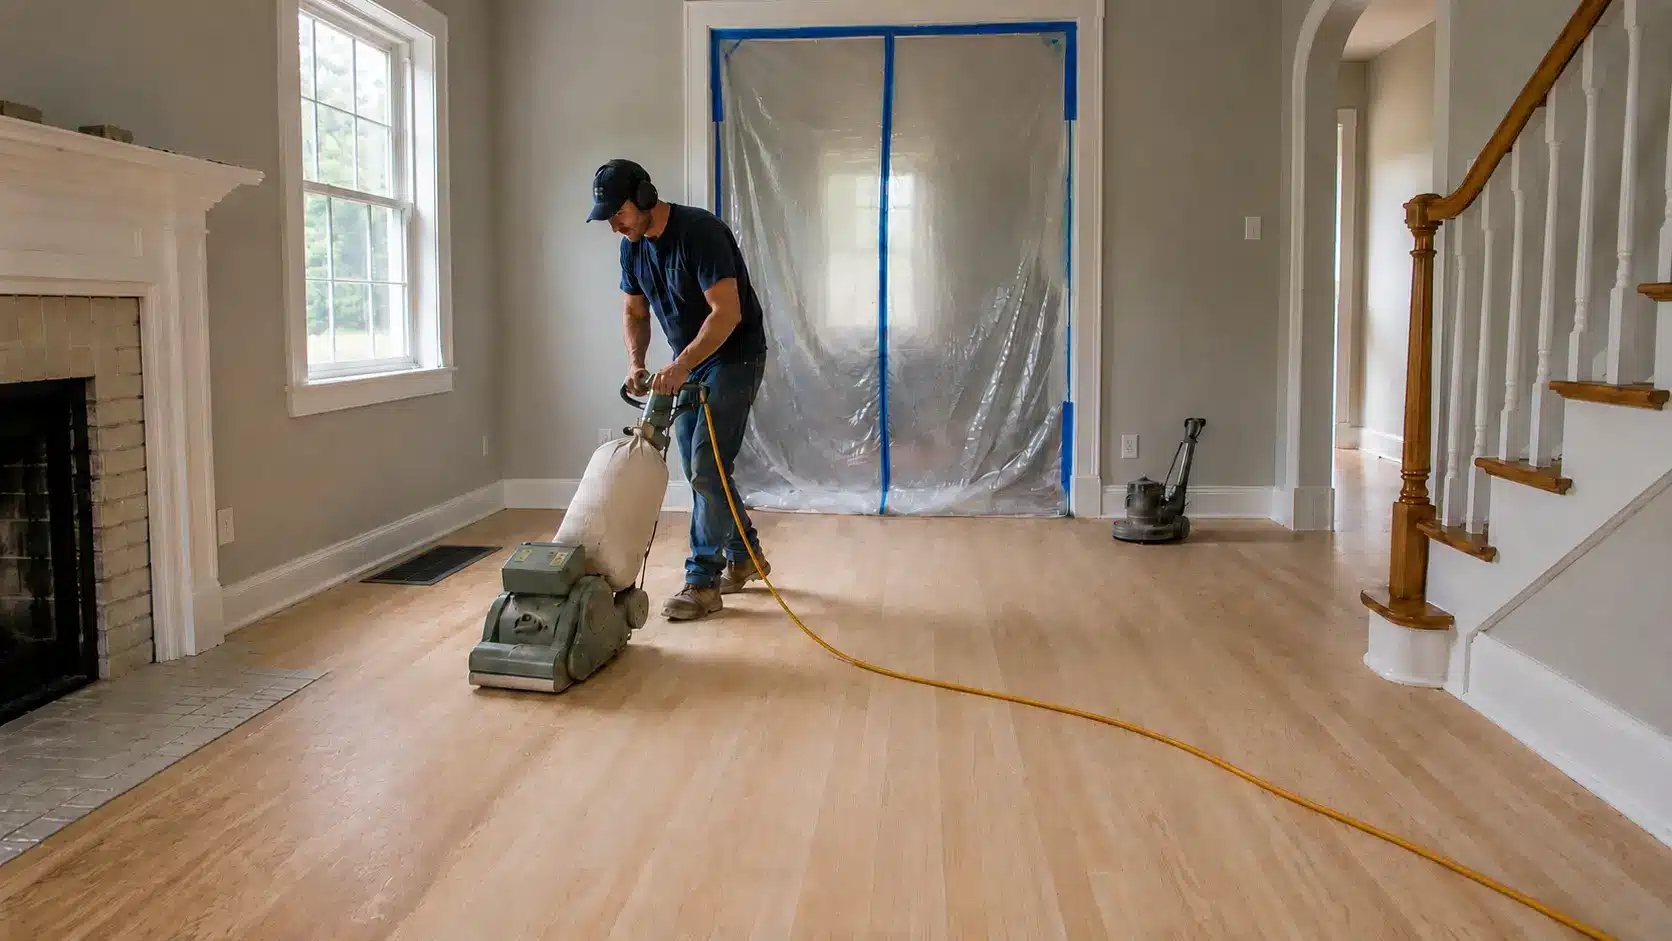
Sand open areas with a drum or belt sander and use a floor edger near walls and baseboards.
Many heavily worn floors start with a coarse grit such as 36-grit, then move to 60-grit and finish with 80- or 100-grit, though lighter damage may call for a finer starting point. Work with the grain, overlap each pass slightly, and keep the sander moving to prevent gouges.
Step 3: Repair Damage and Remove Dust
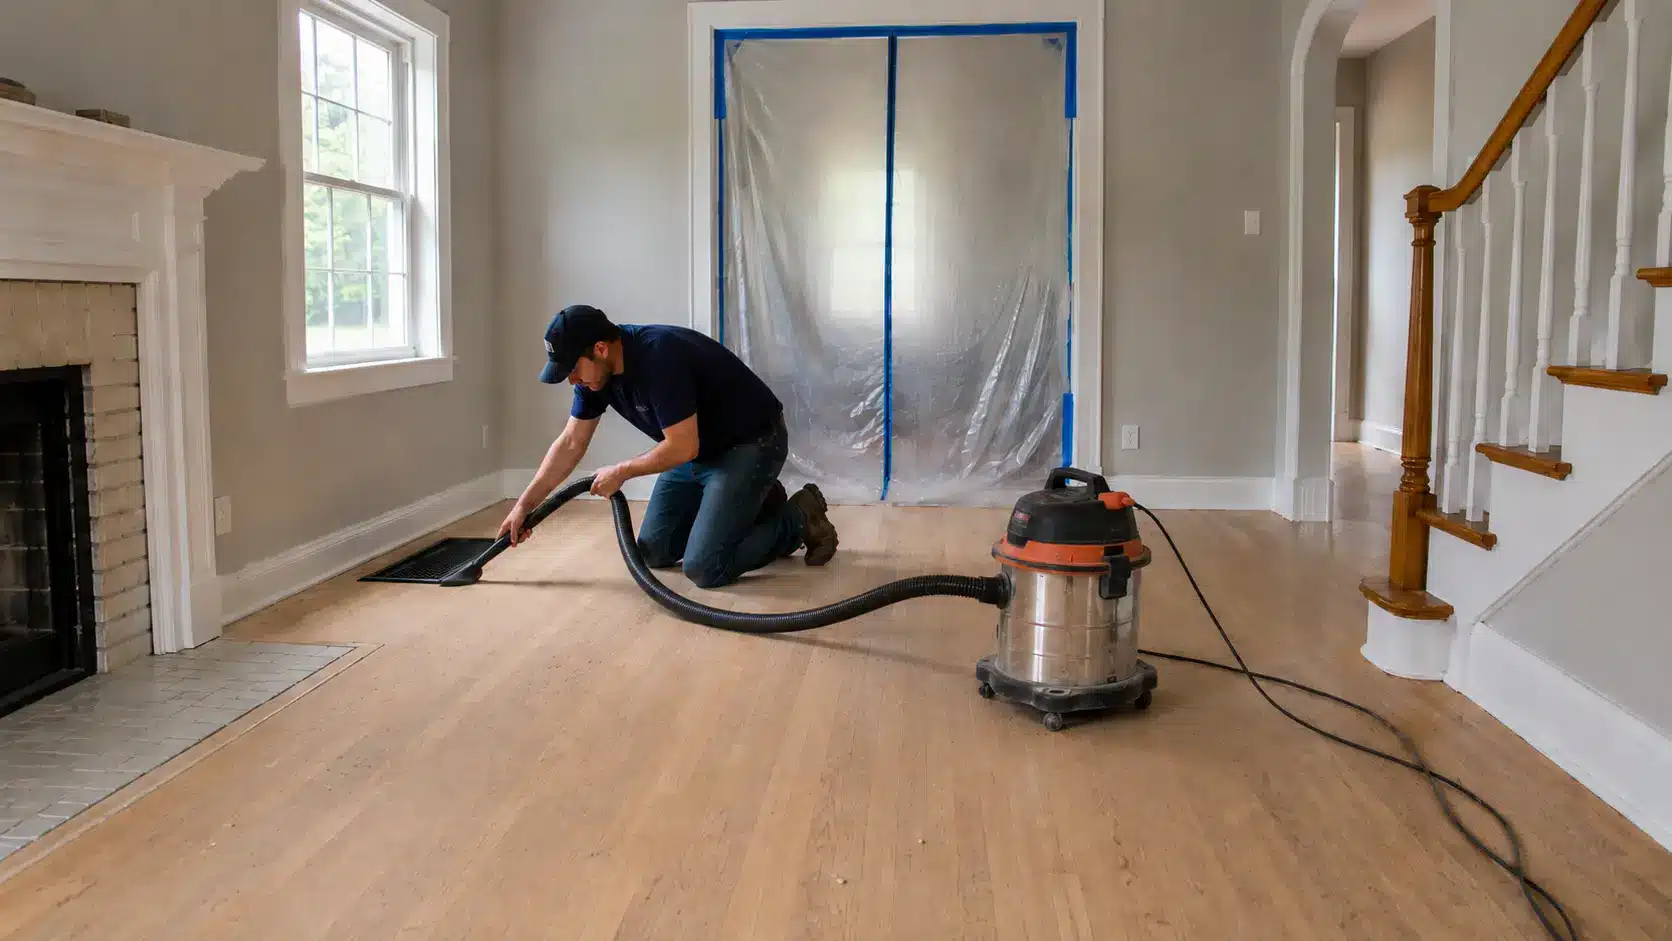
Inspect the bare floor for nail holes, small cracks, narrow gaps, and worn spots. Fill minor defects with hardwood floor filler, let it dry, and sand the repair level.
Vacuum carefully around corners, baseboards, gaps, and vents, then wipe the surface with a microfiber mop or tack cloth to remove remaining dust.
Step 4: Apply Stain if You Want a New Color
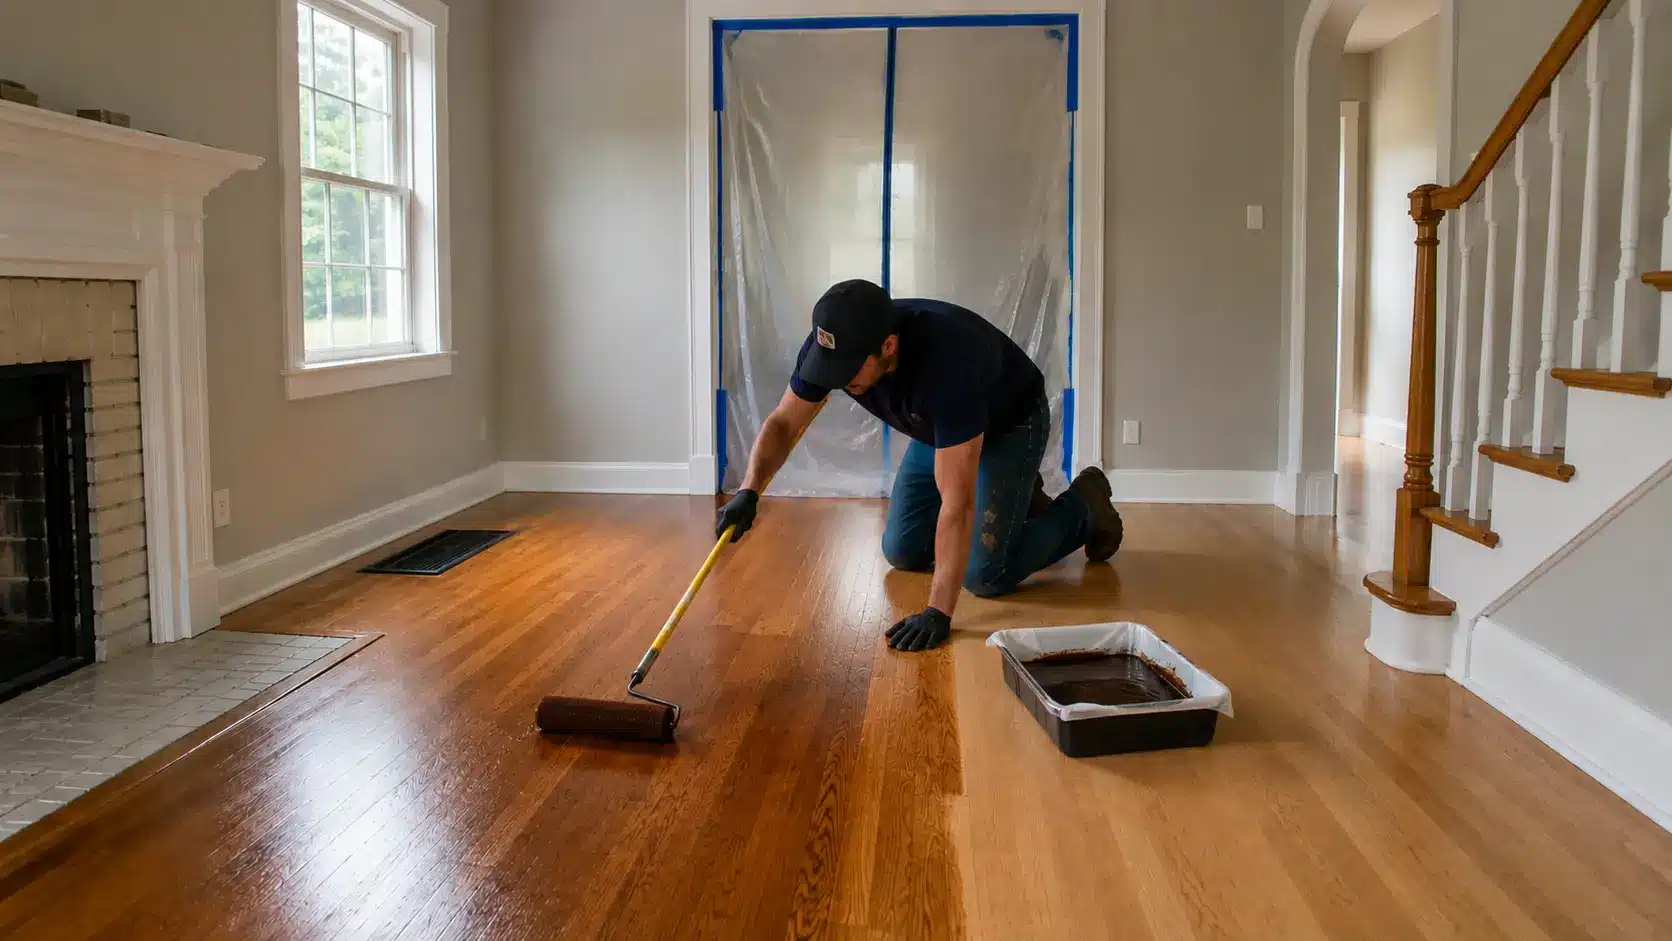
Staining is optional if you prefer the natural color of the sanded wood. If you want a new tone, test the stain in a hidden area first.
Apply it with the grain in small sections using a brush, rag, or roller suited to the product, allow it to penetrate for the recommended time, wipe away excess, and let the floor dry completely.
Step 5: Apply the Protective Finish
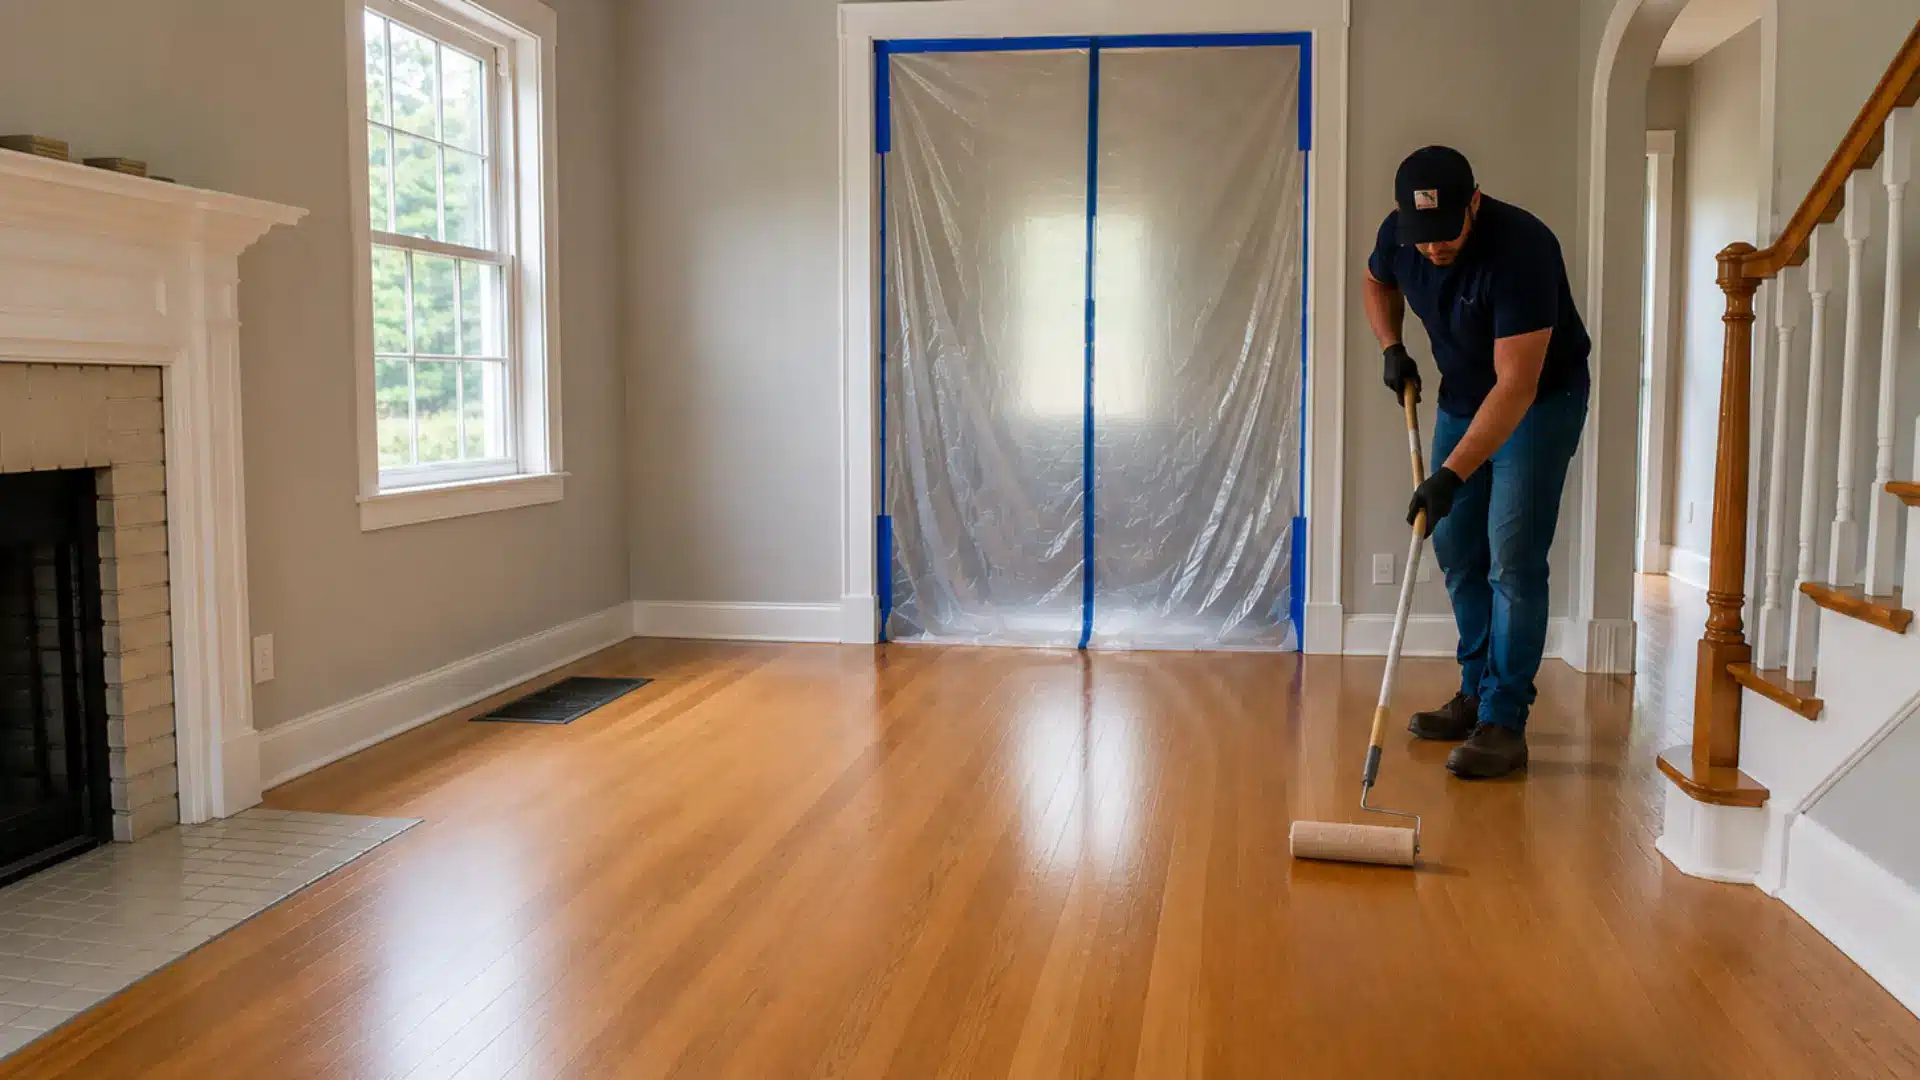
Choose a hardwood floor finish, such as water-based polyurethane, oil-based polyurethane, or hardwax oil, and keep the room well ventilated during application and drying, since the EPA notes finish fumes can concentrate indoors.
Start at the wall farthest from the doorway and work toward the exit, applying smooth, even coats with the grain. Let each coat dry as directed, scuff lightly between coats, and clear dust before recoating.
Once you finish these steps, give the floor time to dry and cure before walking on it or moving furniture back. Careful drying helps prevent marks and protects the new finish.
Tips to Care for Refinished Hardwood Floors
Once the finish has fully cured, regular care helps a floor stay smooth and protected for longer by reducing scratches, moisture, and everyday wear.
- Use felt furniture pads: Place pads under chairs, tables, sofas, and other heavy furniture.
- Lift furniture instead of dragging it: Dragging can scratch or damage the finish.
- Clean spills quickly: Do not let water or other liquids sit on the wood.
- Remove dirt often: Dust and small pieces of grit can scratch the floor when people walk over them.
- Protect busy areas: Use suitable rugs or mats in entrances and other high-traffic spaces.
- Check worn spots early: Dull areas and light scratches may only need a new topcoat if the wood underneath is still protected.
- Avoid rough cleaning tools: Harsh scrubbing wears down the protective finish faster.
Keeping indoor humidity steady throughout the year also protects the finish long after the refinishing work is done. These simple habits help the topcoat handle foot traffic, pets, furniture, and small spills without exposing the wood underneath.
Mistakes to Avoid When Refinishing Hardwood Floors
A few habits separate a smooth, lasting refinish from one that shows problems within a year. Always test first by trying the sander, stain, and finish in a hidden area before covering the whole room, since this catches problems early.
Sand and apply products following the grain for an even appearance across every board.
Wipe the surface clean before staining or sealing, since leftover residue can ruin the job. Stick to thin coats, since heavy layers can dry unevenly and leave bubbles, streaks, or soft spots.
Respect the drying times on the product label between coats and during final curing rather than guessing. Once cured, protect the finish with felt pads, breathable rugs, and hardwood-safe cleaners. Careful preparation and a bit of patience turn a routine refinishing job into a smooth, durable floor built to last.
Frequently Asked Questions
Can hardwood floors be refinished without sanding?
Only lightly worn floors can be screened and recoated without full sanding. Deep scratches, exposed bare wood, stains, or color changes usually call for complete refinishing with a drum or belt sander instead.
How many times can hardwood floors be refinished?
Solid hardwood can often be refinished several times, while engineered wood may only allow one or two refinishes. The remaining thickness of the wear layer determines how many refinishes are actually safe.
What grit sandpaper should I start with?
Many heavily worn floors start with a coarse grit such as 36-grit, followed by 60-grit and then 80- or 100-grit passes. Lighter surface damage often calls for a finer starting grit instead.
How long does hardwood floor refinishing take?
Most refinishing projects take several days from start to finish, covering prep, sanding, repairs, staining, and finish application. Drying and curing extend the timeline further, so plan to keep the room clear until the finish has fully set.
How much does it cost to refinish hardwood floors?
Professional refinishing commonly runs several dollars per square foot, depending on floor condition, location, labor rates, and finish choice. DIY refinishing costs less upfront but requires tool rental, materials, and a meaningful time investment.
Final Touch
Learning how to refinish hardwood floors takes patience, but the payoff is a floor that looks and feels new again without tearing anything out. Rushing rarely pays off here, since the small details in prep and drying tend to show up later, for better or worse, once the finish has cured.
Taking it one stage at a time, with the right tools on hand and a bit of built-in flexibility for drying times, makes the whole project far less stressful than it looks going in.
A floor that gets this kind of care usually holds up to years of daily life, pets, and passing seasons without needing more than a light touch-up. Let me know how your floor turned out.