My neighbor has orchids that bloom twice a year like clockwork, and mine just sat there looking sad for months. I finally asked her what she was doing differently, and her answer surprised me; she was doing less, not more.
That’s when I realized orchid plant care isn’t about constant attention or complicated routines.
It’s about understanding a few key principles and then stepping back. You’ll find that these plants actually prefer a hands-off approach once their basic needs are met.
They’re not the high-maintenance flowers everyone warns you about. What they need is the right balance of water, light, and airflow, nothing fancy. I’m sharing everything
I’ve learned about keeping orchids healthy and encouraging those gorgeous blooms, so you can enjoy them without the stress or guesswork.
What You Need to Know About Orchids First
Before I get into care tips, let me clear up some confusion about orchid types. You’ve probably seen Phalaenopsis orchids everywhere. They’re the ones with those graceful, arching stems and flat, colorful blooms.
People call them Moth Orchids, and they’re by far the most common variety you’ll find in stores.
There’s a reason for that. They’re the easiest orchids to grow indoors, which is why I always recommend starting with them.
Now, here’s the interesting part. Orchids get labeled as low-maintenance plants, and in some ways, they are. They don’t need daily watering or constant repotting.
But they do require specific care that’s different from your average houseplant. You can’t treat them like a pothos and expect them to thrive.
That’s exactly what this guide is for. I’m walking you through everything you need to know.
Watering schedules, light requirements, potting basics. So your orchid doesn’t just survive, it actually blooms beautifully.
Essential Care Requirements for Healthy Orchids
Getting orchids to thrive comes down to nailing a few core basics. Once you understand what they need in terms of light, temperature, and potting, everything else falls into place naturally.
Getting the Light Right
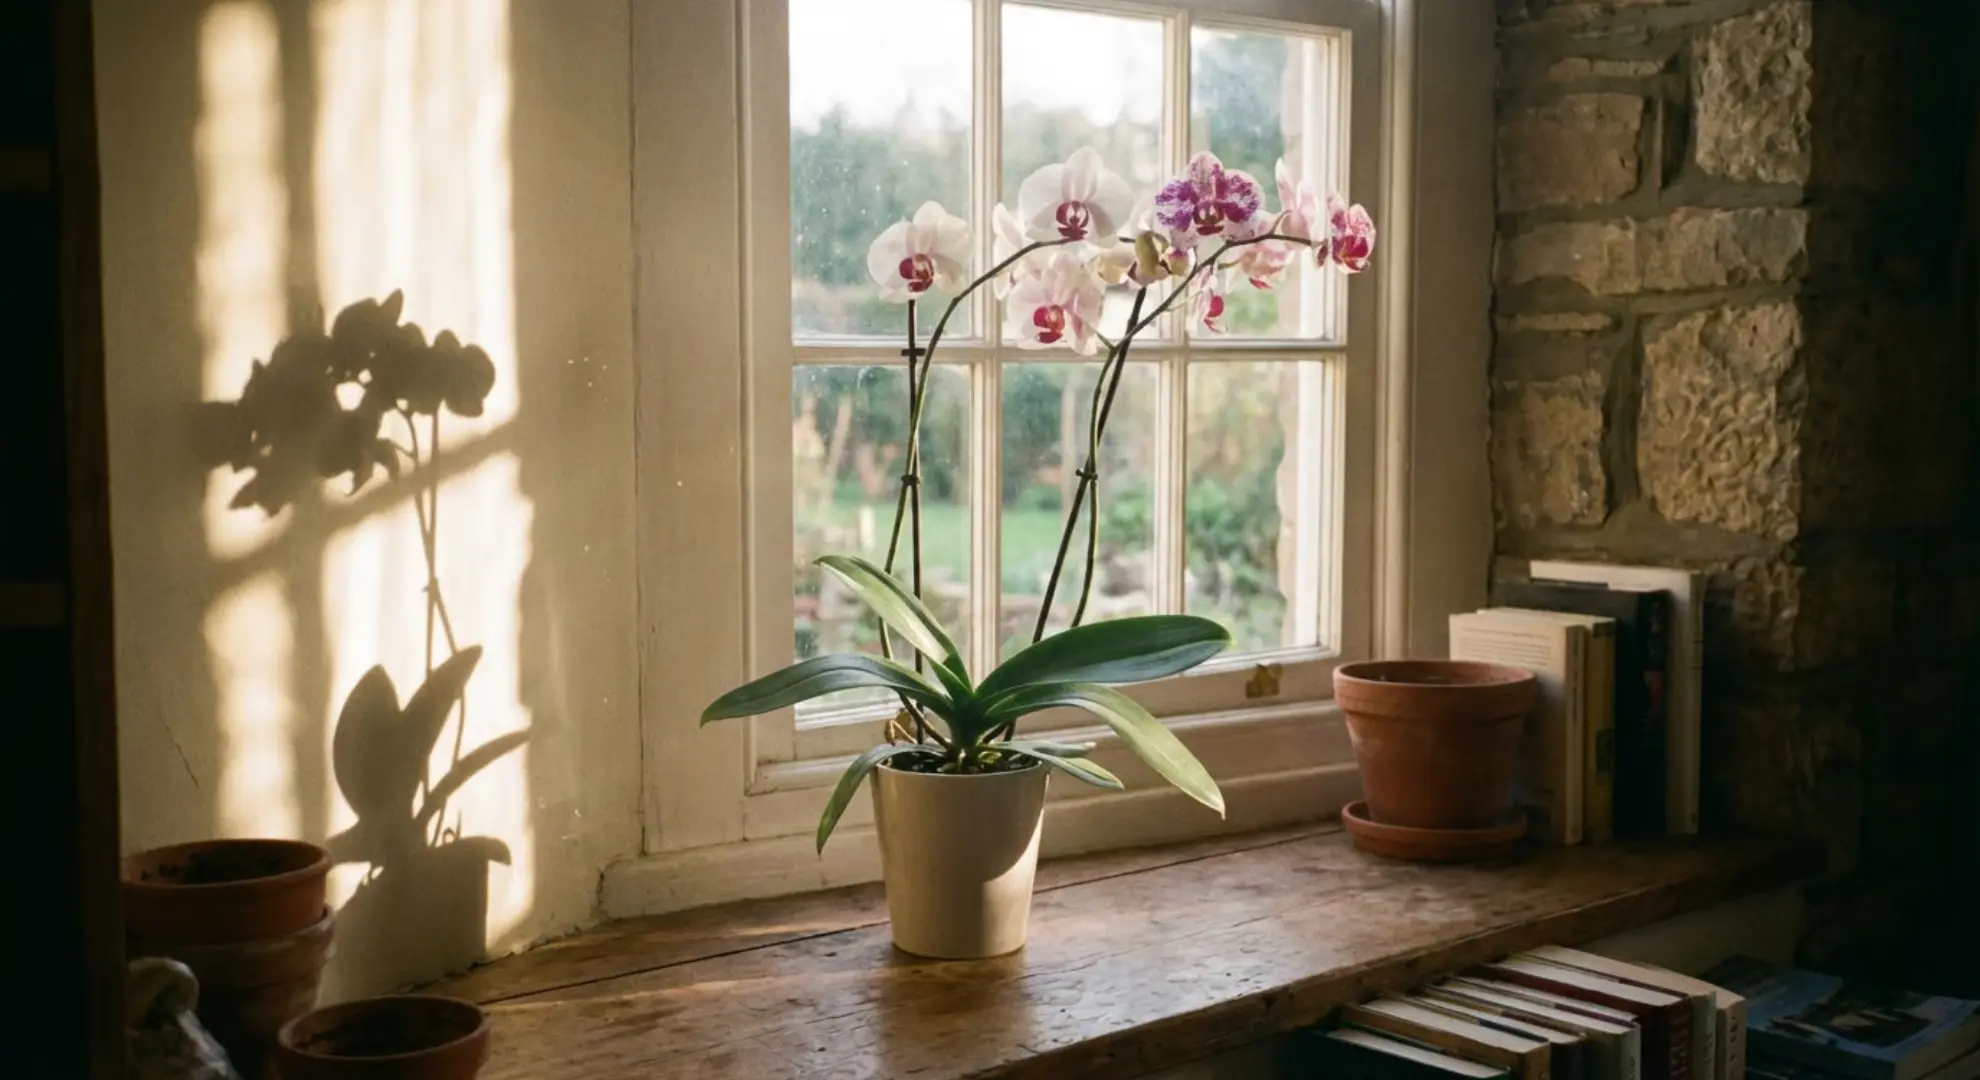
Light is where most people mess up with orchids, and I’ve been there too. Your orchid needs bright, indirect light to thrive. Think of it as Goldilocks lighting. Not too harsh, not too dim.
Direct sunlight will scorch those beautiful leaves, leaving them yellow and damaged. But stick your orchid in a dark corner, and it’ll stop blooming altogether.
I’ve found the best spot is near an east-facing window. You get that gentle morning light without the intense afternoon rays. If you only have south or west-facing windows, pull your orchid back a few feet or use a sheer curtain to filter the light.
Here’s a quick test I use. Hold your hand above the orchid at midday. If you see a sharp, dark shadow, the light’s too strong. A soft, fuzzy shadow means you’re in the sweet spot.
Temperature and Humidity Levels
Orchids aren’t picky about temperature, but they do have preferences. They’re happiest between 60 and 80 degrees Fahrenheit. That’s pretty much normal room temperature for most homes, which makes things easy.
I keep mine in rooms where the temperature stays consistent. Avoid placing them near heating vents, air conditioners, or drafty windows. Those sudden temperature swings stress them out.
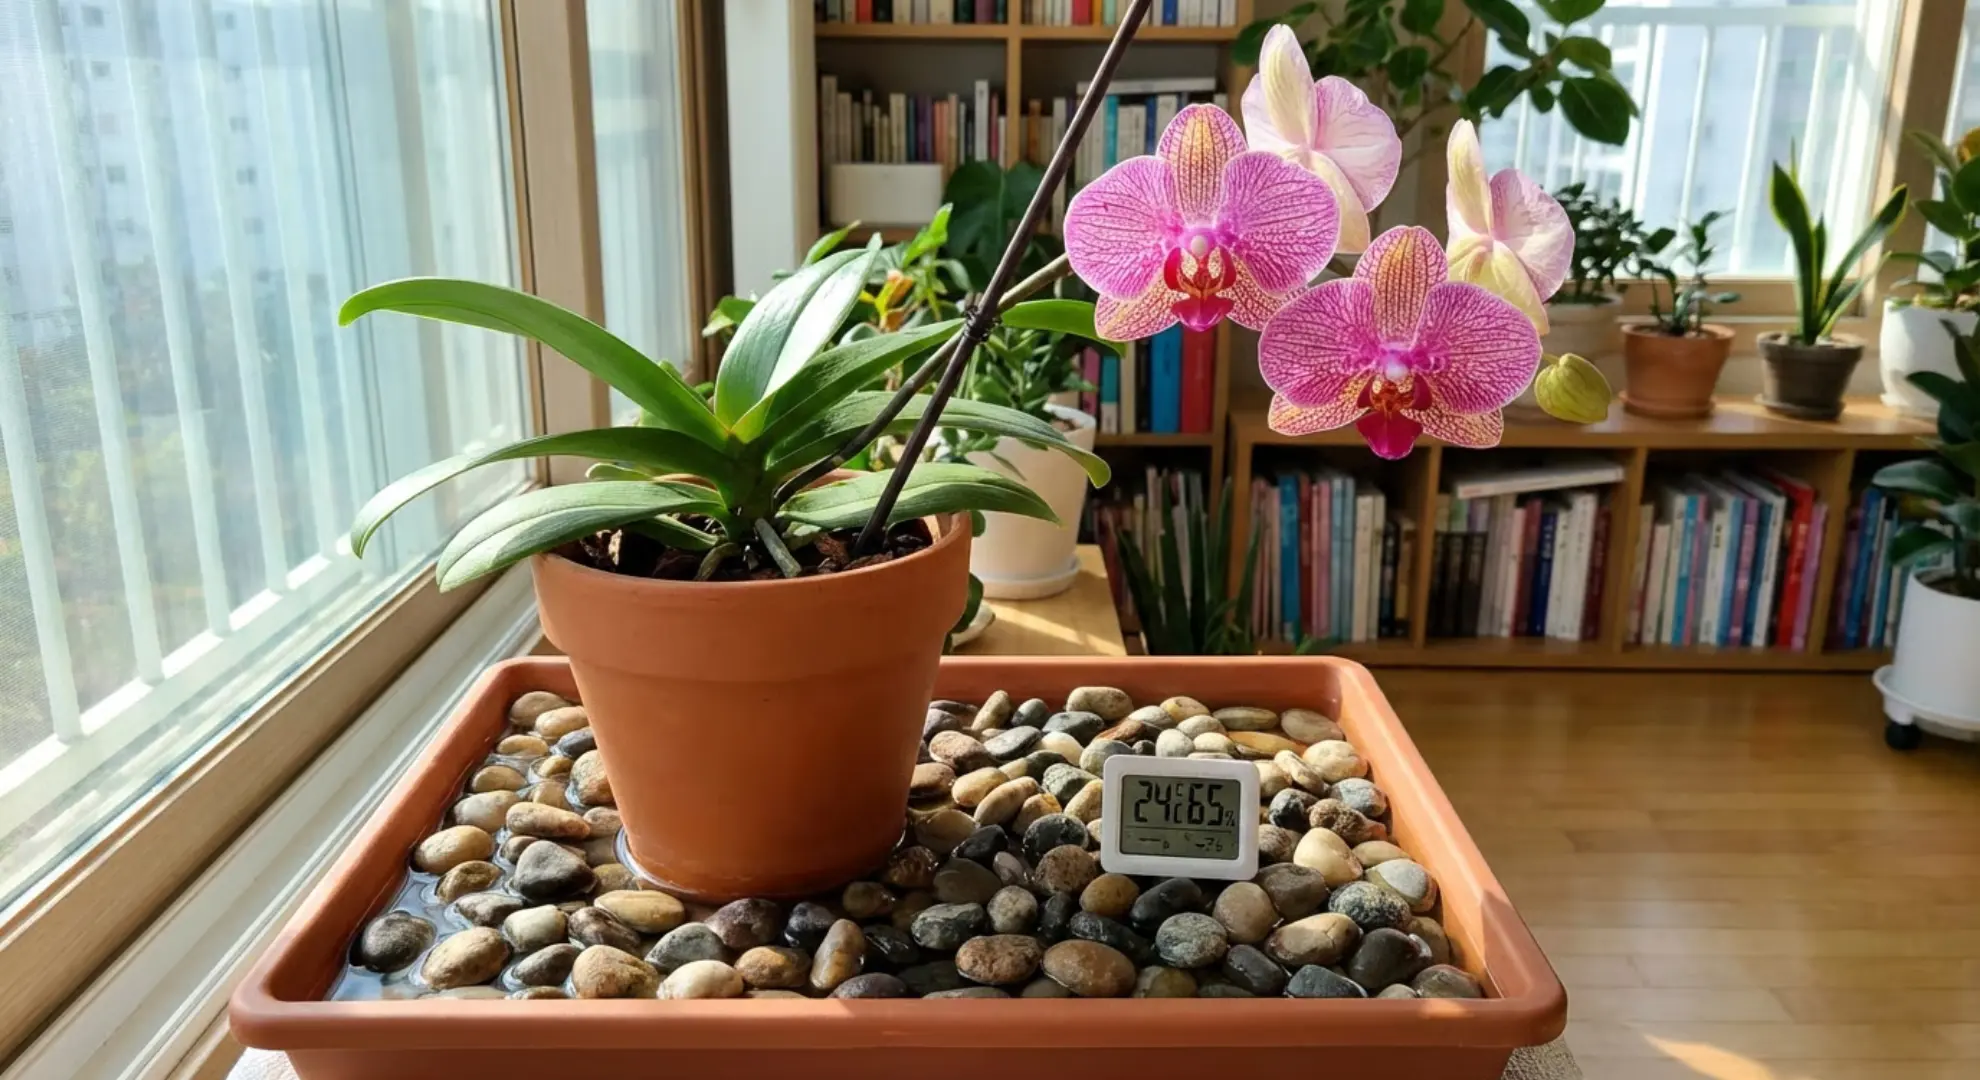
Humidity is another story. Orchids love moisture in the air, around 40 to 70 percent. Most homes sit below that, especially in winter. I noticed my orchids looking droopy until I started boosting humidity around them.
You don’t need fancy equipment. I set my pots on trays filled with pebbles and water. The water evaporates and creates humidity without soaking the roots. Grouping plants together helps too. They create their own little humid microclimate.
Choosing the Right Pot and Mix
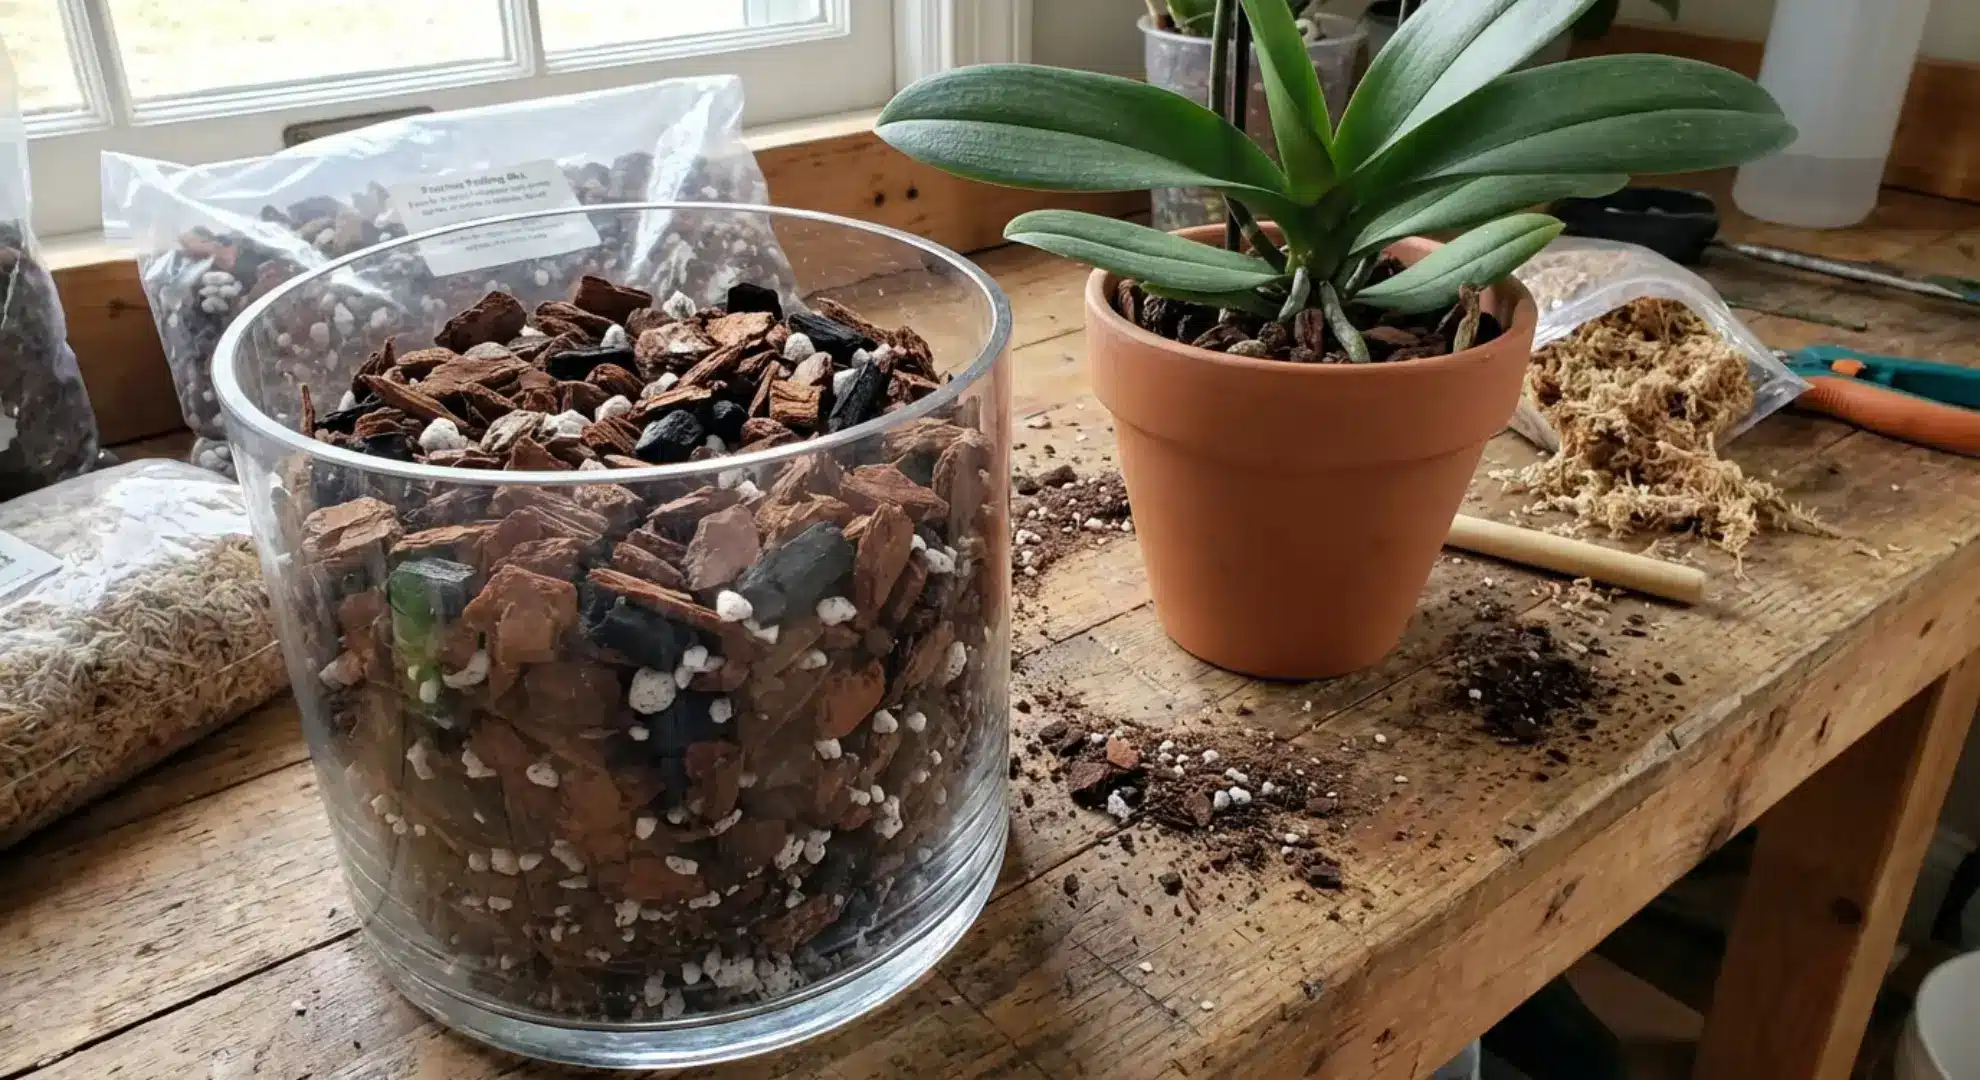
This one surprised me when I first learned it. You can’t use regular potting soil for orchids. Their roots need air circulation, and soil suffocates them. I use orchid-specific potting mix made from bark chips, perlite, and charcoal. It’s chunky and loose, which is exactly what orchid roots love.
Drainage is absolutely critical. Root rot is the number one orchid killer, and it happens when water sits around the roots too long. I always use pots with drainage holes. Clear plastic pots are actually ideal because you can see the roots and check their health.
If you prefer decorative pots, use them as outer covers and keep your orchid in a plastic pot inside. After watering, make sure all excess water drains out completely. Never let your orchid sit in standing water.
Common Mistakes to Avoid in Orchid Care
I’ve made just about every orchid mistake in the book, and I’ve watched friends do the same. The good news is most of these problems are easy to fix once you know what to look for.
- Overwatering: This is the big one. Most orchids die from too much water, not too little. I learned to check the roots and potting mix before watering. If it’s still moist, wait a few more days.
- Using tap water with high mineral content: Hard water leaves salt deposits on roots and can damage your orchid over time. I switched to filtered or distilled water, and my orchids responded immediately.
- Placing orchids in direct sunlight: Those leaves will burn faster than you think. I made this mistake with my first orchid and ended up with crispy, yellow foliage that never recovered.
- Skipping the drainage step: Letting water pool at the bottom of the pot is asking for root rot. Always make sure excess water drains completely after watering.
- Repotting too often: Orchids actually like being a bit root-bound. I only repot when the mix breaks down or roots are bursting out everywhere, usually every two years.
- Ignoring air circulation: Stagnant air invites fungal problems and pests. I keep a small fan running in the room where my orchids live, and it’s made a huge difference.
- Fertilizing too much: More isn’t better with orchid fertilizer. I use a weak solution once a month during growing season and skip it completely when they’re not actively growing.
- Giving up after blooms fade: Your orchid isn’t dead just because the flowers dropped. With proper care, it’ll bloom again. I’ve had orchids rebloom multiple times once I stopped treating them like they were done.
You’ll avoid most orchid problems by sticking to a simple routine and resisting the urge to fuss too much. These plants reward patience more than anything else.
Post-Bloom Care for Orchids: Keeping Your Plant Healthy
Your orchid just finished blooming, and now you’re wondering what’s next. I’ve been there, watching those beautiful flowers fade and feeling a bit lost.
Here’s the thing: post-bloom care is actually simple.
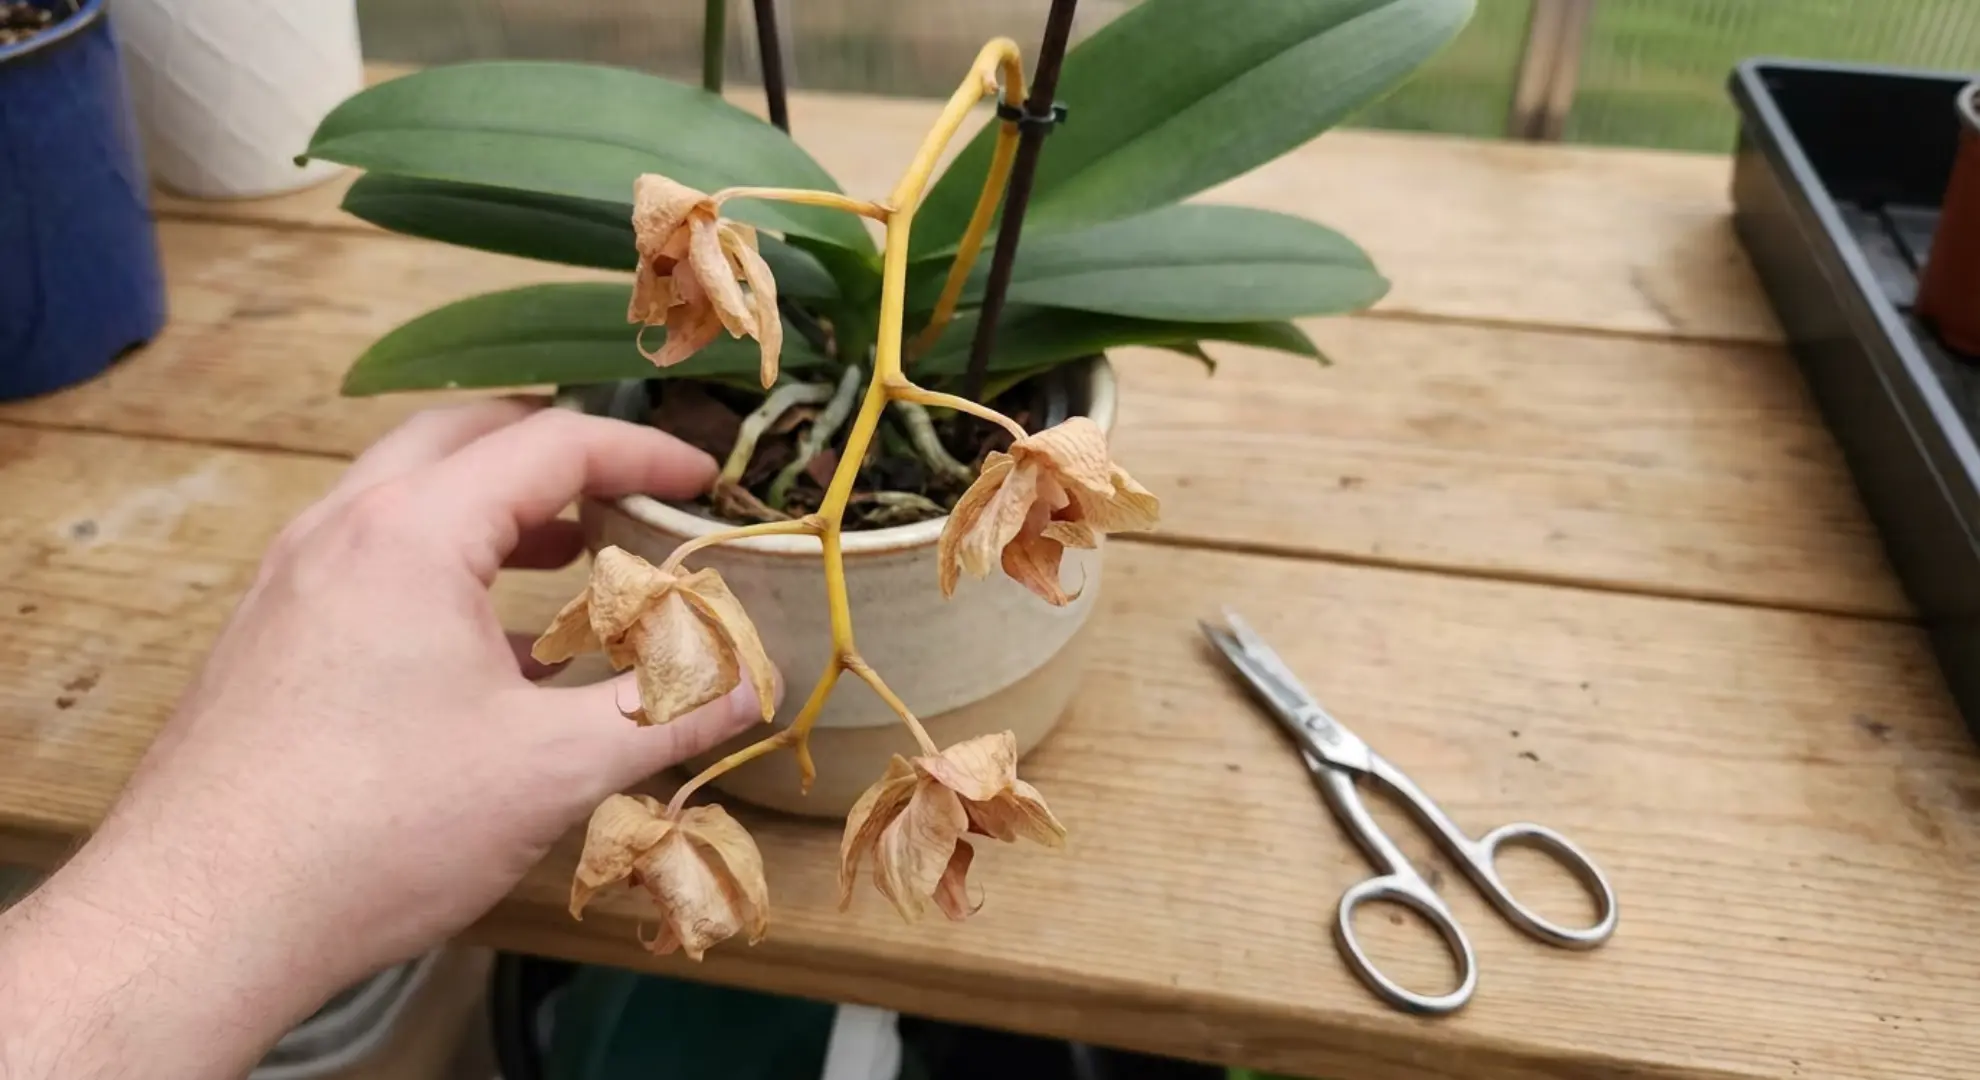
First, trim the spent flower spike. Cut it back to just above a node if you want potential reblooming, or remove it entirely. I usually go for the clean cut
Keep your watering routine steady. You’ll want to water once weekly, letting the potting medium dry slightly between sessions. Overwatering kills more orchids than anything else.
Light matters too. Place your orchid in bright, indirect sunlight. I’ve found an east-facing window works perfectly.
Don’t forget fertilizer. Feed monthly with a balanced orchid formula to rebuild energy stores.
Your orchid needs rest after blooming. Give it consistent care, and you’ll see new growth in a few months. That’s when you know you’re doing it right.
Repotting Orchids: Timing and Techniques
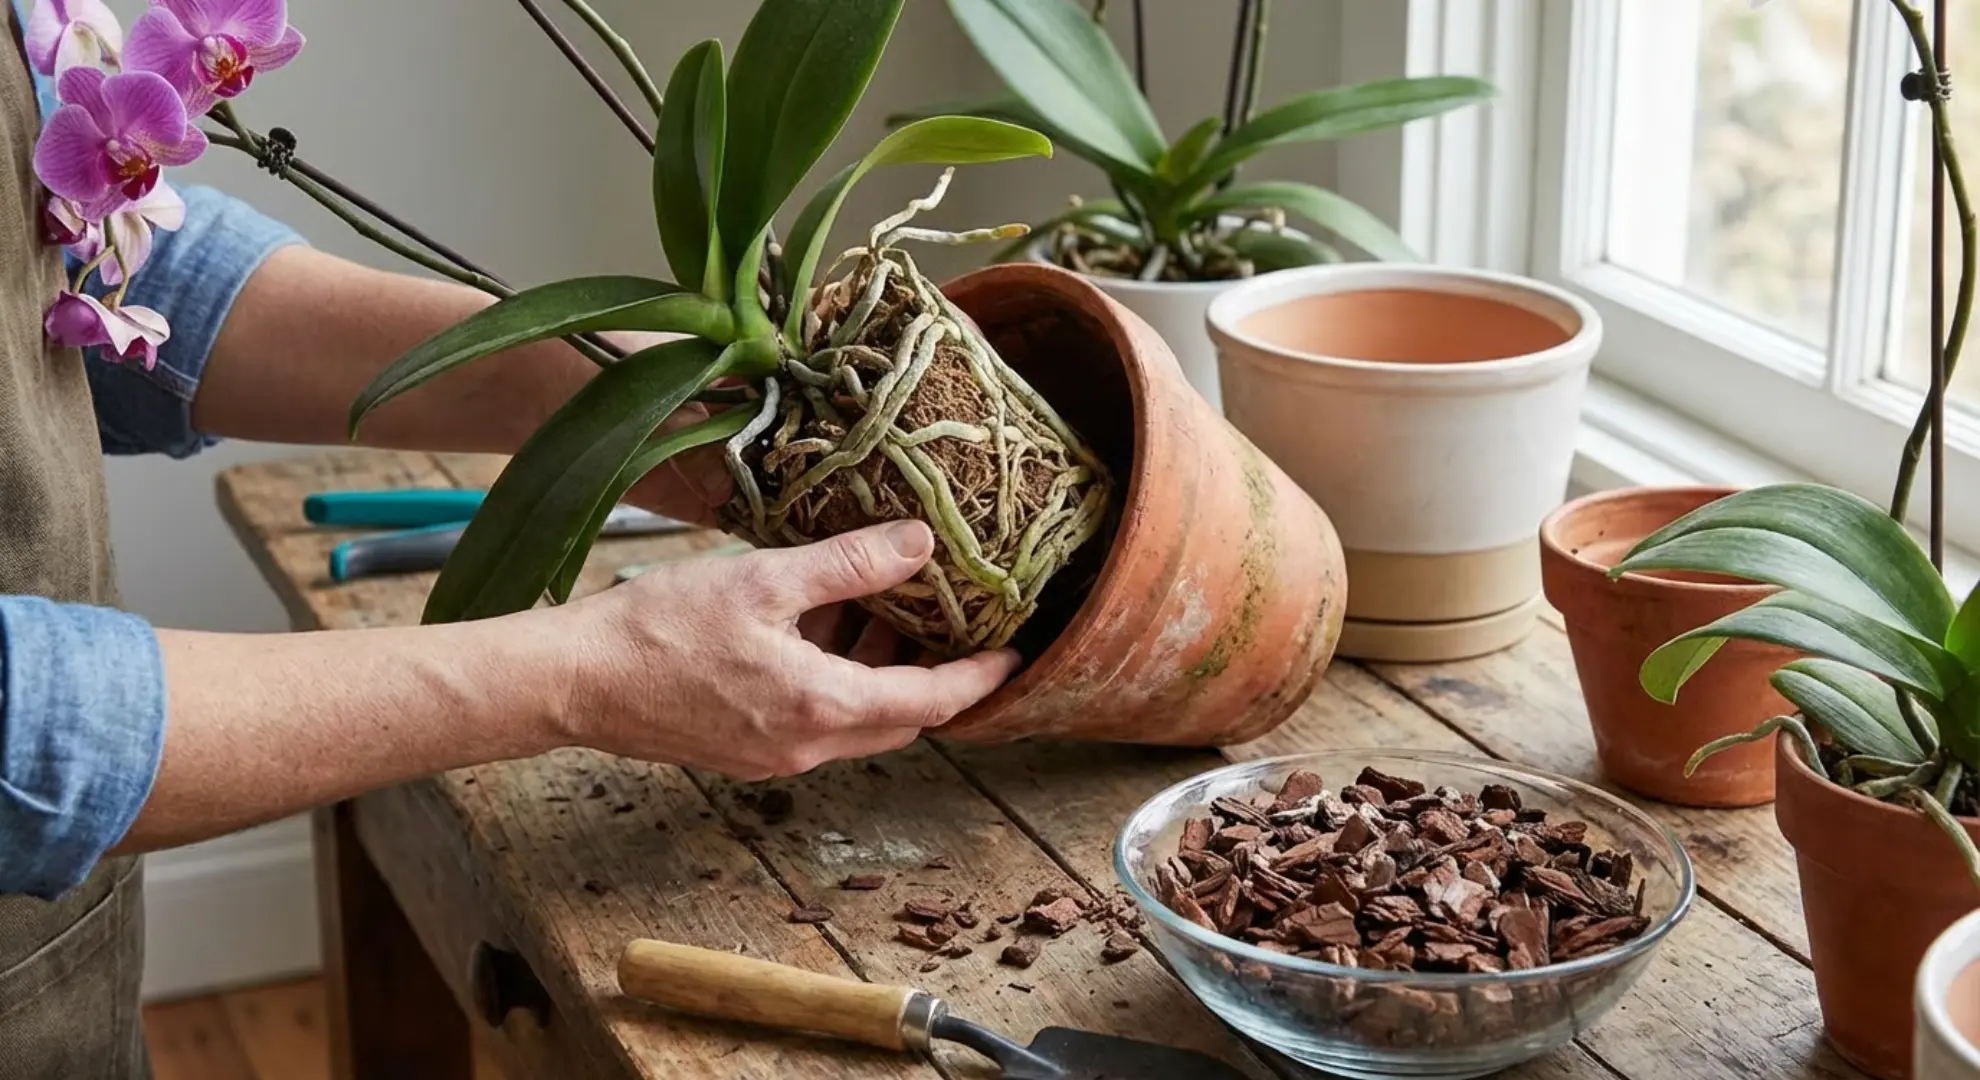
Repotting orchids seems scary, but it’s easier than you think.
I’ve learned timing is everything. Repot every 1-2 years, right after blooming ends. That’s when new roots start growing, making the transition smoother.
Here’s how I do it: Remove your orchid gently and shake off old medium. Trim any dead or mushy roots with sterilized scissors.
Choose a pot that’s just slightly larger. Too big causes water retention issues.
Use fresh orchid bark mix, never regular potting soil. Position your plant so the base sits at pot level.
Water lightly after repotting and hold off on fertilizer for a month.
You’ll notice your orchid looks stressed initially. That’s normal. In my experience, they bounce back within weeks, growing stronger than before.
How to Join the Orchid Care Community: Forums and Discussions
Growing orchids gets easier when you’ve got fellow enthusiasts backing you up. I’ve learned so much from online communities over the years.
Online forums and social media groups connect you with experienced growers worldwide. You’ll find real-time advice, troubleshooting help, and inspiration from others’ successes. I’ve solved countless problems just by posting photos and asking questions.
These communities share everything from bloom updates to rescue stories, making your orchid journey less isolating.
Popular Orchid Care Communities
Here’s where I hang out online:
Reddit’s r/orchids offers active daily discussions with helpful members who identify problems quickly.
American Orchid Society Forum provides expert-level insights and scientific accuracy.
Orchid Board features dedicated sections for different orchid types.
Facebook groups like “Orchid Lovers” and “Beginner Orchid Growing” create friendly, supportive spaces.
Jump in, introduce yourself, and start asking questions. You’ll be amazed how welcoming these communities are.
Orchid Care Best Practices and Advanced Tips
Once you’ve mastered the basics, these advanced practices will take your orchid care to the next level. I’ve picked up these tips over years of trial and error.
- Ice cube watering method: Place 2-3 ice cubes on the potting medium weekly. The slow melt prevents overwatering and mimics natural rainfall patterns I’ve found effective.
- Humidity trays: Set your pot on a tray filled with pebbles and water. This creates localized humidity without wetting roots directly.
- Root inspection routine: Check roots monthly through clear pots. Green or white roots mean healthy growth; brown or mushy ones need trimming.
- Temperature fluctuation: Create a 10-15°F drop at night. This temperature shift triggers blooming cycles in my experience.
- Air circulation: Use a small fan on low setting. Good airflow prevents fungal issues and strengthens stems naturally.
- Fertilizer dilution: Mix fertilizer at half-strength but apply weekly. “Weakly, weekly” feeding produces better results than monthly full doses.
- Repotting timing: Watch for roots growing over pot edges or medium breaking down. These signals mean it’s time to repot.
- Sterilization practice: Always sterilize cutting tools between plants. I use rubbing alcohol to prevent the spread of disease.
These practices sound advanced, but they become second nature quickly. Your orchids will reward you with healthier growth and more reliable blooming cycles.
Conclusion
I’ve walked you through everything I know about orchid plant care, from watering basics to advanced techniques. These plants aren’t as complicated as they seem once you understand their needs.
You’ve got the tools now to keep your orchids thriving year-round. Start with consistent watering, proper lighting, and the right potting medium.
Those three elements make the biggest difference.
The beauty of orchids is that they reward patience. Give them time to adjust after repotting or blooming cycles.
You’ll notice stronger roots and more reliable blooms when you stick with good care habits.
Want to look deeper into specific topics? Check out other blogs covering everything from pest management to rare orchid varieties. There’s always something new to find!