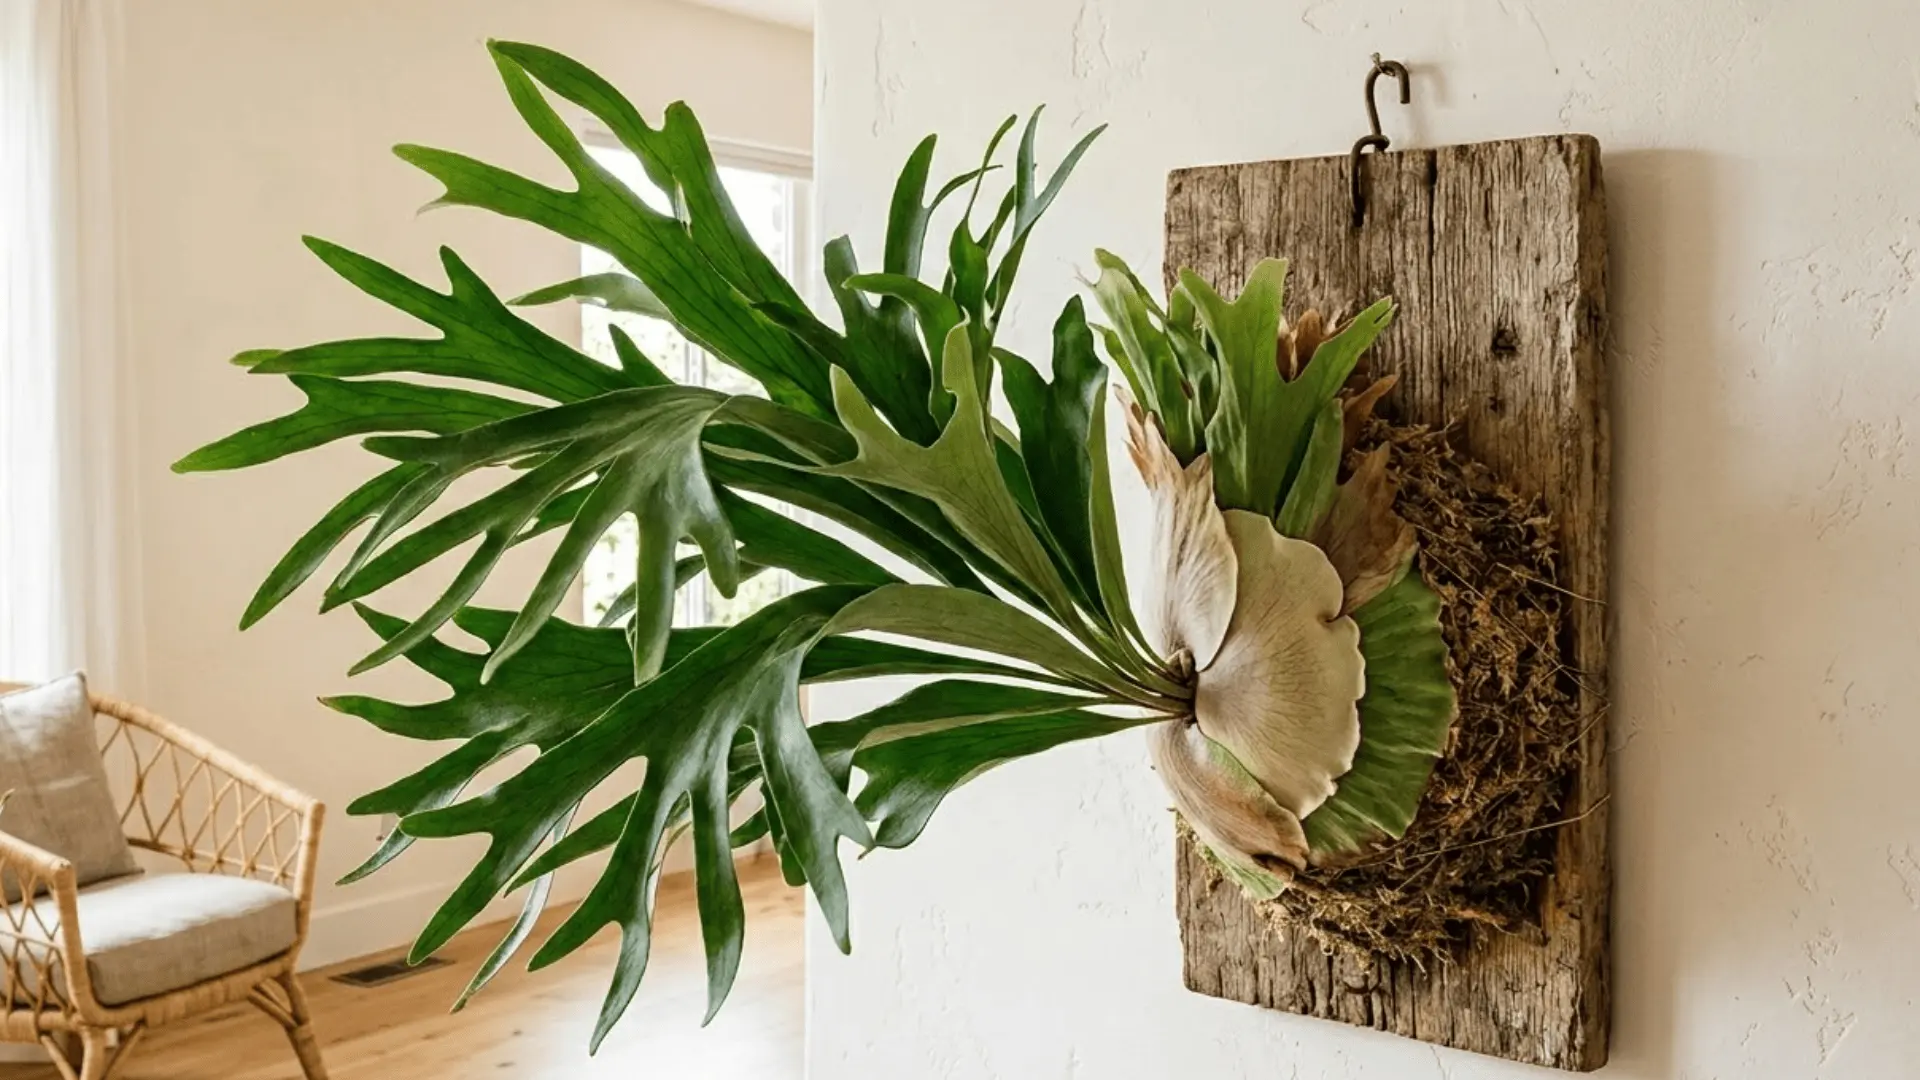
If you’ve ever walked into a beautifully curated space and found yourself stopping to stare at what looked like a living piece of wall art, chances are a staghorn fern was involved.
These extraordinary plants grow the way rules say houseplants shouldn’t, with no soil, no pot, just their gorgeous antler-shaped fronds reaching outward like they own the room.
Once you understand what they actually need, caring for them becomes second nature.
This guide walks you through watering, lighting, mounting, feeding, and fixing the most common hiccups along the way.
What is a Staghorn Fern?
Staghorn ferns are epiphytic plants, meaning they grow on trees rather than in soil, drawing nutrients from the air and water around them.
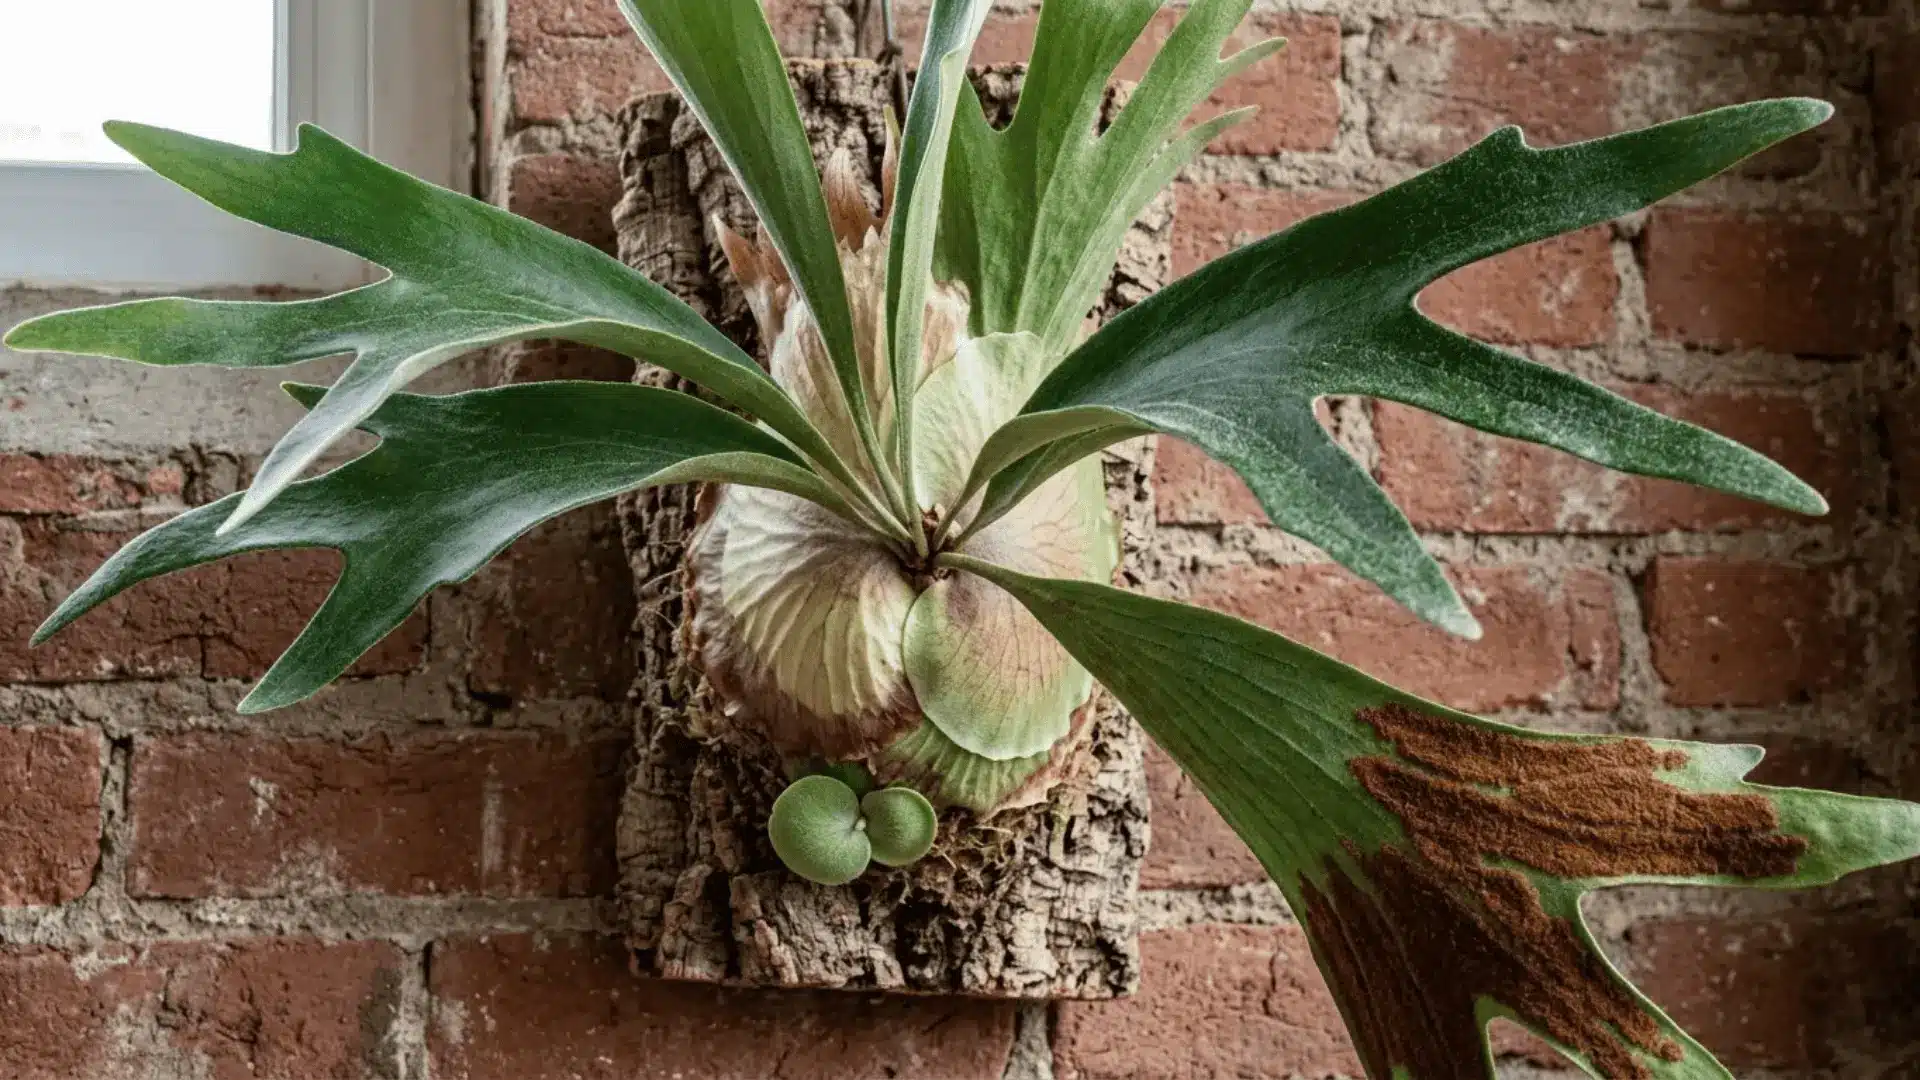
What makes them truly distinctive is their two-frond system: the antler-shaped fertile fronds that extend outward dramatically, and the flat shield fronds that anchor the plant and protect its roots.
They’re a natural fit for vertical gardening and wall displays, and once they settle in, they’re surprisingly unfussy.
The most commonly grown varieties include:
- Platycerium bifurcatum
- Platycerium superbum
- Platycerium veitchii
- Platycerium grande
What is the Ideal Light for a Staghorn Fern?
Staghorn ferns thrive in the kind of light that feels gentle and diffused, nothing too harsh, nothing too dim. Getting this balance right is honestly one of the easier parts of staghorn fern care.
Finding the Right Spot
Think of how light filters through a tree canopy, and you’ll have a pretty good idea of what staghorn ferns prefer. Bright, indirect light is their sweet spot, and east-facing windows tend to deliver exactly that.
Rooms with large windows work beautifully too, as long as the plant isn’t sitting in direct afternoon sun, which can scorch the fronds quickly.
Reading What Your Fern is Telling You
Staghorn ferns are fairly communicative once you know what to look for.
Watch out for:
- Pale or yellowing fronds, which usually signal too little light
- Slow or stunted growth, another sign the plant isn’t getting enough brightness
- Brown, crispy patches on the fronds, a sign of too much direct sun exposure
How Often to Water a Staghorn Fern?
Watering a staghorn fern feels a little different from your usual houseplant routine, and that’s exactly what makes it interesting.
Once you find your rhythm, it becomes one of the most intuitive parts of caring for these plants.
Building a Watering Routine
Staghorn ferns generally do well with a good soak once a week, though this isn’t a rigid rule. During warmer months when the plant is actively growing, it may need water more frequently.
In cooler months, pulling back slightly is the smarter move. Always check whether the shield frond feels dry before watering again, since consistency matters far less than actually reading the plant.
Soaking vs. Misting: Which Does What?
Both methods have their place, and knowing when to use each one makes a real difference.
| Method | How to Do It | Best For |
|---|---|---|
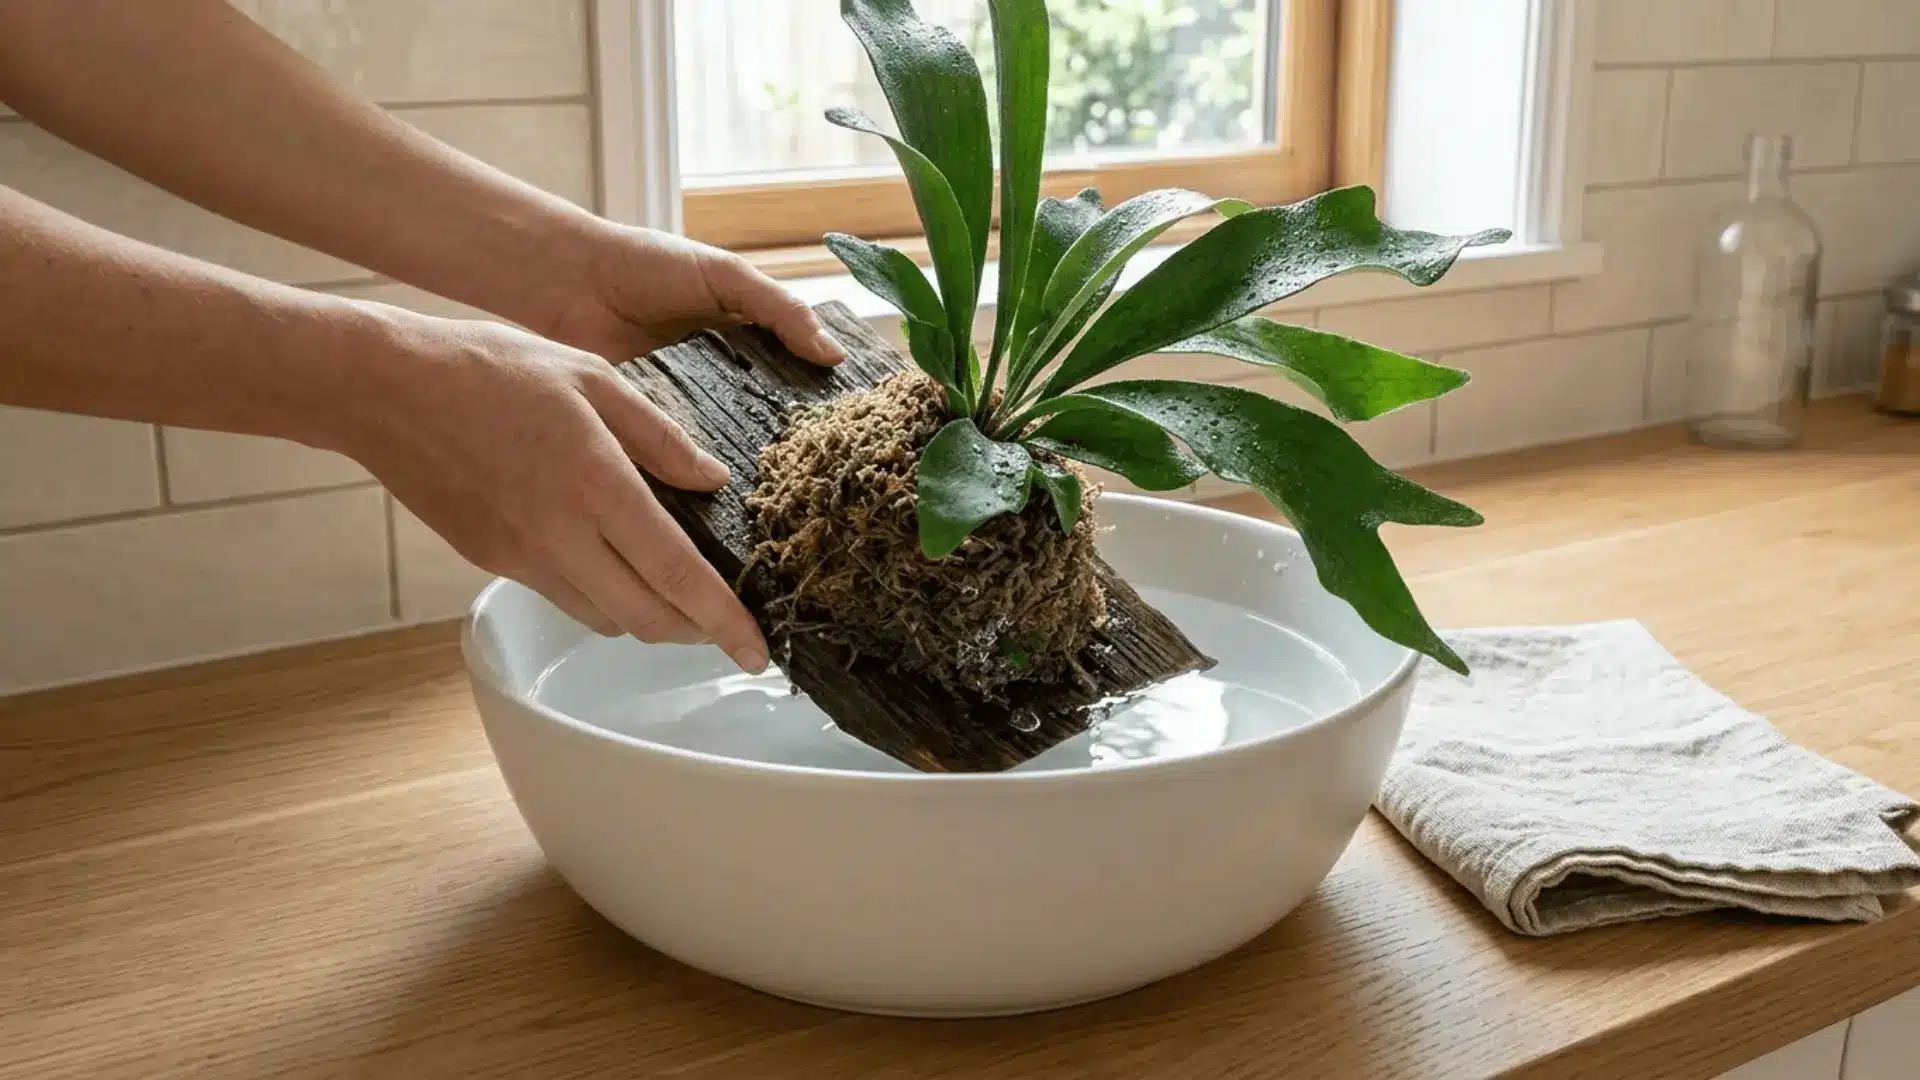
| Soaking | Submerge the root ball in water for 10-20 minutes | Mounted ferns, thorough hydration |
| Misting | Lightly spray fronds with a bottle | Dry climates, humidity boost |
| Combination | Soak weekly, mist in between | Hot or arid indoor environments |
Spotting Watering Problems Early
Your staghorn fern will usually show signs before things get serious. Keep an eye out for:
- Black or brown spots on the shield frond, which often point to overwatering or poor drainage.
- Crispy, curling fronds signal the plant has gone too long without moisture.
- Soft, mushy roots at the base are a telltale sign of root rot that needs immediate attention.
How Humidity Affects Your Staghorn Fern?
Staghorn ferns come from humid, tropical environments, so replicating that indoors makes a bigger difference than most people expect.
Getting the humidity right is one of those quiet factors that shows up clearly in how healthy and lush your plant looks over time.
What Humidity Levels Work Best?
Since staghorn ferns are native to rainforest-like conditions, they naturally prefer a humidity range that feels rich and moist without being stifling.
Keeping indoor humidity somewhere between 50% and 70% gives them the environment they’re genuinely used to.
Standard indoor air, especially in air-conditioned or heated spaces, tends to fall well below that, so this is worth paying attention to rather than leaving to chance.
Simple Ways to Raise Humidity Indoors
A few easy adjustments around the house can bring humidity levels up noticeably for your fern.
| Method | How It Helps | Best For |
|---|---|---|
| Humidifier | Maintains consistent moisture in the air | Any room, most reliable option |
| Bathroom placement | Steam from showers naturally boosts humidity | Bright bathrooms with indirect light |
| Pebble tray with water | Releases moisture as water evaporates beneath the plant | Small spaces, low-effort solution |
| Grouping plants together | Plants release moisture collectively through transpiration | Plant-heavy corners and shelves |
Soil and Mounting Options for Staghorn Ferns
Staghorn ferns don’t follow the usual houseplant playbook, and how you choose to grow them is a big part of what makes them so visually striking.
Understanding their natural needs makes picking the right setup a lot more straightforward.
Why Staghorn Ferns are Usually Mounted?
In the wild, staghorn ferns anchor themselves to tree trunks and branches rather than growing in the ground soil.
This epiphytic habit means their roots are designed to grip surfaces and absorb moisture from the air around them, not from soil.
Mounting them indoors replicates this naturally, gives their roots the airflow they need, and honestly, it’s a big part of why they look so stunning as wall displays.
Popular Mounting Methods
Each mounting option brings something slightly different to the table, both functionally and aesthetically.
| Mounting Method | Why It Works | Lifespan | Maintenance Level |
|---|---|---|---|
| Wooden boards | Sturdy, natural-looking; nails and screws hold easily | Several years with proper sealing | Low |
| Cork bark | Lightweight, porous surface mimics tree bark naturally | Long-lasting, resists rot well | Very low |
| Wire baskets | Maximum airflow to roots, holds sphagnum moss securely | Indefinite with occasional lining changes | Moderate |
Best Growing Medium
The material packed around the roots matters just as much as the mount itself.
The most reliable choices include:
- Sphagnum moss, which retains moisture really well and keeps roots hydrated between waterings
- Orchid bark mix, which offers excellent drainage and mimics the loose, airy conditions in which staghorn ferns naturally grow in
Whichever combination you go with, the goal is the same: keep the roots airy, lightly moist, and never sitting in anything dense or compacted. Get that right, and your staghorn fern will take to its mount beautifully.
Fertilizing Staghorn Ferns
Staghorn ferns are light feeders, but a little nutrition goes a long way in keeping their fronds full, green, and vigorous.
Knowing what to use and when to apply it makes the whole process genuinely simple.
| Category | Balanced Liquid Fertilizer | Organic Fertilizer | Slow-Release Granules |
|---|---|---|---|
| Best Option | Miracle-Gro Water Soluble All Purpose Plant Food (10-10-10 or 20-20-20) |
Alaska Fish Fertilizer 5-1-1 or liquid seaweed extract | Osmocote Smart-Release Plant Food Plus (14-14-14) pellets |
| How to Apply | Dilute to ¼ to ½ strength, pour over shield fronds, and let it trickle through the moss | Mix with water and apply during regular watering or misting | Tuck a few pellets into the sphagnum moss around the root ball |
| Spring & Summer | Once a month | Once a month | Every 3 to 6 months |
| Fall & Winter | Reduce to once every 6 to 8 weeks | Reduce to once every 6 to 8 weeks | No reapplication needed |
| Why It Works | Delivers all primary nutrients evenly and absorbs quickly | Gentler on roots, mimics natural nutrient release from decomposing matter | Releases nutrients slowly with each watering, low maintenance |
A quick note before you fertilize: Always apply to a moist plant, never a dry one, and resist the urge to feed more frequently, thinking it’ll speed up growth. With staghorn ferns, less is genuinely more.
How to Mount a Staghorn Fern?
Mounting a staghorn fern is genuinely one of the more satisfying parts of caring for these plants, and it’s simpler than it looks.
Here’s how to do it cleanly and correctly.
- Step 1: Gather your materials, including a wooden board or cork bark, sphagnum moss, and fishing line or soft wire.
- Step 2: Soak the sphagnum moss in water until fully saturated, then squeeze out the excess.
- Step 3: Mound the damp moss onto the board where the fern’s root ball will sit.
- Step 4: Position the fern on top of the moss and secure it firmly with fishing line or wire, wrapping around the shield fronds without covering the antler fronds.
- Step 5: Hang the mount in a spot with bright, indirect light and give it a good soak to help the fern settle in.
Once mounted, your staghorn fern will gradually anchor itself to the board as its shield fronds expand and take over. At that point, the fishing line has done its job, and the plant truly owns its space.
Propagating Staghorn Ferns
Staghorn ferns can be propagated at home, and with a little patience, it’s a pretty rewarding process. There are two ways to go about it, one being significantly more beginner-friendly than the other.
Propagation by Pups
Staghorn ferns regularly produce small offsets called pups around the base of the mother plant.
Here’s how to work with them:
- Look for pups that have developed their own shield fronds, as separating them too early reduces their chances of surviving independently.
- Use a clean, sharp knife to carefully cut the pup away from the mother plant, keeping as many roots intact as possible.
- Mount the pup immediately onto a small board with damp sphagnum moss and secure it gently with fishing line until it anchors itself.
Propagation from Spores
Spore propagation is possible but considerably slower and more involved than dividing pups. Keep these points in mind:
- Spores are found on the underside of mature antler fronds, appearing as brown powdery patches when ready for collection.
- Germination can take several months under the right conditions, requiring consistent humidity, warmth, and indirect light.
- This method is best suited for patient, experienced growers rather than those new to staghorn fern care.
Common Staghorn Fern Problems
Even the most well-cared-for staghorn ferns run into trouble occasionally, and most issues are easier to fix than they look. Knowing what to watch for makes all the difference.
Problem 1: Why are my staghorn fern’s leaves turning yellow?
Solution: Yellowing usually points to overwatering or insufficient light. Let the mount dry out more between waterings and move the plant closer to a bright, indirect light source to help it recover.
Problem 2: The fronds on my staghorn fern are turning brown and crispy.
Solution: This is typically a sign of low humidity or underwatering. Increase your watering frequency slightly, mist the fronds regularly, and consider placing a humidifier nearby to restore moisture levels.
Problem 3: I think my staghorn fern has pests.
Solution: Scale insects and mealybugs are common pests, appearing as small brown bumps or white cottony clusters on fronds. Remove them with a rubbing alcohol-dipped cotton swab and spray neem oil to prevent return.
Problem 4: The base of my staghorn fern looks soft and mushy.
Solution: Root rot occurs if the plant remains overly wet without enough airflow. Remove affected roots, let it dry, reduce watering, and improve ventilation.
Indoor vs. Outdoor Staghorn Fern Care
Staghorn ferns can thrive in both settings, but what they need from you shifts depending on where they’re growing.
Here’s a side-by-side look at what to keep in mind for each environment.
| Care Factor | Indoor Care | Outdoor Care | Watch Out For |
|---|---|---|---|
| Temperature | 60°F to 80°F | Warm, humid climates | Vents, drafts, and frost below 50°F |
| Light | Bright, indirect light near east-facing windows | Dappled shade or filtered light | Harsh afternoon sun outdoors |
| Humidity | 50% to 70% via misting or a humidifier | Naturally humid climates are preferred | Dry spells outdoors, dry air indoors |
| Frost Protection | Not a concern | Cover with a frost cloth when needed | Unexpected temperature dips |
| Best Climate | Any climate with the right conditions | USDA zones 9 to 12 | Cold winters, if kept outside |
| Airflow | Good ventilation around the mount | Natural airflow is beneficial | Strong winds are damaging fronds |
The Closing Note
Staghorn fern care gets easier the more you observe and connect with your plant.
Every frond that unfurls, every pup that appears at the base, is a small sign that you’re doing something right.
Mounted on a living room wall or tucked into a shaded outdoor corner, these plants have a way of making any space feel more alive and intentional.
We hope this guide gave you everything you needed to feel confident caring for yours. Have questions or a staghorn story of your own? Drop it in the comments below, and we’d love to hear from you!