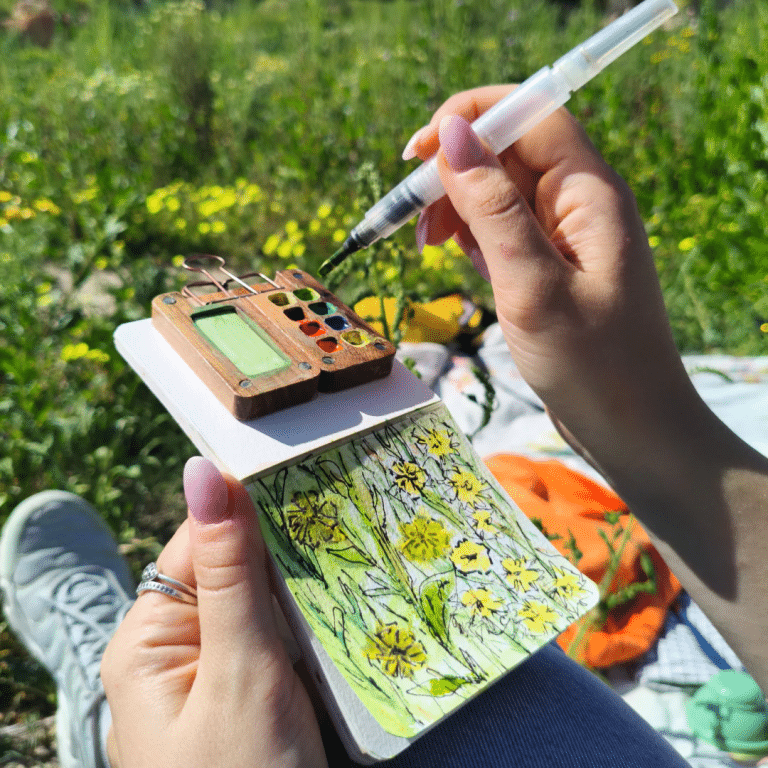
There’s something quietly satisfying about opening a watercolor palette that’s neatly set up and ready to go. The colors are in their places, the mixing areas are clean, and you know that as soon as water hits the paint, you’re in “making mode.”
Setting up a watercolor palette isn’t just a technical step before you start painting. It’s part of the creative process. A thoughtful setup helps you stay relaxed, avoid muddy colors, and spend more time painting instead of fighting your materials.
Let’s walk through how to set up a simple, reliable palette you’ll actually enjoy using.
Start With the Basics: Palette and Paint
First, you need somewhere for your colors to live.
You can use a plastic palette, a ceramic tray, or a metal travel palette. The material doesn’t matter nearly as much as practicality: you want small wells for your paints and a few open areas for mixing. If you’re just starting out, a lightweight plastic or metal palette is more than enough.
Next comes the paint. Watercolors usually come in two forms:
- Pans – small, dry cakes of color that you activate with water.
- Tubes – creamy paint you squeeze into wells and let dry.
Both work perfectly well. Pans are convenient and tidy; tubes are great if you like strong color and want to control exactly how much paint you add to each well. If tubes feel intimidating, don’t worry – once they dry in the palette, they behave just like pans.
Choose a Simple, Honest Color Selection
One of the easiest ways to overwhelm yourself is to start with too many colors. You don’t need a rainbow of forty shades to make beautiful art. In fact, limiting your palette makes color mixing easier and your paintings more harmonious.
Start with a handful of essentials: a couple of yellows, a couple of reds, a couple of blues, and one or two earthy browns. From just those, you can mix greens, purples, oranges, and a lot of subtle muted tones. You can always expand later as you discover what you like to paint.
The goal here is not to own “every color,” but to have a compact set you can actually learn and remember.
Arrange Your Colors in a Logical Flow
Once you’ve chosen your colors, it’s time to decide where each one goes. This might sound like a small detail, but it has a big impact on how fluidly you paint.
A helpful approach is to arrange your colors roughly in the order of the color wheel. For example, you might start with yellows, then move into oranges and reds, then purples, blues, and finally greens. Earth tones can sit together in a separate corner or row.
After a while, your hands will automatically reach for “that blue in the top right” or “the warm brown on the bottom left.” That kind of muscle memory keeps you relaxed and in flow while painting, instead of pausing every few minutes to search for the right spot.
If you’re using tube paints, squeeze a modest amount of each color into its well and let it dry with the palette open. Don’t worry if it doesn’t look perfect; it’s a working tool, not a showroom piece.
Make a Swatch Map (Your Future Self Will Thank You)
Wet paint in a well can be misleading. It often looks darker, duller, or simply different from how it appears on paper. That’s why making a swatch map is one of the most valuable steps in setting up your palette.
Take a small piece of watercolor paper and paint a little rectangle of each color in the same order as your palette. Under each swatch, write the color name. Once the sheet is dry, keep it in the lid of your palette, tape it nearby, or tuck it into your sketchbook.
Now, every time you’re unsure what a color will look like, you can glance at your map instead of guessing. This is especially helpful when you’re mixing – you’ll quickly learn which colors are strong, which are transparent, and which give you those lovely, granulating textures.
Leave Room to Breathe (and Mix)
A common beginner mistake is filling every available space with paint. It seems efficient, but it leaves you with nowhere to mix.
Your palette needs breathing room. Those empty areas are where your colors start to interact and become something new – skin tones, soft skies, deep shadows, or the grey of a rainy street.
Think of your mixing areas as a temporary playground for color. You can let things get a little messy while you’re experimenting. When it becomes too muddy, simply wipe it clean with a damp cloth or paper towel and start fresh.
Build a Simple Painting Ritual Around Your Palette
How you set up around your palette is just as important as the palette itself. Before you paint, take a moment to create a calm little workspace:
- Two jars of water – one for rinsing, one for clean water.
- A cloth or tissue to lift excess water or dab your brush.
- A scrap of watercolor paper to test mixes before committing them to your painting.
Place the palette on the side of your dominant hand so you can reach it naturally. The idea is to remove as much friction as possible between “I want to paint” and “the brush is moving.”
If collecting all the materials and arranging colors from scratch feels overwhelming, a curated set can simplify things a lot. A ready-made option like the Watercolor Kit from Tobios Kits gives you coordinated colors and a practical palette layout from day one, so you can focus more on the creative part and less on logistics.
Keep It “Artistically Clean,” Not Perfect
Over time, your palette will stop looking pristine. That’s a good sign: it means you’re using it.
You don’t have to scrub it spotless after every session. Instead, think in terms of “artistically clean.” Wipe out obviously muddy puddles in the mixing areas. If one well gets badly contaminated (for example, a blob of blue in your yellow), gently clean that spot and, if needed, add a touch more paint later.
The paint that’s already dry in the wells is meant to be reused. Just add water and it springs back to life. Nothing is wasted.
Let Your Palette Evolve With You
The palette you set up today doesn’t have to be the one you keep forever. As you paint more, you’ll discover that some colors become your go-to companions, while others just sit there untouched. You might fall in love with moody neutrals, bright florals, or coastal blues – and your palette can shift accordingly.
Rearrange colors. Swap some out. Add new ones slowly and intentionally. Your palette should reflect the way you see the world, not some fixed rule from a textbook.
In the end, setting up a watercolor palette isn’t about doing it “right.” It’s about creating a simple, intuitive space where color feels inviting, not intimidating. Once you’ve done that, the real fun begins: water, pigment, paper – and a quiet moment that belongs entirely to you.

