Have you ever looked at your coneflowers and wondered what to do with those spiky seed heads? I felt the same way until I tried saving the seeds myself. It turned out to be simple, fun, and surprisingly rewarding.
If you want to fill your garden with more Echinacea, swap seeds with friends, or just save a little extra cash, this guide is for you.
I’ll walk you through why and when to collect seeds, how to do it step by step, and the best ways to store them.
Let’s roll up our sleeves and start growing together.
Why Collect Coneflower Seeds?
Coneflowers (Echinacea) are garden favorites for good reason. They bloom for months, bring in pollinators, and come back year after year.
Saving seeds lets you:
- Grow more plants without spending extra
- Share seeds with friends or local gardeners
- Support bees, butterflies, and birds
- Add more native plants to your space
- Keep local plant varieties alive and thriving
It’s also a great way to join community seed swaps or fill up Little Free Library boxes with something useful. Saving coneflower seeds doesn’t just help your garden; it supports your neighborhood, too.
When to Collect Coneflower Seeds
The best time to gather coneflower seeds is from late summer into early fall. That’s when the blooms are done and the seed heads start to dry out.
Look for these signs:
- The flower petals have fallen off
- The cone has turned brown or black
- It feels hard and a little prickly
- Birds start pecking at the heads
Collecting seeds at this stage gives you the best chance at healthy new plants next season. Wait too long, and the birds might beat you to it.
Steps on How to Collect Coneflower Seeds
Ready to get started? Here’s a simple process you can follow to collect and save coneflower seeds from your own garden.
Get these ready before you start:
- Gloves (cones are sharp)
- Scissors or pruners
- Small knife (optional)
- Paper bags or trays for collecting heads
- Envelopes or glass jars for storage
- Labels and markers
1. Prepare the Plant
First, you’ll want to pick the coneflower heads that are completely dry and have already dropped their petals. The cone should feel firm and be dark in color.
Make sure you skip any heads that show signs of mold, rot, or insect damage. Those won’t give you good seeds.
If it’s been rainy, I suggest waiting a day or two for everything to dry out. You definitely want to avoid storing anything that’s damp, as that could lead to mold later on.
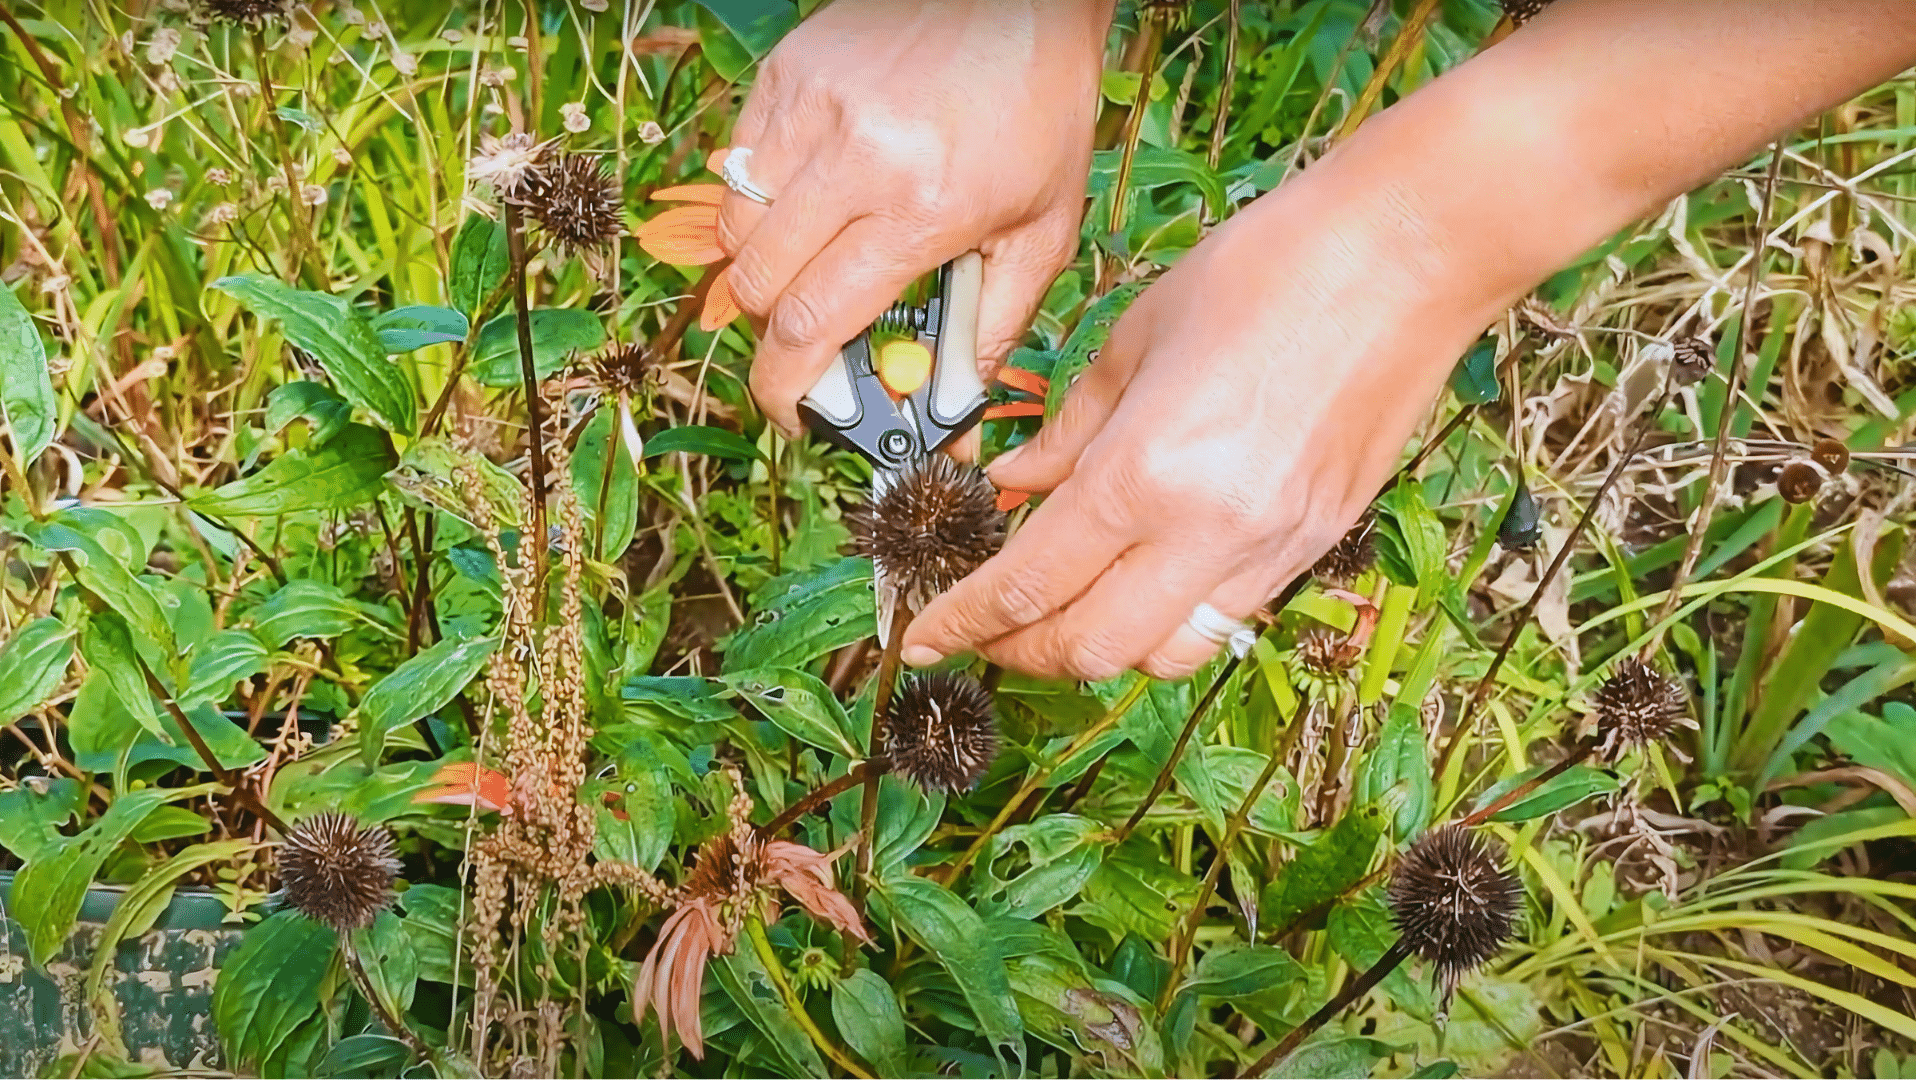
2. Cut and Collect Seed Heads

Use clean, sharp scissors or pruners to snip the stem about two to three inches below the seed head. This will give you a good grip for when you handle the seeds later.
Drop each seed head into a paper bag or spread them out in a shallow tray. Keep the layers thin so air can flow easily, which helps prevent mold.
Don’t forget to label the bags with the variety and date. This will save you from guessing later when you’re ready to plant or share the seeds.
3. Dry the Seed Heads
Spread your seed heads in a single layer on a tray, screen, or even a piece of cardboard. Find a spot indoors with good airflow and no direct sunlight, like a garage or spare room.
Let them dry for at least a week. If it’s humid, give them more time. Be sure to check every few days. When the heads feel crisp and break apart easily, they’re ready for the next step.
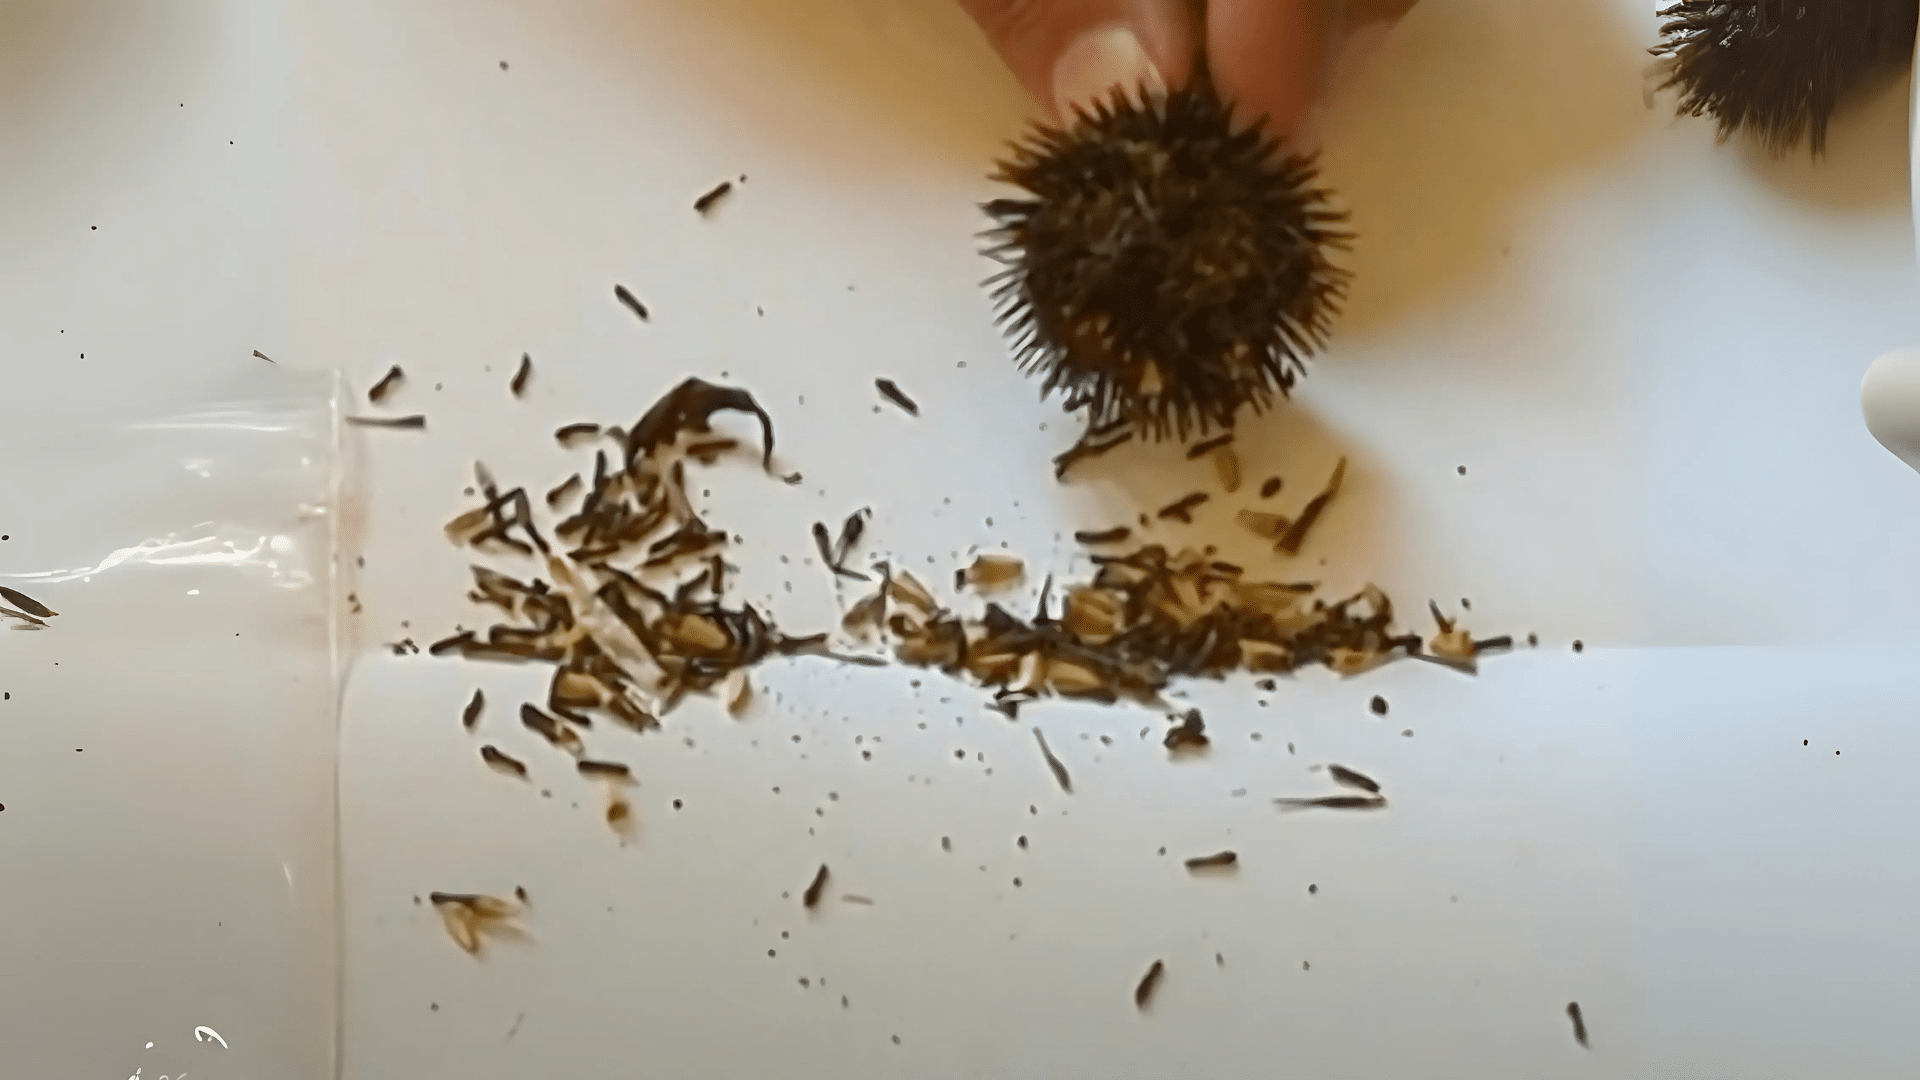
4. Extract the Seeds
Put on a pair of gloves first; those cones can be sharp. Gently pull apart each seed head and loosen the seeds from the center.
Look for small, dark seeds mixed in with lighter chaff. Tap or shake the cone over a tray to catch everything. Take your time and work slowly so you don’t lose any seeds along the way.
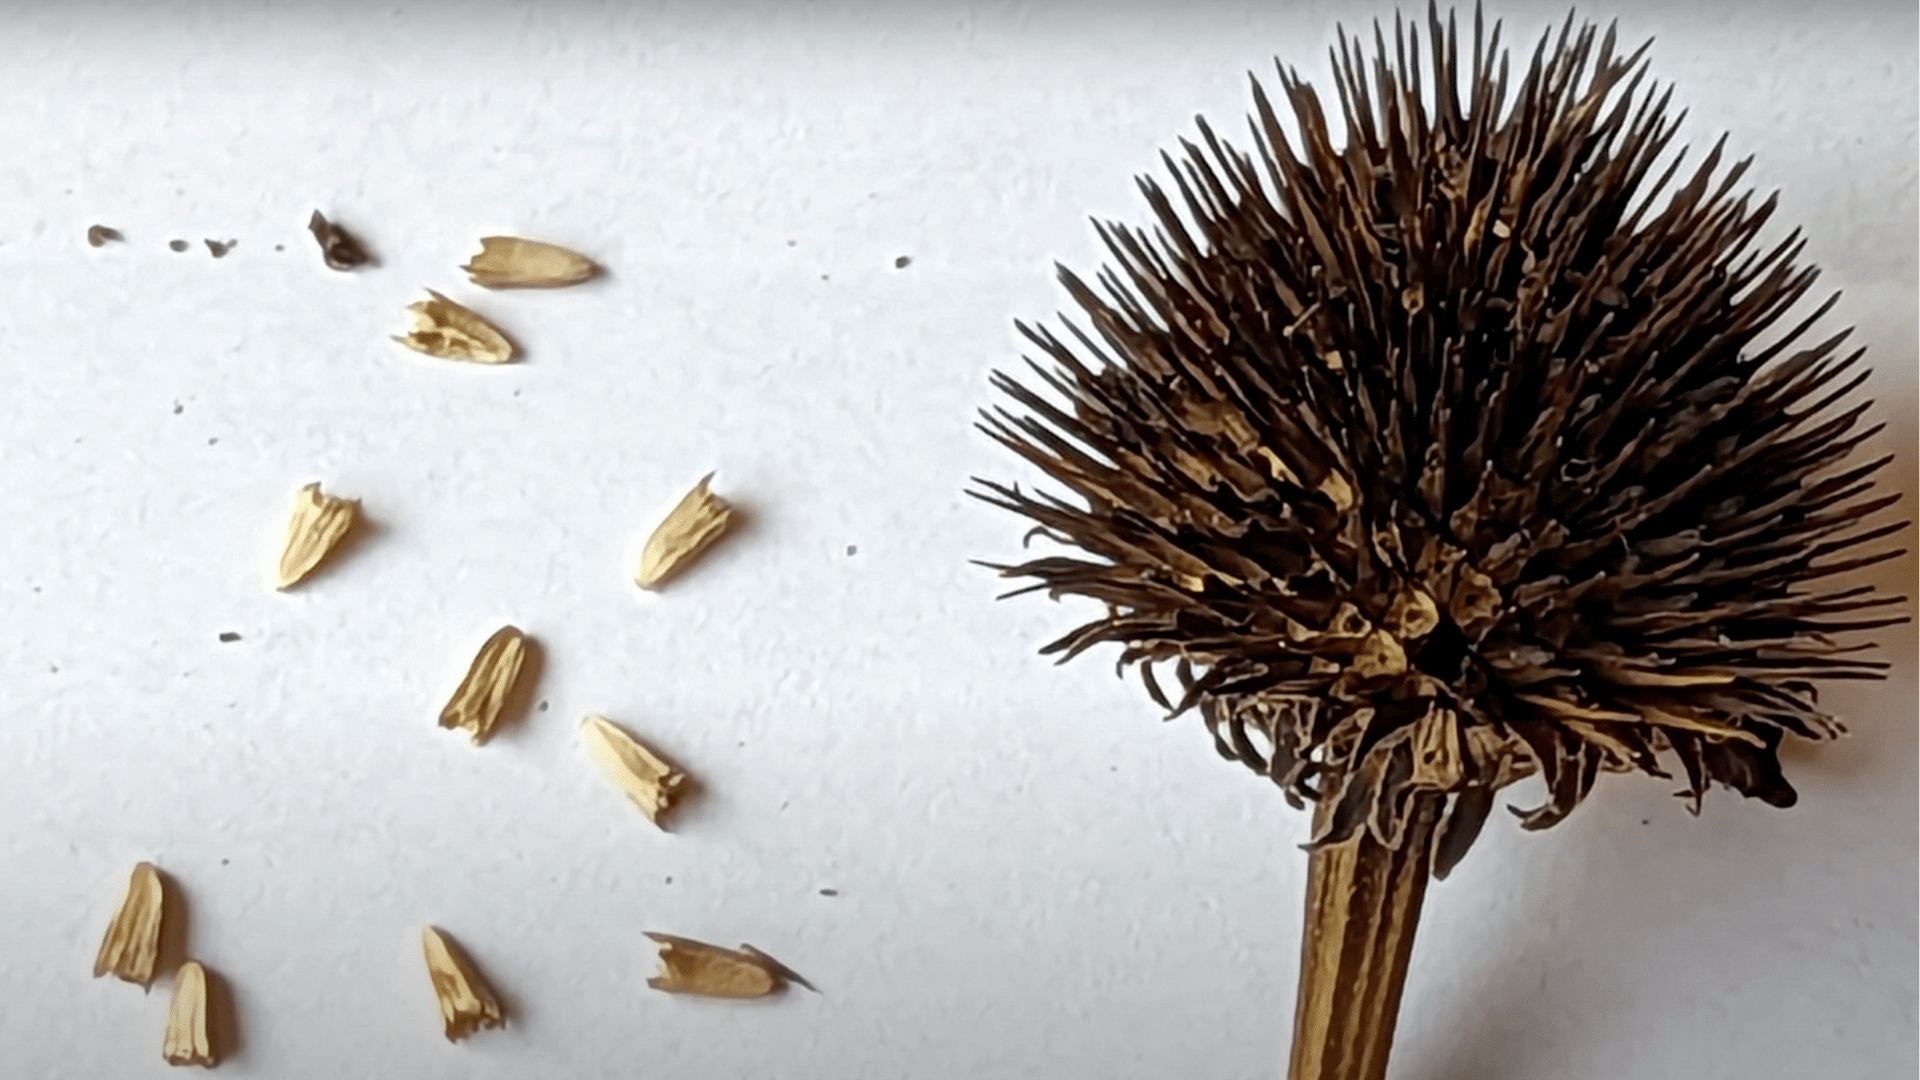
5. Clean and Sort Seeds
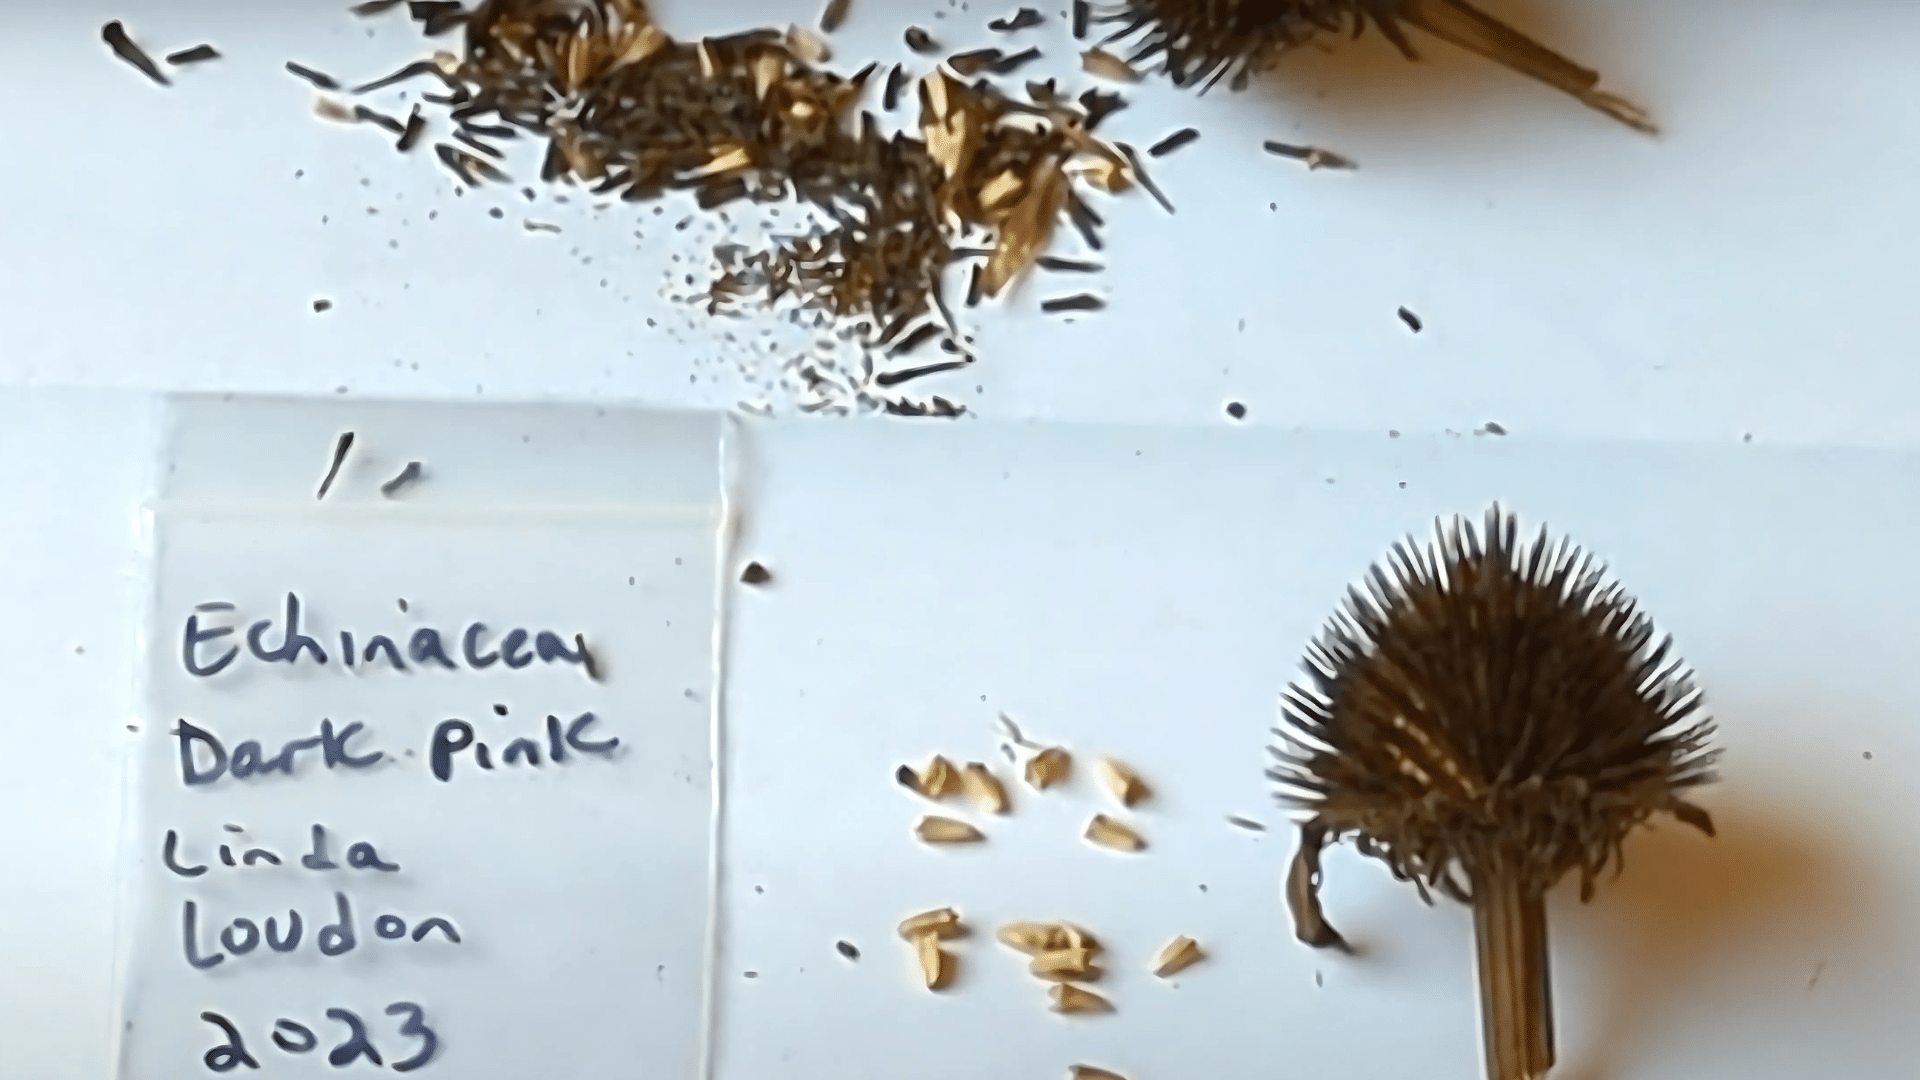
Go through the collected seeds and remove any that are light, shriveled, or damaged. Brush away the chaff and leftover plant bits. You can toss the extras in your compost pile.
Healthy seeds will feel firm and look full. Set those aside in a clean spot, and make sure everything is dry before you store or plant them.
Check out this YouTube video for help:
Tips for Successful Collection and Storage
- Only collect seeds once the heads are totally dry.
- Never store seeds if you feel any dampness, they’ll mold quickly.
- Don’t use plastic containers unless seeds are completely dry.
- Try a quick germination test before planting big batches.
- Collecting too soon (immature seeds won’t sprout)
- Not drying heads long enough (mold risk)
- Forgetting to label (easy to mix up varieties)
Conclusion
Saving coneflower seeds doesn’t take fancy tools or expert skills, just a little time, care, and patience.
You now know when to collect them, how to dry and clean them, and the best ways to store them so they stay fresh.
Each step brings you closer to strong, healthy plants for seasons to come. If you’re looking for more gardening ideas or want tips on growing other native flowers, be sure to check out the other blogs.
Feel free to share your own seed-saving stories or questions in the comments. I’d love to hear what’s blooming in your yard.
Let’s keep growing together, one seed at a time.