It’s the time of the holidays, and Christmas is near, which means it’s time to decorate your home and make it shine bright.
Everyone loves this tradition, but let’s be honest, most of us get lazy when it comes to hanging Christmas lights.
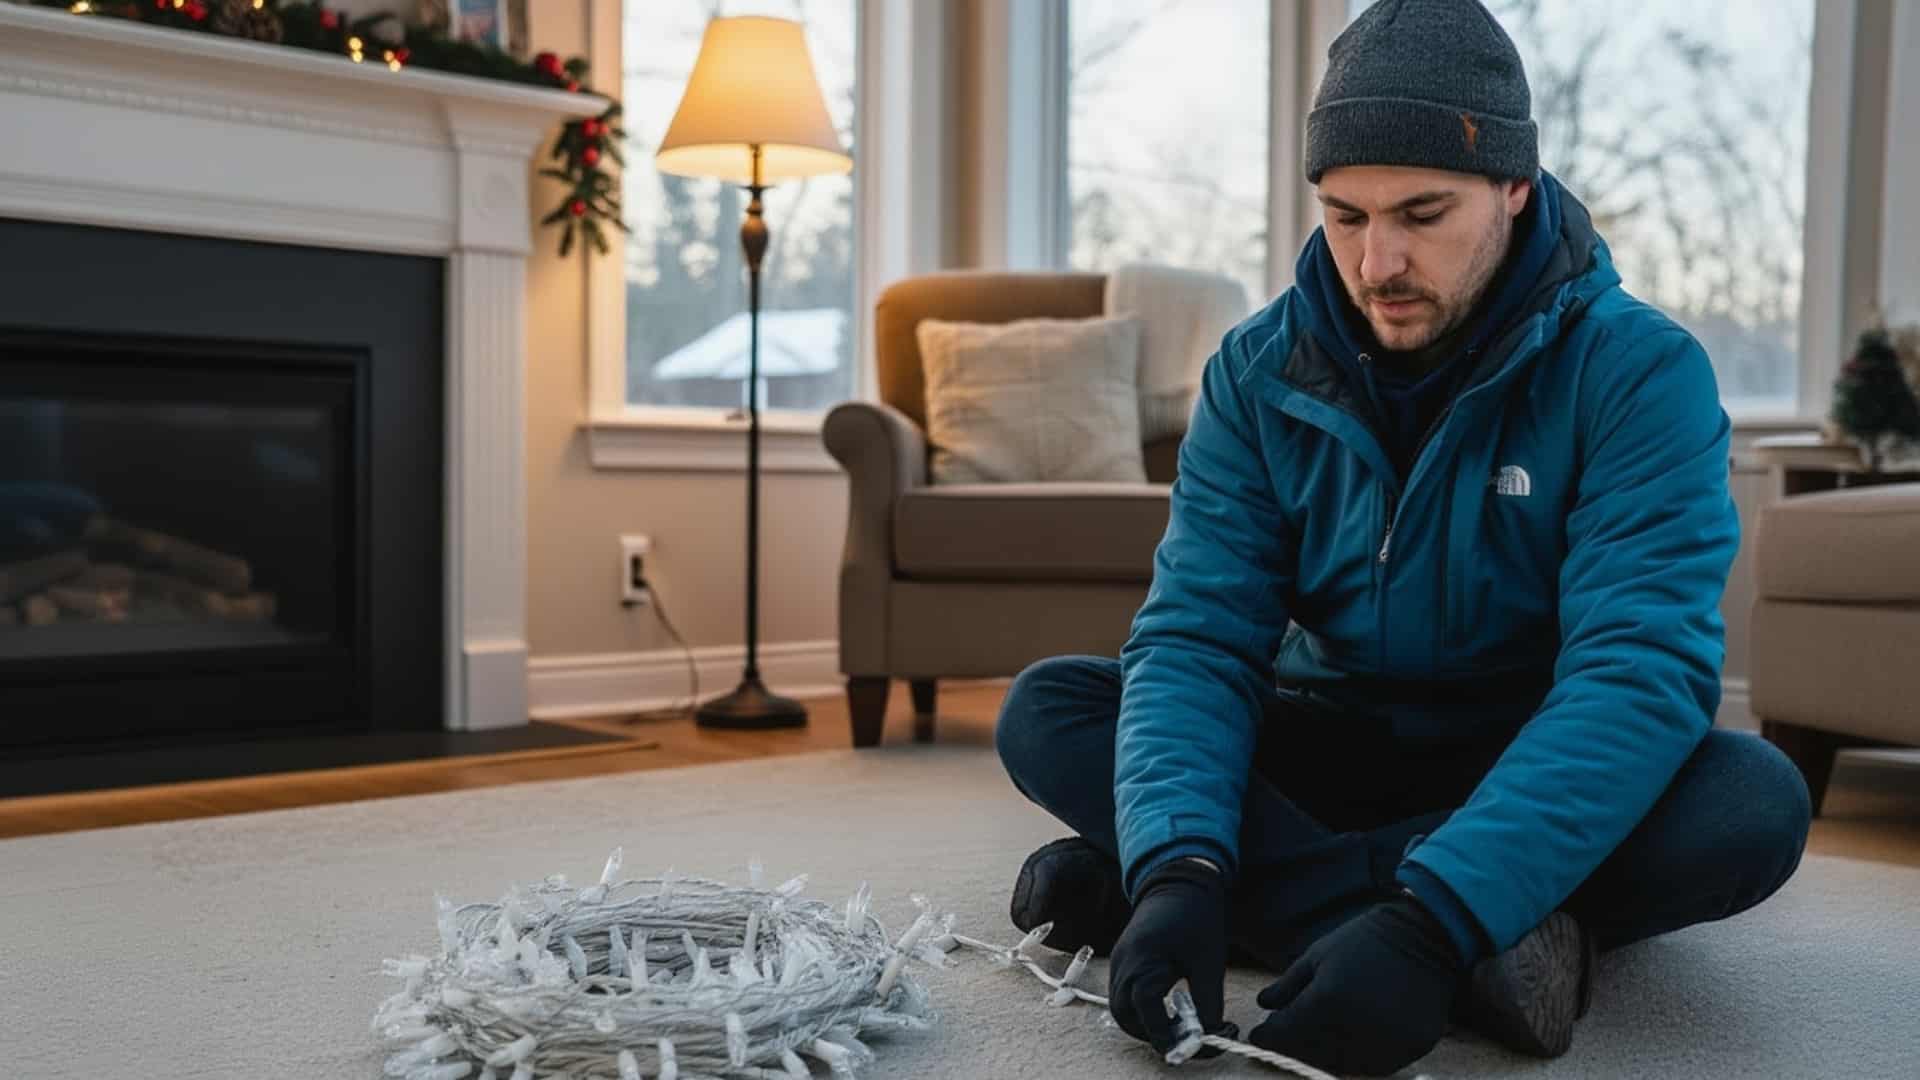
I’ve been there too, standing on the roof with tangled lights while my family watches from below. It’s exciting but also tiring and sometimes even risky.
That’s why I’m here to help you make it easier and safer. In this guide, I’ll share expert tips, practical tricks, and the best way to hang Christmas lights efficiently.
You’ll learn how to plan, choose, install, and maintain them so your home looks brighter, safer, and better than ever this Christmas season.
How to Choose the Best Christmas Lights for Your Home?
Choosing the right Christmas lights is all about matching your home’s style, space, and setup. Start by checking safety and durability.
- Only use lights rated for outdoor use with UL or ETL labels. Measure your rooflines and trees before buying so you know exactly how much you’ll need.
- Go for energy-efficient LEDs to save in the long term and lower your bills.
- Always check compatibility too, make sure your lights can connect safely in series, and use outdoor-rated extension cords and timers.
Now, I get it, choosing between all these light types can sound confusing. So let’s break down the most common ones and where they work best.
Types of Christmas Lights
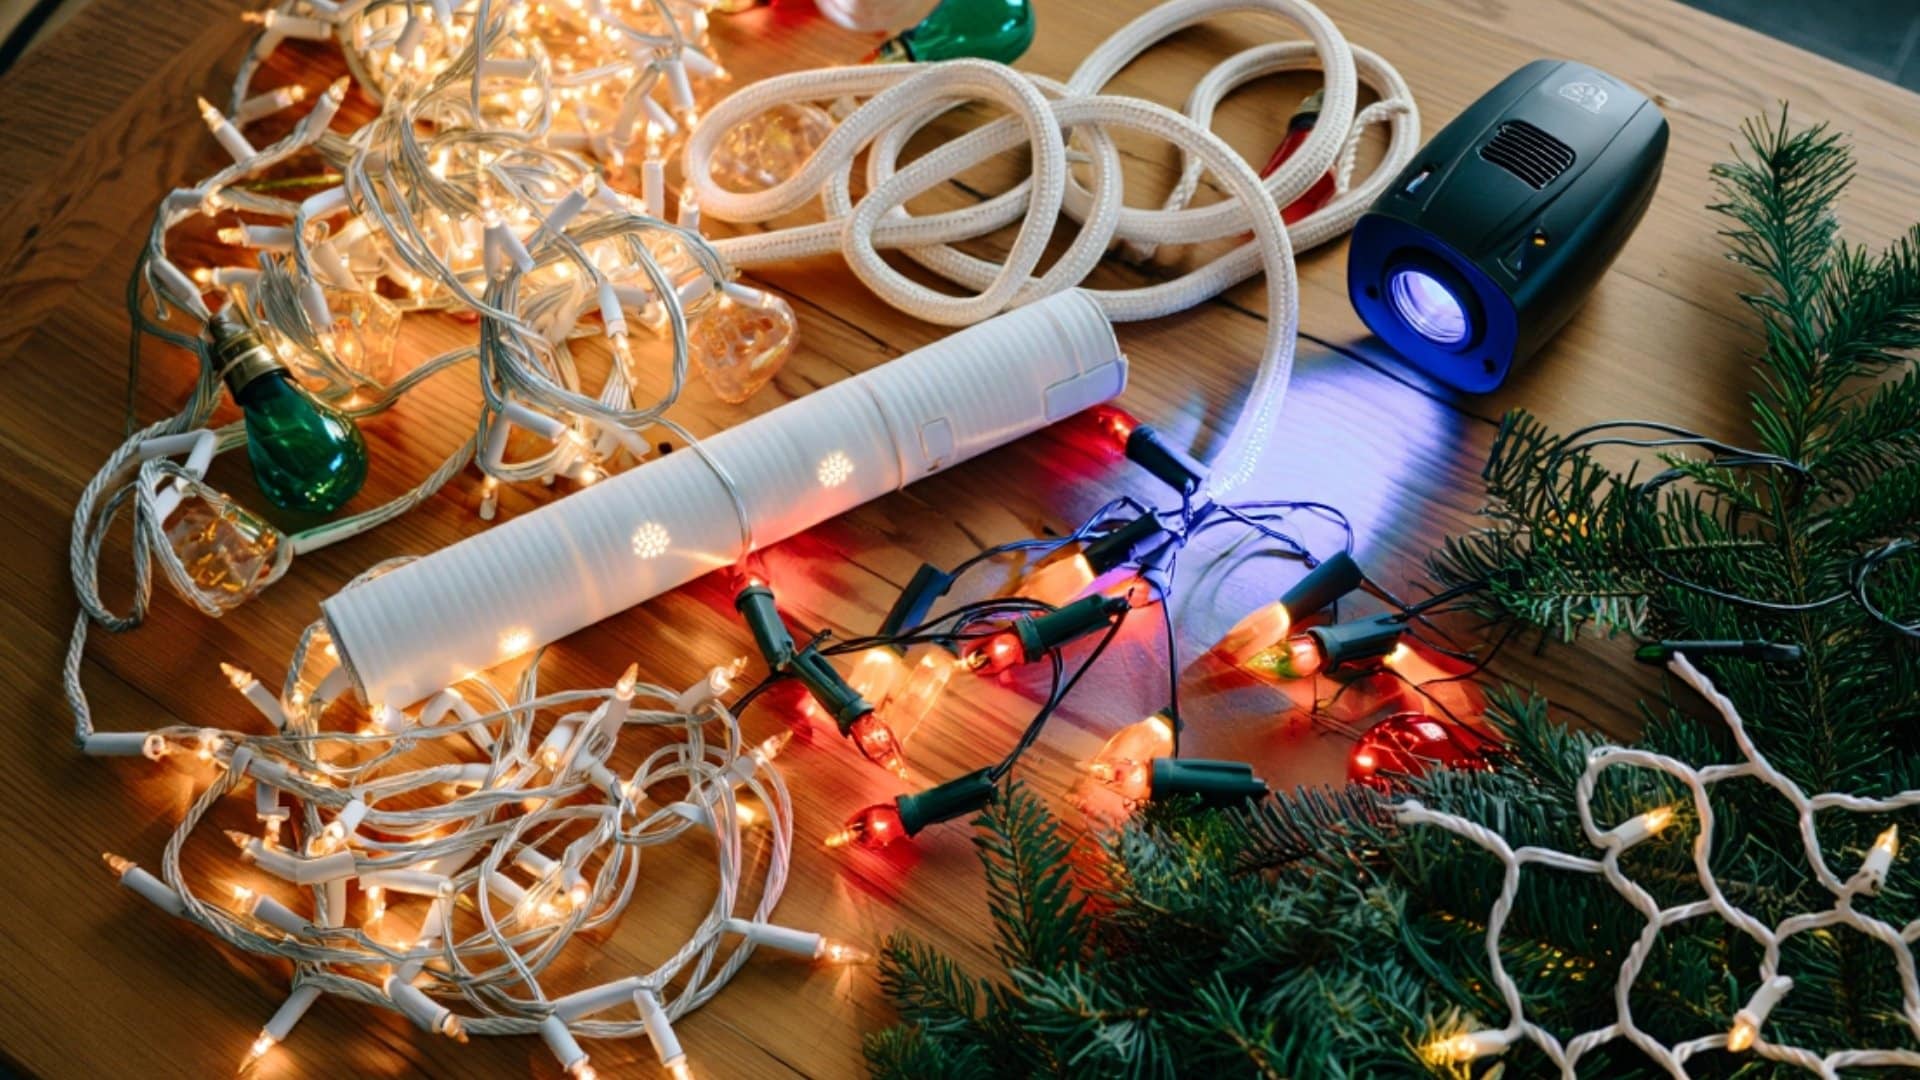
Each type of Christmas light has its own look, purpose, and best placement around your home.
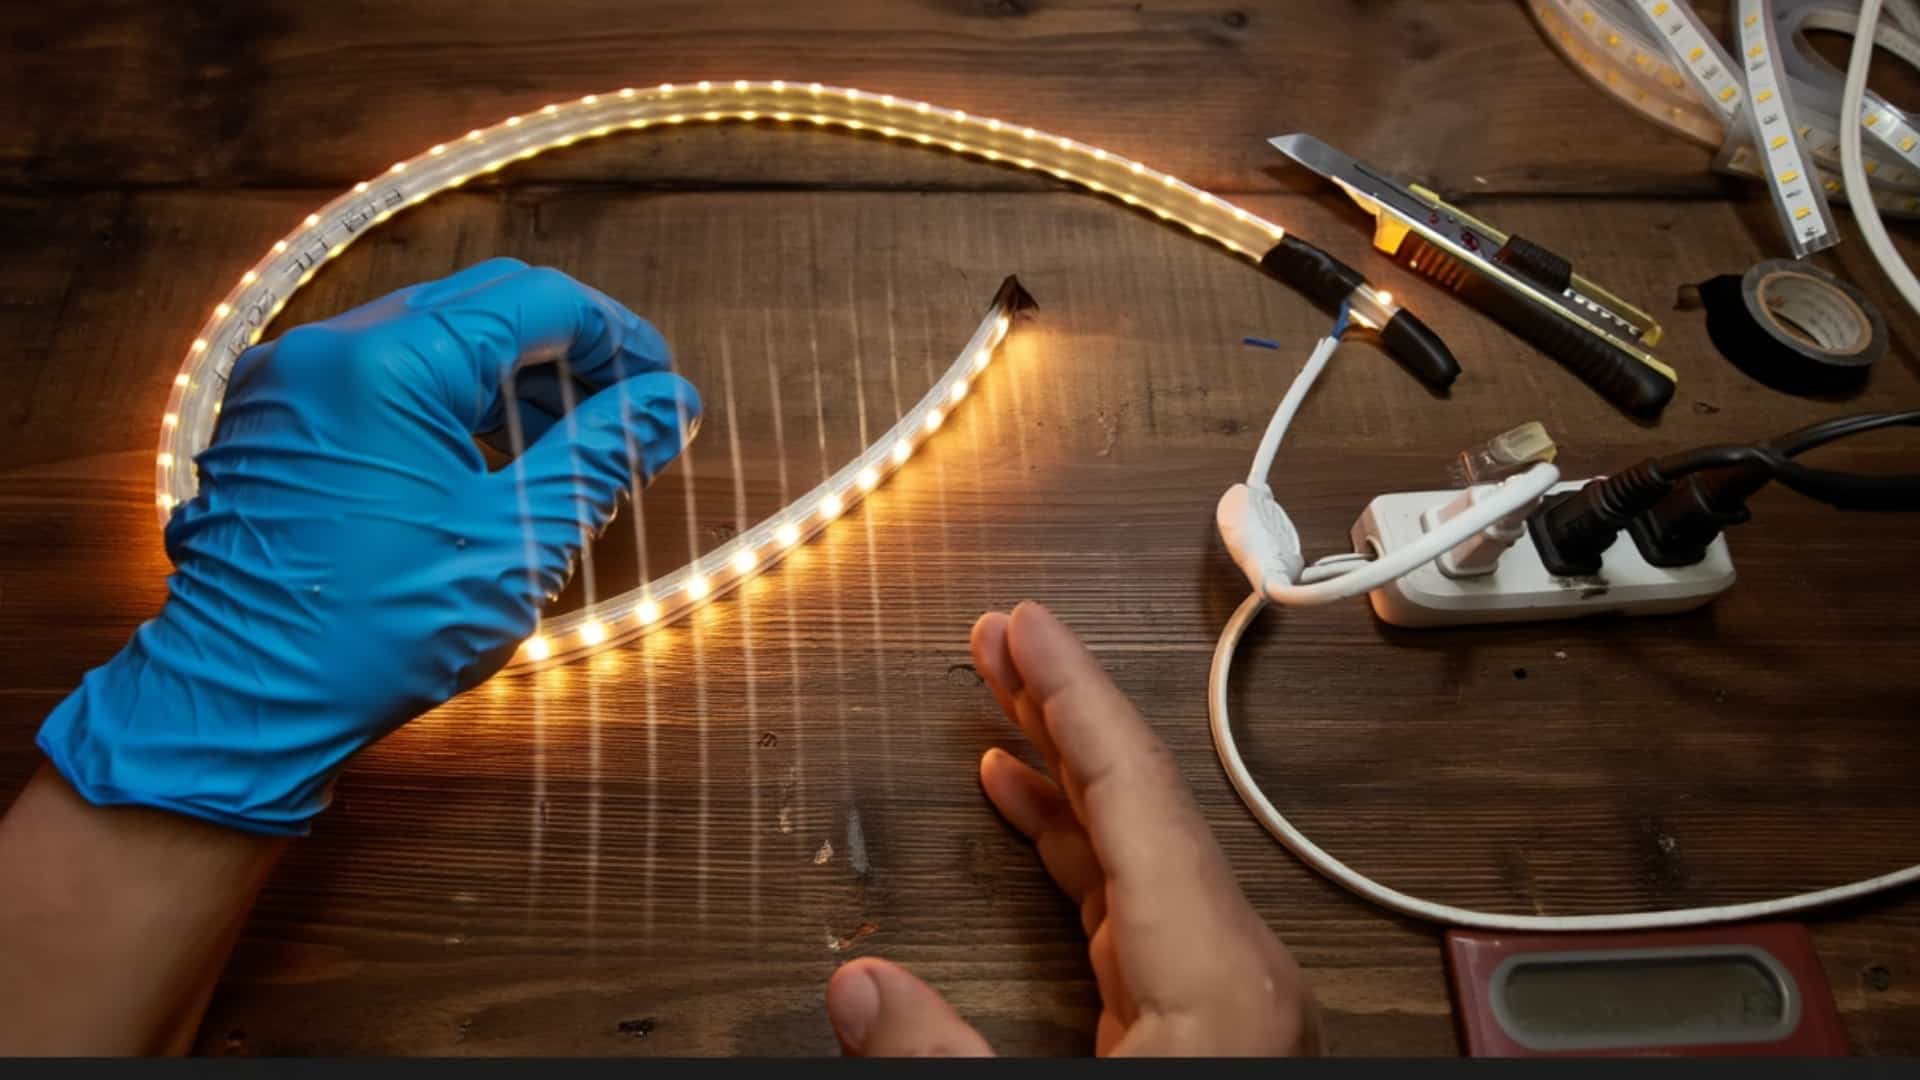
- LED Lights: Energy-efficient, bright, and cool to the touch; best for outdoor rooflines and large displays.
- Incandescent Lights: Warm, classic glow; great for indoor trees or cozy porch setups.
- String Lights: Simple and versatile for roof edges, windows, or tree wrapping.
- Icicle Lights: Perfect for eaves and porch edges for that drippy winter effect.
- Net Lights: Quick coverage for bushes and hedges.
- Large Bulb Lights (C7/C9): Bold, vintage look for rooflines or large trees.
- Fairy or Micro-LEDs: Soft and delicate, best for wreaths, mantels, or indoor décor.
If your house is sleek and modern, go for cool-white LEDs for a crisp finish.
Traditional homes look stunning with warm whites or colorful C9 bulbs. Stick with one tone for style, or mix colors for a playful, family-style holiday glow.
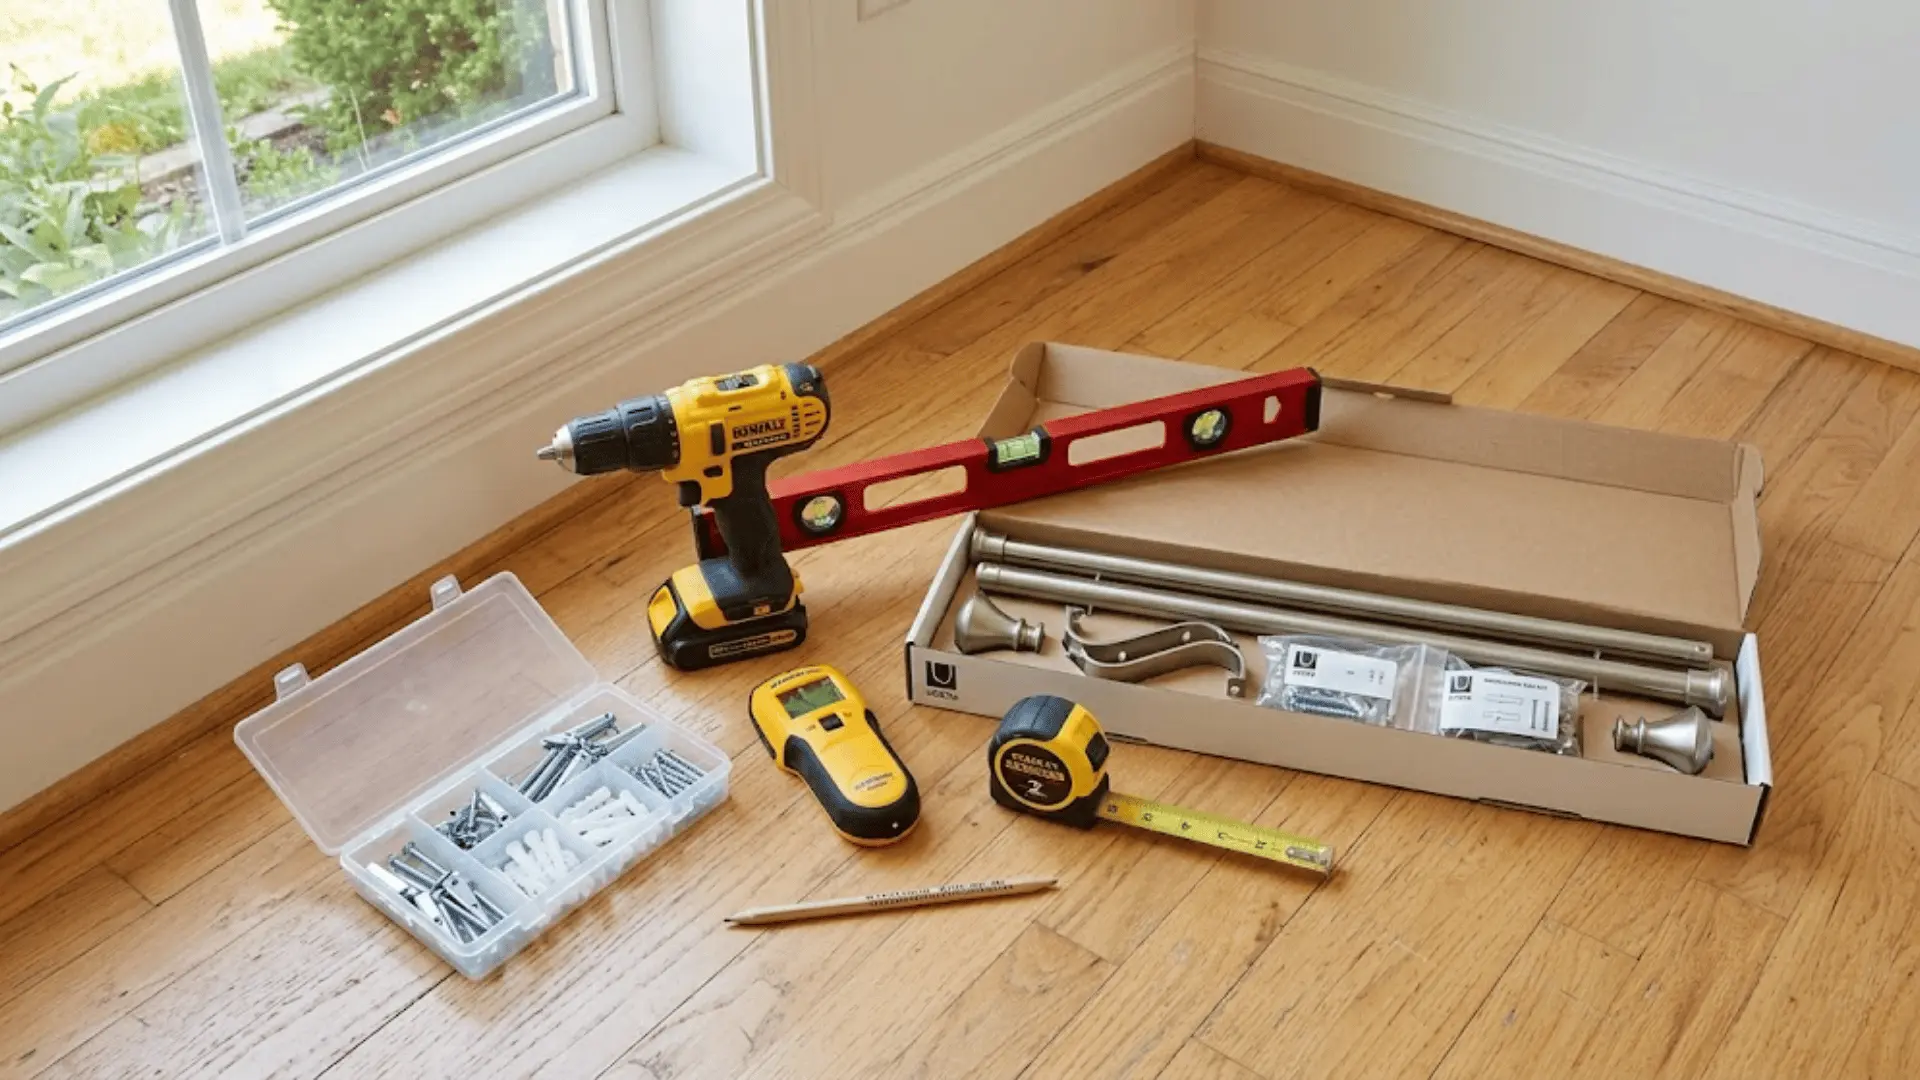
Tools and Materials Required for Hanging Christmas Lights
Before you start hanging your Christmas lights, it’s essential to have the right tools and materials ready.
Proper preparation saves time, ensures safety, and helps you achieve a clean, professional-looking setup from the very first try.
| Tools | Materials |
|---|---|
| Ladder | C9/C7 empty-socket light line + retrofit bulbs |
| Measuring tape | 18-2 SPT-1 zip cord |
| Diagonal cutters | Male & female vampire plugs + inline connectors |
| Channel-lock pliers | Timer + outdoor extension cords |
| Mallet | Flex or circular clips |
| Hot glue gun | Electrical tape + socket caps |
With these basic tools and materials in place, you’ll be fully equipped to install your lights efficiently and safely, setting the stage for a smooth, hassle-free decorating process.
The Best Way to Hang Christmas Fairy Lights
Installing Christmas lights the right way comes down to preparation, precision, and patience.
I’ve spent years refining this process through thousands of installations, and here’s exactly how you can get it right the first time.
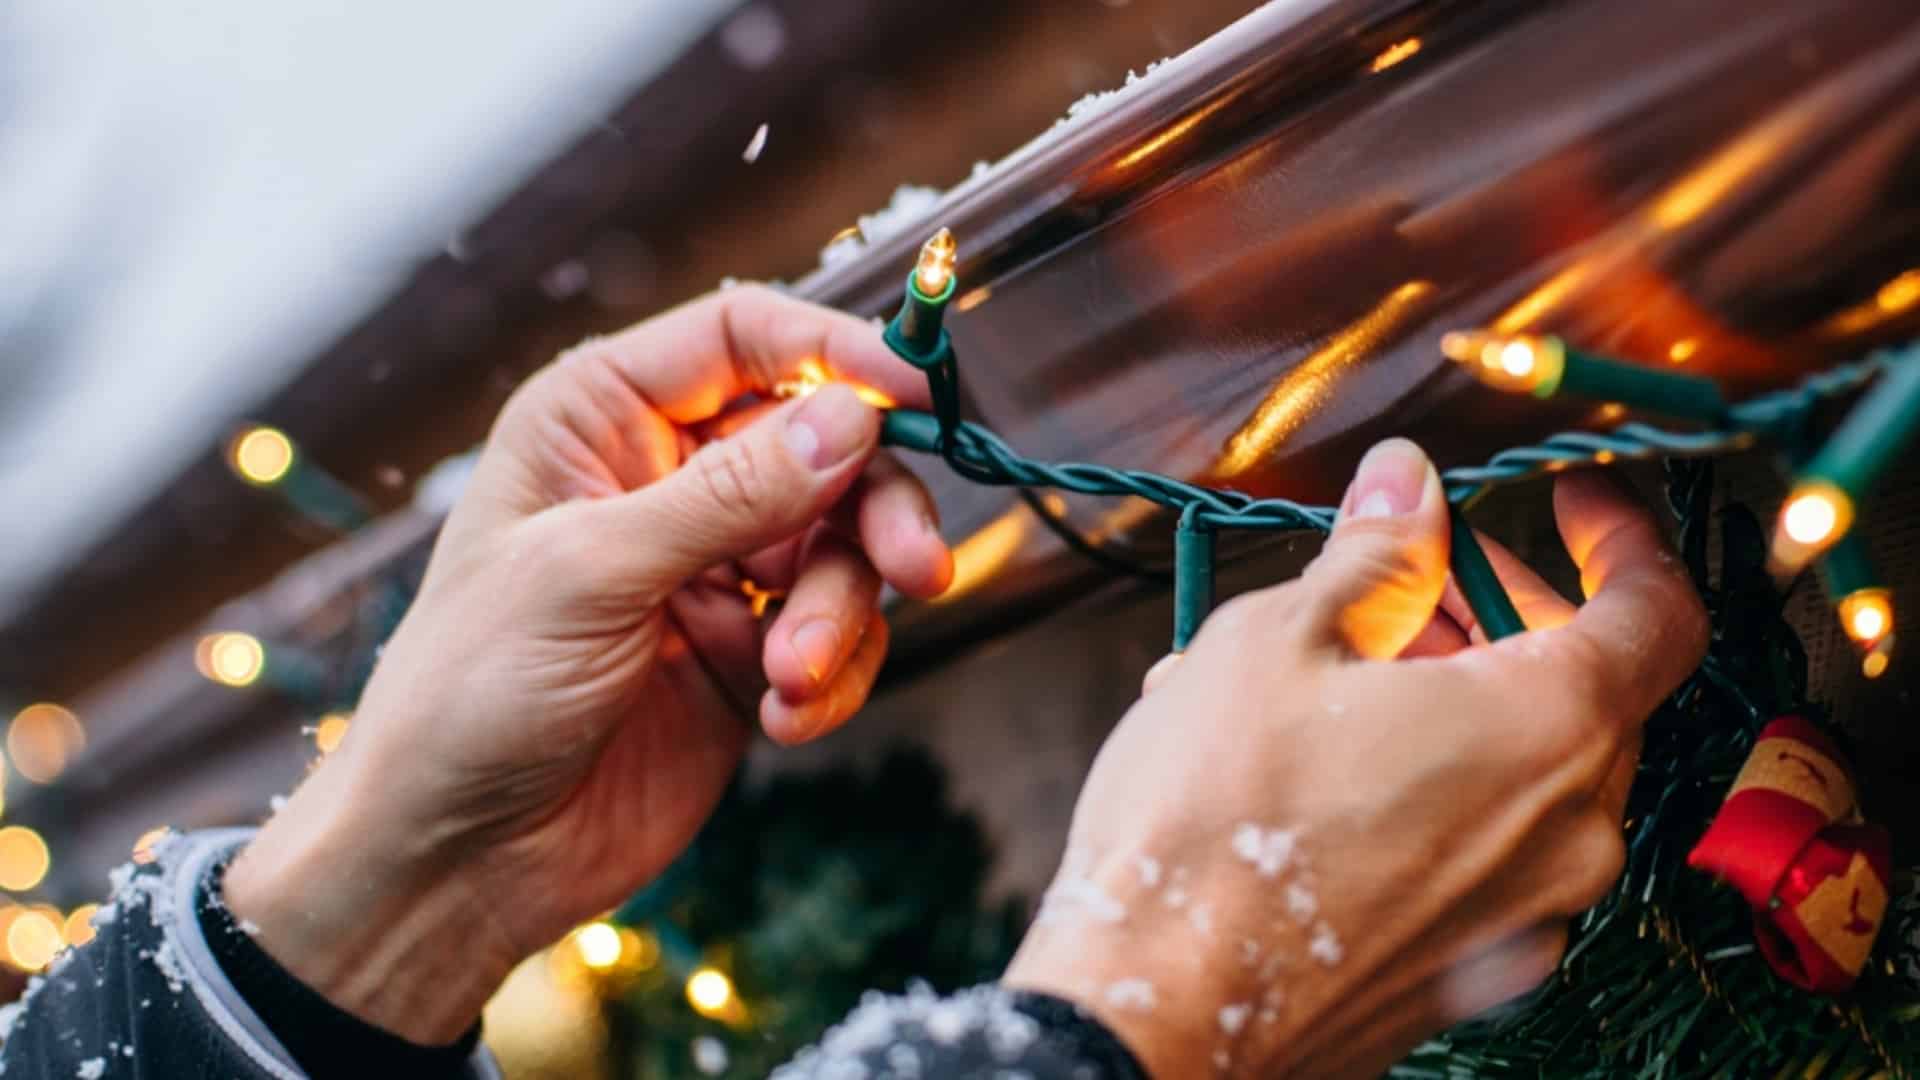
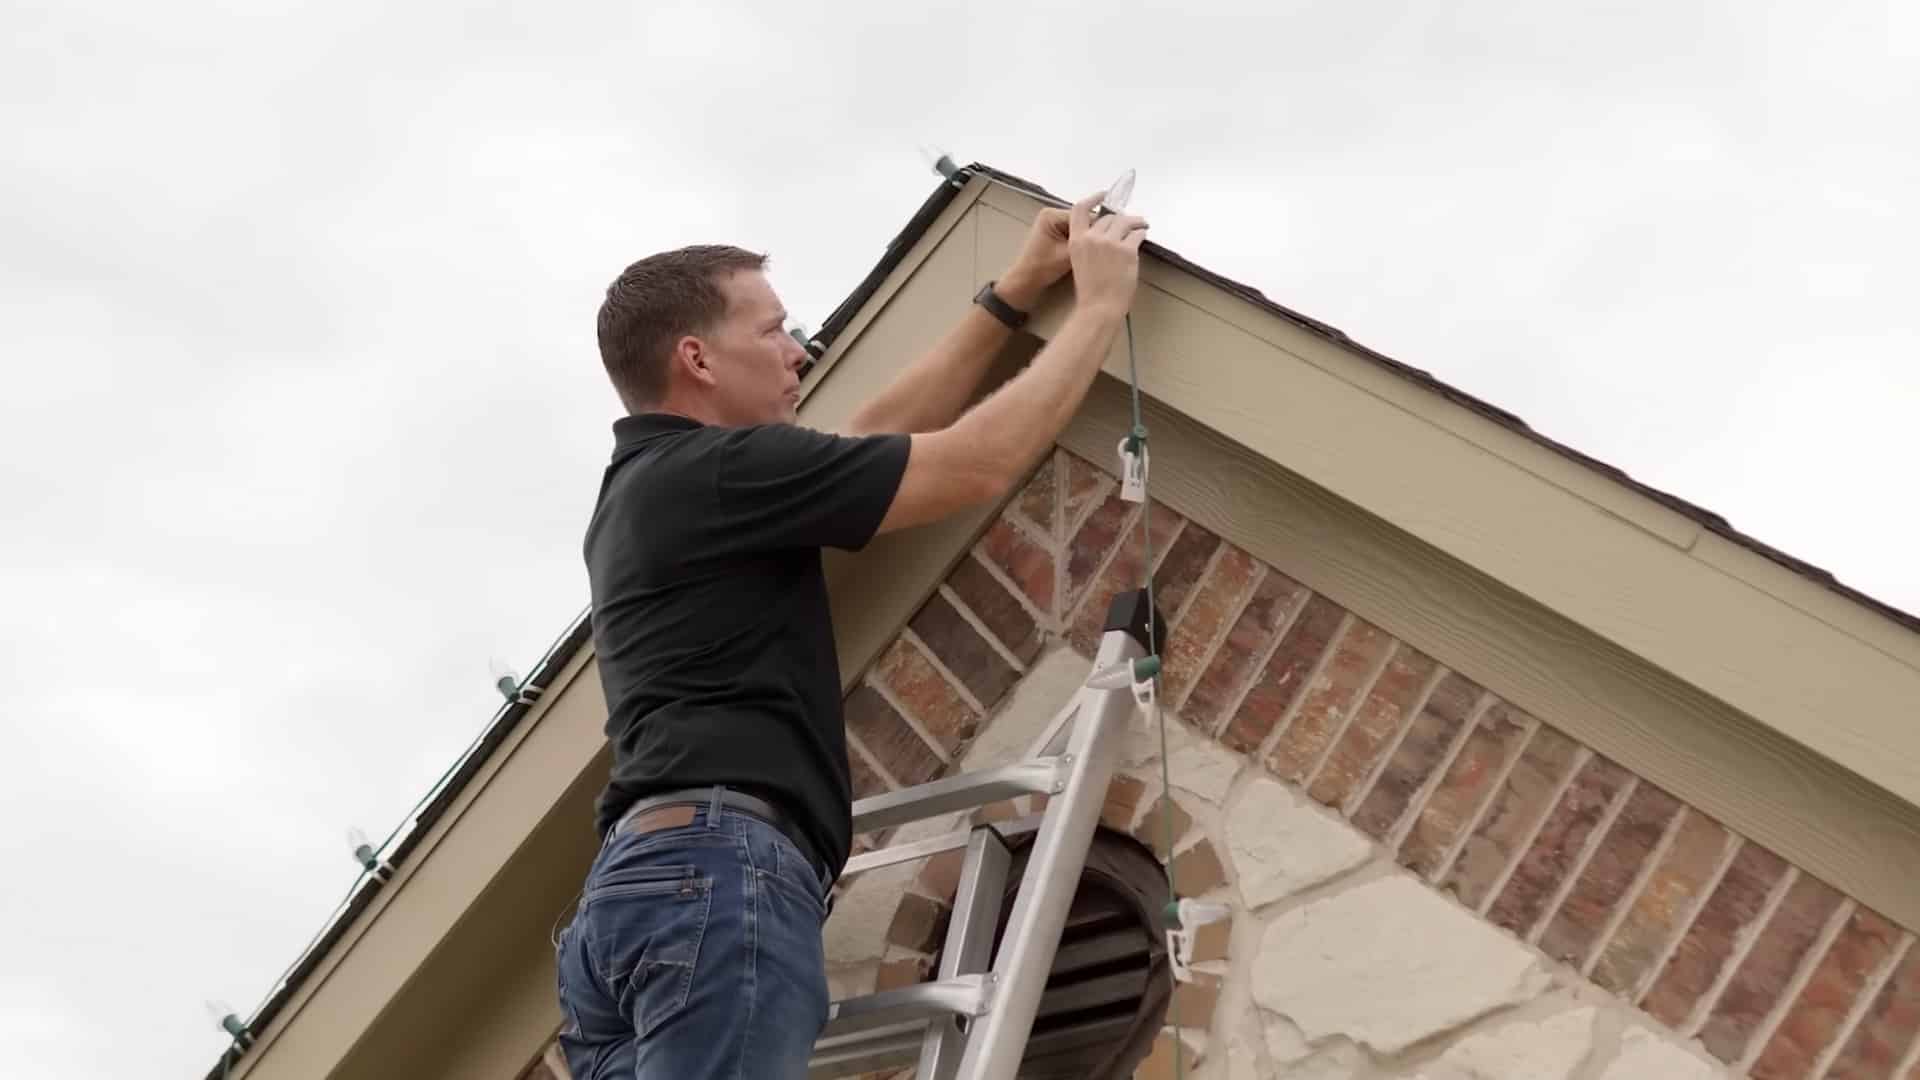
Step 1: Prepare and Prioritize Safety
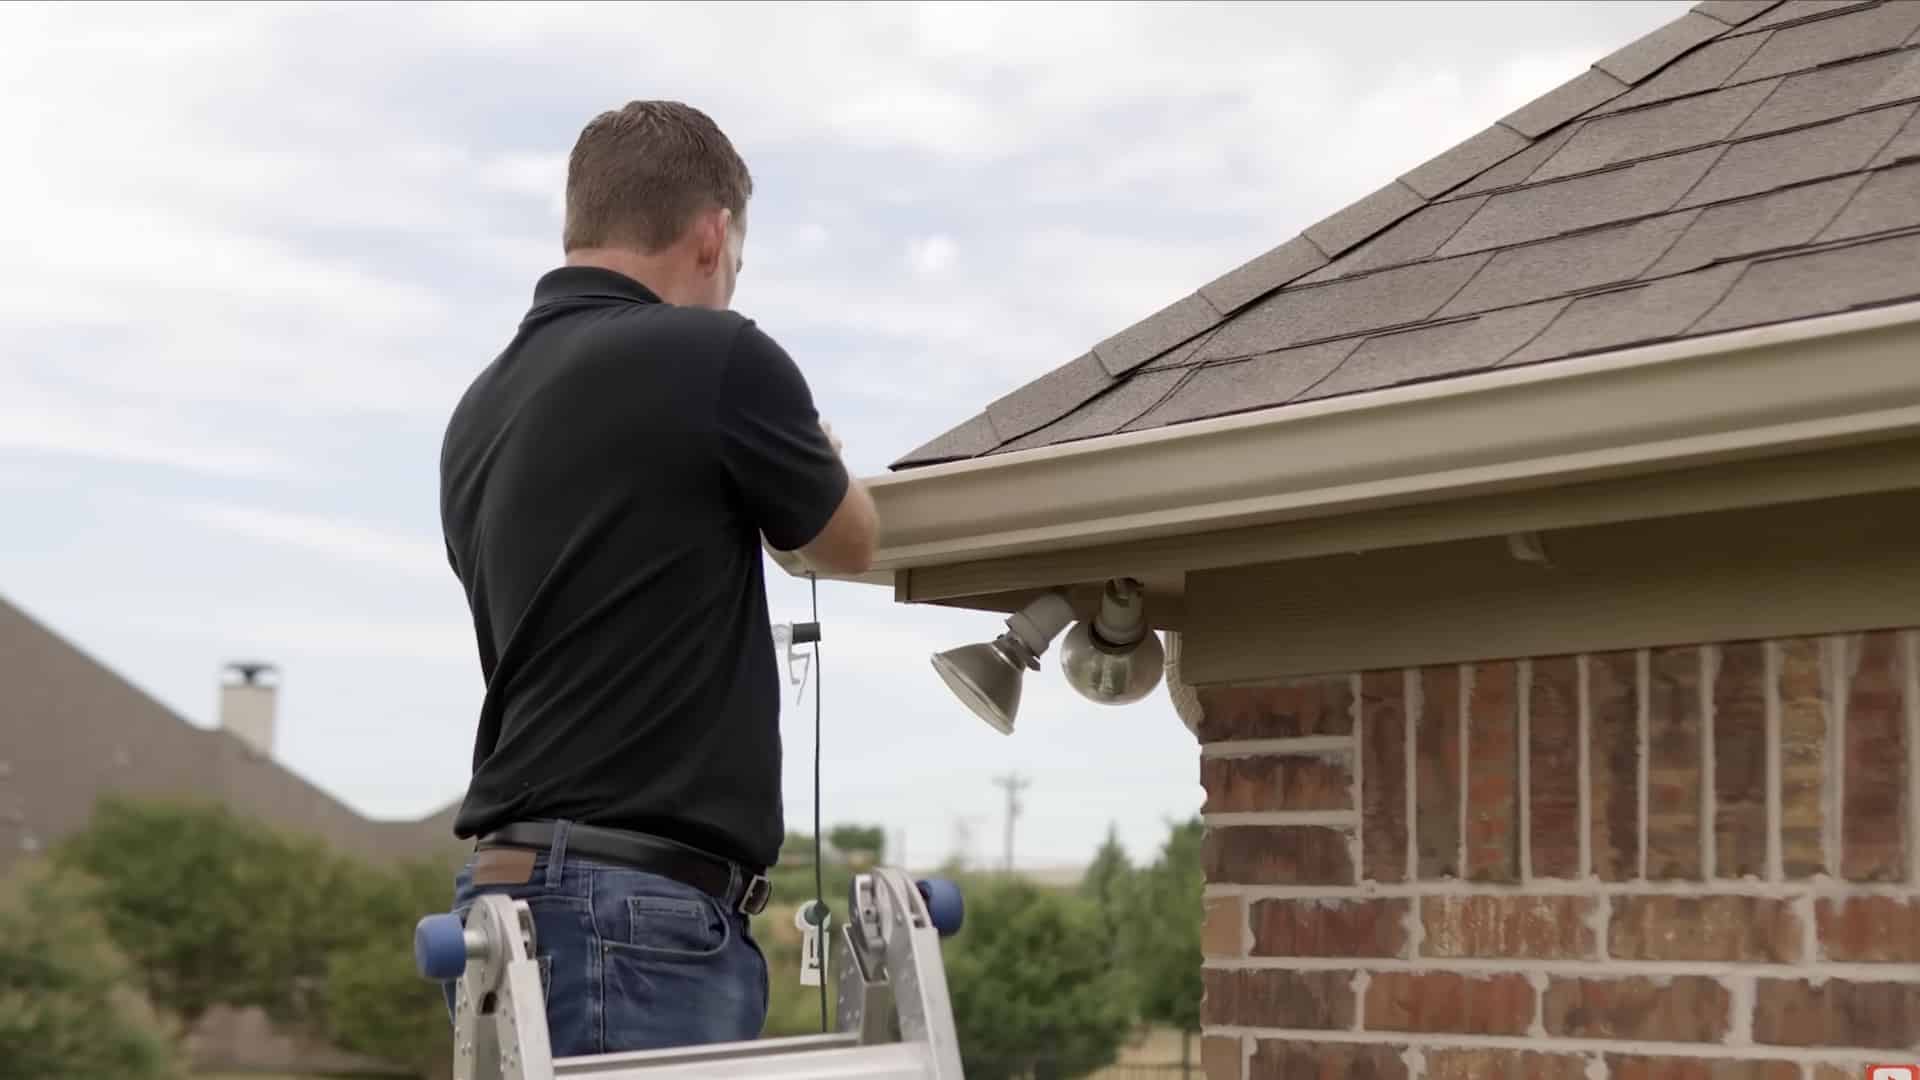
Before anything else, make sure your workspace is safe and organized. Use a sturdy ladder on level ground, wear proper shoes, and have a helper nearby if possible.
Check weather conditions and daylight before starting, and keep tools within reach to avoid risky movements.
A well-prepared setup not only keeps you safe but also helps the entire process run more smoothly from start to finish.
Step 2: Choose the Right Lights and Hardware
Select professional-grade lights and durable materials designed for outdoor use.
C9 or C7 bulbs work best for rooflines, while quality light lines allow full customization. Stick to consistent spacing; 9-12 inches creates an even, bright look.
Avoid low-quality strands that burn out quickly or tangle easily. A little investment in reliable materials always pays off with a cleaner, longer-lasting display.
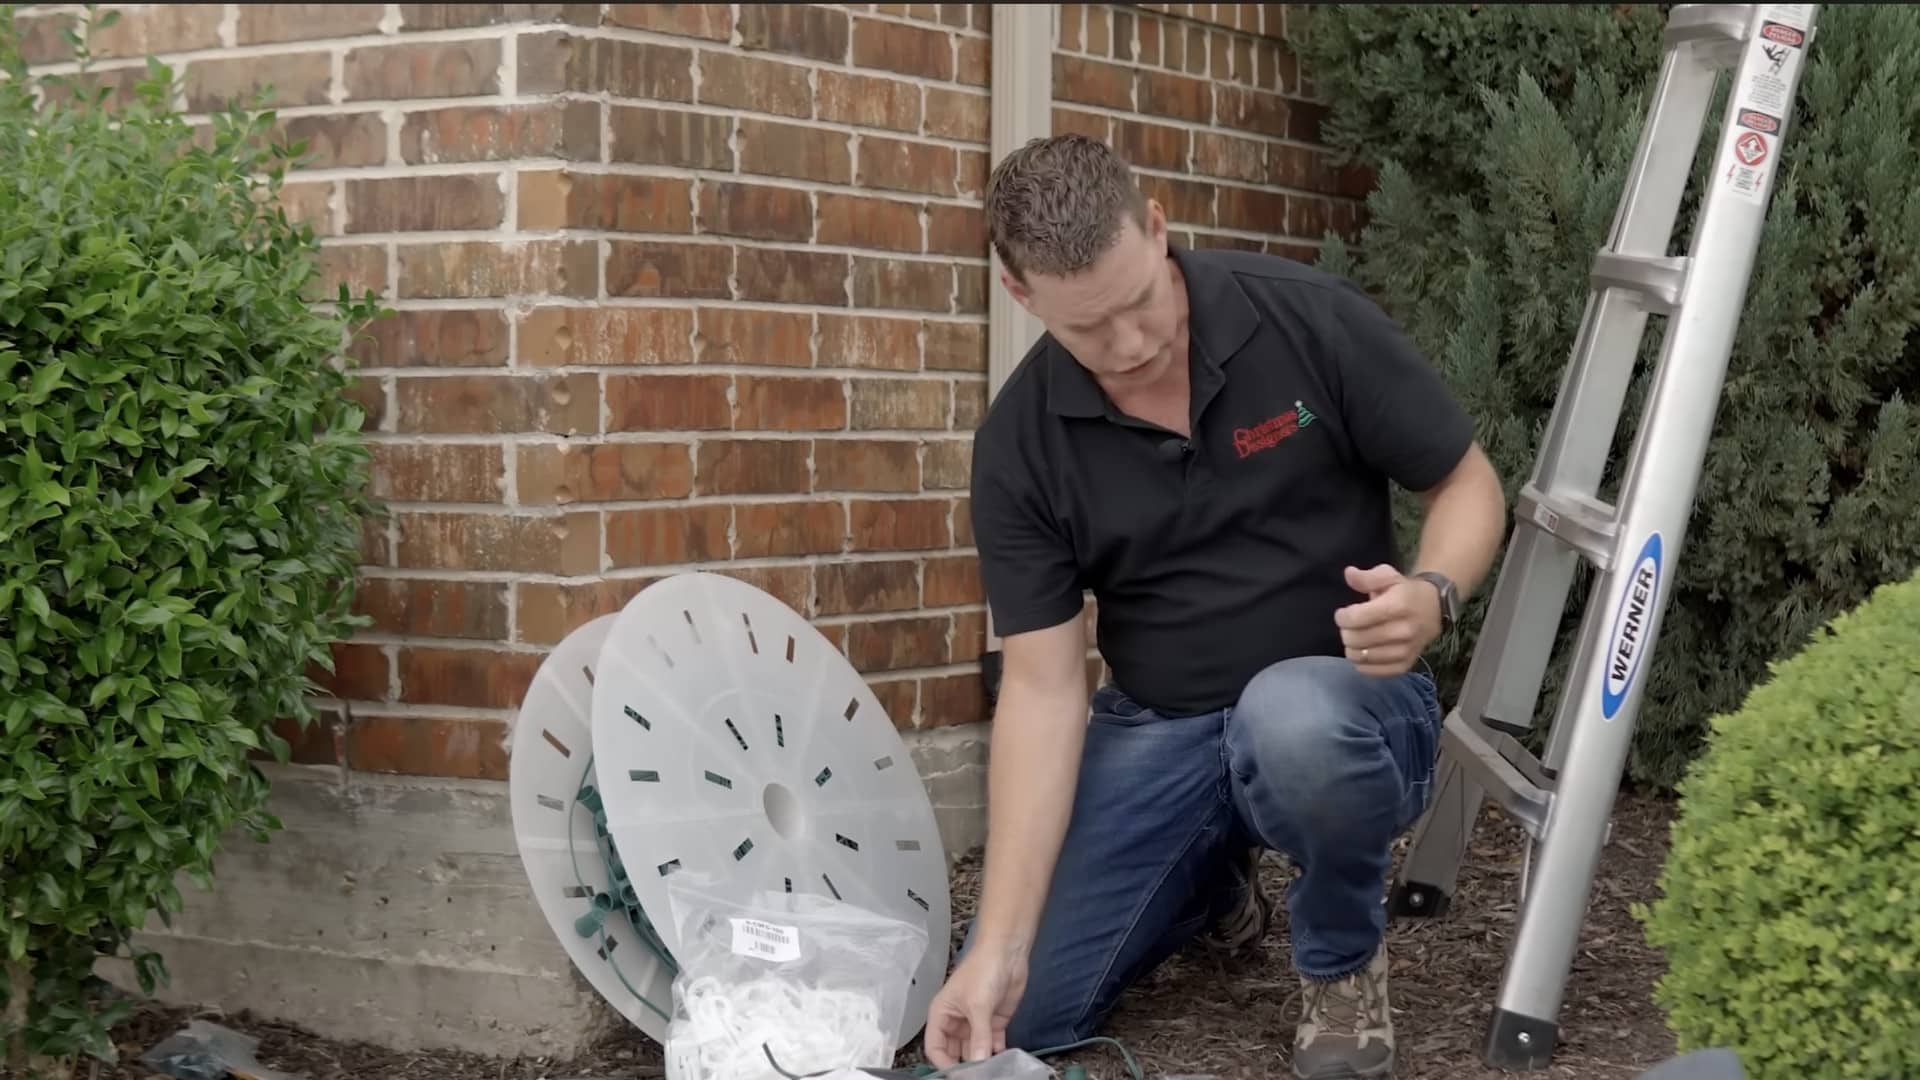
Step 3: Measure and Plan Your Layout

Measure every section where you’ll hang lights, including gutters, arches, and peaks.
Mapping out your layout prevents awkward gaps or uneven sections once installed. Mark key points like corners and transitions so spacing remains uniform throughout.
This small step ensures your light run looks balanced and symmetrical, which makes a huge difference when the display is turned on at night.
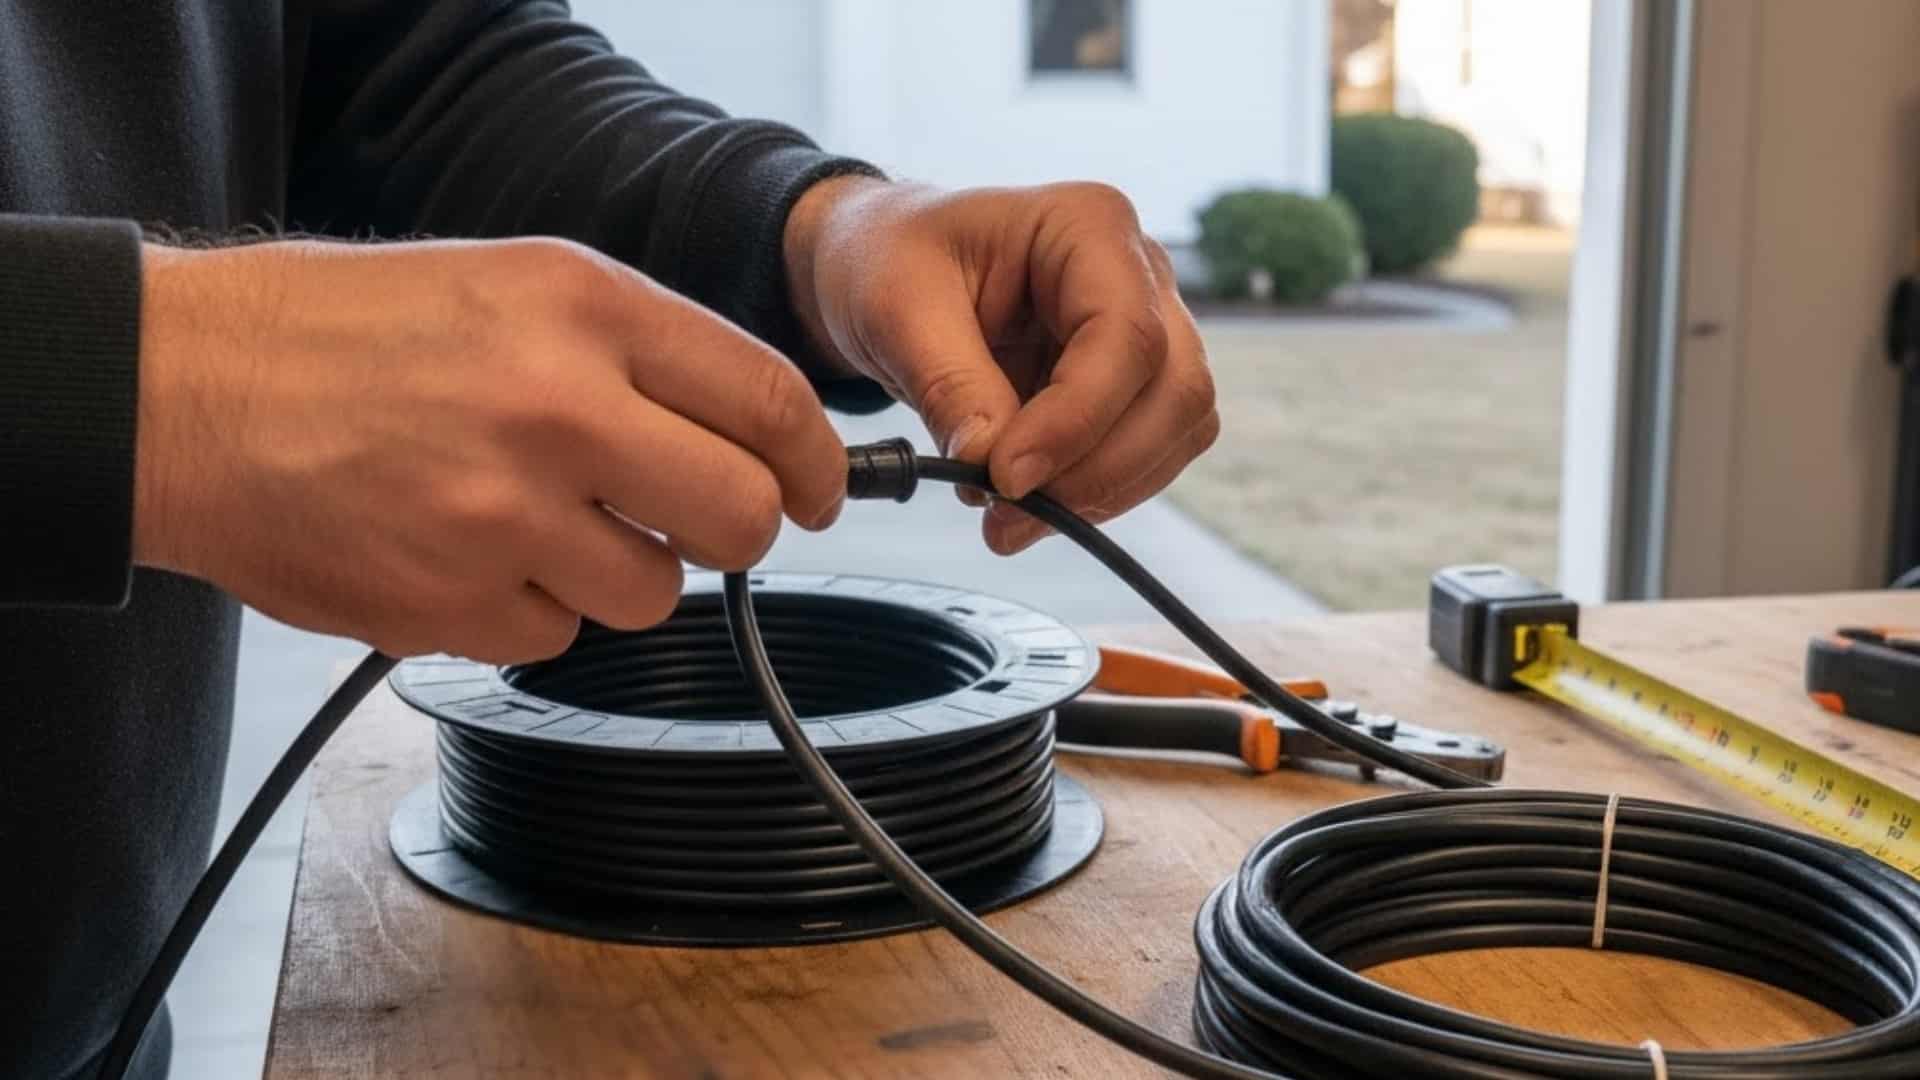
Step 4: Build and Customize Your Light Lines
Use bulk light line and vampire plugs to create sections that perfectly fit your home’s dimensions.
Cut to length and attach male or female plugs as needed, following the correct polarity for each connection. Keep track of your wiring orientation to avoid confusion later.
Custom-built lines not only look cleaner but also reduce clutter from unnecessary extensions or overlapping cords.
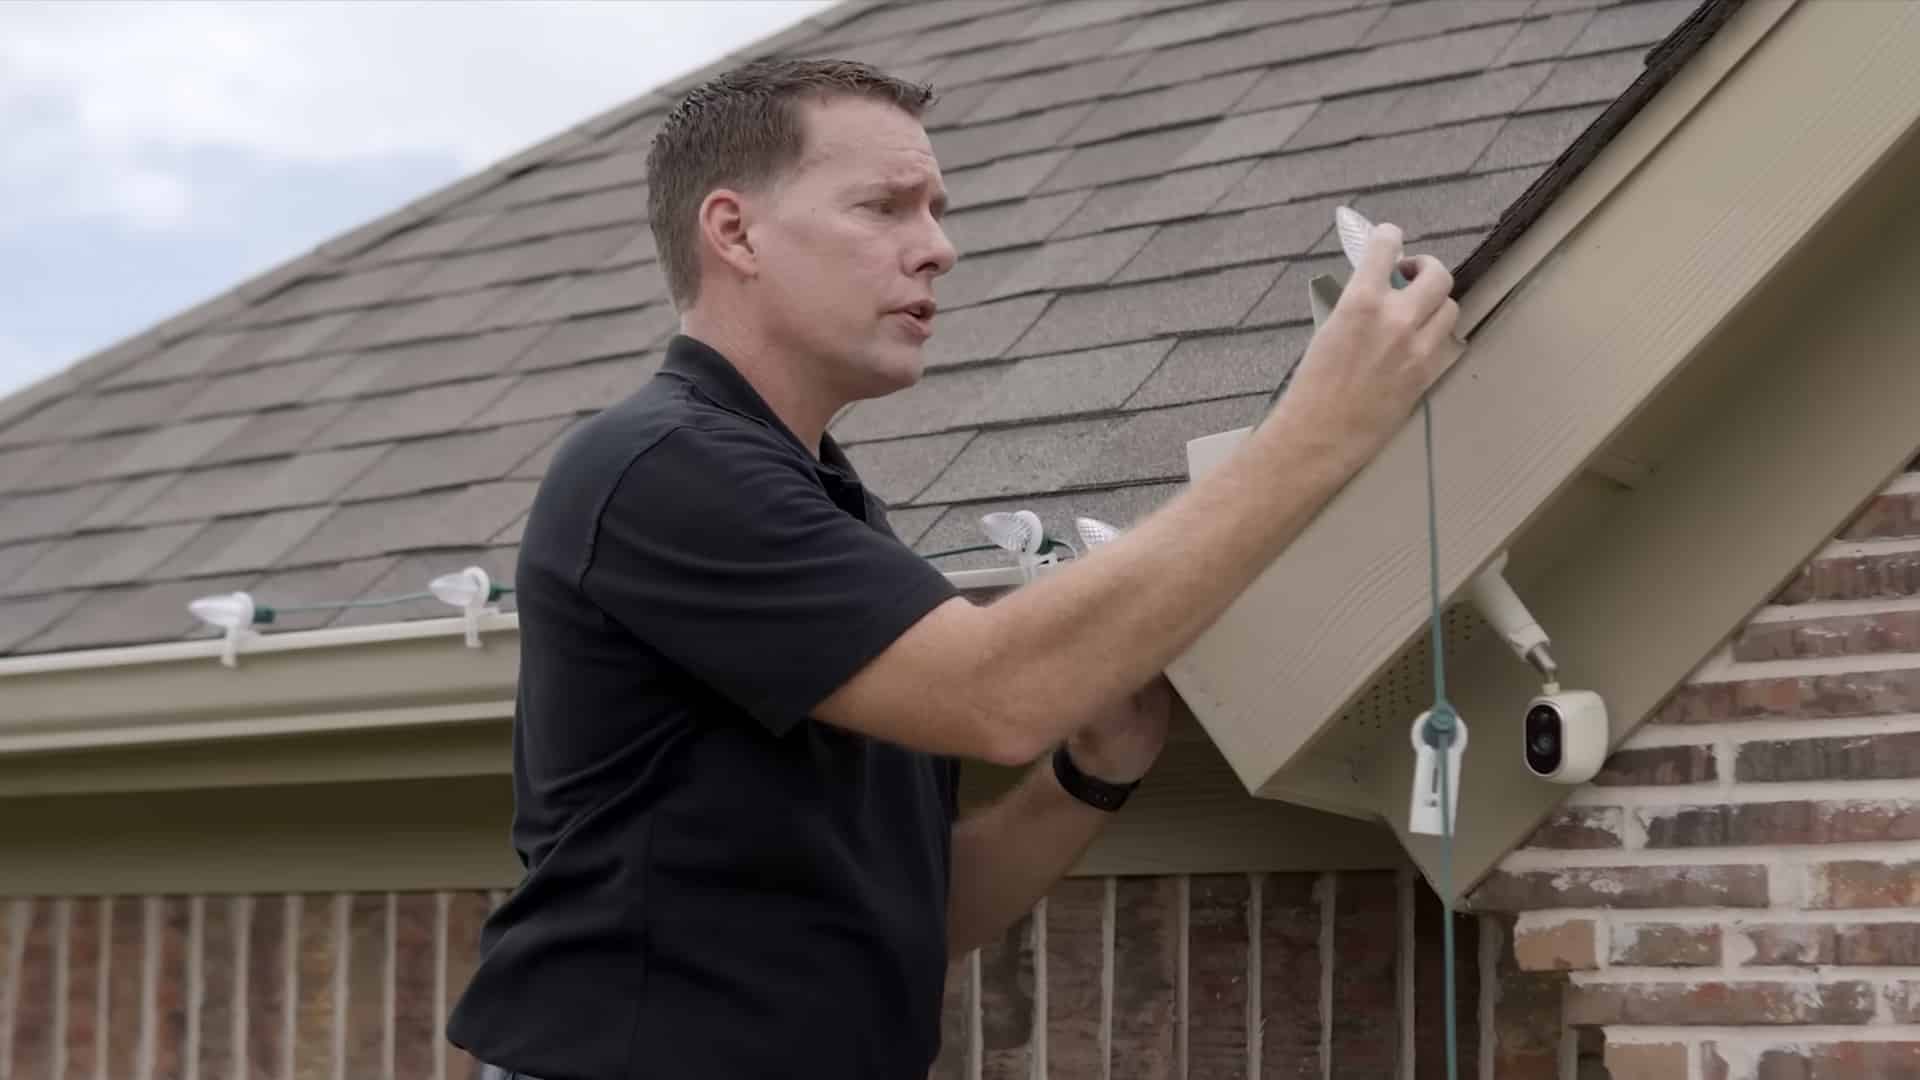
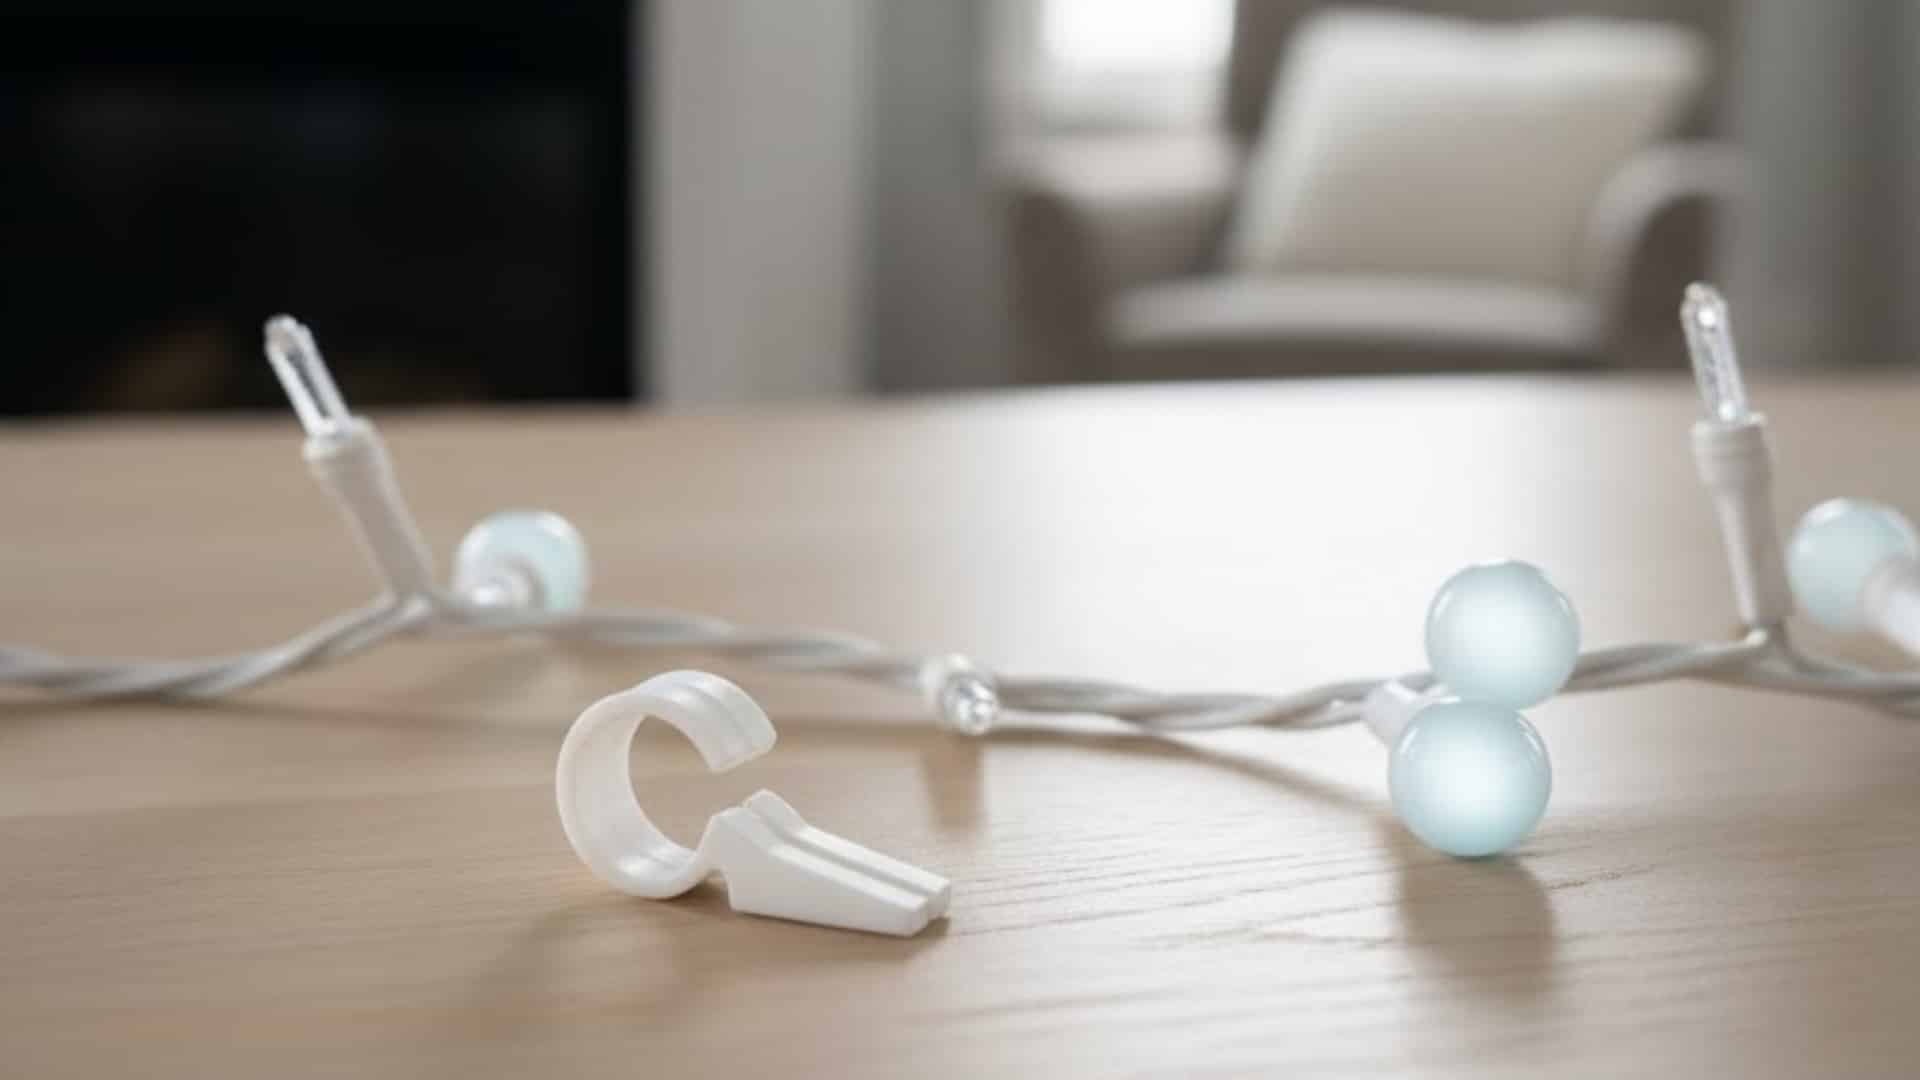
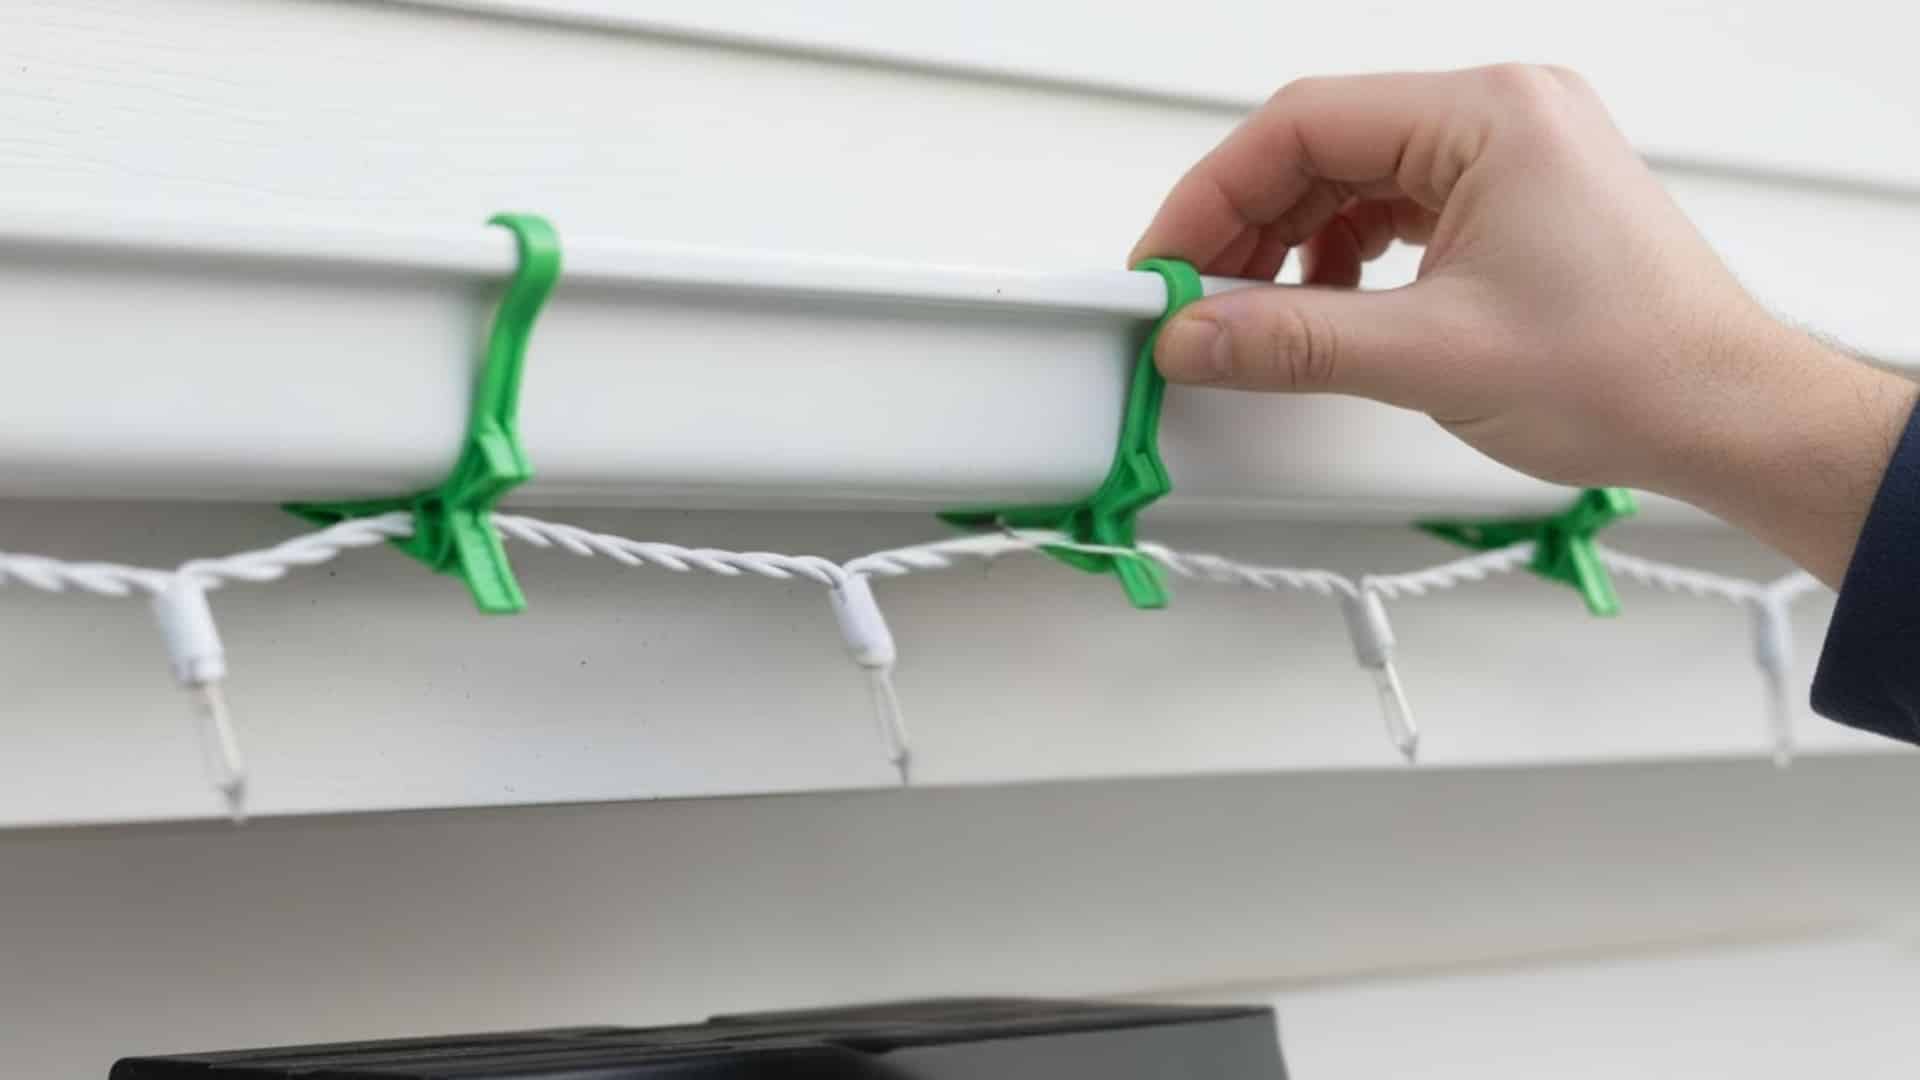
Step 5: Attach Clips and Mount the Lights
Secure each socket using flex or circular clips that suit your roofline or gutter type.
Work methodically from your power source outward, maintaining even tension without overstretching the line. Make sure bulbs face the same direction for a uniform glow once lit.
Taking time to mount everything neatly creates a polished, professional finish that holds up all season long.
Step 6: Manage Power Connections
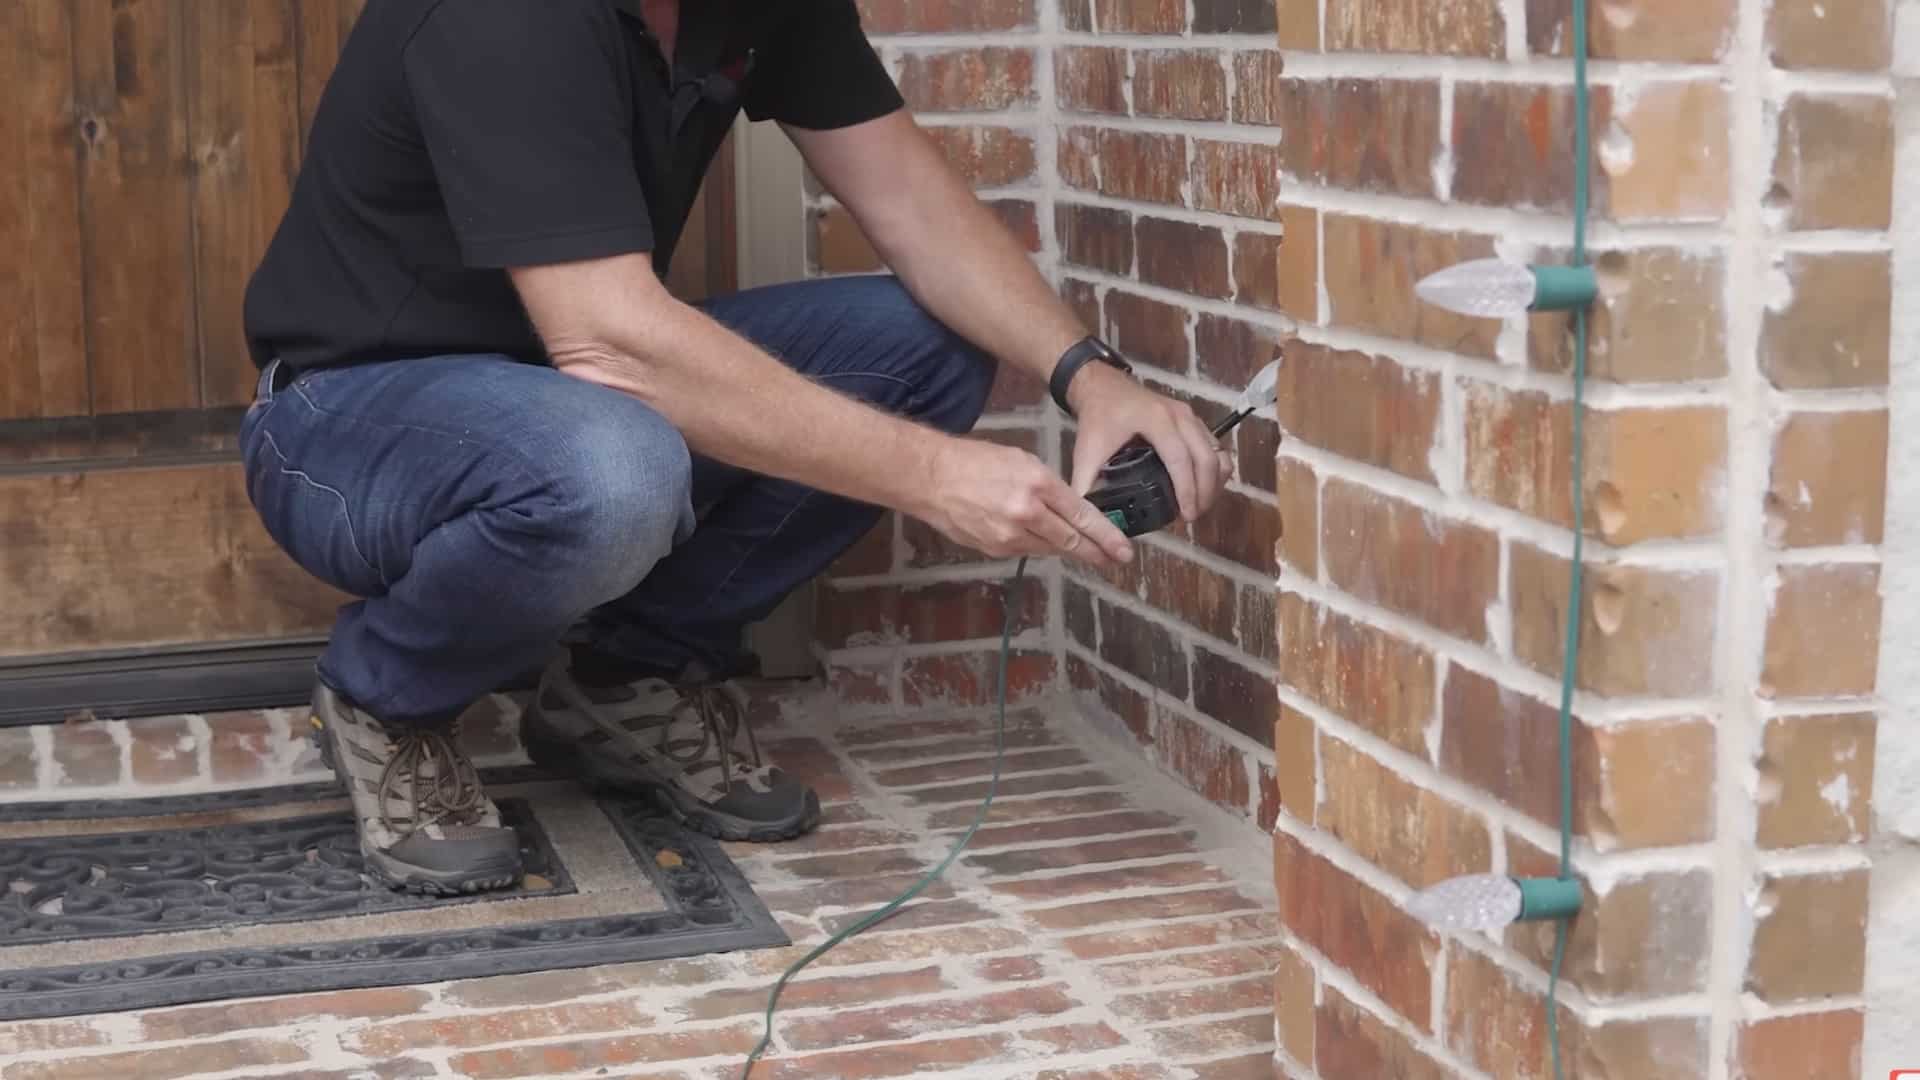
Connect your lights through outdoor-rated extension cords and use a timer for automatic control.
Keep all power points close to the ground or under covered areas to protect them from moisture. Avoid overloading circuits by keeping runs under 250 bulbs or 250 feet, whichever comes first.
Clean, efficient wiring keeps your display bright, safe, and consistent every evening.
Step 7: Test and Adjust the Final Display
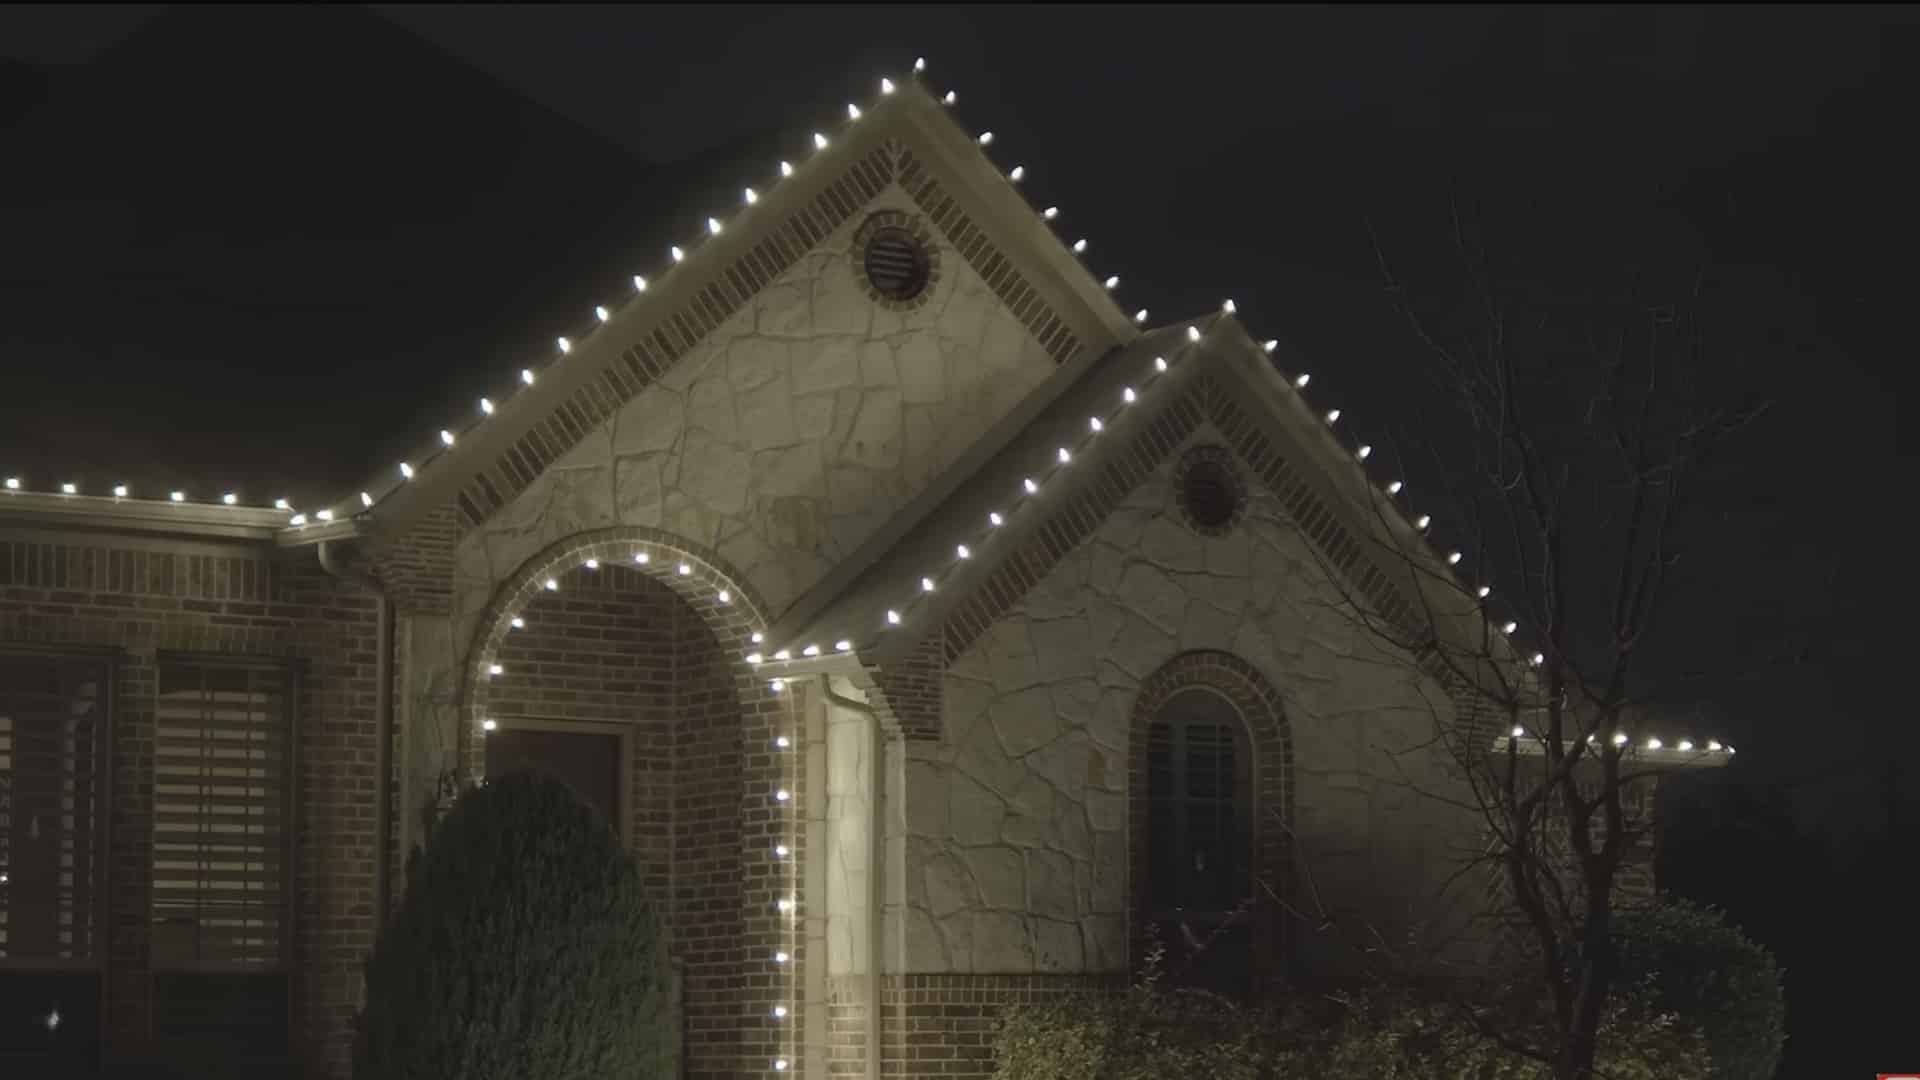
Once everything is in place, plug in your setup and inspect the entire layout at night.
Look for uneven spacing, dim bulbs, or loose clips. Small tweaks at this stage make the final result stand out.
A balanced, glowing display shows professionalism and attention to detail; the marks of someone who truly knows how to light up a home for the holidays.
Check out the video by Christmas Designers for a visual guide on installing Christmas lights.
How to Hang Christmas Lights Without Gutters or Nails?
Hanging Christmas lights when your house has no gutters can feel tricky, but trust me, it’s totally doable. You just gotta use the right stuff and a bit of planning.
I’ve done this a hundred times on different homes, and these methods work every single time.
- Use shingle or roofing clips: They slide under roof shingles and hold tight without messing anything up.
- Try adhesive or magnetic hooks: They stick on trim or metal surfaces easily and come off clean.
- Cup hooks or screw-in hooks: These work great on wooden trim for holding lights steady.
- Zip ties or cable ties: Wrap them around railings, fences, or poles to keep lights from sagging.
- Mounting tape or hook-and-loop strips: Good for short-term setups that still need to stay put.
You don’t need fancy tools or gutters to light your house up right. Just a few tricks, a steady hand, and you’re golden.
Pro Tips and Tricks for Hanging Christmas Lights Efficiently
Installing Christmas lights efficiently takes more than just patience; it’s about using smart techniques professionals rely on for speed, safety, and flawless results.
These easy Christmas light installation tips are simple to follow and perfect for beginners who want faster, cleaner, and safer results without needing advanced tools.
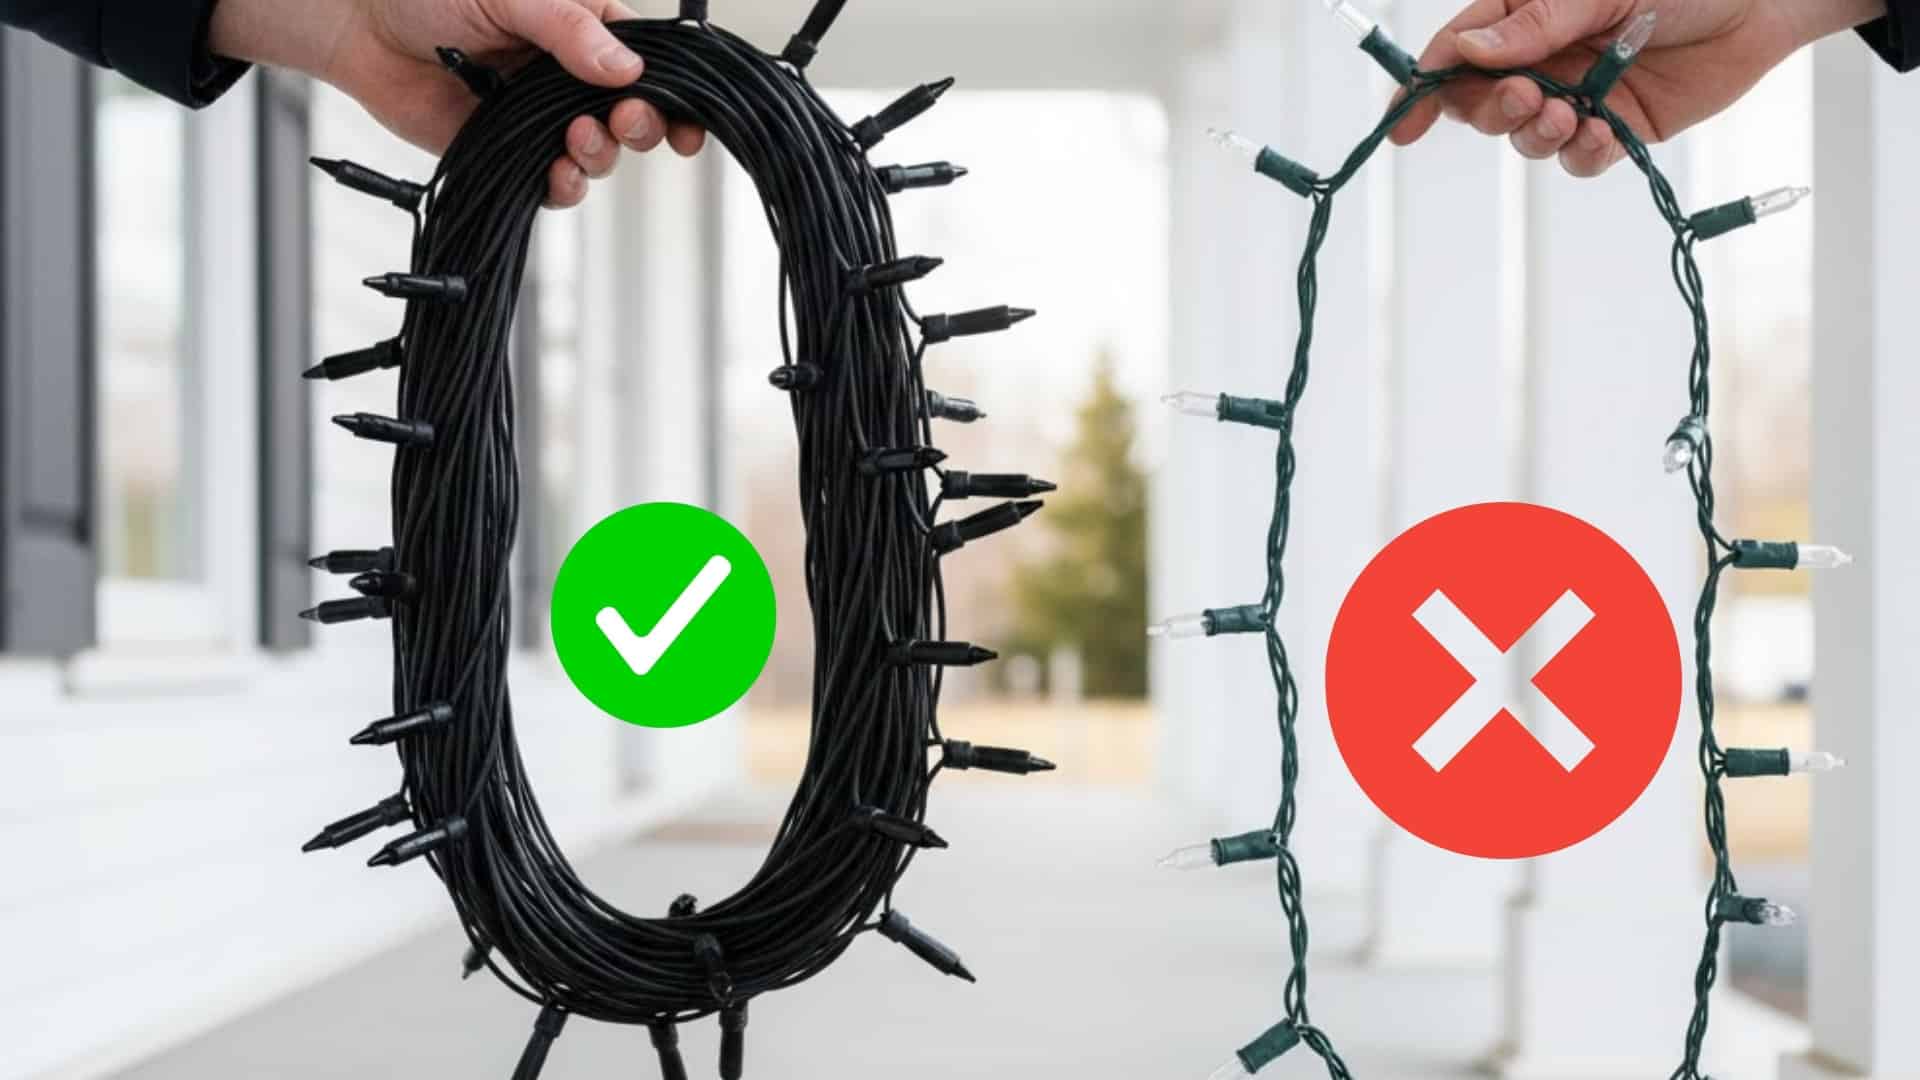
1. Pre-Attach Your Clips Before Hanging
Preparing your clips or hooks on the ground before climbing saves time and keeps your setup tidy.
It also ensures even spacing and fewer ladder adjustments during installation, giving you a consistent, polished look from start to finish.
How to Do It:
- Lay light strands flat on the ground
- Attach clips evenly before climbing
- Coil strands carefully to prevent tangling
2. Test All Light Strands in Advance
Testing every light strand before hanging prevents frustration later. This step makes sure all bulbs work and helps you avoid taking lights down just to fix a broken section.
How to Do It:
- Plug in each strand and check for dark bulbs
- Replace faulty bulbs or damaged wires
- Mark tested strands for quick identification
3. Keep Wires and Cords Organized
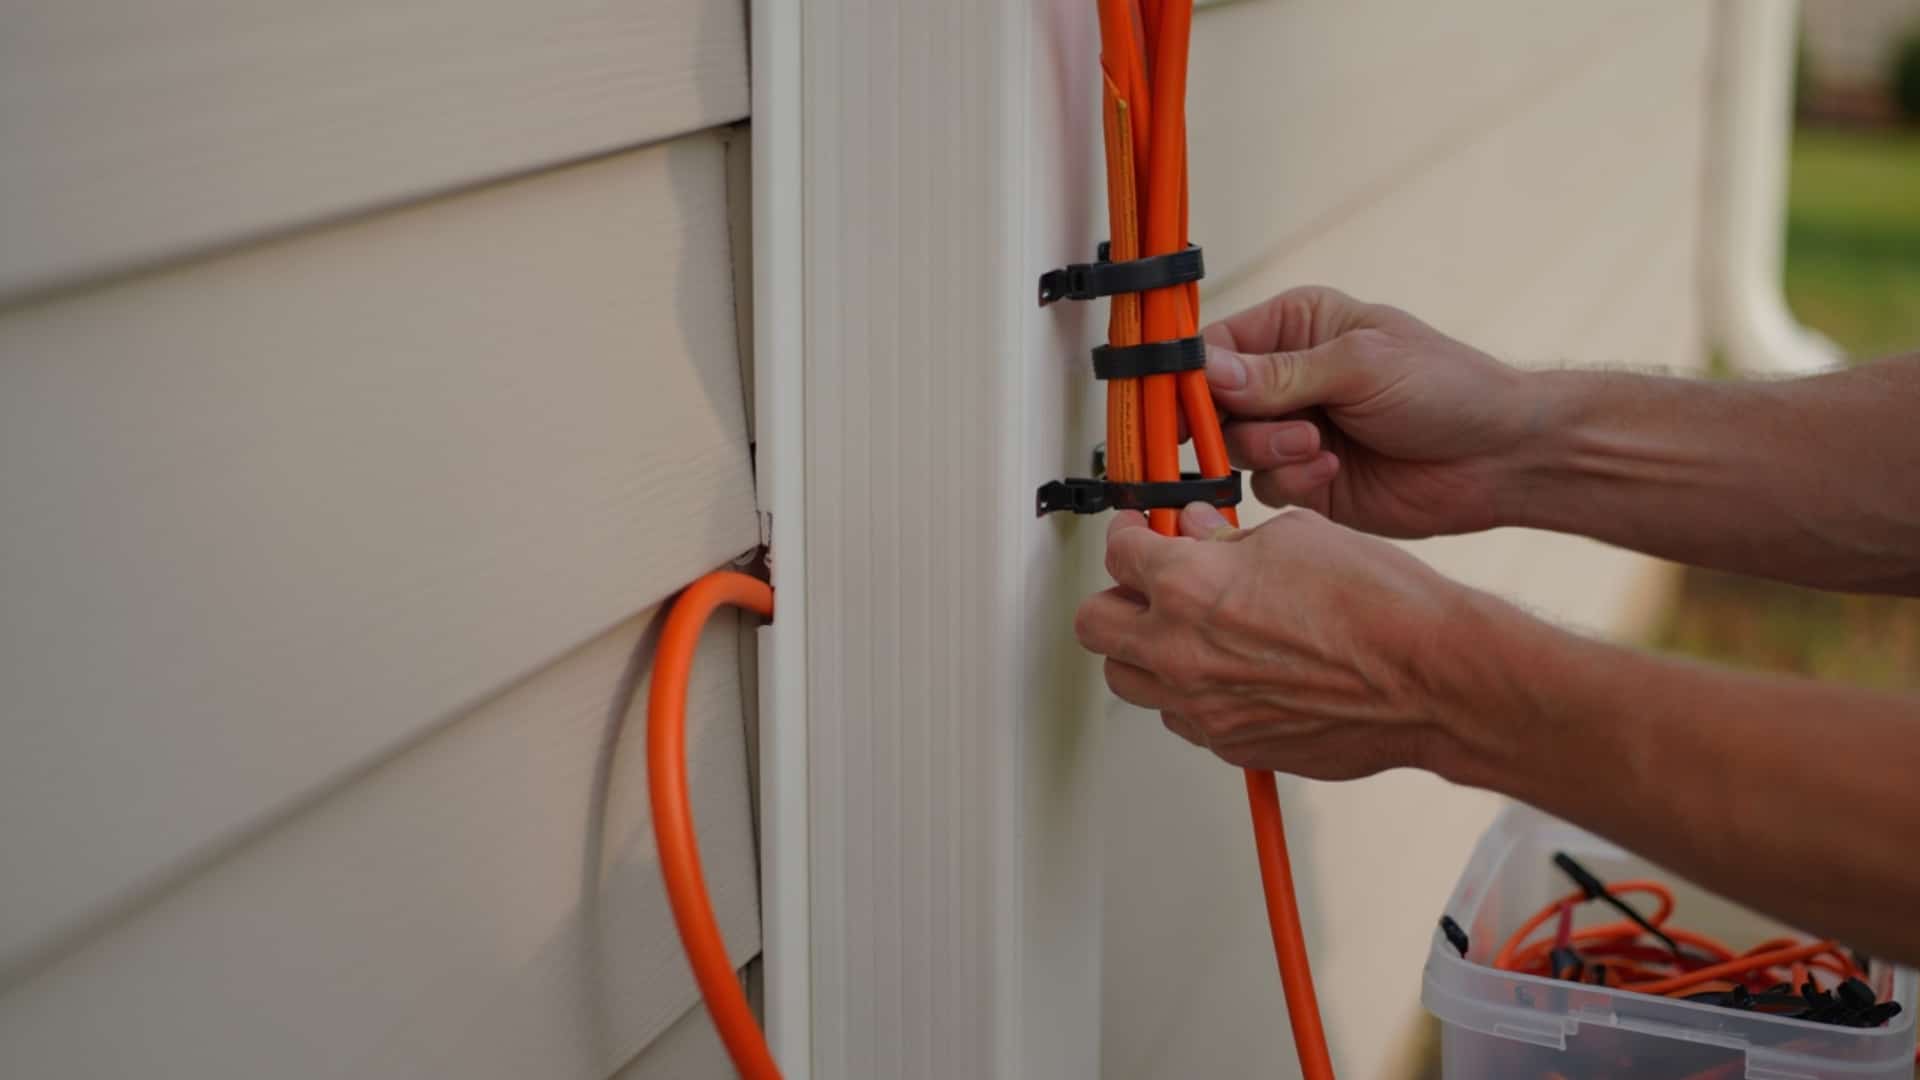
A tidy setup makes everything safer and easier to maintain. Organized cords prevent tripping, reduce damage, and make your display look more professional.
How to Do It:
- Use cord wraps or zip ties to bundle excess wire
- Keep power cords close to walls or edges
- Label extension cords for future use
4. Choose the Right Clip Color for Your Trim
Matching clip color to your trim keeps focus on your lights, not the attachments. This small detail instantly improves your display’s appearance.
How to Do It:
- Use white clips for light-colored trim
- Use black or brown for darker exteriors
- Always pick weather-resistant clips
5. Use a Timer to Automate Your Lights
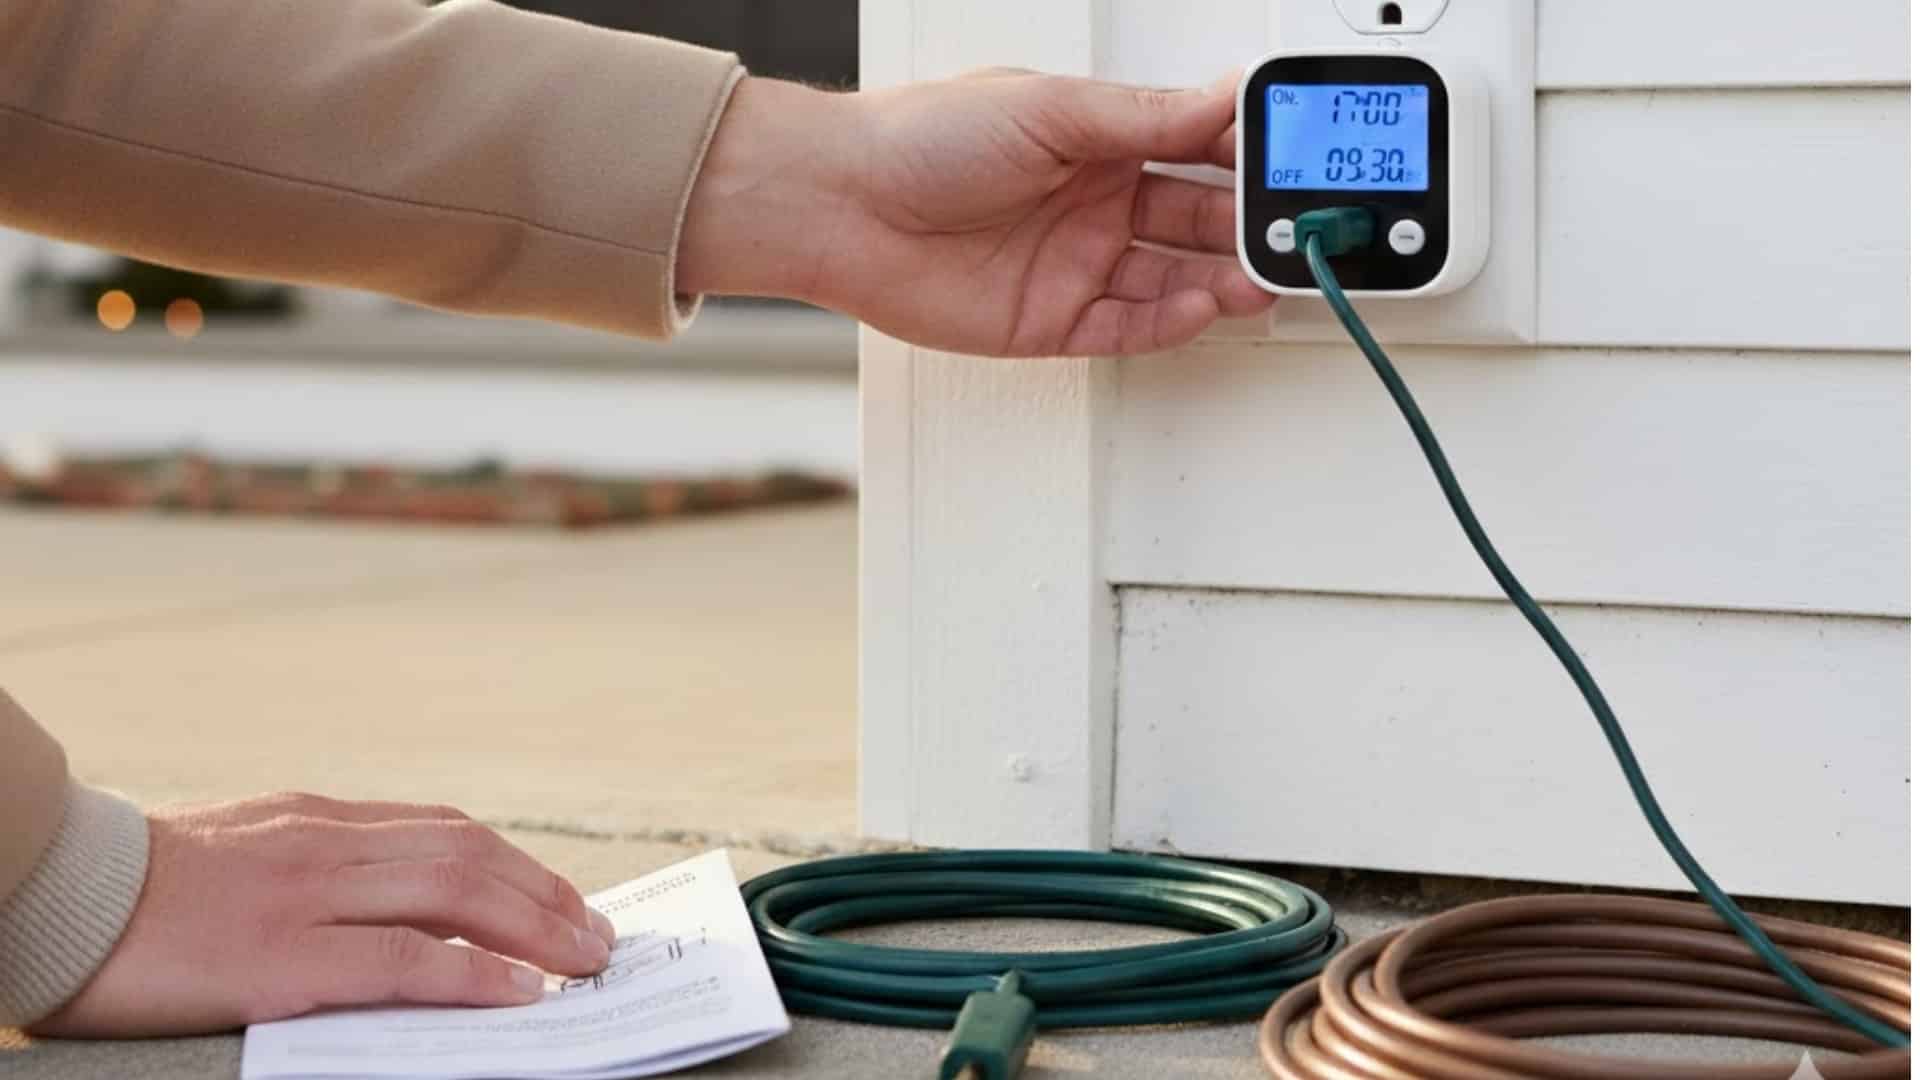
Timers make managing your lights effortless. They turn lights on and off automatically, saving energy and ensuring your display shines at the perfect time.
How to Do It:
- Choose a digital or mechanical outdoor timer
- Set preferred start and end times
- Test timing once before leaving it on schedule
6. Use a Painter’s or Telescopic Pole for Hard-to-Reach Areas
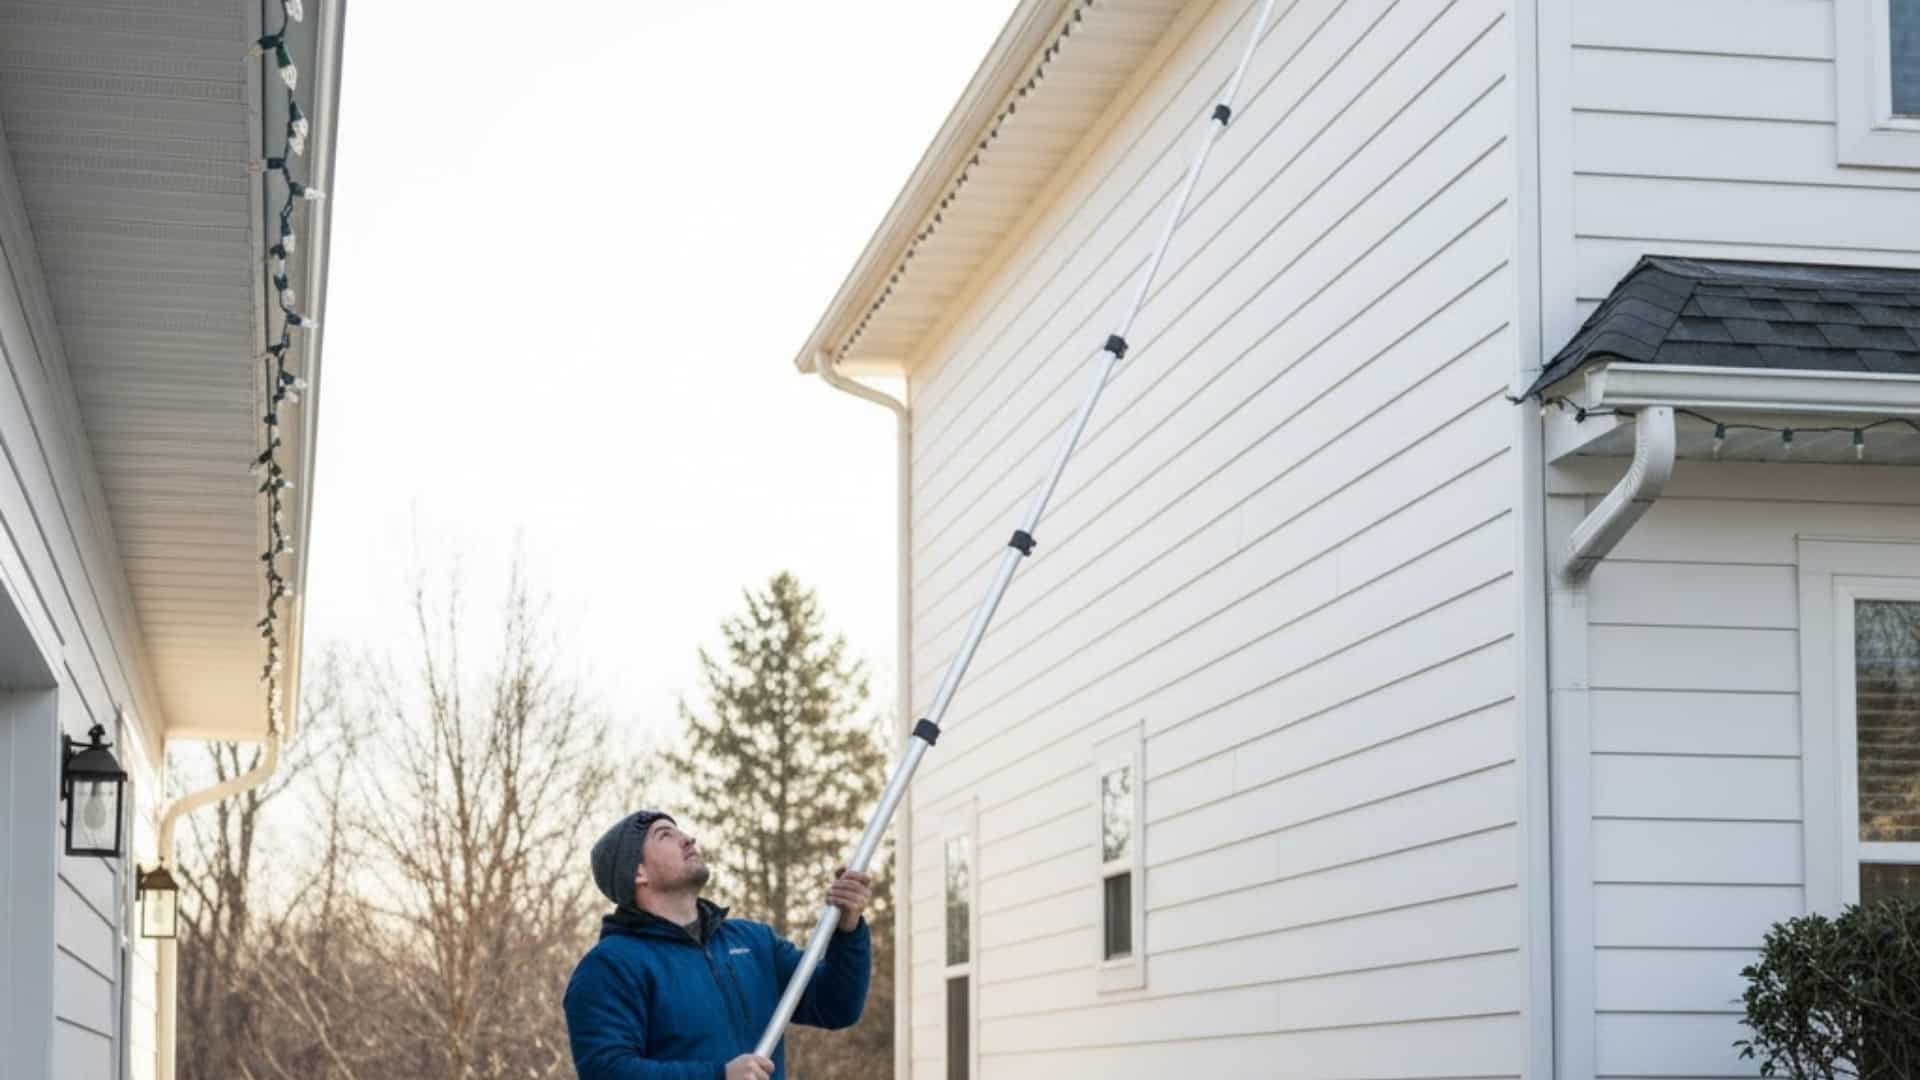
This method improves safety and saves time. A pole with a hook helps you reach high gutters, trees, or rooflines without dangerous ladder climbs.
How to Do It:
- Attach a hook or clip holder to a painter’s pole
- Hook the light strand onto gutters or branches
- Adjust height or angle as needed for placement
7. Use Electrical Tape to Seal Exposed Connectors
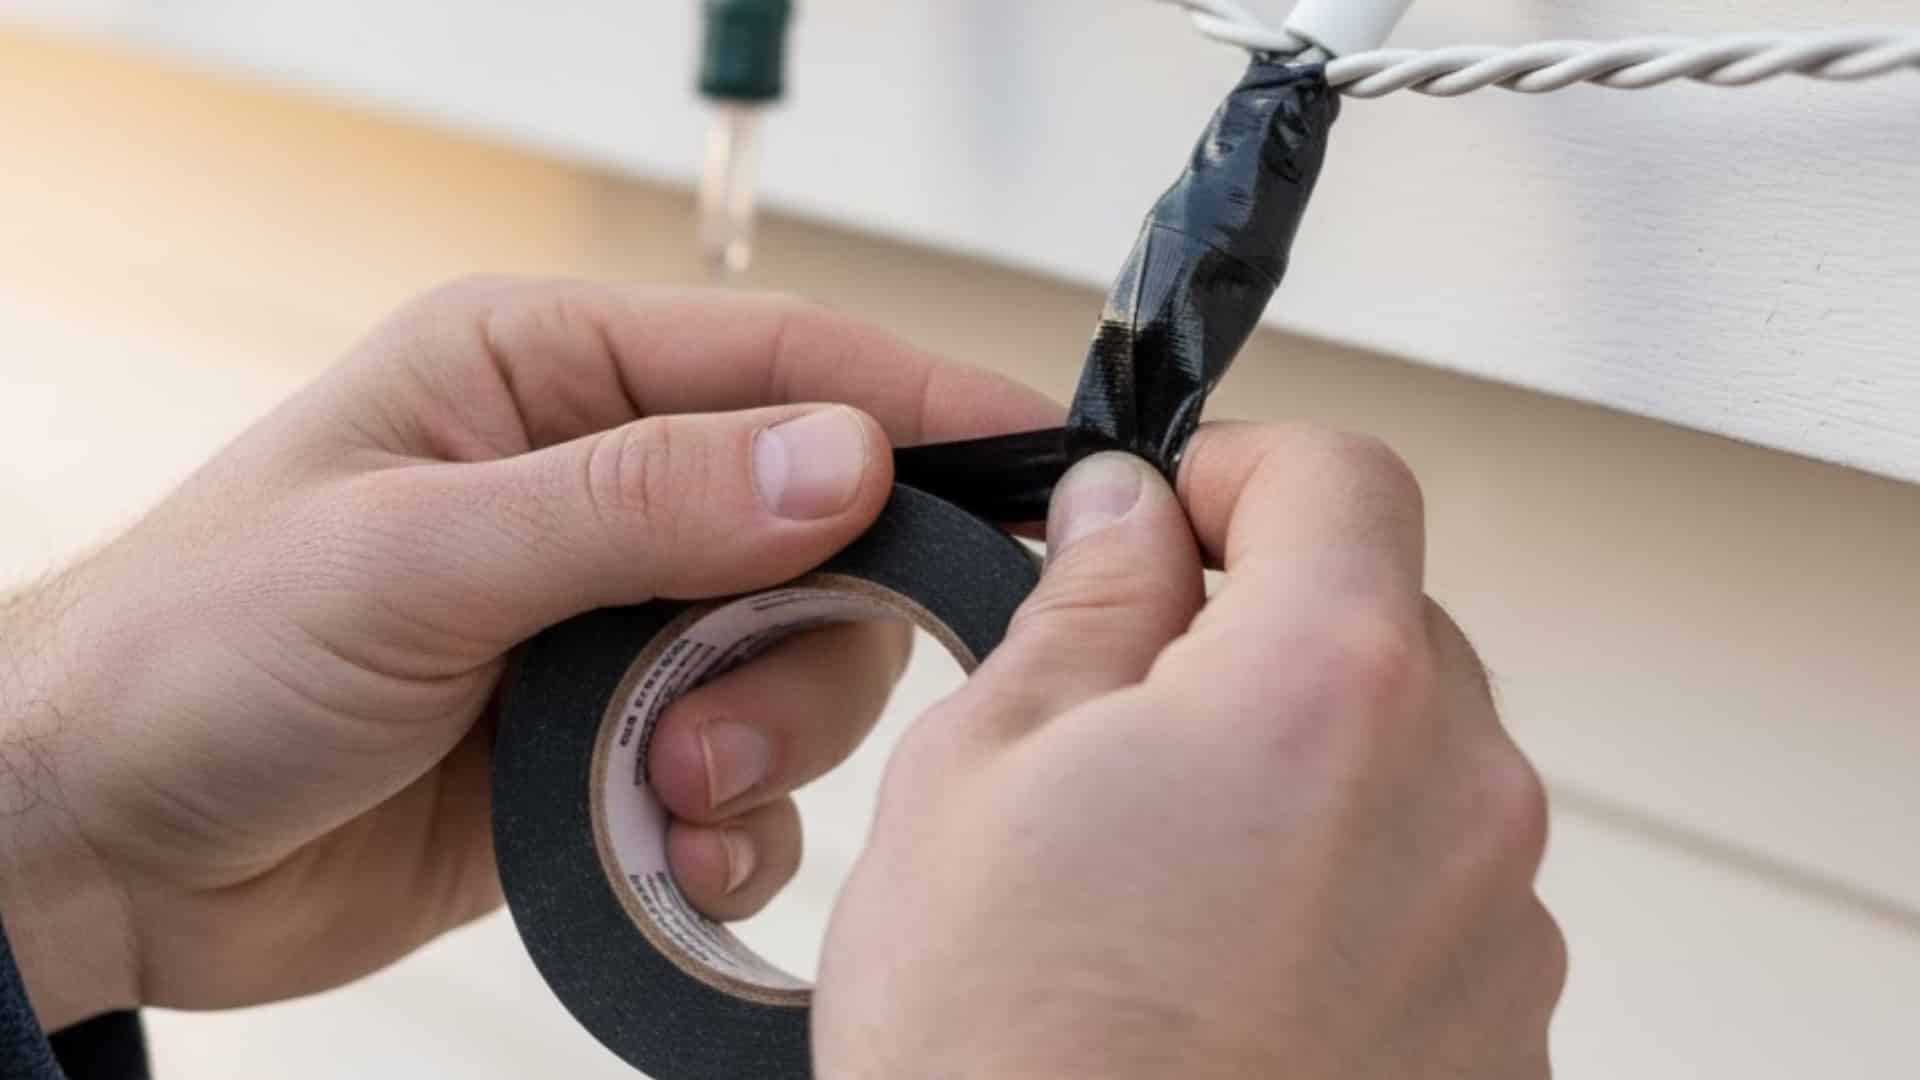
Moisture can trip circuits and cause outages. Taping exposed plug ends keeps water out, ensuring uninterrupted lighting even in wet weather.
How to Do It:
- Wrap female plug ends with electrical tape
- Seal all exposed connectors tightly
- Use weatherproof outdoor tape for durability
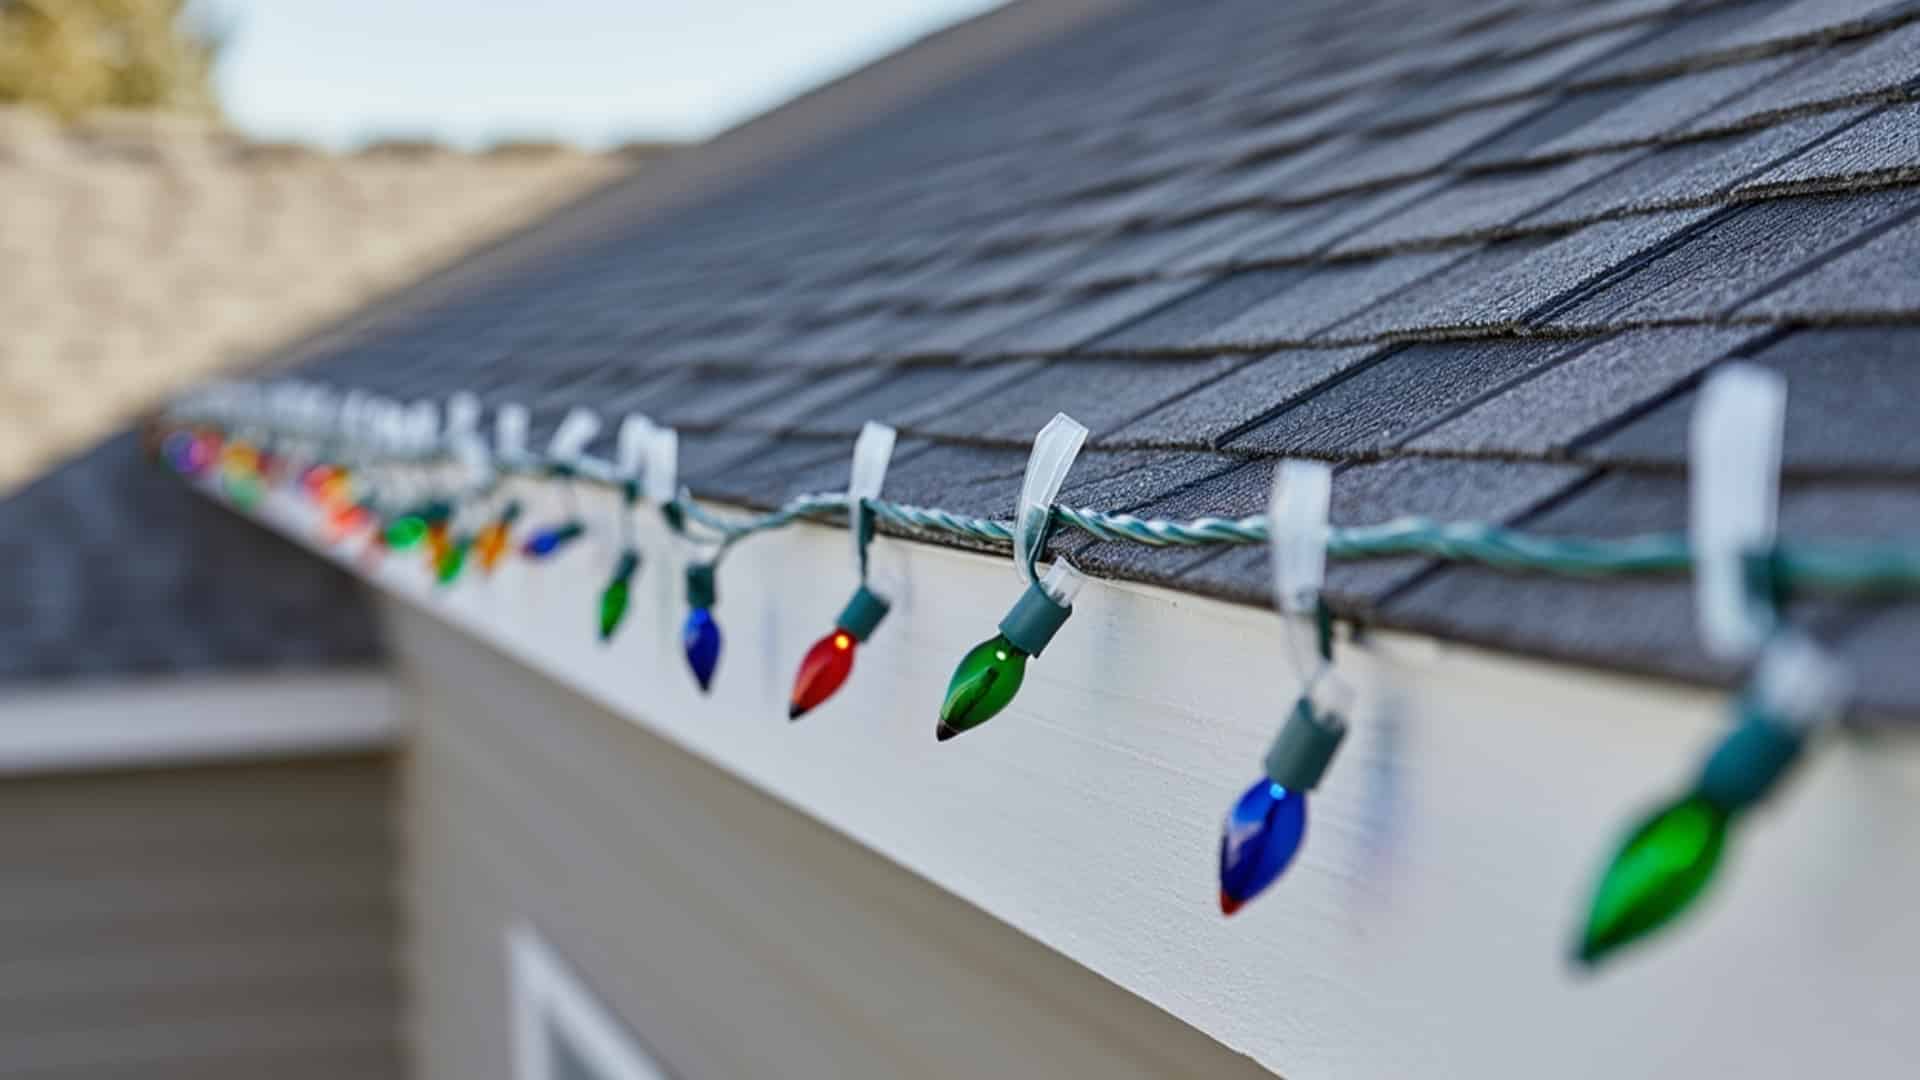
8. Maintain Even Bulb Spacing Using a Hand Guide
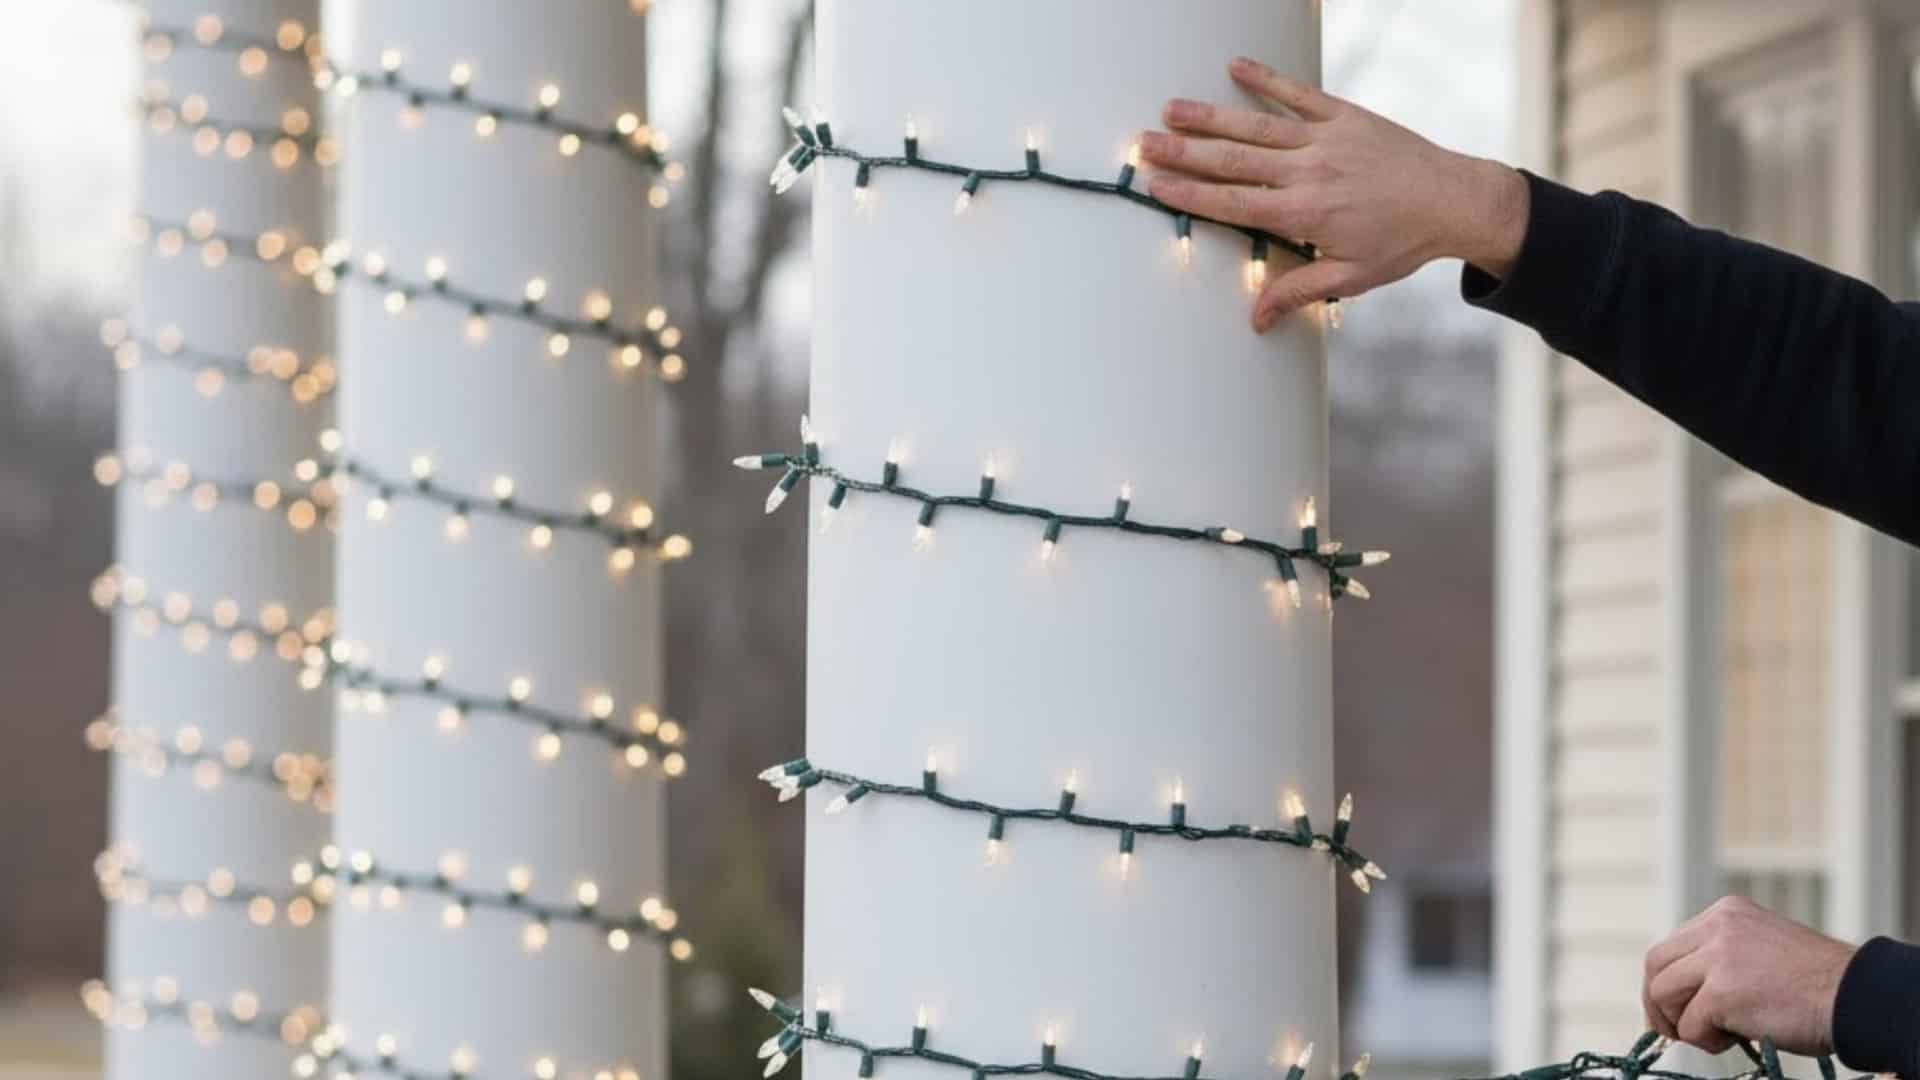
Uniform spacing creates a neat, professional appearance. Using your hand as a quick measurement guide keeps bulb placement visually consistent.
How to Do It:
- Use your hand’s width between bulbs or wraps
- Check spacing after every few strands
- Step back to ensure alignment looks even
9. Use Magnetic or Gutter Clips for Faster Setup
These clips save time and eliminate the need for nails or glue. They securely attach lights to metal surfaces or gutters while allowing easy removal later.
How to Do It:
- Choose magnetic clips for metal roofs
- Use gutter clips for roofline edges
- Check that clips are rated for outdoor use
10. Group Lights by Zone Before Hanging
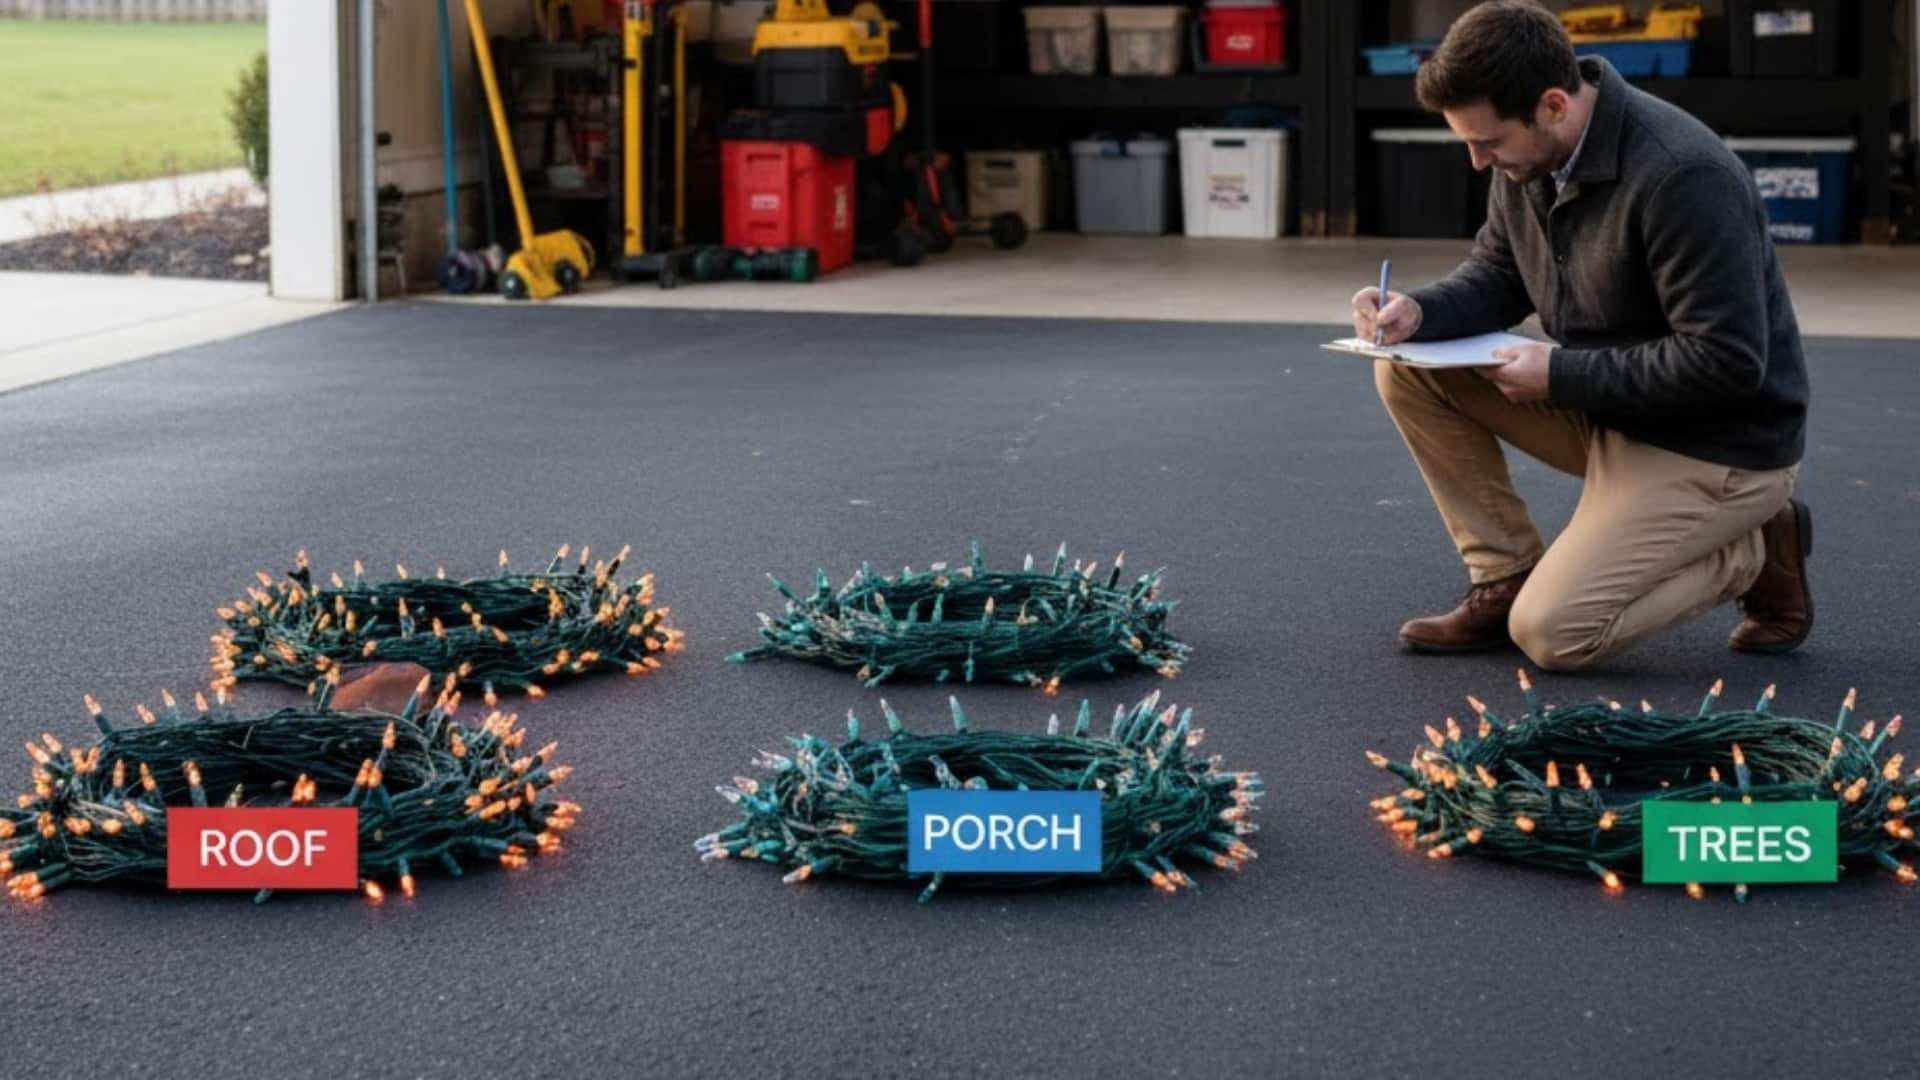
Sorting strands by area helps streamline installation and troubleshooting. It’s a simple way to stay organized while creating balanced illumination across your home.
How to Do It:
- Label strands by location (roof, trees, fence)
- Keep grouped lights coiled together
- Test each group before installation
11. Custom-Cut Light Strands for a Perfect Roofline Fit
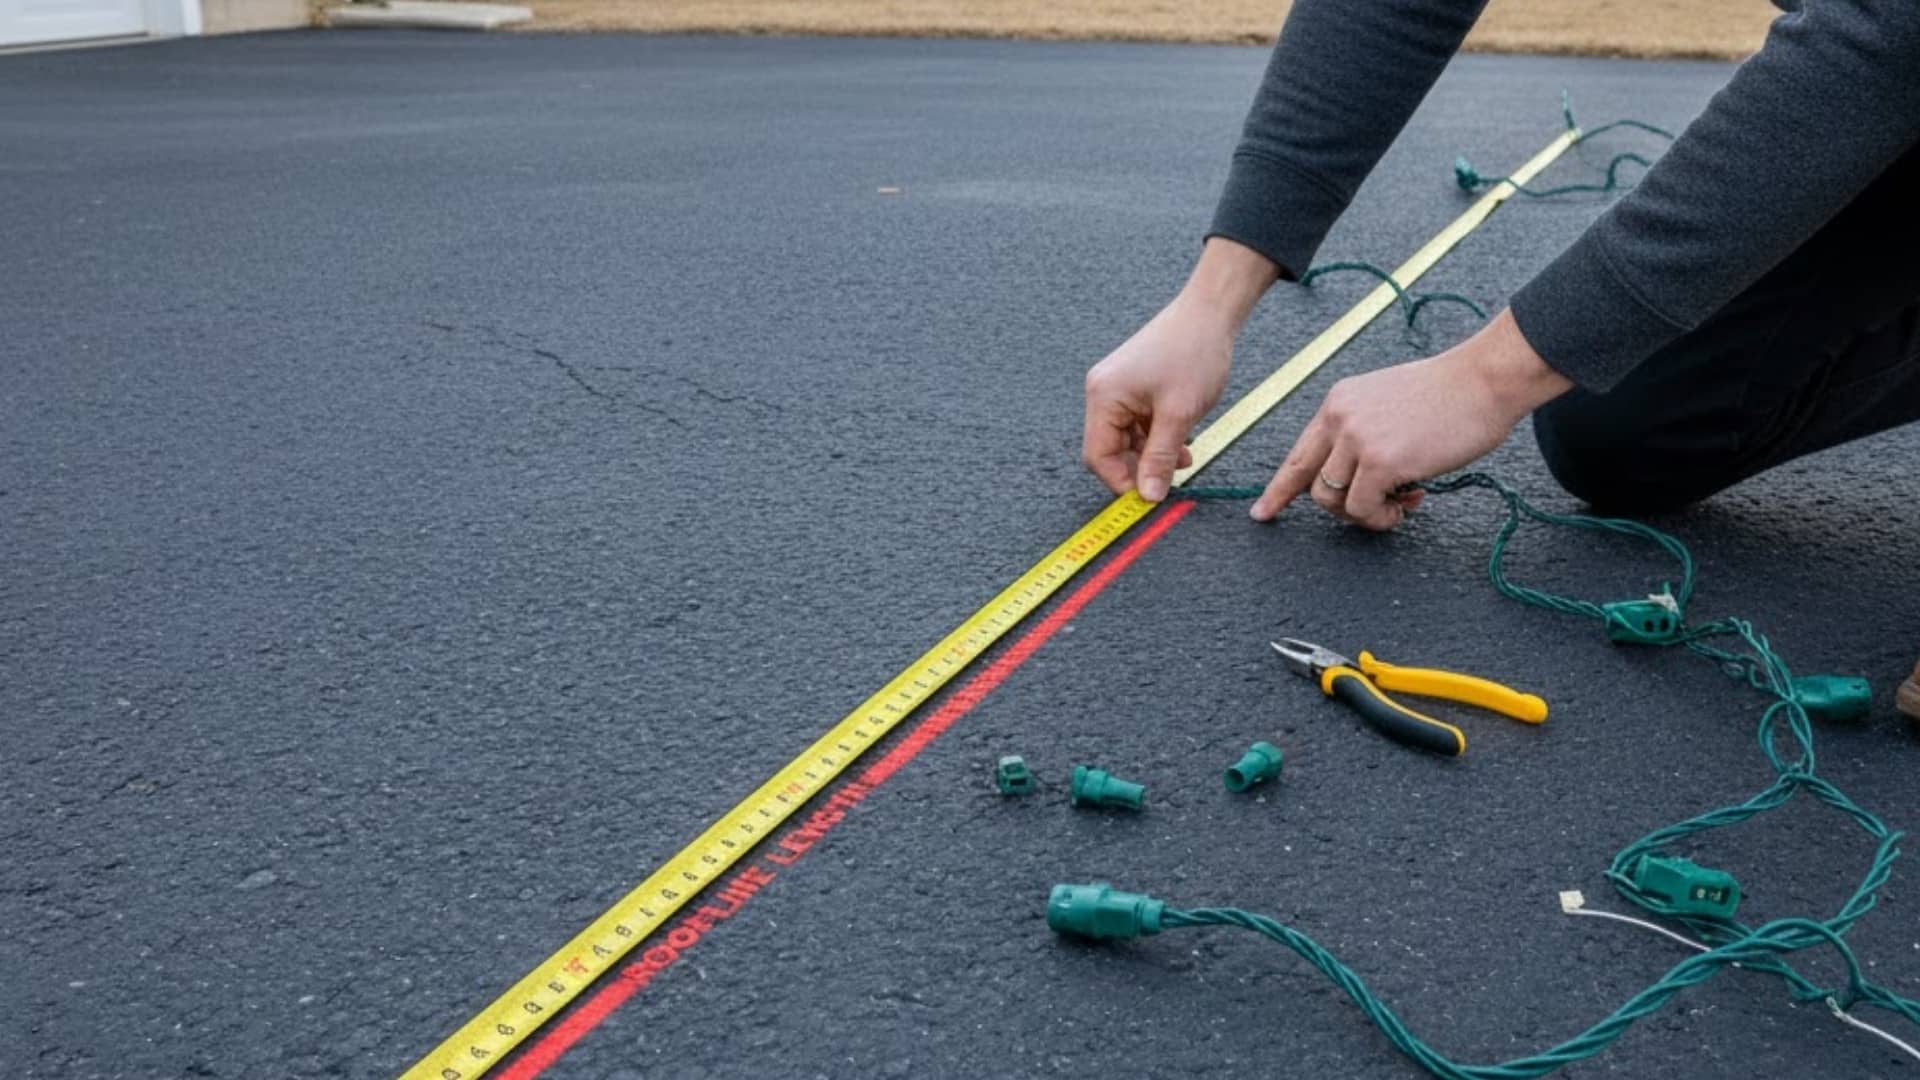
Cutting your light strands gives a precise, smooth look. Custom cutting ensures each roofline section fits exactly without excess wire or awkward overlaps.
How to Do It:
- Measure roofline sections before cutting
- Use C7/C9 socket lines and Gilbert plugs
- Test connectivity before mounting
12. Balance Power Loads Across Multiple Circuits
Distributing power across circuits keeps your lights safe and prevents tripped breakers. It’s especially useful for large or mixed-light setups.
How to Do It:
- Identify separate household circuits
- Divide wattage evenly among them
- Use outdoor-rated GFCI outlets
13. Create Custom Extension Cords Using Bulk Wire
Making your own extension connections gives flexibility and clean routing between distant sections. This advanced technique enhances both function and aesthetics.
How to Do It:
- Use SPT-1 or SPT-2 bulk wire
- Add male or female Gilbert plugs as needed
- Label connections for organized reuse
14. Use Commercial-Grade LED Lights for Durability
Professional-grade LEDs withstand weather, last longer, and shine brighter than consumer models. They’re an investment that pays off over many seasons.
How to Do It:
- Choose one-piece acrylic molded LED strands
- Avoid removable-bulb retail versions
- Store them properly after the season
15. Secure Roof Access with Proper Safety Equipment
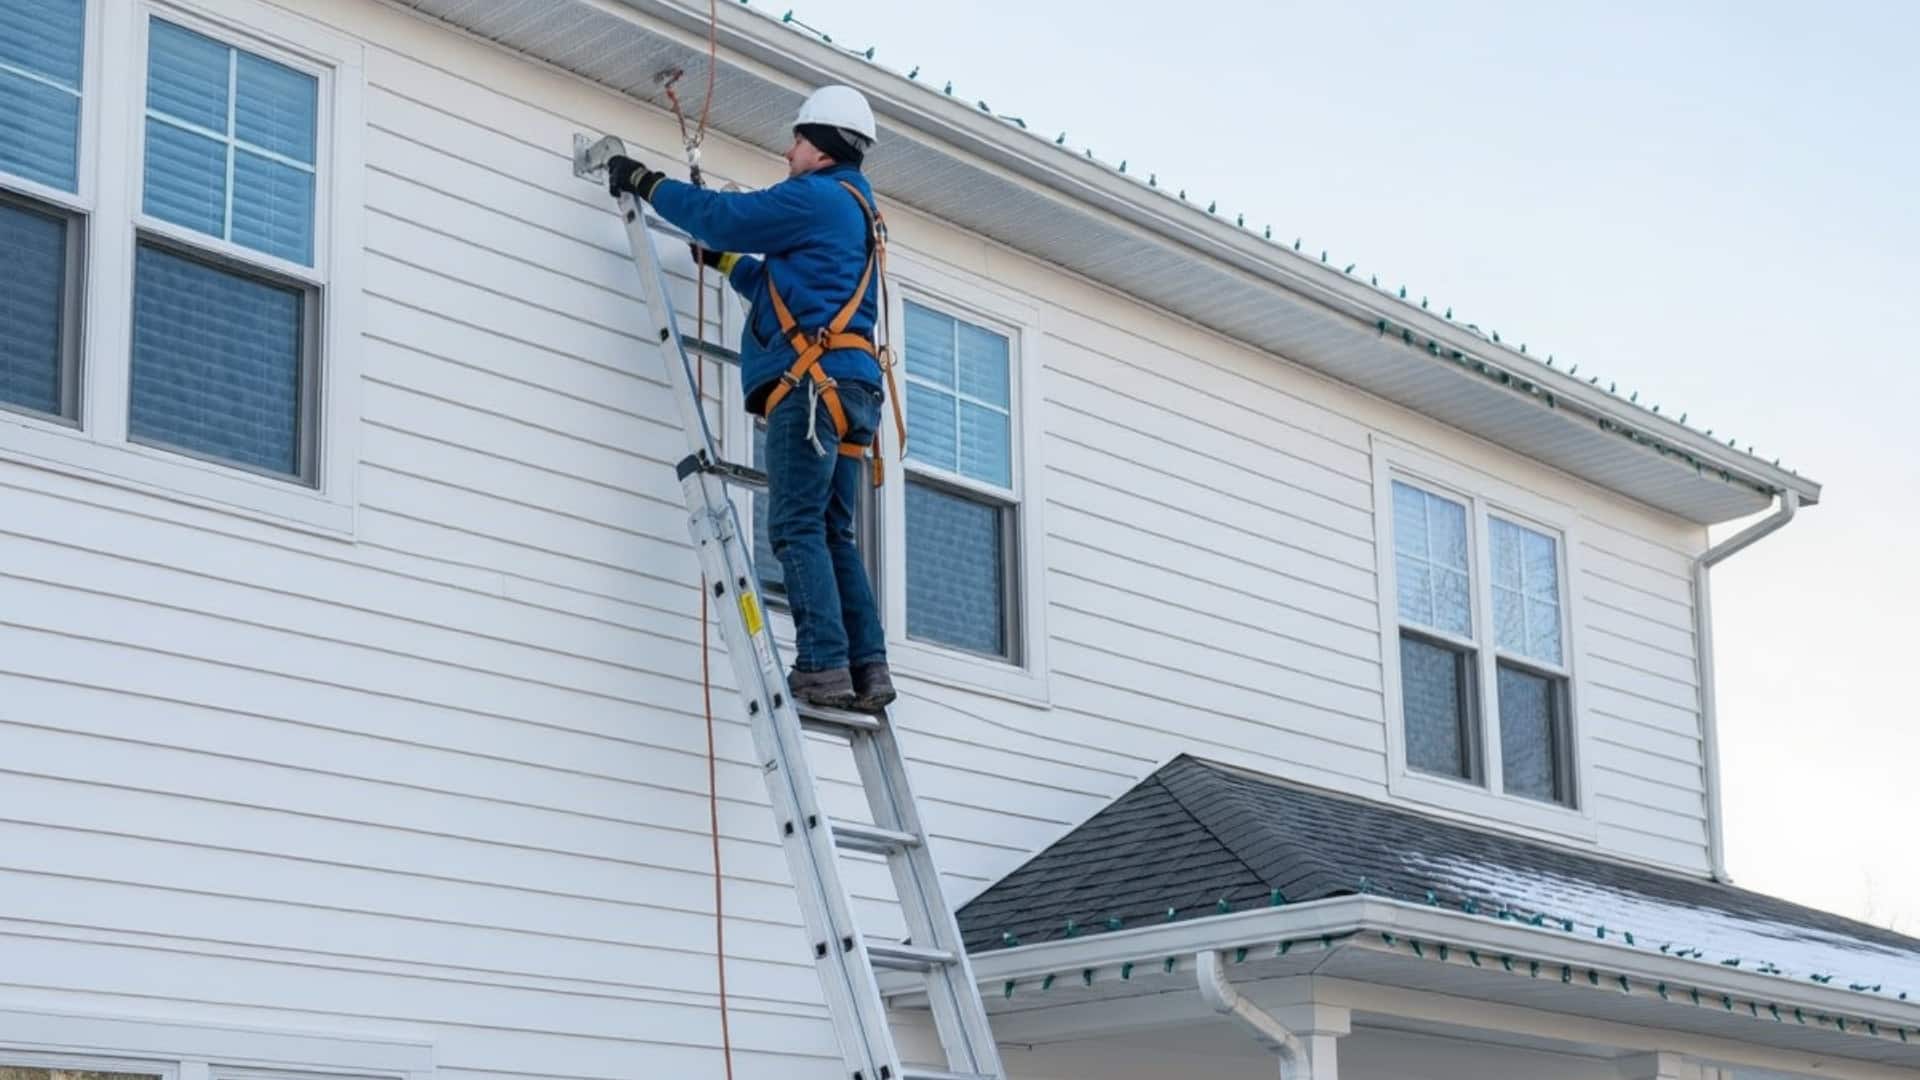
For high installations, safety gear is non-negotiable. A stable ladder setup, harness, and roof anchors help prevent falls and injuries.
How to Do It:
- Use a sturdy, level ladder with stabilizers
- Wear a harness with roof anchor points
- Have a spotter assist when working above ground
These Christmas light hanging tips are perfect for homeowners ready to achieve professional-quality displays safely and efficiently.
Maintaining and Caring for Your Christmas Lights the Right Way

Once your lights are up and glowing, keeping them in good shape through the holidays is easy if you stay consistent.
Little maintenance steps help them shine bright and last longer for seasons to come.
- Check for loose bulbs weekly: Gently tighten or replace them to avoid dead spots in your display.
- Keep cords dry and raised: Use clips or cable ties to lift them off wet ground and prevent short circuits.
- Avoid overloading circuits: Split large displays across outlets to stay safe and steady.
- Clean dust or debris regularly: A quick wipe keeps lights looking fresh and prevents overheating.
- Turn lights off during storms: Heavy rain or snow can damage connections if left running.
A few minutes of care each week will keep your lights looking sharp, shining safely, and ready for reuse next year.
How to Take Down and Store Christmas Lights Properly?
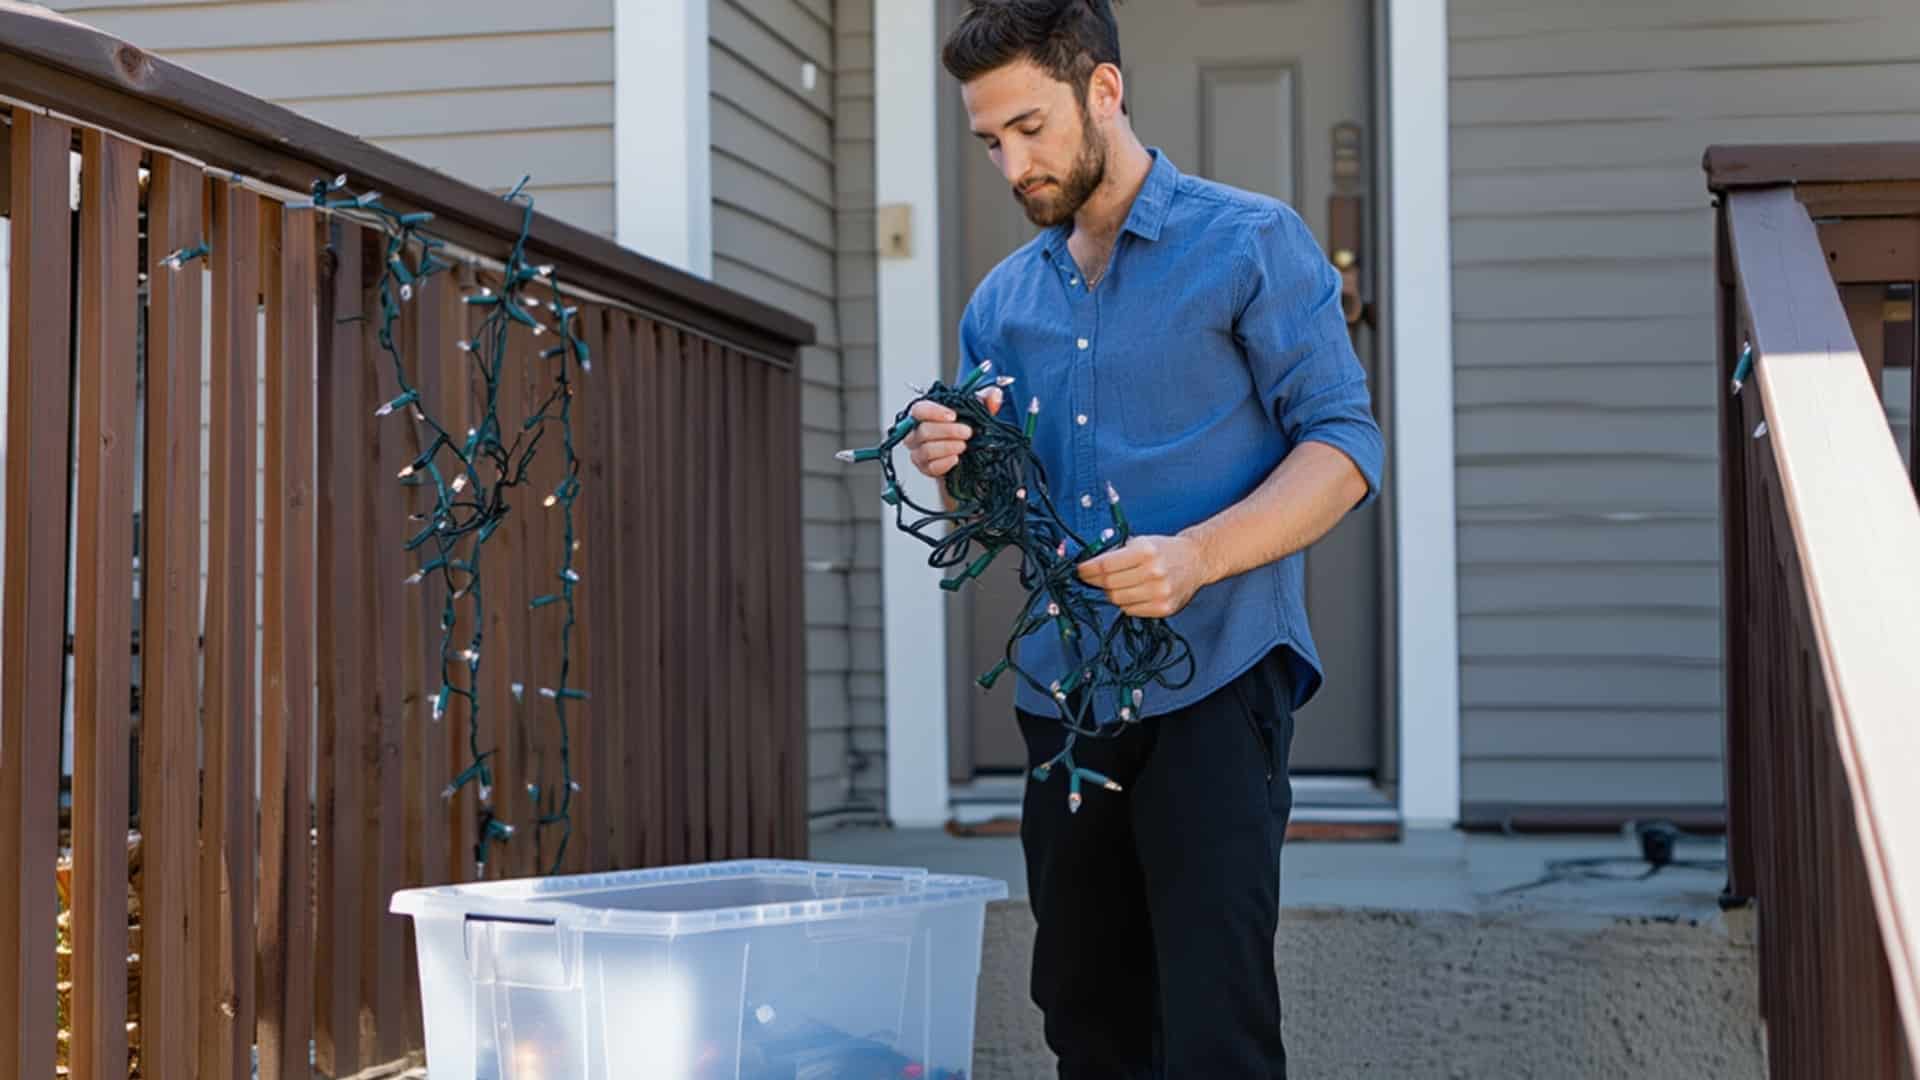
When the holidays end, don’t rush the cleanup. Take your time removing each strand gently. Check every wire and bulb before packing them away.
Replace broken ones and wipe the lights with a soft cloth to remove dust or moisture. Let them dry completely before moving to the next step.
Wrap each strand carefully to stop tangling later. You can use a storage reel, a piece of cardboard, or even a clothes hanger.
Keep the strands flat and secure the ends tightly. Organized wrapping saves hours of frustration next year.
Store your lights in labeled plastic containers with tight lids. Keep them in a cool, dry place away from moisture or pests.
Add small items like clips and extension cords in the same box. This simple care keeps your lights ready for next season.
Common Mistakes to Avoid When Hanging Christmas Lights
Many people love decorating, but still make small mistakes that cause big problems. Most of these are easy to avoid with a little care and planning.
- Using indoor lights outdoors where they can’t handle rain or snow.
- Plugging too many light strands into one outlet or extension cord.
- Skipping the test and realizing too late that half the lights don’t work.
- Hanging lights on wet roofs or using ladders on uneven ground.
- Using nails or staples that tear wires or damage paint.
- Ignoring timers and leaving lights on all night, wasting power.
- Tossing lights into boxes without wrapping them neatly for next year.
Avoid these mistakes, and you’ll keep your setup safer, brighter, and easier to manage every single holiday season.
Conclusion
Hanging Christmas lights doesn’t need to feel like a tough job.
With the right tools, proper steps, and a few expert tricks, it can be easy and fun. I’ve hung lights for years and learned that planning and safety make all the difference.
When you follow a smart process, you don’t just decorate your home, you create memories that sparkle every evening.
From choosing the right lights to storing them properly, everything matters for a smooth experience. The goal is to make your home glow with joy, not stress.
So grab your lights, take your time, and enjoy the process.
What’s your favorite way to decorate with lights during the holidays? Tell us and share your ideas in the comments below.