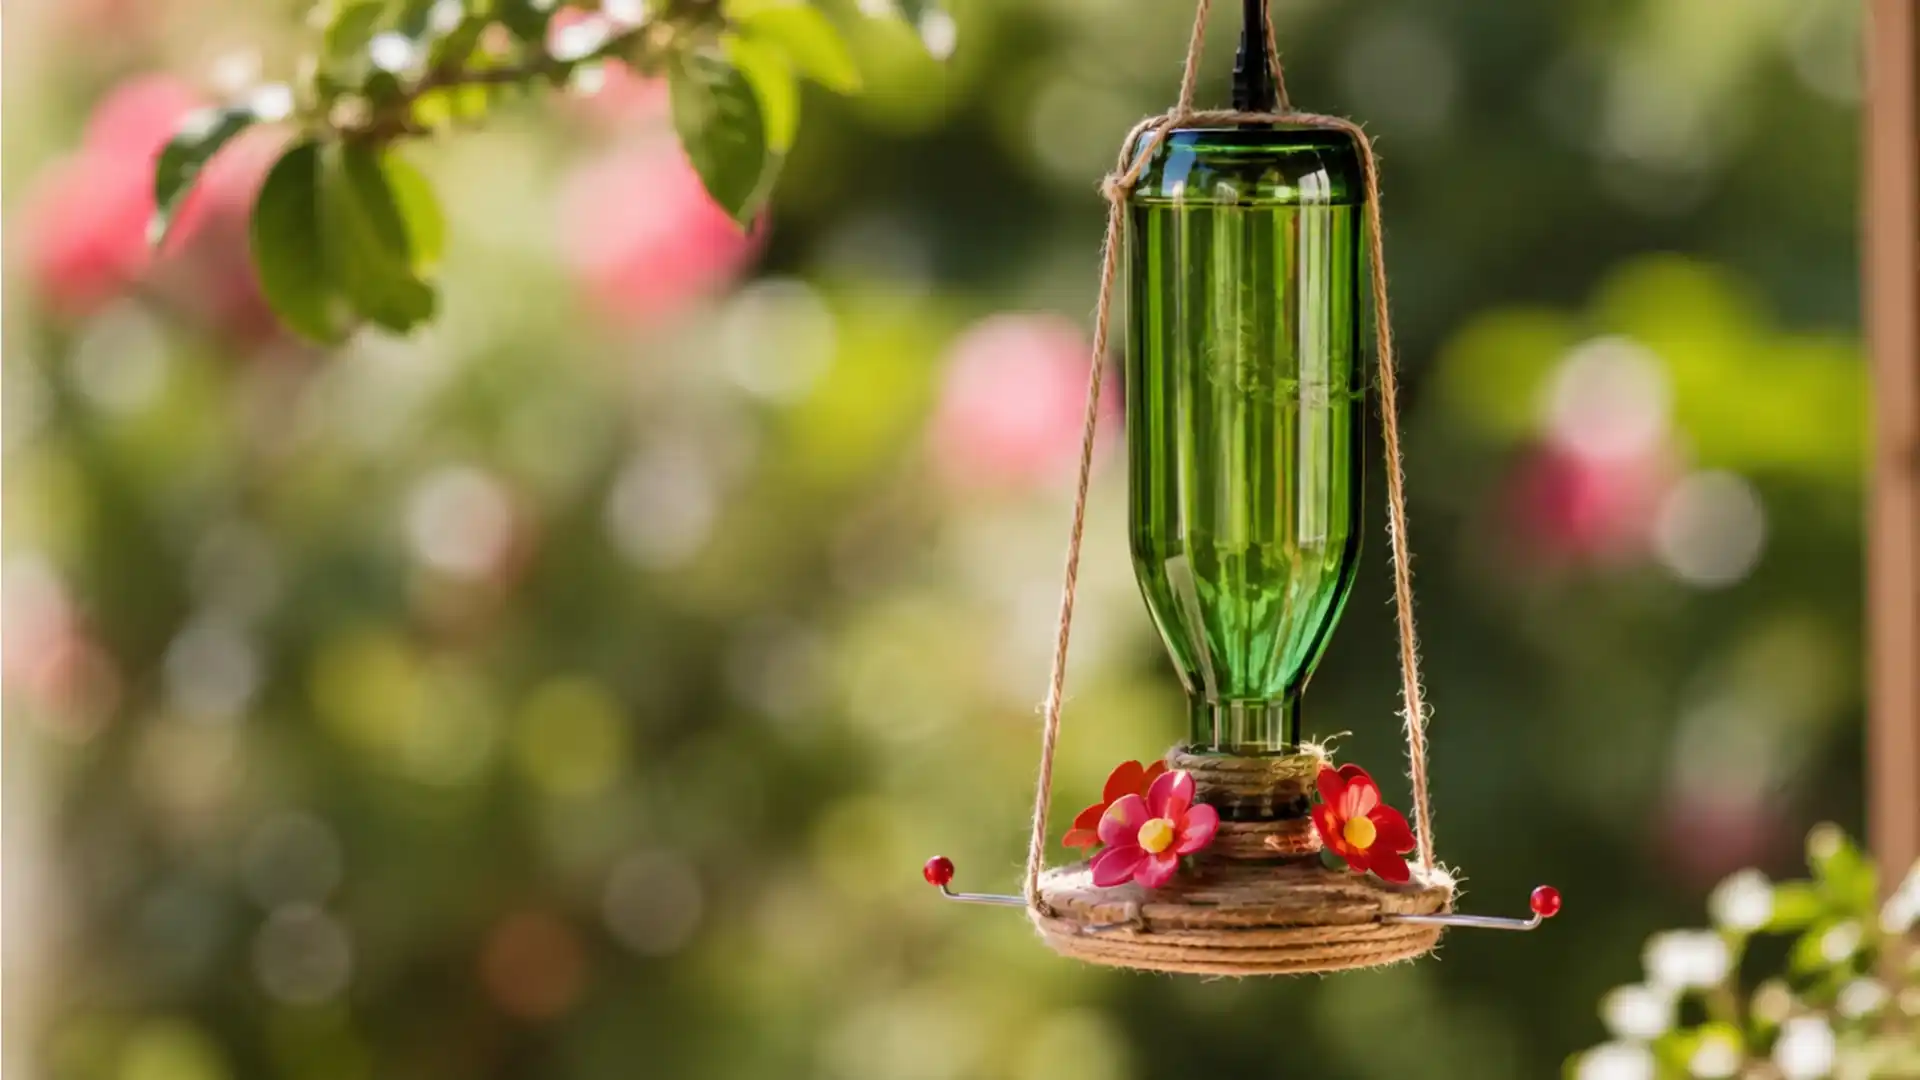
Your window does not need a store-bought bird feeder to pull in your first hummingbird. It just needs a reason, and that reason is probably already sitting in your recycling bin.
A jar, a bottle, a spoon, almost anything with a little color can turn your yard into a spot they circle back to.
I have watched a plain leftover container do exactly that within days of hanging it near a flower bed.
Ahead, you will find the full build from start to finish, the nectar recipe that keeps hummingbirds coming back, and the placement and cleaning habits that make a homemade feeder last a whole season.
Why Build a Feeder Instead Of Buying One?
A homemade feeder does more than save a few dollars at checkout, and the reasons only add up once the first jar or bottle gets a second life.
- Costs far less than a glass or ceramic feeder from the shelf.
- Turns items headed for the trash into something a hummingbird actually visits.
- Lets you pick color and shape freely, which helps attract more birds.
- Comes together in minutes using things already sitting around the house.
- Works as a fun, hands-on project for kids or anyone new to gardening.
- Gives full control over cleanliness, since every part gets chosen and washed by hand.
- Fits almost any yard size, from a small balcony to a wide backyard.
Hummingbirds also pull double duty once they settle in, since inviting more birds into your yard naturally helps keep certain pest populations in check.
Once the reasons for building one settle in, the next question is simple: Which design fits your yard best?
That is where the ideas below come in handy.
Materials You Will Need To Build DIY Feeder
Every material for this build likely already sits in a kitchen drawer or recycling bin.
- Screw-On Cap Bottle: A plastic or glass bottle with a screw-on cap forms the main nectar reservoir for the finished feeder.
- Two Aluminum Cans: These supply the base structure and the material for the decorative flower accents added later.
- Scissors: Scissors handle most of the cutting work, from trimming can tops to shaping flower accents.
- Flathead Screwdriver: A screwdriver starts the small holes needed in the bottle cap and can bottom.
- Drill or Nail: A 1/8 inch drill or a medium-sized nail creates the feeding ports around the base.
- Five-Minute Epoxy: This epoxy seals every seam and joint, keeping the finished feeder watertight and sturdy.
- Bright Acrylic Paint: An optional addition that gives flower accents bold color. Choose a non-toxic, lead-free acrylic made for outdoor craft use, and keep it off the feeding ports so nectar and paint never mix.
How to Make DIY Hummingbird Feeder: 9 Simple Steps
These short steps carry this project from empty containers to a finished feeder. Working through them in order keeps the pieces aligned and the seams watertight:
Step 1: Poke Hole in Bottle Cap
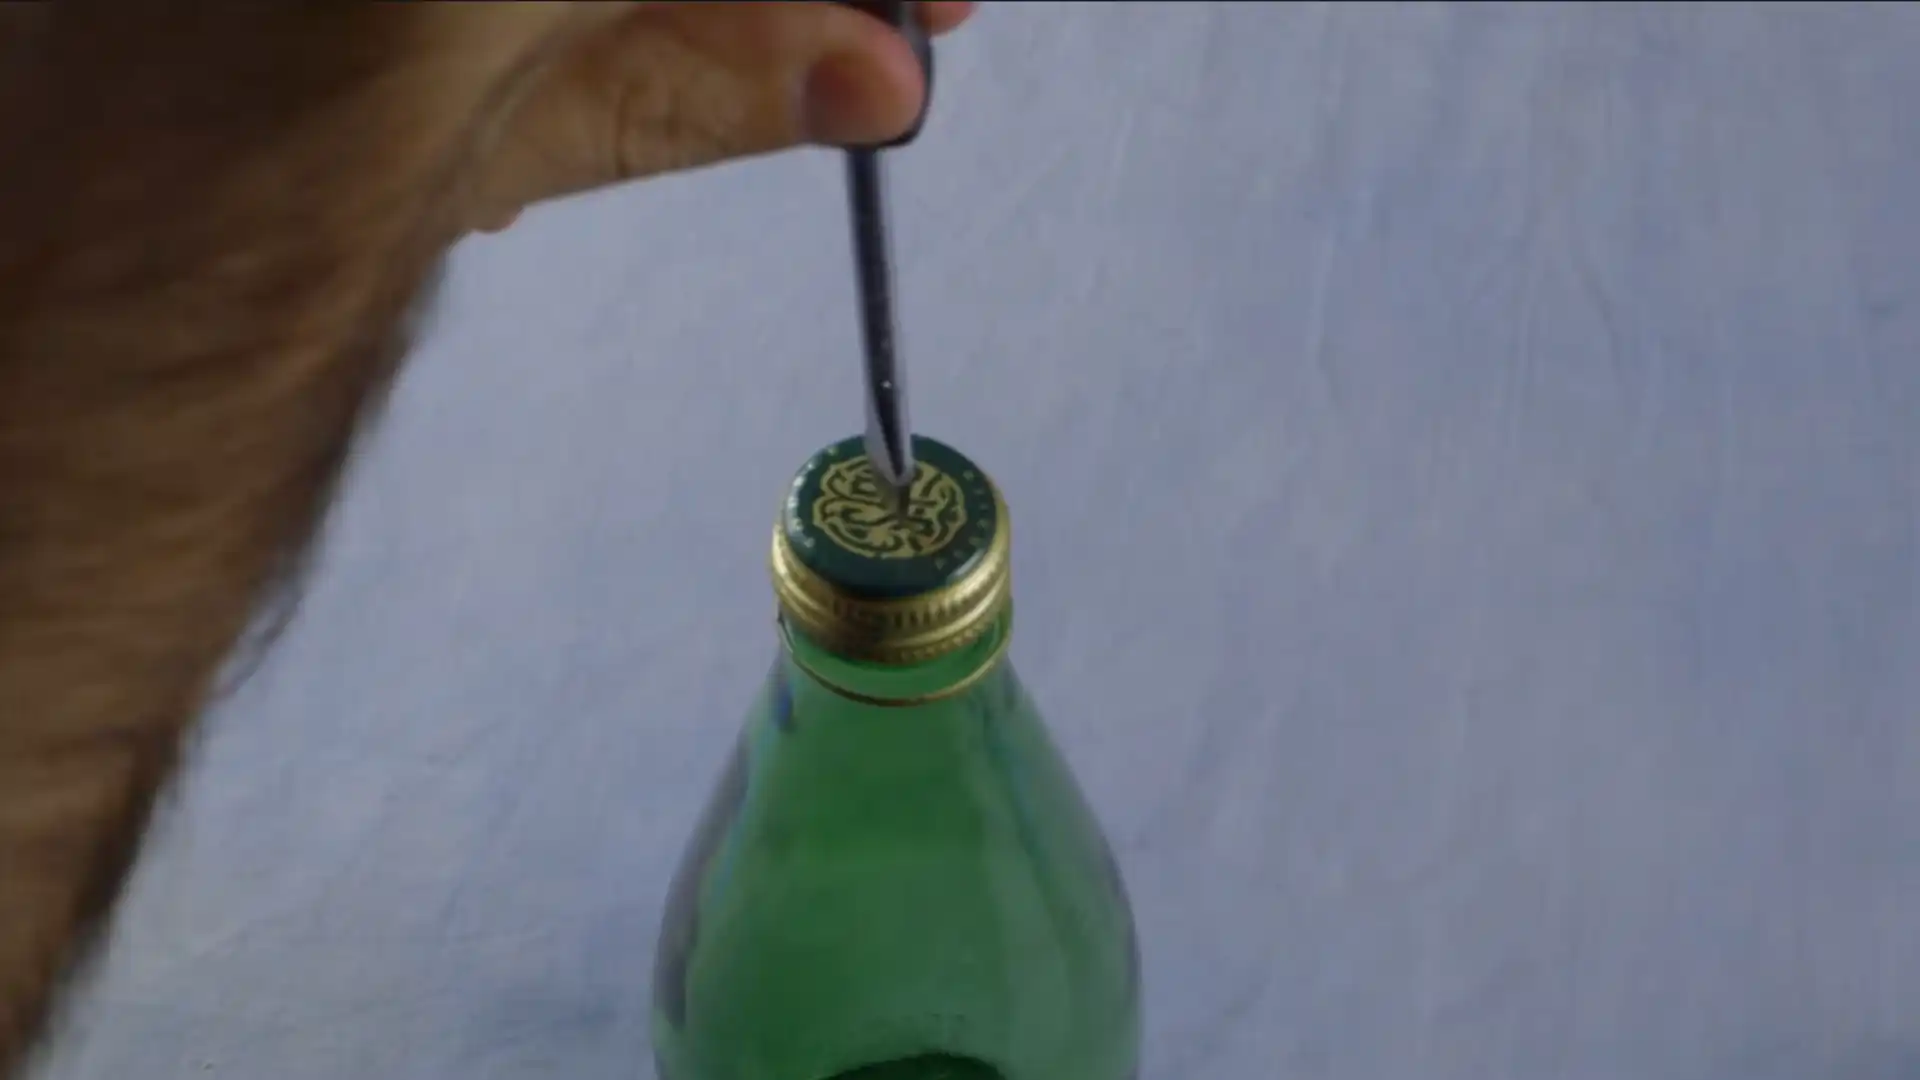
A flathead screwdriver works well for starting a small hole in the center of the bottle cap.
Once the initial opening is made, the pointed tip of a pair of scissors can widen it to roughly three-eighths of an inch, or about one centimeter across.
This opening will later let nectar pass from the bottle into the feeding base, so it needs to stay centered and clean.
Step 2: Cut Hole in Can Bottom
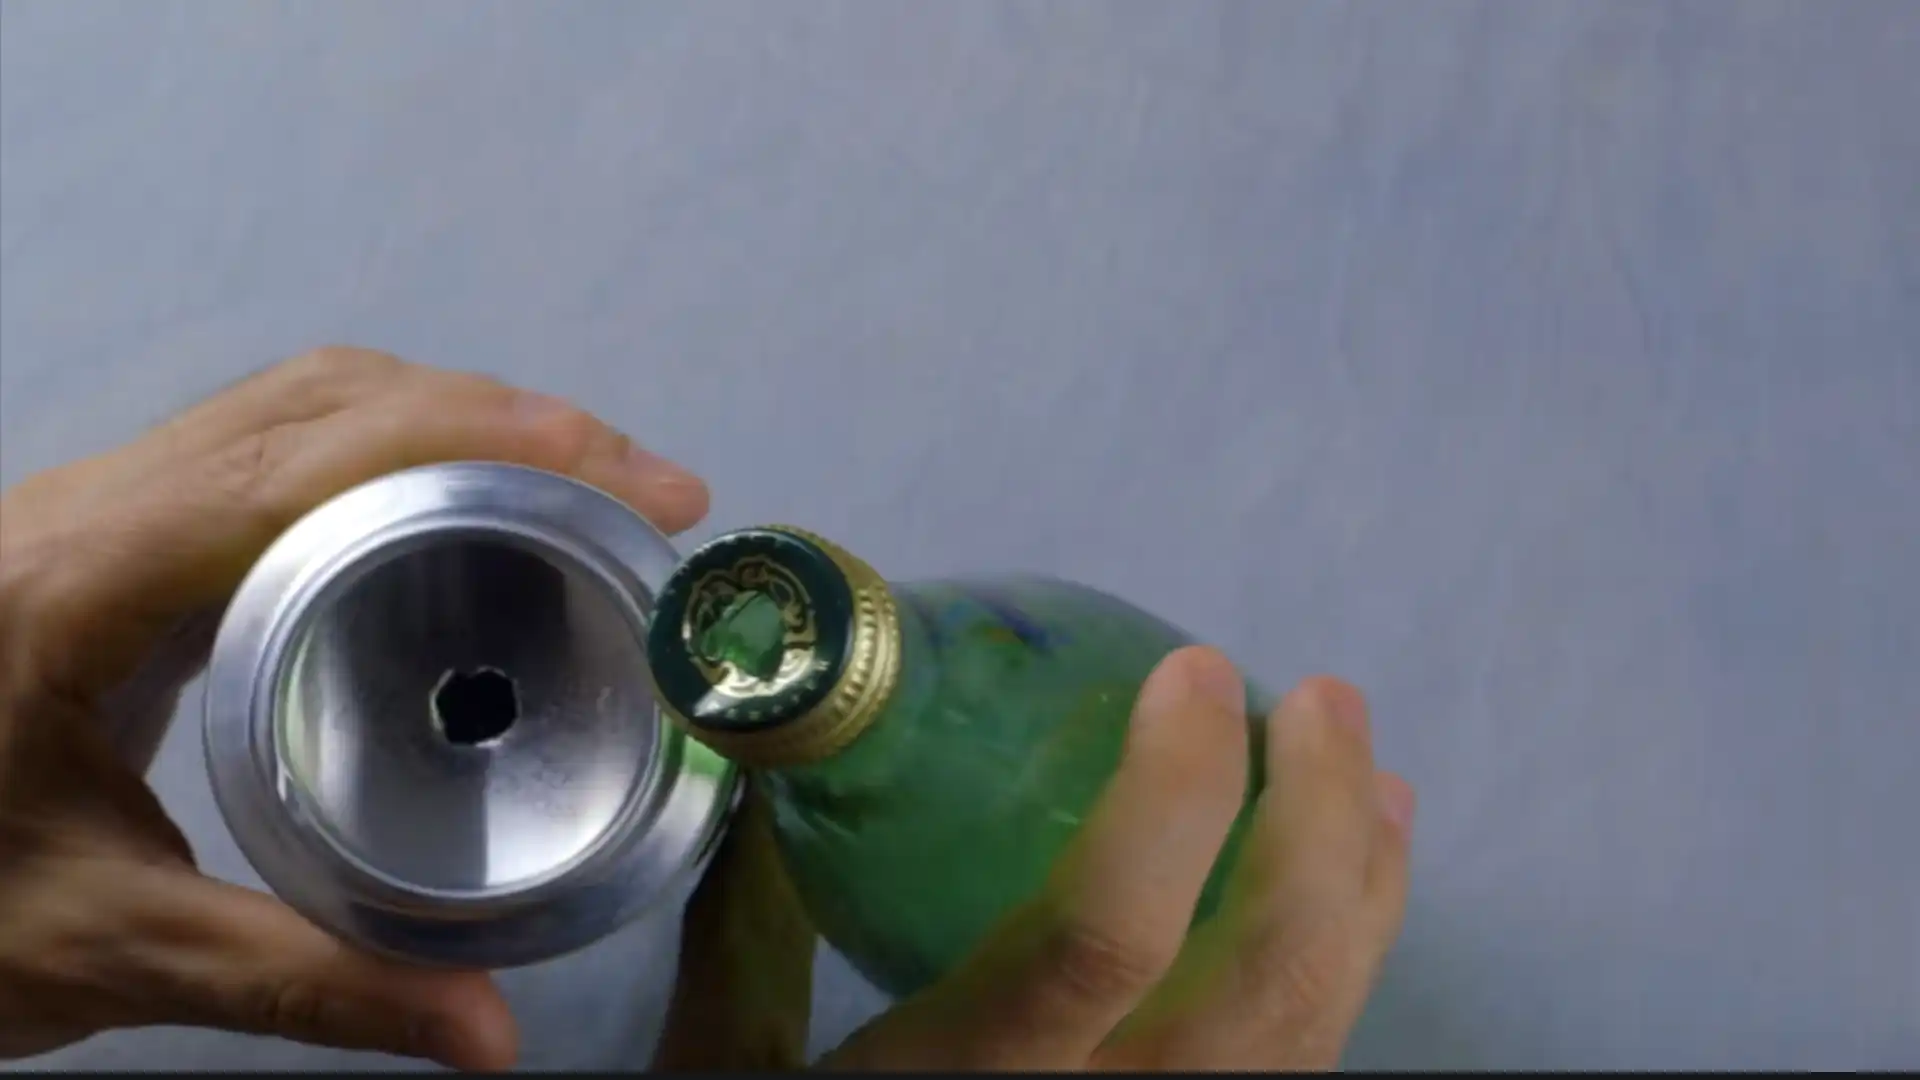
Cut a matching hole in the center of the can bottom using the same screwdriver-and-scissors method from the previous step.
Matching the size to the bottle cap opening keeps nectar flow steady once the pieces come together.
Sharp metal edges form easily during this process, so slow, careful cuts protect fingers from small nicks.
Step 3: Trim Tops Off Both Cans
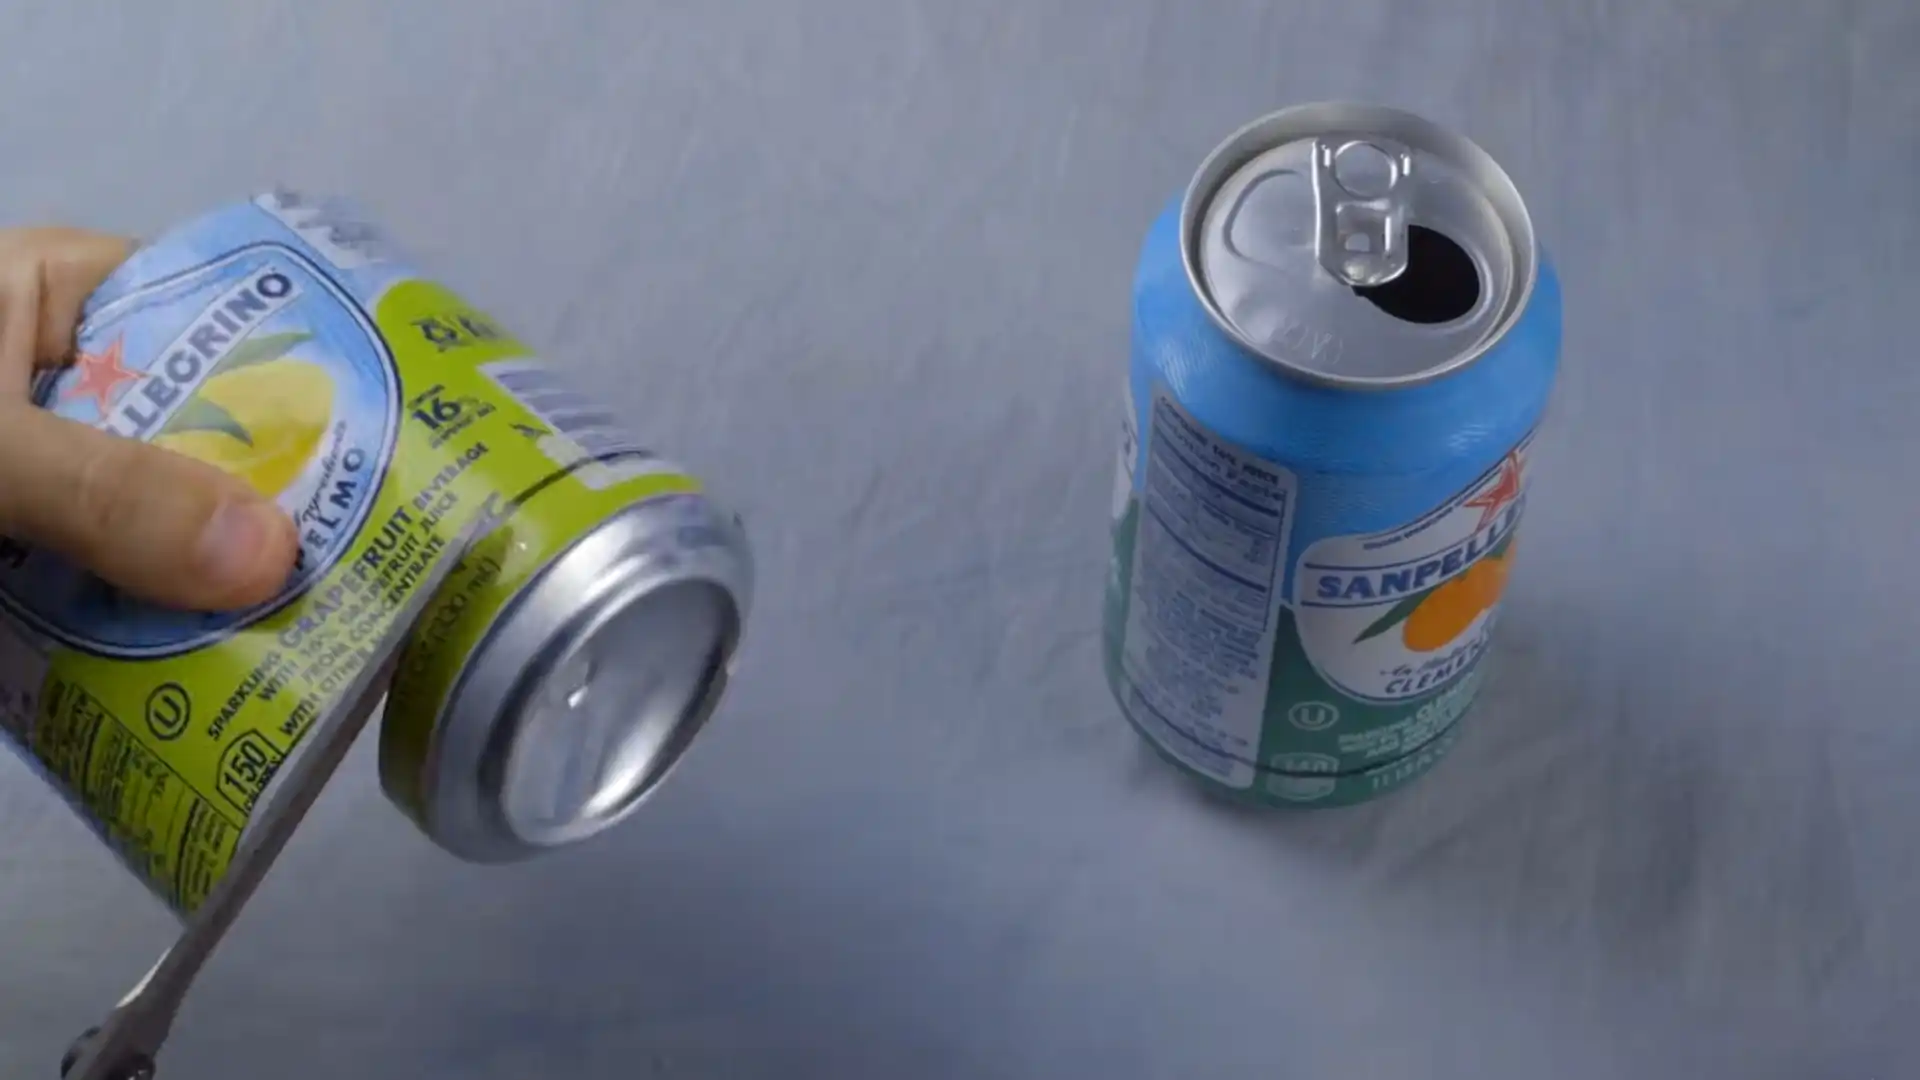
Both cans need a line marked about three-eighths of an inch from the bottom edge before cutting begins.
Trim away the top portion of each can along that marked line with scissors, leaving two shallow metal cups.
These cups form the base and outer shell of the feeder, so keeping the cuts even helps the pieces fit together cleanly in later steps.
Step 4: Join The Two Can Pieces
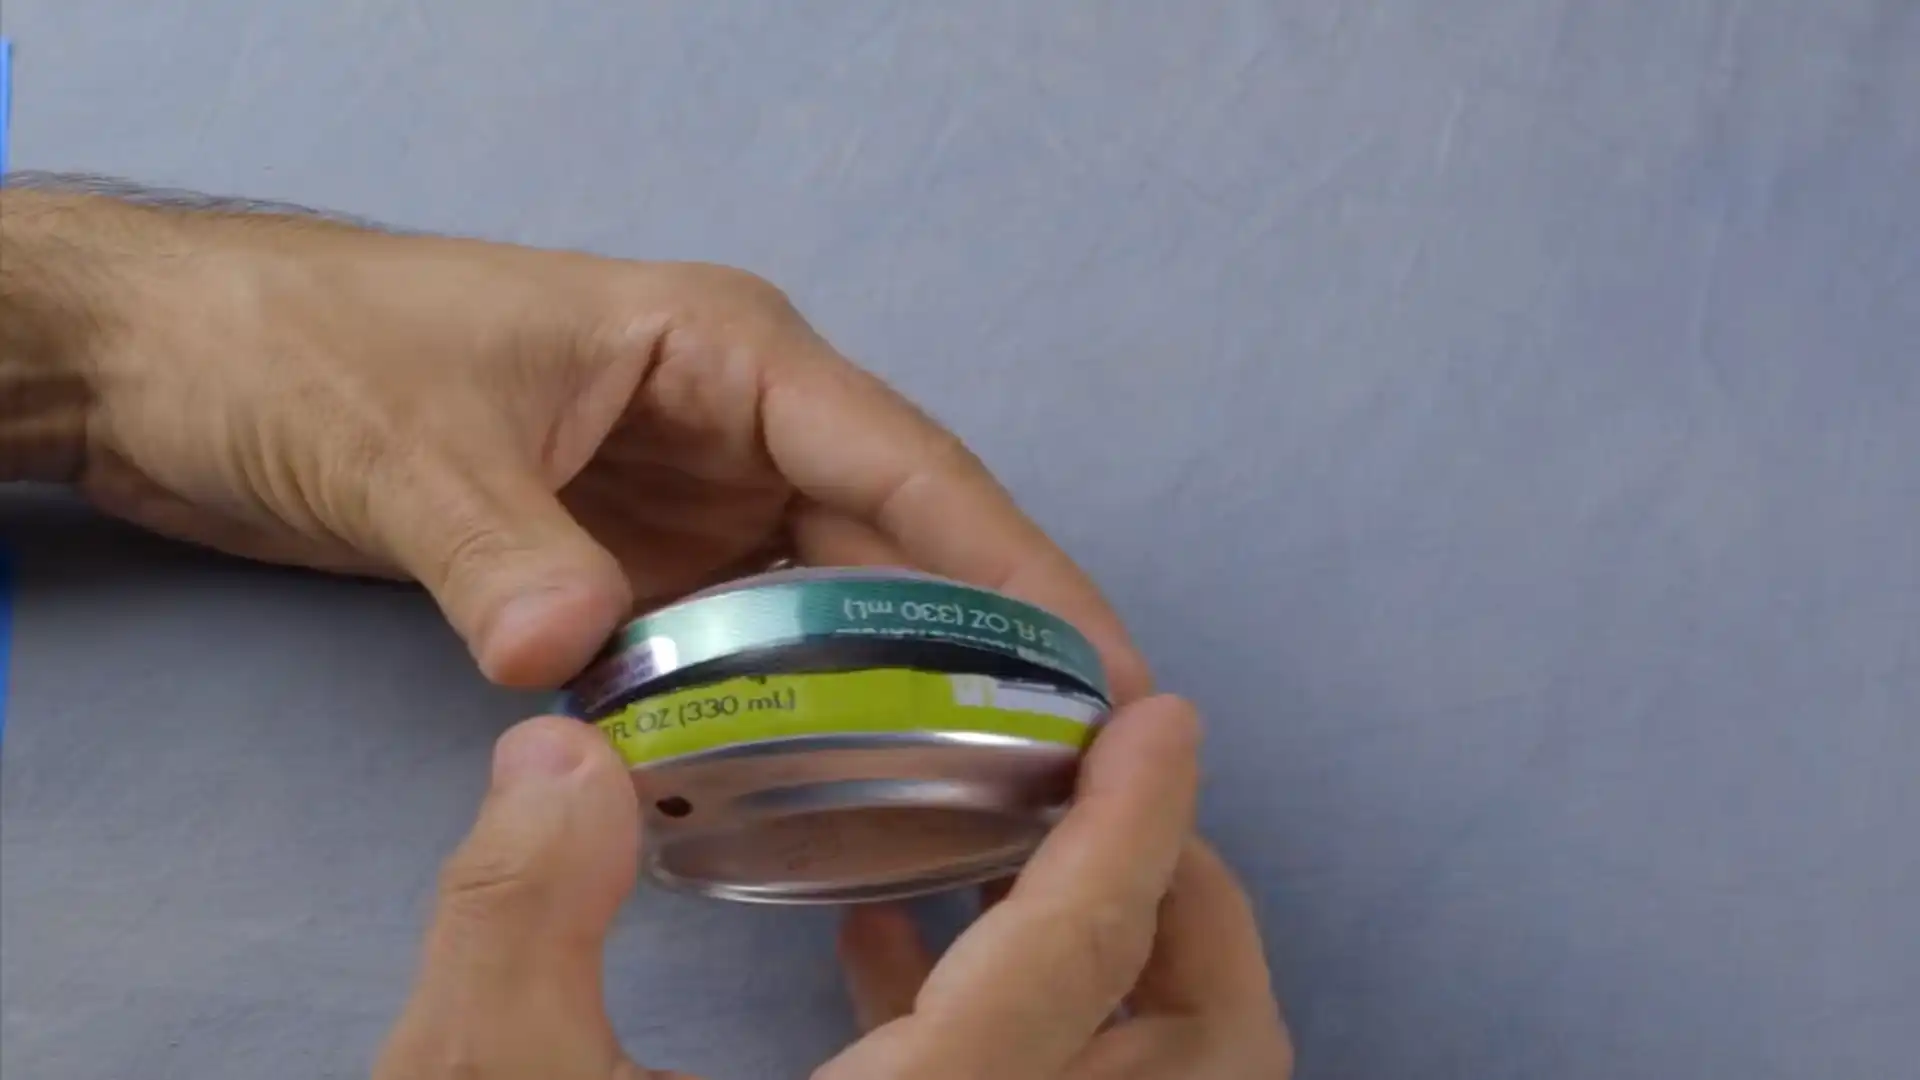
The can bottom with the drilled hole gets three evenly spaced marks along its tapered outer edge, followed by a single cut into one side of that edge.
This small cut lets the piece flex slightly so it slides inside the second can bottom, creating a snug, layered base.
Lining up both openings correctly at this stage keeps the nectar path clear.
Step 5: Seal Seams With Epoxy Glue
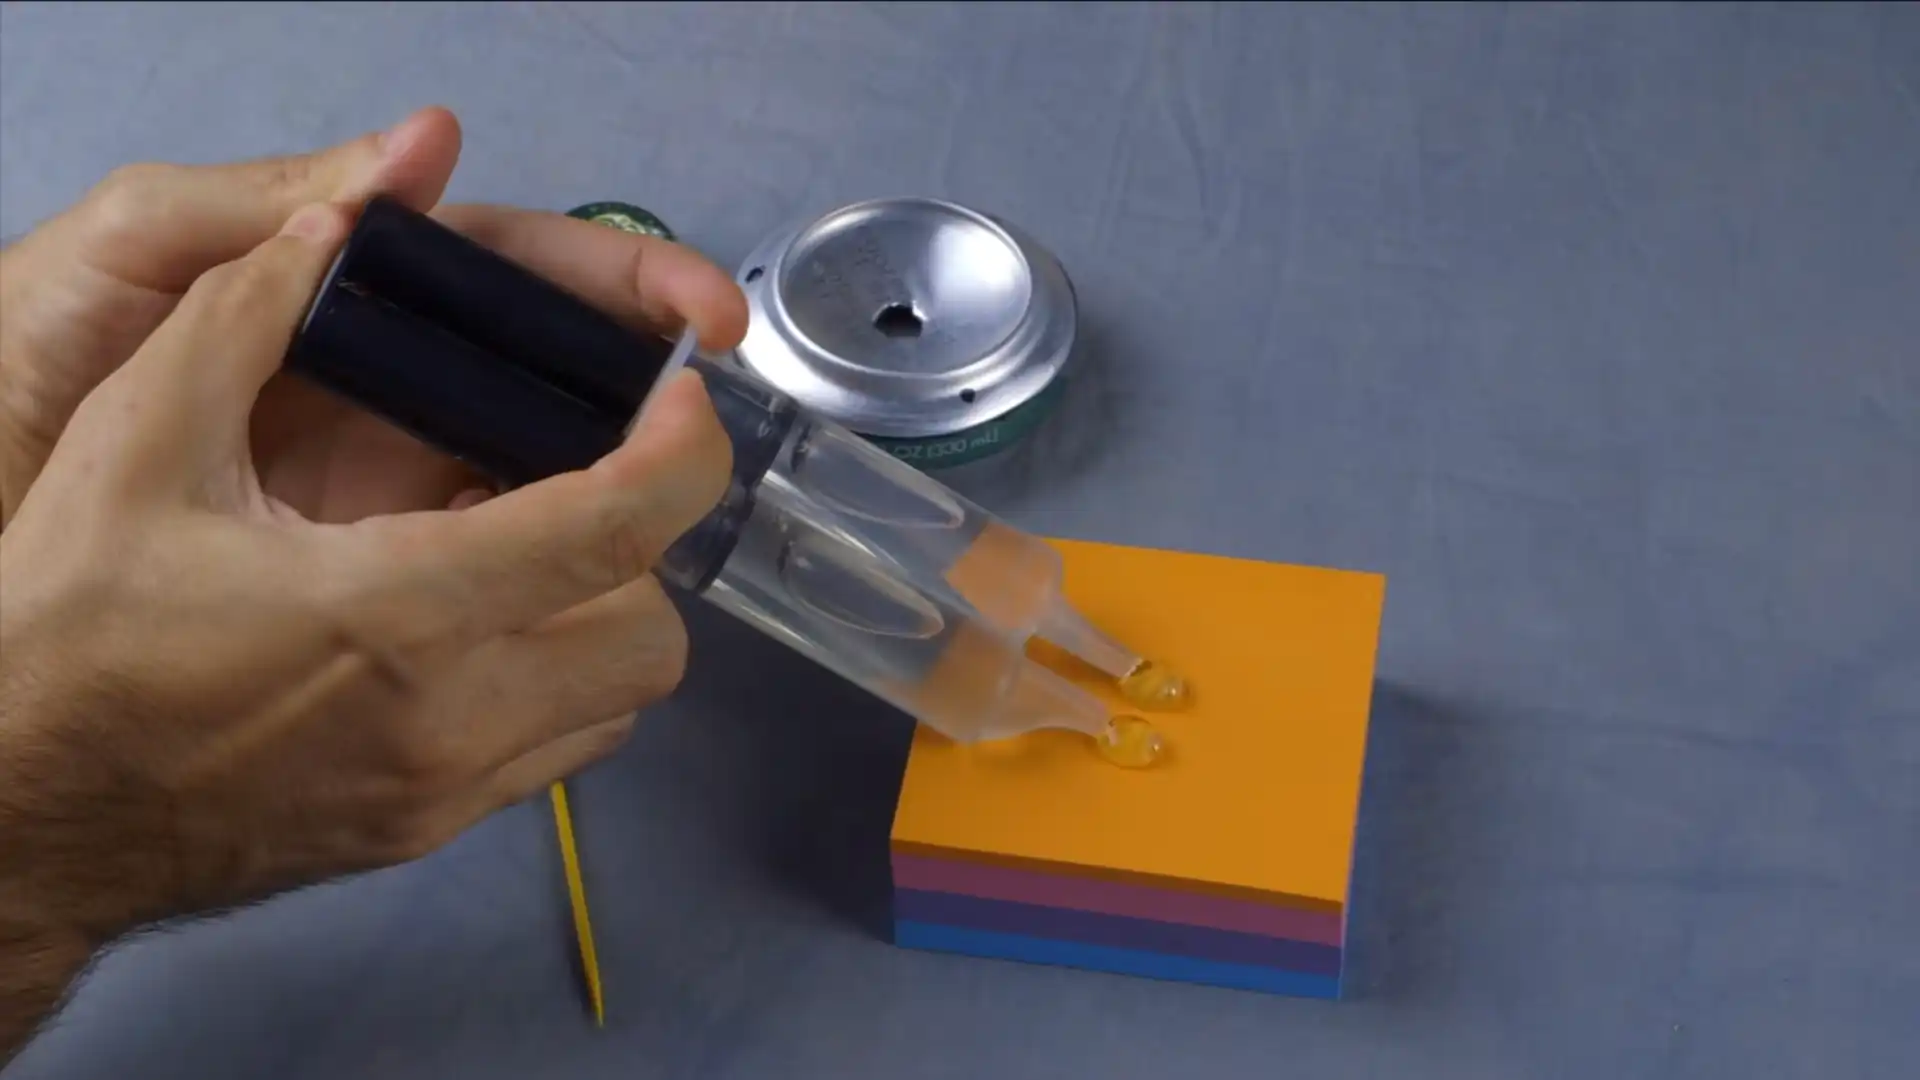
A small batch of five-minute epoxy spreads around the outer seam where the two can pieces meet, sealing any gaps and keeping the joint watertight.
A thin, even layer works better than a thick one since excess epoxy can drip or clog the central hole.
Letting this layer cure fully before moving forward keeps the base sturdy and leak-free.
Step 6: Attach Bottle Cap to Base
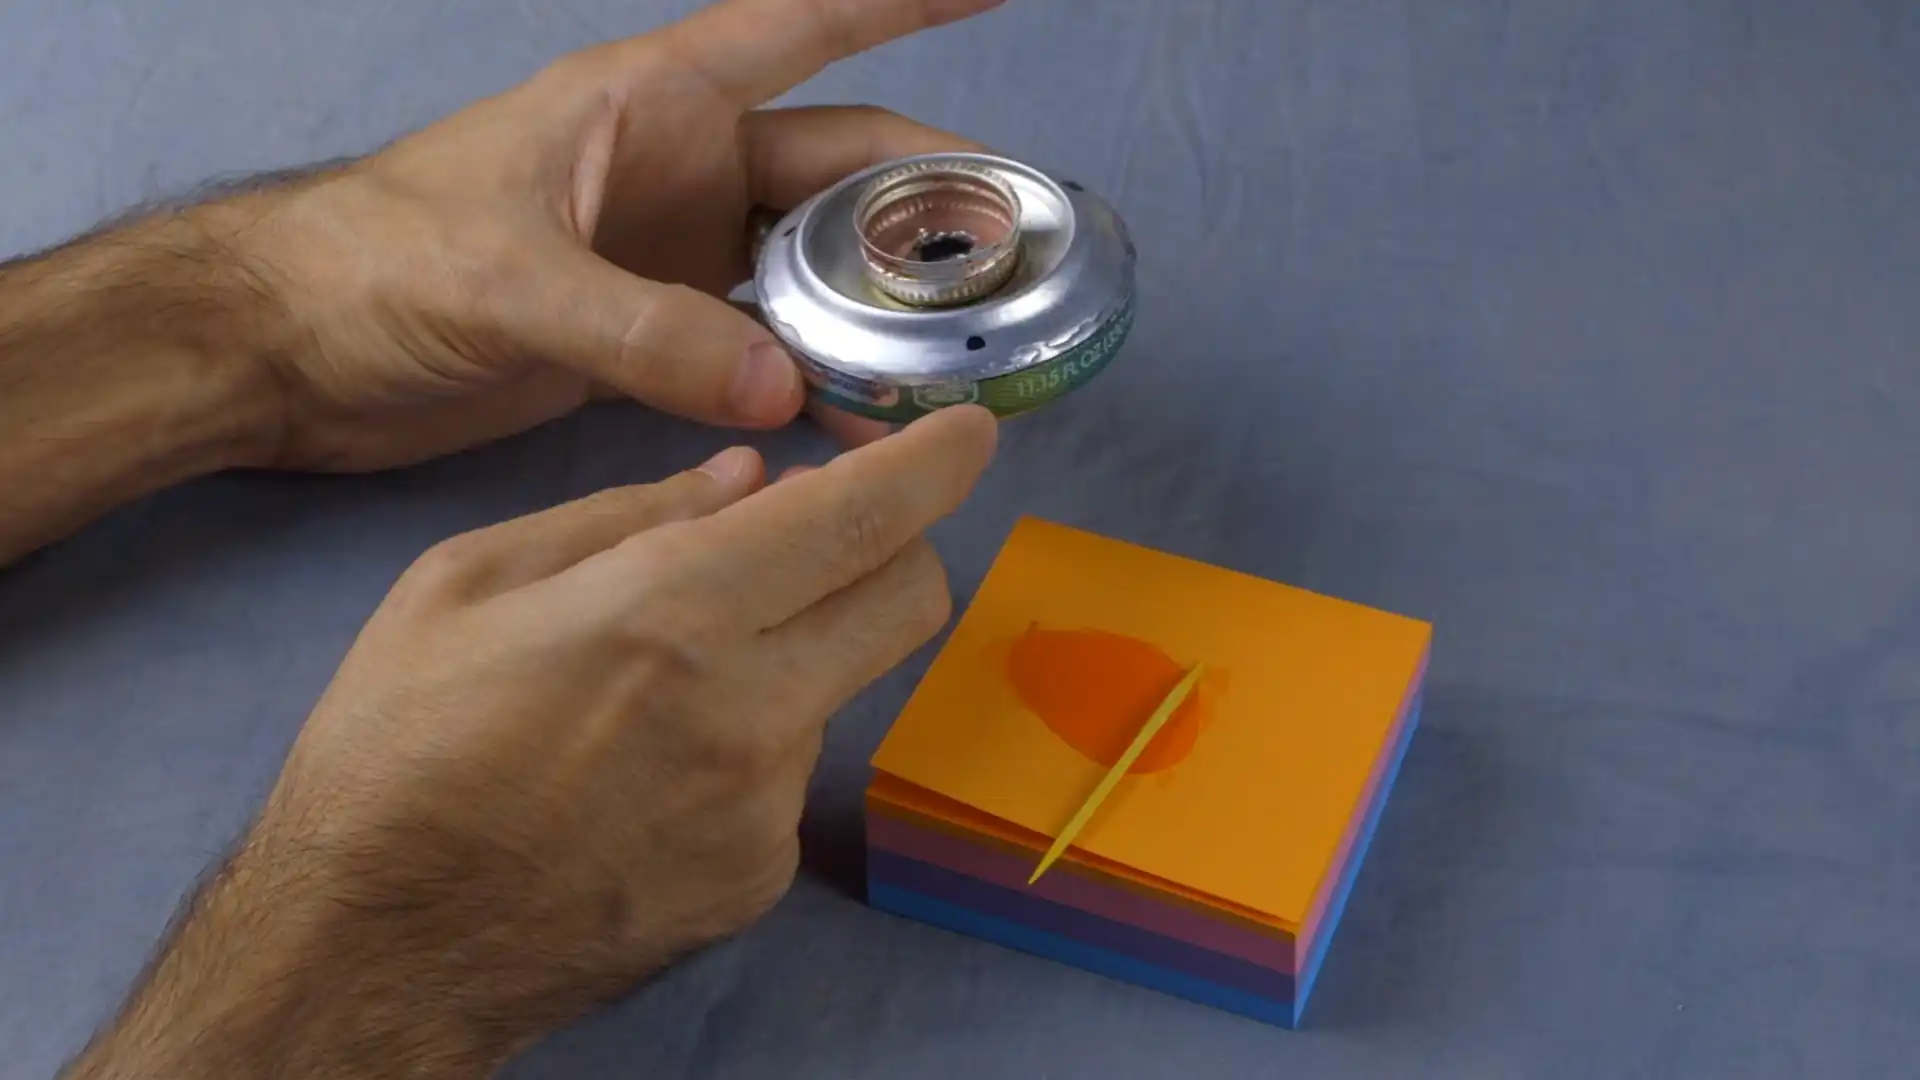
Spread the remaining epoxy across the flat side of the bottle cap before pressing it onto the assembled base, with both holes lined up carefully.
A couple of minutes usually allows the epoxy to set enough for handling.
Checking the alignment before the glue cures avoids a crooked cap, which could cause nectar to leak from the sides. This keeps the base firmly attached to the cap.
Step 7: Drill Drainage Holes Around Edge
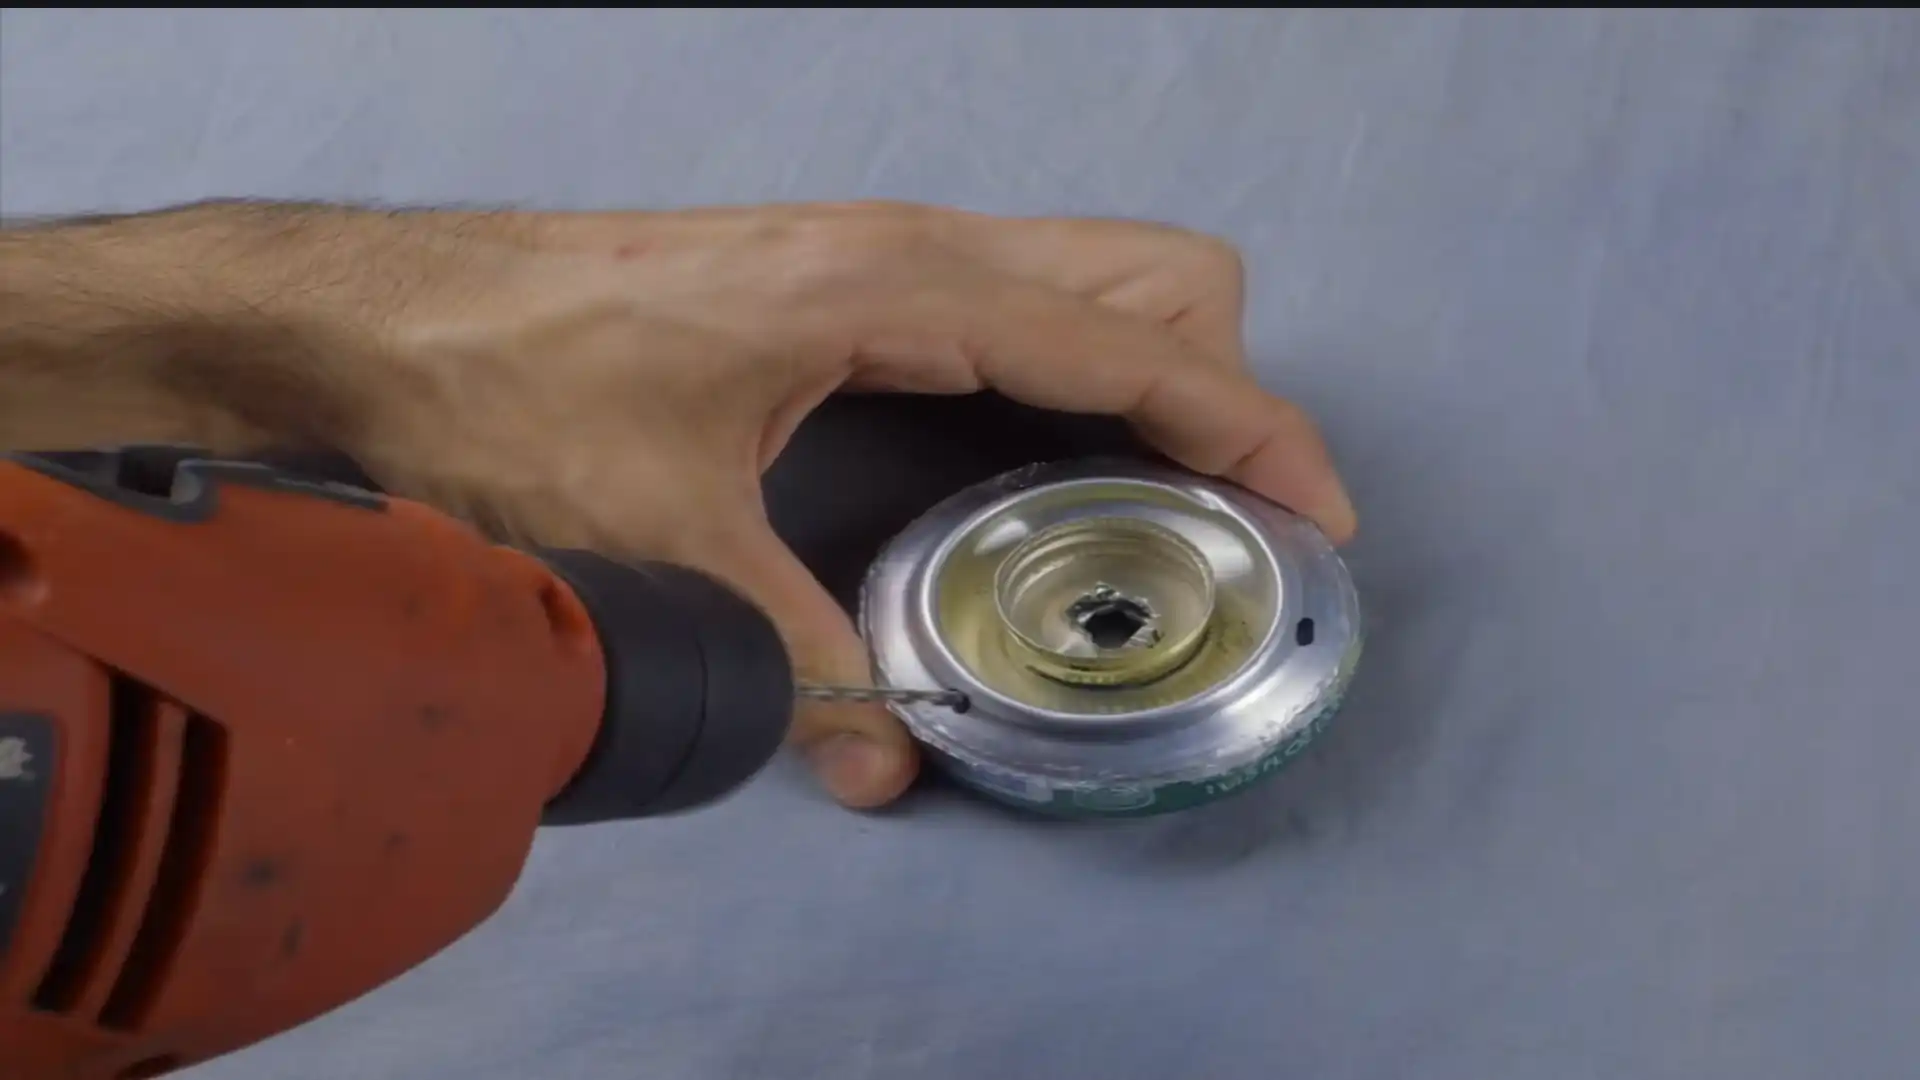
Once the base has cured, use an eighth-inch drill bit or a similarly sized nail to create three small holes spaced evenly around the outer edge of the base.
These openings act as feeding ports where hummingbirds access the nectar inside.
Keeping the spacing even gives the finished feeder a balanced look and offers birds several places to land and drink.
Step 8: Add Painted Flower Accents
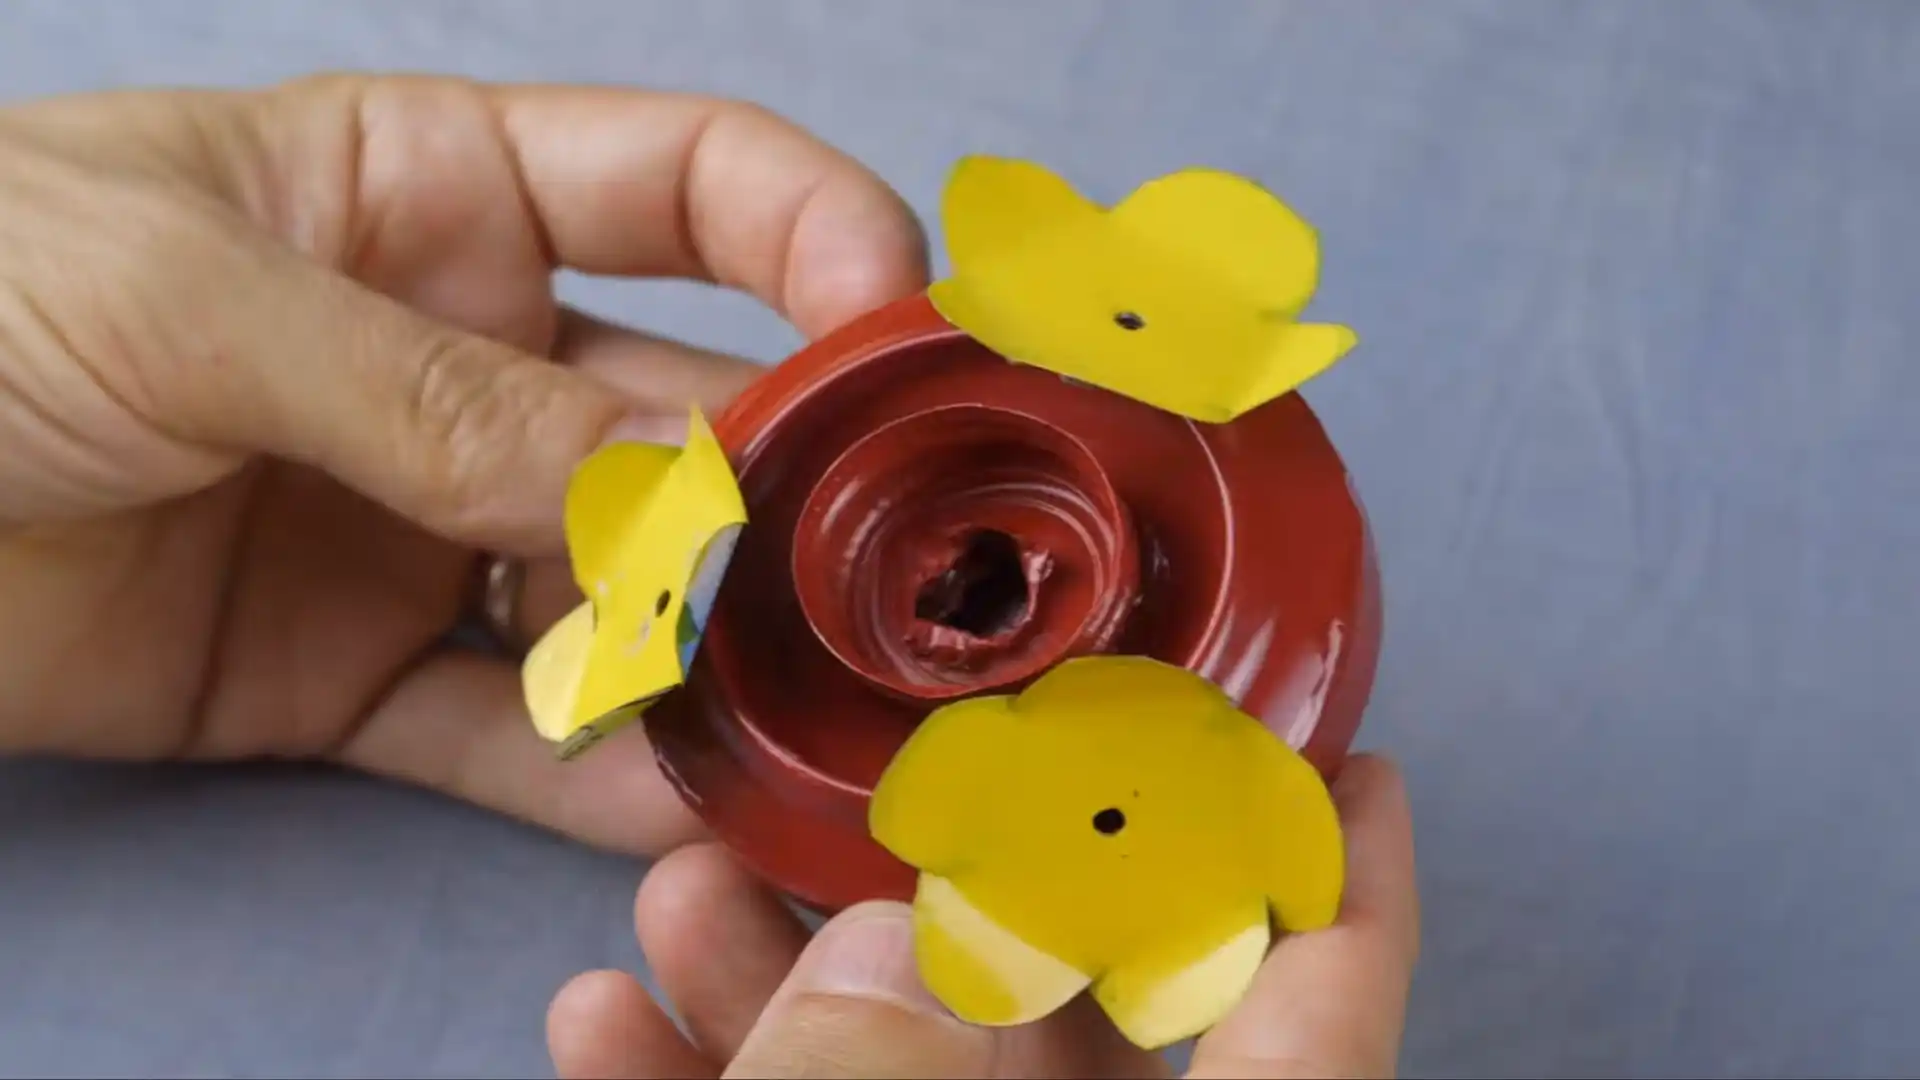
Leftover pieces of aluminum can get traced and cut into flower shapes, each about one to one and a half inches across, with a small hole drilled in the center of every flower.
Bright acrylic paint, such as red or yellow, makes these accents stand out and helps attract hummingbirds from a distance.
Let each coat cure somewhere dry and out of reach of pets or kids until it’s fully set, since wet paint can transfer onto feathers if a bird lands on it too soon. Letting the paint dry fully before gluing keeps colors crisp.
Step 9: Assemble And Hang The Feeder
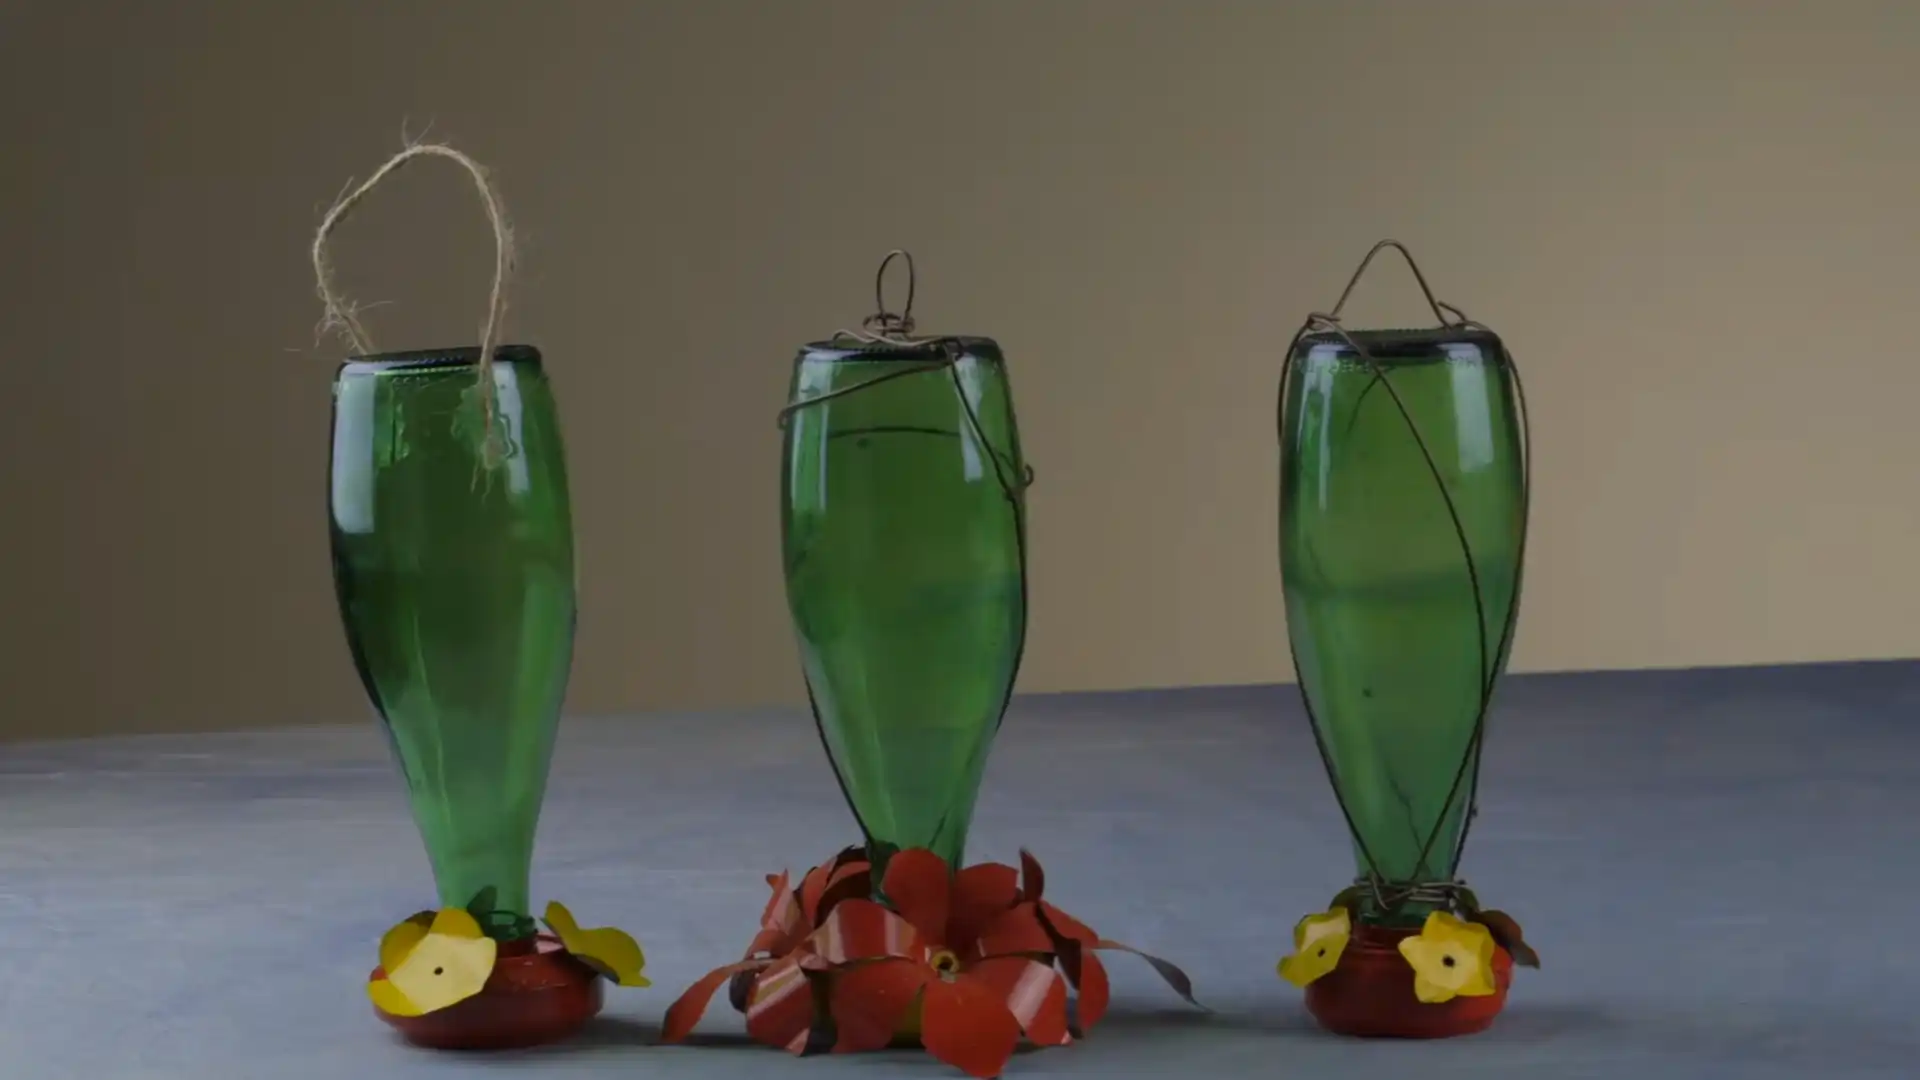
A fresh batch of epoxy attaches the painted flowers to the base, with toothpicks helping line up each hole before the glue sets, then removed before curing finishes.
Gently bending the petals adds a more natural shape.
Once everything cures, the bottle screws into the cap base, and twine, wire, or hot glue secures a hanger for the finished feeder.
Prefer to watch the build before you pick up scissors? Here is a quick video walkthrough of the whole process, start to finish.
Source: ehullquist
Other Feeder Design Variations to Try
A few creative twists can turn the basic build into a completely different look without changing the core process.
- Mason Jar Version: A mason jar swaps in for the bottle, giving the feeder a rustic, farmhouse-style appearance.
- Double-Tier Feeder: Stacking two can bases creates extra feeding ports for busier backyards with multiple visiting birds.
- Painted Glass Bottle: Frosted glass paint on the bottle adds texture and color beyond the aluminum flower accents.
- Wine Bottle Build: A wine bottle offers a taller, more refined silhouette that pairs well with garden decor.
- Multi-Color Flowers: Mixing several paint shades across the flower accents creates a more playful, garden-inspired look.
- Hanging Chain Display: Swapping twine for a decorative chain adds a polished finish to the finished hanger.
Small design changes like these keep the project fresh while sticking to the same reliable building method.
Mixing the Perfect Nectar Recipe
Nectar quality matters just as much as feeder design when it comes to getting hummingbirds to visit your homemade feeder.
A simple mix of one part white granulated sugar to four parts water, stirred until fully dissolved, replicates the sugar content found in natural flower nectar.
Boiling the water first helps the sugar dissolve completely and kills off any bacteria present in the water at that moment.
I am not fully certain how long that protection lasts once the mixture cools, so treat boiling as a good starting step rather than a reason to stretch out how long a batch sits in the feeder.
Food coloring and red dye add no benefit and may cause harm over repeated exposure, so plain, clear nectar works best inside the feeder.
Filling the reservoir only partway during cooler months reduces waste, since hummingbirds feed less often when temperatures drop.
Fill the reservoir enough that nectar reaches the feeding ports right away, so the first hummingbirds to visit a new feeder find food immediately instead of an empty port.
Ideal Feeder Placement and Safety Routine
Smart placement helps hummingbirds find the feeder fast and keeps them safe while feeding:
| Factor | Recommendation | Why It Matters | Placement |
| Height | Five to eight feet up | Feels safe, close to cover | Near a sturdy branch |
| Shade | Partial shade spot | Slows nectar spoilage | Avoid full afternoon sun |
| Nearby Flowers | Close to blooming plants | Adds extra food sources | Pick bright, nectar-rich blooms |
| Window View | Within sight of windows | Lets households watch birds | Keep some distance from glass |
| Branch Distance | Away from tree limbs | Blocks easy ant access | Keeps squirrels from reaching it |
| Ant Barrier | Dab of vegetable oil | Stops crawling insects | Reapply after heavy rain |
| Flight Path | Open, unobstructed area | Lets birds spot threats | Avoid dense, low shrubs |
A quick note on that ant barrier: Keep oil strictly on the pole or hanger, well below the feeder itself, since any oil that reaches a hummingbird’s feathers can interfere with flight. Verify this against current guidance from a wild bird resource before relying on it as your only ant defense.
Pairing a feeder with a few well-placed flowering trees gives hummingbirds a backup food source whenever the reservoir runs low or needs cleaning.
Cleaning and Maintenance Tips for a Healthy Feeder
A simple cleaning routine keeps nectar fresh and protects visiting hummingbirds from harmful bacteria.
- Clean Every Few Days: Feeders need a full wash every three to four days in hot weather, stretching to about a week when temperatures cool.
- Watch For Cloudy Nectar: Cloudy or discolored liquid signals bacterial growth and calls for an immediate rinse and refill, even if freshly filled.
- Check For Sour Smells: A sour odor from the feeding ports is an early warning sign that spoilage has already started inside the reservoir.
- Scrub With Vinegar Water: Warm water mixed with a small amount of vinegar cuts through sticky residue that builds up inside the ports over time.
- Rinse Thoroughly Before Refilling: A thorough rinse removes lingering vinegar smell, keeping hummingbirds from avoiding the feeder once fresh nectar goes back in.
Staying consistent with cleaning keeps the feeder safe and hummingbirds coming back all season.
Frequently Asked Questions (FAQs)
What Household Items Can Be Used as a Hummingbird Feeder?
Aluminum cans, plastic bottles, mason jars, and even old spoons can turn into hummingbird feeders with a few holes and some creative shaping.
How Long Does Homemade Hummingbird Nectar Last?
Homemade nectar typically stays fresh for three to four days in warm weather and up to a week during cooler seasons.
Do You Need Red Dye in Hummingbird Nectar?
Red dye is not necessary and may actually harm hummingbirds over time, so plain sugar water works fine without any added coloring.
How Often Should You Clean a Hummingbird Feeder?
Feeders need cleaning every three to four days in hot weather and roughly once a week when temperatures stay cooler outside.
Time To Build
A DIY hummingbird feeder turns spare bottles and cans into something your yard actually looks forward to.
The build takes an afternoon, a little patience with the epoxy, and whatever bright paint you have got sitting in a garage cabinet.
Once it is hanging in the right spot, the wait for that first visiting hummingbird becomes part of the fun.
A feeder built this way can hold up for a full season with nothing more than a regular vinegar rinse and fresh nectar.
Drop a comment below with photos, color choices, or questions about your build. Real backyard results from other readers often help more than any single guide ever could.