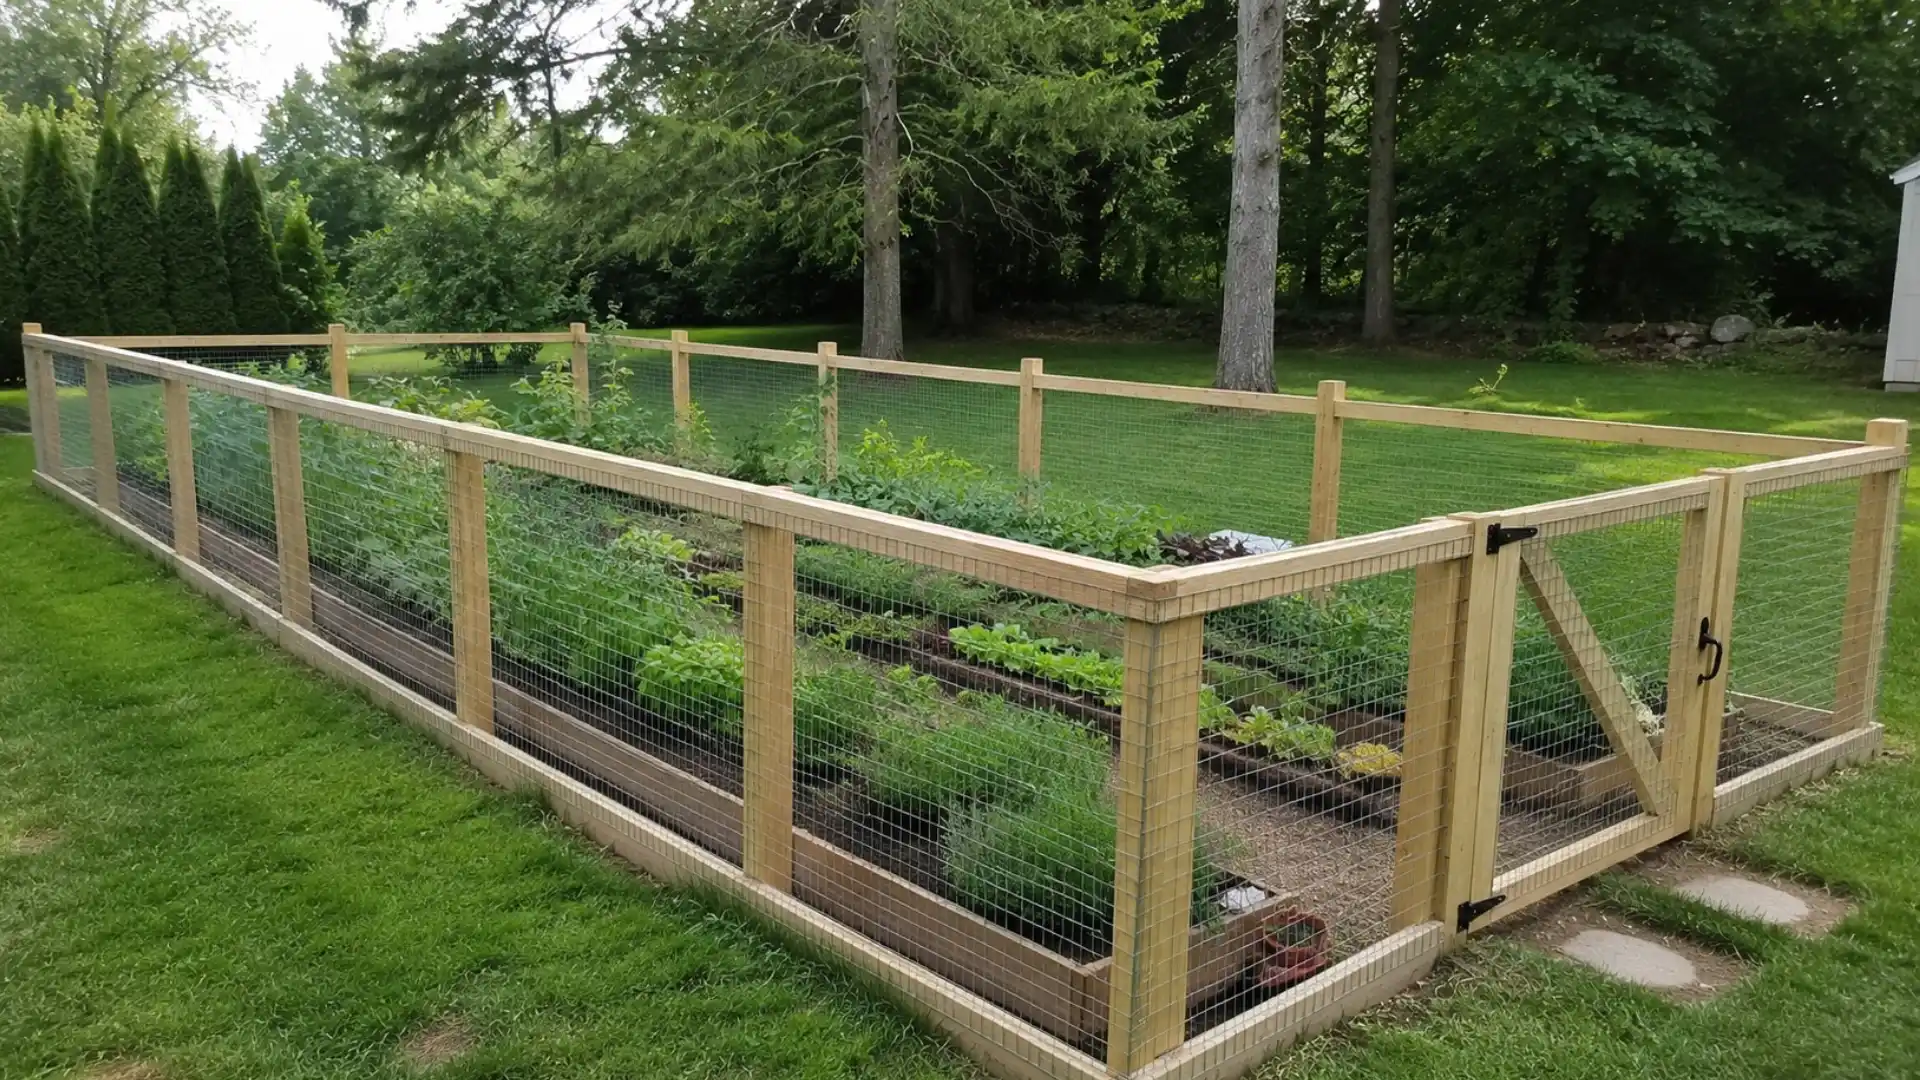
Rabbits, deer, and other hungry visitors can undo a season of garden work fast. The simplest fix is a fence, and you do not need to hire anyone to build one.
With a few basic tools and the right materials, a sturdy DIY garden fence is well within reach.
The key is matching your fence to the pest causing the damage and picking materials that will hold up over time.
Setting the posts, stretching the fencing, and hanging a gate is mostly straightforward work, and the payoff is a garden that stays yours.
Plan Before You Buy Anything
A little planning up front saves you a return trip to the store. Start by measuring your garden’s perimeter, so you know how much fencing, wire, or wood to buy, plus a bit extra for a gate.
Then figure out which animal is actually causing the damage.
Rabbits and small rodents need a fence at least 2 to 3 feet tall with tight bottom gaps. Deer need at least 8 feet, or a shorter fence angled outward at the top.
Diggers like groundhogs need wire buried at the base. If rabbits are your main problem, pairing this fence with a few extra tactics for stubborn rabbits usually finishes the job.
Check your local rules on fence height and property placement before you build, too.
I am not aware of a blanket permit requirement for a modest garden fence in most Houston-area cities, but rules vary by municipality.
Choosing the Right Garden Fence Material
Every material has its own strengths, so the right pick depends on your budget, the pests you’re dealing with, and how long you want the fence to last.
The comparison below can help you decide.
| Material | Cost/linear ft* | Best for | Notes |
|---|---|---|---|
| Chicken Wire | $0.50–$1 | Rabbits, birds | Lightweight, wears out faster |
| Plastic Mesh Netting | $0.30–$0.75 | Curved or odd beds | Cheapest, least durable |
| Welded Wire/Hardware Cloth | $1–$3 | Groundhogs, armadillos, larger animals | Sturdy, good for burying |
| Wood Panels/Pallet Wood | $15–$45 | Privacy, looks | Needs sealing or staining, and re-sealed more often in our humidity |
| Vinyl | $15+ | Long-term use | Low upkeep, higher upfront cost |
*Rough national averages. Expect some variance at Houston-area suppliers, so check current pricing before you budget your project.
If you are building the fence around a new bed rather than an existing one, it is worth getting the layering inside a raised bed right at the same time.
Tools and Supplies You’ll Need
Gather these basics before you start, so you are not making extra trips to the store mid-project.
- Wooden Stakes or Posts – 4×4 posts for sturdier fences, thinner stakes for lightweight netting or mesh
- Post Hole Digger or Sledgehammer – For digging holes or driving stakes into the ground
- Fencing Material of Choice – Chicken wire, mesh netting, hardware cloth, wood panels, or vinyl
- Staple Gun or Crown Nailer – To attach wire or mesh to posts
- Tin Snips or Wire Cutters – To trim fencing to size and clean up sharp edges
- Tape Measure – To mark post spacing and check the perimeter
- Level – To keep posts and panels straight, especially on uneven ground
- String or Twine – To mark a straight line before setting posts
- Drill with Screws or a Hammer with Nails – To secure wood panels or gate hardware
- Work Gloves – To handle wire and rough wood safely
- Concrete Mix (optional) – For extra-secure posts in loose or sandy soil
Step-by-Step: Building Your Garden Fence
With your materials and tools ready, it is time to put the fence together. Follow these steps in order for a sturdy, gap-free result.
Step 1: Clear and Prep the Ground
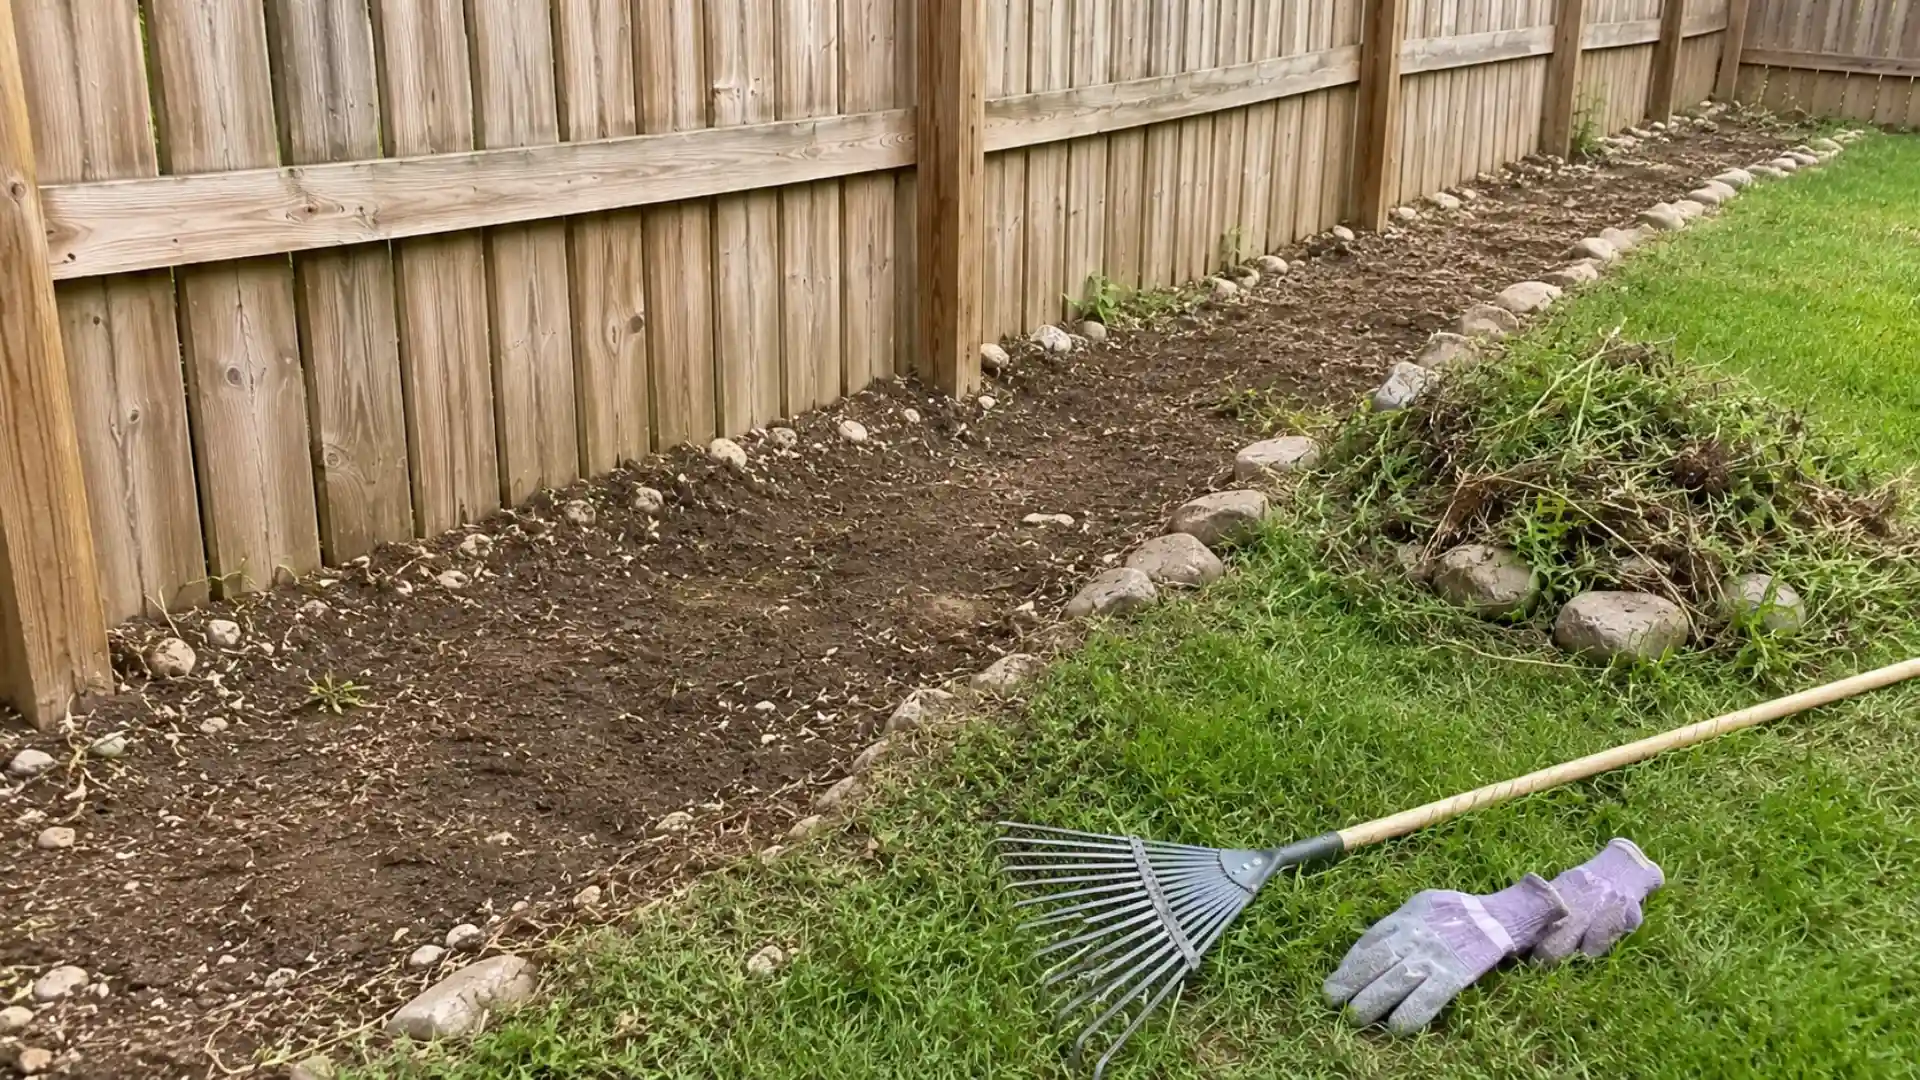
Before marking post spacing, walk the fence line and clear away rocks, weeds, roots, and debris.
A clean path makes digging holes easier and keeps posts sitting straight instead of tilting around buried obstacles. Rake the area flat if the ground is uneven, and pull up any large roots that could get in the way later.
Step 2: Mark and Measure Post Spacing
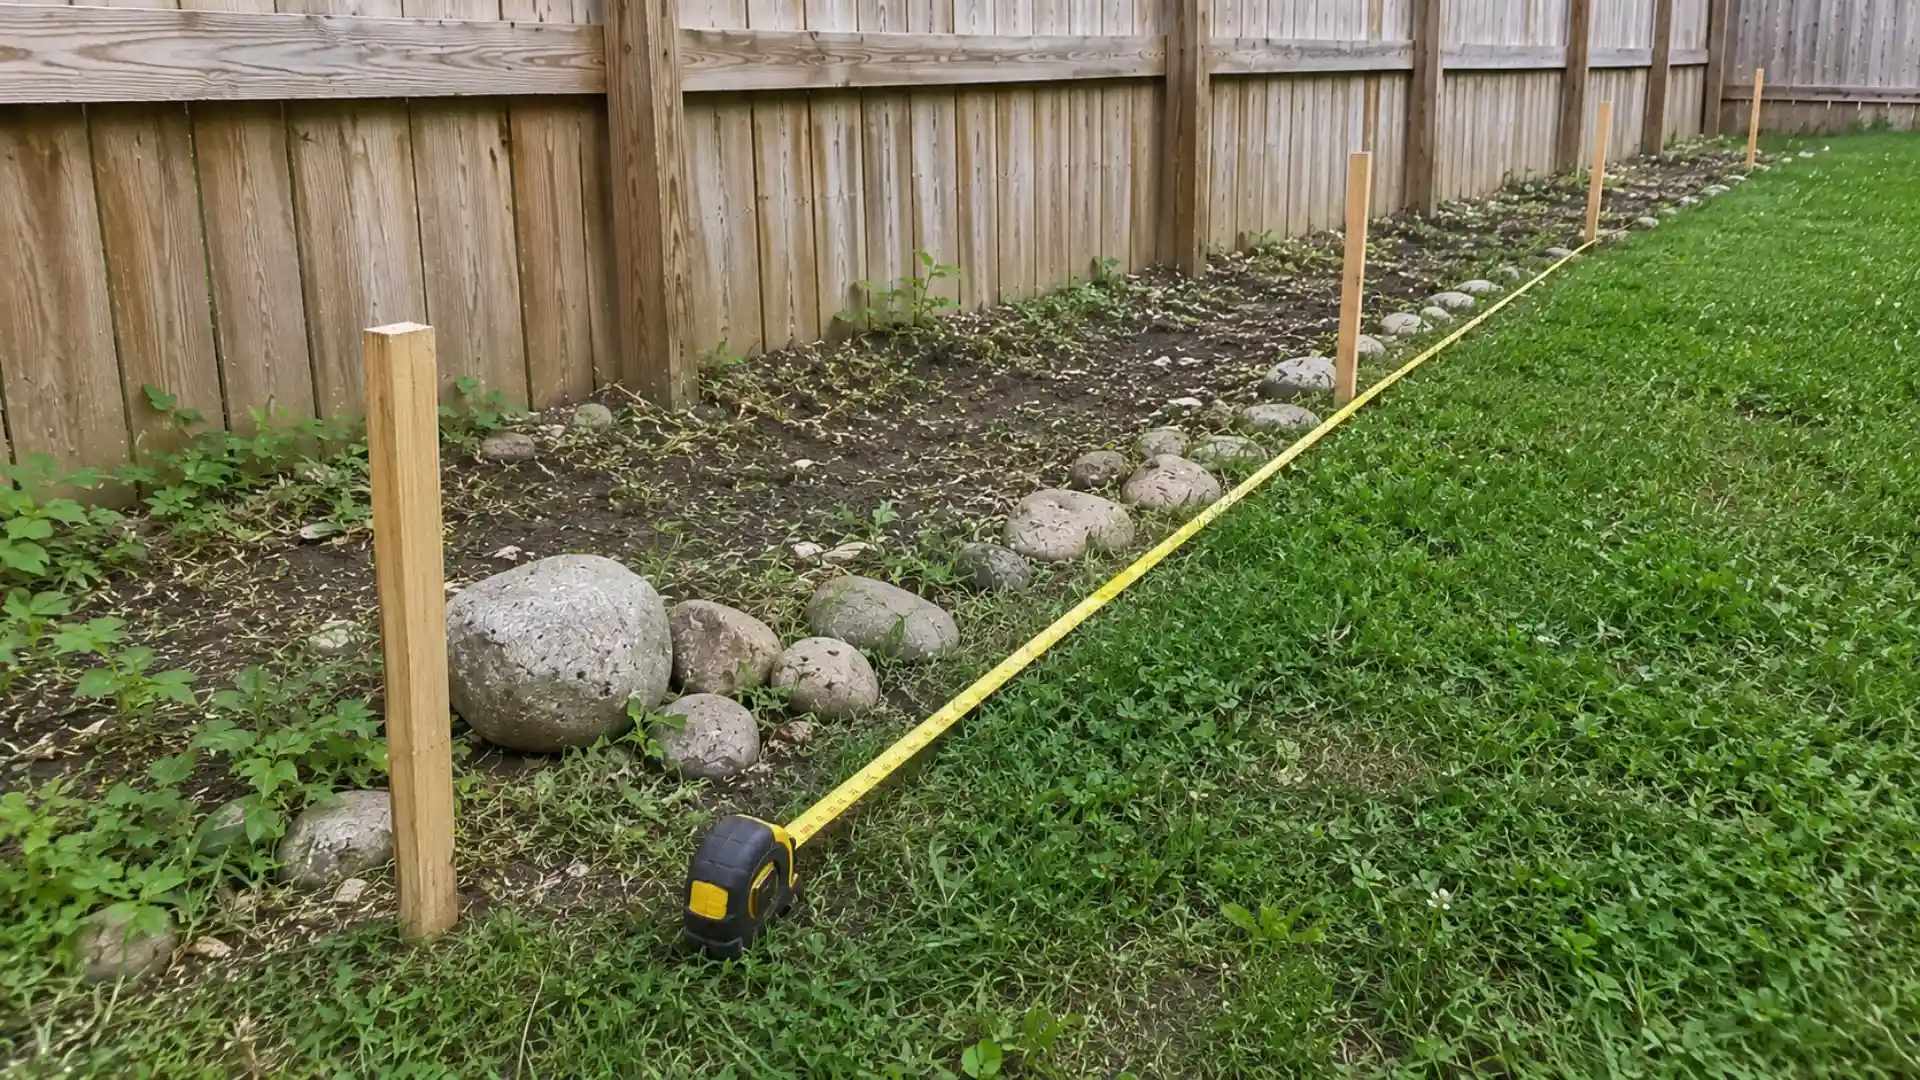
Walk the perimeter of your garden and mark where each post will go using stakes or spray paint.
For plastic netting or lightweight mesh, space posts 1.5 to 2 feet apart to keep the material from sagging. For heavier wood panels or welded wire, posts can sit 6 to 8 feet apart since the material holds its shape better.
Step 3: Set and Secure Posts in the Ground
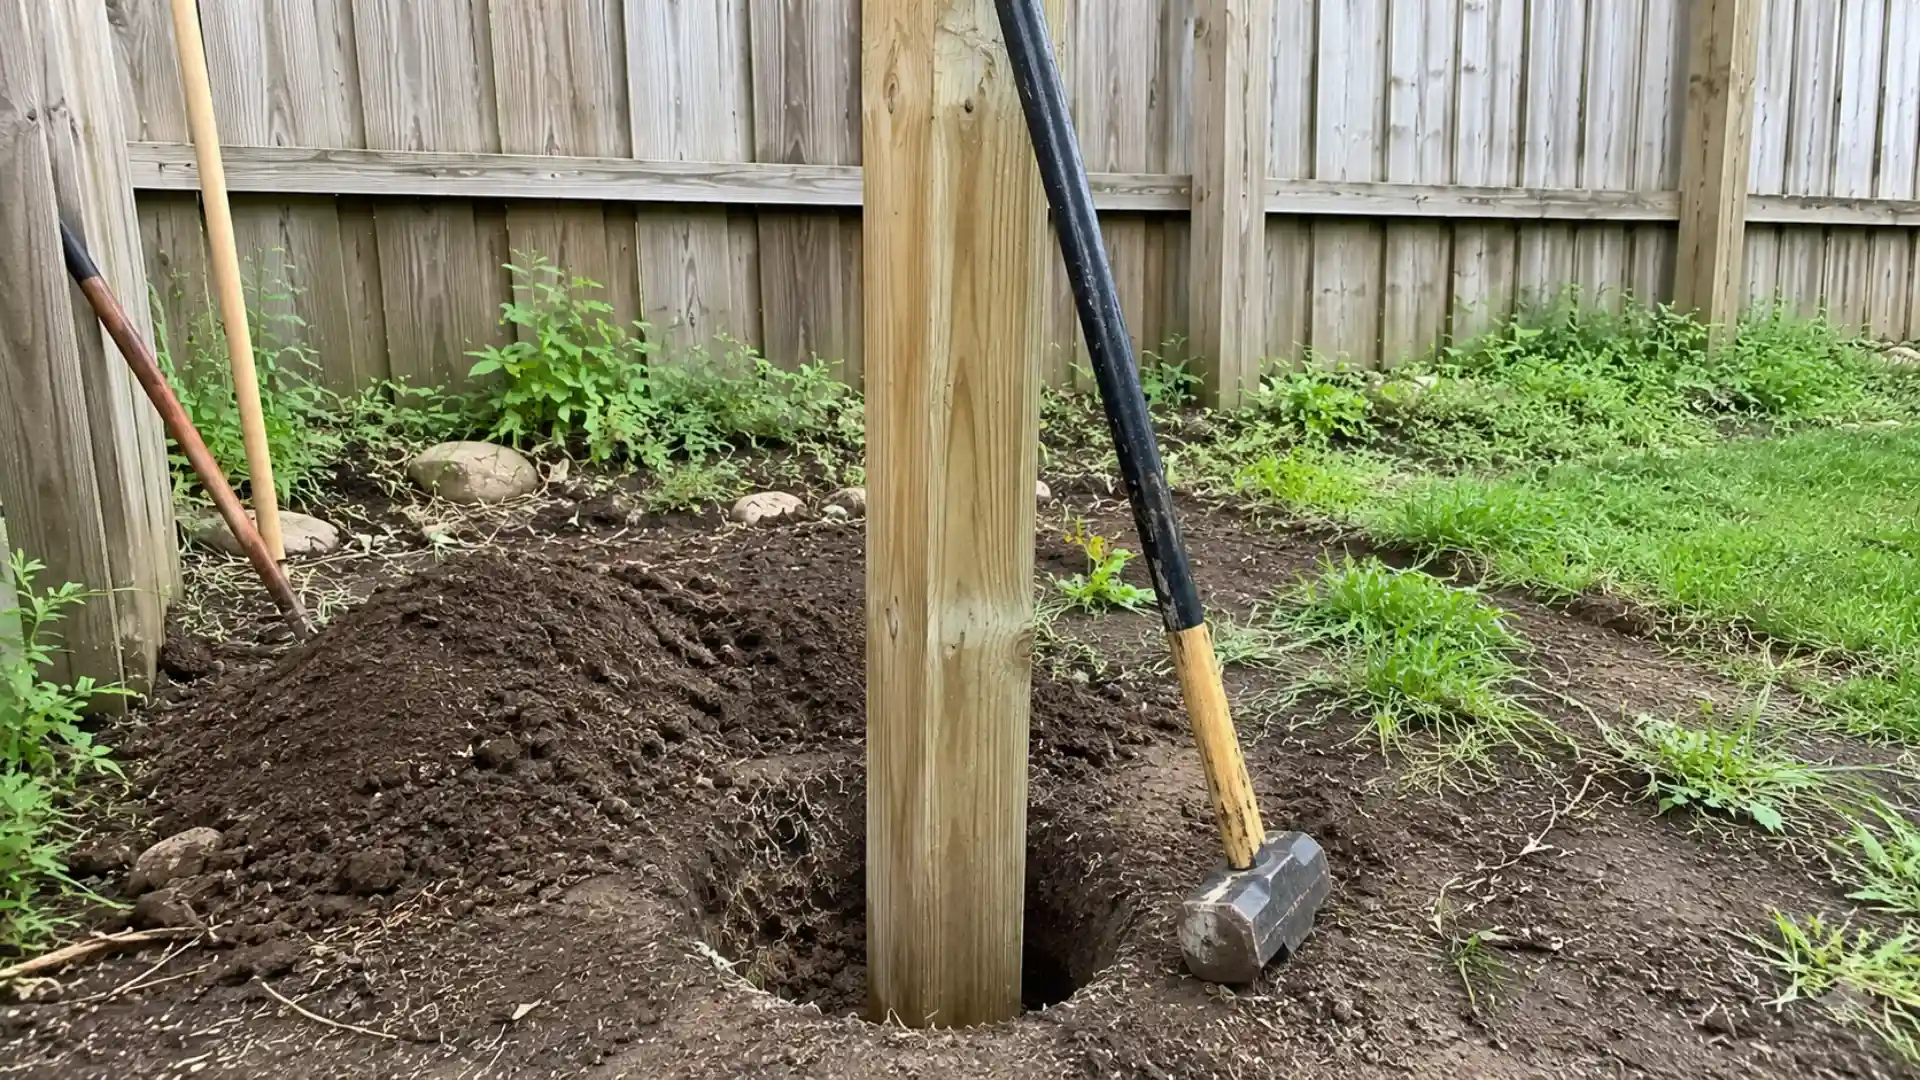
Dig holes with a post hole digger, or drive stakes directly into soft ground with a sledgehammer.
Posts should sit at least 12 to 18 inches deep for stability, deeper for taller fences facing wind. Use a level to keep each post upright before it sets.
If your soil runs sandy or leans toward the heavy clay common around Houston, adding concrete mix around the base gives posts extra hold and prevents leaning over time.
Step 4: Attach the Fencing Material
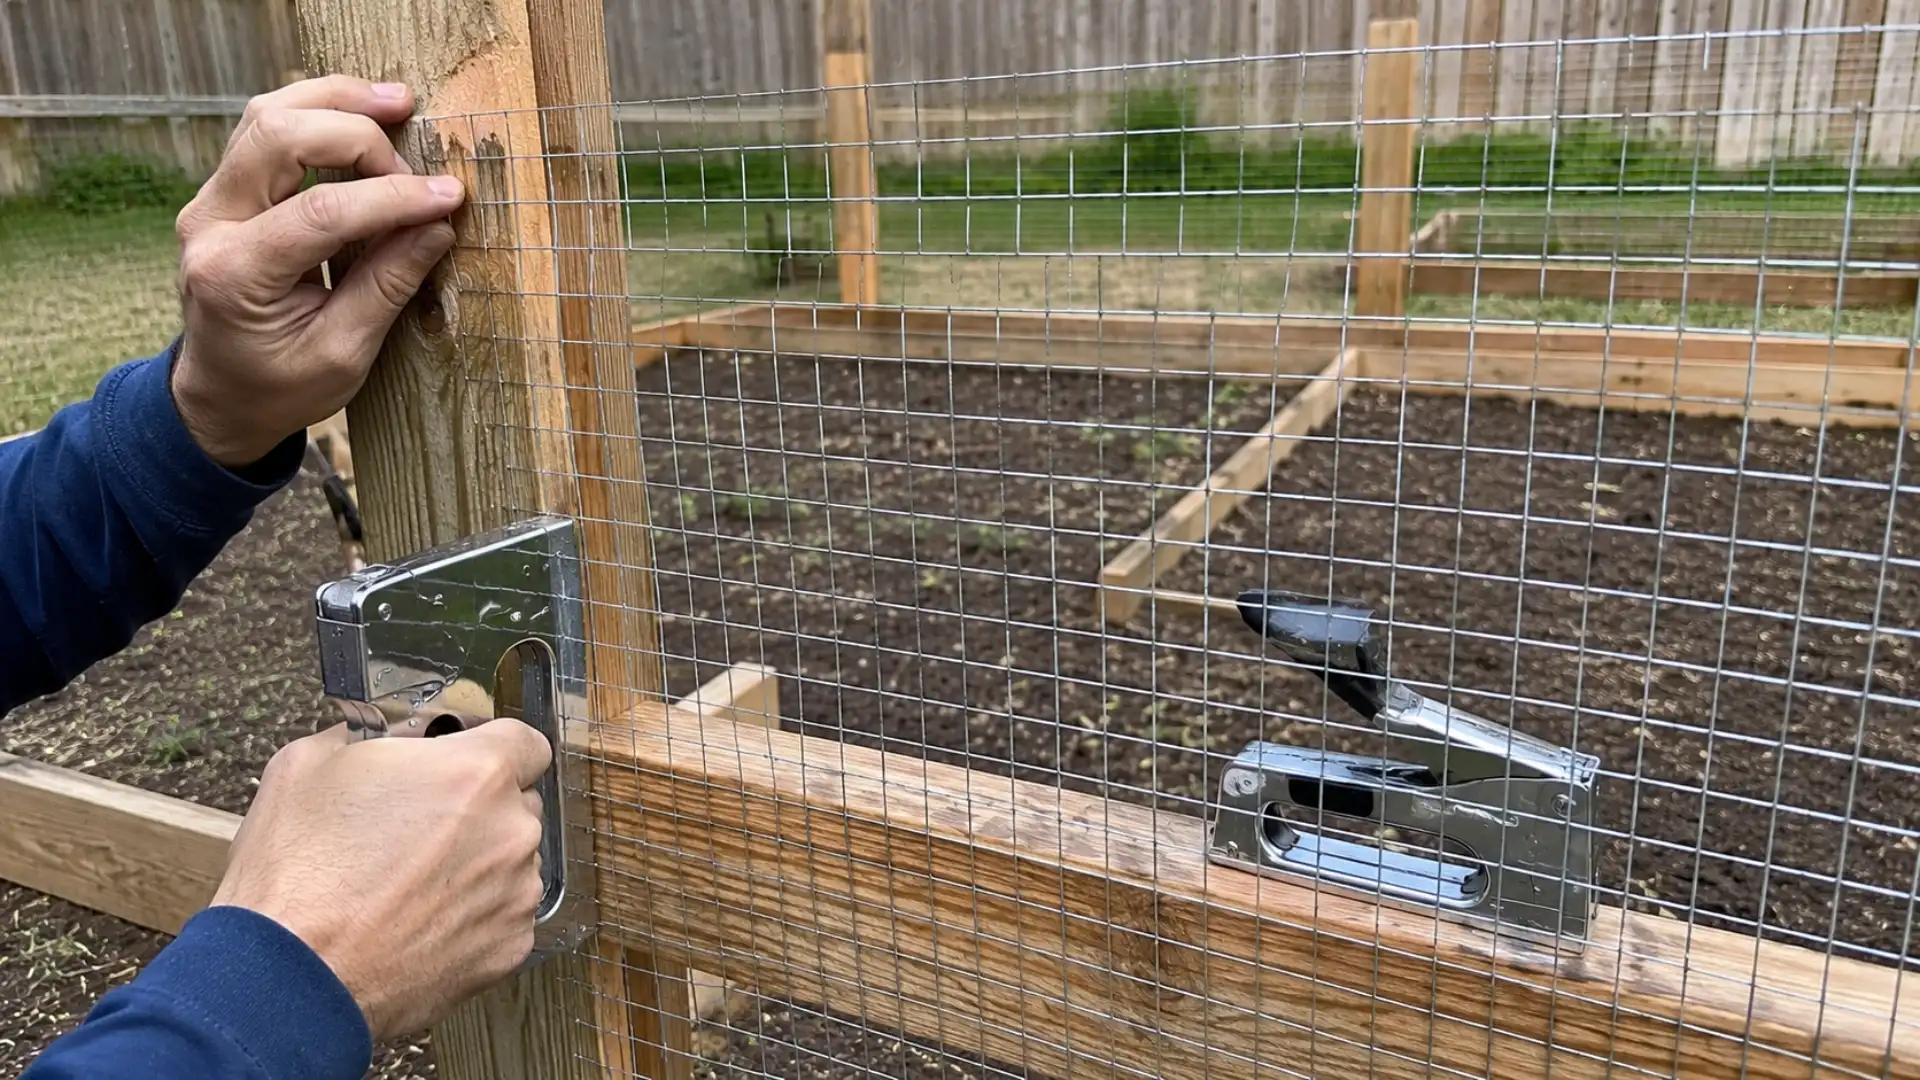
Once posts are secure, attach your chosen material using a staple gun for wire and netting, or screws and nails for wood panels.
Work from one end to the other, pulling the material taut as you go to avoid sagging.
Step 5: Bury the Bottom Section
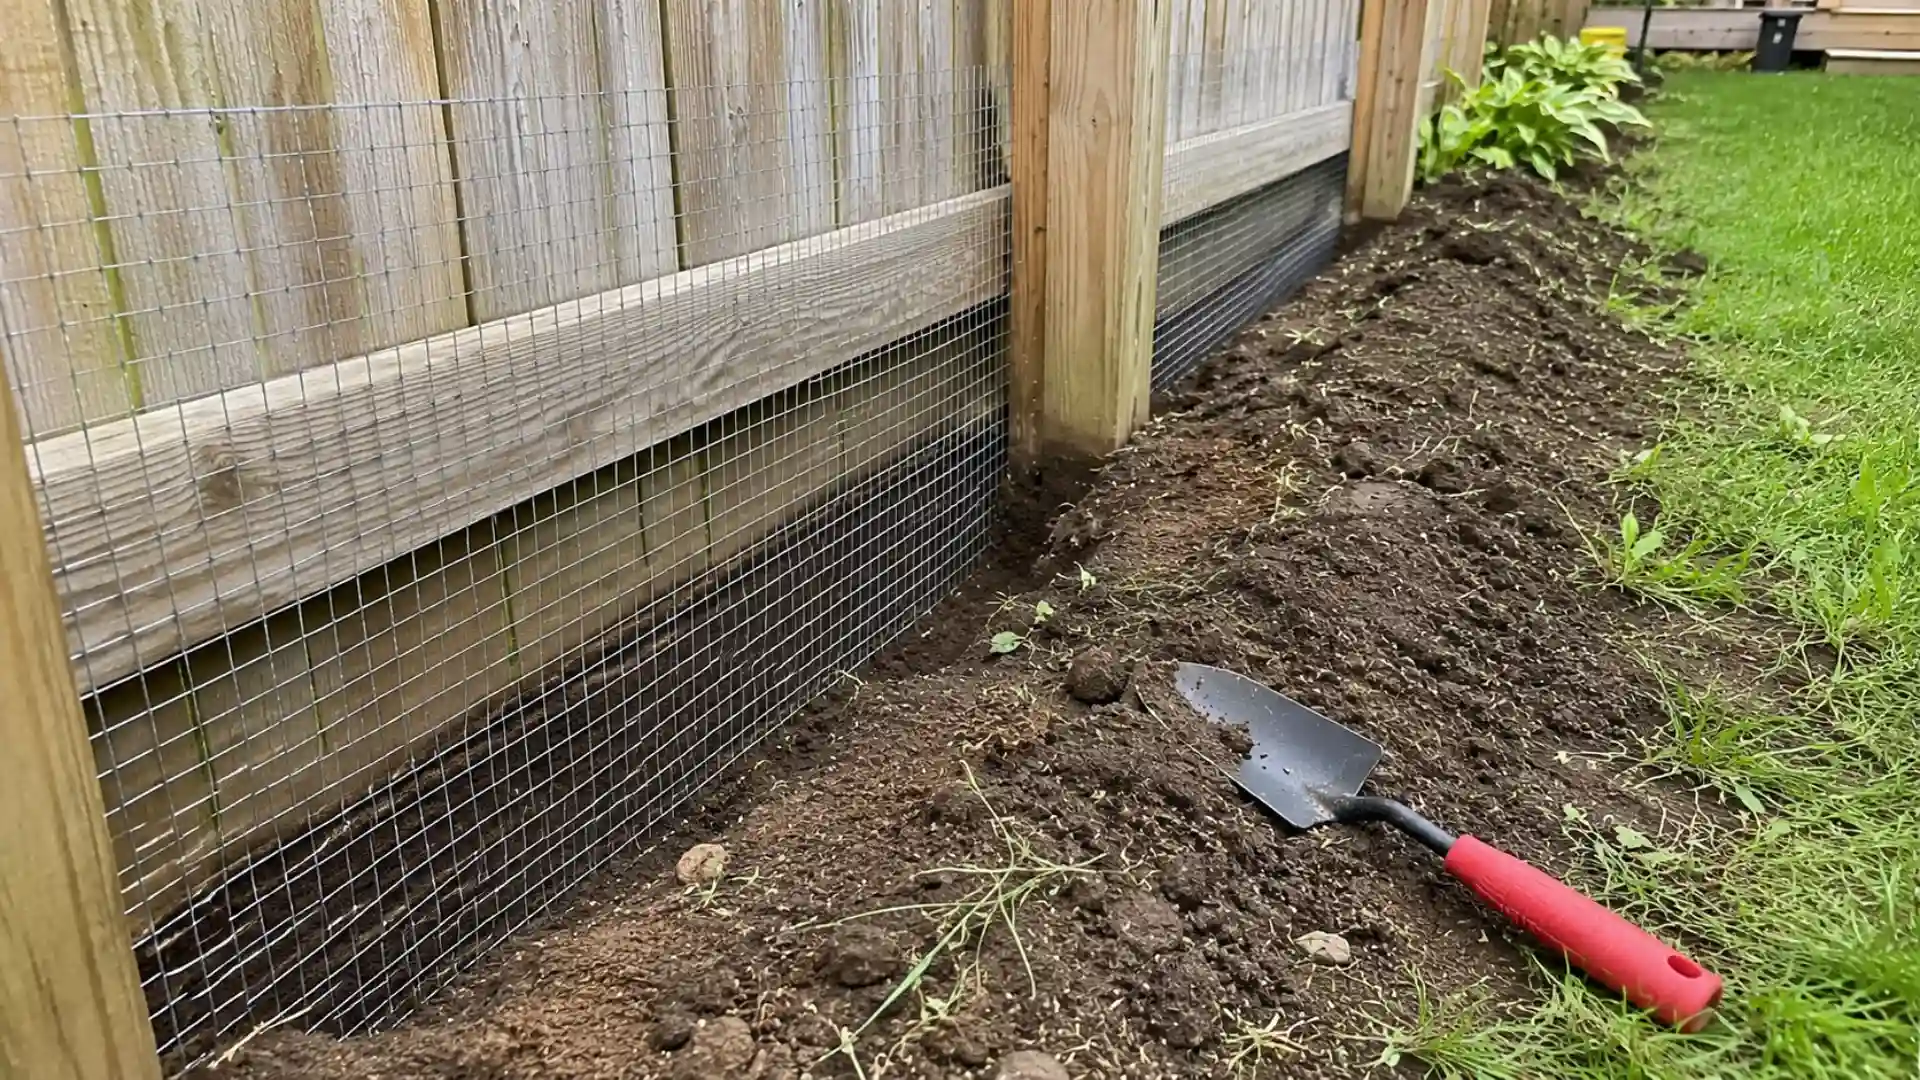
To stop groundhogs, rabbits, and other diggers, extend the fencing 6 to 12 inches below ground level. Dig a shallow trench along the perimeter before setting the material in place, then backfill with soil to hold it down.
This buried section is often skipped, but it is one of the most effective ways to block animals that tunnel under a fence instead of climbing over it.
Step 6: Trim Excess Material
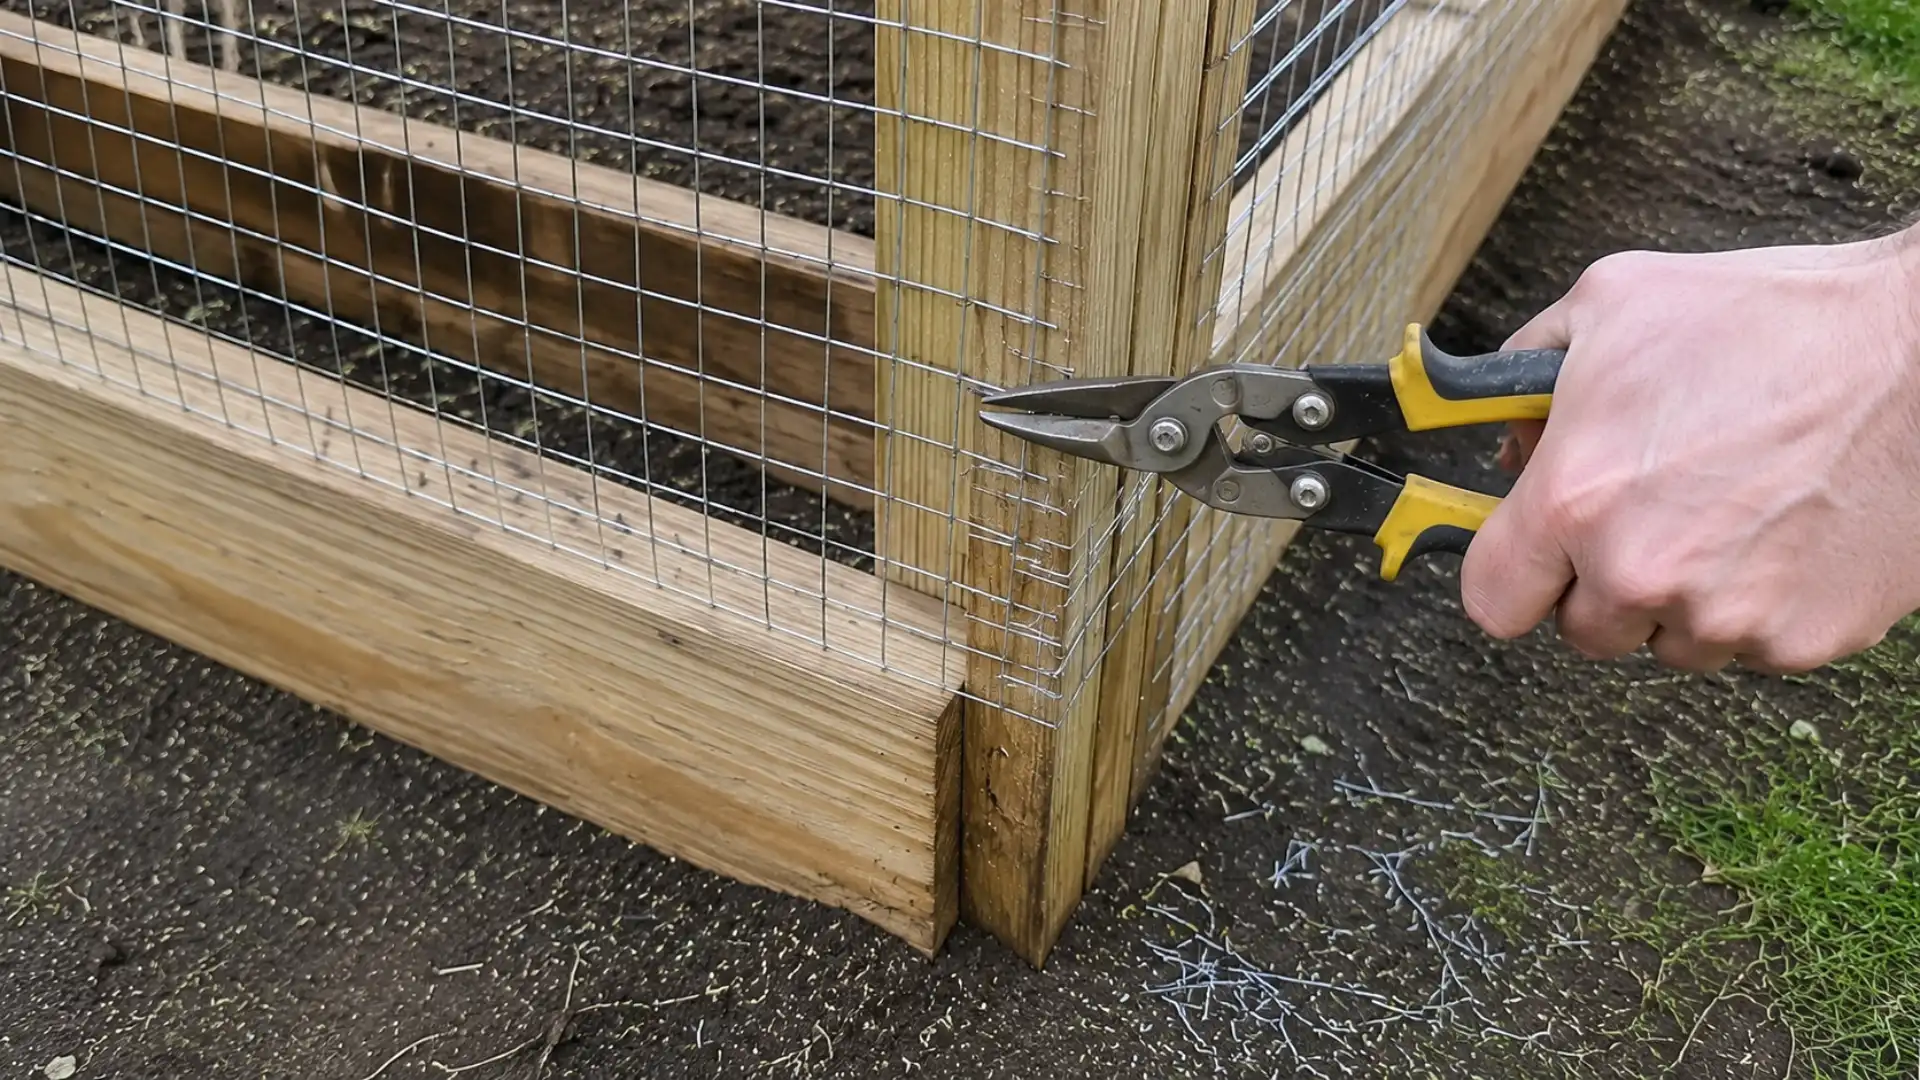
Use tin snips or wire cutters to remove any leftover fencing at the top, bottom, or corners.
Clean edges prevent sharp wire ends from sticking out, which can cause injury or snag on clothing. Trimming also gives the fence a neater, more finished appearance.
Take your time here, since rushed cuts can leave uneven edges that weaken the overall structure near posts and joints.
Step 7: Check for Gaps
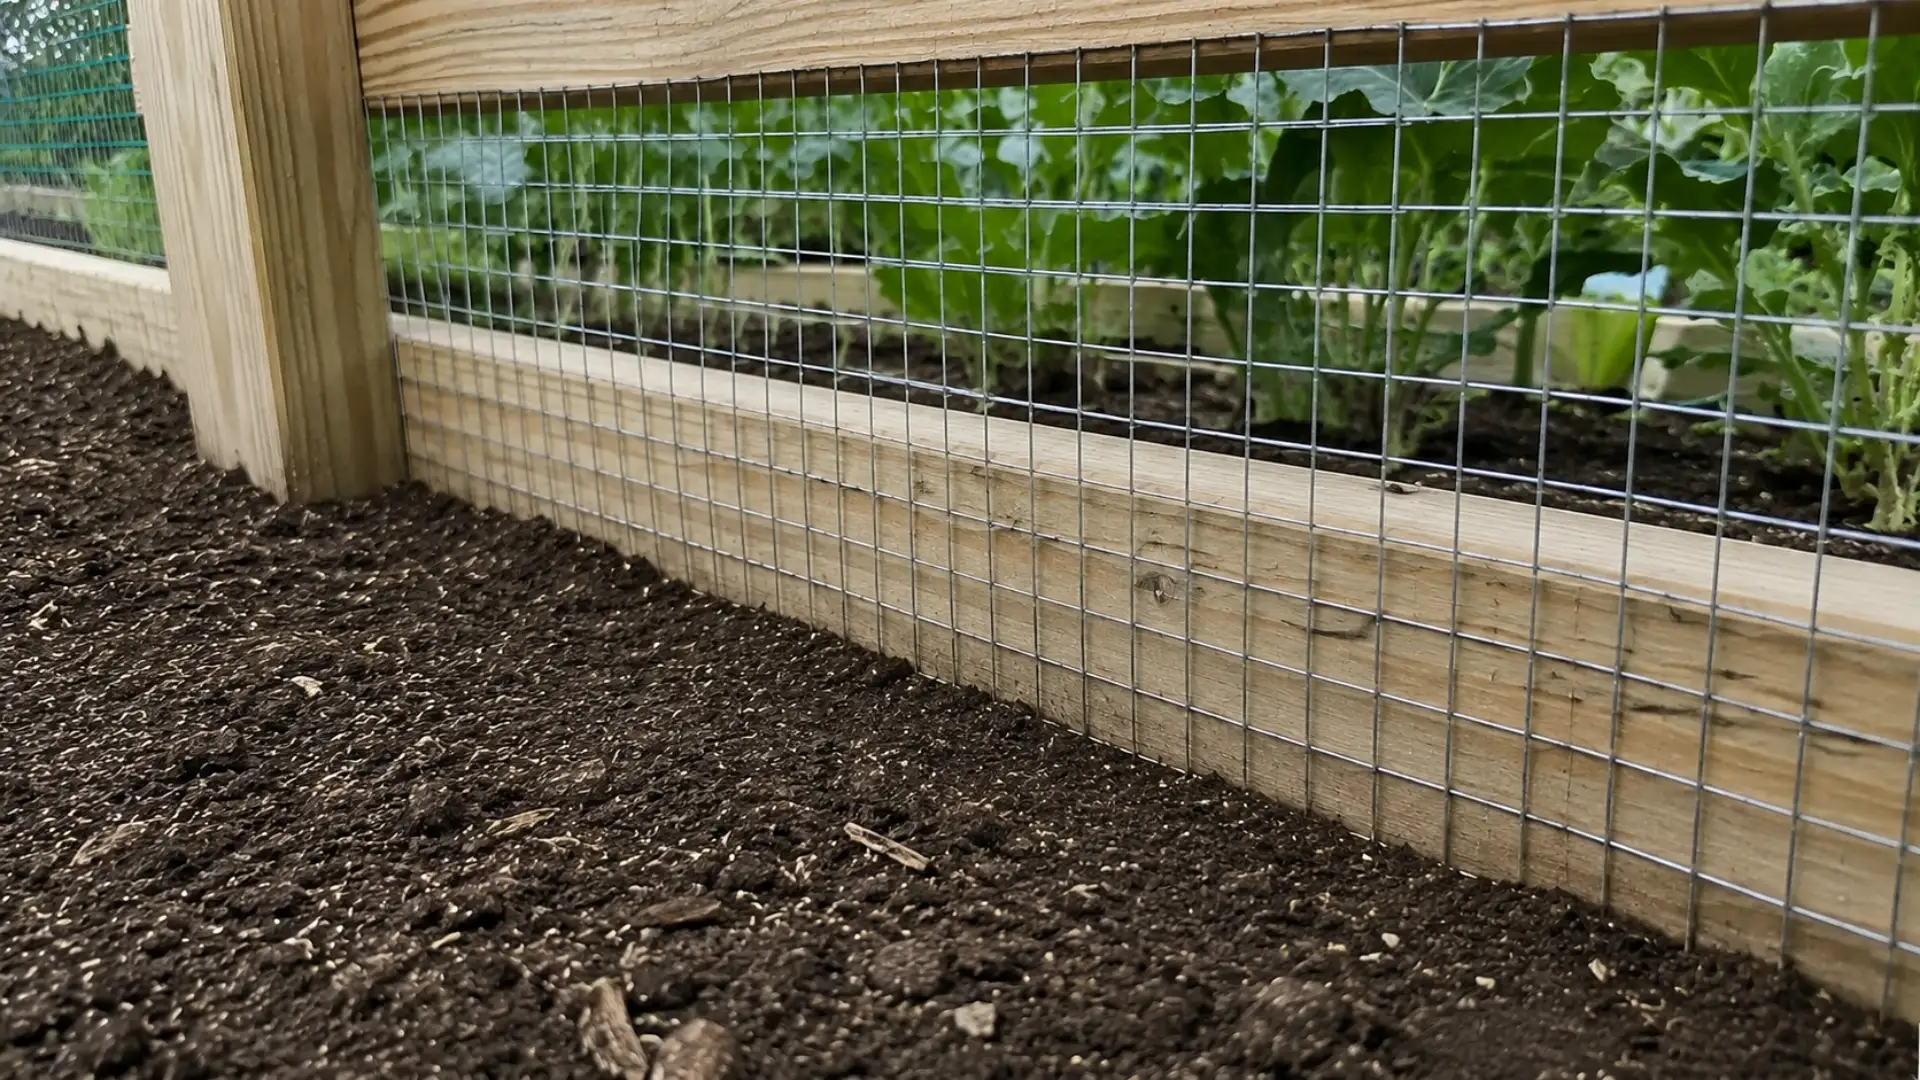
Walk the full perimeter and check for any openings larger than 1 inch, since small animals like voles and young rabbits can squeeze through surprisingly tight spaces.
Patch any gaps with extra wire or mesh before considering the project finished.
Step 8: Reinforce Corners and Do a Final Walkthrough
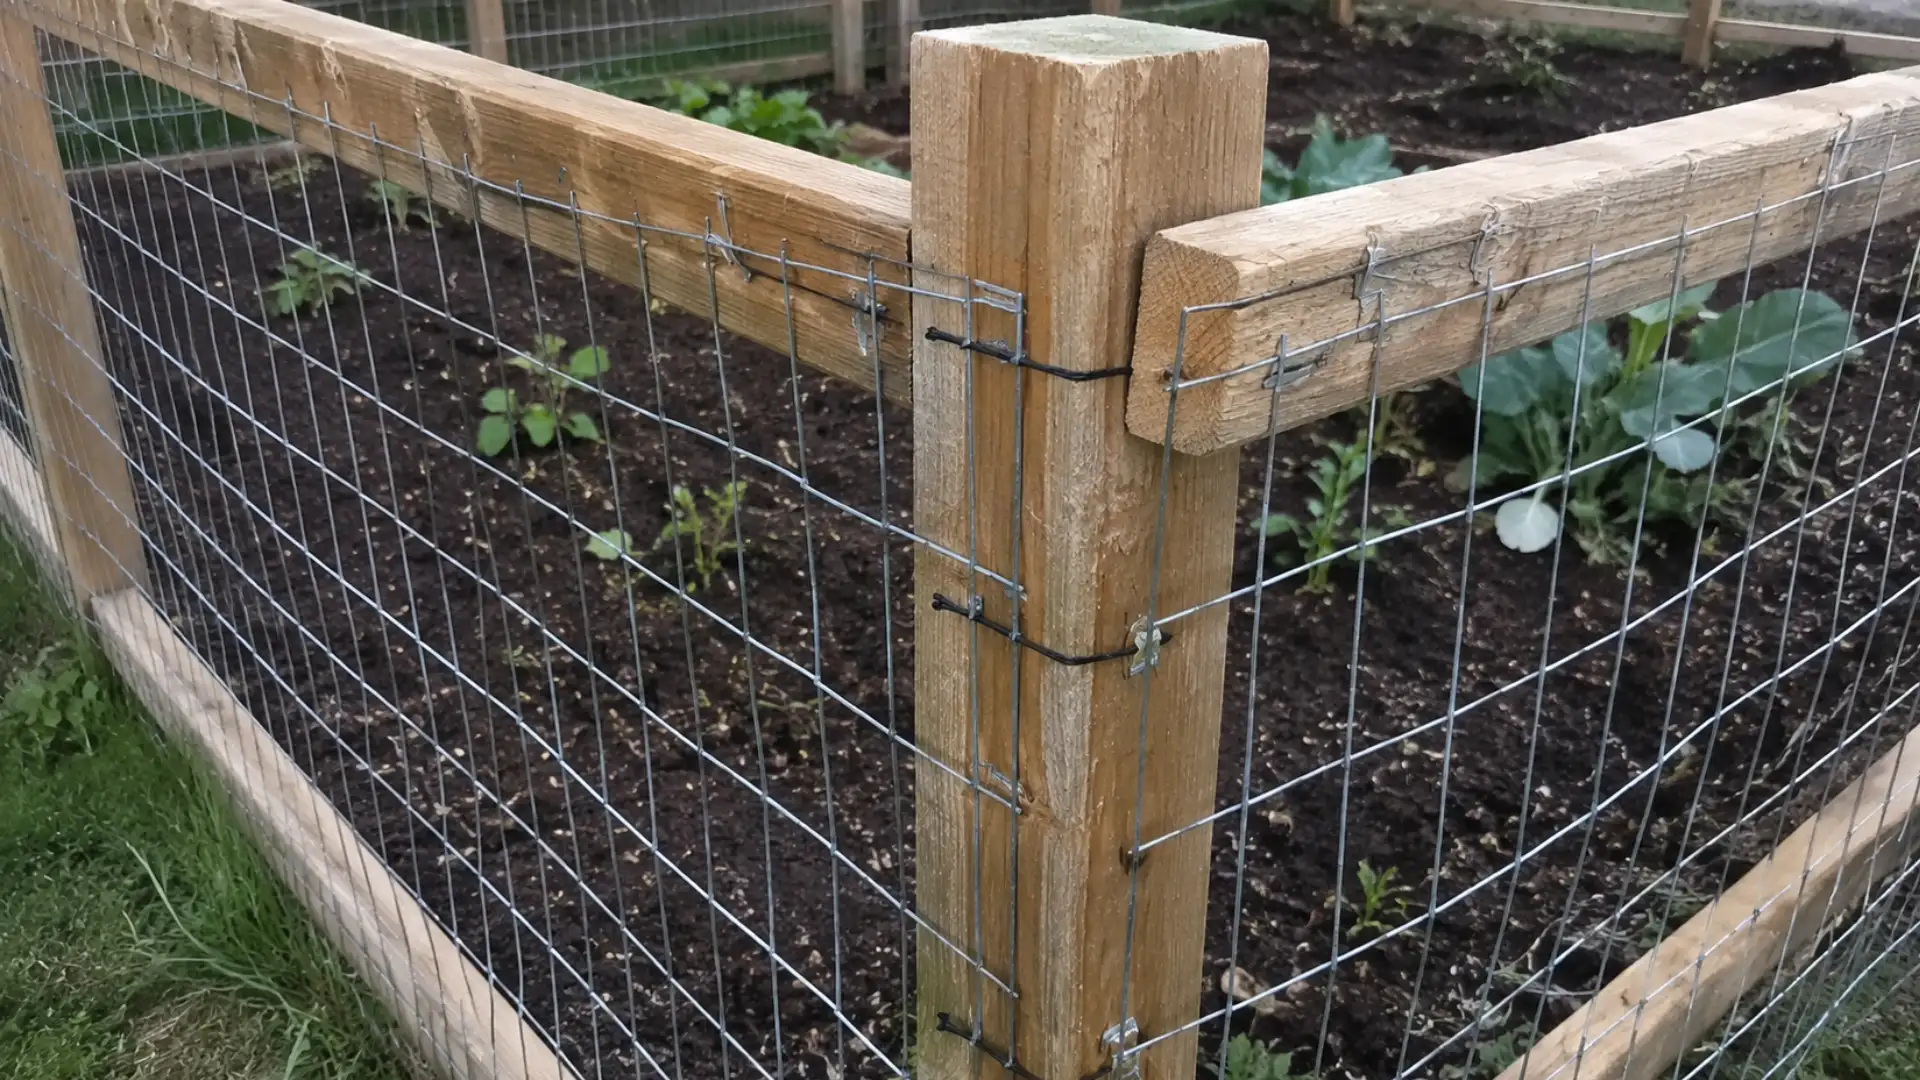
Corners and gate posts take the most pressure from wind and pushing animals, so add diagonal bracing or an extra stake at these points.
Finish with a full walkthrough: tug on each post to check for wobbling, press on fencing sections to test tension, and confirm staples or screws are holding firm.
Step 9: Adding a Gate or Access Point
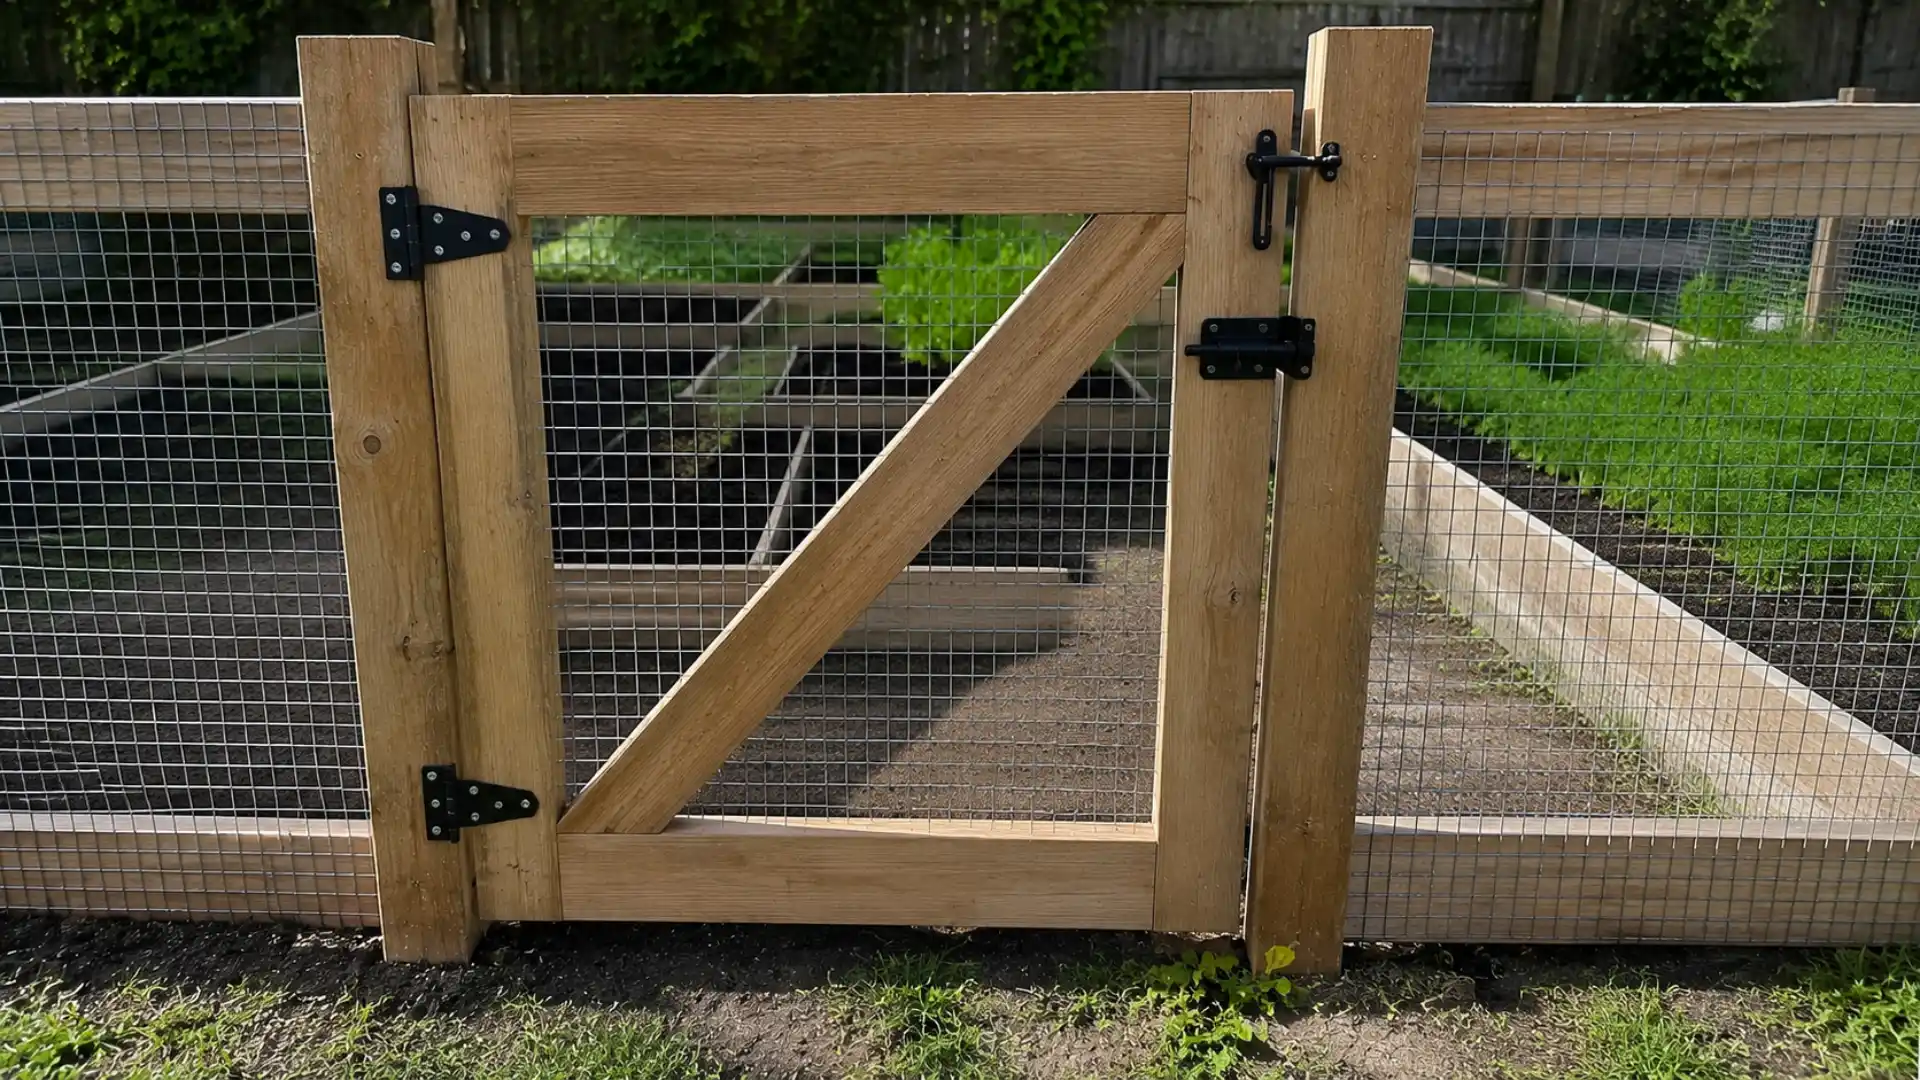
Before setting any posts, decide where the gate will go, ideally somewhere with easy access for a wheelbarrow or watering can.
A simple hinge-and-latch design works well for most garden fences. Test the gate by opening and closing it a few times to confirm the latch holds firm.
Fencing for Houston’s Weather and Local Pests
Houston’s humidity and clay-heavy soils change how a fence holds up over time.
Untreated wood swells, warps, and rots faster here than in drier climates. That is why pressure-treated lumber, cedar, or vinyl are worth the higher price tag.
If you are setting posts in heavy clay, the digging takes longer, and a post hole digger with a narrow blade saves your back compared to a standard shovel.
Rabbits and deer are not the only ones raiding Gulf Coast gardens. Armadillos are common across our area, and they do not climb so much as dig, so the buried wire from Step 5 does double duty.
An outward-angled fence about 2 feet tall with the bottom buried 8 to 12 inches deep works well as an armadillo deterrent on its own.
If deer pressure is heavy in your neighborhood, pairing your fence with a few tree picks that shrug off deer browsing gives young plantings a second layer of protection near the fence line.
During hurricane season, add diagonal bracing at every post, not just the corners. Sustained wind pressure over hours is more likely to rack a lightweight fence loose than a single storm gust.
Maintenance Tips to Make It Last
A little upkeep goes a long way toward keeping your fence sturdy for years. Check these items on the schedule below.
| Maintenance Task | How Often | Why It Matters |
|---|---|---|
| Reseal or repaint wood | Every 1 year in Gulf Coast humidity, up to 2 years elsewhere | Prevents rot, cracking, and sun damage over time |
| Check for loose staples or sagging wire | After storms | Loose spots create gaps animals can push through |
| Inspect posts for wobbling or leaning | Twice a year | Catches shifting before the fence loses stability |
| Clear debris and overgrowth along the fence line | Seasonally | Keeps material from trapping moisture or rotting faster |
| Replace worn or damaged sections | As needed | Saves time and cost compared to rebuilding the whole fence |
Garden Fence Ideas to Match Your Style
A fence does not have to be purely functional. With a few small choices, it can also add personality to your yard.
1. Rustic Pallet Wood Fence
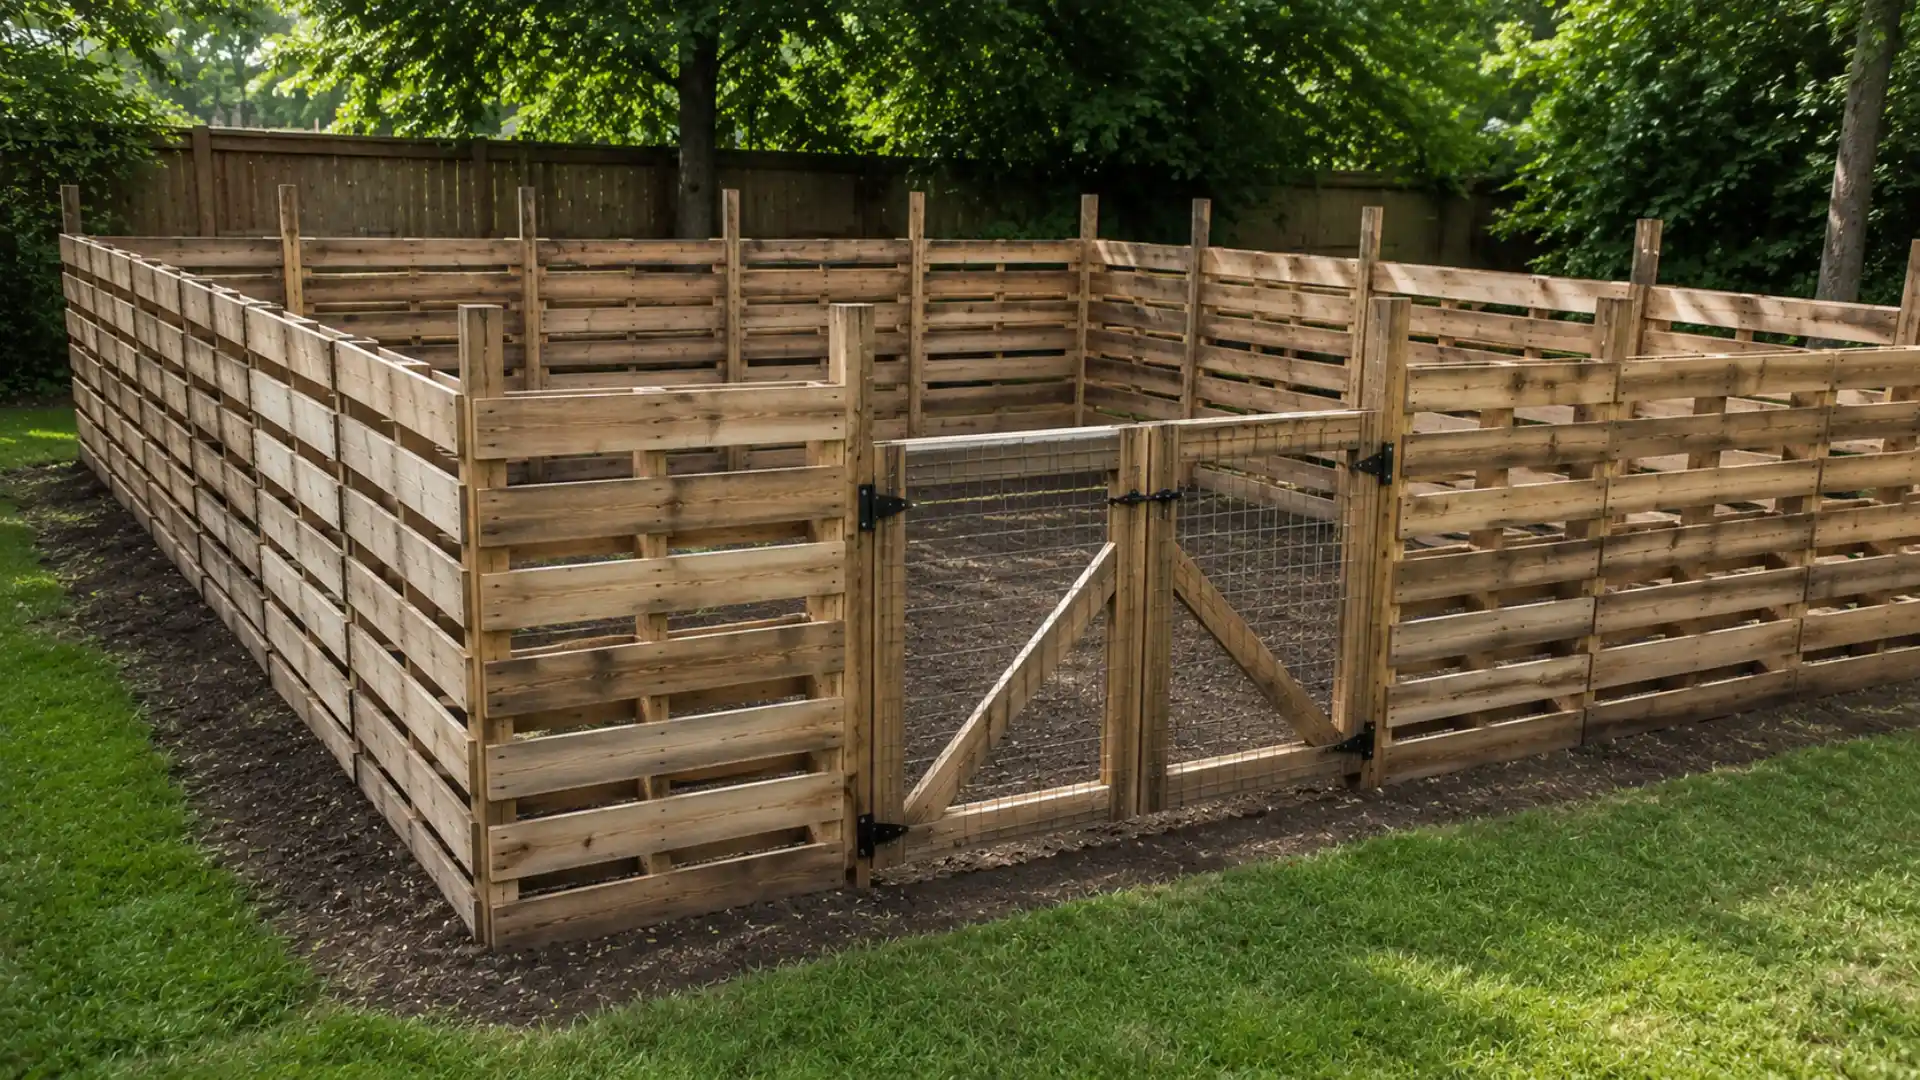
Reclaimed pallets make one of the most budget-friendly fence options around, often free from local businesses or shipping centers.
Once cleaned up and reassembled, they create a weathered border that suits cottage or vegetable gardens.
2. Painted Picket Fence
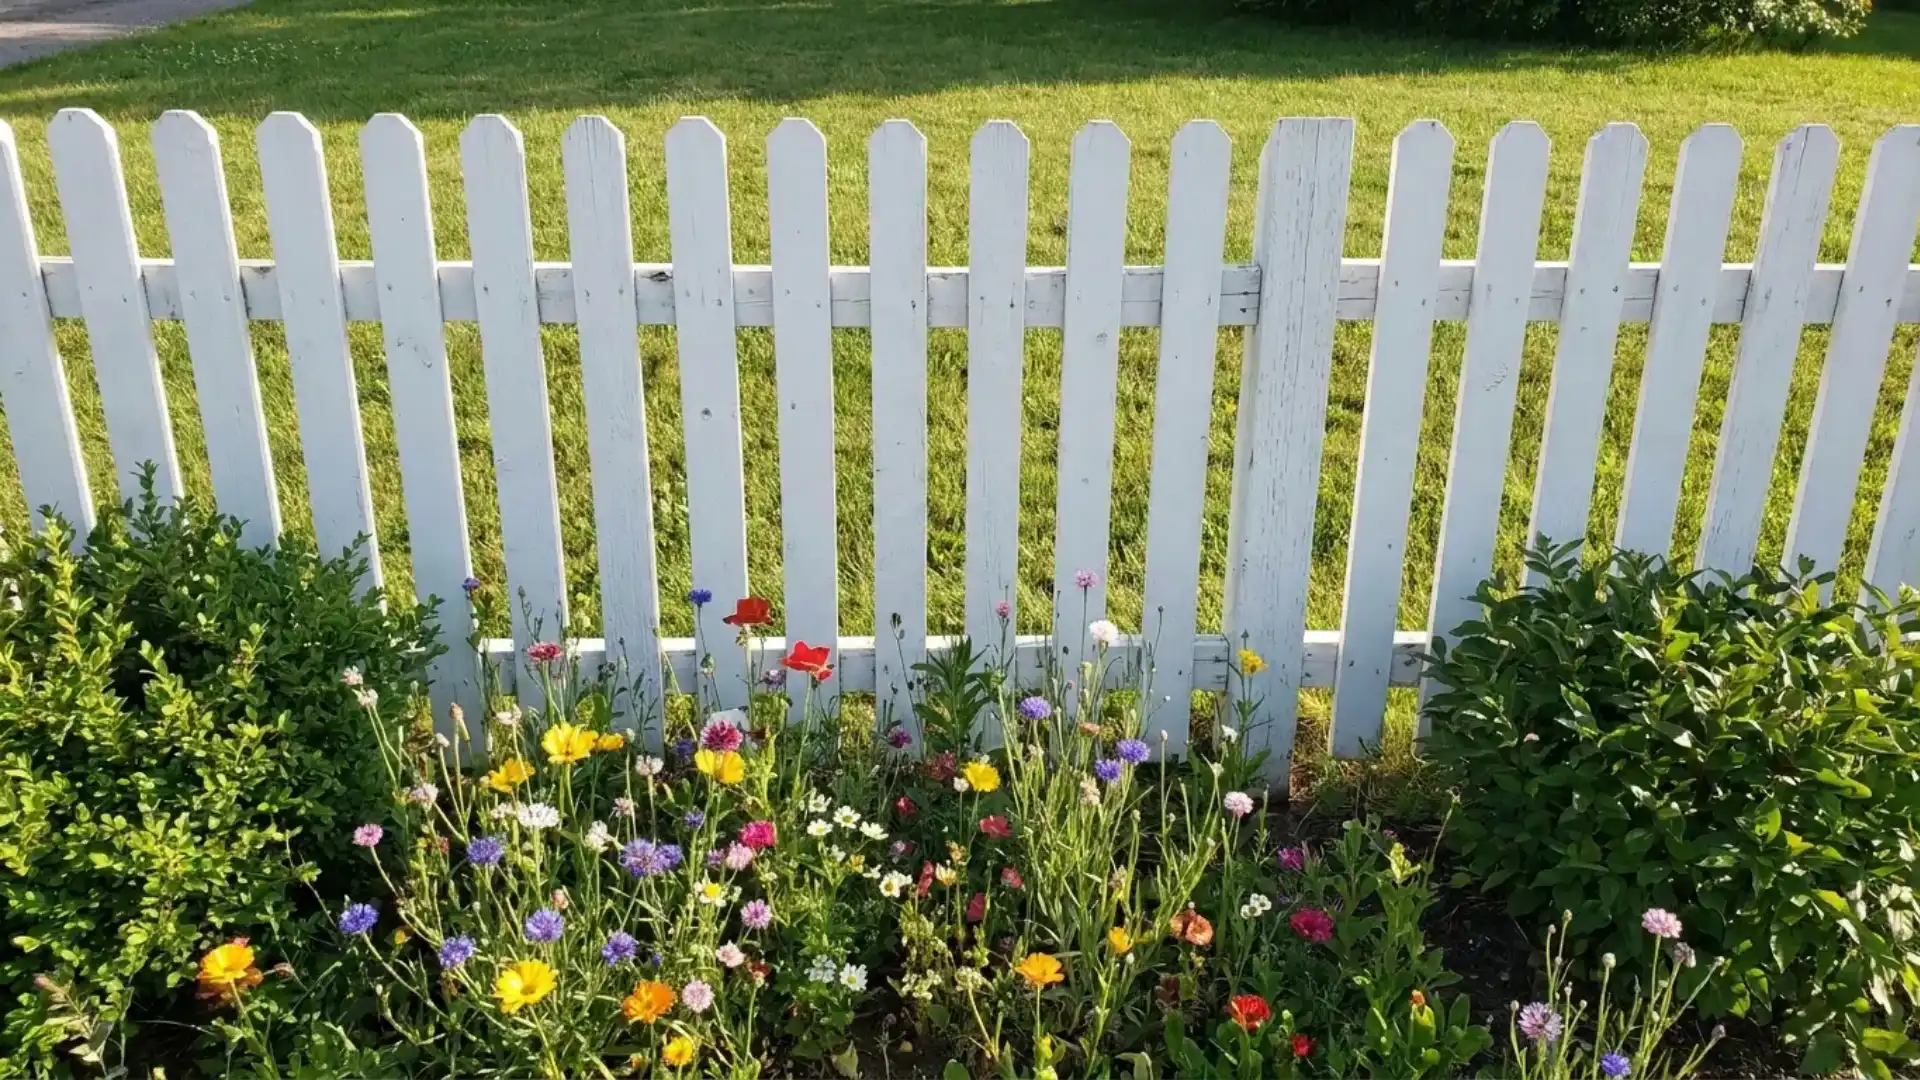
A classic wood picket fence brings a clean, tidy border to flower beds or front-yard gardens.
Picket spacing can be adjusted based on which pests you are keeping out: tighter for rabbits, wider if the fence is mainly decorative.
3. Lattice Panel Fence
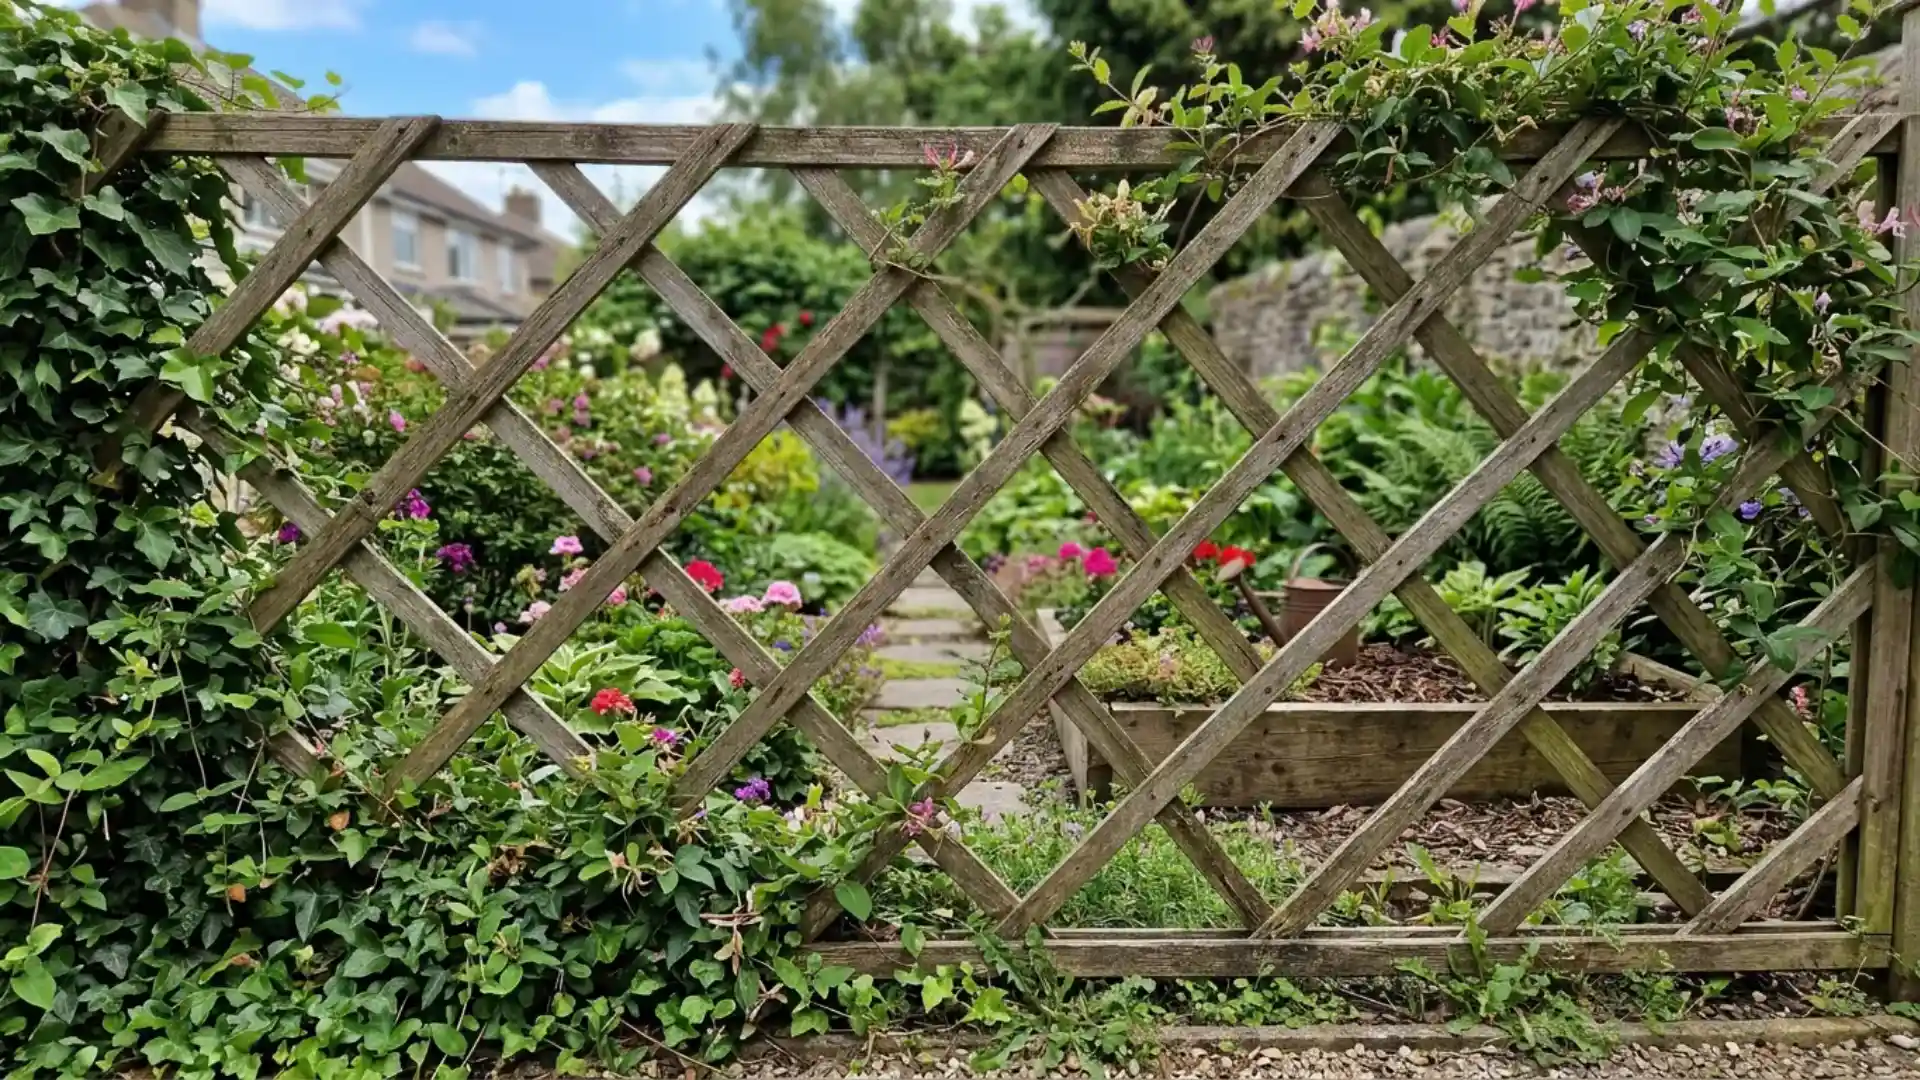
Lattice panels, made from wood or vinyl, create a crisscross pattern that lets light and air pass through while still marking a clear boundary.
It works especially well for climbing plants like clematis or beans, though it offers less protection against larger pests pushing through.
4. Bamboo Fence
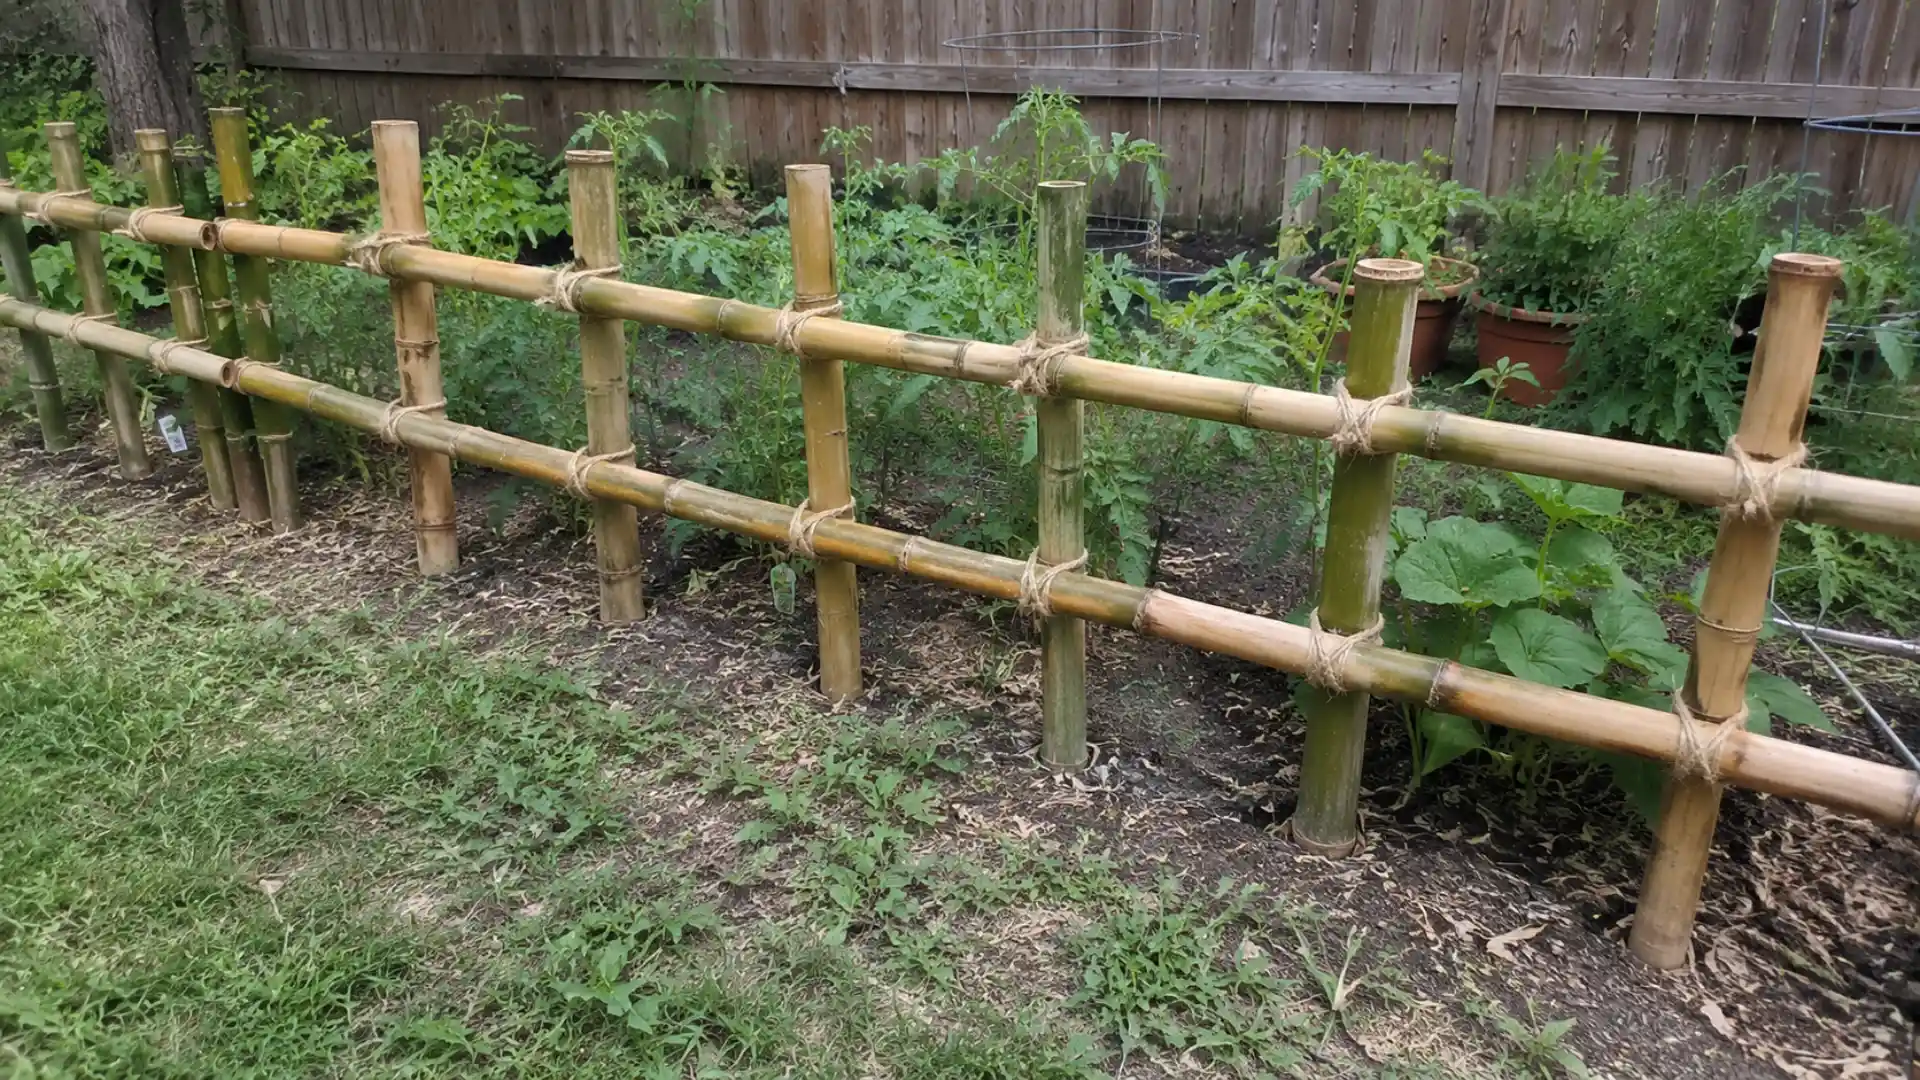
Bamboo fencing brings a natural, relaxed look to a backyard garden and is fairly simple to install using pre-made rolls tied to posts.
It works well as a low border or a taller privacy screen, depending on how it is layered. Bamboo holds up reasonably well outdoors but benefits from a sealant to slow down splitting or fading.
5. Wood-Frame Wire Fence
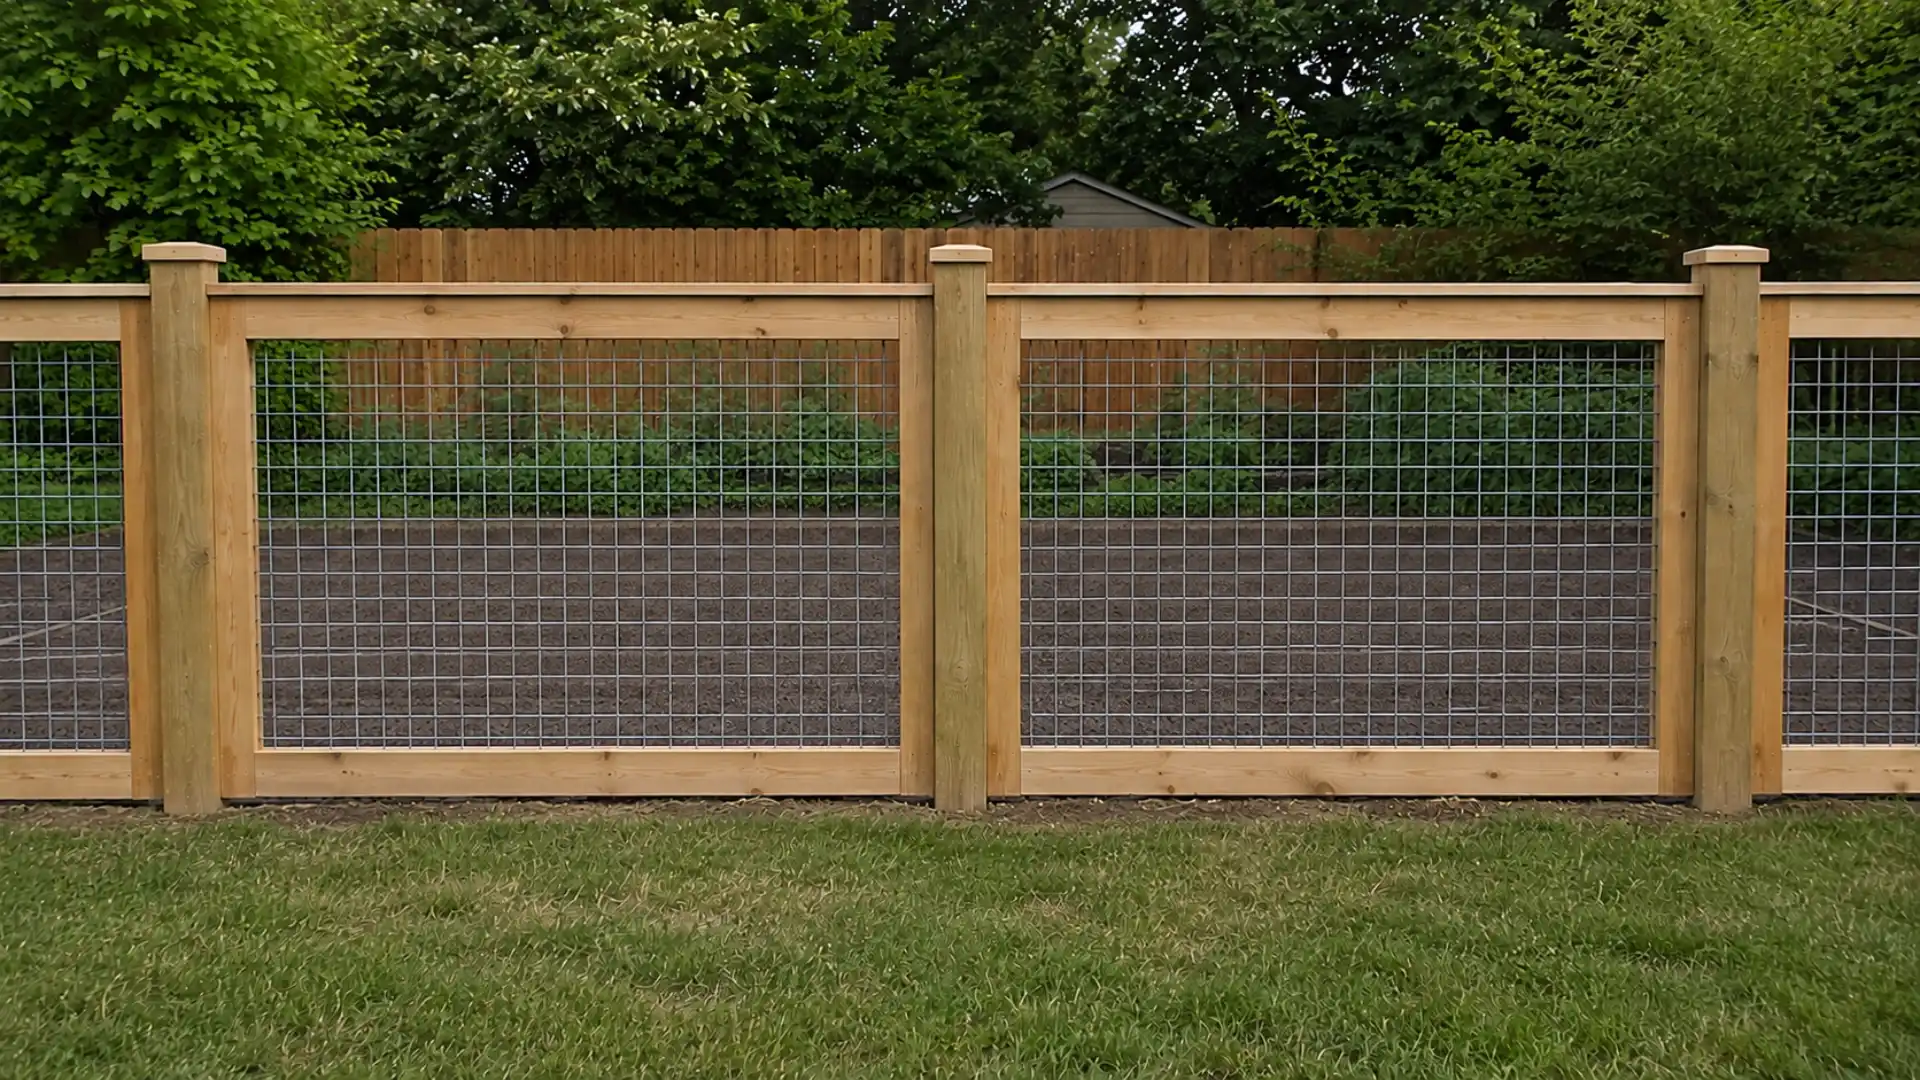
This design combines a wooden frame with wire mesh or hardware cloth stapled to the inside, giving you the structure of a wood fence with the pest control of wire.
It is sturdier than wire alone and more affordable than solid wood panels.
6. Upcycled and Repurposed Fence
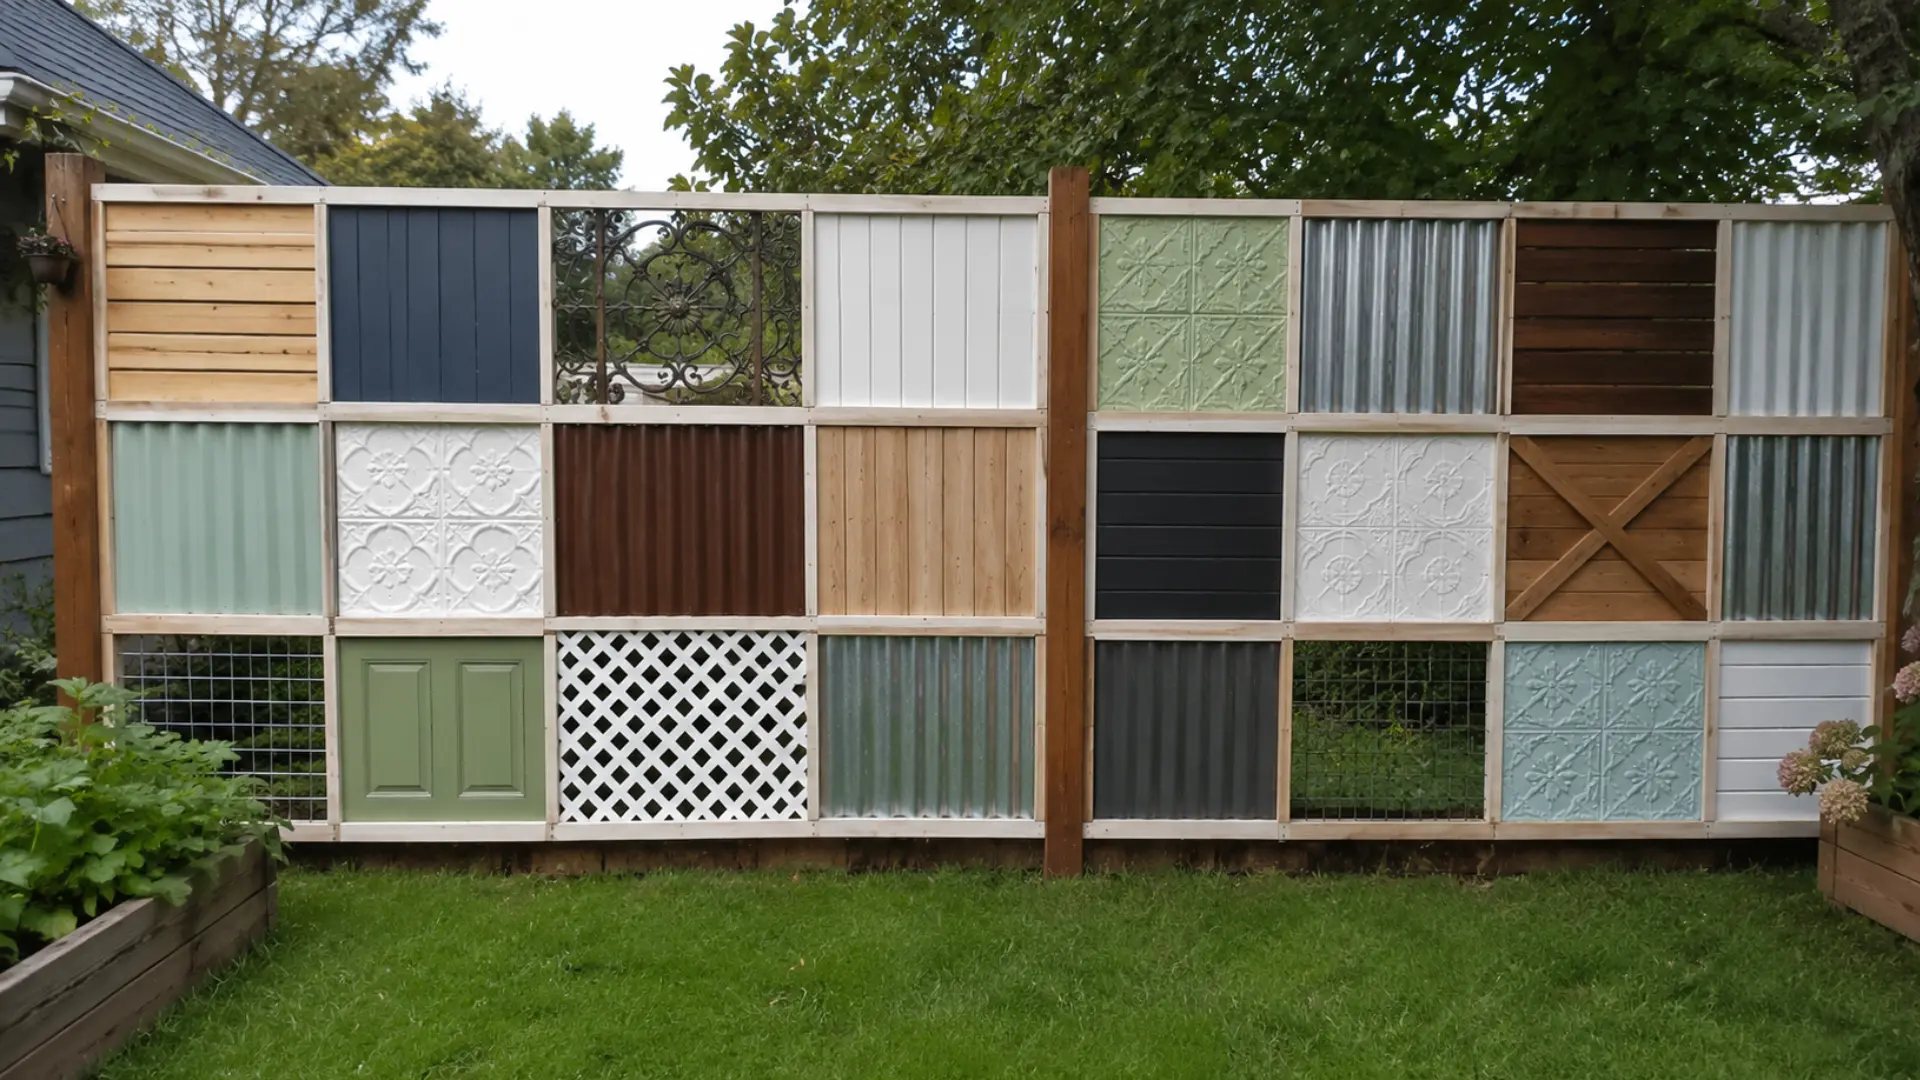
Old doors, headboards, shutters, or scrap metal sheets can be combined to build a fence that costs almost nothing and looks one-of-a-kind.
Pieces can be mixed and painted, or left as-is for a salvaged look.
7. Colorful Accent Fence
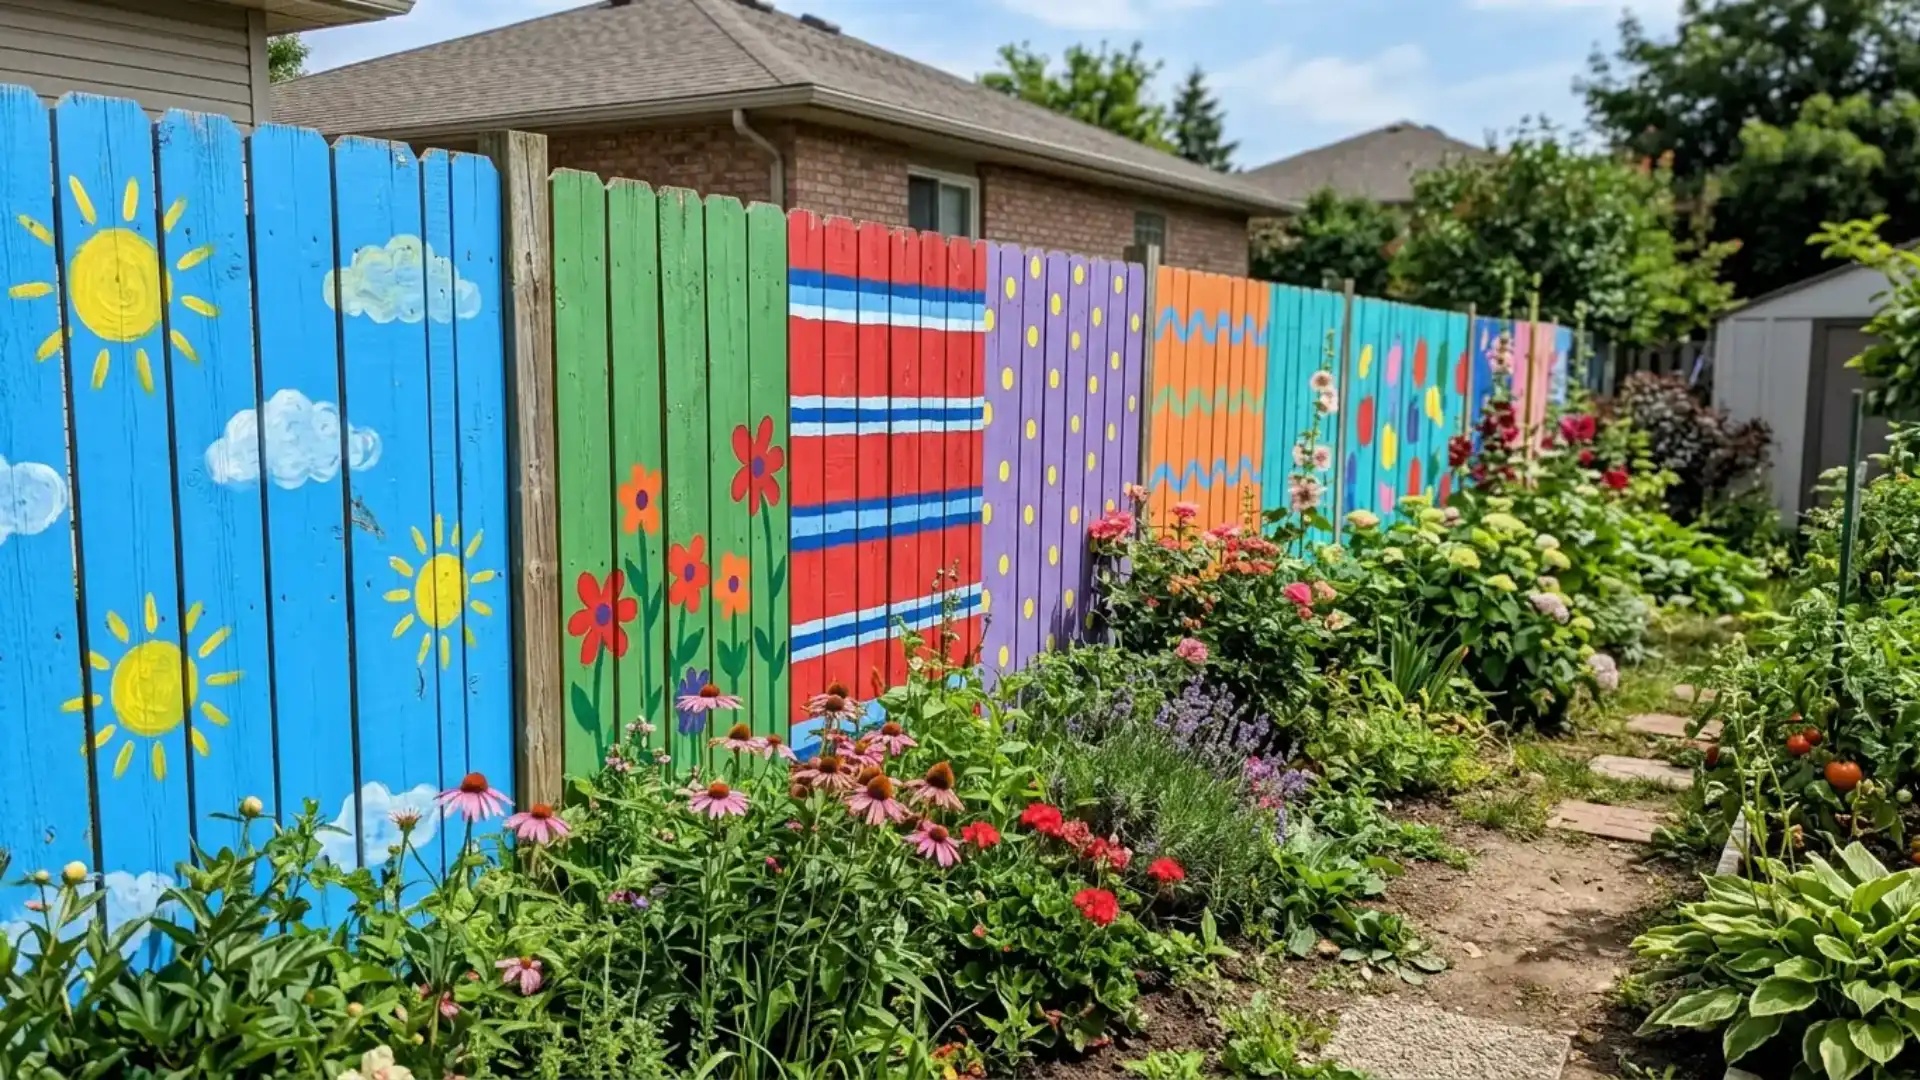
Turning a plain wood or wire fence into a colorful feature is as simple as adding paint.
Sections can be painted in different shades, striped patterns, or even a small mural, giving the garden a playful focal point.
8. Living Border Fence
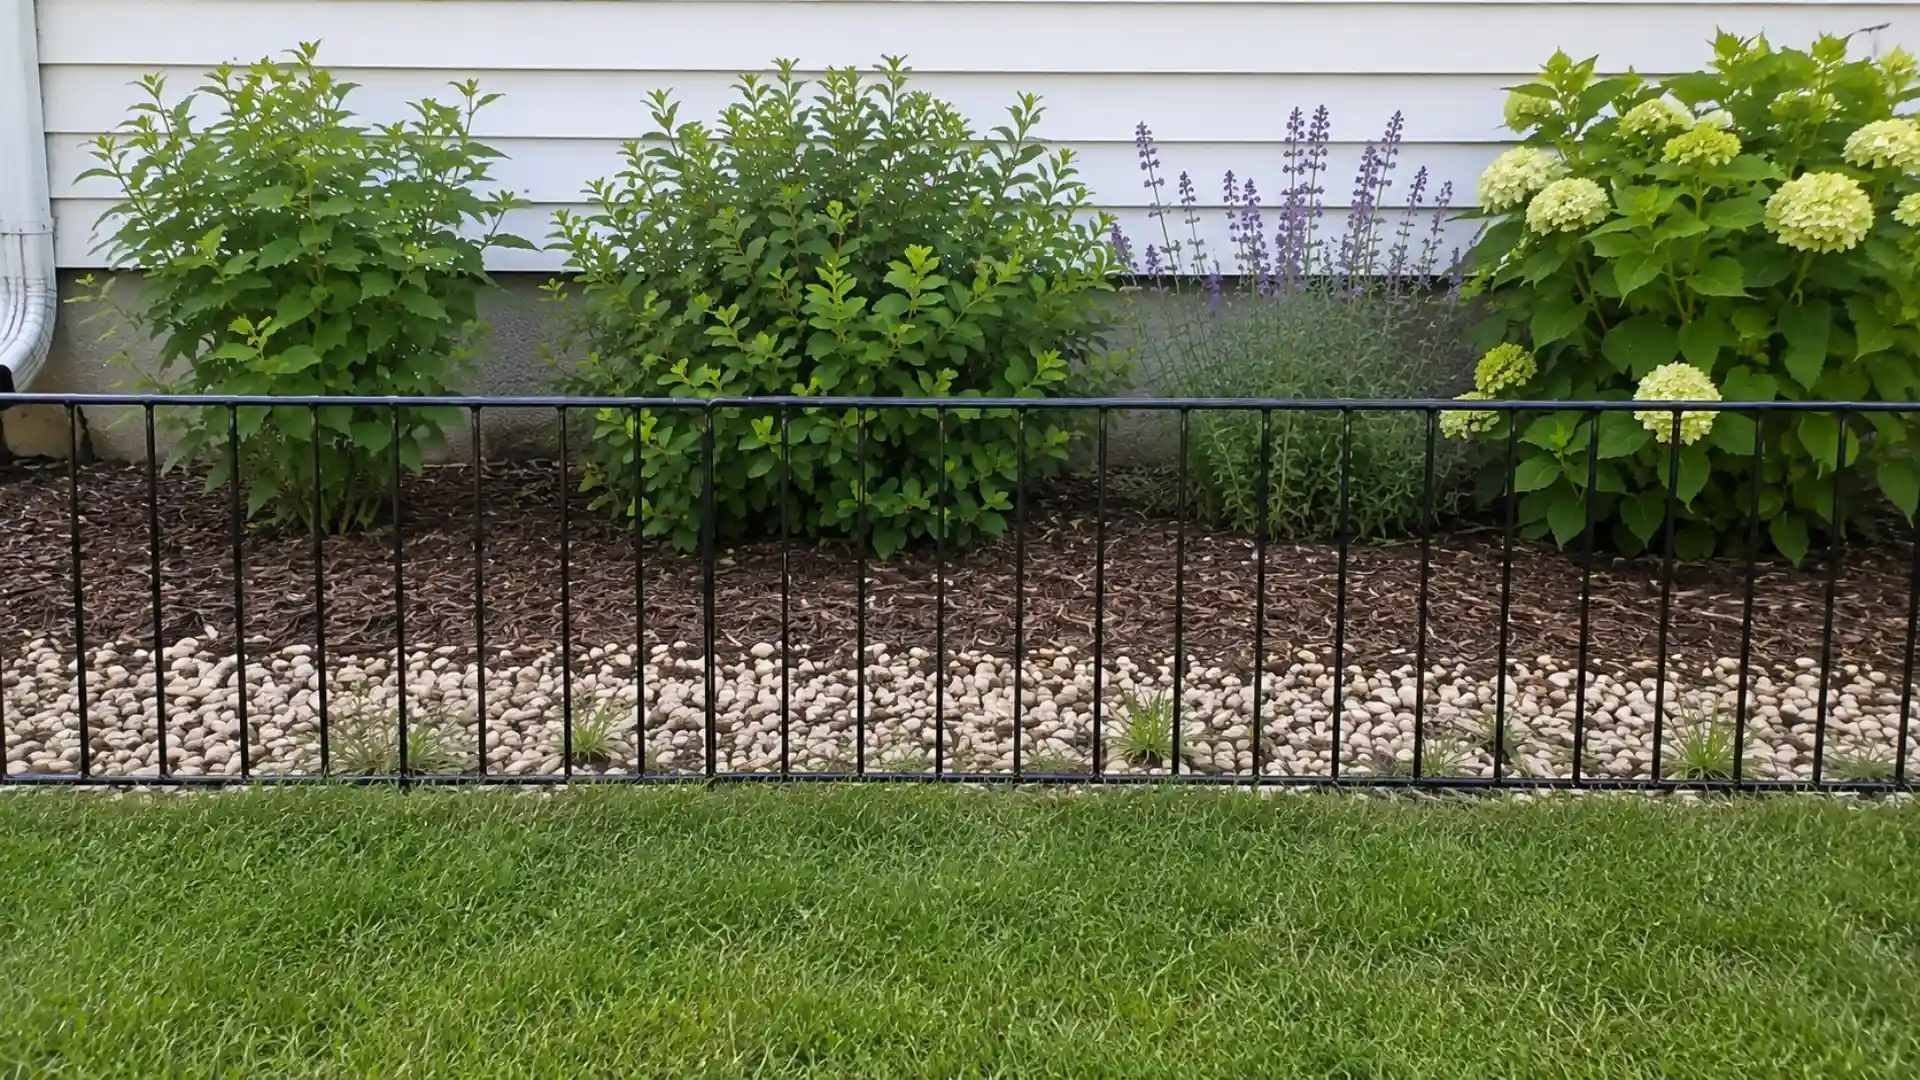
Pairing a low wire or picket fence with tall companion plants like sunflowers, marigolds, or ornamental grasses softens its appearance while adding a natural layer of pest deterrence.
The plants grow along the fence line, partially hiding it, while their scent or height can also help keep certain animals away.
9. Split-Rail Fence
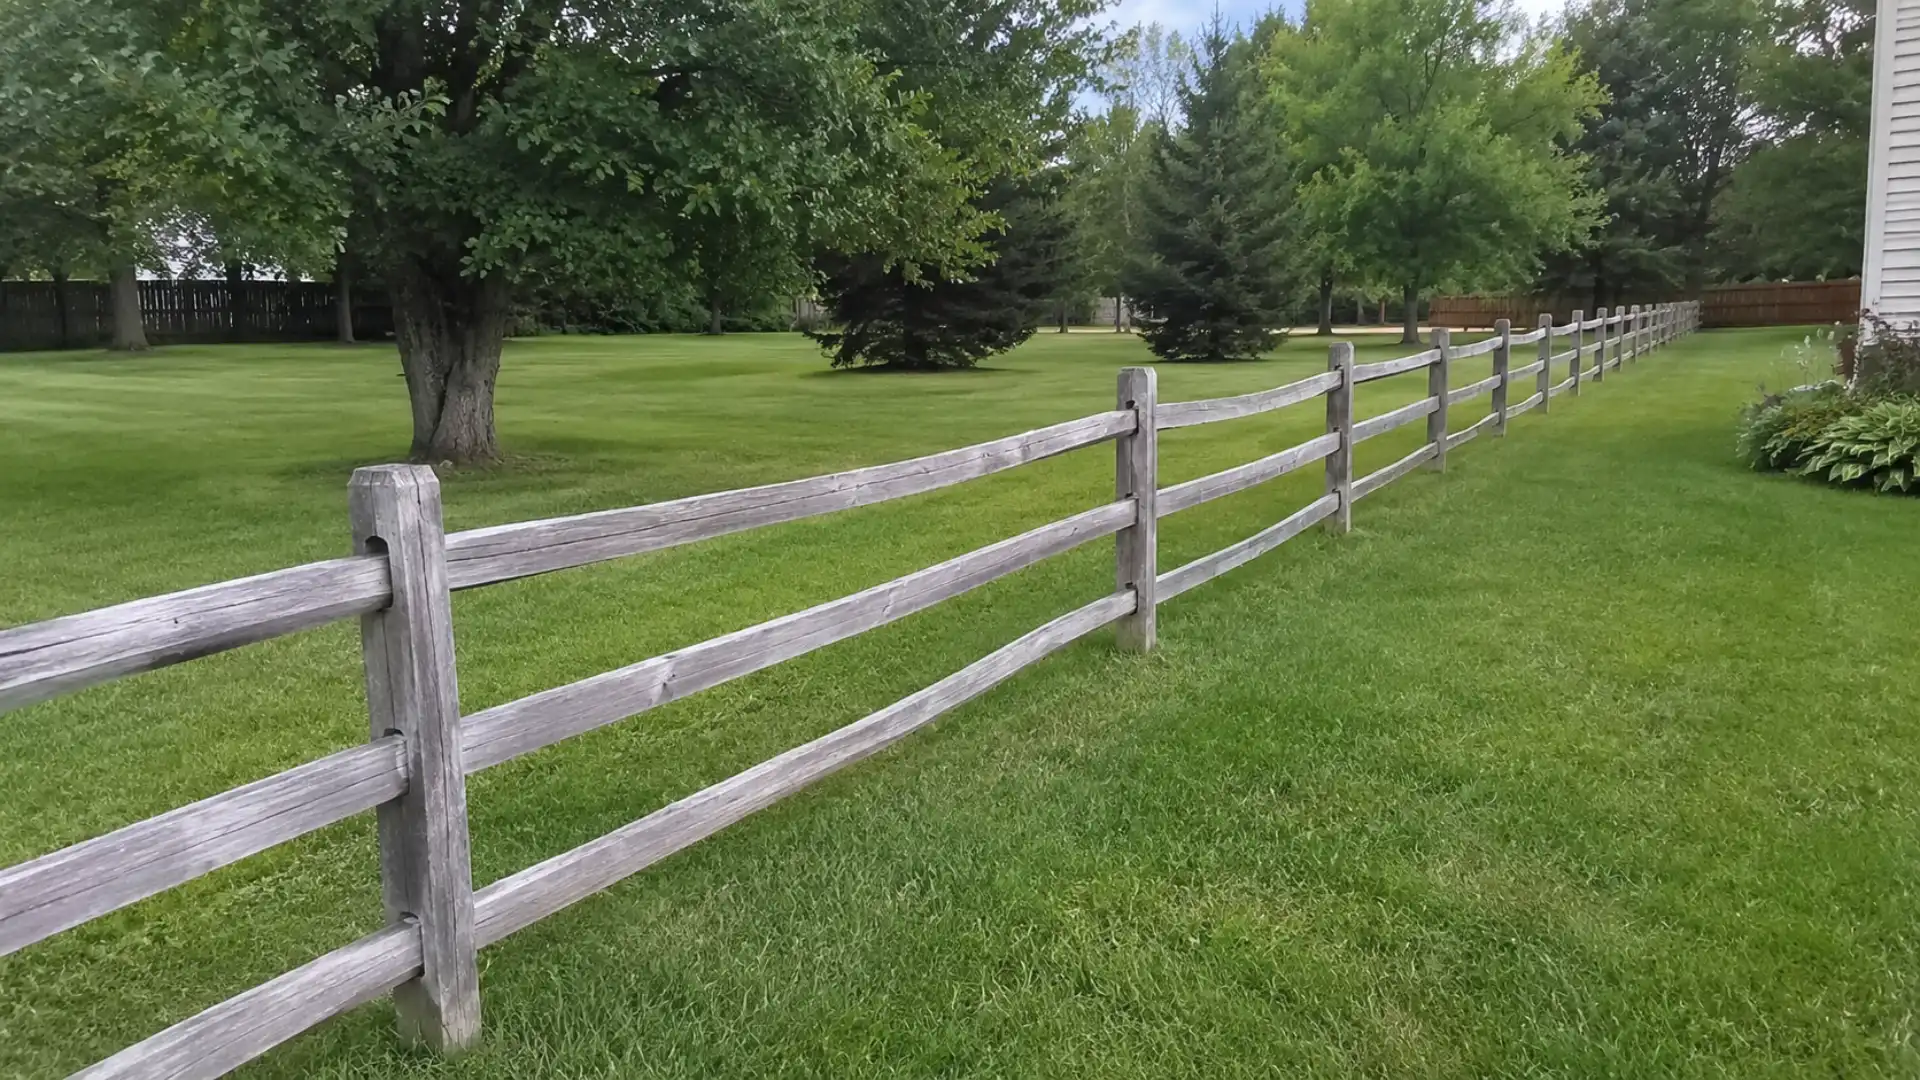
A split-rail fence uses horizontal wooden rails set into posts for a rustic, farm-style look without solid panels.
On its own, it won’t stop small animals, so wire mesh is often attached to the rails. It suits larger properties or country-style yards well.
10. Willow or Wattle Fence
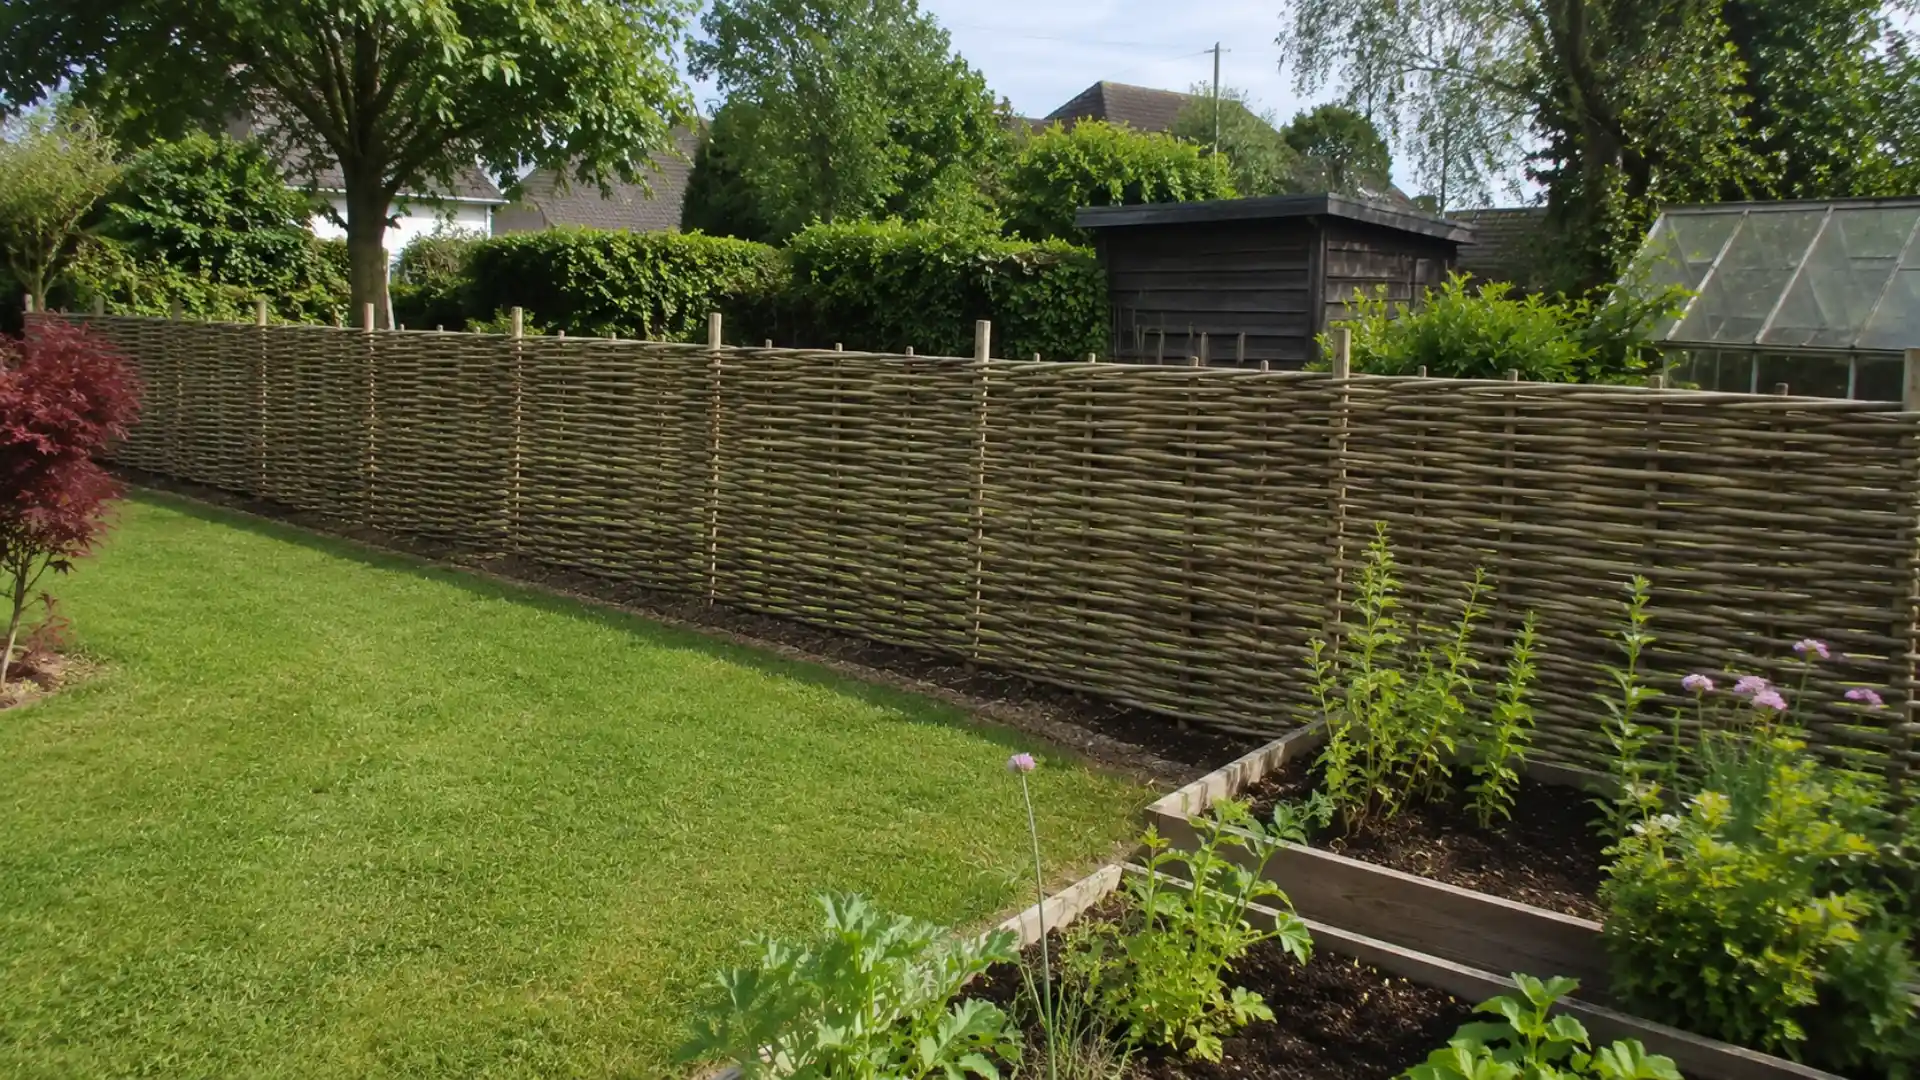
Woven willow branches or thin sticks create a traditional wattle fence with a soft, handmade texture that suits cottage gardens and raised beds.
Gaps between branches can be sizable, so it pairs well with wire mesh where pest control matters.
11. Metal Sheet Fence
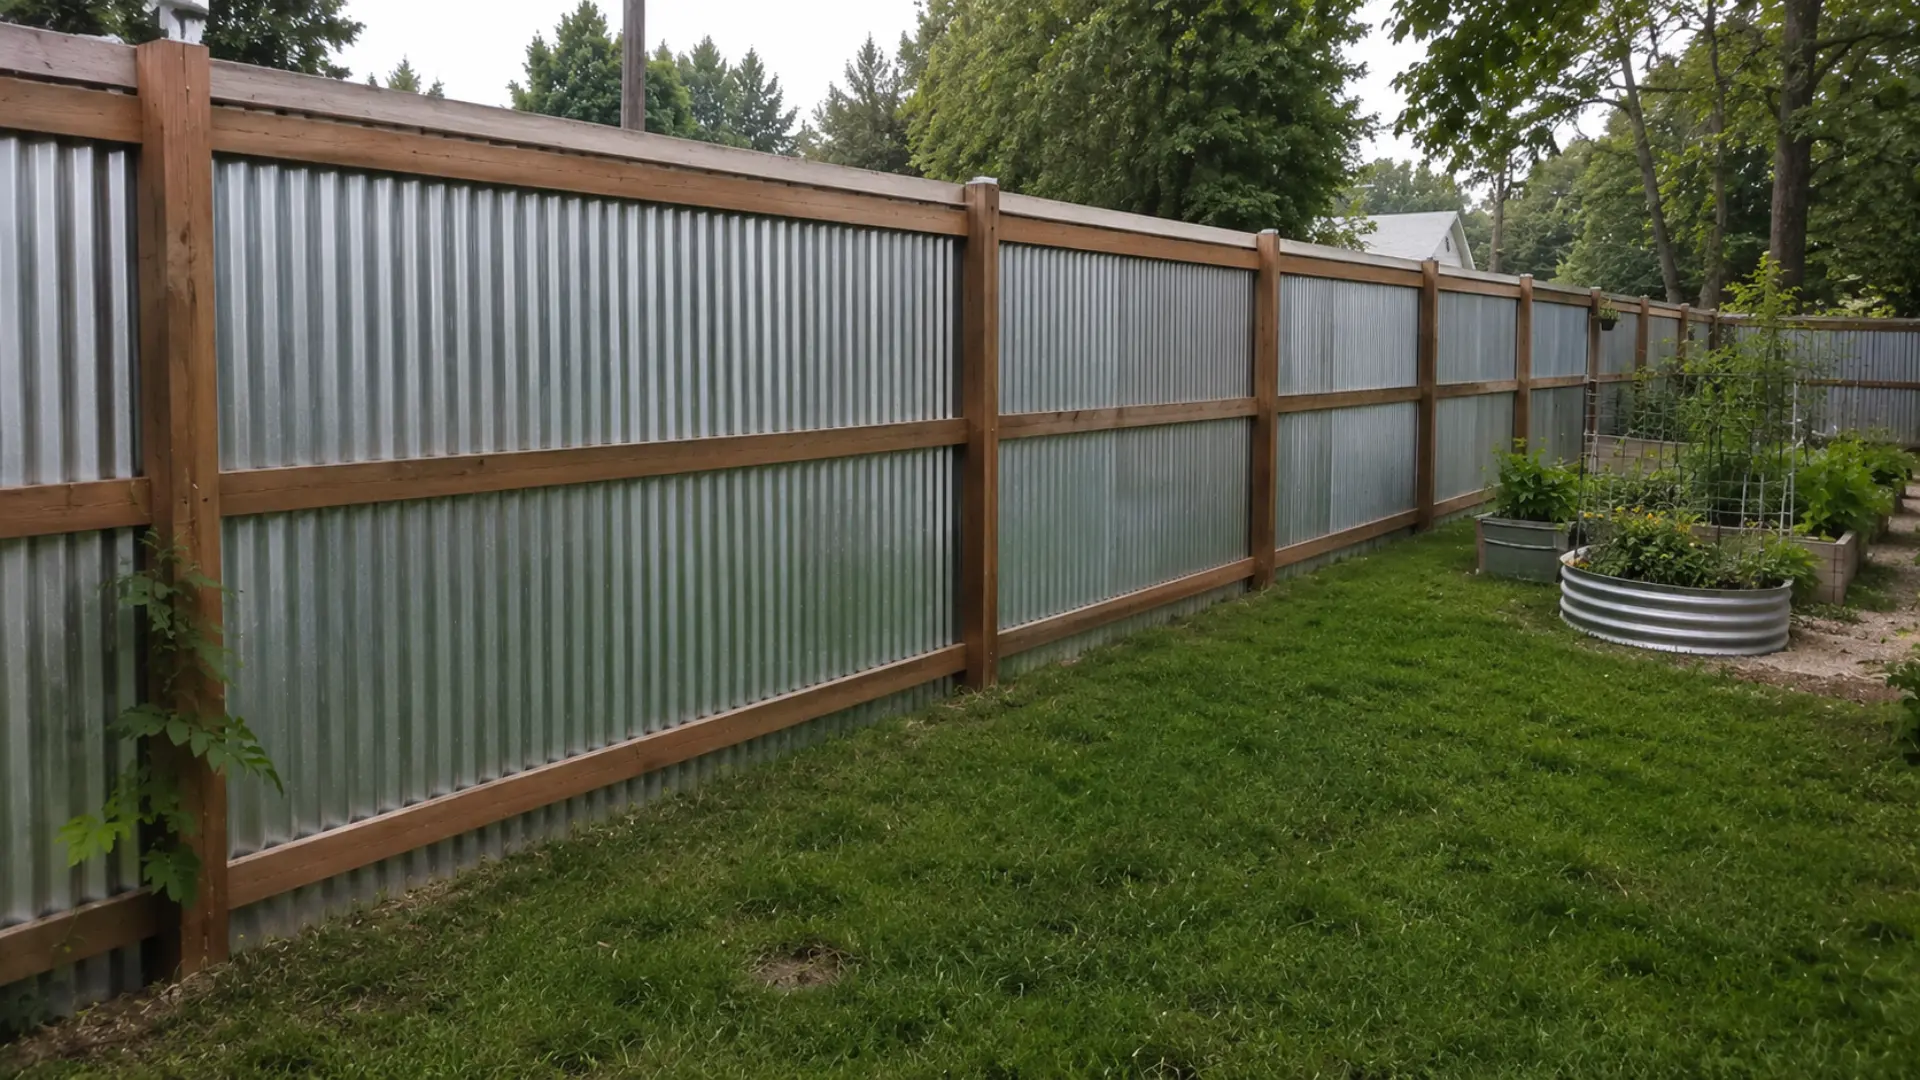
Corrugated metal sheets, sometimes reclaimed from old roofing, create a durable, low-maintenance fence with an industrial look.
Metal holds up well against rain and wind without needing yearly resealing like wood.
Common DIY Garden Fence Mistakes to Avoid
Even a well-planned fence can run into trouble if a few common errors slip through. Watch for these and fix them early.
| Mistake | Fix |
|---|---|
| Fence too short for the pest | Add height: 2–3 ft for rabbits, 8 ft (or an angled top) for deer |
| Gaps over 1 inch | Patch with extra wire at the bottom and corners |
| No buried barrier | Extend fencing 6–12 inches underground |
| Wobbling posts | Reset deeper, or add concrete for support |
| Weak gate latch | Install a proper hinge-and-latch set |
| Skipped ground prep | Clear rocks and roots before setting posts |
| Flimsy material for large animals | Switch to welded wire or hardware cloth |
| Untreated wood in humid climates | Use pressure-treated lumber, cedar, or vinyl instead |
| Ignored upkeep | Check posts twice a year, reseal wood yearly in humid climates |
Wrapping Up
A DIY garden fence is not complicated once you break it into small steps. Figure out which critter you are dealing with first, since that decides your height, material, and how deep to bury the base.
Set the posts, stretch the fencing tight, and pay extra attention to the buried edge and the bracing that holds up through wind and rain.
A well-placed gate keeps daily access easy, and a little yearly upkeep keeps the whole thing standing for years.
I would love to hear what’s been raiding your garden. Drop a comment below and tell me which critter sent you looking for a fence, and I will help you figure out the right height and material for your yard.
Frequently Asked Questions (FAQs)
Can I Build a Garden Fence Without Digging Post Holes?
Yes, you can drive stakes directly into soft ground with a sledgehammer or mallet instead of digging holes.
How Do I Keep a Garden Fence Standing on Sloped or Uneven Ground?
Step the fence in sections along the slope and set each post at a consistent depth rather than following the ground angle.
Is It Better to Fence the Whole Yard or Just the Garden Beds?
Fencing just the garden beds is usually cheaper and easier, while a full yard fence works better for larger pest problems.
What is the Best Time of Year to Install a Garden Fence?
Early spring or fall is ideal, since the ground is soft enough to dig but not frozen or overly dry.
Do I Need a Permit to Build a Garden Fence in a Residential Area?
Low garden fences usually do not need a permit, but taller fences or ones near property lines may require local approval.