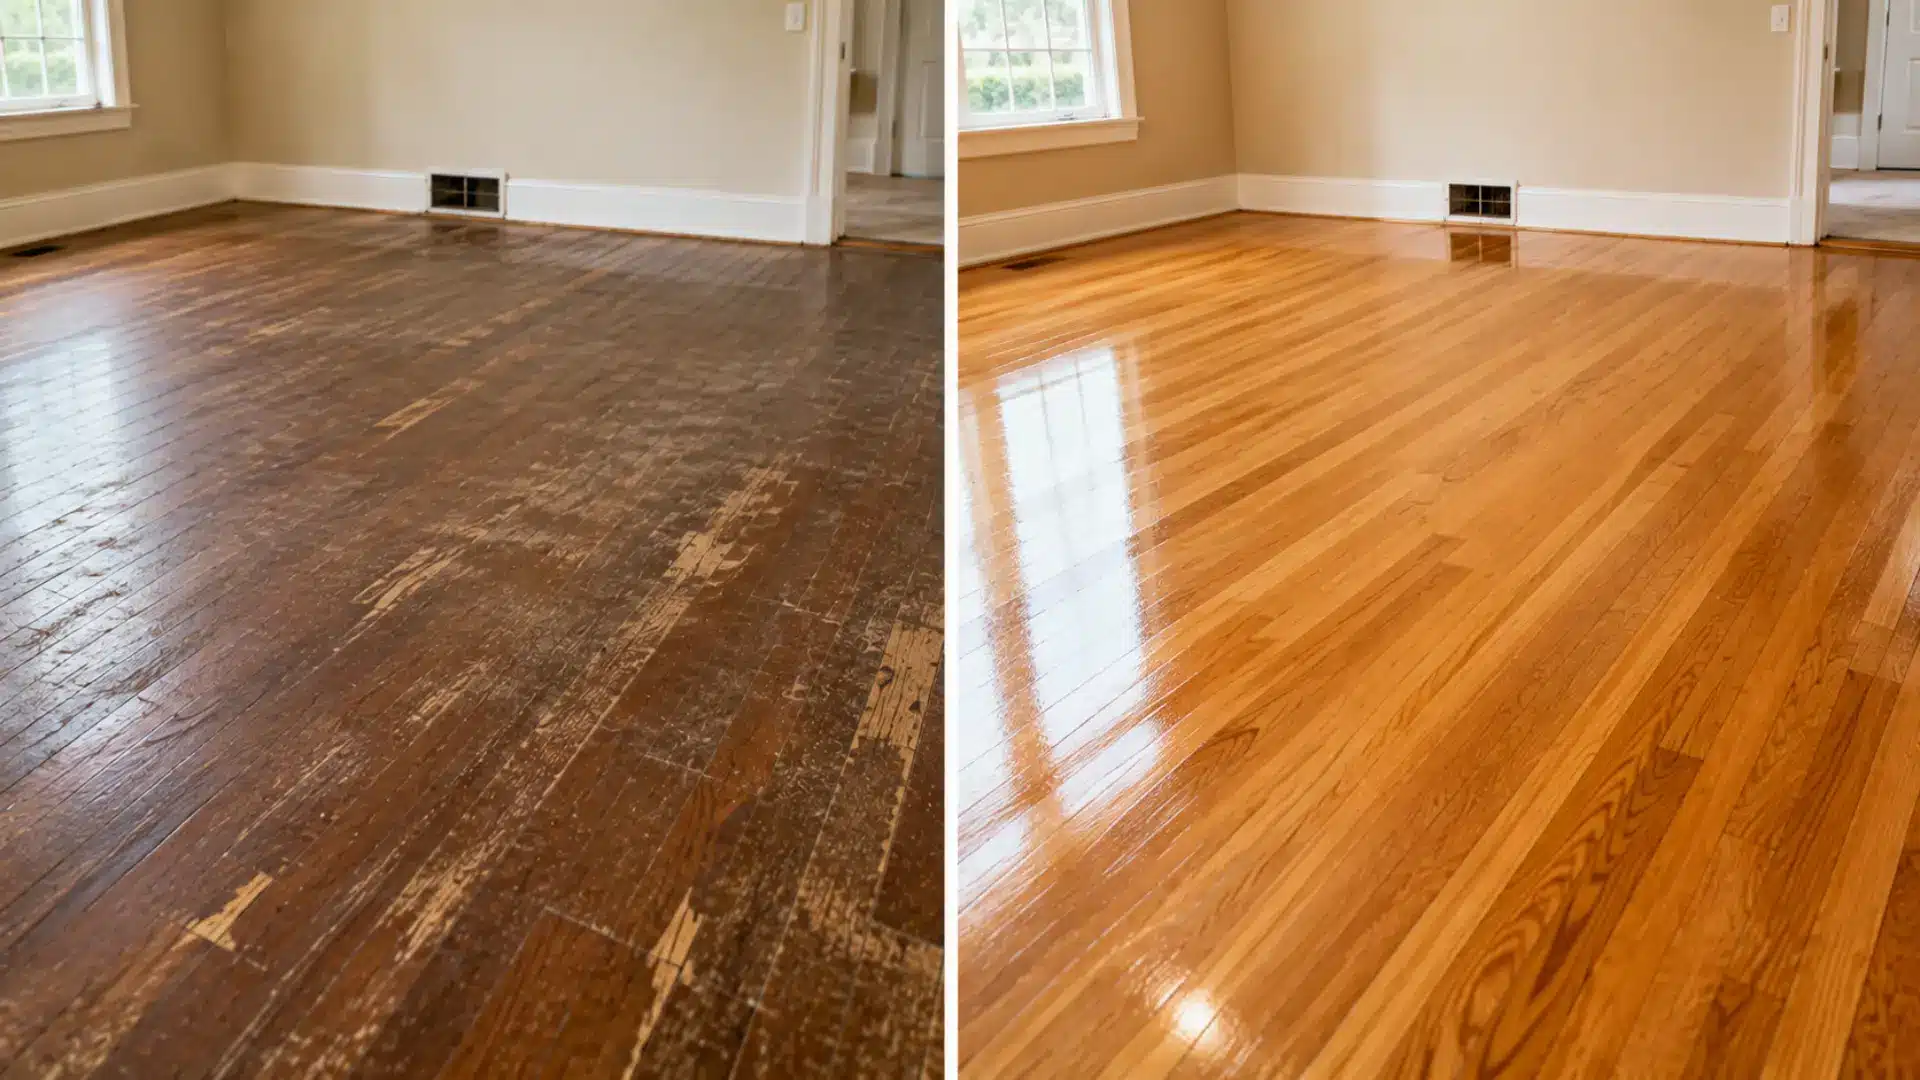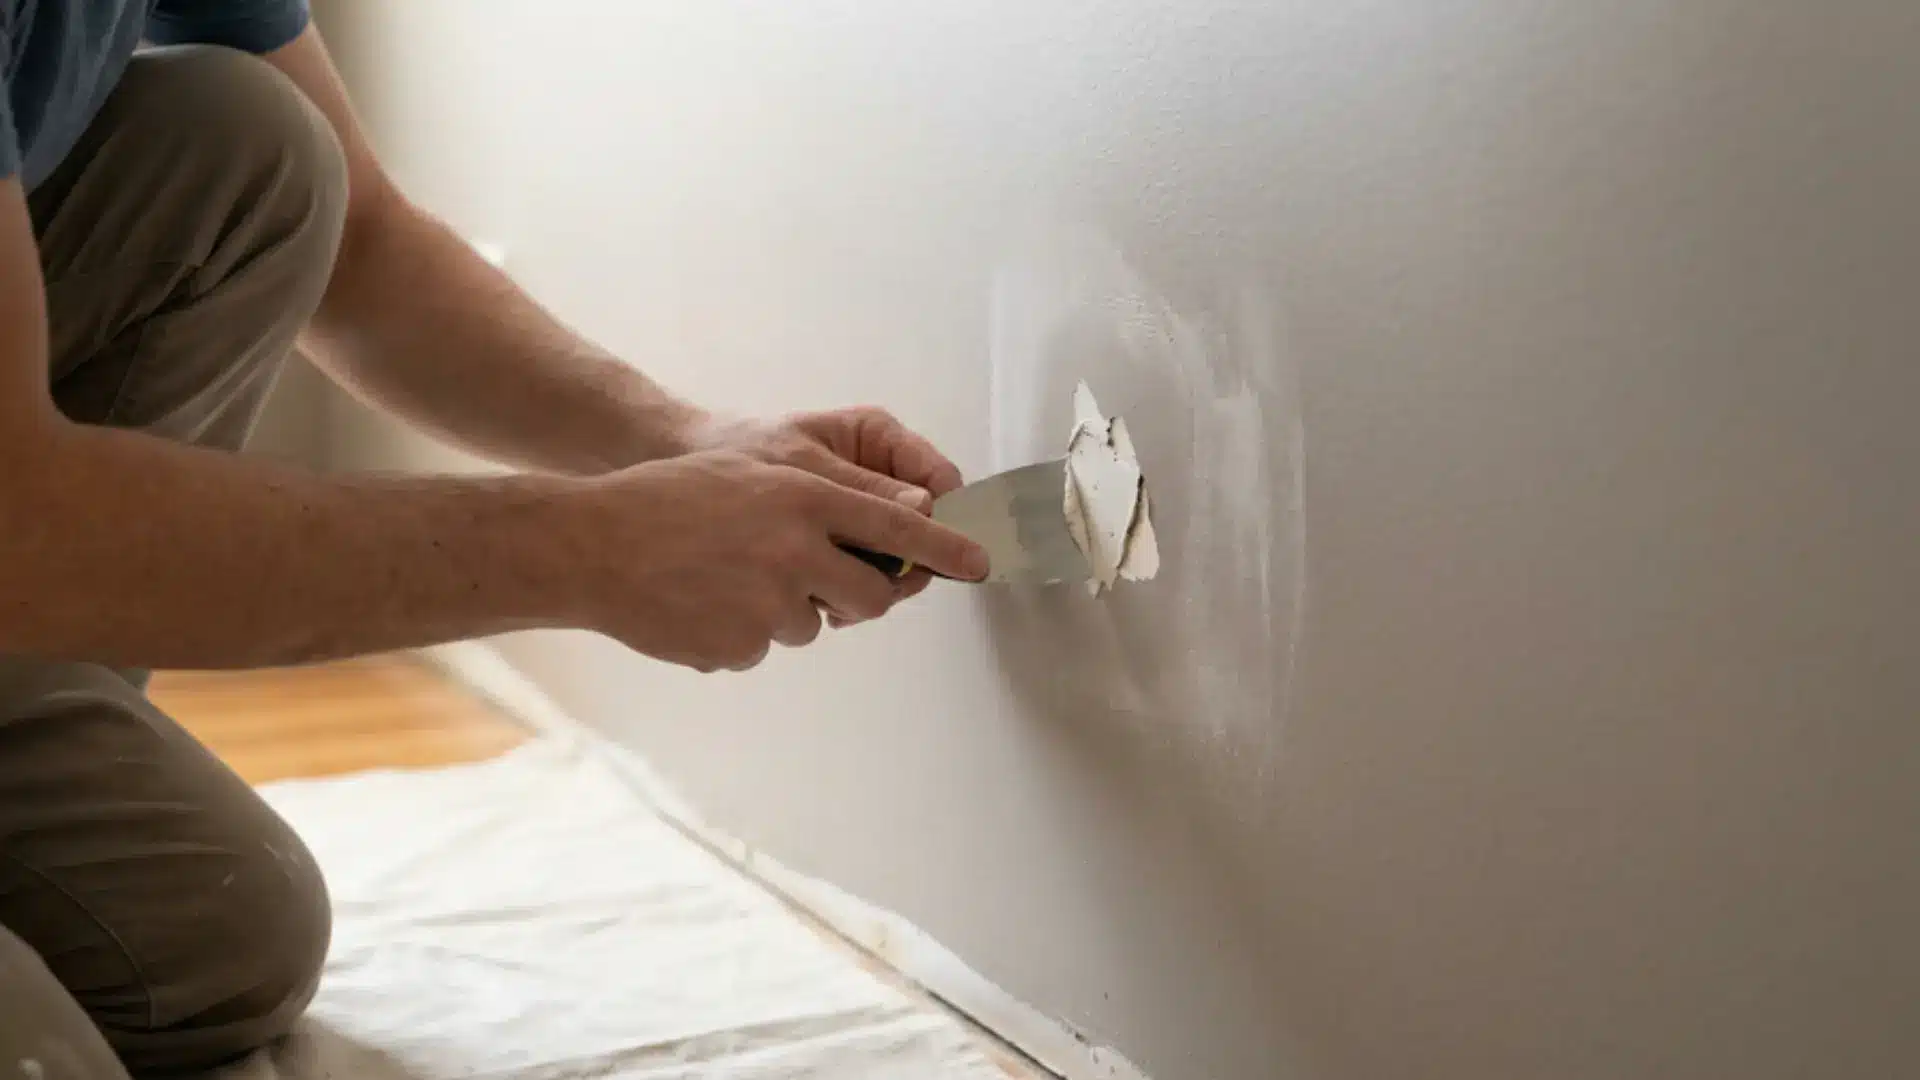
That small paint chip on your wall can make the whole room feel unfinished. You may think a quick dab of paint will fix it, but it often leaves a raised spot, a dull patch, or a shiny mark.
The frustrating truth is that learning how to repair chipped paint is less about the paint and more about what happens before the paint. Most patches fail due to skipped prep steps, the wrong filler, or a wrong sheen match. Not a bad color match
I will walk you through exactly what to check, which tools you need, every repair step explained clearly, and how to make the fix actually disappear into your wall.
Why Paint Chips and Why a Proper Repair Matters
Paint does not chip randomly. Interior wall paint chips most commonly due to physical impacts (furniture, doorknobs, hooks), tape pulled off too quickly, moisture buildup behind the wall, or old paint that has lost adhesion over the years.
On walls painted over unprimed surfaces, or where multiple layers of old paint have built up, even a minor knock can dislodge a whole flake rather than leaving a dent.
One cause that often goes unnoticed: latex paint applied directly over old oil-based paint. Oil paint repels the water in latex, so the new coat never truly bonds. The result is chipping that looks like a paint failure but is actually a compatibility problem between layers. If you keep seeing the same wall chip in the same spot, this is worth investigating before you repair it again.
The root cause changes what you do. A surface chip with no dent just needs light prep and paint. Peeling edges indicate loose adhesion; they need to be cut back and stabilized before any filler is applied. Skipping this is the single most common reason a patch peels off again within weeks.
What Should You Check Before Repairing Chipped Paint?
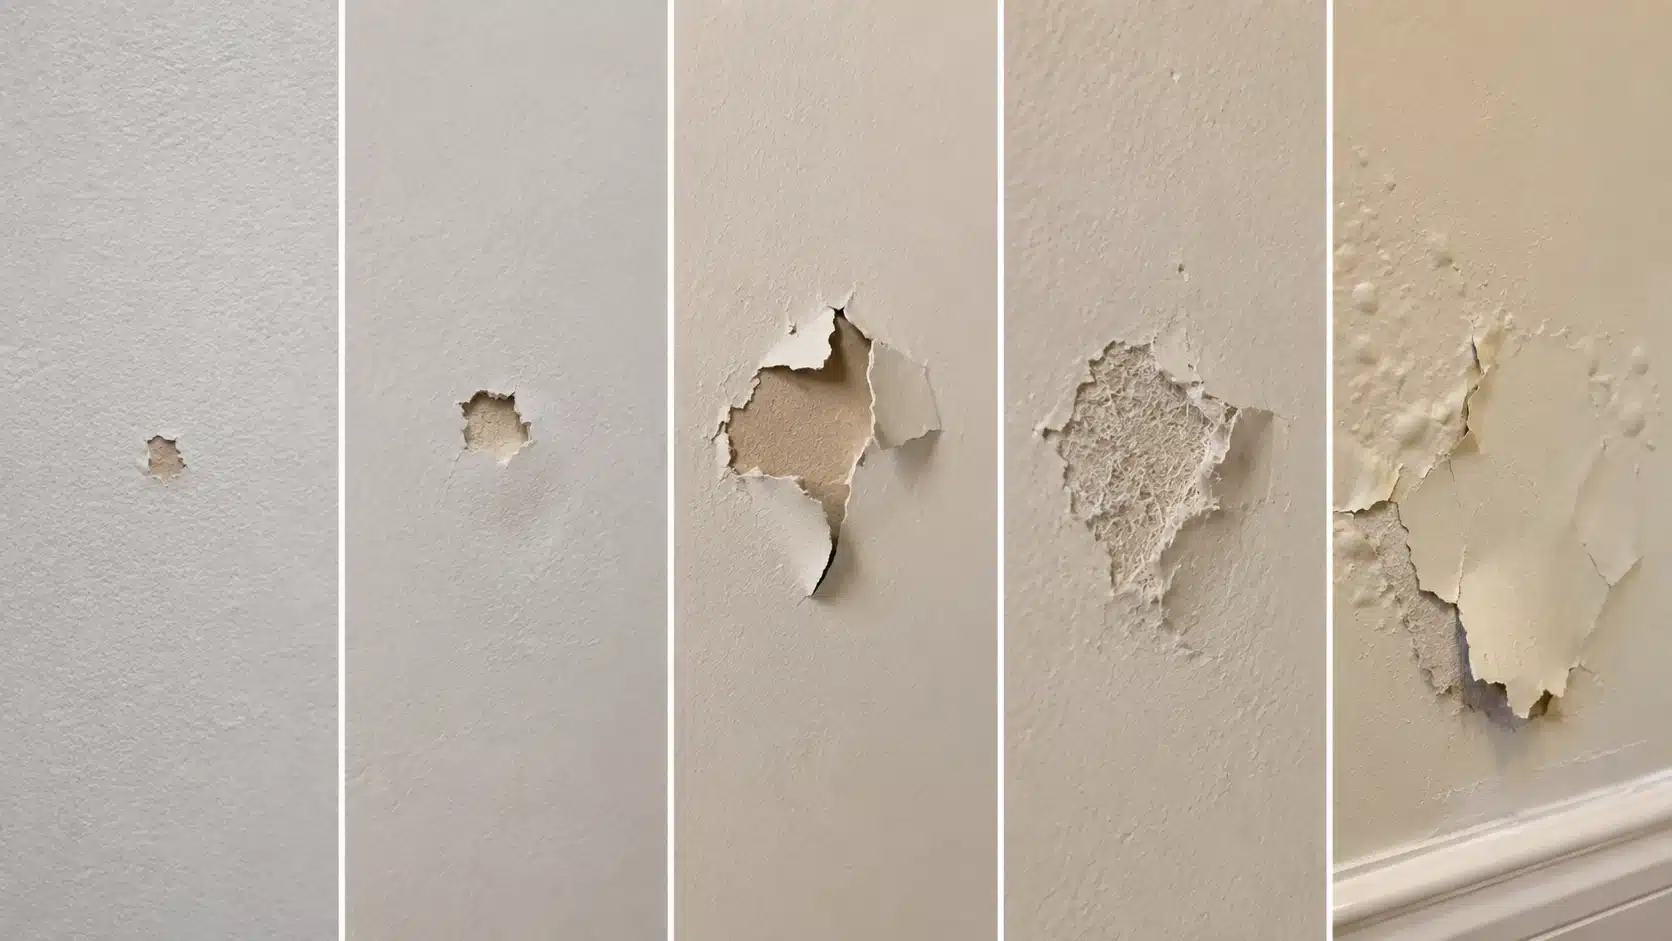
Chipped paint can almost always be repaired, but the right approach depends on the depth, loose edges, and the wall’s condition. A tiny surface chip with sharp, stable edges requires far less work than one with peeling paint around it or torn drywall paper underneath. Before buying supplies, run through this quick check:
- Tiny Missing Paint Only: This is usually a surface chip. Light sanding, primer, and matching paint may be enough.
- Small Dent Under the Chip: This means the wall has a low spot. Use spackle, sand smooth, prime, and paint.
- Flaking or Loose Edges: Loose paint must come off first. Scrape back to stable paint before filling or painting.
- Torn or Fuzzy Drywall Paper: Damaged paper needs primer before filler. This helps seal the surface and prevent bubbling.
- Large Peeling or Bubbling Area: This may indicate paint adhesion failure. Scrape wider, check the cause, and repaint the section if needed.
One important thing renters should do at this stage: do not enlarge the damage by trying to fix it without approval. Document the chip with a photo, and if repainting is involved, check your tenancy agreement or ask your landlord before proceeding.
Lead paint caution: If your home was built before 1978, older paint layers may contain lead. Avoid dry sanding or scraping large areas. Check the current US EPA guidance on lead-safe renovation practices before starting work.
How to Repair Chipped Paint on a Wall: Step by Step
clean repair depends on three things: a stable edge, a flat surface, and a sealed patch. Skip one, and the result will show. Loose paint peels, low spots create shadows, and unprimed spackle dries dull under paint.
Tools and Materials You Need
Not every chip needs a full toolkit. A truly tiny surface chip might only need sandpaper, primer, and a small brush. Deeper chips and peeling edges need a bit more.
Here is what to gather before you start, grouped by job so you only pick up what you actually need.
| Basic Tools | Extra Items for Deeper Chips | Paint Matching Supplies |
| Plastic scraper or putty knife | Lightweight spackle or pre-mixed spackling compound | Leftover paint tin |
| 220-grit sandpaper | 2-inch putty knife | Clean paint chip for store matching |
| Damp microfibre cloth | 4-inch drywall knife | Sheen details: matte, eggshell, satin, or semi-gloss |
| Interior primer | Sanding block | Small sample paint pot |
| Matching paint | 120-grit sandpaper for initial feathering | Small test area on the wall |
| Small paintbrush | Painter’s tape | Stir stick for mixing paint |
| Small tray or paper plate | Drop cloth | Small roller for texture matching |
One thing that catches many people out: color is not the only thing to match. The sheen level matters just as much. If your wall is eggshell and you apply a matte touch-up, the patch will catch the light differently, even when the color is perfect.
When visiting the paint store for a color match, bring the chip from behind a socket plate or the back of a door frame rather than from the visible wall surface.
Exposed wall paint has faded from light and air over the years, so the store will match the weathered version rather than the original. The chip from a protected area is much closer to what was originally applied.
With your tools ready, it is time to get into the actual repair. Here is every step explained so you know not just what to do, but why each one matters.
Step 1: Prepare the Space
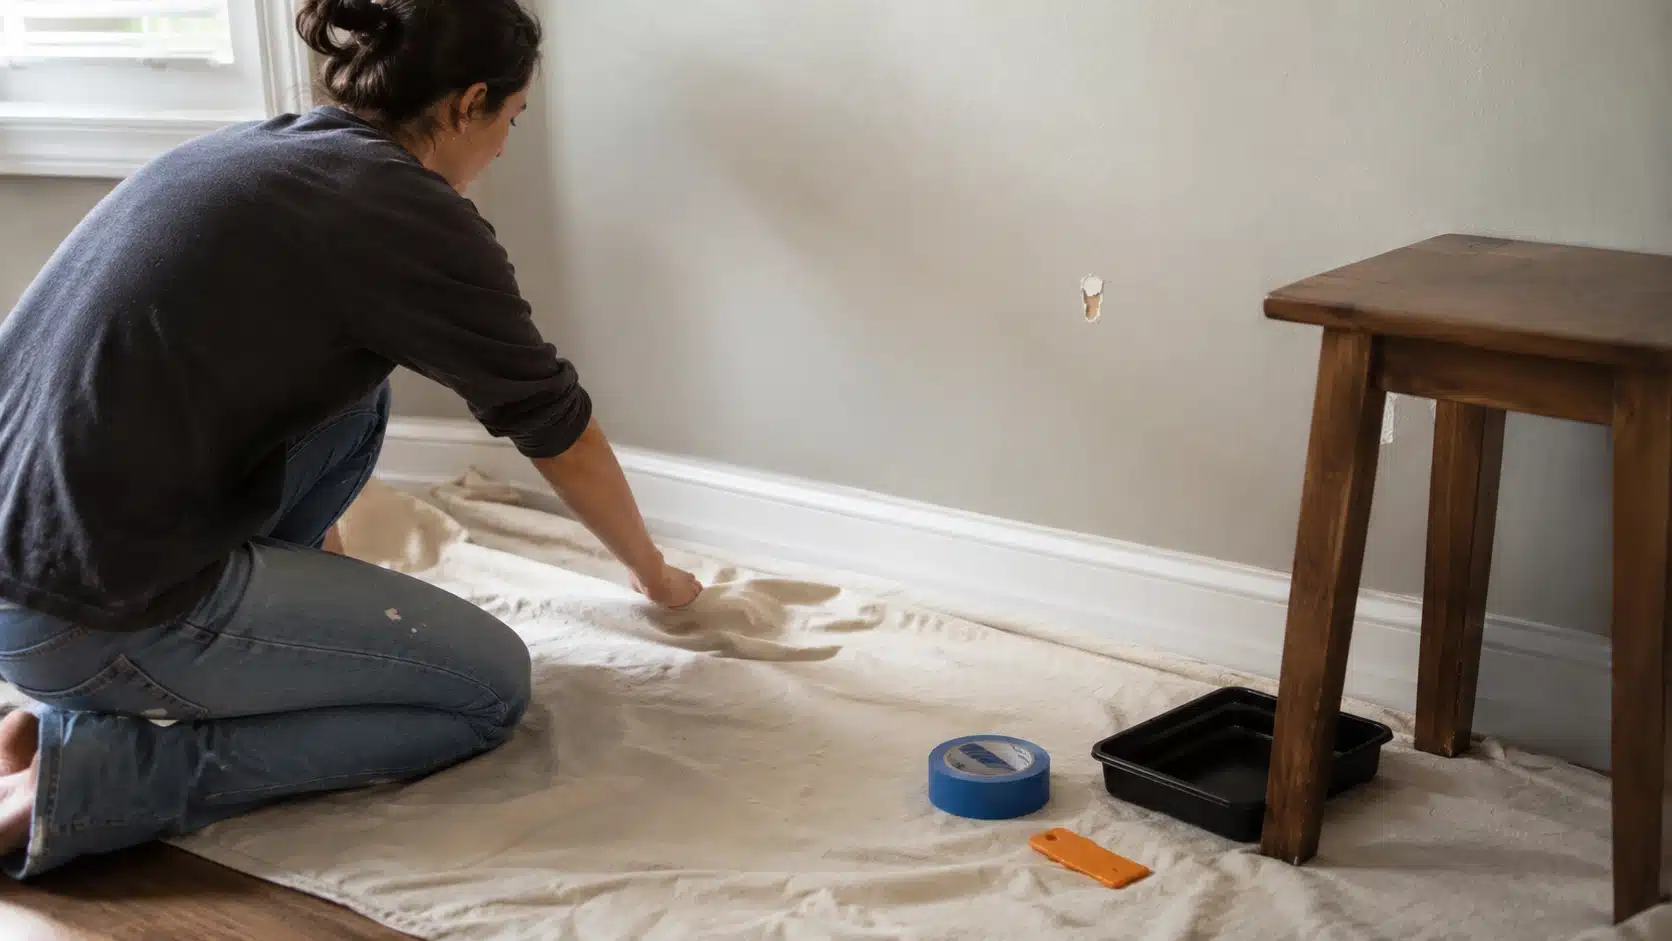
Before touching the wall, lay a drop cloth on the floor to protect it and cover any nearby furniture. Good prep at this stage saves you from having to clean up paint dust and spackle debris later. Treating this like a proper paint project from the start, the same way you would approach any structured DIY build– gives you a cleaner working area and a better final result.
Tip: Use painter’s tape along skirting boards or trim near the chip to keep the work area contained and tidy.
Step 2: Remove the Largest Paint Chips First
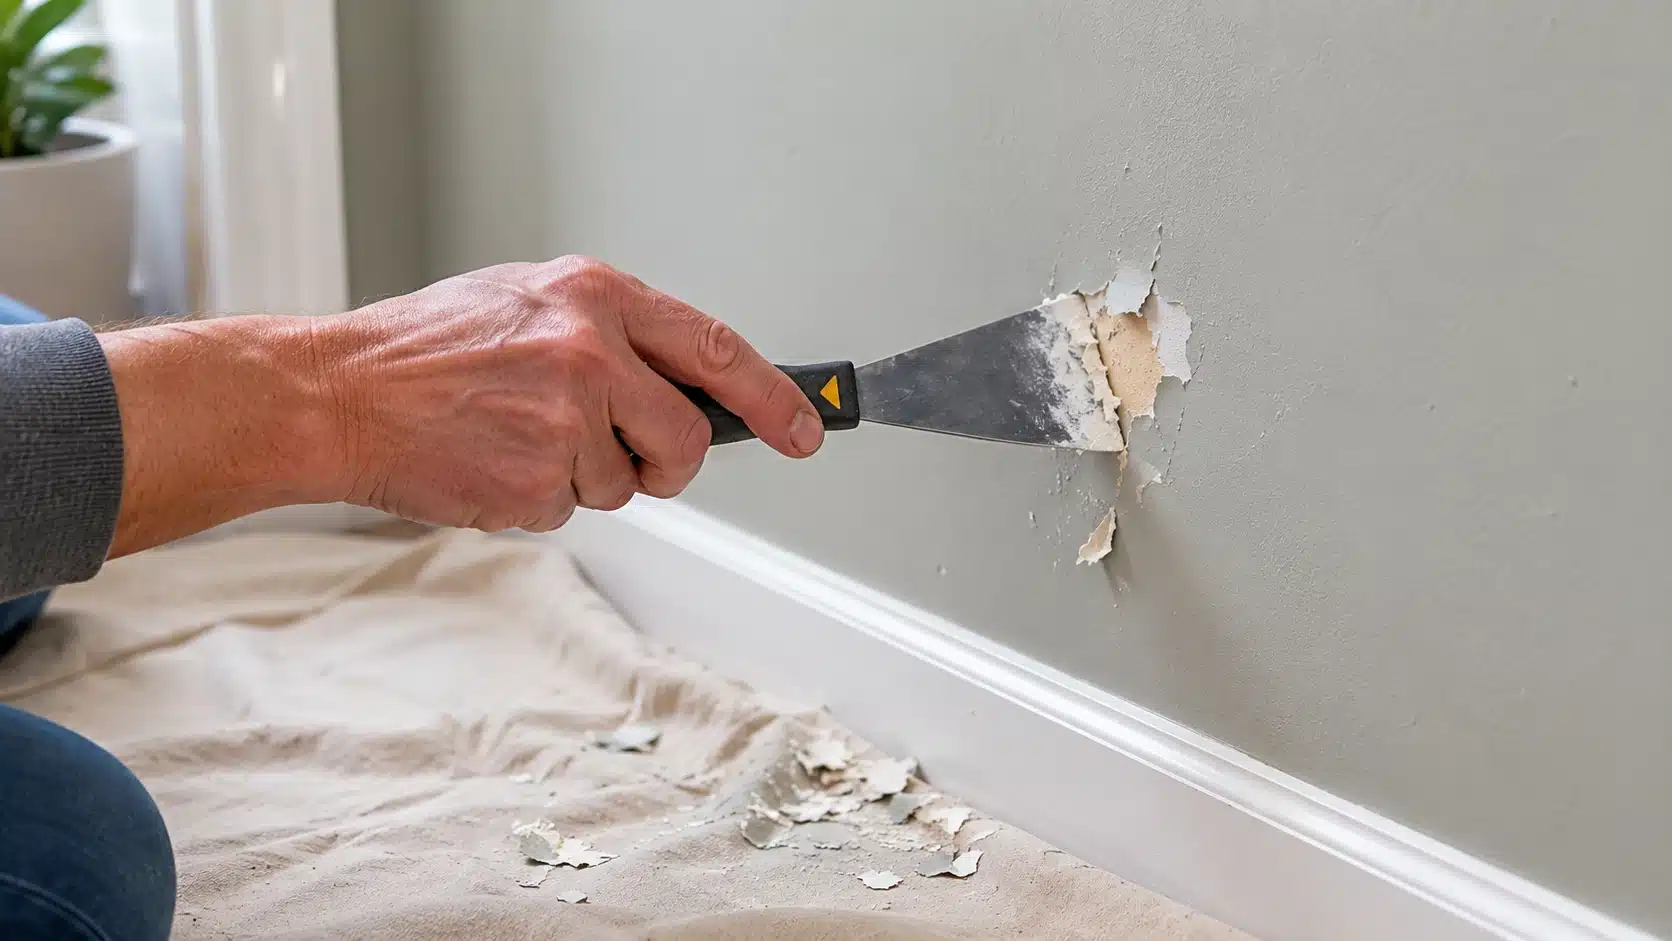
Hold a paint scraper at an angle to the wall and work through the bigger chips first, then move to the smaller ones. Holding the scraper at an angle gives you control and helps you lift the paint cleanly without gouging the underlying wall surface. Work steadily and do not force the scraper flat against the wall.
Tip: Work from the center of the chip outward. This gives you better control and reduces the risk of accidentally enlarging the damaged area.
Step 3: Remove Smaller Chips With a Wire Brush
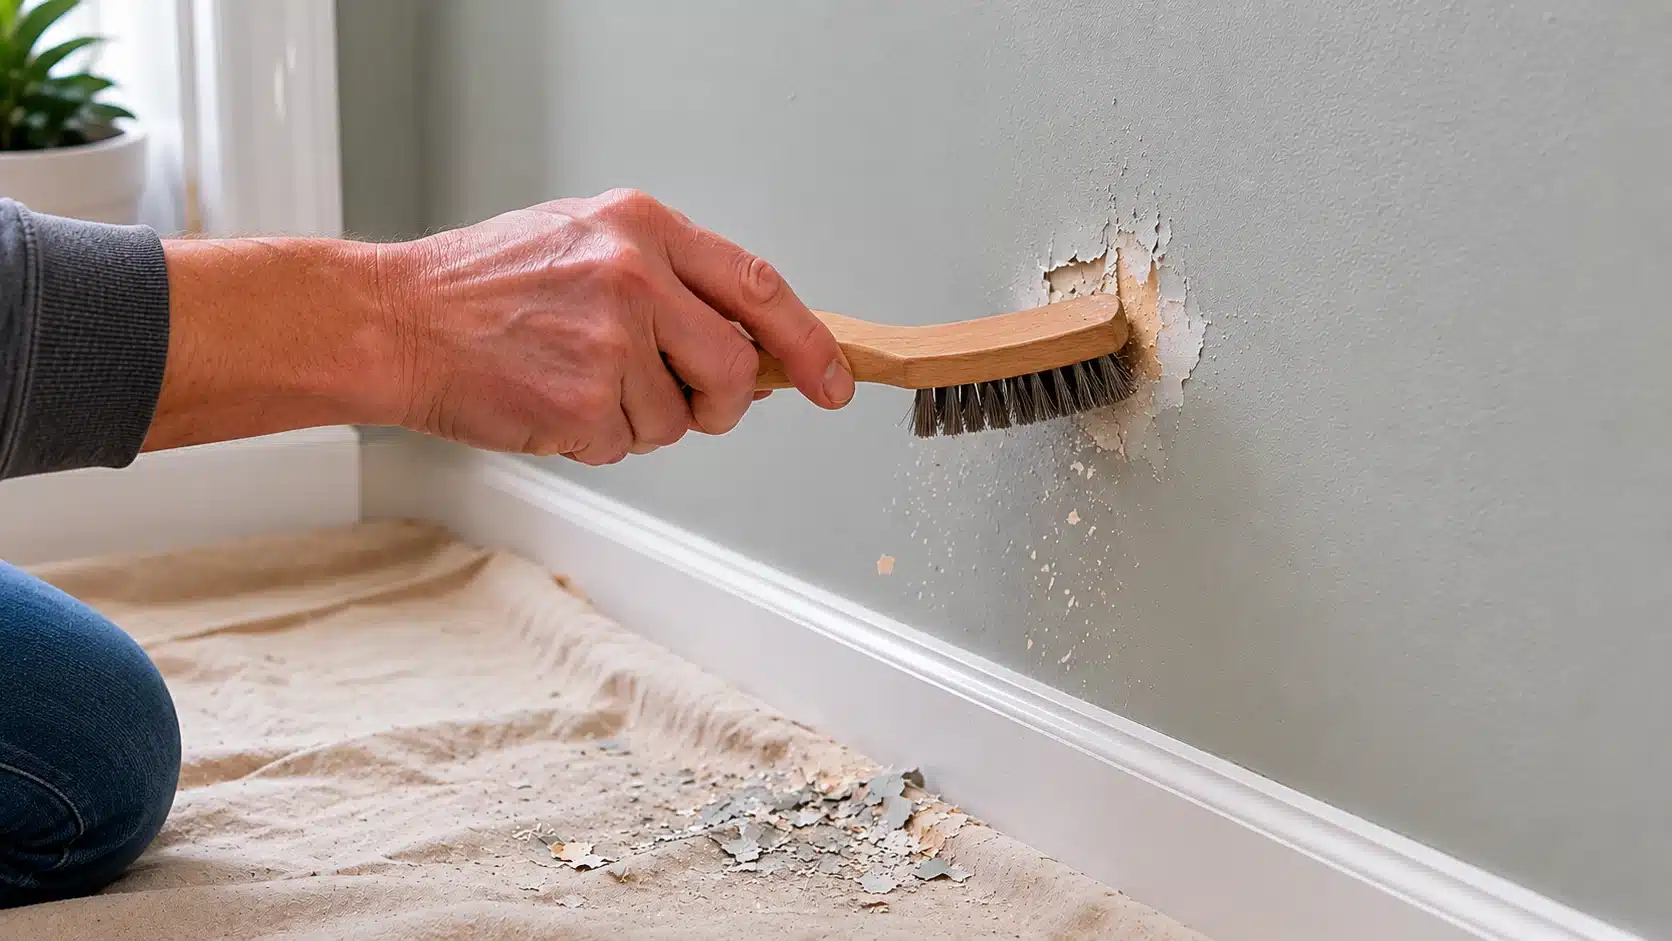
Once the larger chips are cleared, go over the area with a wire brush to lift the remaining smaller chips that the scraper missed. The wire brush gets into the edges of the damaged area and clears away any fragments that would otherwise sit under the spackle, creating an uneven surface.
Tip: Use short, light strokes with the wire brush rather than scrubbing hard. The goal is to dislodge loose paint, not scratch the wall surface beneath.
Step 4: Sand Around the Chipped Area
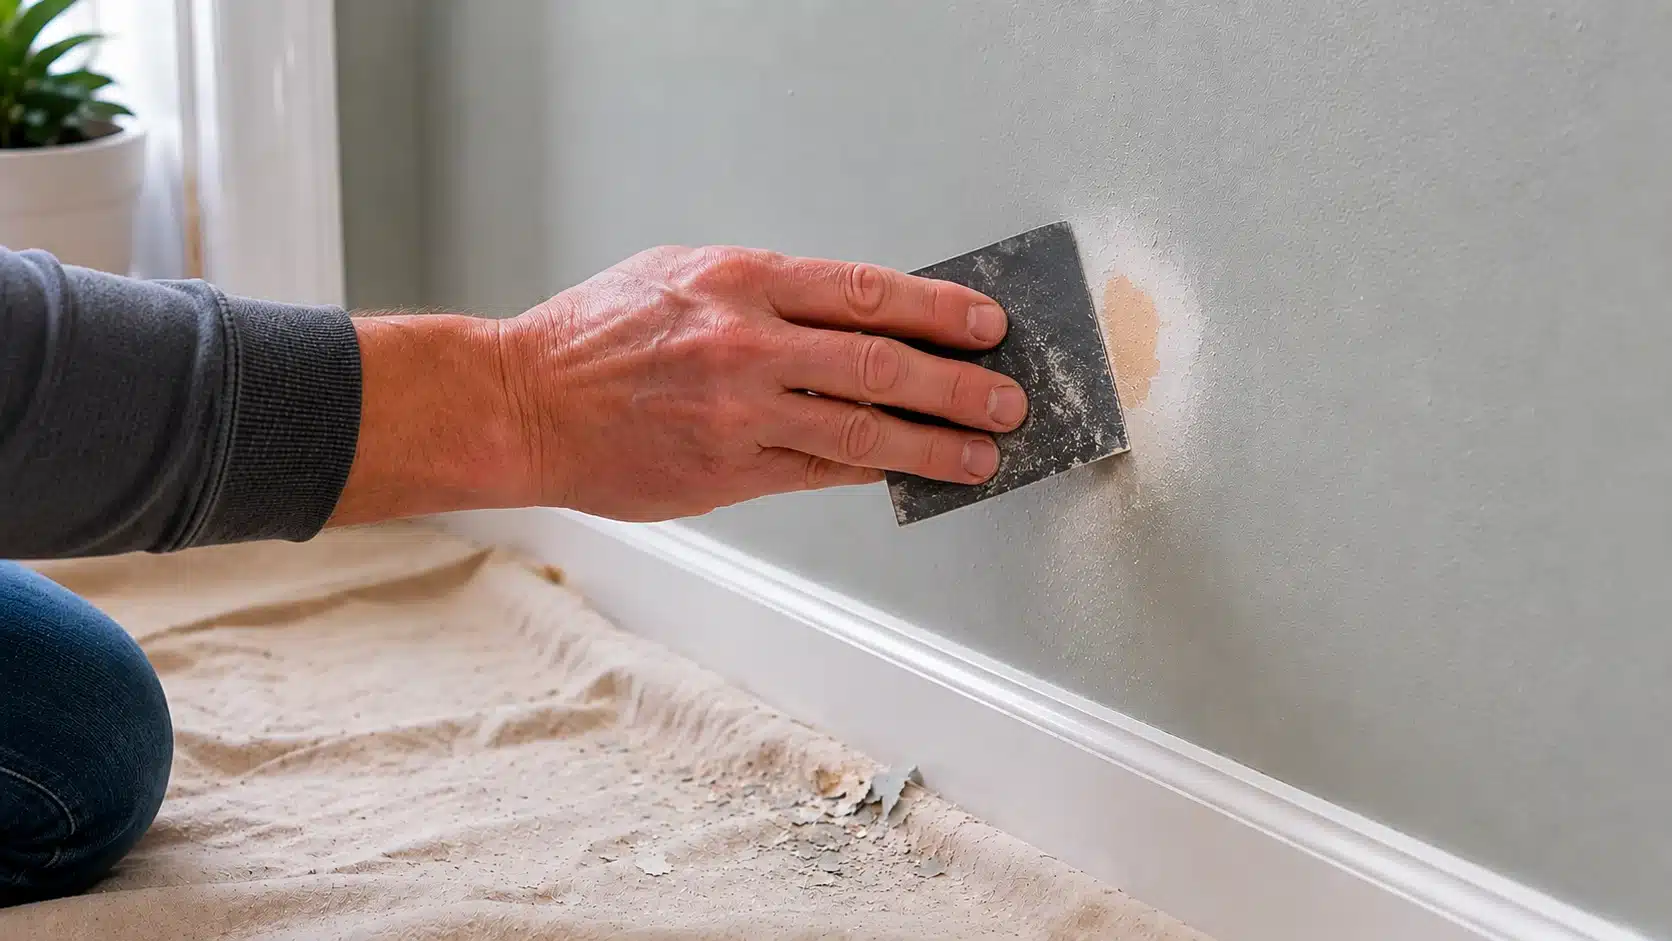
Lightly sand the surrounding area around the chip to smooth the transition between the bare wall and the existing paint. Continue until no more paint flakes off when you run sandpaper over the area. This is the feathering stage, which prevents a hard, raised rim from showing through the finished repair. When the area stops flaking and feels smooth to the touch, it is ready for patching.
Tip: Run your finger across the sanded edge to feel for any remaining ridge. It should feel like a gradual slope from the surrounding paint down to the bare area, with no sharp step.
Step 5: Apply Spackle With a Putty Knife
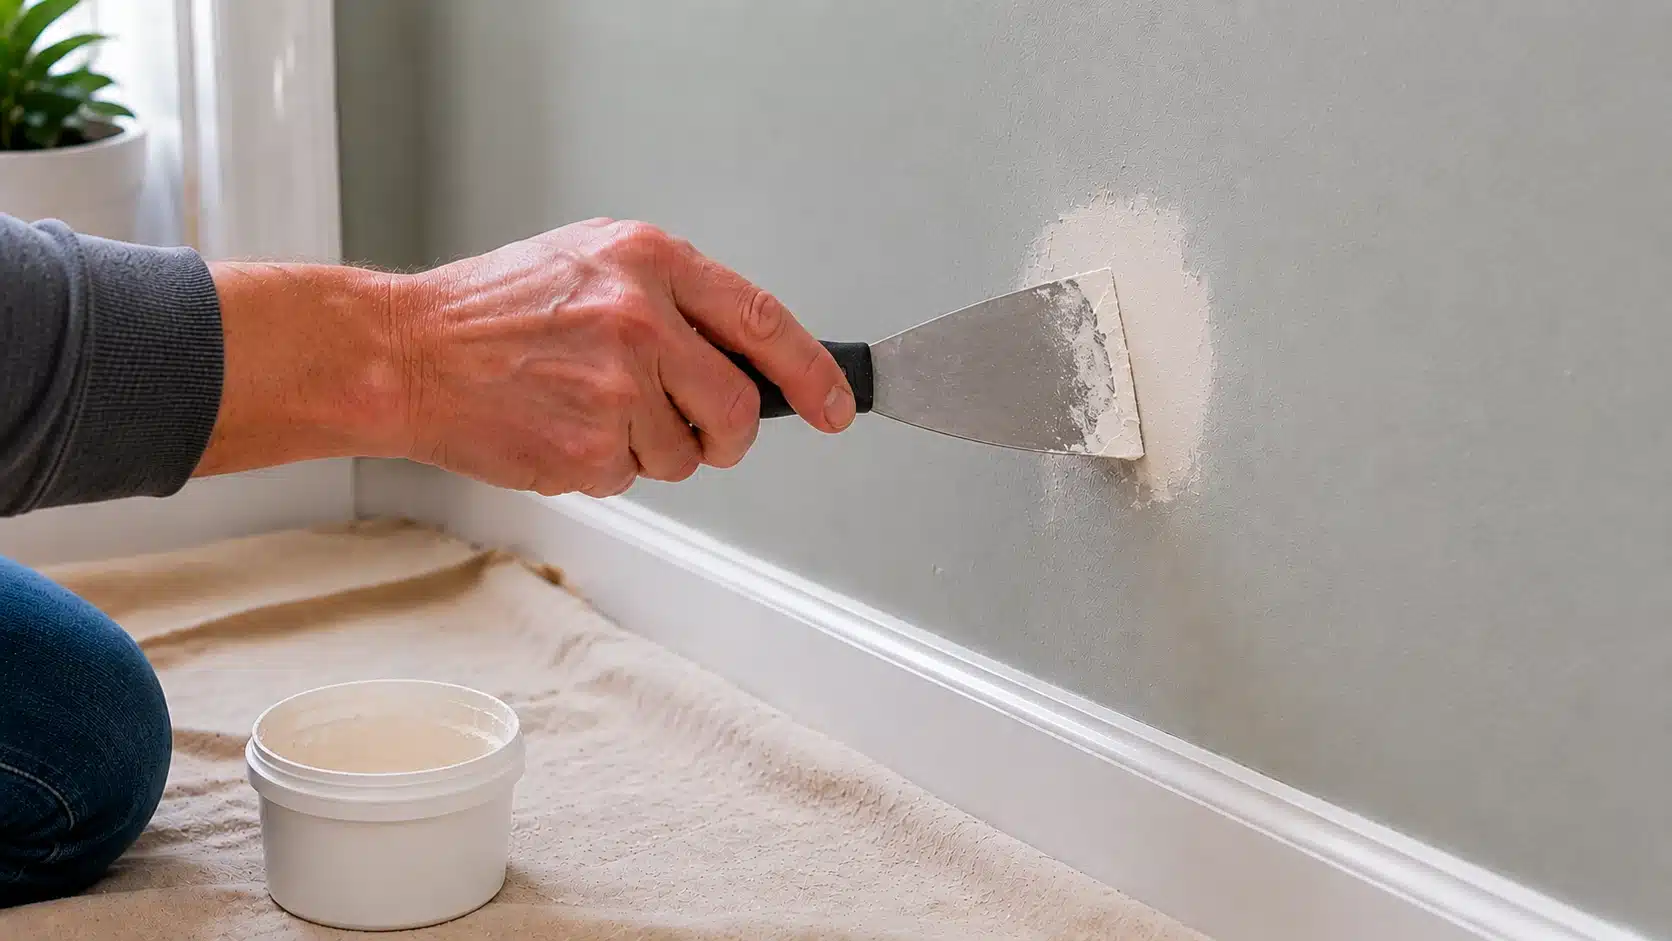
Using a putty knife, spread a thin layer of spackle over the patched area and smooth it out evenly. The layer should be thin rather than piled up. Let it dry completely, then repeat the process by applying another thin layer and allowing it to dry again. Keep repeating until the patch sits level with the surrounding paint surface. Each layer must be given proper drying time before the next is applied.
Tip: Use pre-mixed lightweight spackle for most wall chips. It dries faster and sands more easily than traditional filler. Always check the label for the recommended dry time for each coat.
Step 6: Let the Wall Dry for 24 Hours
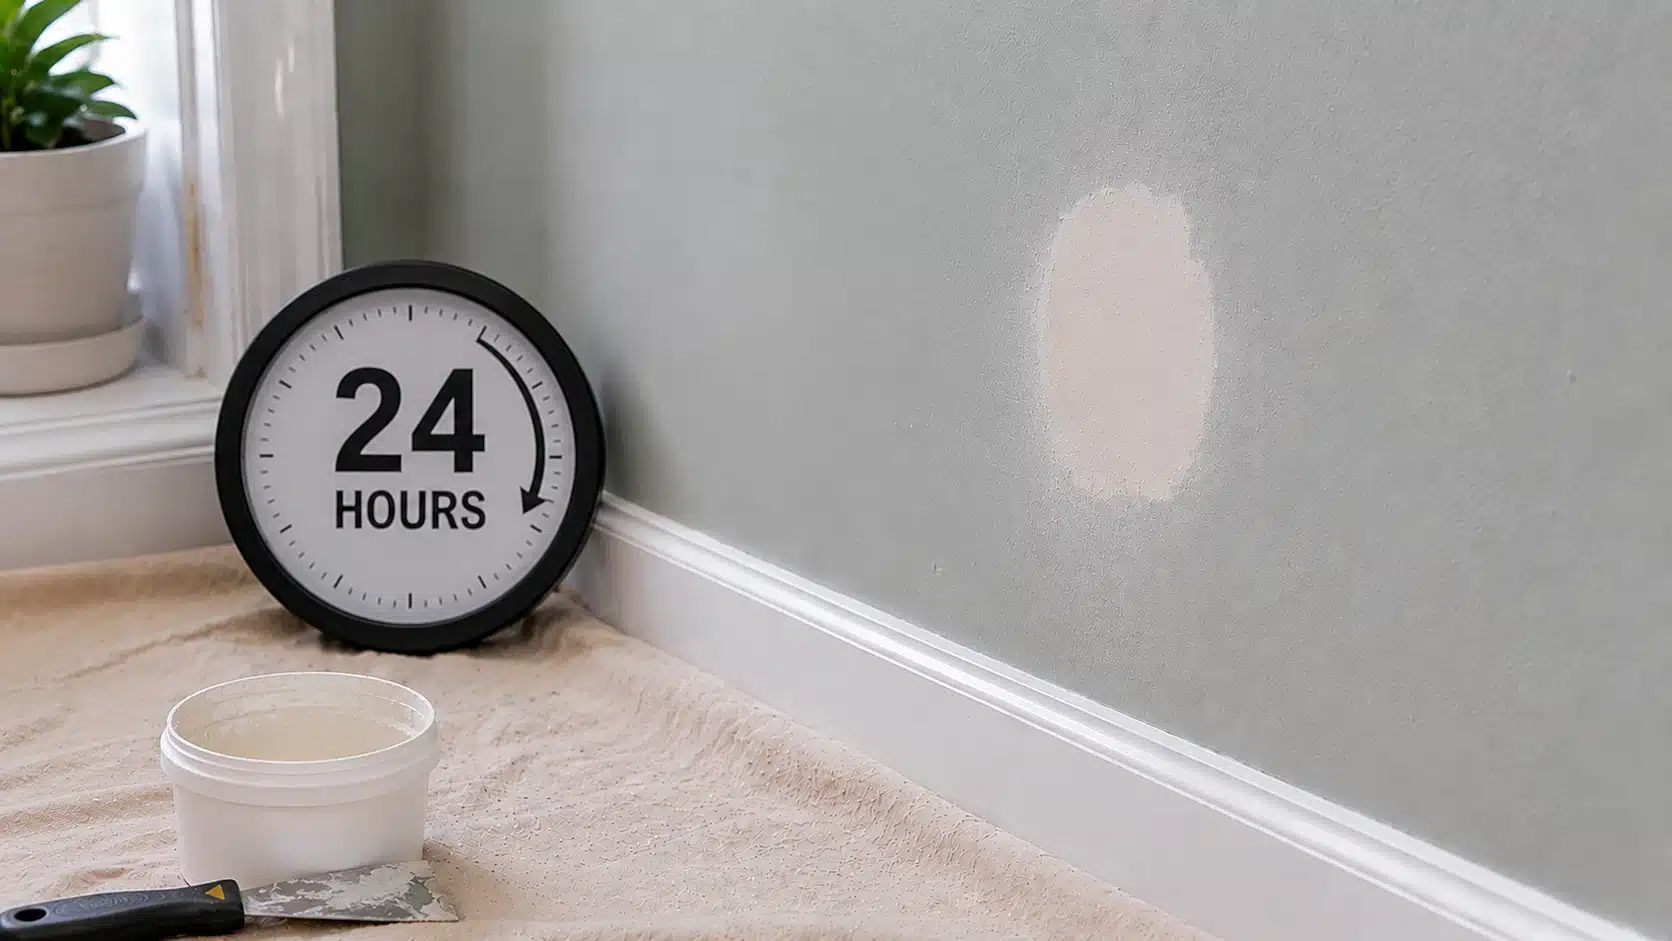
Once the final spackle layer is applied and level, allow the wall to dry for a full 24 hours before sanding. This is important. If you sand too early, while the spackle is still soft underneath the surface, the wall will look uneven, and the patch may tear. Full drying time ensures the spackle is hard all the way through, not just on the surface.
Tip: In a humid room such as a bathroom, give the patch additional drying time beyond 24 hours. Point a fan at the area to help the process without adding heat that could cause cracking.
Step 7: Sand the Patch Smooth With Fine-Grit Sandpaper
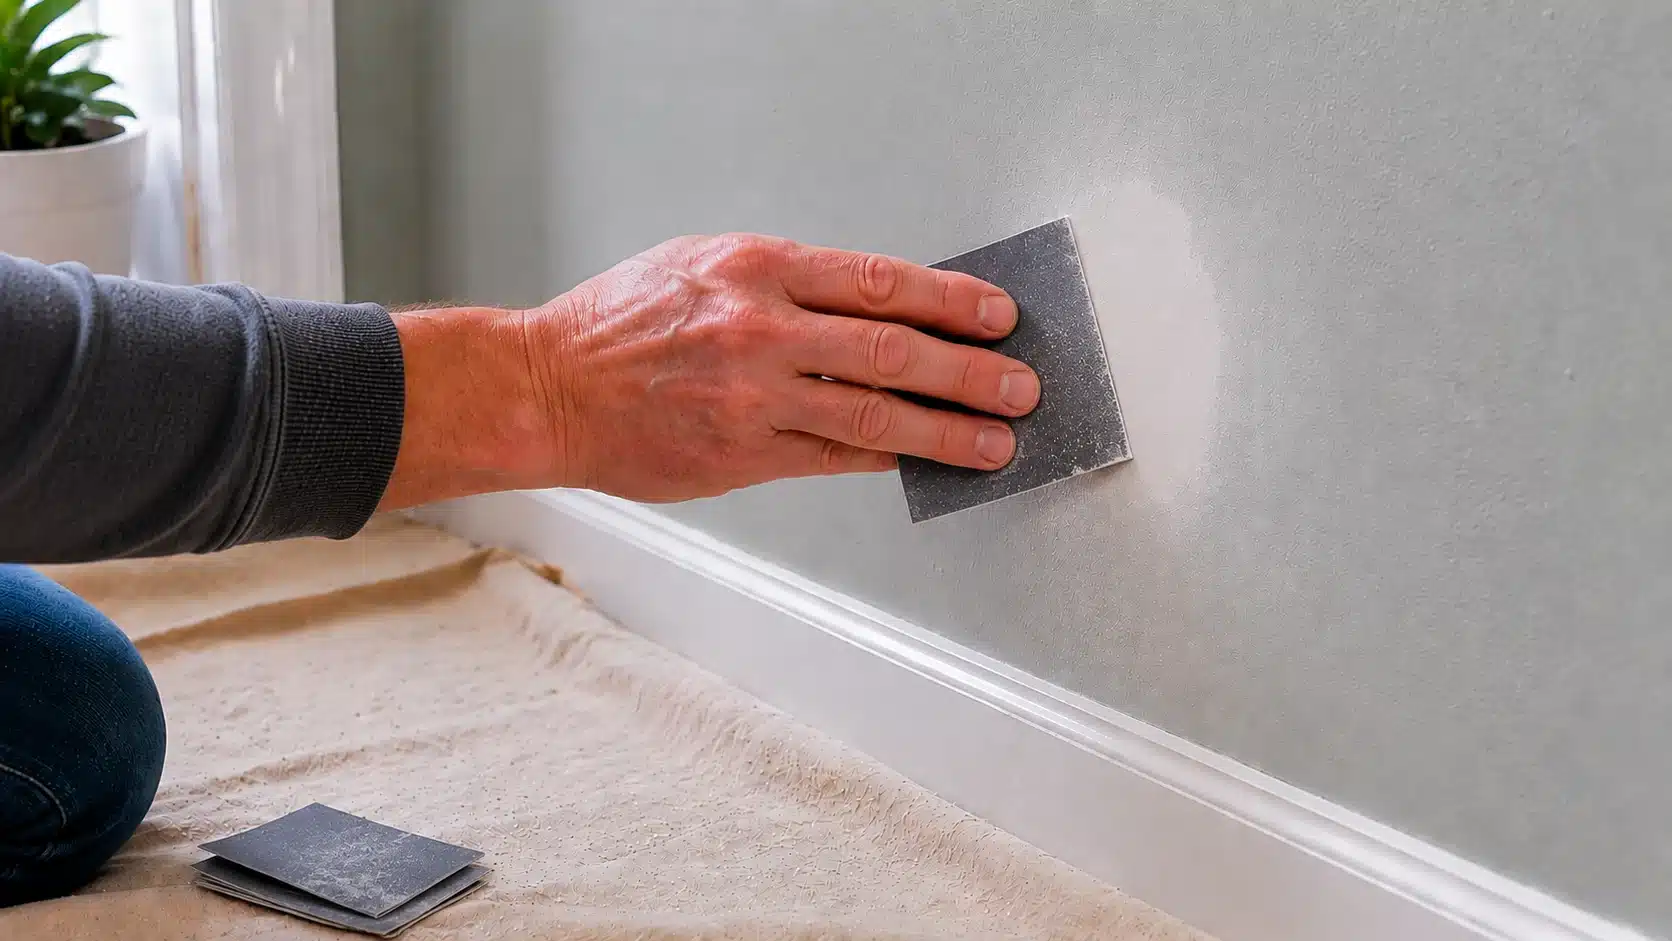
Once fully dry, use fine-grit sandpaper in the 180-220 grit range to smooth the patched area. Hold the sandpaper flat against the wall and work it across the edges where the spackle meets the surrounding paint. The goal is a surface that feels completely smooth and flush with no raised edges or ridges. When the patched area feels even to the touch, the sanding is complete.
Tip: Check under the raking light by holding a torch nearly parallel to the wall. This reveals any low spots or ridges that your hand alone might miss.
Step 8: Clean the Area and Apply Primer
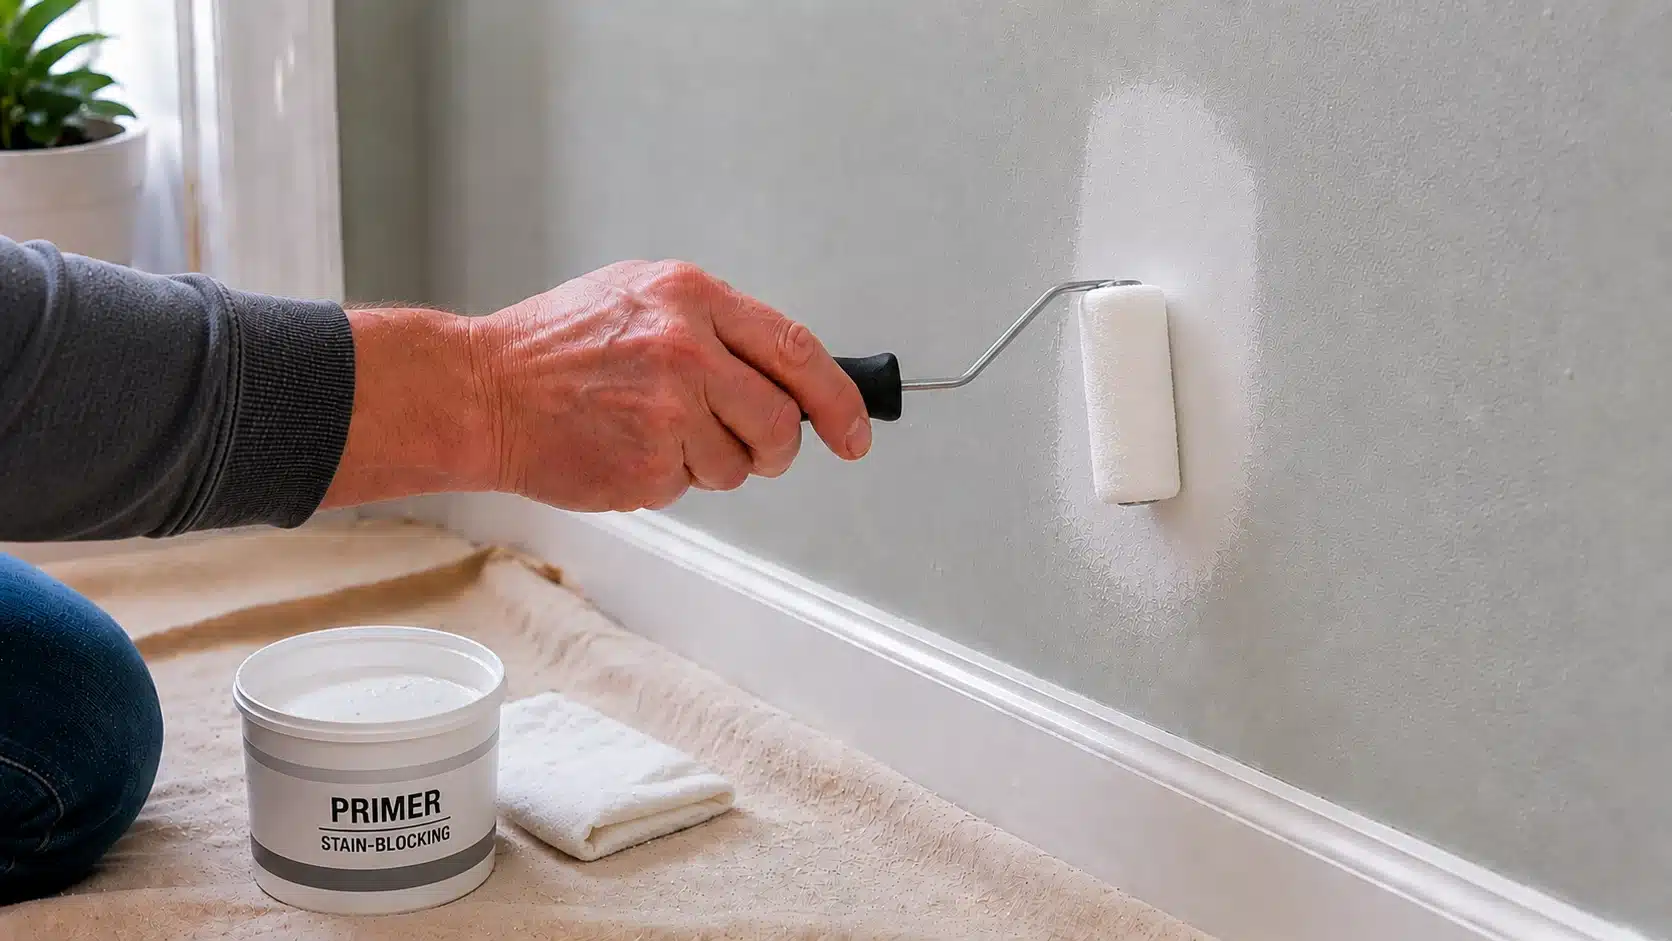
Wipe the entire patched area with a lint-free cloth to remove any sanding dust left on the surface. Dust left behind will affect how the primer and paint bond to the wall.
Once clean, roll primer over the patched area until it is completely covered. Allow the primer to dry fully before moving on to paint. Primer seals the spackle so that paint does not absorb unevenly and dry with a dull or flat appearance.
Extend the primer about an inch past the edge of the spackle patch. This creates a better transition zone for the paint and reduces the risk of a visible halo where primed and unprimed paint meet.
Tip: Use a stain-blocking primer if there is any discoloration around the chip, to prevent old marks from showing through the new paint.
Step 9: Paint the Patched Area and Move Outward
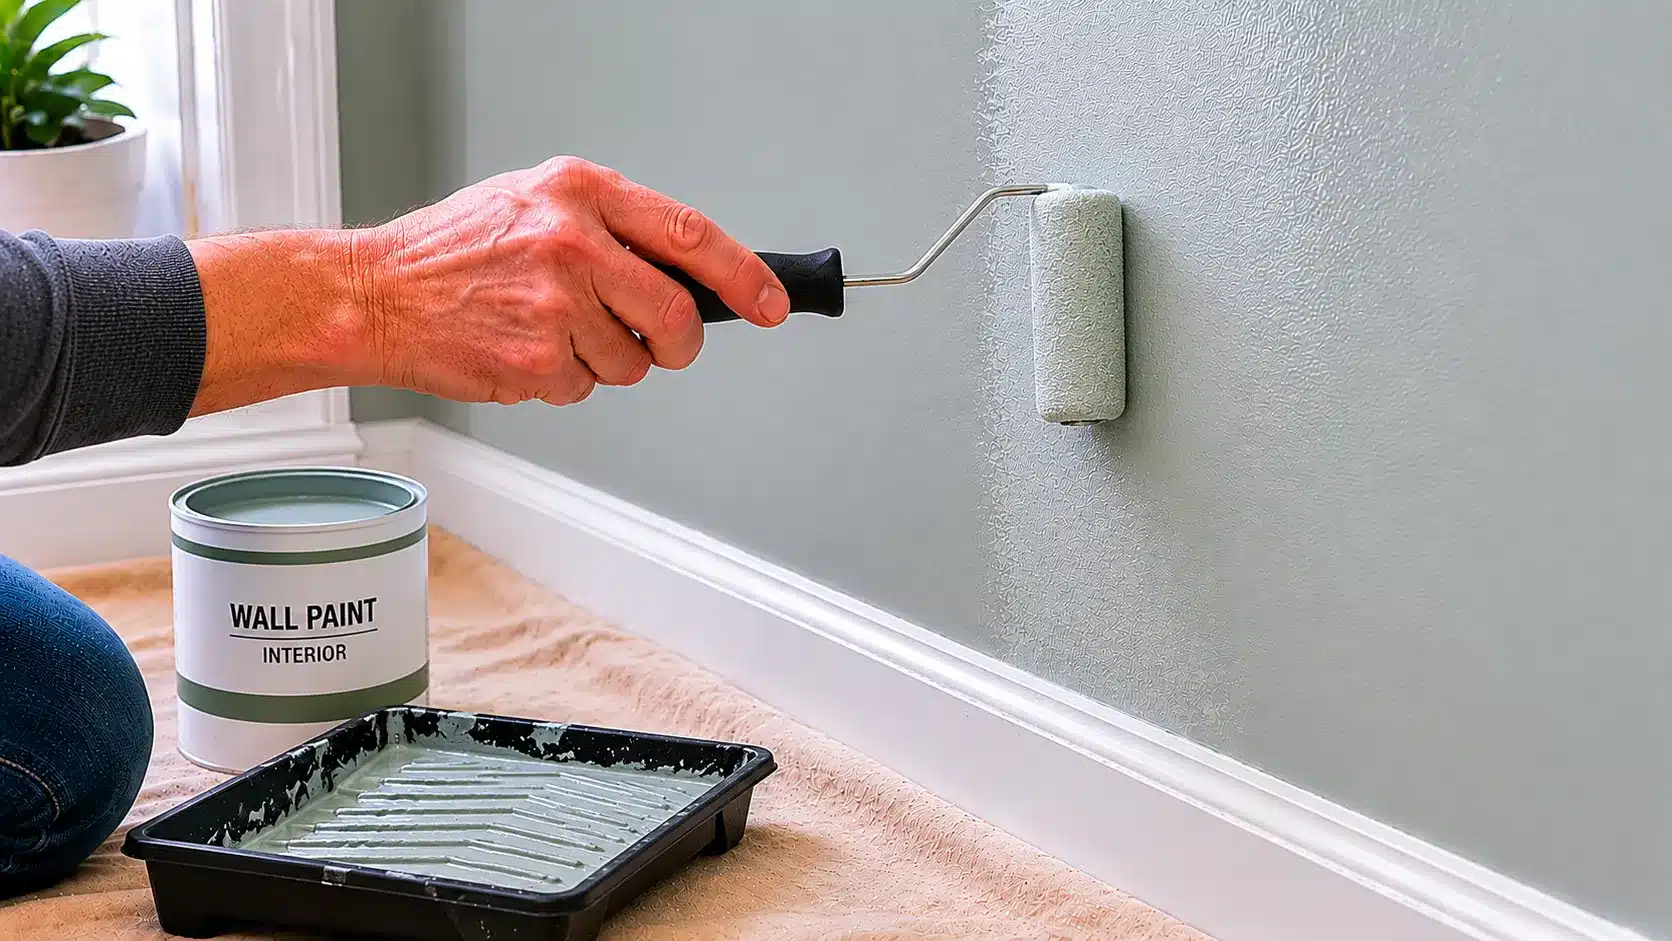
Once the primer is completely dry, apply your matching paint. For a small patch, you only need to cover the repaired area with new paint. For a larger patch job, you may want to paint the entire wall for an even finish. Roll the paint over the patched area, moving the roller outward from the center of the repair. Allow the paint to dry fully. The patch will disappear into the wall, and the surface will look clean and consistent again.
Tip: If your wall was originally painted with a roller, use a small foam roller for the touch-up rather than a brush. A brush leaves a different surface texture that can catch the light even when the color is a perfect match.
| Note for tiny surface chips with no dent: You may be able to skip the spackle steps entirely. After cleaning, sanding the edges, and removing any loose paint, go straight to primer and then paint. This works well when the chip is small enough that there is no visible shadow or low spot. |
The repair is done. Now the real test is whether the patch disappears into the wall. That depends on how well you match and apply the finish, which is exactly what the next section covers.
Recommended video: How to Fix Paint Chips on a Wall | The Home Depot
How to Make the Repaired Paint Blend With the Wall
The rule that separates a repair you can see from one you cannot: flat, sealed, matched. The surface must be flush, the spackle must be sealed with primer, and the paint must match in both color and sheen. A visible patch almost always fails on one of these three things.
- Match the Paint Color: If you still have the original tin, stir it well and test it in a small, hidden spot first, old paint may have shifted slightly. If you do not have it, take a clean chip from behind a socket plate or door frame to a paint store for matching. Buy a sample pot, apply it to the primed patch, and let it dry before comparing.
- Match the Paint Sheen: Matte, eggshell, satin, and semi-gloss all reflect light differently. A satin patch on a matte wall will stand out even when the color is perfect. Check the original tin label, or test a small patch under different lighting before committing.
- Match the Wall Texture: Most interior walls have a light roller texture. A brush can leave smooth strokes that look different from the surrounding surface. Use a small foam roller for roller-painted walls. For orange-peel or stipple texture, you may need texture spray or a stipple brush before painting.
- Use Thin Coats and Feather the Paint: Apply paint slightly beyond the patch, about five to ten centimeters in each direction, and use a dry brush or roller to soften the outer edge. Two thin, feathered coats will always blend better than one thick coat applied only to the patch.
- Know When to Paint a Larger Area: If the original wall paint has faded, even a strong color match may look different. Painting wall-to-wall or corner-to-corner often looks better than a small touch-up. Natural breaks such as corners, door frames, and ceiling lines hide the transition.
For renters: check whether you are permitted to repaint before taking this step, and confirm the wall color with your landlord if possible.
What Mistakes Make Chipped Paint Repairs Look Bad?
Poor prep causes more failed patches than bad paint. When a repair remains visible, the reason is almost always one of these mistakes:
- Painting over loose edges: If loose paint surrounds the chip, new paint applied on top will eventually peel away too, sometimes taking a larger area with it than the original chip.
- Skipping the cleaning step: Grease, dust, and wall grime prevent filler and primer from bonding properly. This is especially common near kitchens and high-traffic walls.
- Applying spackle too thick: Thick spackle takes longer to dry, can crack as it dries, and is harder to sand flush. Thin layers, each fully dry, always yield better results.
- Sanding before the spackle is fully dry: Damp spackle tears under sandpaper, leaving a rough, pitted surface that is difficult to recover without restarting the fill process.
- Skipping primer: Bare spackle absorbs paint differently than the surrounding wall, causing the patch to look flat or dull, even with a perfect color match.
- Using the wrong sheen level: A matte patch on a satin wall will always show under normal room lighting. A sheen mismatch is more visually obvious than a slight color difference.
- Using a brush on a roller-textured wall: Smooth brush strokes contrast with the subtle stippled texture from the original roller, creating a visible smooth circle in the middle of a textured wall.
- Touching up a faded or dirty wall: New paint on a significantly faded wall will look brighter than the surrounding area. Clean the full wall section first and consider whether a larger repaint is needed.
- Rushing dry time between coats: Paint applied over partially dried primer or spackle can bubble, wrinkle, or dry unevenly. Always follow the product label’s recommended dry time at each stage.
When Should You Stop Patching and Repainting the Wall?
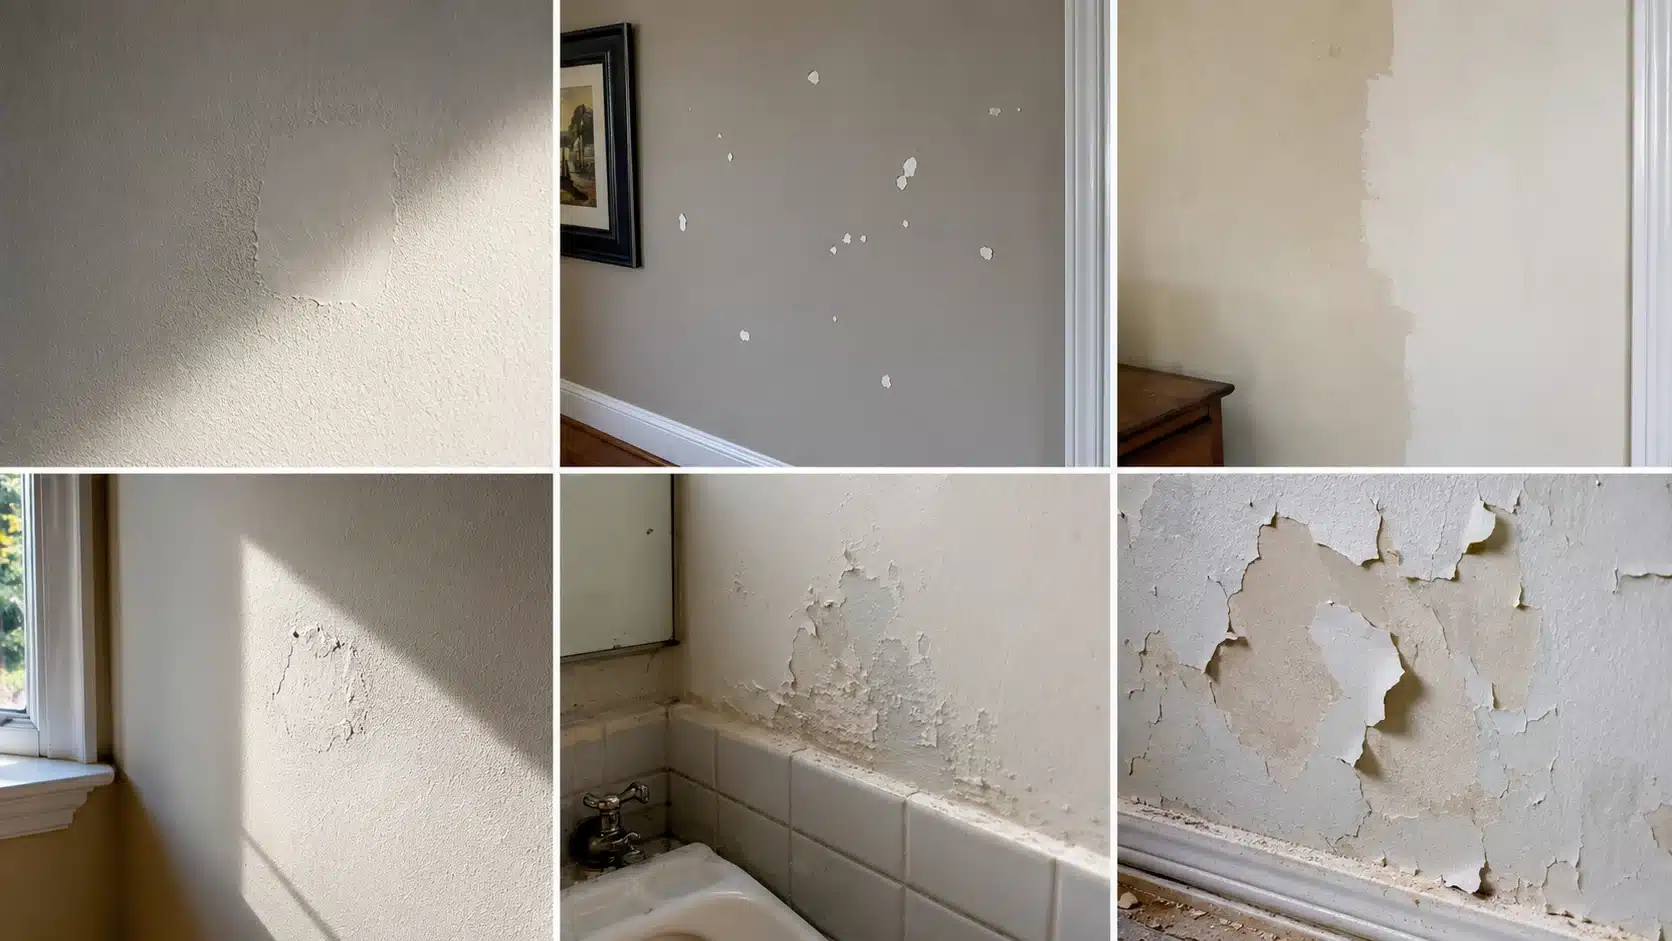
Repainting a larger area is necessary when a spot repair still shows because of fading, texture, sheen, or widespread damage.
| Situation | What It Means |
| One spot still shows | Light reveals differences in shadow, texture, or sheen. |
| Several chips on one wall | Many touch-ups can look patchy. |
| The paint has faded | Fresh paint may not match old paint. |
| Chip is in a bright area | Side light can make repairs visible. |
| Paint keeps peeling | Moisture or poor adhesion may be the cause. |
| Large areas lift during prep | Old paint may not be bonded well. |
Once you know when patching will not give a clean result, you can choose the smarter fix. A wider repaint may take a little more time, but it often leaves the wall looking smoother and more even than repeated touch-ups.
How to Prevent Paint From Chipping Again
Once the repair is done, a few habits will keep you from doing it again in the same spot.
- Always prime bare drywall or spackle before painting. Unprimed surfaces are the number one reason paint fails adhesion over time.
- Use the right paint for the room. Kitchens and bathrooms need a semi-gloss or satin finish that resists moisture. Flat or matte paint in high-humidity rooms absorbs moisture and weakens over time.
- Do not use tape that is too aggressive on freshly painted walls. Standard blue painter’s tape is safe on paint that has cured for at least 30 days. Tape applied to paint that is less than two weeks old can pull a clean layer off with it.
- Apply two coats instead of one. A single thick coat dries unevenly and has more internal stress. Two thin coats bond better and flex more with wall movement.
- Address moisture before it reaches the wall. Paint that bubbles or peels near windows, baseboards, or corners is almost always signaling a moisture problem, much like how fixing underlying conditions matters before any surface treatment can hold.
- If your walls have been painted many times over many years, the total paint thickness can reach a point where the layers lose flexibility and chip more easily. At that stage, consider stripping back to bare drywall or skim coating the surface before the next full repaint. It is a bigger job once, versus a recurring repair cycle every couple of years.
Final Thoughts
Knowing how to repair chipped paint well comes down to respecting the order of the steps: clean the surface, remove all loose edges, fill in thin layers, sand flush, prime the bare patch, then apply matching paint in thin feathered coats. Done in this order, even a small repair will genuinely disappear into the wall.
Remember, spackle, primer, and sheen matching do more of the work than the color itself. Whether you are repairing a rental wall, a deeper gouge, or a larger section of peeling paint, the approach adapts, but the core principles stay the same.
Are you repairing a small surface chip, a deeper dent, or dealing with a rental wall? Drop a comment below and share your situation, what worked, or where you are stuck. I would love to help you get it right.