Birds notice small water spots faster than many people expect. A diy bird bath gives you a simple way to turn an empty corner, old pot, saucer, or bowl into a safe place for birds to drink and splash.
The best part is that the project does not need perfect tools or a large garden. What matters is the right depth, a steady base, and a spot where birds feel protected. Some materials invite regular visits.
Poor choices can feel too deep, slippery, or exposed. You’ll learn how to build one with common items, where it should sit, and what safe extras can make it more useful and keep birds visiting your yard.
| Difficulty | 1 to 3 out of 5, depending on the material. Saucers and pots are easy, while cement needs more care. |
| Time | 30 minutes to 2 hours, plus drying or curing time for glue, paint, sealant, or cement. |
| Cost | $10 to $60 for basic builds. Cement or solar fountain versions may cost more. |
| Tools Needed | Shallow basin, sturdy base, outdoor glue, gloves, pebbles, flat stones, sealant, and measuring tape. |
| Skill Required | Beginner-friendly. Focus on keeping it shallow, stable, safe, and easy to clean. |
Before You Start: Bird Bath Safety Basics
Before building a bird bath, think about safety first. Birds need a shallow, steady, and clean spot where they can drink, bathe, and leave easily.
- Keep the Water Shallow: Keep the water around 1 to 1.5 inches deep. If the bowl is deeper, add flat stones so small birds can stand safely.
- Choose a Stable Base: Use a wide, steady base like a pot, brick, stone, or tree stump. Place it on flat ground so it does not tip over.
- Add Grip Inside the Basin: Smooth bowls can be slippery. Add clean pebbles, flat stones, or a textured saucer to help birds stand and move safely.
- Use Safe Materials: Non-toxic paint, outdoor glue, and a safe sealant. Avoid rusty metal, treated wood, peeling paint, sharp edges, and chemical containers.
DIY Bird Bath: Step-by-Step For Easy Methods
A DIY bird bath can be made with simple garden items, old bowls, pots, or cement. The goal is to keep it shallow, stable, and safe for birds.
1. Cement or Concrete Bird Bath
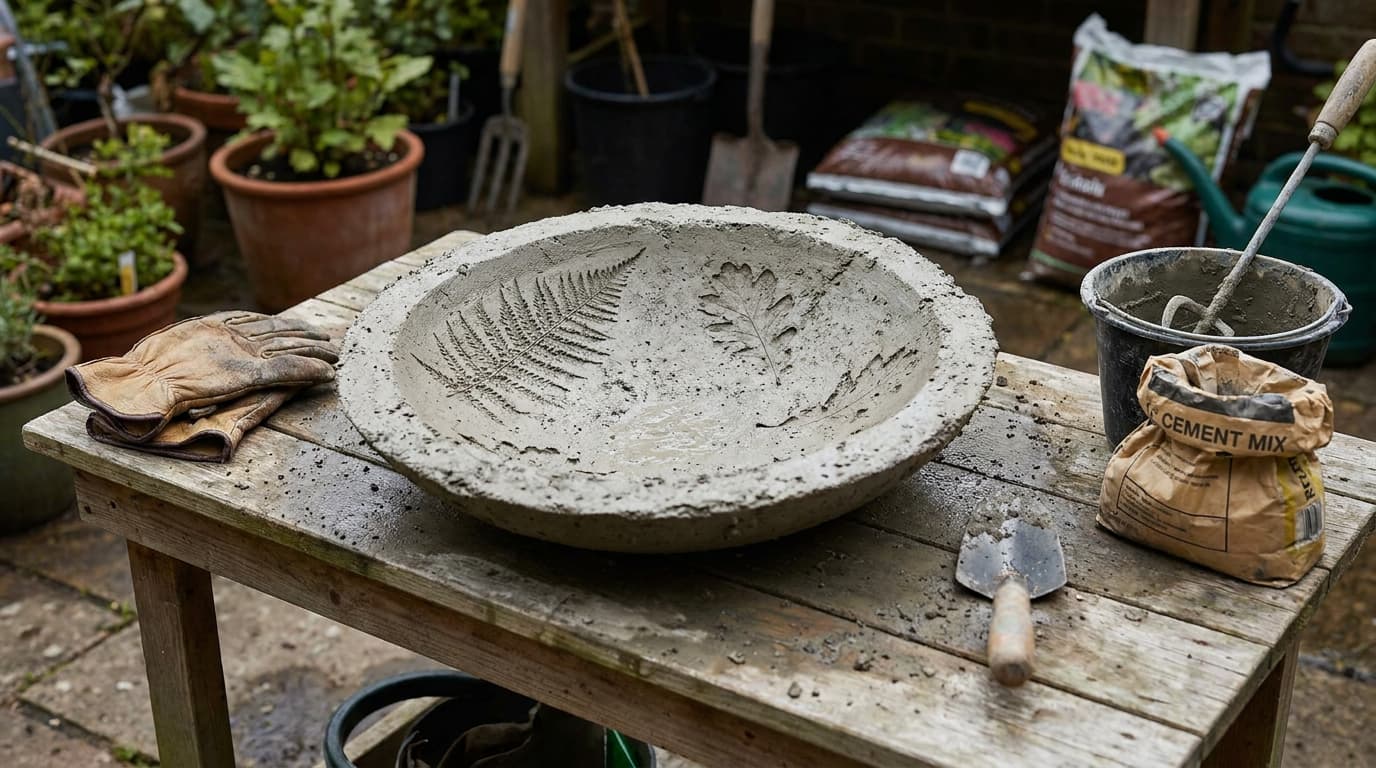
Cement bird baths are strong, long-lasting, and great for gardens with open space. They take more time than quick saucer projects, but the finished bath feels natural, heavy, and weather-friendly when sealed well.
| Material | Quantity | Purpose |
|---|---|---|
| Portland cement | 1 part | Forms the basin |
| Sand | 2 parts | Adds strength |
| Water | As needed | Makes the mix workable |
| Plastic bowl or leaf mold | 1 | Shapes the bath |
| Gloves | 1 pair | Protects hands |
| Non-toxic sealant | 1 small can | Makes it water-safe |
How to Make:
- Step 1: Mix Portland cement and sand in a1:2 ratio inside a bucket or tray. Add water slowly, stirring, until the mixture becomes a thick paste that holds its shape.
- Step 2: Place your plastic bowl, leaf mold, or chosen mold on a flat surface. Press the cement mixture into or over it, shaping the center into a shallow basin no more than2 inches deep.
- Step 3: Smooth the rim and inner surface with wet fingers or a small tool. If you want texture, press a large leaf gently into the wet cement, then lift it carefully.
- Step 4: Leave the cement bird bath undisturbed for48 to 72 hours so it can cure properly. Do not move it too early, as cracks may form.
- Step 5: Remove the mold, rinse the bath several times, and let it dry. Apply a non-toxic, waterproof sealant, let it fully cure, then add shallow water.
Pro tip: Rinse new cement several times because fresh concrete can be harmful to birds.
2. Terracotta Pot Bird Bath
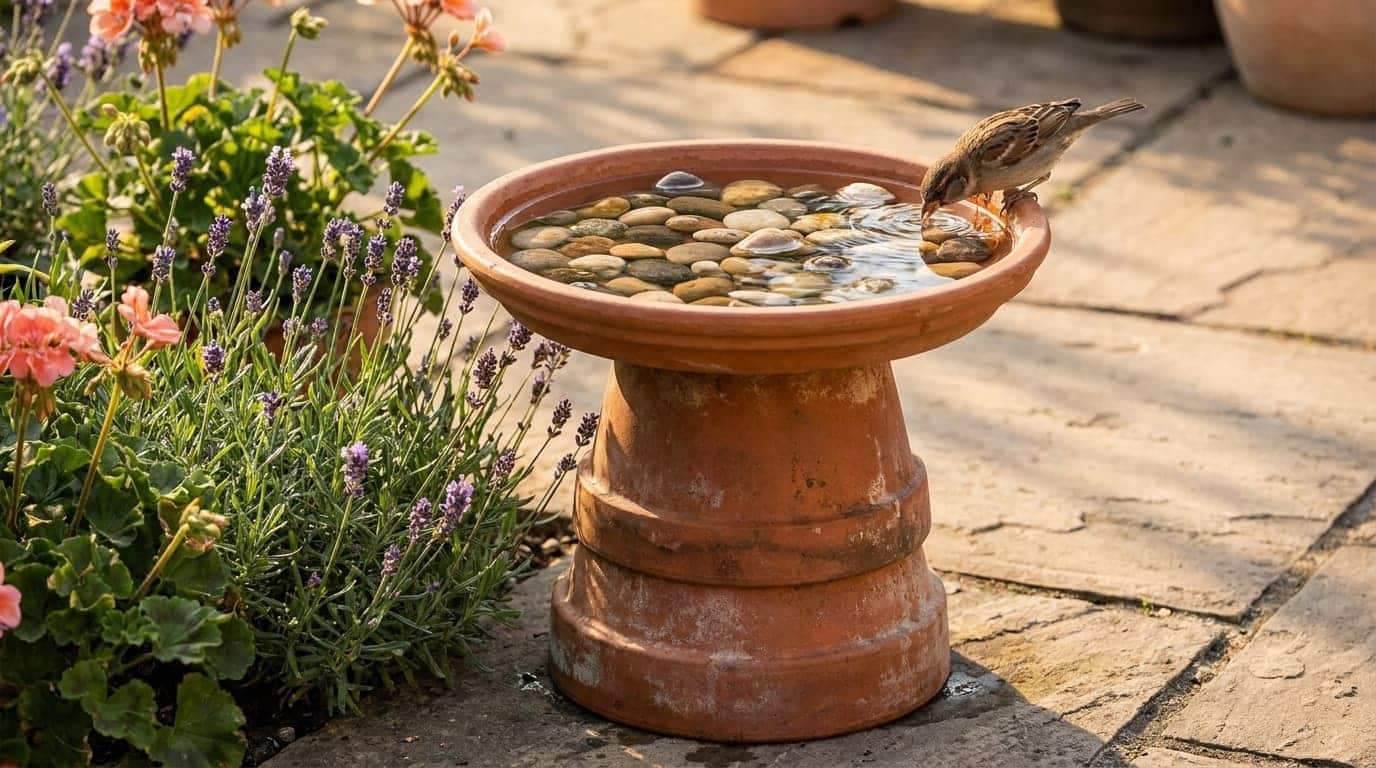
A terracotta pot bird bath is one of the easiest beginner projects. It uses simple garden supplies, looks natural near plants, and works well for patios, small yards, and flower beds.
| Material | Quantity | Purpose |
|---|---|---|
| Terracotta pots | 1 to 2 | Builds the base |
| Terracotta saucer | 1 | Holds water |
| Outdoor glue | 1 tube | Secures parts |
| Pebbles | 1 handful | Adds grip |
| Outdoor paint | 1 small can | Adds color |
| Sealant | 1 small can | Protects surface |
How to Make:
- Step 1: Wash the terracotta pots and saucer to remove dust, soil, and loose clay. Let every piece dry fully before gluing, painting, or sealing.
- Step 2: Turn the largest pot upside down on flat ground to create the base. Check that it does not rock or tilt before adding more pieces.
- Step 3: If you want extra height, stack a second pot on top. Keep the wider side down where possible so the base stays steady and balanced.
- Step 4: Apply outdoor glue around the top of the base, then place the saucer in the center. Press it gently and let the adhesive dry fully.
- Step 5: Add pebbles inside the saucer for grip, then fill it with shallow water. Place it in partial shade where birds can reach it safely.
Pro tip: Paint only the outside so the water area stays safer for birds.
3. Glass Bowl Bird Bath
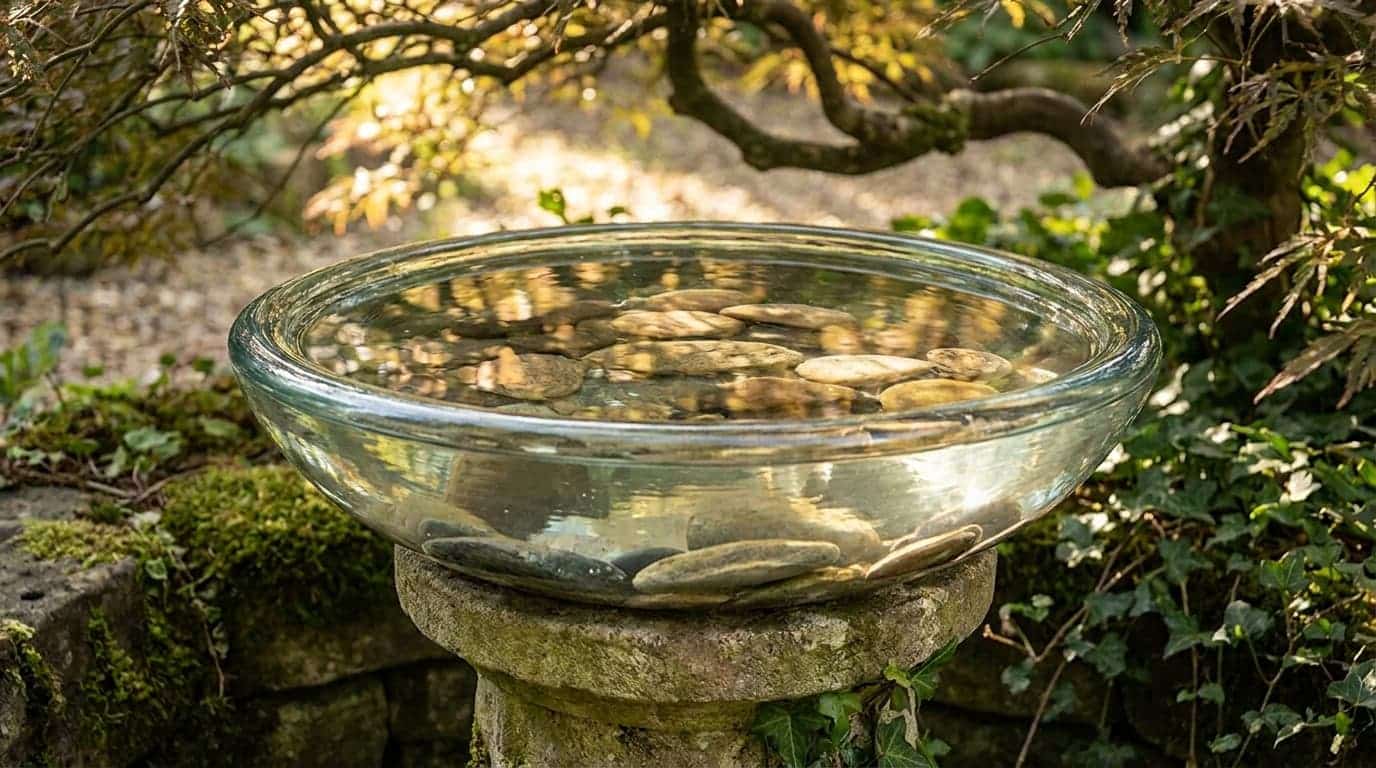
A glass-bowl bird bath suits decorative garden corners, but it requires careful setup. Use thick glass, a steady base, and stones inside so birds can land and stand safely.
| Material | Quantity | Purpose |
|---|---|---|
| Thick glass bowl | 1 | Holds water |
| Sturdy base | 1 | Supports bowl |
| Outdoor adhesive | 1 tube | Joins parts |
| Flat stones | 3 to 5 | Gives footing |
| Pebbles | 1 handful | Adds grip |
How to Make:
- Step 1: Choose a thick, wide, shallow glass bowl with no cracks, chips, sharp edges, or weak spots. Avoid thin glass because it breaks more easily outdoors.
- Step 2: Pick a heavy base such as a large pot, vase, metal stand, or garden pedestal. Test it first to make sure it will not tip.
- Step 3: Apply outdoor adhesive to the top of the base. Carefully center the glass bowl, press it down gently, and wipe away any excess glue.
- Step 4: Let the adhesive cure in a safe, dry place for the full time listed on the label. Do not move the bath before it sets.
- Step 5: Add flat stones and pebbles inside the bowl, then fill it with shallow water. Keep it away from busy paths and freezing weather
Pro tip: Move glass bird baths indoors during freezing weather to prevent cracks.
4. Plant Saucer Bird Bath
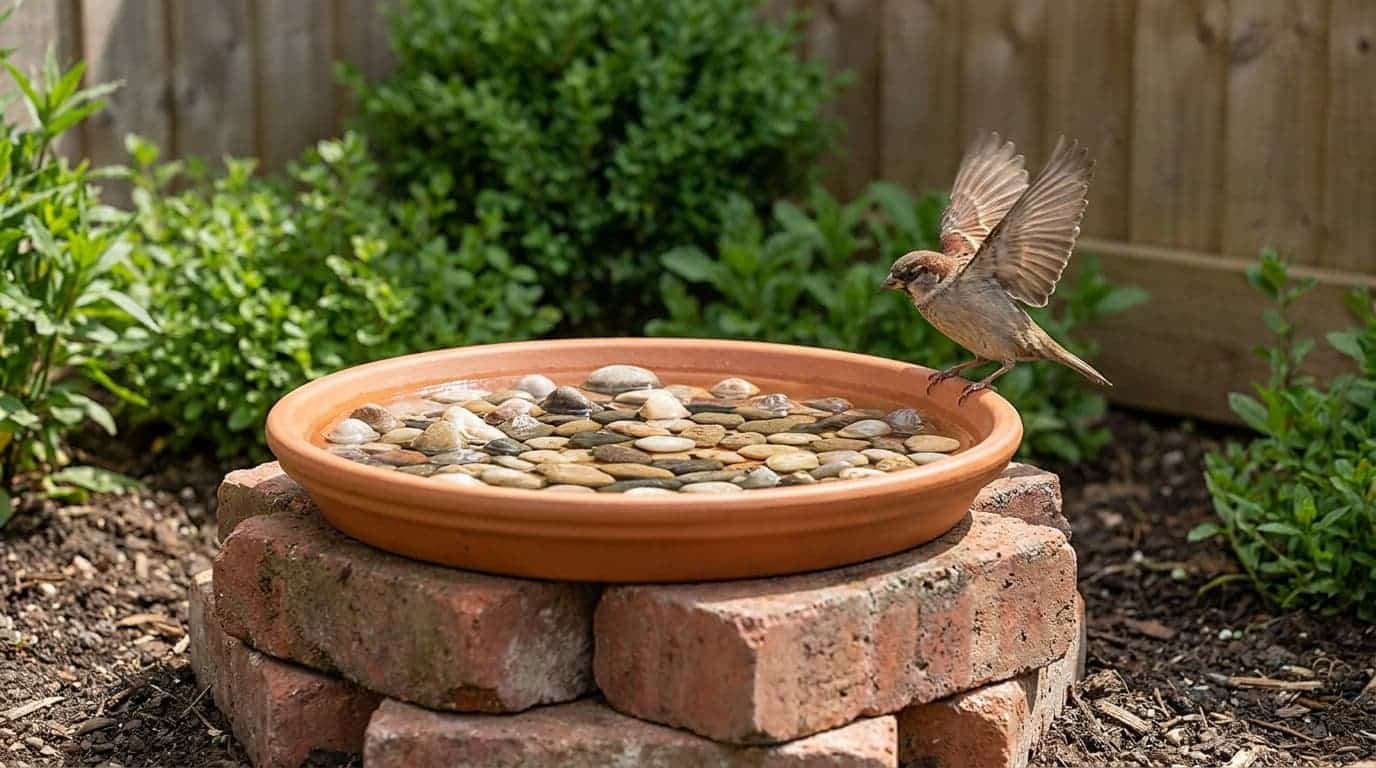
A plant saucer bird bath is quick, cheap, and easy to clean. It is a smart choice for beginners, renters, balconies, and anyone who wants a simple setup.
| Material | Quantity | Purpose |
|---|---|---|
| Wide plant saucer | 1 | Holds water |
| Bricks or stump | 1 base | Raises saucer |
| Flat stones | 3 to 5 | Creates perches |
| Pebbles | 1 handful | Adds grip |
| Water | 1 to 1.5 inches | Lets birds bathe |
How to Make:
- Step 1: Choose a wide, shallow plant saucer with a flat bottom and enough landing space. Avoid deep saucers that hold too much water.
- Step 2: Place the saucer on bricks, a stump, or a flat garden stone. Keep it low enough for birds to approach without stress.
- Step 3: Check that the saucer sits level and does not wobble. Adjust the base before adding stones and water, since it gets heavier afterward.
- Step 4: Add pebbles and flat stones across the bottom to create grip, shallow zones, and safe standing spots for smaller birds.
- Step 5: Fill the saucer with 1 to 1.5 inches of water. Refresh it often, especially when leaves, dirt, or droppings collect.
Pro tip: This is the best starter option for a no-fuss DIY bird bath.
5. Upcycled Dish Bird Bath
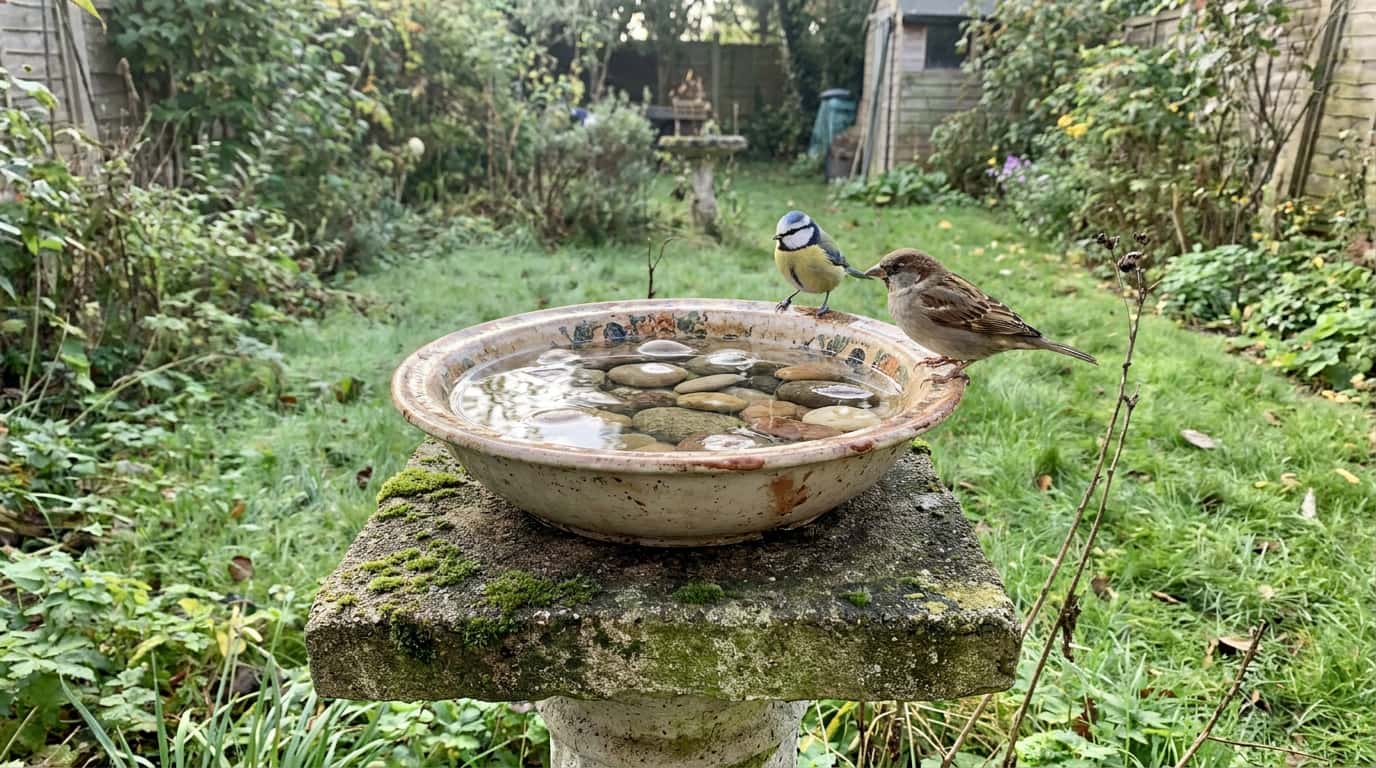
An upcycled dish bird bath is a smart way to reuse old kitchen items. Shallow bowls, pie pans, and serving plates work well when they are clean, steady, and safe.
| Material | Quantity | Purpose |
|---|---|---|
| Shallow dish | 1 | Works as basin |
| Stable base | 1 | Keeps it steady |
| Outdoor glue | 1 tube | Holds parts |
| Pebbles | 1 handful | Prevents slipping |
| Clean water | Shallow fill | Gives birds water |
How to Make:
- Step 1: Choose a shallow dish, pie pan, or serving plate without cracks, sharp edges, peeling paint, or an unknown coating inside.
- Step 2: Pick a wide, stable base that can support the dish without tipping. Bricks, a stump, or a heavy pot can work well.
- Step 3: Place the dish on the base and test it by pressing lightly on different sides. If it shifts, use outdoor glue to secure it.
- Step 4: Add pebbles or small flat stones inside the dish to reduce slipping and help birds judge the water depth.
- Step 5: Fill the dish with fresh shallow water. Clean it often because smooth dishes can quickly collect dirt, algae, and droppings.
Pro tip: Avoid dishes with unknown coatings because they may not be safe for birds.
These DIY bird bath ideas fit many spaces and budgets. Choose the one that suits your garden, then keep it shallow, clean, and safe.
Where to Put a Bird Bath for Maximum Bird Visits
Placement is everything. You could build the most beautiful bird bath in the world, but if it’s in the wrong spot, birds simply won’t use it. Here’s how to get the location exactly right.
- The Shelter Rule: Always place your bird bath within 5 to 10 feet of shrubs or trees. Birds need a quick escape route if a predator appears. Without nearby cover, they’ll feel too exposed and skip the bath entirely.
- Sun vs. Shade: Partial shade is the sweet spot. Full sun heats the water quickly, speeds up evaporation, and encourages algae growth. Deep shade keeps things cool but can feel too hidden for birds. Aim for morning sun and afternoon shade wherever possible.
- The Right Height: Ground-level baths attract robins, thrushes, and blackbirds but increase the risk of cat attacks. Pedestal-style baths at 18 to 36 inches offer better protection and attract a wider range of species. If you have outdoor cats nearby, always go elevated.
- Distance From Your House: Place the bird bath 10 to 15 feet from your windows to reduce the risk of birds flying into the glass. Close enough to watch from indoors, but far enough to avoid window collisions, a genuinely win-win distance.
- Keep It Away From Feeders: Seed husks and debris from feeders quickly fall into the water and contaminate it. Keep your bird bath and feederat least 6 to 10 feet apart to maintain cleaner water and reduce the cleaning workload.
Good placement makes the bird bath feel safe, visible, and easy to use. Once the location is right, birds are far more likely to return regularly.
What to Put in a Bird Bath Besides Water
Water should stay the main part of a bird bath, but safe extras can help birds stand, perch, and notice it more easily.
| What to Add | Why It Helps | How Often to Clean |
|---|---|---|
| Flat stones | Give birds safe standing spots and make deep areas feel shallower. | Rinse every few days and scrub weekly. |
| Pebbles | Add grip to smooth glass, ceramic, or plastic basins. | Rinse every few days to prevent slime. |
| Small branch | Works as a simple perch for landing, drinking, or stepping in. | Replace when soft, dirty, or worn. |
| Solar fountain | Adds moving water, which can attract birds faster. | Clean the pump and basin weekly. |
| Water dripper | Creates a soft sound that birds can notice from nearby. | Check weekly and clear any clogs. |
| Mister | Adds light moisture and can help birds during hot weather. | Clean weekly, especially during heavy use. |
Keep add-ins simple, clean, and useful. Avoid soap, salt, sugar, oils, food, bleach, fragrance, and chemicals because they can make water unsafe.
How to Maintain Your DIY Bird Bath
A clean bird bath keeps birds safer and more likely to return. These simple maintenance steps help prevent dirty water, mosquitoes, algae, and seasonal problems.
- Change Water Every 2 to 3 Days: Stagnant water can attract mosquito larvae within 24 to 48 hours. Replacing it often keeps the bath fresh, safer, and more inviting for birds.
- Scrub Weekly With Vinegar: Use 1 part white vinegar to 9 parts water to scrub the basin weekly. Rinse well afterward and avoid soap, as residue can harm birds.
- Remove Debris Daily: Leaves, feathers, seed husks, and droppings can collect quickly. A quick daily check keeps the water cleaner and reduces the need for heavy scrubbing later.
- Use a Bird Bath Heater in Winter: A purpose-made heater or de-icer helps stop water from freezing. This gives birds access to liquid water when natural sources are harder to find.
- Add Extra Pebbles in Summer: Hot weather speeds up evaporation. Extra pebbles help keep the water depth safer for small birds as the level drops during the day.
Good care takes only a few minutes, but it makes a real difference. Fresh water, clean surfaces, and seasonal checks keep birds coming back.
Safe Decorative Ideas for a DIY Bird Bath
A bird bath can look beautiful without becoming unsafe. Focus decoration on the outside, while keeping the water area plain, shallow, and easy to clean.
1. Painted Base
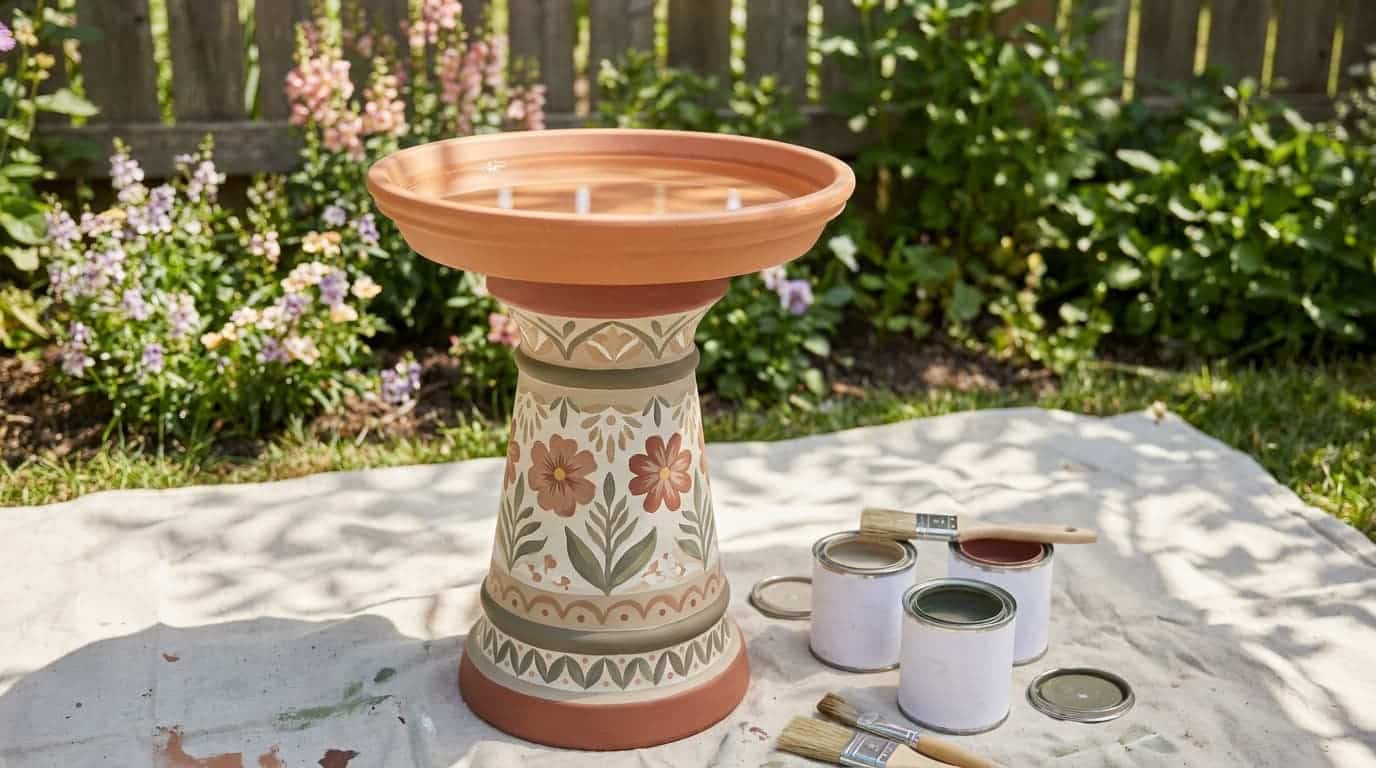
Paint only the base, stand, or outer pot with outdoor-safe, non-toxic paint. Avoid painting the basin because birds drink and bathe there. This adds color without risking paint flakes, chemical residue, or extra cleaning trouble inside the water area.
2. Mosaic Edges
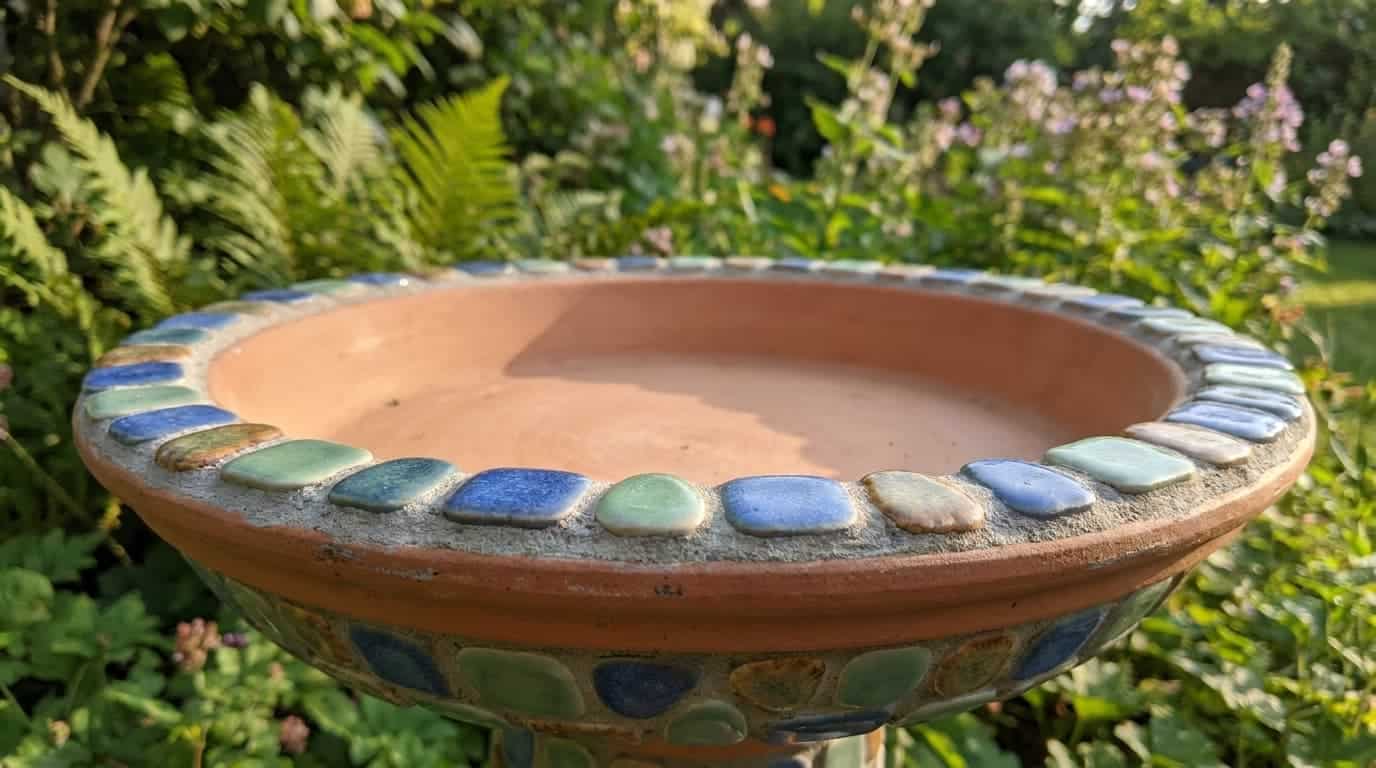
Add smooth mosaic tiles around the outer edge or base, not inside the basin. Sharp or loose pieces can hurt birds and trap dirt. Keep the water area plain so the bath stays easier to scrub and rinse.
3. Pebble Border
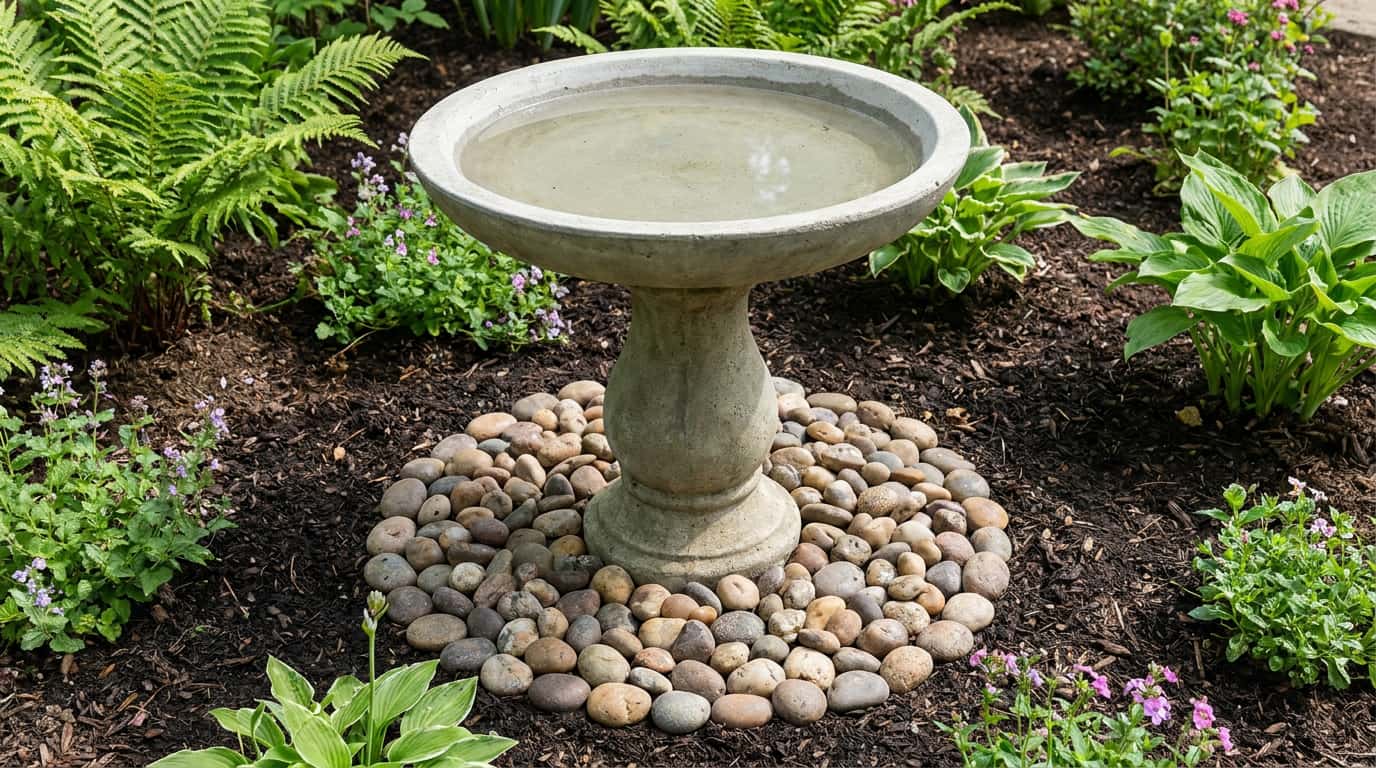
Add smooth pebbles around the outer rim or base for a natural garden look. Keep sharp stones and loose pieces away from the basin. This adds texture while leaving the water area open, shallow, and simple to rinse.
4. Stenciled Outer Pattern
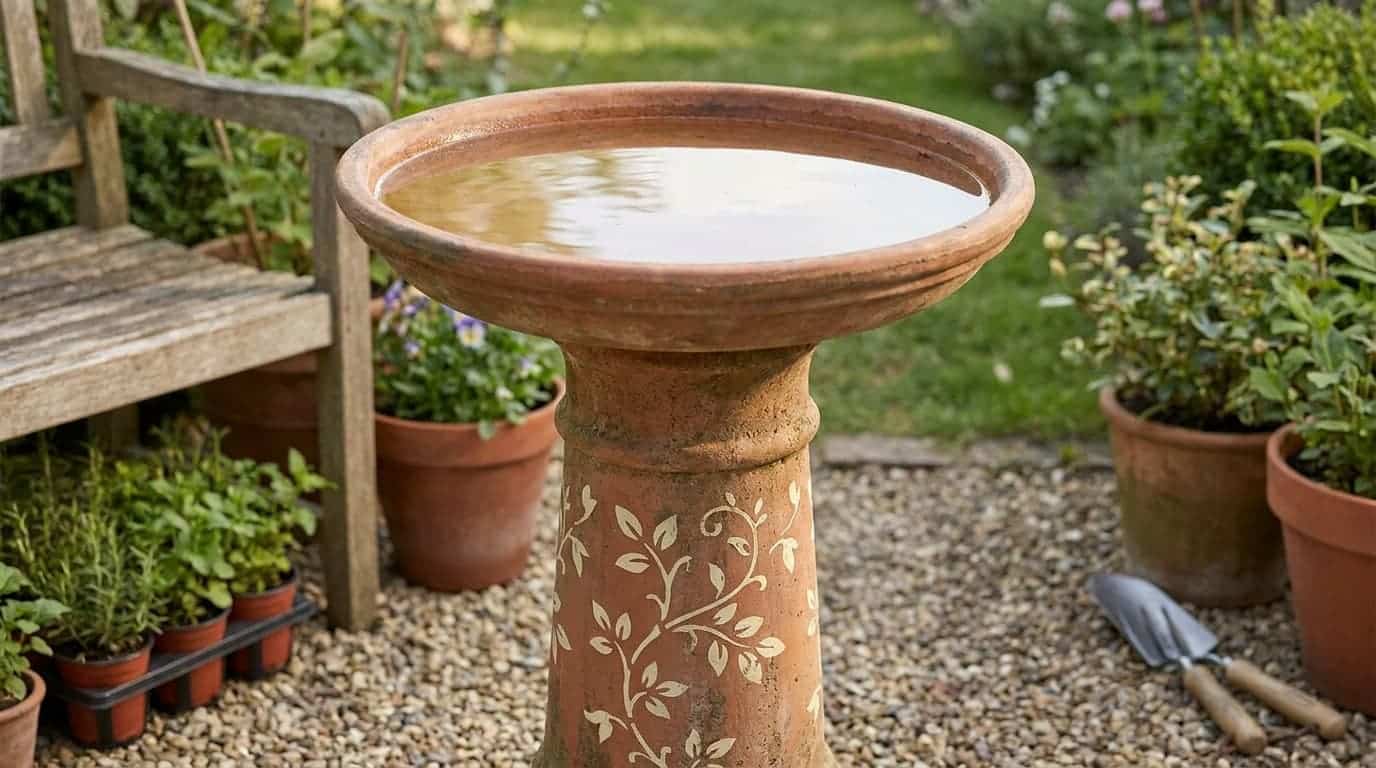
Use a small stencil on the outside of the pot, stand, or base. Choose outdoor-safe paint and let it cure fully before use. Keep the design away from the basin so that birds only touch clean, safe surfaces.
Safe decoration should never make cleaning harder or pose a risk to birds. Keep the basin simple, decorate the outer parts, and check finishes regularly.
Common DIY Bird Bath Problems and Fixes
Even well-built bird baths can run into problems over time. Knowing what causes these issues makes troubleshooting easier and helps create a safer, more reliable water source.
| Problem | Cause | Easy Fix |
|---|---|---|
| Birds stop visiting | Too much noise, pets, or movement nearby. | Move it to a calmer spot. |
| Water splashes out fast | The basin is uneven, or the fountain spray is strong. | Level it and lower the flow. |
| Bath dries too quickly | Heat, wind, or shallow water speeds evaporation. | Refill often or add shade. |
| Small birds stay away | Larger birds may dominate the bath. | Add stones or a second small bath. |
| Hard to clean | Grooves and too many add-ins trap dirt. | Keep the basin simple. |
| The pump stops working | Dirt, leaves, or algae block it. | Rinse the pump and clear the intake weekly. |
| Ants or insects gather | Food, nectar, or dirty water attracts them. | Clean nearby areas and move feeders. |
Most bird bath problems have simple solutions. Small adjustments to placement, design, or maintenance can improve bird activity, reduce upkeep, and keep the bath working effectively.
Frequently Asked Questions
Can I Use Tap Water in a Bird Bath?
Tap water is usually fine for a bird bath if it is safe for people to drink. Let heavily chlorinated water sit for a few hours before use. Avoid softened water because added salts may not be ideal for birds.
What Size Should a Bird Bath Basin Be?
A good basin should be wide enough for birds to land comfortably, usually 12 to 24 inches across. Wider basins give birds more space, but the depth still matters most. Keep the water shallow so small birds feel secure.
Can I Put Sand in a Bird Bath?
Sand is not the best choice inside a bird bath because it can trap droppings, algae, and debris. It may also make cleaning harder. Smooth pebbles or flat stones are easier to rinse and safer for regular bird use.
Can Rainwater Be Left in a Bird Bath?
Rainwater is fine if the bath stays clean, but it should not sit too long. Rain can wash leaves, dirt, and droppings into the basin. Check the water after storms and refresh it if it looks cloudy or dirty.
Final Thoughts
A good bird bath does more than fill an empty garden spot. It gives birds clean water, a safer place to bathe, and a reason to keep visiting.
I like that a diy bird bath can stay simple and still work well when you build it with the right depth, steady base, safe materials, and smart placement.
These small choices make the bath easier for you to manage and safer for birds to use. Try one idea in your garden, then share your results or questions in the comments.