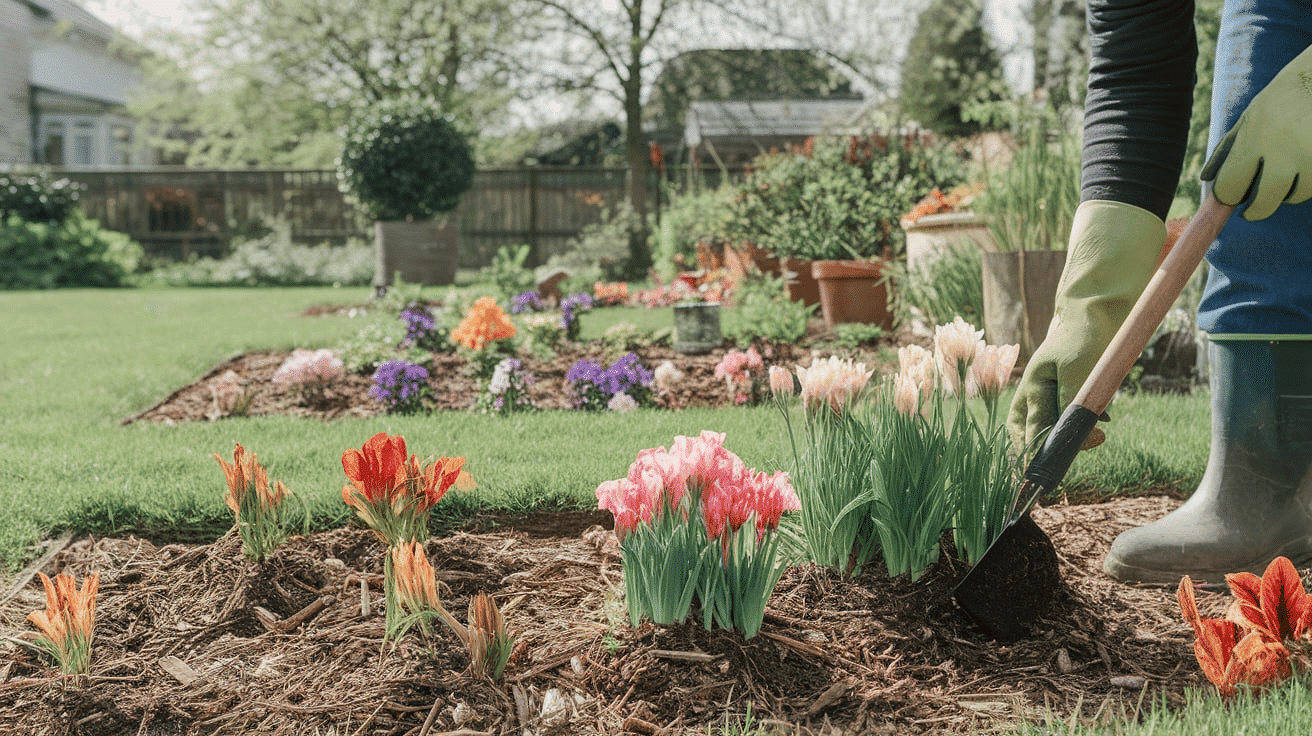
Building a raised bed seems simple until you start asking what actually goes inside it. Most advice about raised garden bed layers focuses on saving money or stacking materials quickly, but very little explains what is happening below the surface.
That’s where problems usually begin. Roots, microbes, moisture, and nutrients all interact in ways that aren’t obvious at first glance. If you understand how those layers work together, you can avoid weak growth, drainage issues, and nutrient imbalances from the start.
In this guide, I’ll walk you through the correct structure, explain why each layer matters, and show how depth changes your decisions, starting with the full bottom-to-top order.
The Correct Layer Order for a DIY Raised Garden Bed
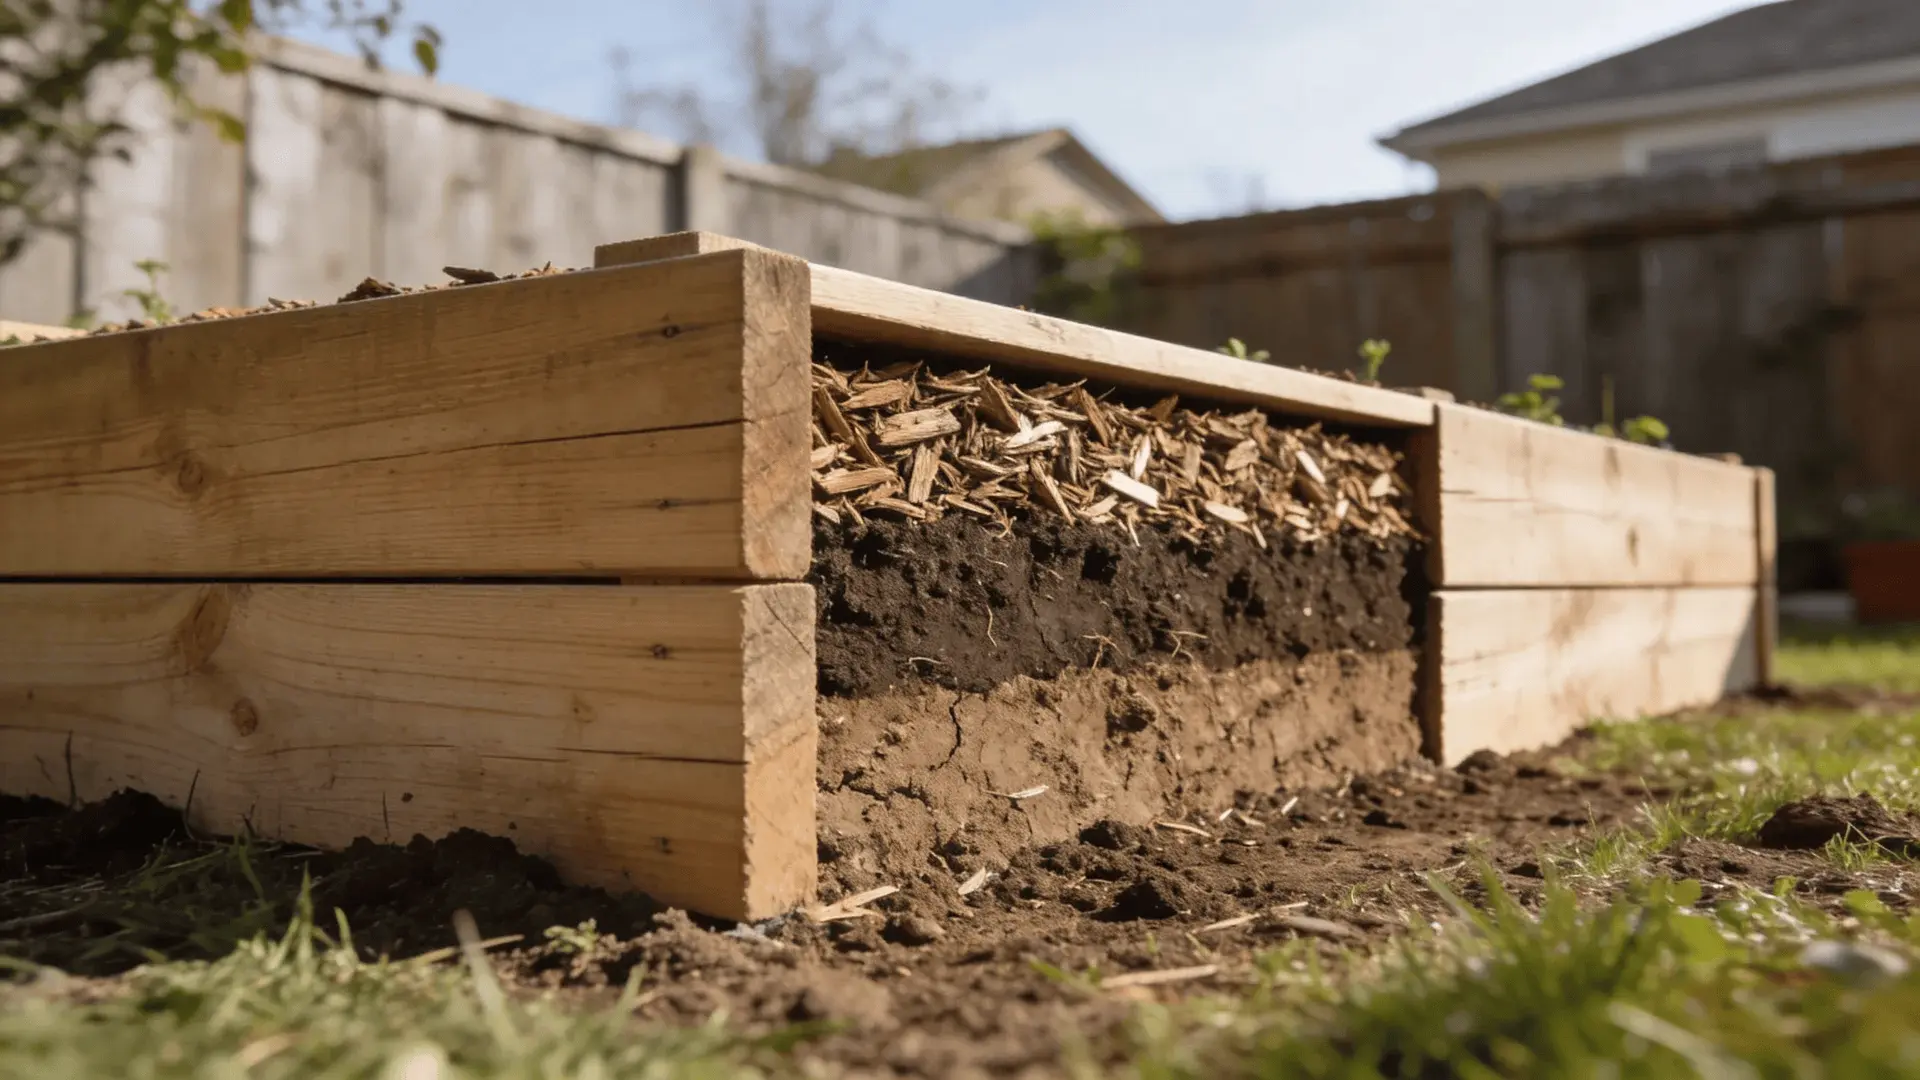
Here is the full layering structure in order:
- Base barrier (weed or pest control)
- Coarse filler (logs, branches, wood)
- Nitrogen buffer layer
- Planting soil mix (root zone)
- Surface mulch
This order works because of one simple rule: coarse material goes below fine material.
Large pieces create air gaps. Smaller particles settle above and hold moisture. That creates a natural drainage gradient where water moves down, roots grow through stable soil, and oxygen can still circulate.
If you reverse that order, fine soil can compact against dense material. Water may pool instead of draining. Roots may hit unfinished wood too early. The structure matters more than the materials themselves.
Here’s a simple breakdown of each layer, what to use, and what it actually does inside your raised bed:
| Layer | Materials | Functions |
|---|---|---|
| Layer 1 – Base Barrier (Weed or Pest Control) | Cardboard, landscape fabric, hardware cloth (depending on weeds/pests) | Blocks weeds and/or burrowing pests; sits directly on the ground; not for holding soil up |
| Layer 2 – Coarse Filler (Logs, Branches, Wood) | Logs, branches, wood | Fills space to lower cost; creates air pockets for drainage; breaks down over time and affects nutrient movement |
| Layer 3 – Nitrogen Buffer Layer | Leaves, grass clippings, manure, partially composted material | Balances carbon-heavy wood with nitrogen-rich inputs; reduces direct impact of wood on planting soil |
| Layer 4 – Planting Soil Mix (Root Zone) | Quality soil mix (topsoil + compost blend) | Main root zone for plants; stays loose, stable, and nutrient balanced; supports early growth and rooting |
| Layer 5 – Surface Mulch | Mulch (straw, leaves, similar organic mulch) | Protects moisture, reduces temperature swings, slows weeds; sits on top and does not replace soil depth |
Use this as a quick reference when filling your bed so every layer has a clear purpose and nothing is added by guesswork.
Step 1 – What Should Go at The Bottom and When to Leave It Open
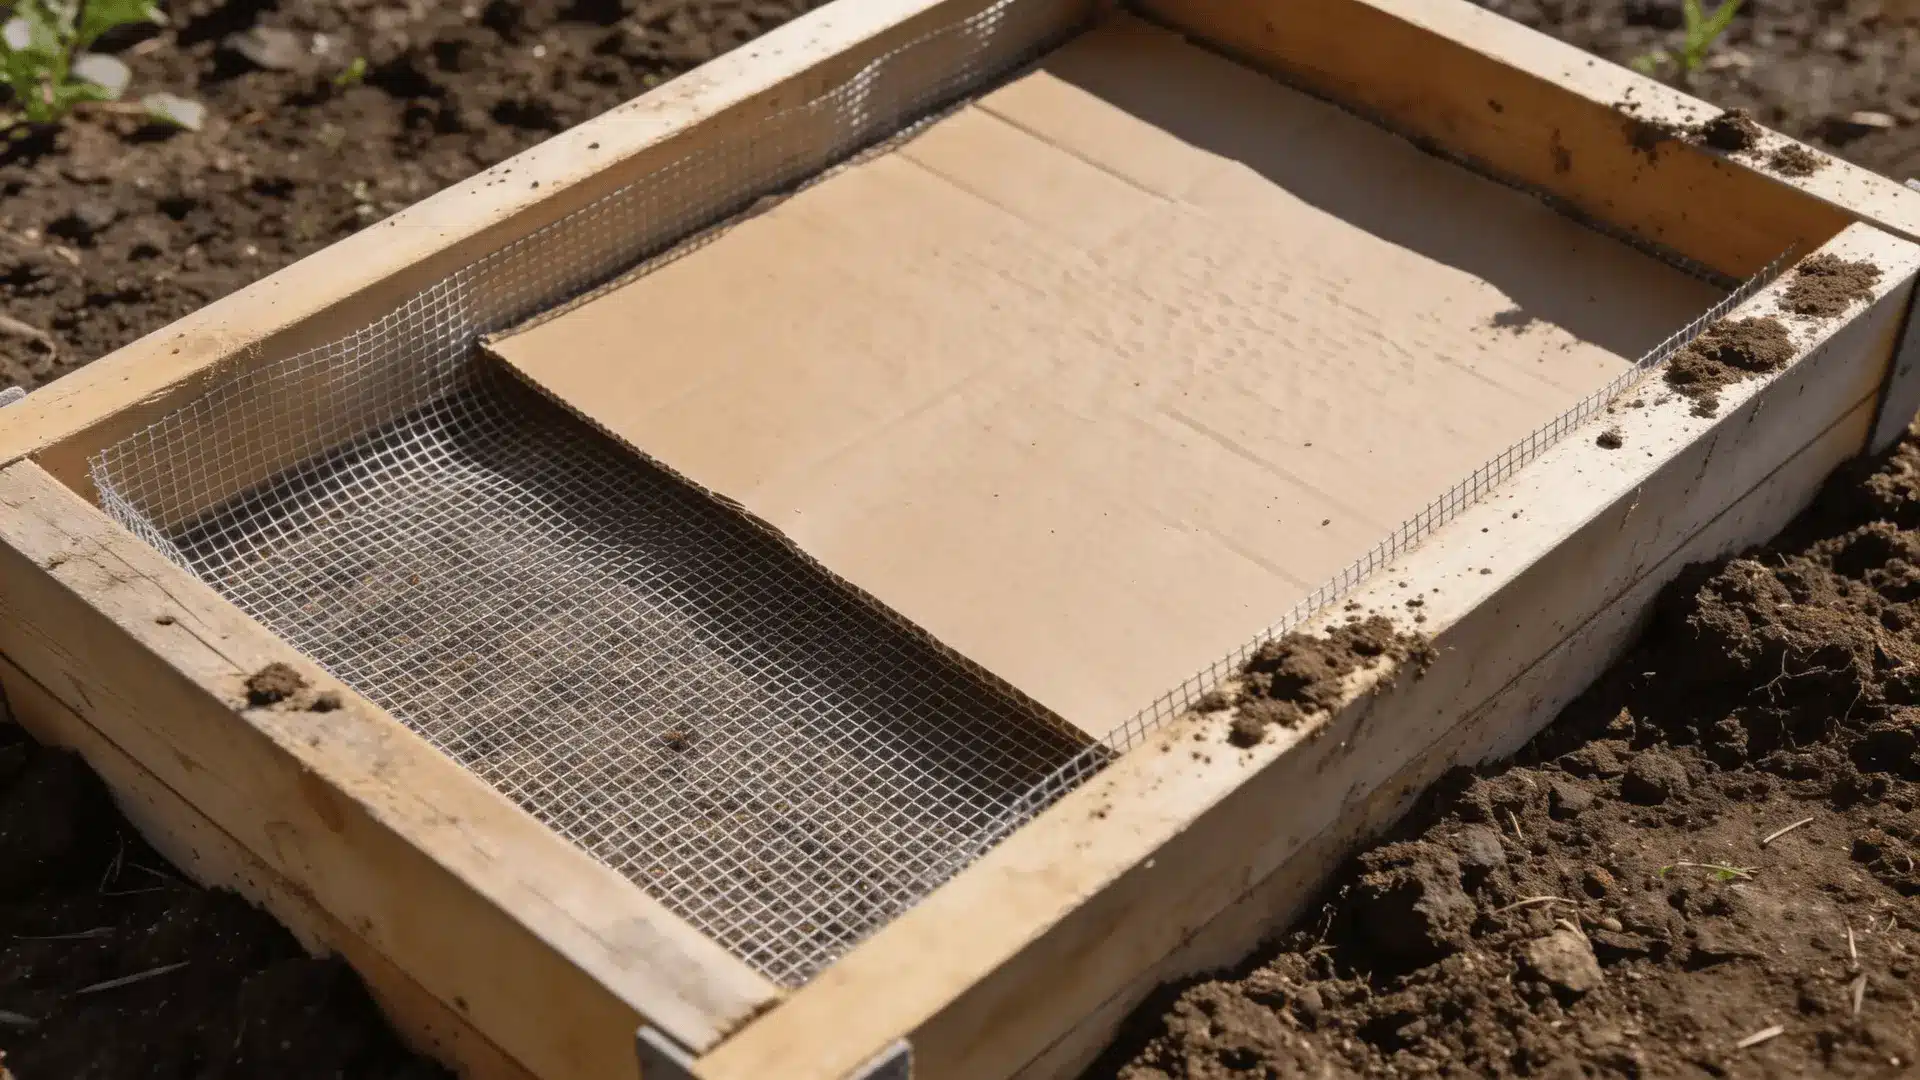
Your bottom-layer decision depends on two things: weed pressure and pest pressure.
Cardboard vs. Landscape Fabric vs. Hardware Cloth
Cardboard is commonly used to suppress weeds because it blocks light. Without light, most weeds cannot continue growing.
But cardboard does not last forever.
Soil microbes and moisture break it down within a few months. That is helpful because it eventually allows roots to connect with native soil below. It also remains breathable as it softens, so oxygen can still move through.
Landscape fabric is more durable and blocks weeds longer. At the same time, it can limit how roots and soil life connect with the ground beneath. In some cases, soil may compact against it, which slows natural drainage.
Hardware cloth serves a different purpose. It stops burrowing animals while still allowing drainage and root movement. In areas with gophers or voles, this can make the difference between thriving plants and constant damage.
When Native Soil Should Stay Exposed
If your ground drains well and you do not have burrowing pests, you can leave the bottom open.
An open bottom allows roots to grow beyond the bed frame and lets worms and microbes move freely into the bed. Over time, this natural connection improves soil structure.
In heavy clay soil, however, drainage can slow after heavy rain. Water may linger because clay moves moisture downward slowly.
In sandy soil, drainage is usually fast enough that leaving the bottom open does not cause trouble.
So the correct choice shifts with your soil type and local conditions.
Step 2 – Using Logs or Wood Correctly (How Nitrogen Drawdown Actually Works)

Wood filler is popular because it reduces the amount of expensive soil you need. In deep beds, those savings can be significant.
But wood changes how nitrogen behaves underground.
When microbes break down wood, they need nitrogen. Fresh wood is high in carbon and low in nitrogen, so microbes pull nitrogen from nearby soil to balance their needs. This process is called nitrogen drawdown.
If wood sits too close to your root zone, microbes may compete with your plants for nitrogen. Plants respond with yellowing leaves and slower growth.
The effect depends heavily on depth.
- In a shallow bed under 12 inches, wood should be avoided or kept very low. Roots will quickly reach it, and nitrogen competition will happen near the active root zone.
- In beds 12–18 inches deep, wood can work if you keep enough soil above it. Roots have time to establish before reaching the decomposing layer.
- In beds over 18 inches, wood filler is usually safe in the lower third to half. By the time roots reach that depth, decomposition has progressed and nitrogen competition is less intense.
Wood does not cause permanent harm. Early decomposition is when issues are most likely to appear. As the breakdown continues, the material gradually becomes part of the soil system.
Why Shallow Beds Fail When Wood is Too High
In shallow beds, roots hit unfinished wood quickly. At the same time, microbes are actively pulling nitrogen at that depth.
Plants show pale leaves and weak growth because the active root zone overlaps with the active decomposition zone.
The issue is not simply that wood exists. It is that the decomposition layer and root layer occupy the same space too soon.
How to Prevent Nitrogen Deficiency when Using Wood
To reduce problems:
- Keep wood low in the bed
- Add nitrogen-rich material above it
- Maintain at least 10–12 inches of quality soil on top
This separation gives microbes room to work while roots establish in stable soil. Over time, the system evens out.
Step 3 – The Middle Layer that Protects Your Root Zone
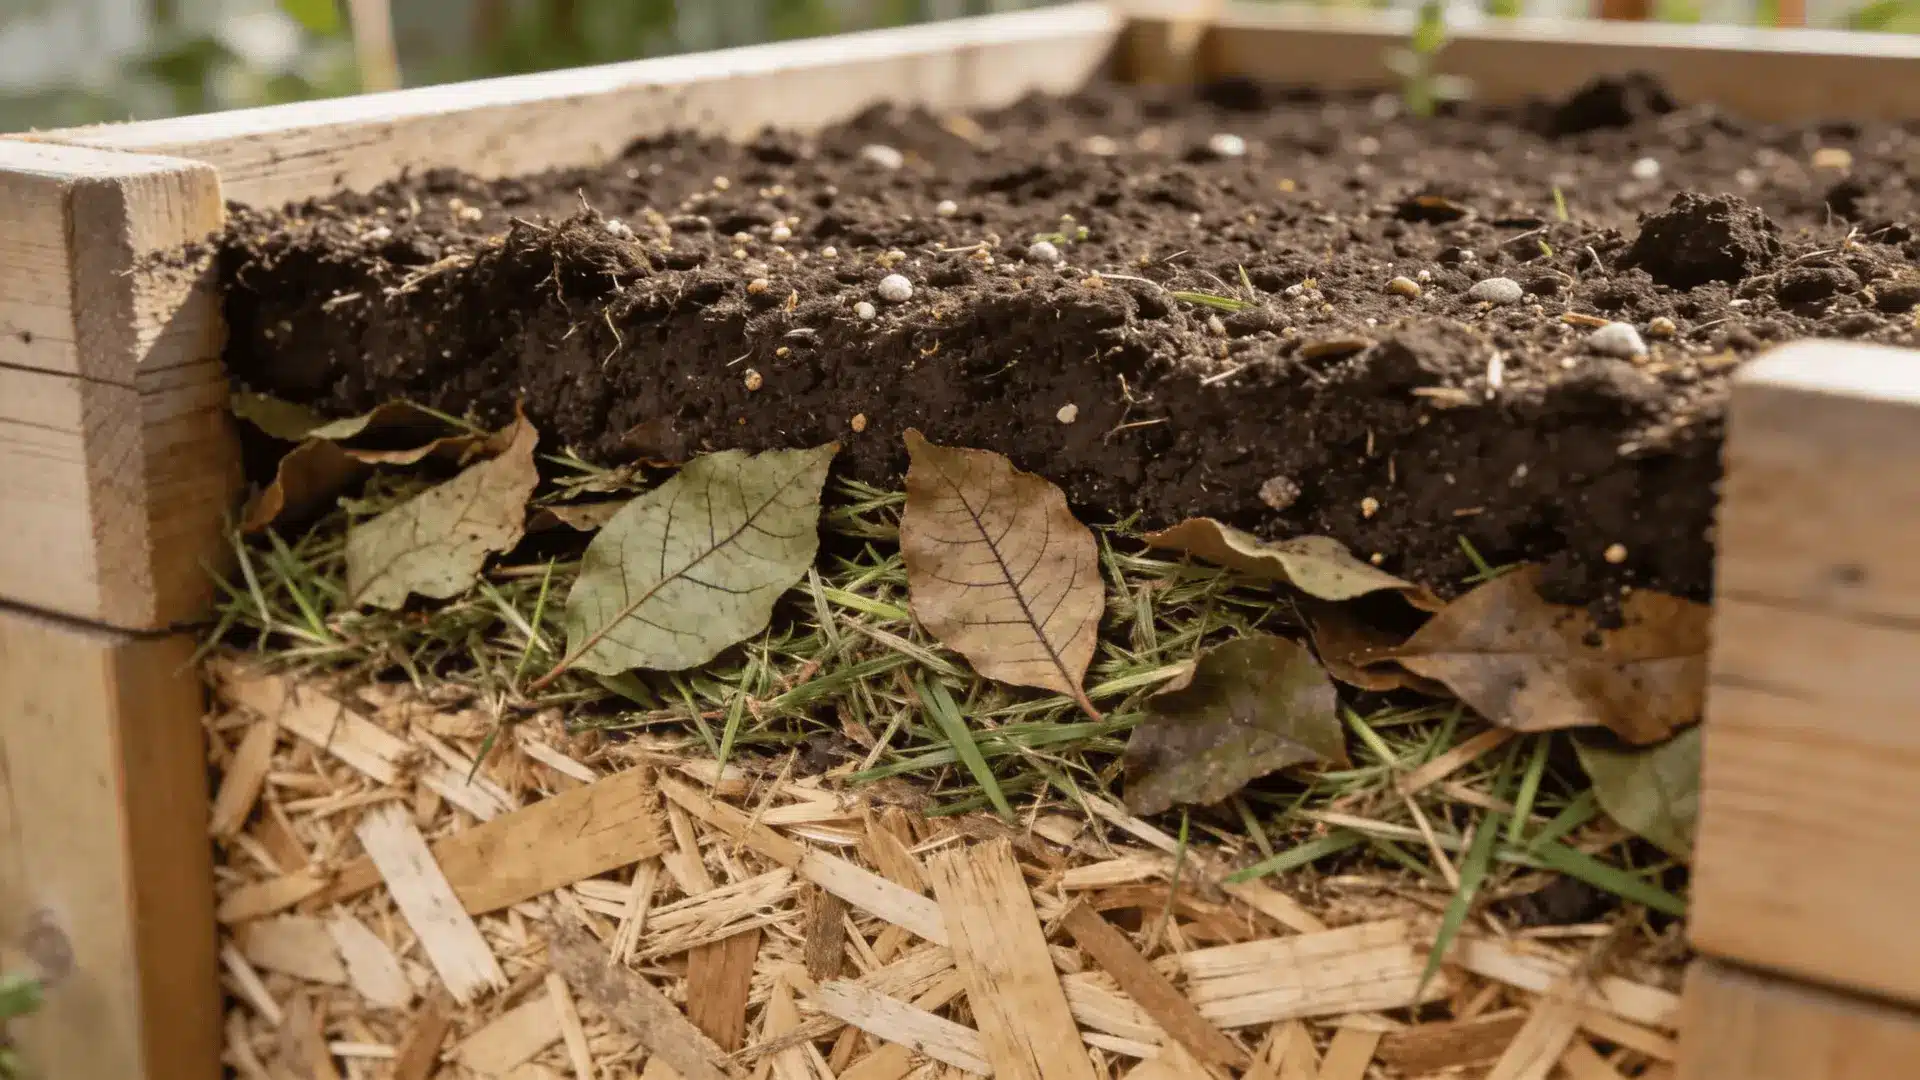
This middle layer is sometimes treated as leftover yard waste. In reality, it plays a specific role.
It acts as a buffer between the raw carbon below and the finished planting soil above.
Carbon-heavy materials break down slowly. Nitrogen-rich materials break down faster. By placing leaves, grass clippings, manure, or partially composted material in this transition zone, you create a gradual shift rather than a sharp boundary.
Microbes work in this middle space first. That slows nitrogen movement upward and reduces sudden nutrient swings in the topsoil.
- Inshallow beds with no wood, this layer may be thin or unnecessary.
- Indeeper beds with heavy wood filler, it becomes more important.
It moderates the decomposition process and protects your root zone from instability during the first growing season.
Step 4 – How Much Soil You Actually Need on Top (Depth by Bed Height)
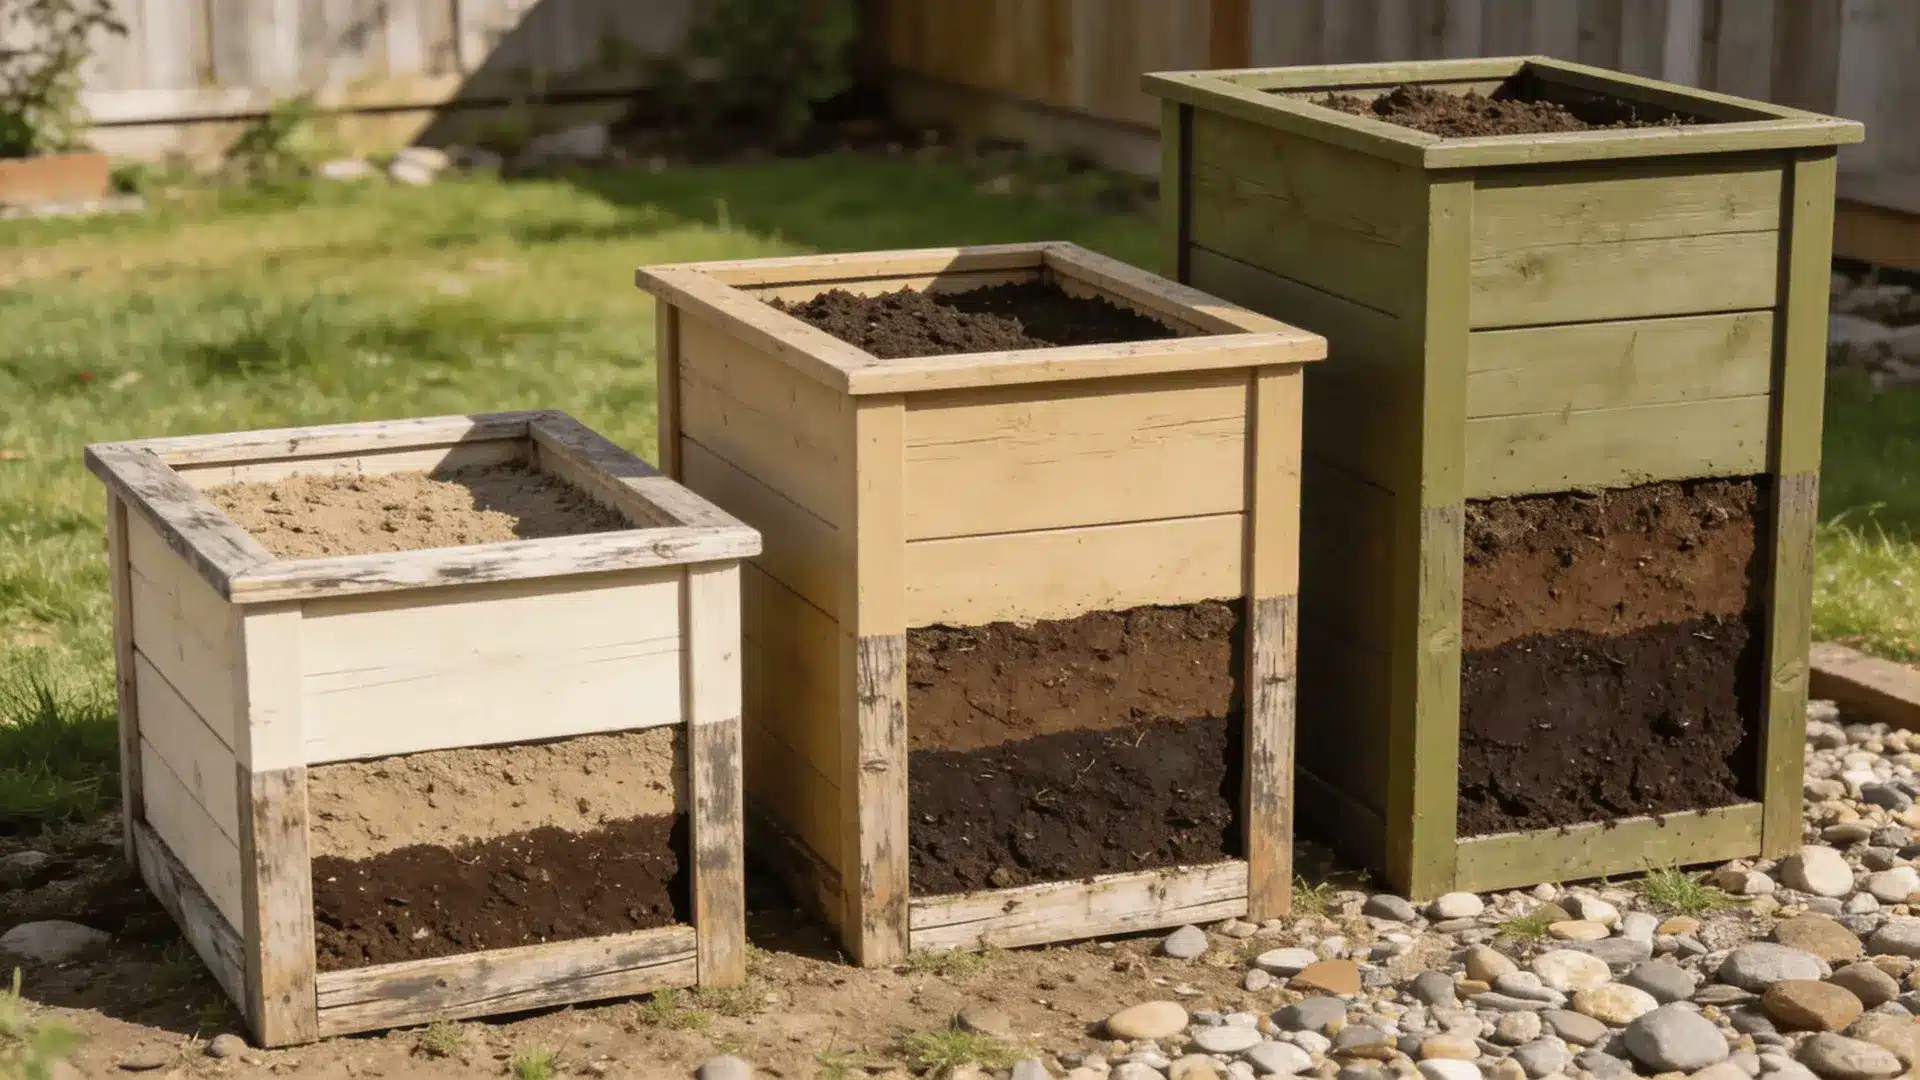
The top soil layer is your root zone. This is where plants begin and establish strength.
Most vegetables need at least 10–12 inches of loose, nutrient-rich soil. Crops like carrots and tomatoes benefit from deeper space. Shallow-rooted greens can survive in less, but growth is steadier with adequate depth.
Here’s how layering changes based on your raised bed height:
| Bed Height | Wood Filler Guidance | Soil Depth Requirement | Key Risk or Benefit |
|---|---|---|---|
| Under 12 Inches | Avoid or keep wood very low | Nearly all space should be quality soil (10–12 inches minimum) | Roots reach bottom quickly; high risk of nitrogen competition and drainage issues |
| 12–18 Inches | Wood can be used in lower portion | Maintain at least 10–12 inches of finished soil on top | Balanced cost savings with stable root zone |
| Over 18 Inches | Fill lower third to half with logs or coarse debris | Keep upper 12 inches as high-quality planting soil | More room for decomposition below; lower nitrogen competition over time |
Understanding 60/30/10 and 70/30 Soil Ratios
Common mixes include:
- 60% topsoil, 30% compost, 10% organic matter
- 70% topsoil, 30% compost
These ratios aim to balance structure and nutrients.
Topsoil provides mineral content and stability. Compost adds nutrients and improves moisture retention. Too much compost can make soil overly fluffy and prone to settling. Too little compost can limit nutrient availability.
The right mix depends on your starting soil. Sandy soil may benefit from slightly more compost. Heavy soil needs enough organic matter to improve drainage. Balance matters more than chasing a perfect formula.
Step 5 – Should You Add Mulch on Top?
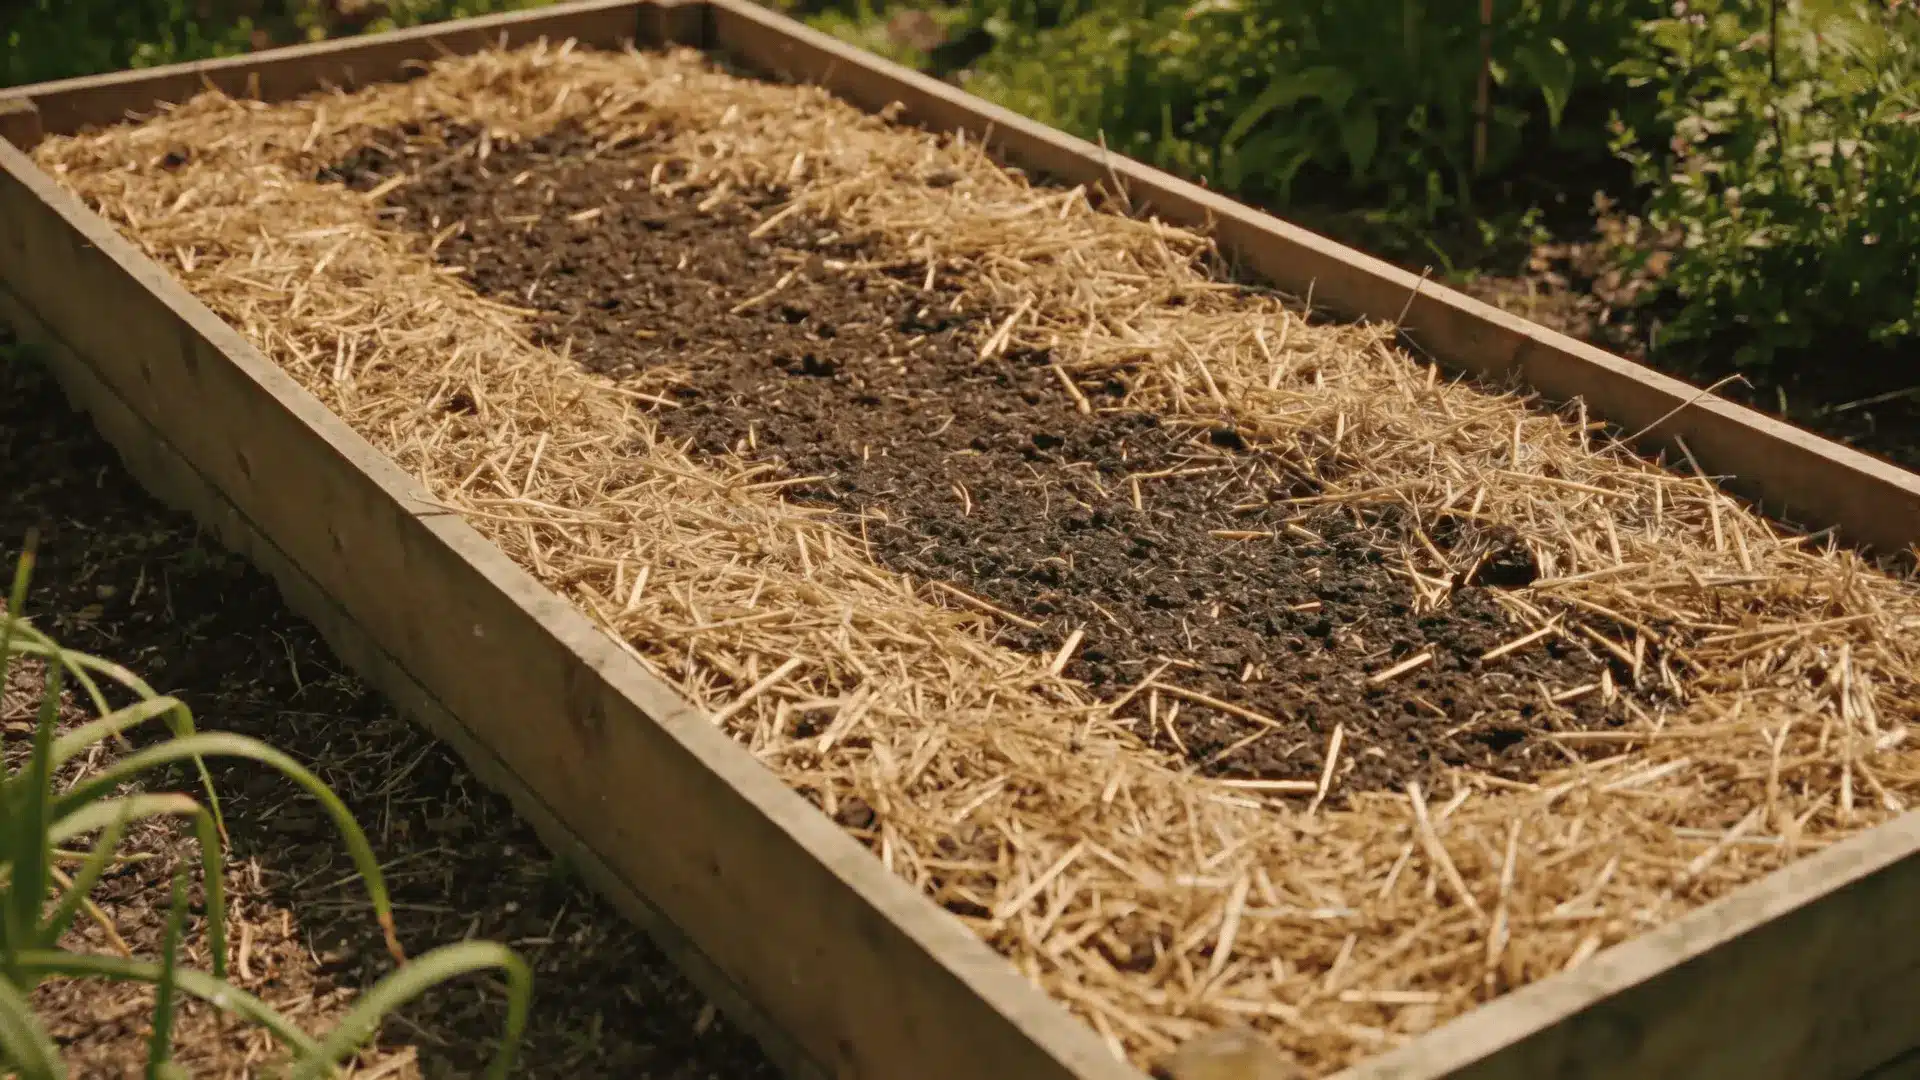
Mulch sits on the surface; it does not replace soil depth. Its main roles are:
- Slowing evaporation
- Reducing temperature swings
- Suppressing surface weeds
Mulch works by blocking sunlight and reducing direct exposure to wind. This helps soil stay evenly moist, which supports steady root growth.
In very wet climates, thick mulch can hold too much moisture. In those cases, thinner layers work better.
Mulch supports the system but does not create it. Your soil structure should function even without it.
Common Layering Mistakes that Cause Yellow Plants or Poor Drainage
When plants struggle in raised beds, the cause is often structural rather than mysterious.
Common problems include:
- Wood placed too high in shallow beds
- Less than 10 inches of planting soil
- Reversing coarse and fine layers
- Compacting soil tightly during filling
- Blocking drainage with dense fabric
Yellow leaves often signal nitrogen competition. Slow growth can point to shallow root zones. Waterlogged soil usually traces back to poor drainage layering.
The symptom appears above ground. The cause sits below. Fixing the structure early prevents repeated frustration later.
Wrapping Up
When you look at diy raised garden bed layers as a system instead of a checklist, everything makes more sense. Each layer influences drainage, nutrient flow, and root stability in its own way.
The base manages what enters from below, the middle layers control decomposition, and the top soil supports active growth. Depth determines how safely you can use wood and how much finished soil your plants truly need.
Once you grasp those relationships, you can adapt your bed to your space without guesswork.
Take a few minutes to evaluate your bed height and soil mix, then build your layers with intention and confidence.
Frequently Asked Questions
What is best to put on the bottom of a raised garden bed?
It depends on pests and weeds. Cardboard works for weed suppression. Hardware cloth works for burrowing animals. Open soil works if neither is an issue.
What is the 70/30 garden rule?
It usually means 70% topsoil and 30% compost in the planting layer to balance structure and nutrients.
Can I fill the whole bed with compost?
You can, but it may settle quickly and lack mineral structure. Mixing with topsoil creates better long-term stability.
Do I have to use logs at the bottom?
No. Logs are mainly for cost savings in deep beds. They are not required for healthy growth.