
Want to turn food scraps into plant food? Worm farming is the answer. This simple method uses worms to change kitchen waste into rich soil that helps plants grow.
Worm farming is suitable anywhere—from small apartments to big backyards. The setup is cheap and easy, and the care is simple.
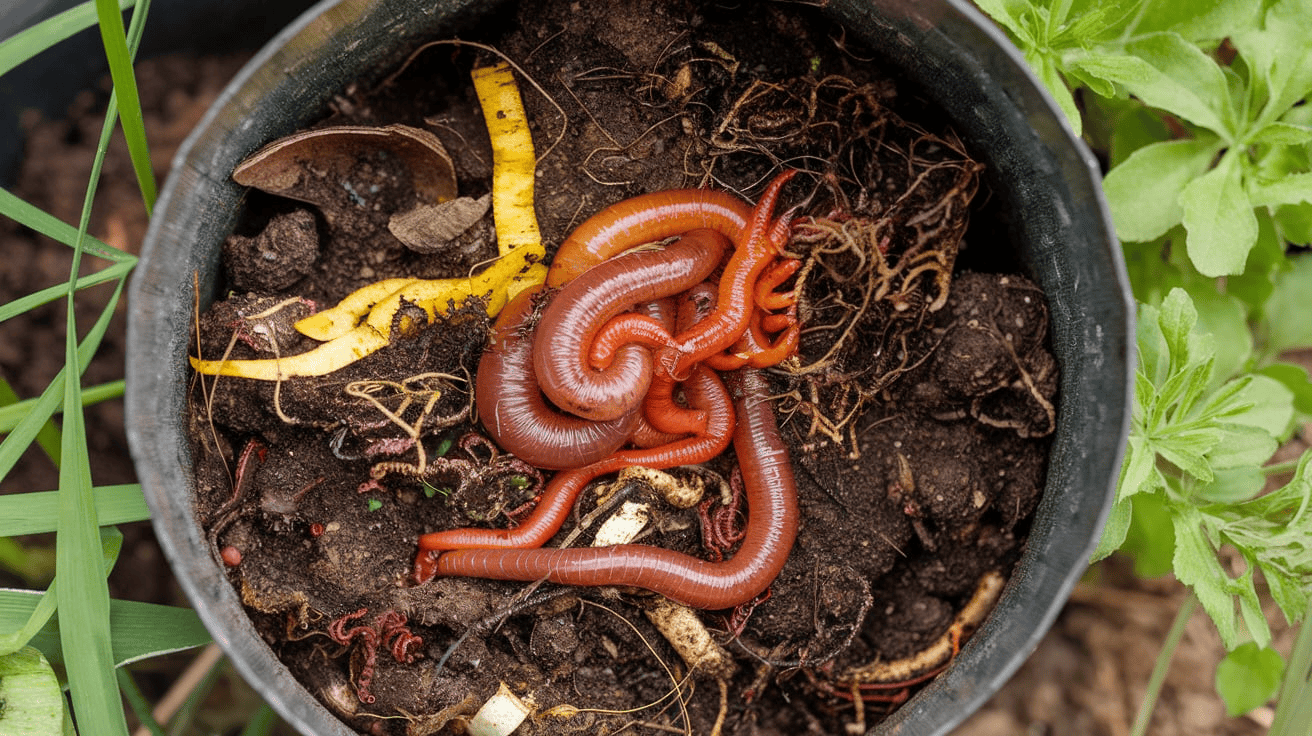
These helpful creatures eat what you might throw away – fruit peels, coffee grounds, and vegetable scraps.
They turn trash into treasure by making what gardeners call “black gold” – some of the best plant food you can get.
In this blog, we’ll cover all the basics of worm farming that you need to know.
Ready to start? Let’s learn how to set up your own worm farm and put those worms to work!
What is Worm Farming?
Worm farming is a simple composting system where worms eat food scraps and other organic materials.
They turn these scraps into rich, useful compost. This process happens in a closed bin or container that you can keep inside or outside your home.
People start worm farms for different reasons:
- To make compost for gardens and plants
- To grow worms for fishing bait
- To breed worms for sale to other gardeners or farmers
Worm farms work because the worms eat through your food waste and create what’s called “worm castings.” These castings are full of nutrients that help plants grow strong and healthy.
The most common worms used in worm farming are Red Wigglers. They work well because they eat a lot of food and make compost quickly.
Other good options include European Night Crawlers and Mealworms, depending on what you want to use them for.
Setting up a worm farm is easy and doesn’t need much space. You can even keep one in your kitchen or on a balcony. It’s a great way to reduce food waste while making something useful.
How to Raise Worms
1. Selecting the Right Worms
The type of worms you choose matters a lot for your success:
- Red Wigglers: These small, red worms are perfect for making compost. They eat a lot and make babies quickly, which means more compost for you.
- European Nightcrawlers: These bigger worms make great fishing bait. They live longer and can handle more soil types.
- African Nightcrawlers: These work well in hot places. They grow fast and make lots of compost.
- Alabama Jumpers: These worms help mix garden soil by moving up and down, improving it for plants.
2. Setting Up Your Worm Farm
Getting started is simple with these steps:
- Pick a container: Use a large bin with a lid. It can be wood or plastic.
- Add holes: Make small holes in the bottom for water to drain and in the lid for air to flow.
- Indoor or outdoor: Indoor bins work in any weather. Outdoor bins need shade in summer and protection in winter.
- Size matters: For every pound of food waste per week, you need about one square foot of bin space.
3. Providing Proper Conditions
Worms need the right care to stay happy and healthy:
- Temperature: Keep worms between 55-75 degrees F. Too hot or too cold will hurt them.
- Moisture: The bedding should feel like a wrung-out sponge. Not too dry, not too wet.
- Food: Give them fruit and veggie scraps, coffee grounds, and tea bags. Skip meat, dairy, and oily foods.
- Check often: Look at your bin weekly. Fix problems like bad smells, bugs, or too much water right away.
- Bedding: Use shredded paper, cardboard, or dry leaves. This gives worms a cozy home.
Start with about 1,000 worms for a small home bin. If you treat them well, they will grow in number.
Choosing the Right Worms for Your Farm
The type of worms you pick can make a big difference in how well your worm farm works. Here’s a simple guide to help you pick the best worms for what you want to do.
Red Wigglers for Vermicomposting
Red wigglers stay near the top of the soil where food is added. They eat about half their weight in food each day, making them great for getting rid of kitchen waste.
| Feature | Details |
|---|---|
| Size | Small (2-3 inches) |
| Best Use | Making compost from kitchen scraps |
| Temperature Range | 55°F to 77°F |
| Special Traits | Processing food very fast |
| Reproduction | Very fast – doubles every 60-90 days |
| Good for Beginners | Yes – very forgiving |
European Nightcrawlers for Fishing Bait

These worms can handle cooler temperatures than other types. Fishermen like them because they stay lively on the hook, and fish find them tasty.
| Feature | Details |
|---|---|
| Size | Medium to large (4-5 inches) |
| Best Use | Fishing bait and some composting |
| Temperature Range | 40°F to 80°F |
| Special Traits | Tougher skin, good hook bait |
| Reproduction | Medium speed |
| Good for Beginners | Yes – hardy and adaptable |
African Nightcrawlers for Warm Climates

| Feature | Details |
|---|---|
| Size | Large (5-7 inches) |
| Best Use | Hot climate composting and bait |
| Temperature Range | 70°F to 90°F |
| Special Traits | Very big, eat lots of food |
| Reproduction | Fast in warm weather |
| Good for Beginners | Only in warm areas |
If you live somewhere hot, these worms will thrive while others might struggle. They make great compost and can eat more food than smaller worms.
Alabama Jumpers for Gardening

These worms are known for their ability to work through tough soil. They also go deeper than other worms, which helps them get air and water to plant roots.
| Feature | Details |
|---|---|
| Size | Medium (3-4 inches) |
| Best Use | Fixing poor soil in gardens |
| Temperature Range | 45°F to 85°F |
| Special Traits | Dig deep, mix soil well |
| Reproduction | Slow to medium |
| Good for Beginners | Better for experienced gardeners |
Choose the worm that fits your main goal – compost, fishing, or better garden soil – and you’ll be off to a great start.
Building a Worm Bin
Getting your worm farm started doesn’t need to be hard. With the right bin in the right place, your worms will be happy and working for you in no time.
Let’s look at how to build a good home for your worms and where to put it.
You can make a worm bin at home or buy one that’s ready to use. Both work well, so pick what fits your needs and budget.
Homemade Worm Bins
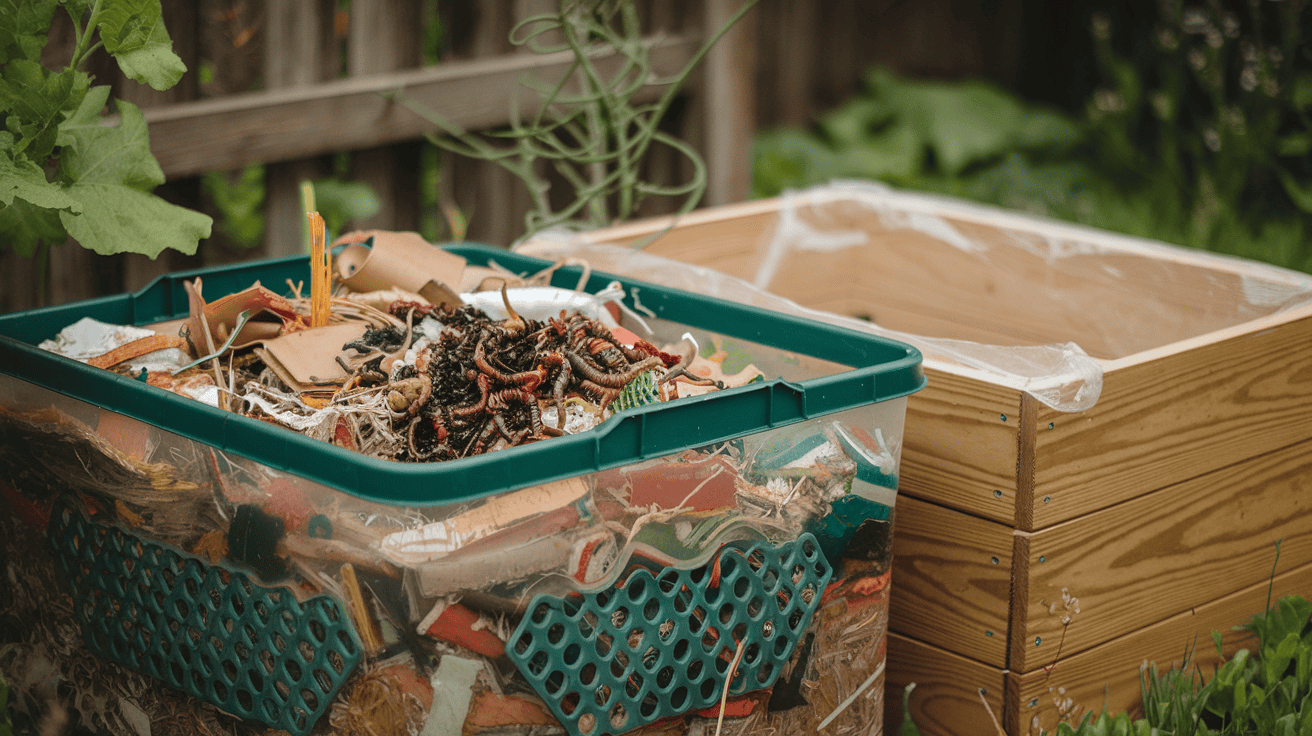
A plastic bin setup is one of the easiest ways to start. This option is perfect for people who want to test worm farming without spending a lot of money.
Wooden boxes make nice-looking bins that control moisture better than plastic. They cost a bit more and need to be lined with plastic to keep the wood from rotting.
Many gardeners prefer wooden bins for outdoor use because they blend in with the garden.
Store-Bought Worm Bins
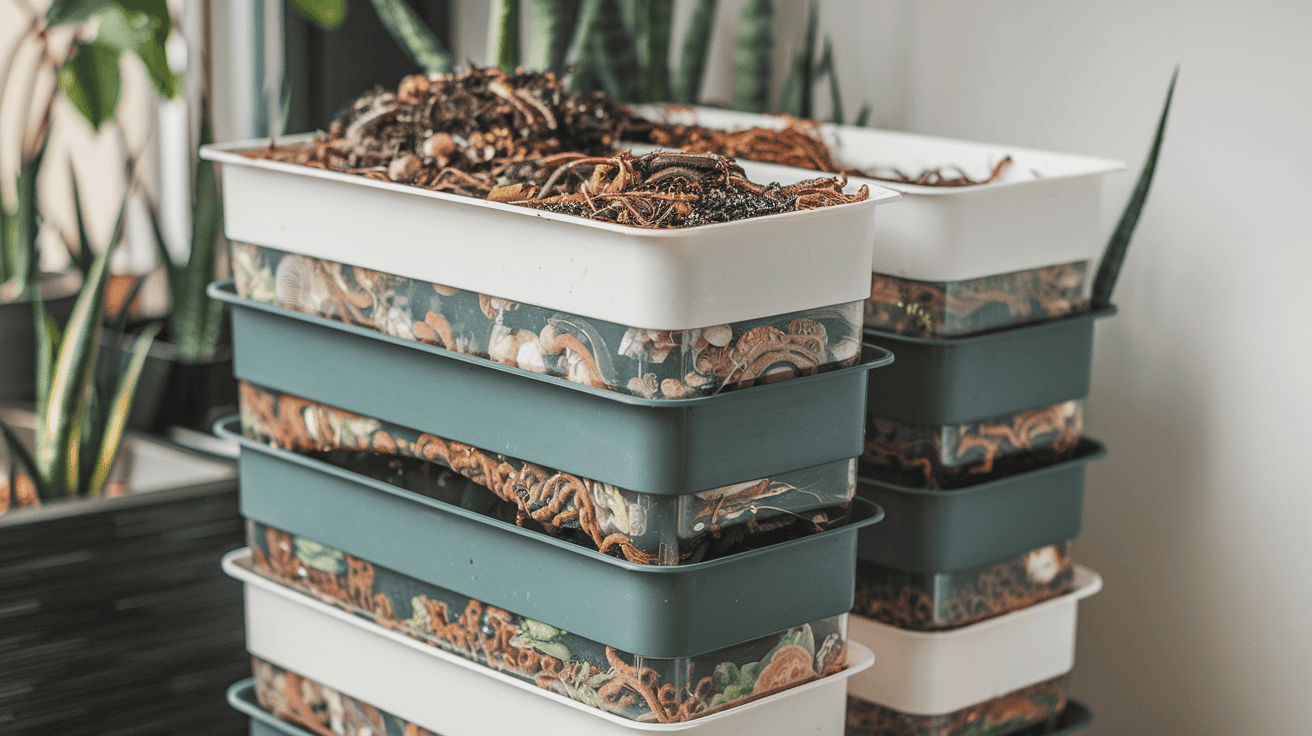
Stacking tray systems cost more but are very user-friendly. They have multiple trays that stack on top of each other. As worms finish the food in one tray, they move up to the next one.
This makes it easy to take out finished compost without disturbing the worms. These work great indoors in small spaces.
In-garden systems let worms work right in your garden beds. They allow worms to move between your garden soil and the compost bin, helping your soil and plants while still making compost you can use elsewhere.
No matter which type you pick, make sure your bin has good airflow through holes or gaps and can drain extra water.
Also, make sure that it is 8-12 inches deep and has a lid to keep pests out. The right bin makes worm farming much easier.
Where to Place Your Worm Bin
Outdoor placement works best in mild weather. Find a shady spot where temperatures stay between 55°F and 77°F. Keep the bin raised off the ground and protected from rain.
In cold areas, add insulation in winter. In hot regions, provide extra shade in the summer.
Indoor placement works well if you have extreme weather. Good spots include garages, basements, or under sinks. Use a tray underneath to catch drips and keep away from heating vents and cold windows.
A healthy worm bin shouldn’t smell bad. If it does, it’s likely too wet or has too much food.
Start simple with a plastic bin with holes. You can upgrade later once you learn what works best for your situation.
How to Raise Worms for Composting
Worm composting turns food scraps into rich soil for plants. Once you know the basics of bedding and feeding, it’s a simple process.
With the right care, your worms will work hard to make compost for your garden.
Choosing Bedding for Your Worm Bin
Bedding gives worms a place to live and helps break down food scraps. Good bedding holds moisture but still lets air move through it.
The best bedding materials are things you might already have:
- Shredded paper or cardboard: Tear up old newspapers, mail, or cardboard boxes. Avoid glossy paper and tape.
- Coconut coir: This comes from coconut husks and holds water really well. You can buy it at garden stores.
- Peat moss: Another good option from garden stores, but some people avoid it because of how it’s collected.
- Dry leaves: Free in the fall, these work great in outdoor bins. Mix with other materials for the best results.
- Grass clippings: Only use grass that hasn’t been treated with chemicals. Mix with dry materials to keep it from getting too wet.
Getting the moisture right is key. Your bedding should feel like a wrung-out sponge – damp but not dripping. If you squeeze it and water comes out, it’s too wet. If it feels dry, spray it with water.
When setting up your bin, fill it about 2/3 full with loose bedding. Make sure to fluff it up so air can move through it. Your worms will thank you!
What to Feed Your Worms
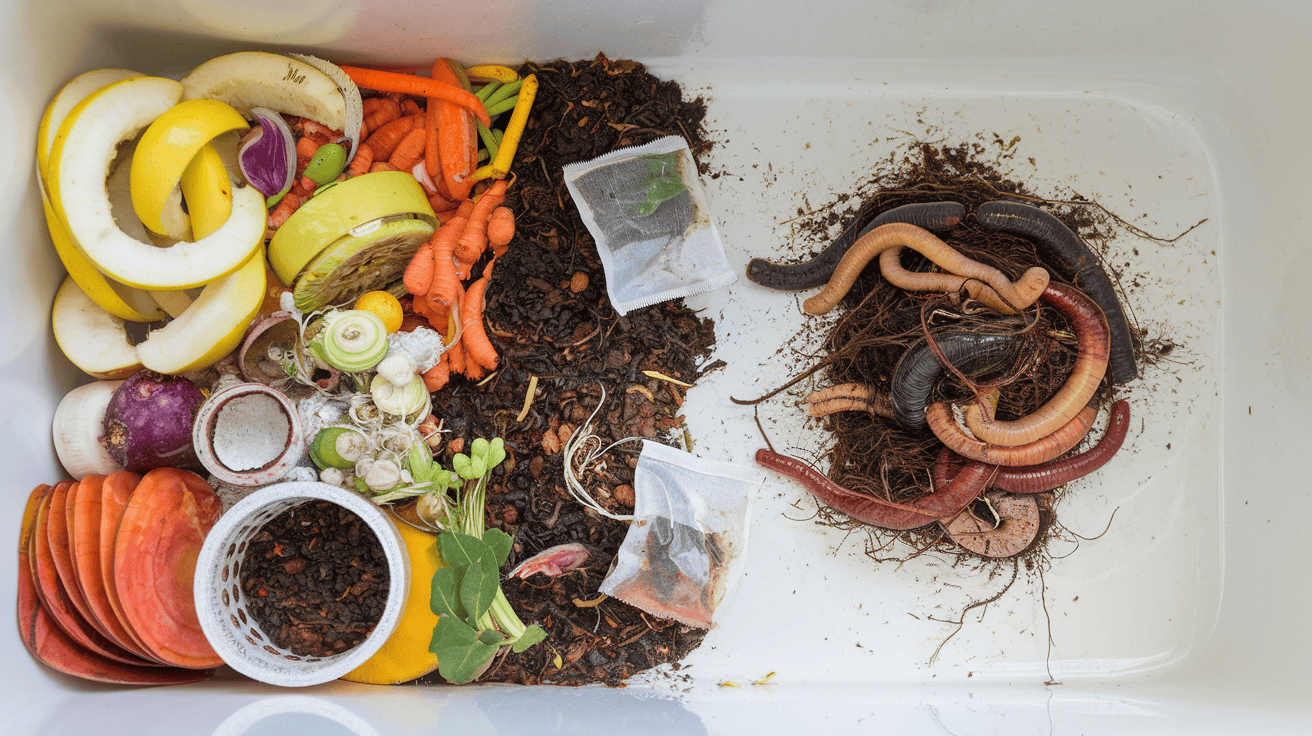
Worms aren’t picky, but they do have foods they like better than others. Feeding them the right things keeps them happy and your bin from smelling bad.
| Foods Worms Love | Foods to Keep Out |
|---|---|
| Fruit scraps (banana peels, apple cores) | Meat or fish scraps |
| Vegetable scraps and peels | Dairy products |
| Coffee grounds and filters | Oily foods |
| Tea bags (remove staples) | Citrus fruits (too acidic) |
| Crushed eggshells (helps with digestion) | Onions and garlic (too strong) |
| Cooked plain rice or pasta (in small amounts) | Pet waste |
| More shredded paper | Bread (can attract pests) |
When you feed your worms, bury the food under the bedding. This helps stop fruit flies and smells. Don’t add more food until most of the last batch is gone.
Start slow—a small handful of food scraps twice a week is enough for a new bin. When fully settled in, a pound of worms (about 1,000 worms) can eat about half a pound of food per day.
If you notice food sitting around not being eaten, cut back on how much you add. If your worms eat everything quickly, you can slowly add more. It’s better to underfeed than overfeed, especially at first.
Maintaining Your Worm Farm
Taking care of your worm farm isn’t hard, but it does need some attention.
With a few simple checks each week, you can keep your worms happy and making great compost.
A healthy worm bin means healthy soil for your plants.
1. Maintaining Proper Temperature and Moisture
Worms are not that different from us – they like to be not too hot, not too cold, and not too wet or dry. Getting these basics right makes a big difference.
Temperature Control
| Temperature | Worm Behavior | What To Do |
|---|---|---|
| Below 55°F | Eat less, slow down, stop breeding | Move bin to warmer spot, add insulation |
| 55°F-77°F | Active and happy (ideal range) | Maintain as is |
| Above 80°F | Can die quickly, bin may smell | Move to a cooler spot, add shade, open lid |
Moisture Balance
Your worm bin should be as wet as a wrung-out sponge. This simple test helps you know:
| Moisture Level | Signs | Solution |
|---|---|---|
| Too Wet | Bad smells, worms trying to escape, standing water | Add dry bedding, leave lid off for a few hours |
| Just Right | Few drops when squeezed, no smell | Maintain as is |
| Too Dry | Worms look thin, slow to compost | Spray with water, add moist food scraps |
2. How to Care for Your Worms
Worms need some basic care to stay healthy and make good compost. These simple tasks only take a few minutes each week.
Weekly Care Tasks
- Check Moisture: Use the squeeze test to make sure bedding isn’t too wet or dry.
- Fluff Bedding: Gently mix the top few inches to add air and stop compacting.
- Check Food: See if worms have eaten what you gave them. Don’t add more until they’ve finished most of the last feeding.
- Look for Problems: Watch for pests like ants or fruit flies, bad smells, or worms trying to escape.
Harvesting Worm Castings
| Method | How It Works | Best For |
|---|---|---|
| Light Method | Put compost in piles in bright light. Worms move down, take compost from the top. | Small amounts of compost |
| Side Method | Push all material to one side and add fresh bedding to the empty side. The worms move over 2-3 weeks. | Continuous harvesting |
| Sifting Method | Use a screen to sift out worms from finished compost. | Getting all the compost at once |
Managing Worm Population
Healthy worms will make more worms! To stop overcrowding:
- A good rule is one pound of worms (about 1,000) per square foot of bin space.
- If the bin gets too full, split it into two bins or share worms with friends.
- Larger worm farms need less care than small ones because they balance themselves better.
With these simple steps, your worm farm will thrive. Soon, you’ll have amazing compost for your plants and a fun, earth-friendly way to use food scraps.
Harvesting Worm Castings

After a few months of feeding your worms, you’ll have rich, dark compost that plants love. This “black gold” is ready to harvest when most of the bin looks like coffee grounds.
When and How to Harvest Worm Castings
Harvest worm castings every 3-6 months using one of these methods:
- Light method: Put bin contents in piles under bright light. Worms move down. You take castings from the top.
- Migration method: Push everything to one side of bin. Add fresh bedding to empty side and put food there. Worms move over in 2-3 weeks, then remove old side’s castings.
- Hand sorting: Make small piles of compost. Worms crawl out the bottom while you collect castings from the top.
Uses of Worm Castings
Mix castings with potting soil (1 part castings to 4 parts soil) for healthier houseplants. Soak castings in water overnight to make worm tea. Water plants with this tea for amazing growth.
Add castings to garden soil to improve water retention, drainage, and plant health without the risk of burning roots.
Troubleshooting Common Worm Farming Problems
Even good worm farmers run into problems sometimes. Here’s how to fix the most common issues fast.
Worms Trying to Escape
When worms try to crawl out of your bin, they’re telling you something’s wrong. This usually happens when:
- The bin is too wet or too dry
- The temperature is too hot or cold
- Something in their food is bothering them
Fix it by checking the moisture (it should feel like a wrung-out sponge), moving the bin to a better spot, or removing any food you don’t like.
Odors in Your Worm Bin
A good worm bin shouldn’t smell bad. Bad smells mean:
- You’re feeding too much food
- The bin is too wet
- Not enough air is getting in
Stop adding food for a week, mix in dry bedding like shredded paper, and fluff up the contents to add air. This should fix the smell within a few days.
Conclusion
Worm farming is simple and helpful for both you and your garden. These little animals work hard to turn kitchen scraps into rich soil that makes plants grow better.
Start with a small bin and a few worms. Watch how they eat and work, learn what they like, and give them time to settle in.
You’ll soon have less trash going to the dump and more good soil for your plants. Plus, it’s fun to see how nature turns food waste into something useful again.
Have you tried worm farming? Tell us about your wins or questions in the comments below!


One Response
We’ve had between 2-4 worm bins for years now and it’s amazing how invaluable they are. I’ve always loved getting my hands in the soil and what better way to do it. Our worms love watermelon too.
I’m having trouble keeping them out of the sun in the summer. Any suggestions?