Dehydrating flowers means taking out all the water so they can last longer. Once dried, flowers retain their shape and some of their color, making them ideal for crafts, keepsakes, and decoration.
People dry flowers to commemorate special moments, such as weddings or graduations, or to use them in handmade cards, scrapbooks, or home décor.
There are several simple methods for drying flowers, including hanging them upside down, pressing them between pages of a book, using silica gel, or even drying them quickly in the microwave.
Some want to decorate their space with a natural touch that won’t wilt in a few days. In this blog, I’ll teach you simple and safe methods for drying flowers at home.
You’ll get clear steps, helpful tips, and honest answers to help you do it right. If you’ve been wondering how to save your favorite blooms, this guide is made to help you get started.
Why People Dehydrate Flowers?

Some flowers evoke memories of significant moments, such as weddings, birthdays, or cherished times spent with someone special. Instead of throwing them away, people dry them to hold on to the memory. A dried rose from a date or a bouquet from graduation can mean a lot, even years later.
Others use dried flowers in crafts. They’re easy to add to cards, candles, or simple art projects. Dried flowers also work well for home décor. You can place them in a vase, hang them on a wall, or set them on a shelf.
They last longer than fresh flowers and require no care. Whether it’s for memory, crafting, or adding beauty to a room, dried flowers are a simple and versatile choice.
Step-by-Step Guide to Drying Flowers
Drying flowers isn’t hard, but it helps to follow a clear process. Preparing the flowers correctly and selecting the most effective Method will yield better results. Below is a full guide to help you through each step, from start to finish.
1. Picking the Right Flowers

Before you start drying, it helps to know which flowers work best. Some hold their shape, color, and texture much better than others. The right flower can make drying easier and give you better results.
Which flowers work best?
Look for flowers that are firm and not too thick. The petals should feel dry, not soft or wet. Stems should be strong enough to hang upside down or sit flat without bending.
You can also try others, but these are reliable and beginner-friendly options. Here are some flowers that dry well:
- Roses: Keep their shape and color, great for air drying or silica gel
- Lavender: Holds scent and dries easily
- Baby’s breath: Light and airy, good for fillers
- Statice: Known for keeping color well
- Daisies and pansies: Great for pressing
- Marigolds: Bright and sturdy, good for many methods
- Hydrangeas: Can dry nicely if picked at the right stage
2. Tools and Materials You’ll Need

- Scissors or garden shears: for cutting stems cleanly
- String or rubber bands: to tie bunches when air drying
- Paper towels or parchment paper: for pressing or microwave drying
- Heavy books: for pressing flowers flat
- Microwave-safe plate or press: if using a microwave
- Low-heat oven: for quicker drying
- Silica gel and a container with a lid: for drying delicate or full flowers
- Spoon or soft brush: to gently remove flowers from silica gel
3. Prepare the Flowers

Good prep leads to better results. I make sure to start with fresh flowers that are just starting to bloom. Avoid ones that are fully open or already wilting.
If the flowers are too wet or soft, they may not dry well. Clean and dry petals give the best results. Steps to follow:
- Cut the flowers in the morning after the dew has dried
- Trim the stems to the length you want
- Remove leaves from the part of the stem you will not use
- Check for bugs or dirt and gently shake them off
- Pat flowers dry with a cloth or paper towel if damp
Flower drying methods vary in time and care. Air drying is the easiest. Tie 3–5 flowers together, hang them upside down in a dark, dry place, and wait 1 to 3 weeks. Keep them spaced out and away from sunlight.
Pressing works best for thin flowers. Place them between plain paper inside a heavy book and leave for 1 to 2 weeks. This one’s my personal favourite.
Microwave or oven drying is quicker. For the microwave, sandwich flowers between paper towels and heat in 30-second bursts, letting them cool in between. In the oven, place flowers on a lined tray at 100°F–150°F (38°C–65°C), leave the door slightly open, and check every 15–30 minutes.
Silica gel is best for full or soft flowers. Bury the flowers in silica gel inside a container, seal it, and wait 3 to 7 days. Each method suits different flower types and tools.
4. Check and Store the Flowers

Once your flowers feel dry and crisp, they’re ready. Test a pedal by gently touching it. It should feel dry but not crumbly. If it still feels soft or cool, give it more time.
Now, it’s essential to store them correctly. Keep dried flowers away from sunlight, heat, and moisture. You can use a cardboard box with a lid, a clean glass jar, an envelope, or a paper bag.
Place them gently inside. If you’re saving many flowers, add thin paper between layers to prevent them from pressing against each other.
Storing your flowers well keeps them safe for months—or even years. You’ll be able to use them for crafts, décor, or memories whenever you like.
How to Use Dried Flowers

Drying flowers is just the start. Once they’re dry, there are many things you can do with them. You can turn them into art, create gifts, or keep them as a cherished memory. Whether you’re saving a rose from a special day or drying wildflowers for fun, dried blooms are useful in many ways. Here are some of the ways I’ve used this in the past:
- Cards: Glue a pressed flower onto folded cardstock. Write a short note. You now have a thoughtful birthday or thank-you card.
- Bookmarks: Press small flowers between two clear plastic sheets or pieces of tape. Trim the edges and punch a hole for a ribbon.
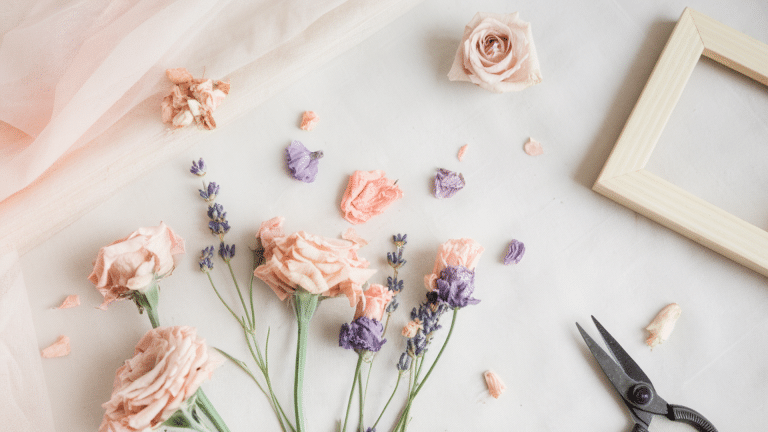
- Wall frames: Arrange a few dried flowers in a pattern on a piece of paper. Please place it in a picture frame. Hang it in your room for a natural touch of décor.
- Candles: Stick tiny dried petals onto the outside of a candle using clear wax. You can also press them into the surface gently while the wax is still soft.
- Soap bars: Mix flower petals into melted soap before it hardens. Use molds to shape them into gift-sized bars.
- Gift tags: Glue a small flower onto a gift label. It adds a sweet touch to any present.
- Journals or scrapbooks: Pressed flowers can be added to journal pages or used to mark special dates or memories.
Storing Dried Flowers the Right Way
Dried flowers are fragile. They can break or fade if not stored well. To keep them in good shape, you need to protect them from light, heat, and moisture.
If you’re saving flowers for long-term storage, check them every few months. Make sure they haven’t collected dust or started to bend. Keeping them clean and dry is key.
Best ways to store them:
- Use a box with a lid, like a shoe box or craft box
- Store in glass jars if you want to see them, but still keep them safe
- Wrap them in soft tissue or paper towels to prevent rubbing or breaking
- Use small labels to record dates, names, or events connected to the flowers
- Keep them away from windows, heaters, and bathrooms
Mistakes to Avoid
Even if you dry flowers the right way, a few small mistakes can cause them to spoil. Here’s what to watch out for:
- Too much handling: Each time you touch them, you risk breaking a petal or stem. Try to move them as little as possible.
- Sunlight: Bright light fades color fast. Even a few days in direct sunlight can cause flowers to appear dull.
- Plastic bags: Avoid storing dried flowers in sealed plastic bags. Moisture can become trapped, allowing mold to grow.
- Overcrowding: If you put too many in one container, they can press against each other and lose their shape.
- No label or tracking: If you’re saving flowers from events, writing the date or name on the box helps you remember their meaning later.
Conclusion
Drying flowers is a simple way to keep them longer. You learned how to pick the right flowers, choose a drying method, and follow each step carefully. You also saw how to store and utilize them in various ways, such as on cards, as wall art, or as small gifts.
Now it’s your turn. Pick a flower you love and try one of the drying methods. Begin with air drying or pressing if you’re new to the process. With a little time and care, you’ll have something you can enjoy for months or even years to come.
If you’ve never tried it before, start small. Press one flower in a book. Hang one bloom to dry. See what happens. You don’t need to get it perfect. The more you try, the more you’ll learn what works for you.
Drying flowers is a peaceful task. It asks you to be patient. It helps you notice details. It provides something soft and lasting to keep, gift, or enjoy in your space. Take your time, choose a flower, and begin.


