Thanksgiving brings a special kind of warmth that fills homes with laughter, delicious food, and gratitude.
It’s a day when family and friends slow down to share memories, love, and joy. While it might not be as grand as Christmas or as spooky as Halloween, it still holds a deep meaning in every heart.
Celebrated on every 4th Thursday of November, Thanksgiving reminds us to appreciate togetherness and simple moments.
With these Thanksgiving art projects, you can add creativity to your traditions and make them even more memorable.
Whether it’s painting a turkey, designing candle holders, or crafting leaf garlands, there’s something special for everyone to enjoy.
I’ll be sharing unique ideas that bring family closer through art, helping you celebrate Thanksgiving with color, care, and cheerful gratitude.
What Makes Thanksgiving Art Projects Special?
Thanksgiving art projects aren’t just about colors or glue sticks.
They’re about feelings, memories, and those small moments that remind you what really matters.
When families sit together with brushes, paper, or even fallen leaves, something magical happens. It’s not just art anymore; it’s laughter, stories, and connection rolled into one creative mess.
For kids and teens, these projects quietly build skills they’ll use later, such as focus, patience, and problem-solving.
It’s wild how something as simple as painting a turkey handprint or designing a gratitude card can actually shape creativity and confidence.
And for adults, it’s that much-needed breather from work, chores, and screens.
Thanksgiving crafts give everyone a reason to slow down and reconnect, regardless of age or background. That’s what makes them truly special.
Essential Tools and Materials for Thanksgiving Art Projects
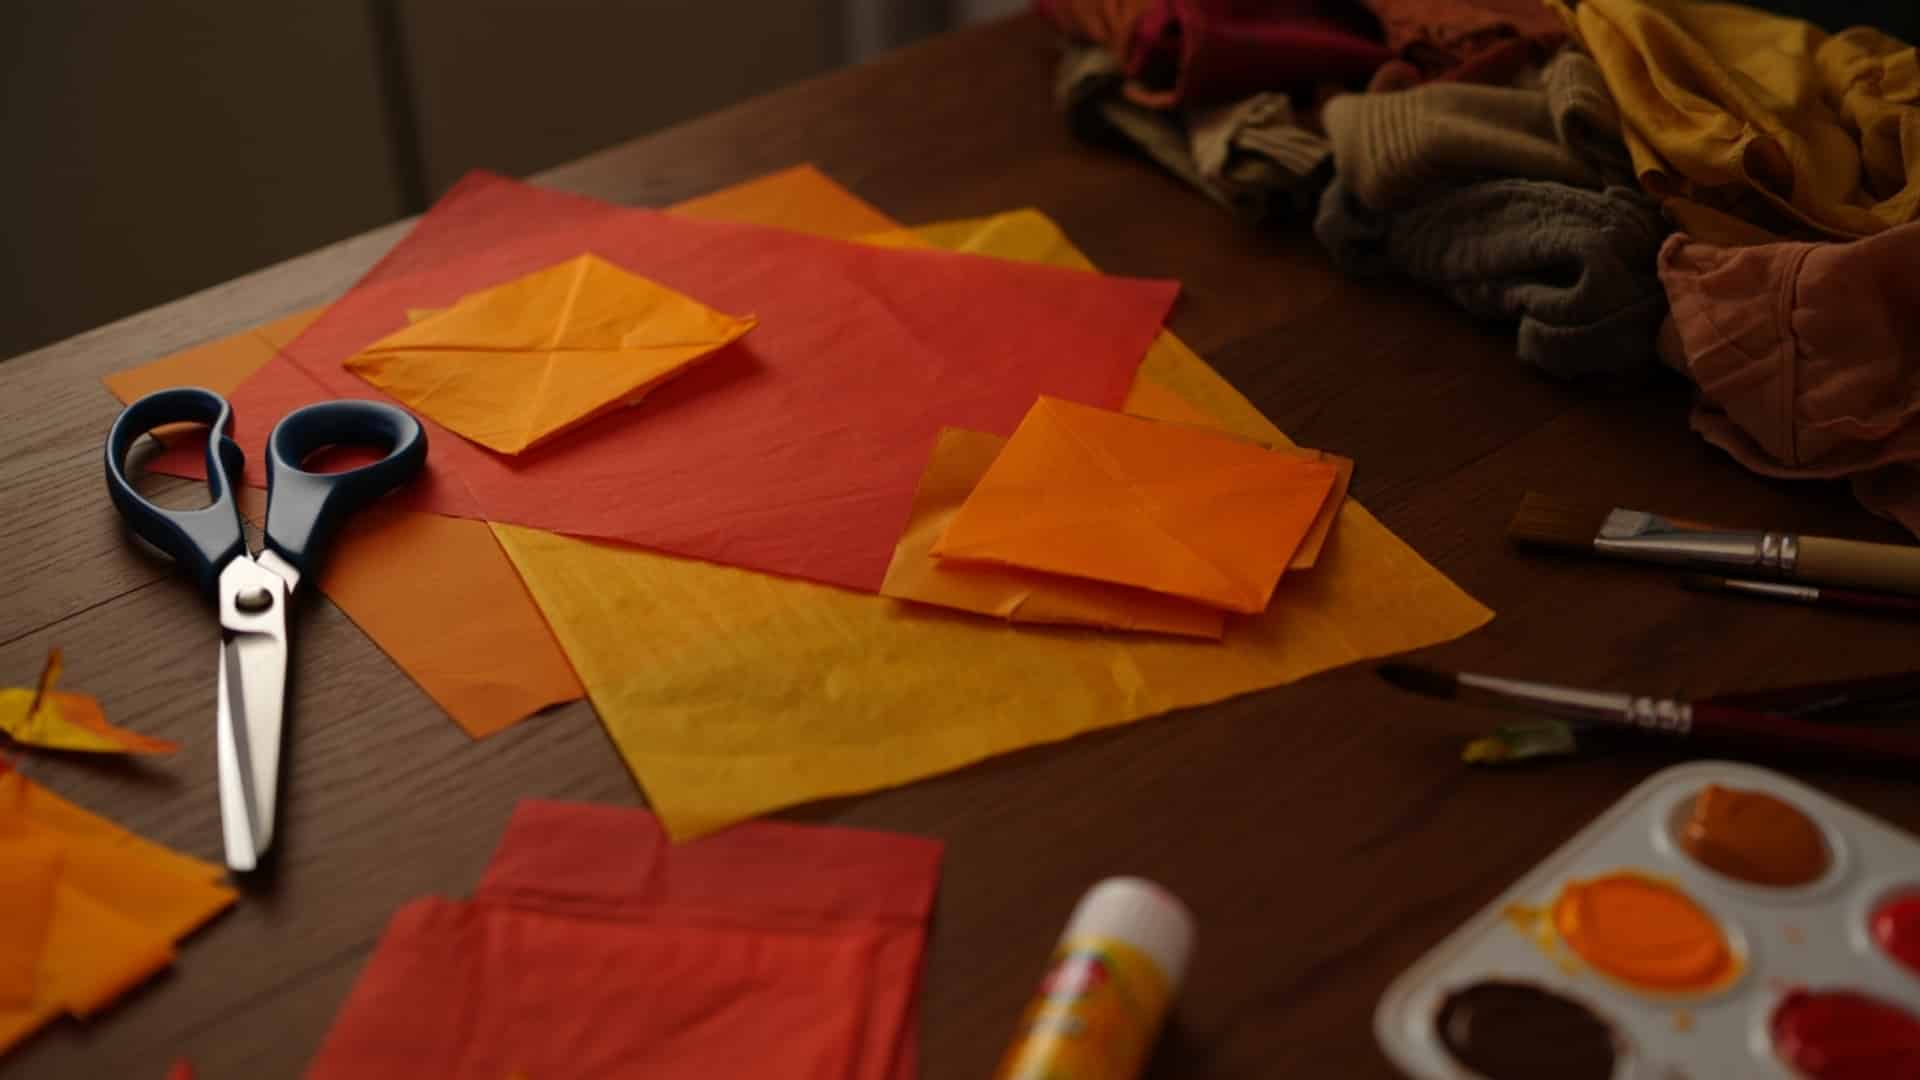
Before you start all the fun in Thanksgiving crafts, it’s good to have your basic tools ready. These simple items work for almost every project and keep things easy to handle.
| Tools | Materials |
|---|---|
| Scissors | Colored Paper |
| Paint Brushes | Acrylic or Washable Paints |
| Glue Stick or Glue | Craft Sticks |
| Tape | Feathers and Leaves |
| Markers or Crayons | Ribbons and Twine |
| Hole Punch | Googly Eyes |
| Pencil and Eraser | Construction Paper |
| Ruler | Recycled Cardboard |
| Palette or Plate | Glitter and Beads |
| Apron or Old Shirt | Tissue Paper |
You don’t need anything fancy, just a few basics, your creativity, and a fun Thanksgiving spirit.
Creative Thanksgiving Art Projects for Kids
Thanksgiving crafts are where imagination and family stories meet, turning simple supplies into colorful memories everyone can feel proud of.
1. Handprint Turkey Painting
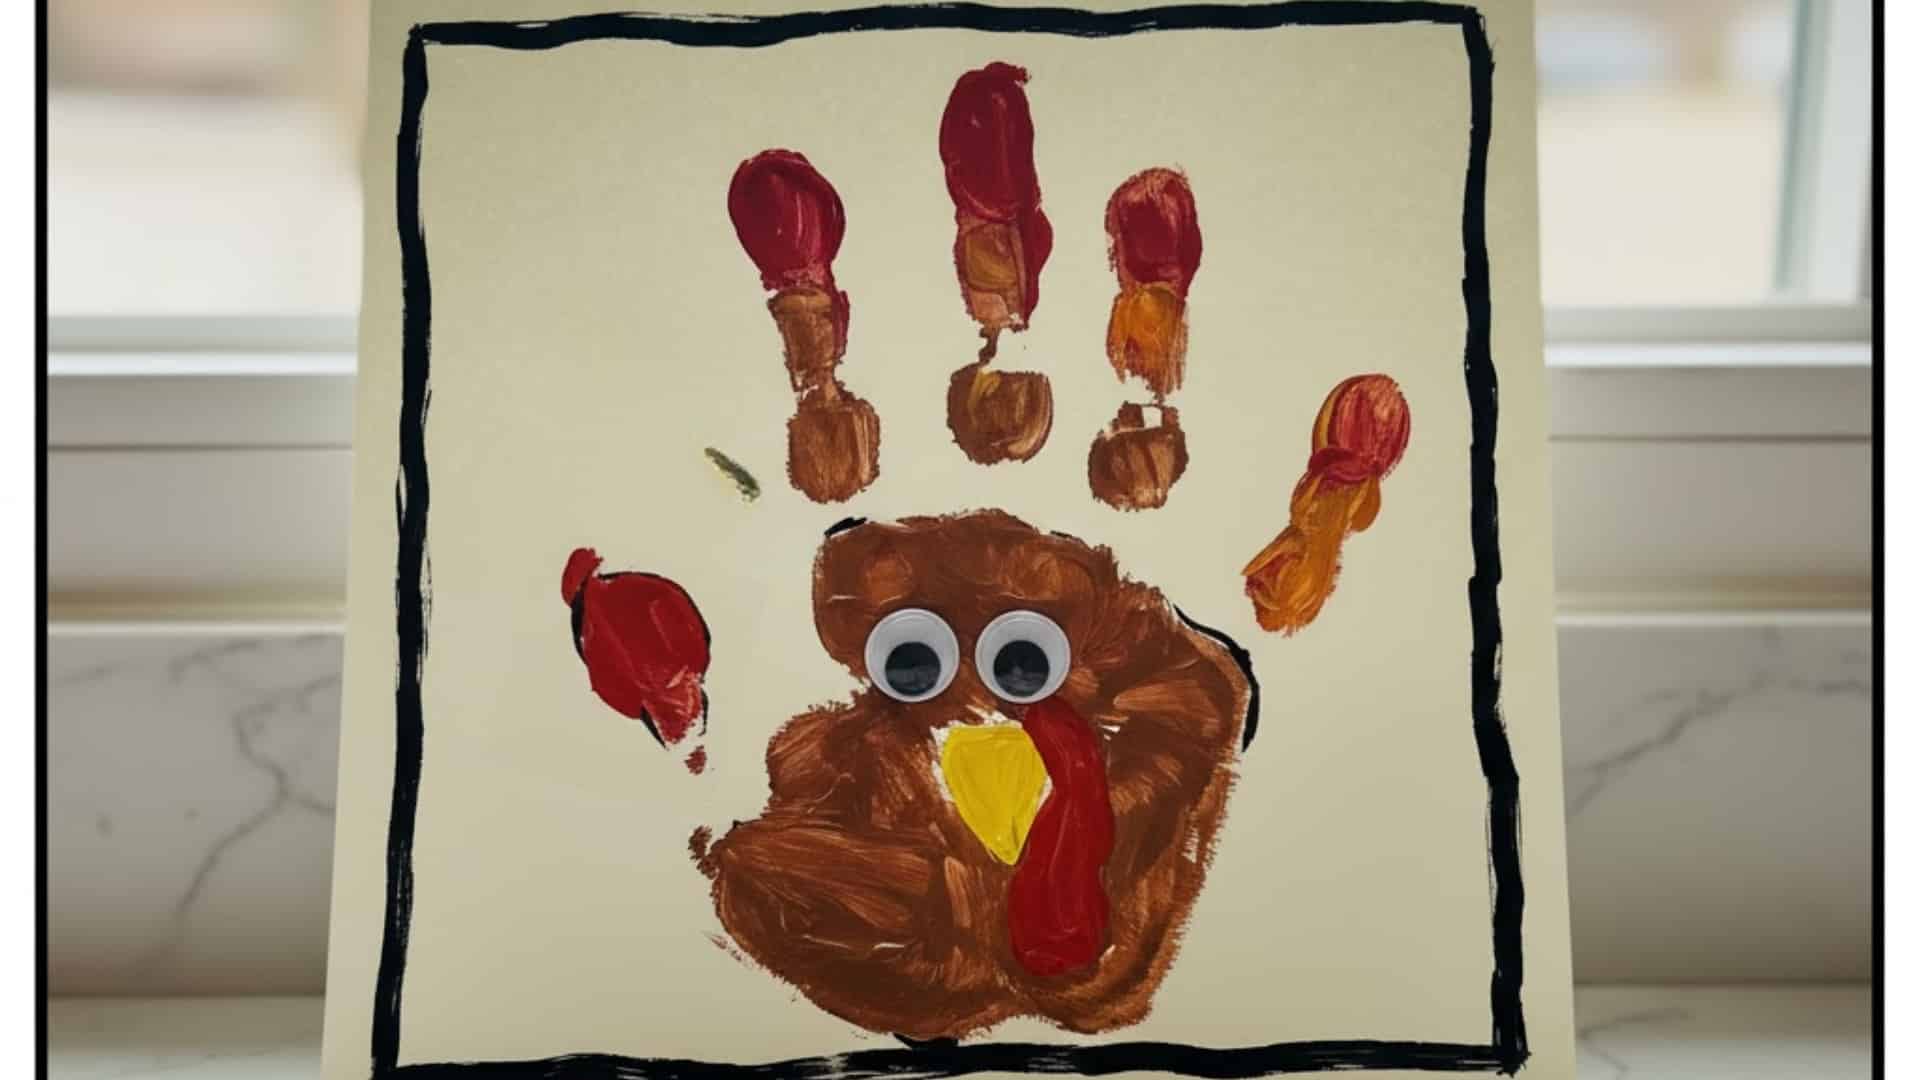
This keepsake project turns tiny handprints into bright turkeys that families love revisiting every year.
Kids practice color choices, coordination, and patient waiting as paint dries, while parents often join in to make matching prints that show growth over time.
It is perfect for classrooms or living rooms, and it displays beautifully on fridges, hallway frames, or scrapbooks that return each November.
To begin, gather brown paint for the body, bright paints for feathers, cardstock, brushes, and small googly eyes for detail.
Steps to Make:
- Paint palm and fingers in warm fall shades, leaving the thumb brown or unpainted for the head.
- Press the hand firmly onto cardstock, lift slowly, and let the print dry completely before decorating.
- Add eyes, beak, wattle, and feather lines with markers or glued details for texture and pop.
2. Paper Plate Turkey Mask
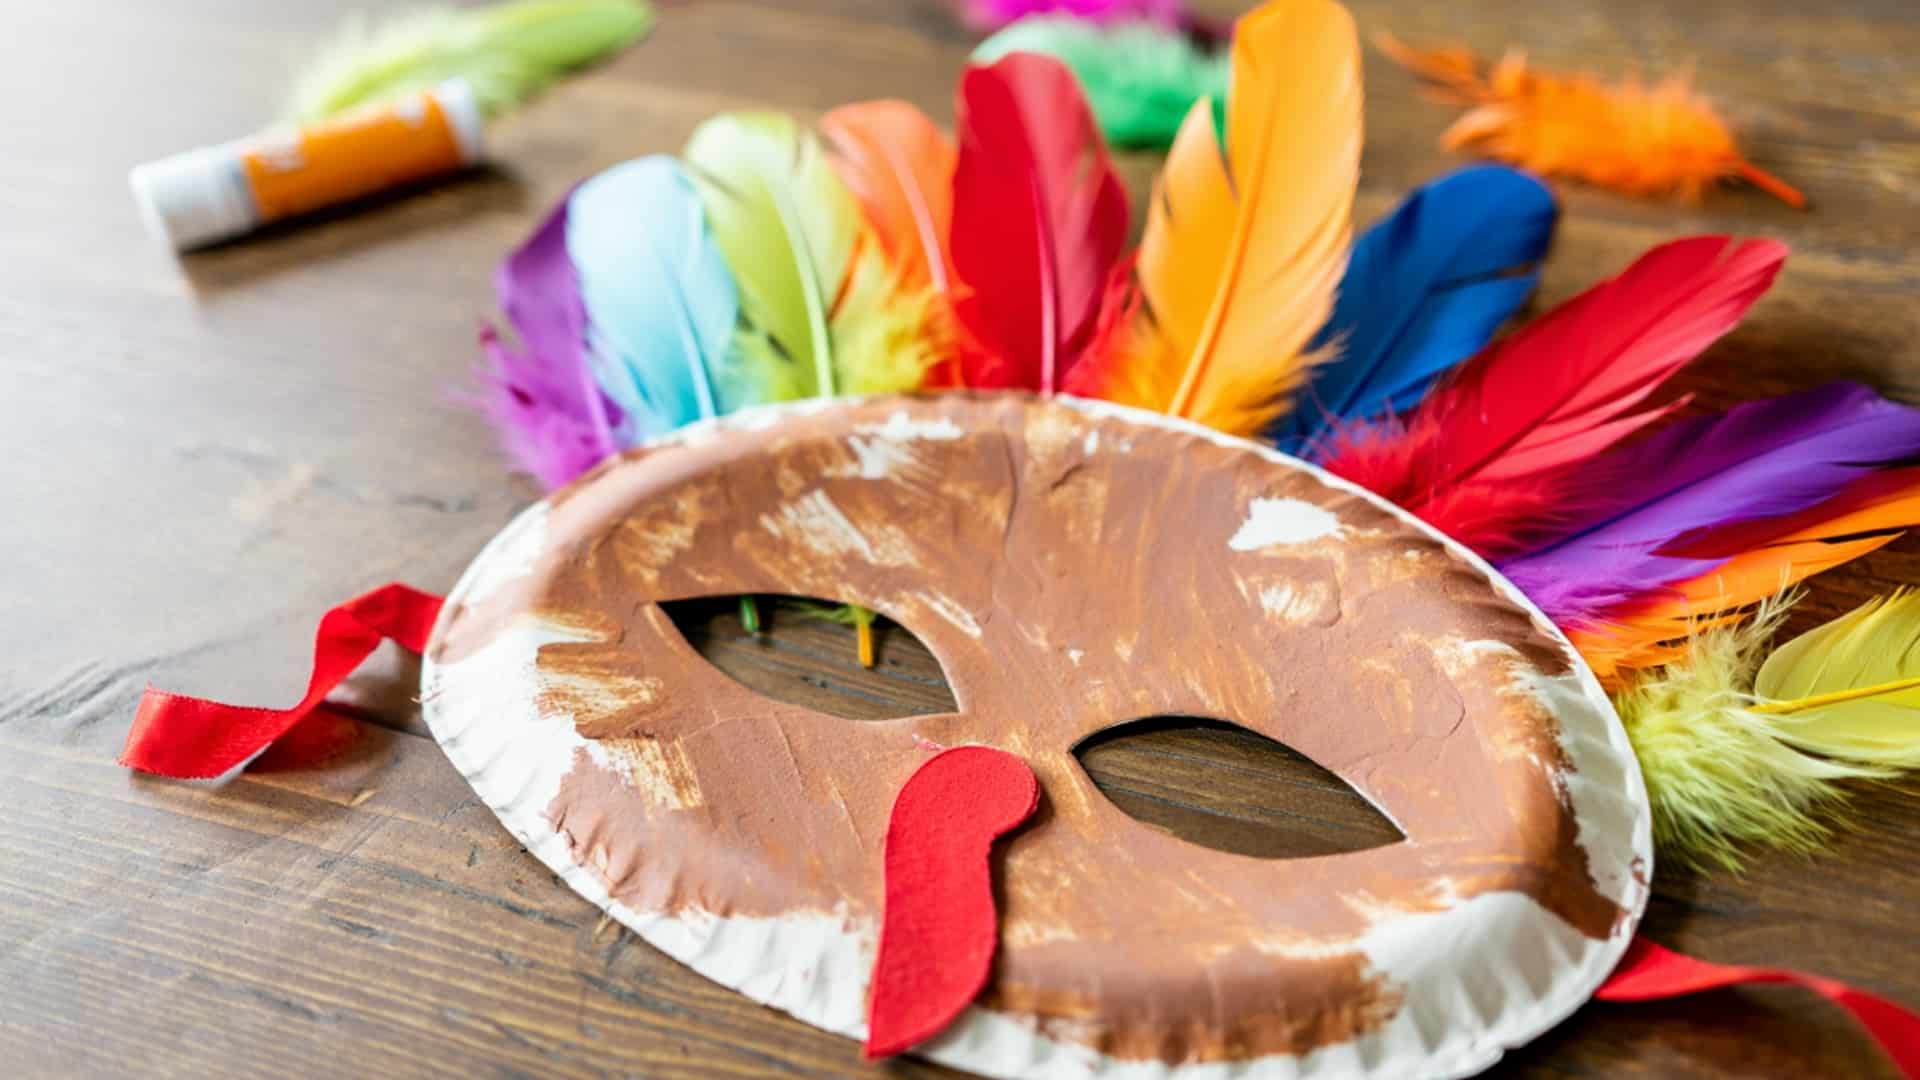
This playful mask turns a plain plate into a cheerful turkey kids can wear for pretend play and holiday photos.
Children explore design, symmetry, and bold color choices while practicing careful cutting and safe gluing. It encourages confident role-play, noisy gobbles, and friendly performances for family or classmates.
Masks can be saved for party games or hung as festive décor when the show ends.
To get started, grab a paper plate, feathers, markers, craft glue, a hole punch, and soft elastic or ribbon ties.
Steps to Make:
- Cut two eye openings in the center of the plate, then color the face area with warm browns and oranges.
- Glue feathers around the outer rim in a layered fan, varying sizes and colors for movement and depth.
- Punch holes on each side and tie elastic or ribbon so the mask sits comfortably and securely.
3. Gratitude Tree with Leaf Notes
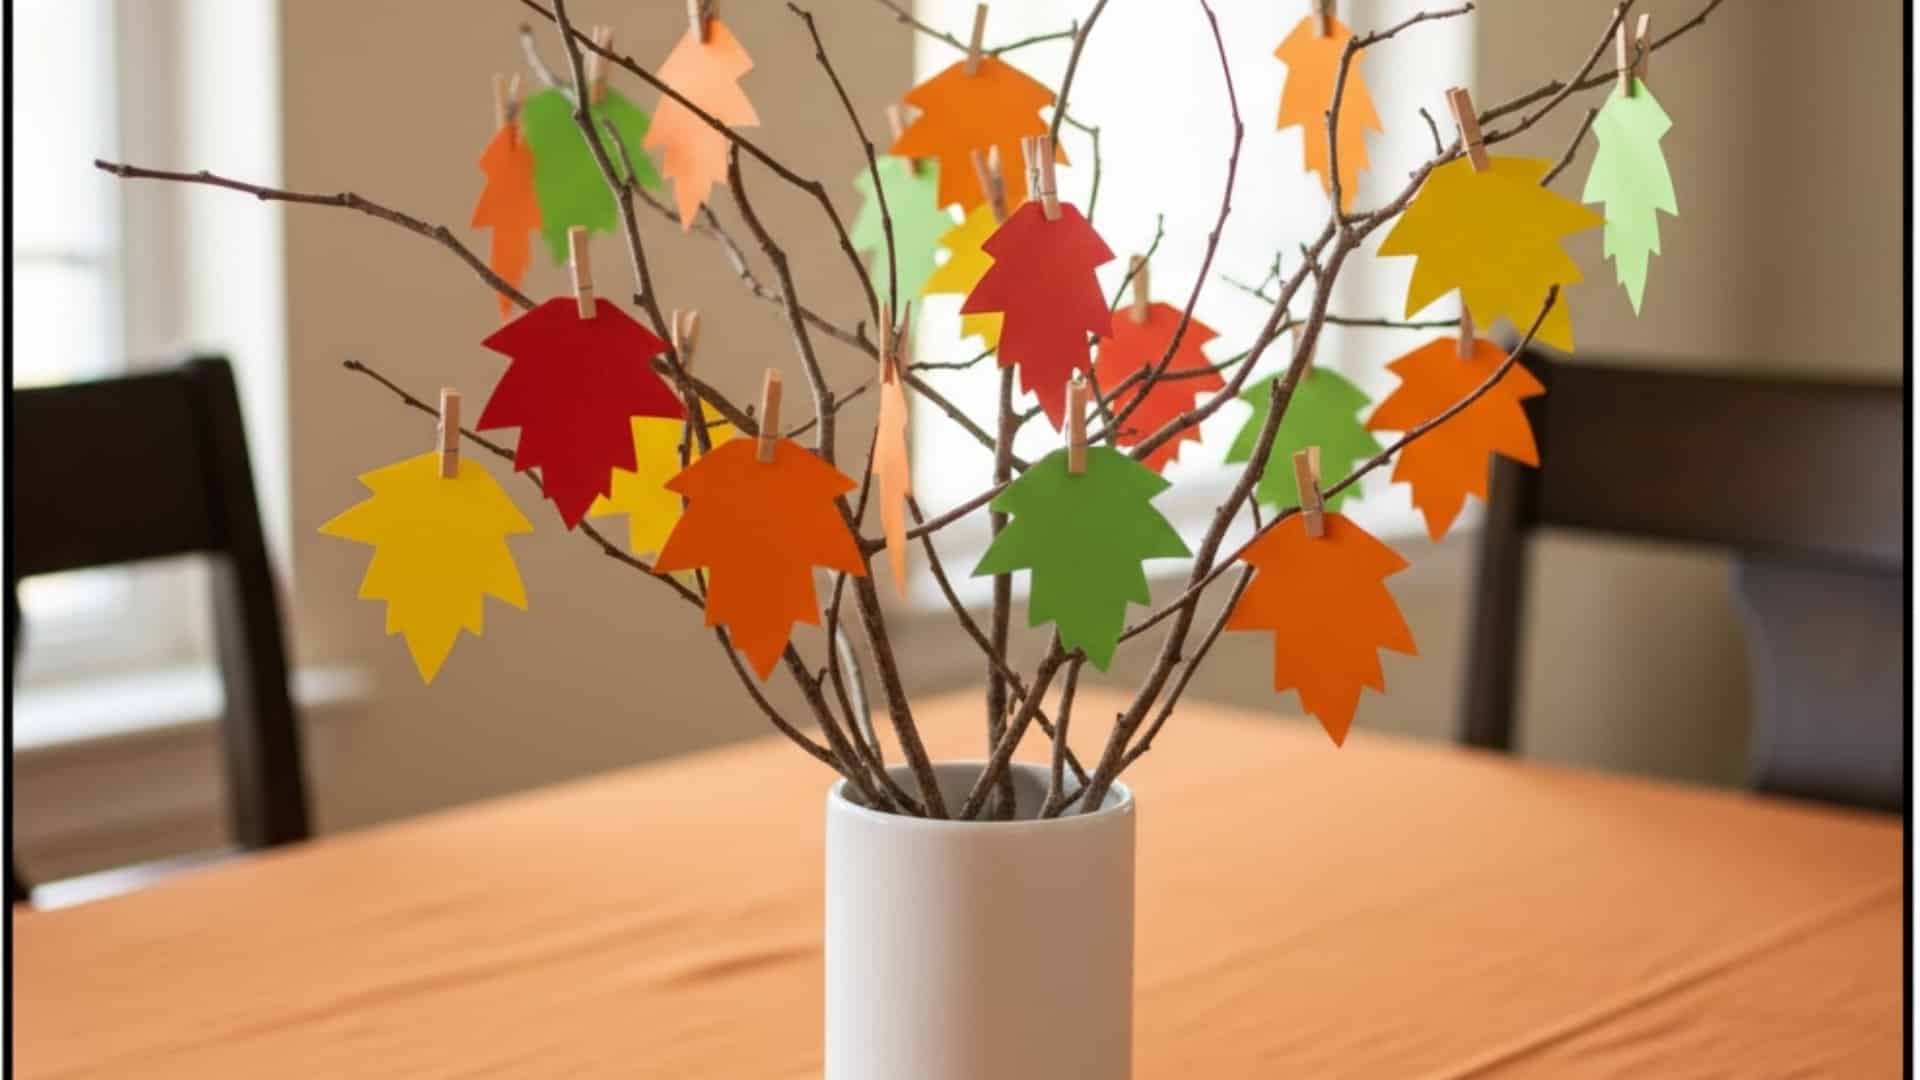
This meaningful craft turns thankfulness into something kids can see and read together.
Each child writes small notes on colorful leaves and adds them to a paper trunk or branch arrangement, practicing reflection, handwriting, and empathy.
The tree grows throughout the week and becomes a powerful table centerpiece on Thanksgiving Day. Families can invite guests to add leaves too, turning it into a shared ritual.
To begin, gather colored paper, scissors, markers, tape or glue, twigs, and a sturdy vase or base.
Steps to Make:
- Cut many leaf shapes, then write one gratitude message per leaf using neat, simple phrases or drawings.
- Attach leaves to a paper trunk or real twig branches, spacing colors evenly for balance and visibility.
- Arrange the display in a vase or on a poster board and refresh with new leaves daily.
4. Corn Kernel Mosaic Art
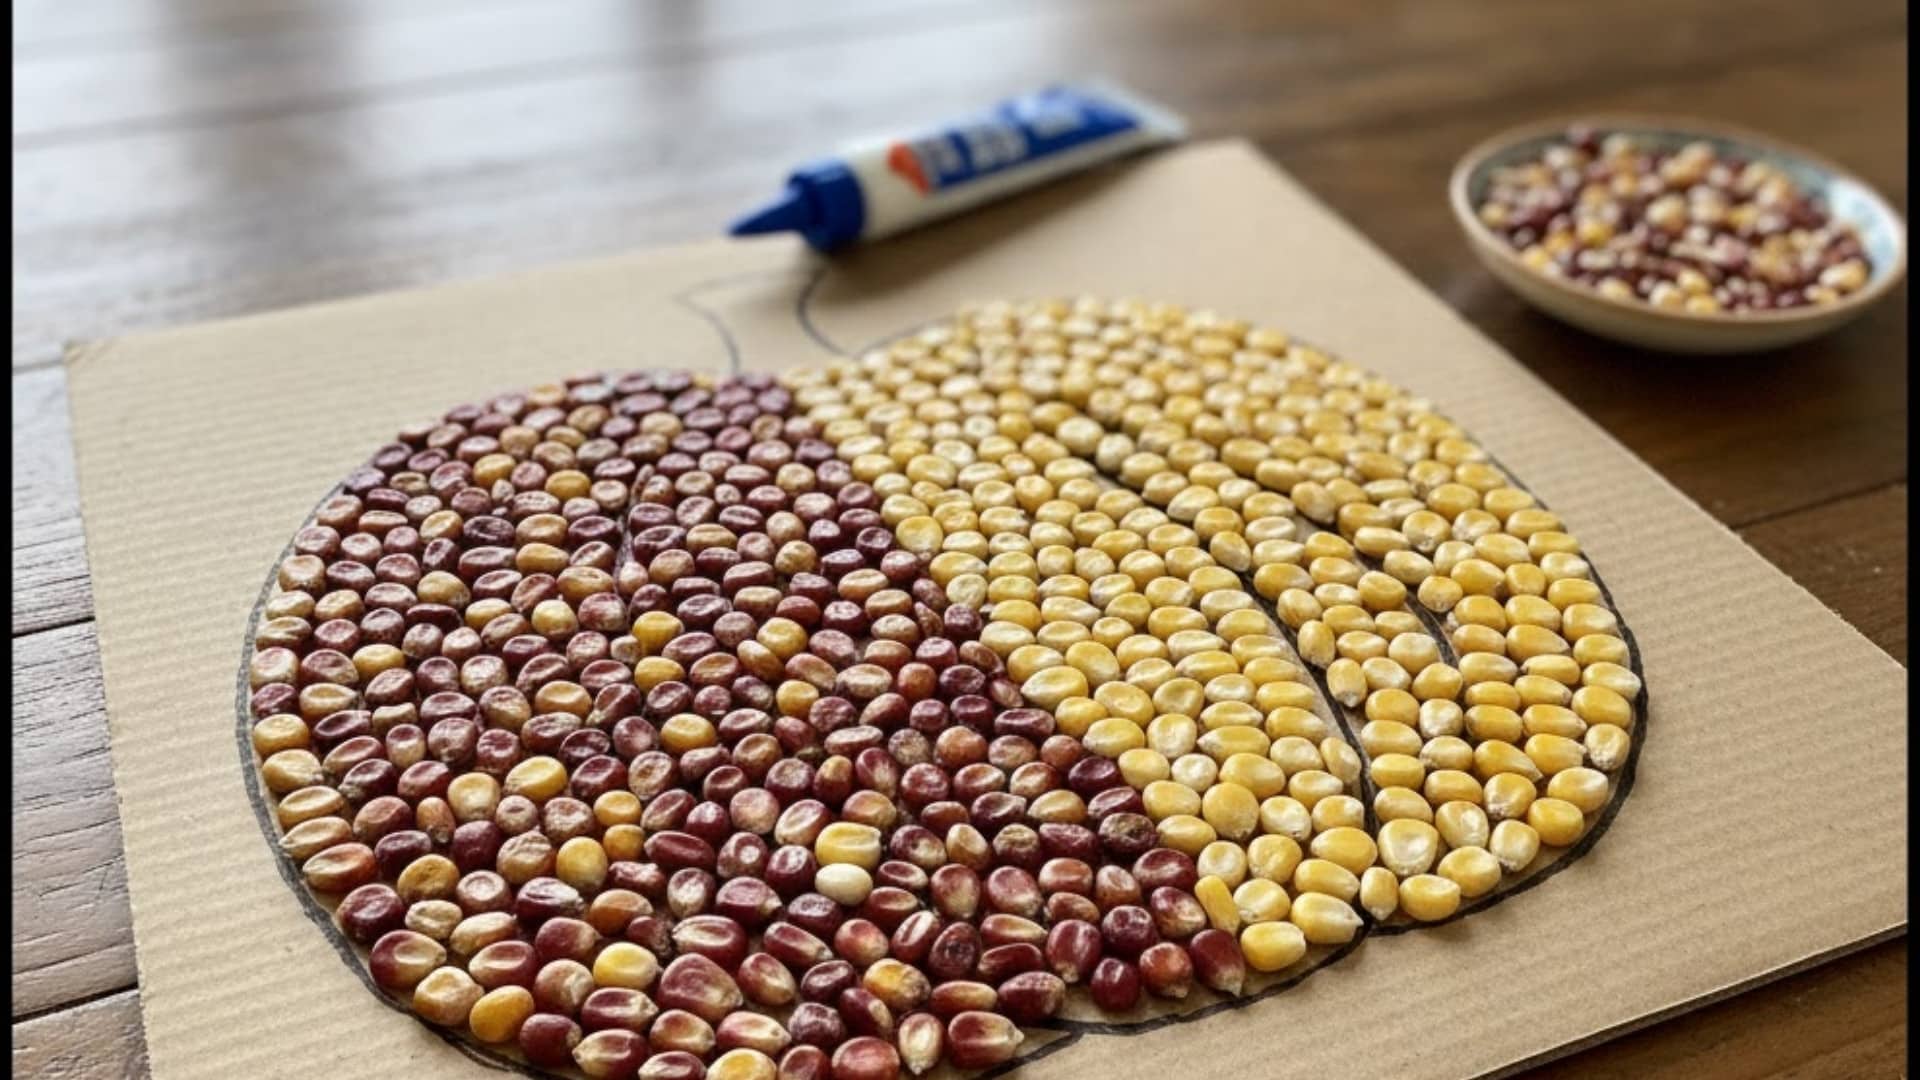
This tactile mosaic celebrates the harvest through tiny kernels arranged into bright shapes and patterns.
Kids plan simple outlines, then practice steady placement and patience as they strengthen fine motor control. It ties beautifully to Thanksgiving themes of abundance and farming traditions.
Finished pieces stand upright on mantels or sit flat beneath centerpieces for cozy texture.
To start, collect dry corn kernels in various colors, thick cardboard, school glue, pencils for sketching, and small dishes for sorting.
Steps to Make:
- Sketch a pumpkin, turkey, leaf, or cornucopia, keeping shapes large enough for kernels to fit comfortably.
- Spread glue in small sections and press kernels closely together, building color blocks and outlines.
- Allow full drying, then trim edges or mount on a contrasting backing for a framed look.
5. Popsicle Stick Scarecrow
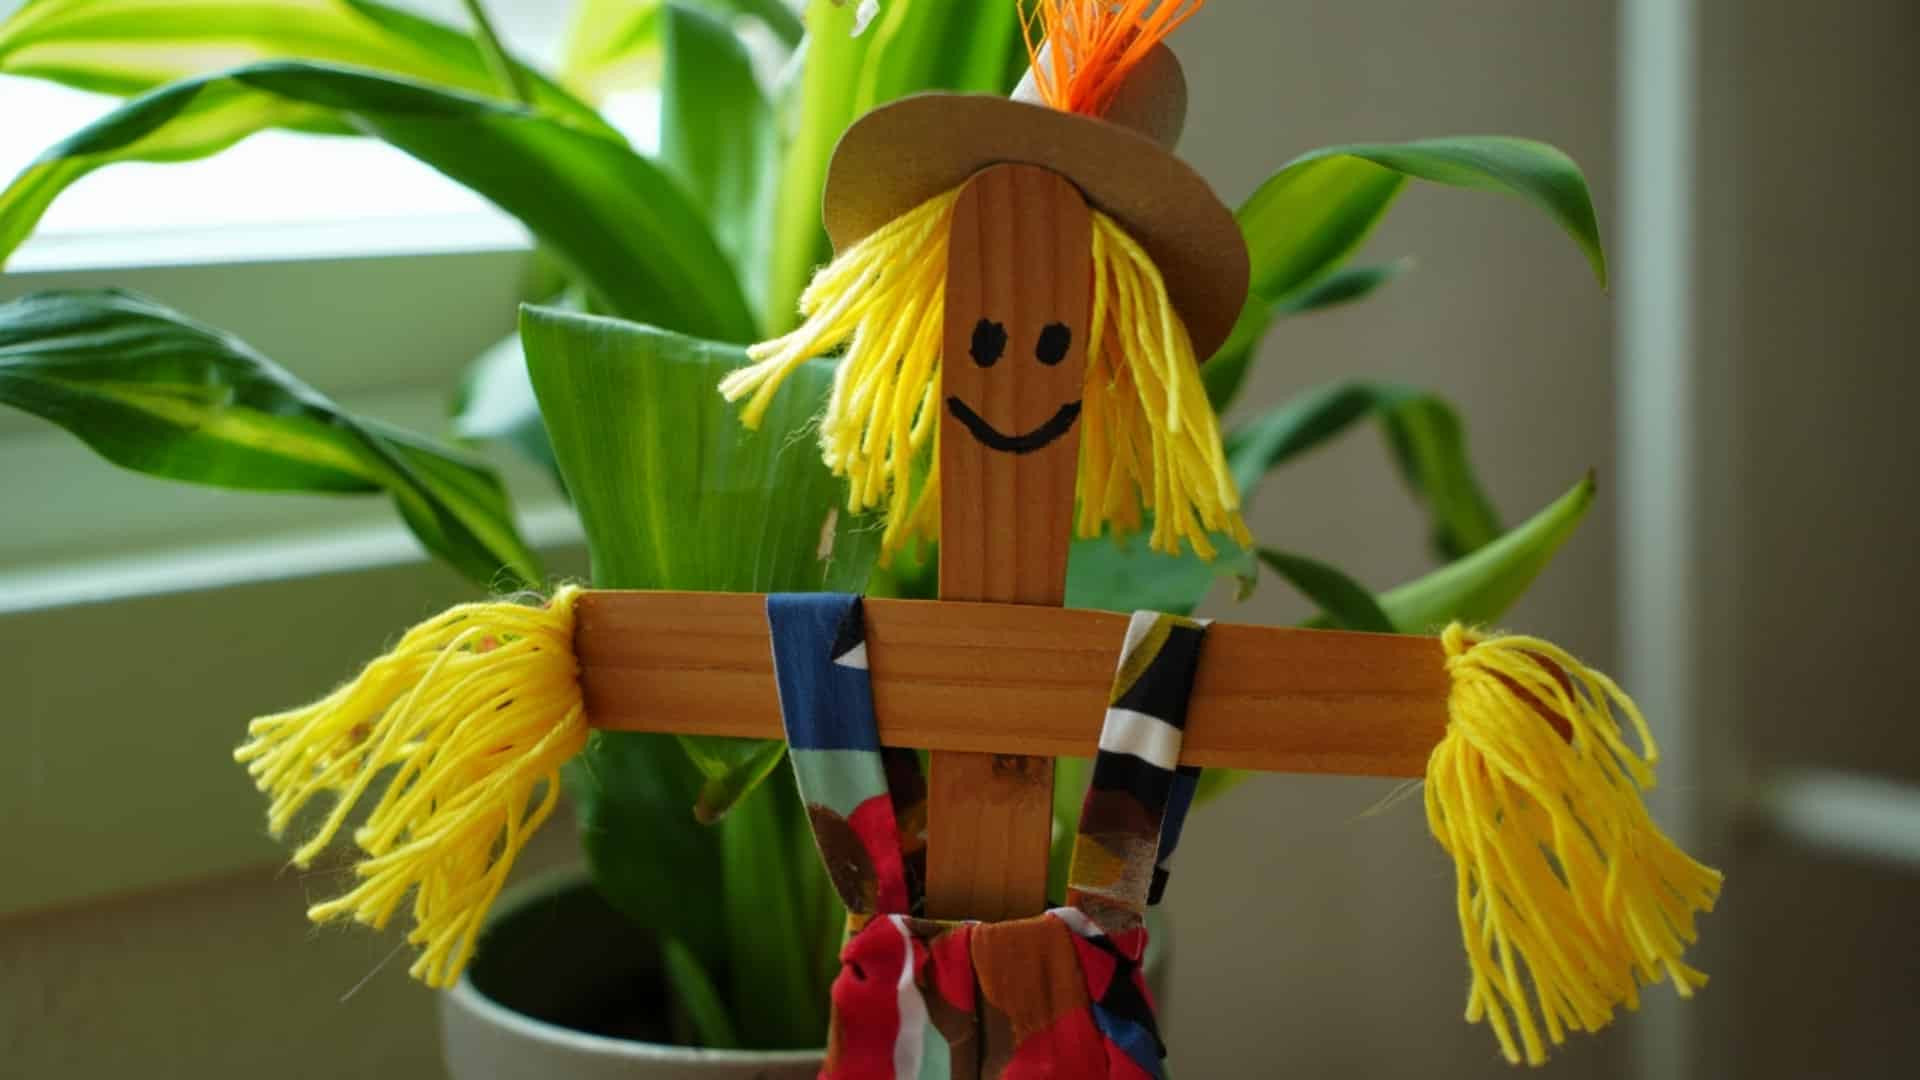
This friendly scarecrow introduces kids to simple construction and character design using sticks, scraps, and markers.
Children explore proportions, clothing ideas, and facial expressions while building patience as glue sets. The finished figure adds rustic beauty to shelves, plant pots, or classroom displays.
Families can create a whole set and name each character together.
To begin, gather craft sticks, school glue, markers, scraps of fabric or paper, small straw pieces or yarn, and cardstock for support.
Steps to Make:
- Glue sticks side by side to form a rectangular body, then add crossed sticks for a hat brim and support.
- Draw a smiling face, then glue fabric or paper clothes, adding buttons or tiny patches for detail.
- Tuck straw or yarn into the sleeves and hat to suggest hay stuffing, pressing gently until secure.
6. Pilgrim Hat Craft
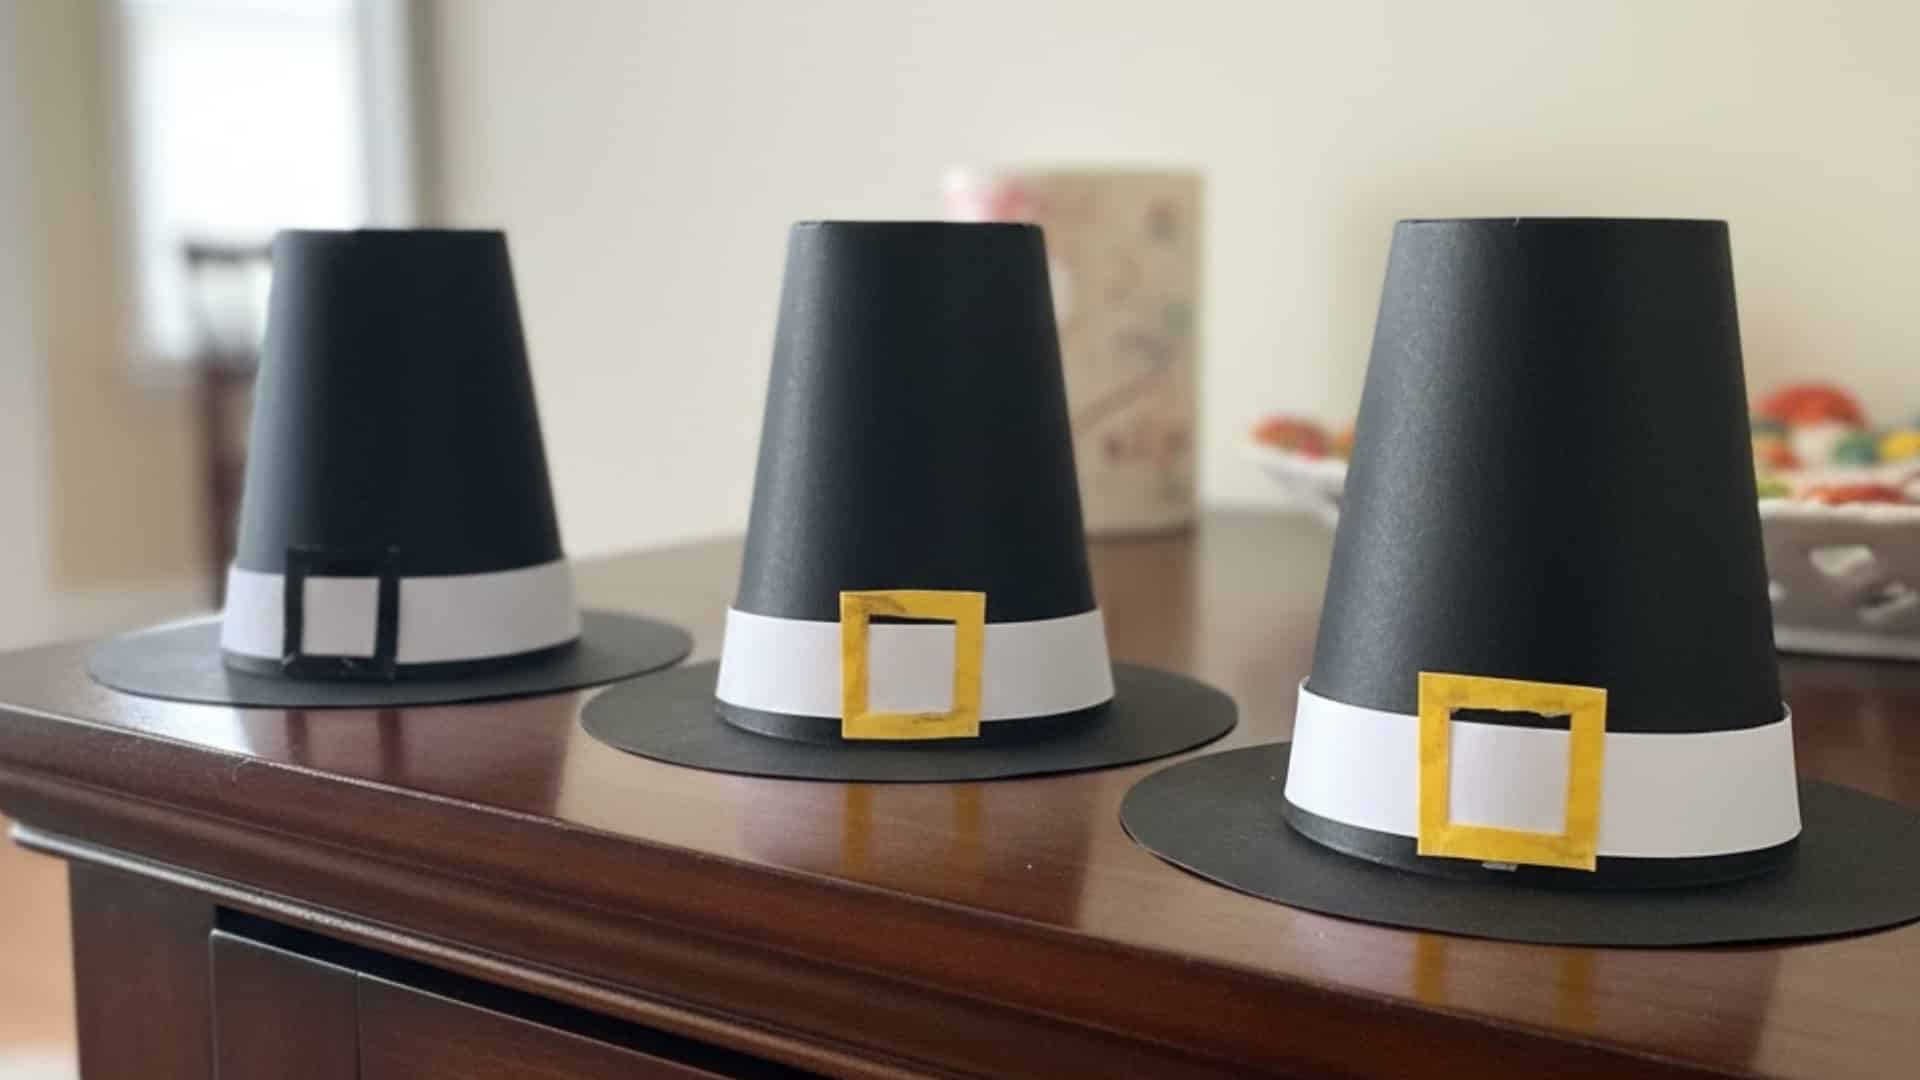
This hat project blends simple history talk with creative decoration, helping kids connect the holiday story to respectful artmaking.
They explore shapes, contrast, and clean lines while practicing careful cutting.
Hats display well on walls, door wreaths, or table place settings, with names added to the bands. Families can create a row of hats to mark each guest’s seat.
To begin, gather black cardstock, yellow paper for buckles, glue, scissors, rulers, and metallic pens for crisp label lettering.
Steps to Make:
- Cut a neat hat crown and wide brim from black cardstock using a ruler to guide straight edges.
- Make a yellow buckle and band, glue them to the front, and add a name or short greeting.
- Outline edges with a metallic pen for shine, then mount on a thicker backing if needed.
7. Pumpkin Seed Art Collage
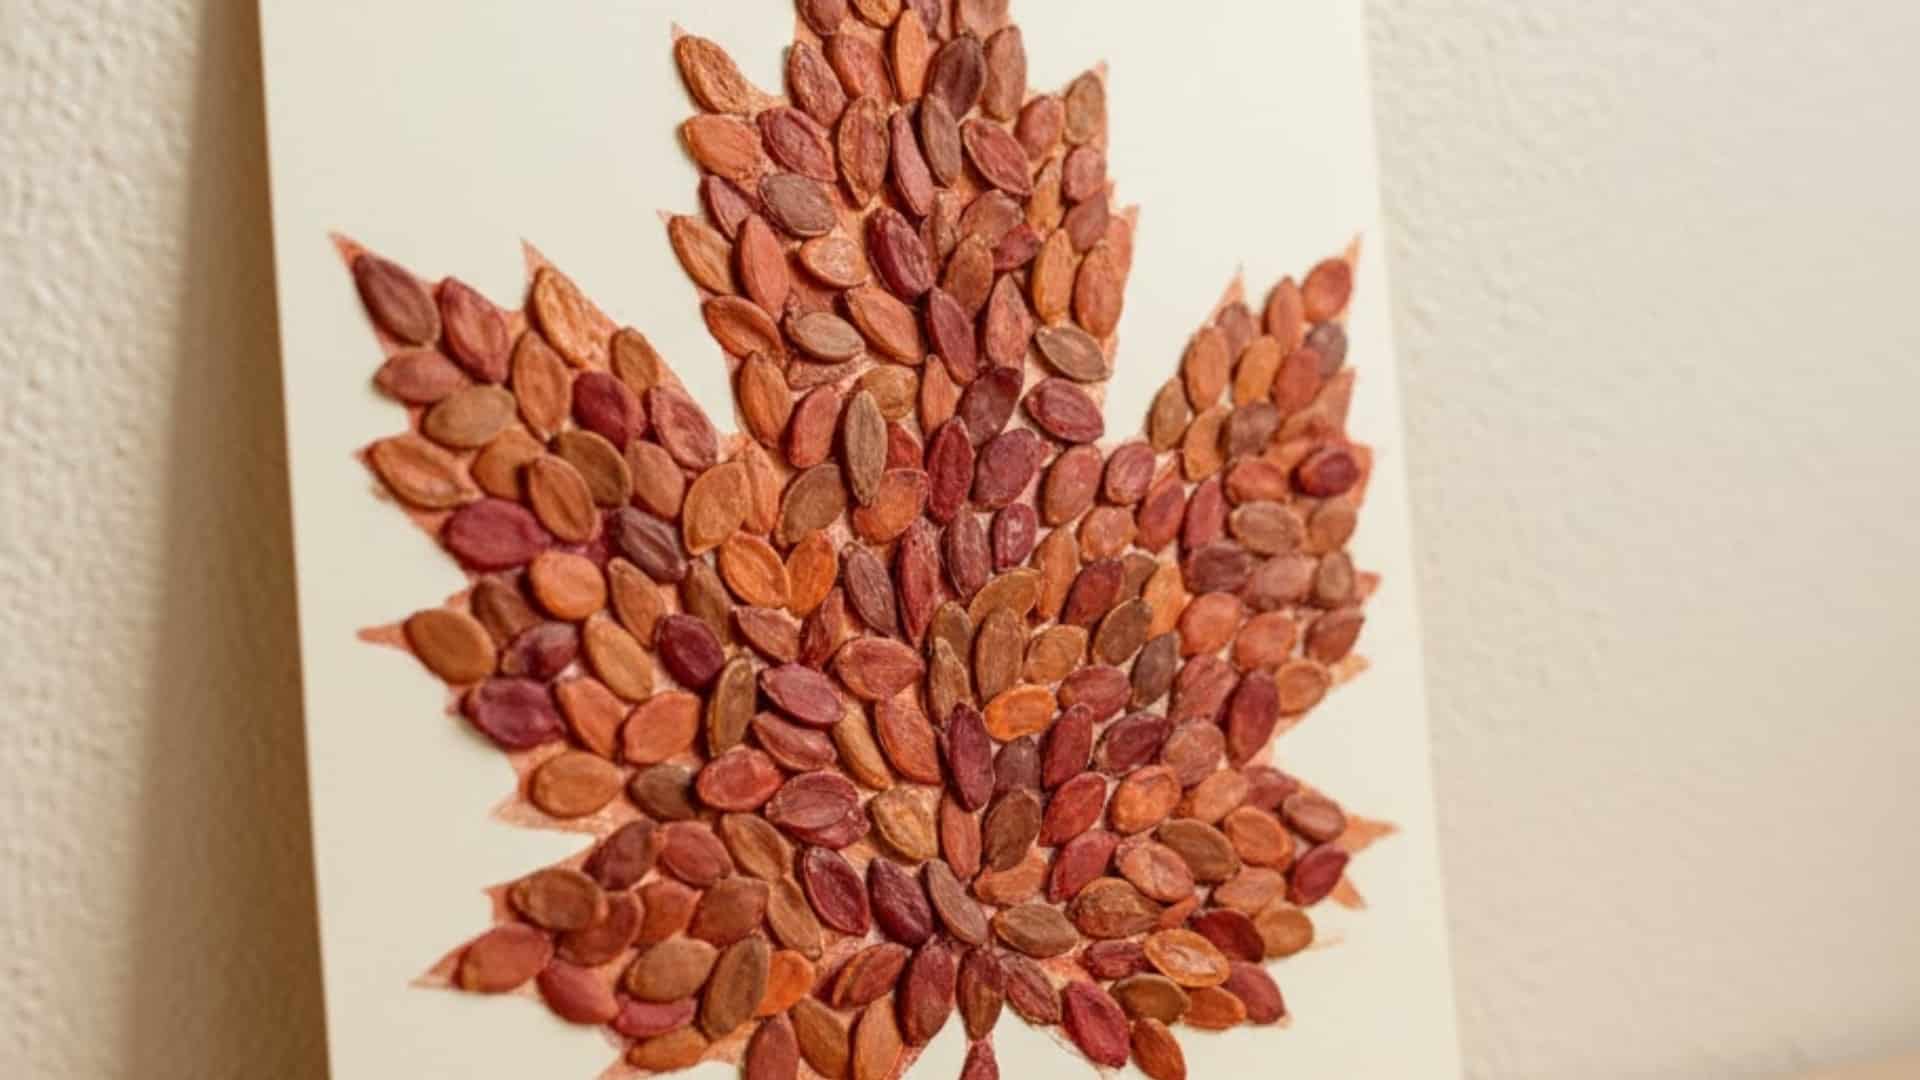
This eco-friendly collage turns cleaned seeds into shimmering textures and patterns.
Kids learn to plan color placement, wait for drying times, and appreciate how small pieces come together to form a bigger picture.
The finished art fits nicely in frames or on clipboards that rotate with the season. Families can use natural seed colors or paint them for bold palettes.
To start, rinse and dry seeds thoroughly, then collect glue, cardstock, small brushes, and optional acrylic paints for tinting.
Steps to Make:
- If coloring, paint seeds in warm tones and let them dry on parchment or foil.
- Sketch a simple design, brush glue in sections, and place seeds tightly for strong outlines.
- Press gently with clean fingers or a spoon, then allow to dry completely before hanging.
8. Paper Bag Turkey Puppet

This cheerful puppet turns storytelling into a craft activity kids can share with siblings or classmates.
They learn sequence, character expression, and voice as they perform, while practicing neat cutting and manageable gluing. Shows can happen after dinner, then puppets rest on shelves as décor.
Families often write short scripts or jokes to perform together.
To begin, grab brown lunch bags, colored paper scraps, markers, glue, and optional googly eyes and felt pieces.
Steps to Make:
- Cut feather shapes, beak, and wattle from colored paper, planning a bold arrangement for the bag flap.
- Glue features onto the flap for the face, and onto the back for the tail feathers, then add eyes and details.
- Practice simple lines and movements, keeping the puppet opening smooth for clear talking.
9. Turkey Feather Headband
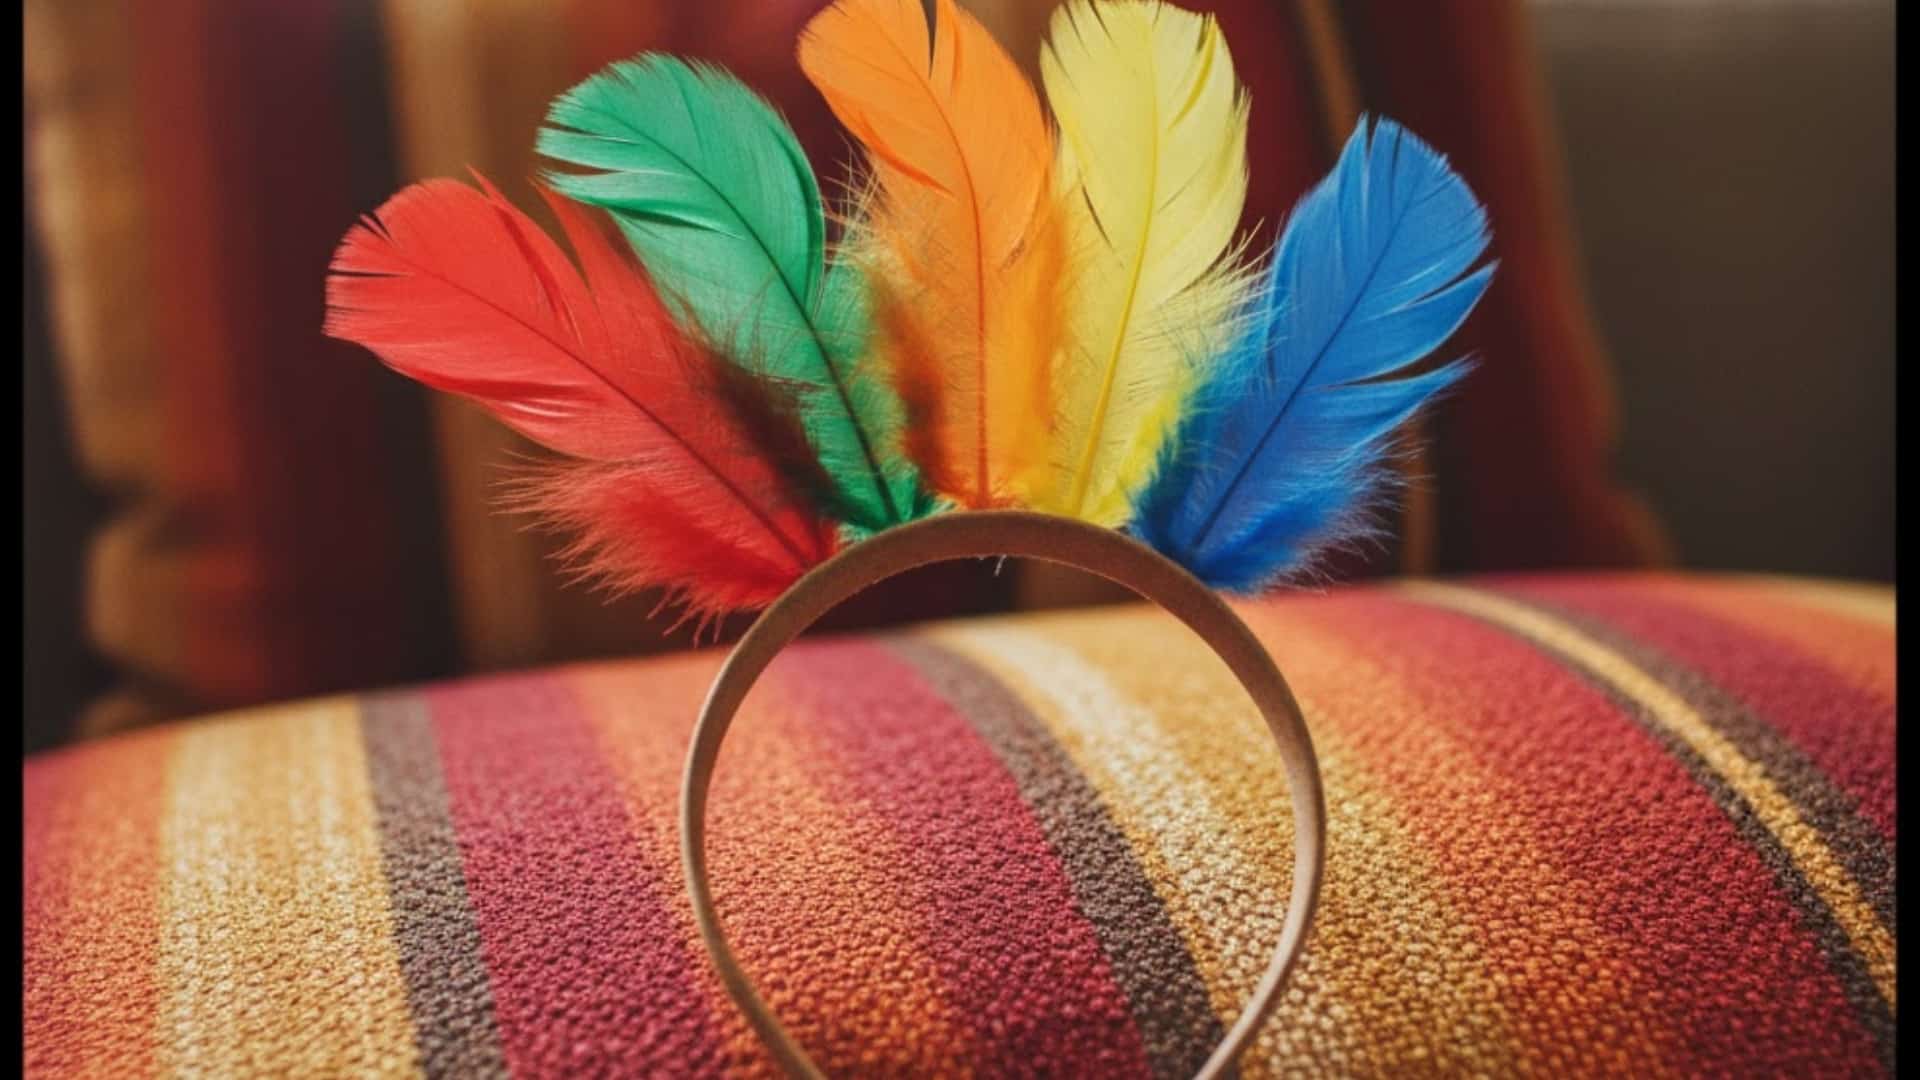
This festive headband lets kids join the holiday spirit with wearable art that invites movement and play.
They measure, decorate, and arrange feathers while considering color balance and comfort. Headbands become party favors or parade pieces for classroom celebrations.
Photos look joyful when the whole group wears matching bands.
To begin, gather cardstock strips, glue, feathers in varied sizes, markers, and safe tape for quick fittings during try-ons.
Steps to Make:
- Measure a strip to fit the head comfortably, leaving space for overlap and secure closure.
- Glue feathers in a fan along the top, alternating lengths for lively motion and layered color.
- Add marker patterns or stickers on the band, then tape or glue the ends to finish.
10. Fingerprint Corn Cob Art
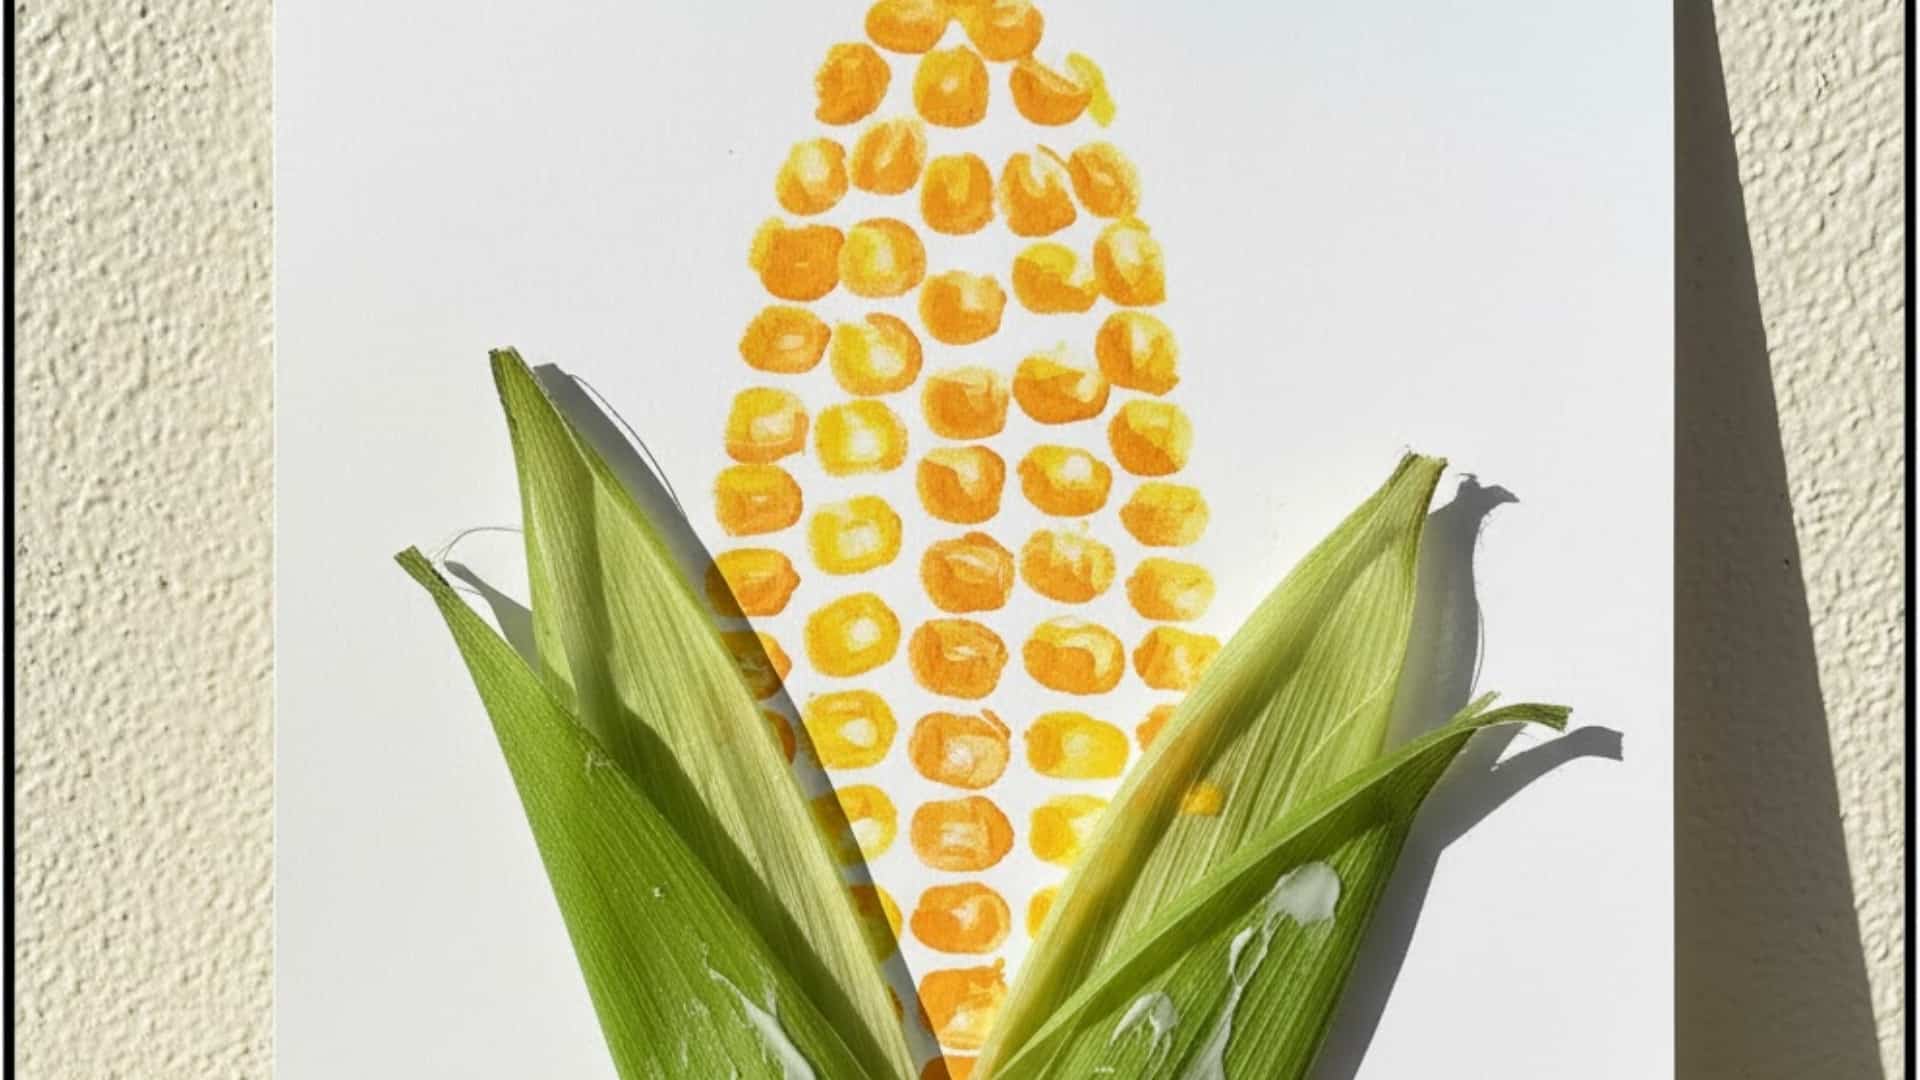
This painting project uses fingertip prints to build cheerful corn kernels in glowing rows.
Children practice spacing, color variation, and gentle pressure while learning about harvest crops. Finished pieces look playful on gallery walls or fridge rows.
Sets of three make a charming seasonal trio.
To get started, gather white cardstock, yellow and orange paints, green paper for leaves, pencils, and wipes for quick cleanup between colors.
Steps to Make:
- Lightly sketch a corn cob outline and wide leaves so kids understand the space for printing.
- Dip fingertips into paint and place prints in neat rows, alternating colors for depth.
- Cut and glue green leaves around the cob, then add thin marker lines for texture.
11. Leaf Rubbing Art
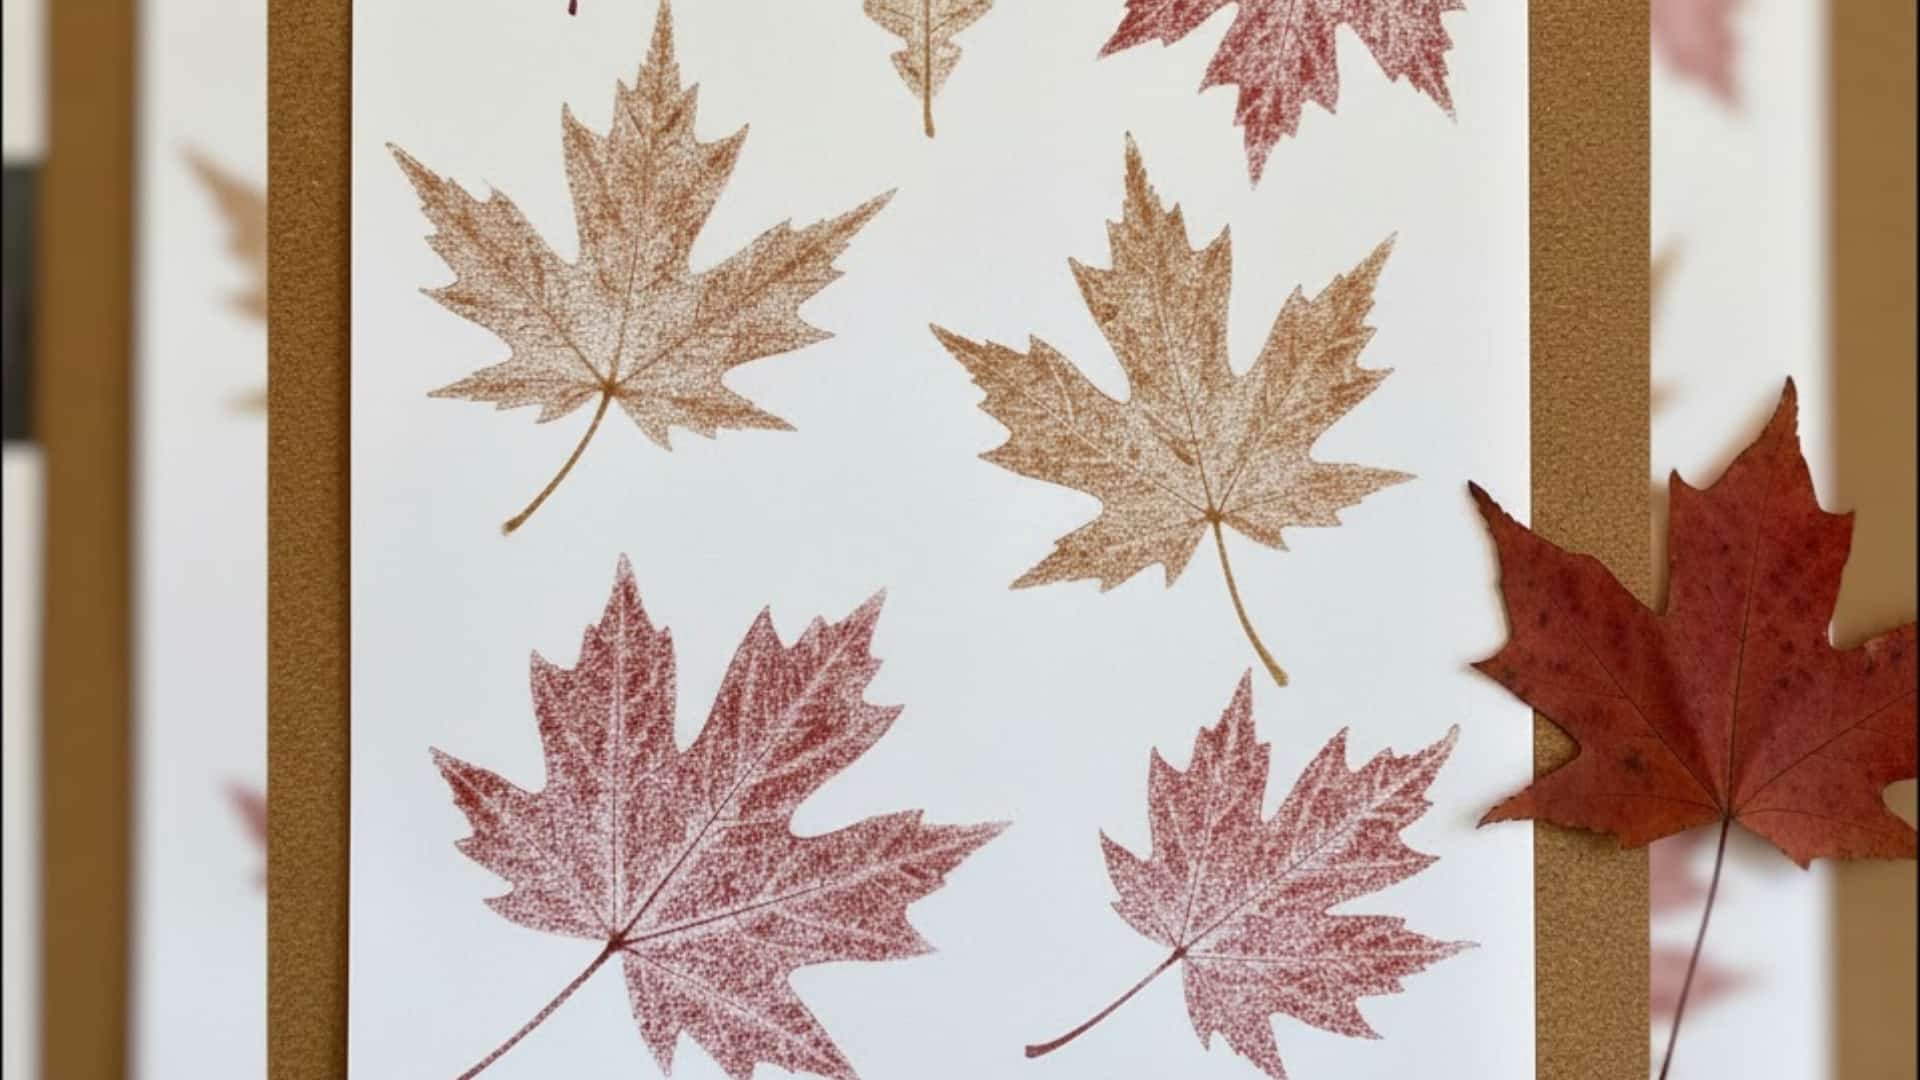
This calming nature study turns leaf textures into colorful impressions while promoting gentle observation and steady hand movements.
Kids learn about veins, shapes, and species differences as patterns appear like magic.
Pages can be bound into simple fall notebooks or arranged as a classroom gallery.
Families might collect leaves on a short walk first. To begin, gather assorted leaves, white paper, crayons with wrappers removed, and clipboards for firm rubbing surfaces.
Steps to Make:
- Place a leaf under paper with veins facing up, holding everything still with one hand.
- Rub a crayon gently on its side across the paper until the shape emerges clearly.
- Repeat with different leaves and colors, then label types if known.
12. Thankful Garland
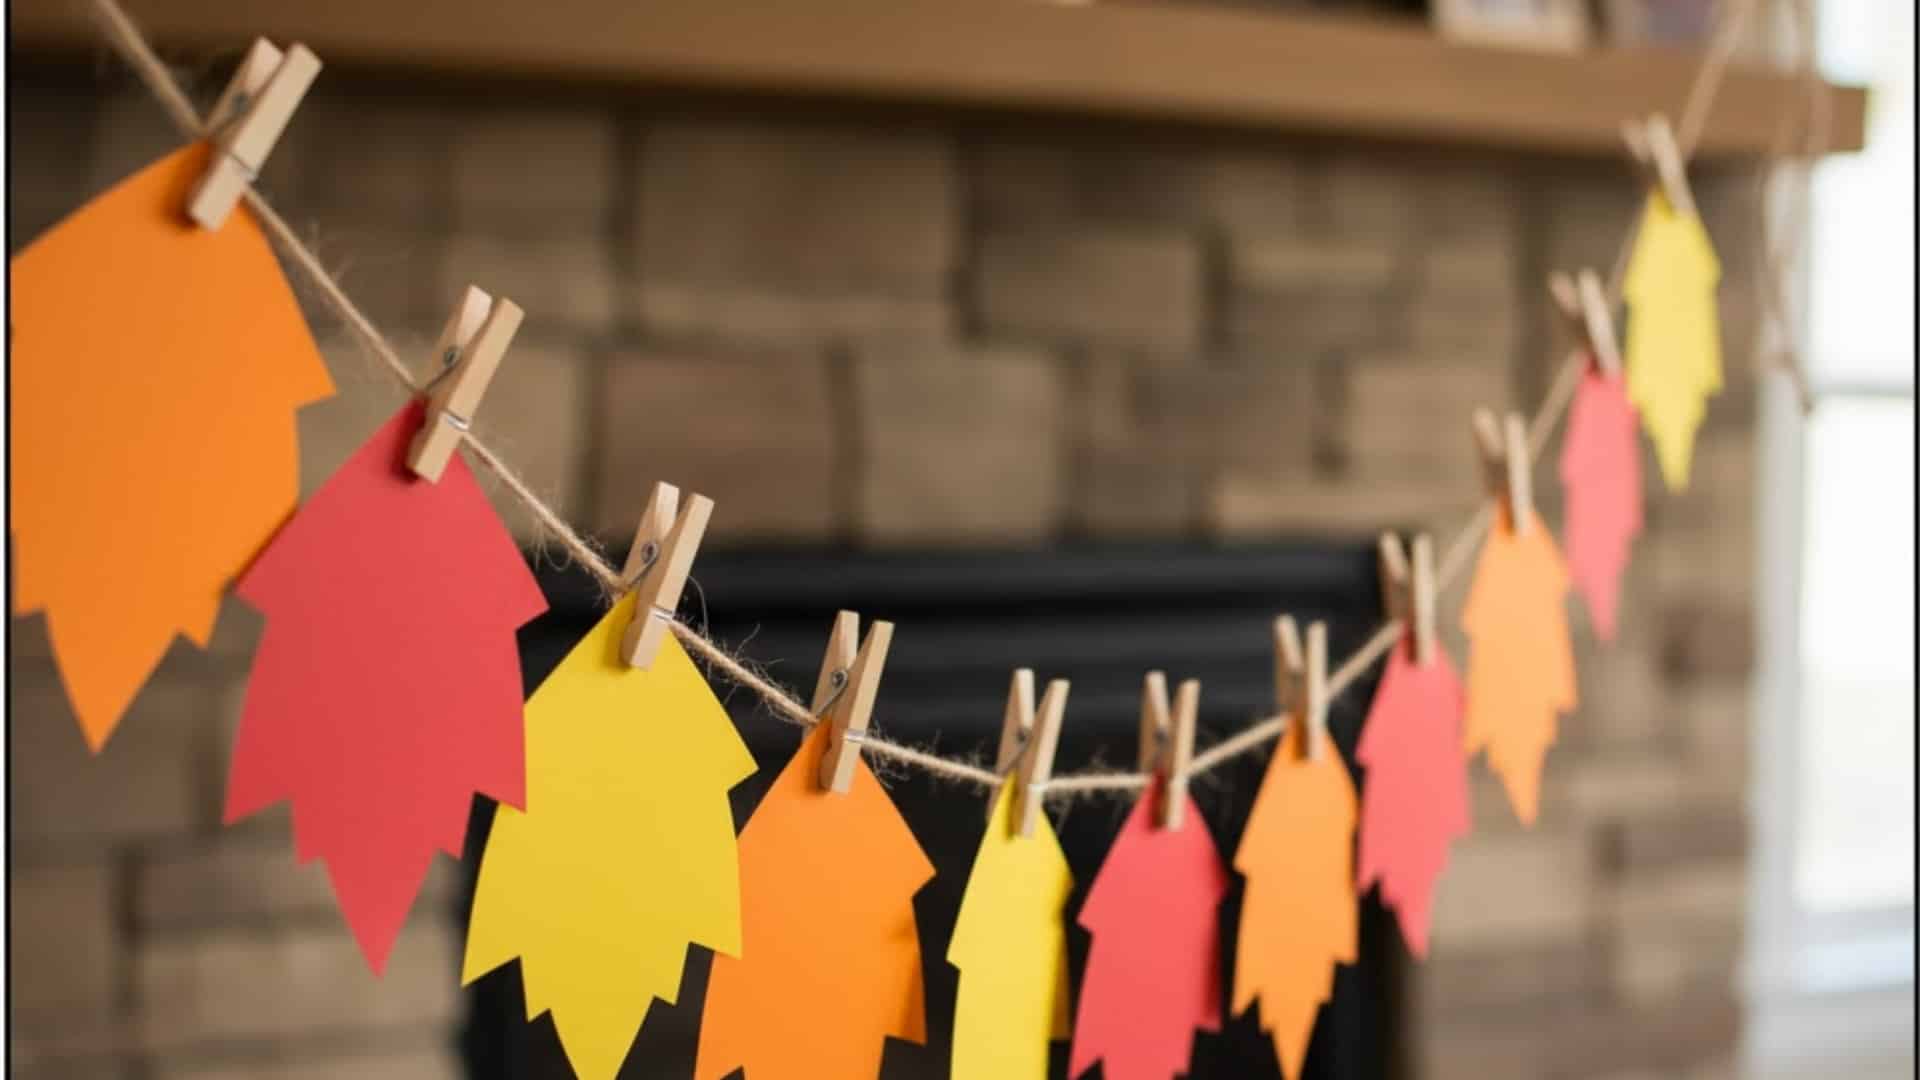
This collaborative garland turns gratitude messages into a welcoming banner for doors, mantels, or windows.
Children practice short writing, neat spacing, and thoughtful words while contributing to a shared display. Families can add new pieces throughout the week to keep it growing.
It also packs flat and stores easily for next year.
To begin, gather string or twine, colored paper, markers, a hole punch, mini clothespins or tape, and simple shape stencils.
Steps to Make:
- Cut leaves or simple shapes, then write a short thankful note on each piece with care.
- Punch holes or clip the shapes to the twine, spacing colors evenly for rhythm.
- Hang the garland where light can shine through or across a gathering spot.
13. Coffee Filter Turkey Craft
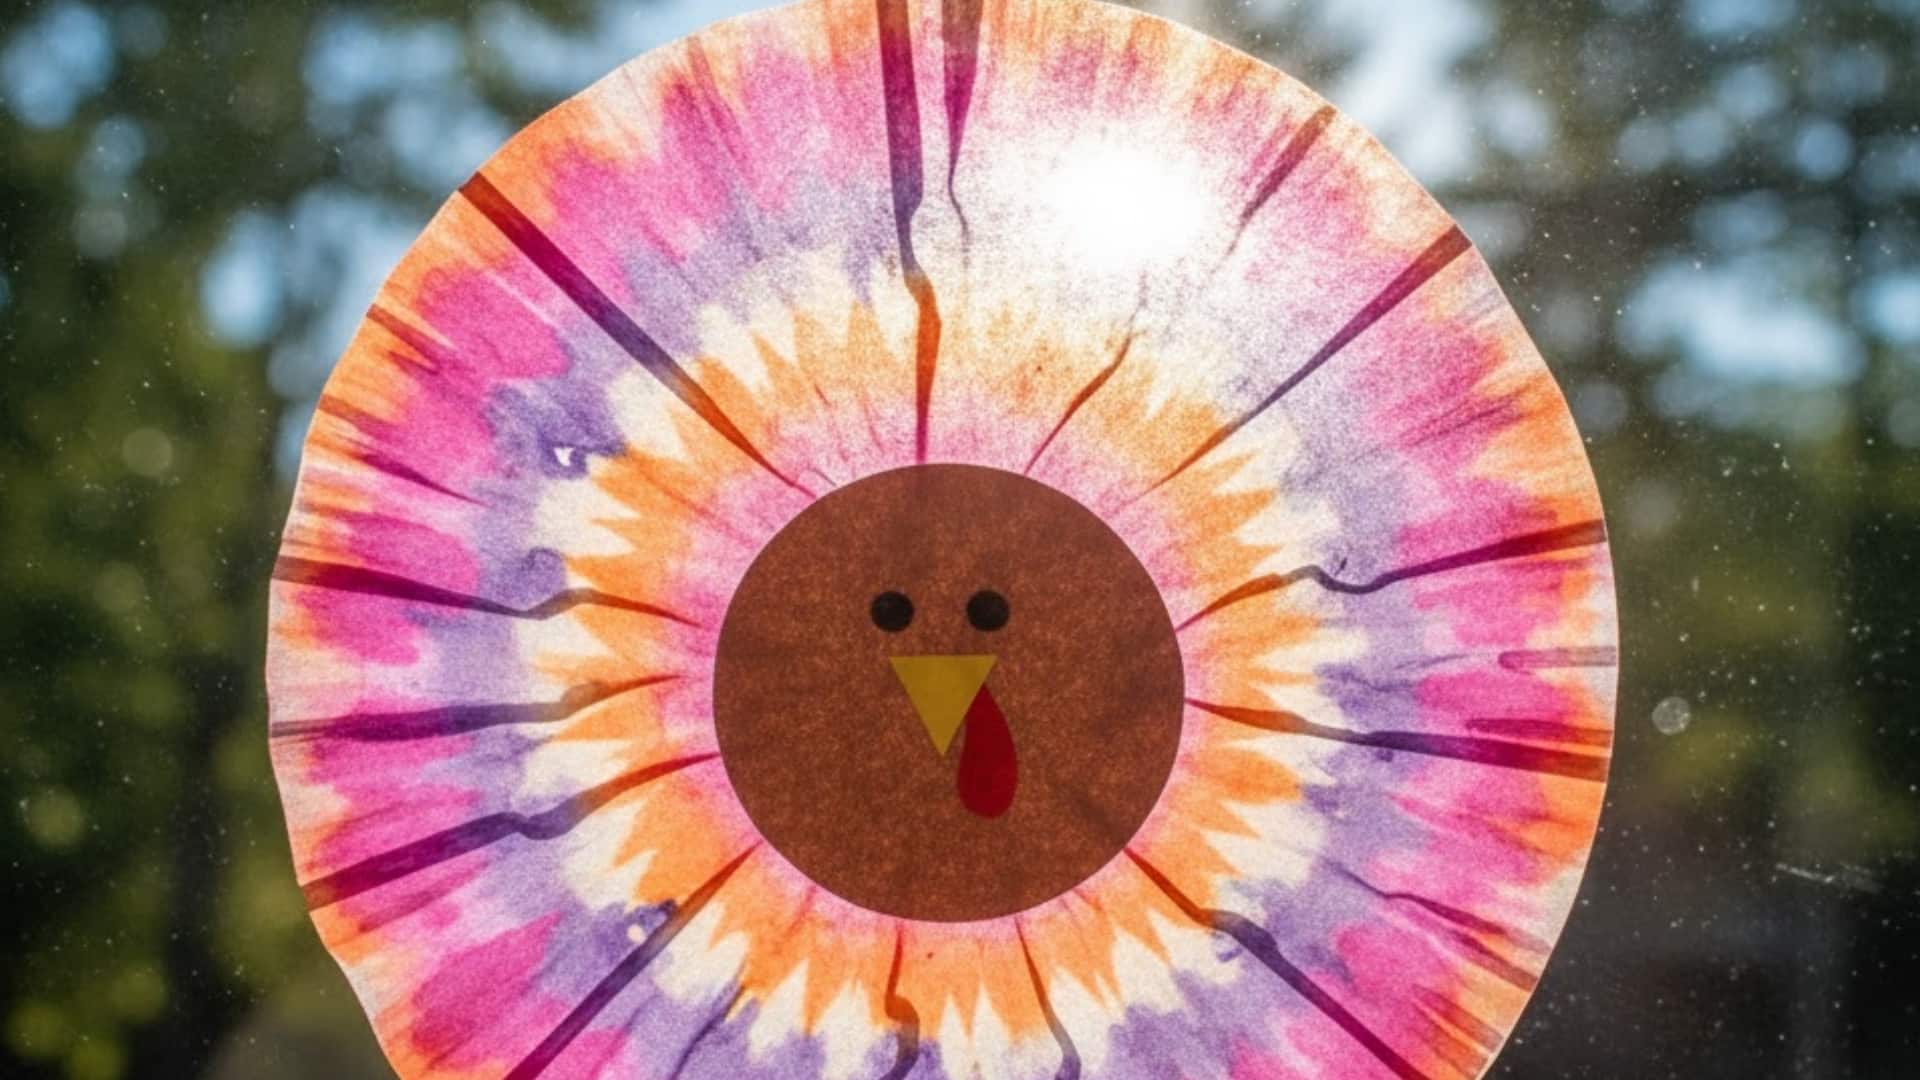
This color-mixing favorite lets kids turn coffee filters into soft, glowing feathers that feel like watercolor.
They practice restraint with water and enjoy watching pigments blend into new shades. The finished turkeys look beautiful in windows or near lamps.
Sets of siblings’ turkeys create a charming flock.
To begin, collect coffee filters, washable markers, a fine mist spray bottle, paper circles for bodies, glue, and scrap paper for drying.
Steps to Make:
- Color filters with markers in overlapping rings and patches of fall hues.
- Lightly mist with water so colors spread naturally, then allow to dry fully.
- Glue dried filters behind a paper body and add face details.
14. Tissue Paper Pumpkin Craft
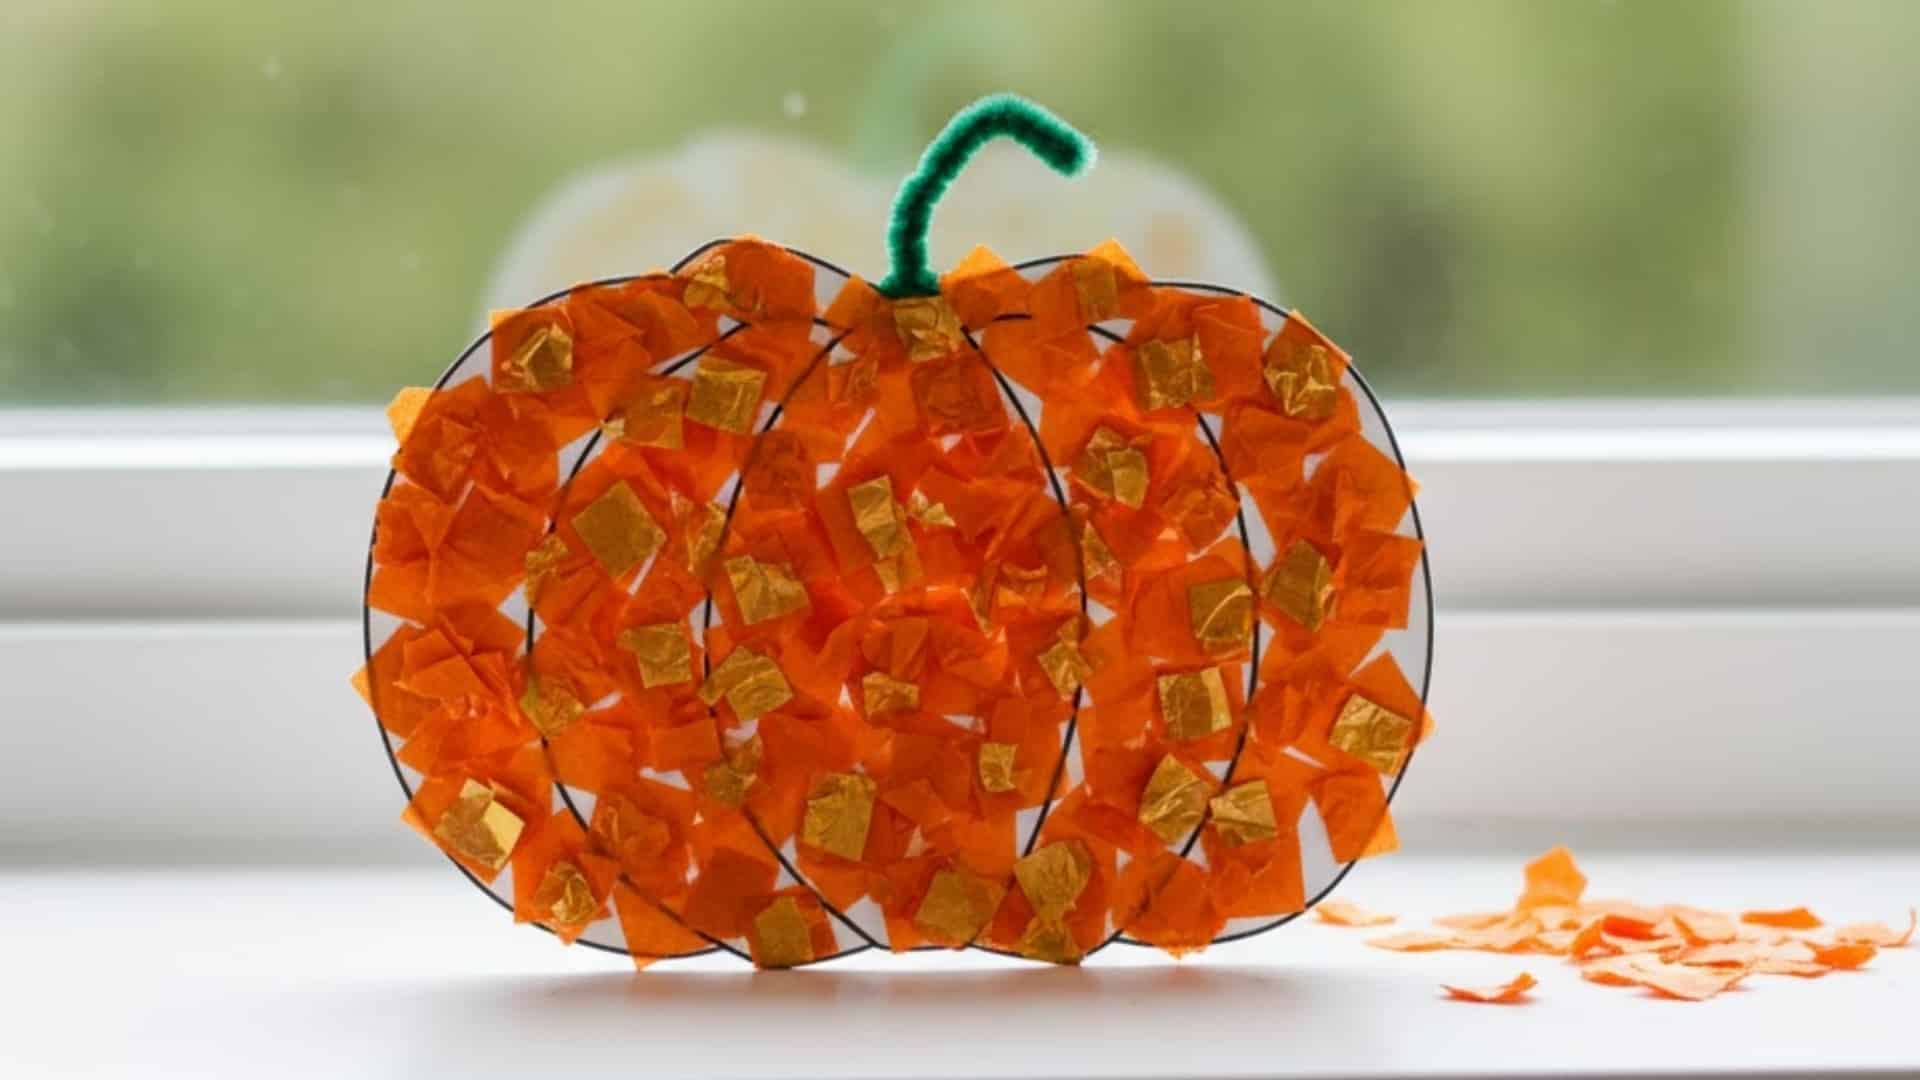
This textured pumpkin builds patience as kids layer small pieces into bright, rounded forms.
They explore value changes by mixing oranges, golds, and a little brown for shadows. Finished pumpkins sit nicely on shelves or as placemats beneath candles.
Groupings create a sweet patch look.
To start, gather orange tissue squares, green pipe cleaners, glue, cardstock pumpkin outlines, and small brushes for tidy adhesive spreading.
Steps to Make:
- Crumple tissue squares slightly, then glue along the outline, filling inward with gentle overlapping.
- Twist a pipe cleaner for a stem and curl it around a pencil for a tendril.
- Add a few darker pieces for shading, then let everything dry flat.
15. Acorn Cap Faces
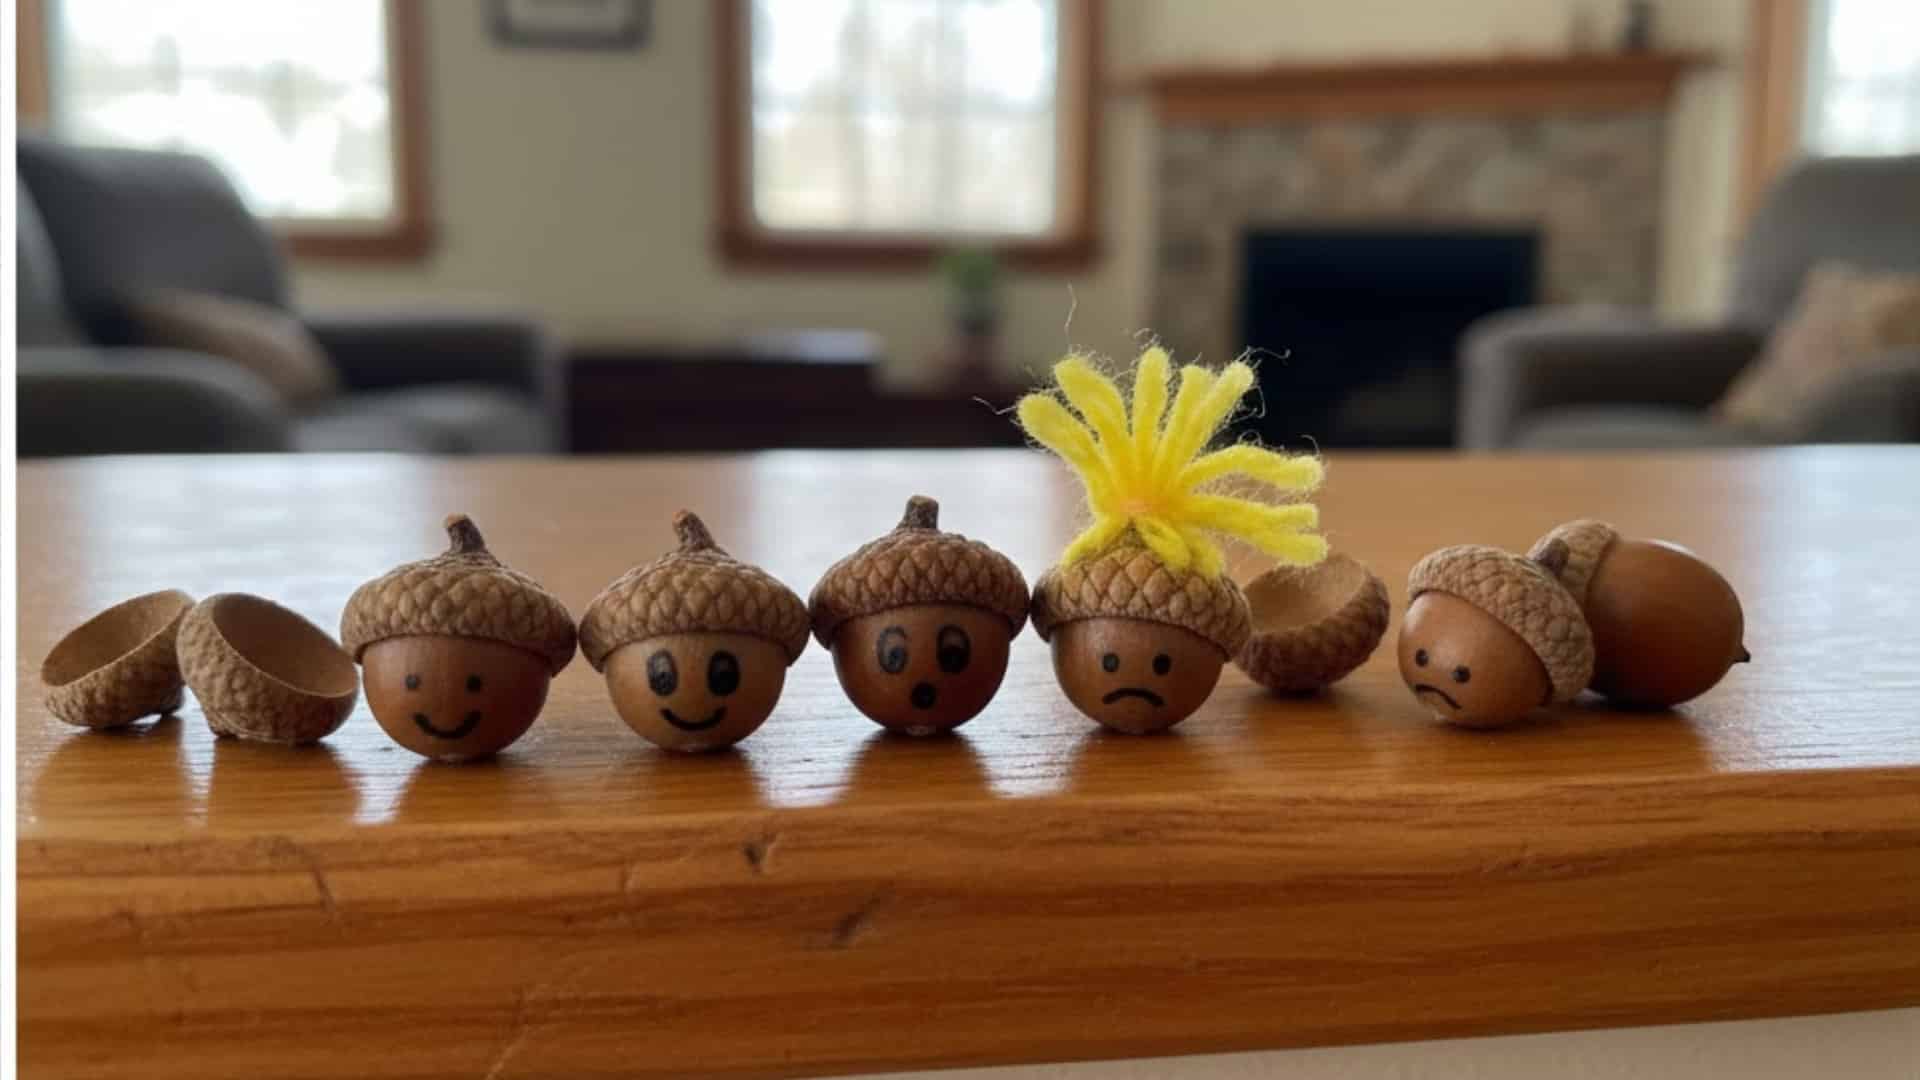
These tiny characters turn nature finds into playful personalities that kids love arranging in families or scenes.
Children practice delicate drawing, gluing accuracy, and storytelling as expressions emerge. Displays fit on window ledges or shadow boxes and make charming gifts for grandparents.
Collecting the acorns becomes a mini outdoor activity.
To begin, gather clean acorn caps, fine markers, tiny pom-poms or yarn, cardstock bases, and clear-dry glue for secure holds.
Steps to Make:
- Draw miniature faces inside the caps with patient lines and simple features.
- Add yarn hair, tiny hats, or scarves from scraps, pressing gently until set.
- Glue each cap to a labeled base and arrange them like a little village.
Cool and Creative Thanksgiving Art Projects for Teens
Thanksgiving art doesn’t have to be childish. These creative projects let teens explore design, color, and emotion while expressing gratitude in a fun, personal way.
16. Watercolor Gratitude Cards
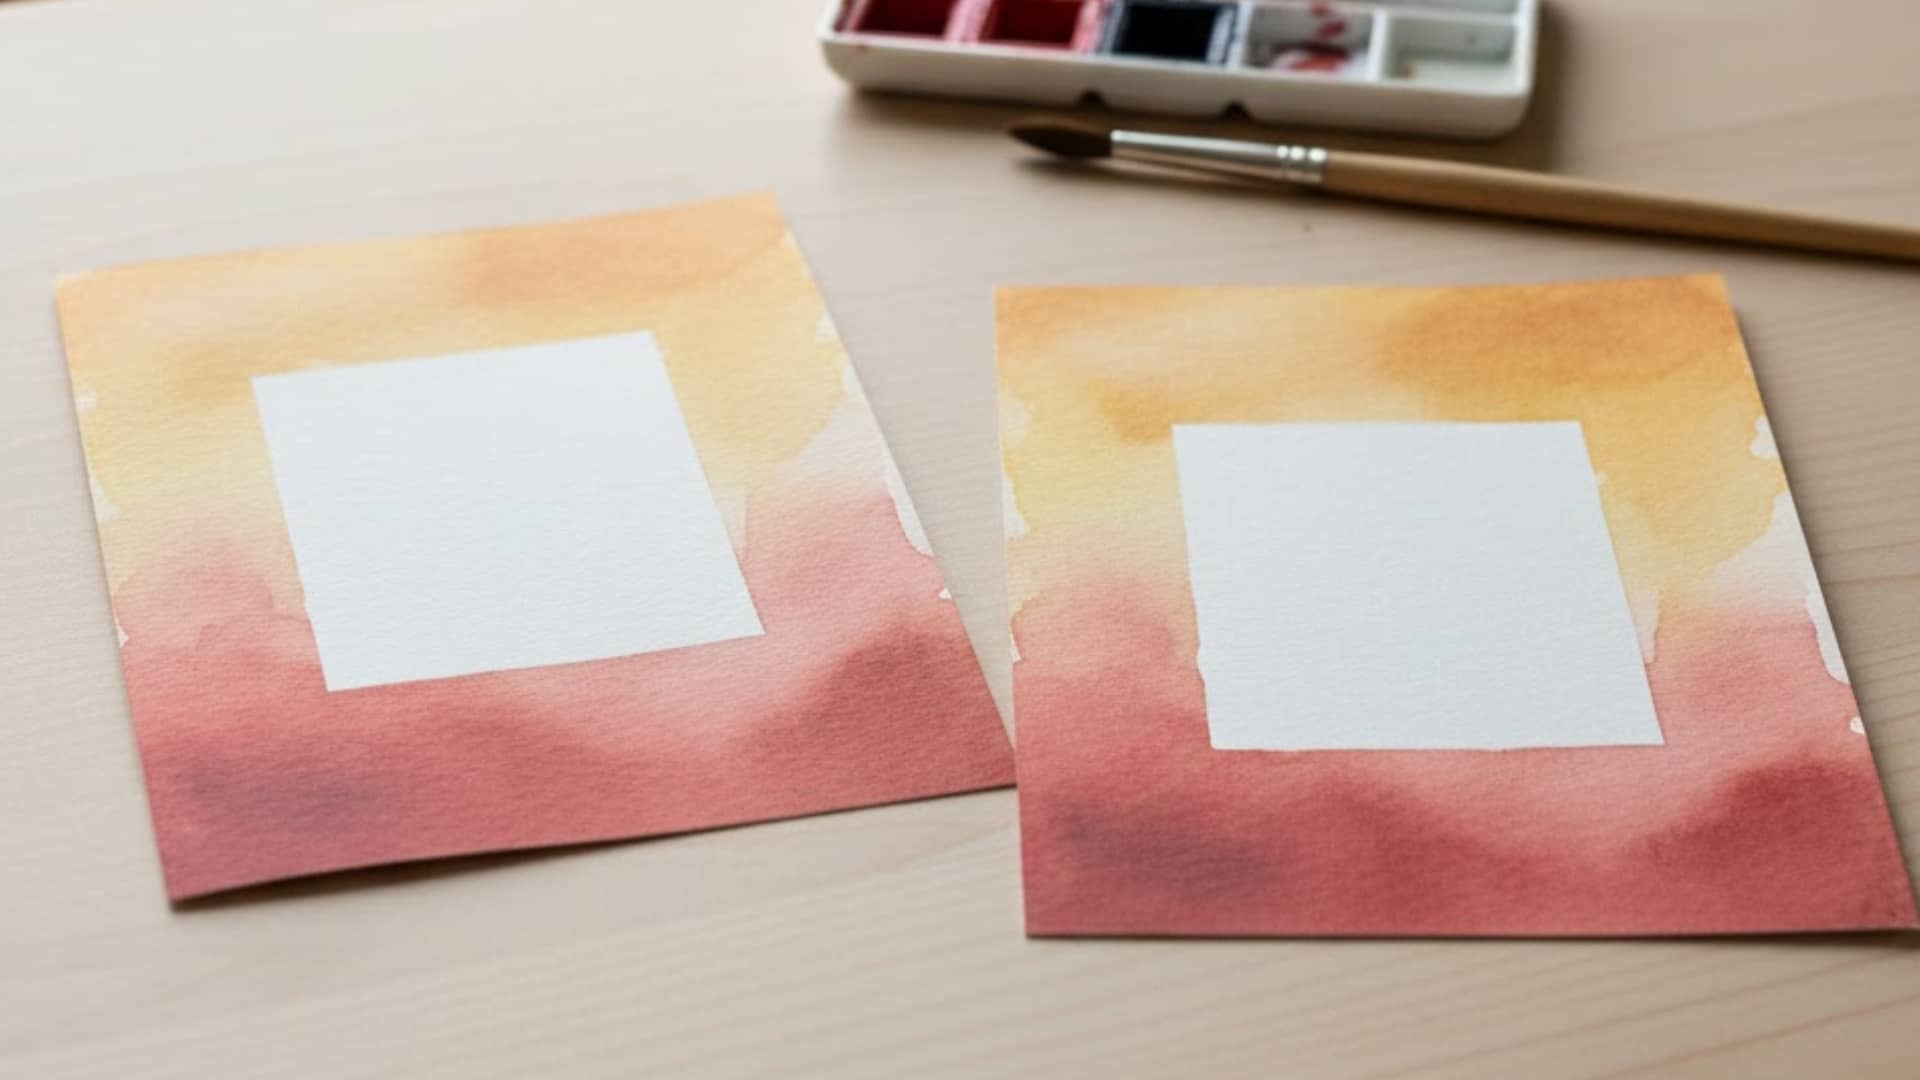
This peaceful art project helps teens slow down and express thankfulness through color and design.
Watercolors flow gently across the page, creating a calm rhythm that feels almost meditative.
It teaches patience, creativity, and balance while encouraging personal reflection. Each card becomes a meaningful, heartfelt message of appreciation.
Teens can gift them to family, teachers, or friends as thoughtful gestures. To start, grab watercolor paper, brushes, paints, and fine pens for lettering.
Steps to Make:
- Paint soft backgrounds with warm shades like gold, orange, and amber.
- Let them dry, then write simple gratitude messages in the center.
- Add borders or small leaf drawings around the edges.
17. String Art Turkey Silhouette
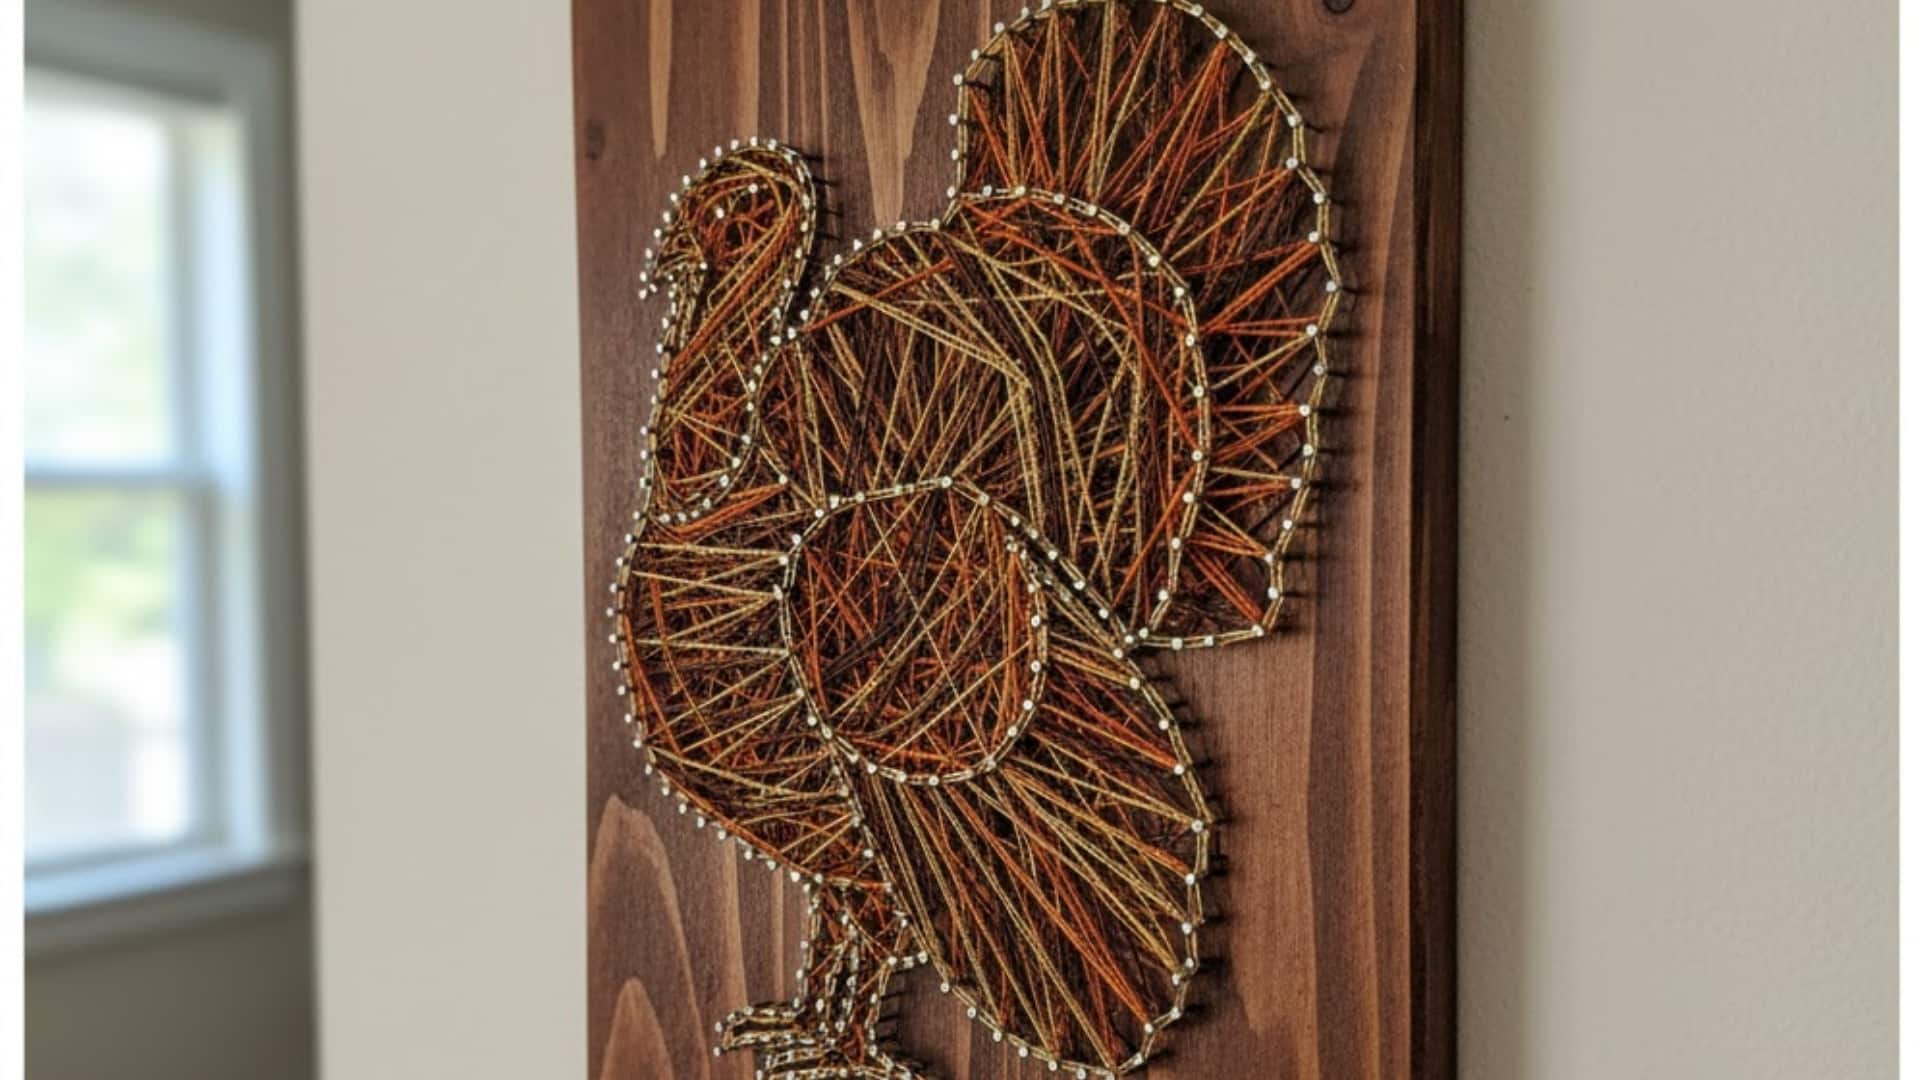
This modern craft turns a simple outline into art that feels stylish and mindful.
Teens hammer nails and weave colored strings to form a turkey silhouette, strengthening focus and patience with each thread.
It helps them think geometrically while building confidence through hands-on creativity. The finished piece looks polished and professional, perfect for room décor or a gift.
To begin, gather a wooden board, nails, a hammer, and colored strings.
Steps to Make:
- Sketch a turkey outline lightly on the wooden board.
- Hammer nails evenly along the lines, leaving equal spaces.
- Wrap the string between the nails until the shape is completely filled.
18. DIY Mason Jar Candle Holder
This cozy project gives teens a reason to decorate and unwind.
Turning jars into glowing candle holders builds patience and creativity while encouraging simple design thinking. The process feels relaxing, and the results are warm and personal.
Each jar becomes a gentle light source, adding a handmade touch to spaces.
Teens often gift them as small tokens of care. To begin, grab mason jars, twine, dried leaves, glue, and small candles.
Steps to Make:
- Clean the jar and apply glue where the decorations will go.
- Press dried leaves and wrap twine around the rim.
- Place a candle inside and light it carefully.
19. Wooden Slice Pumpkin Painting
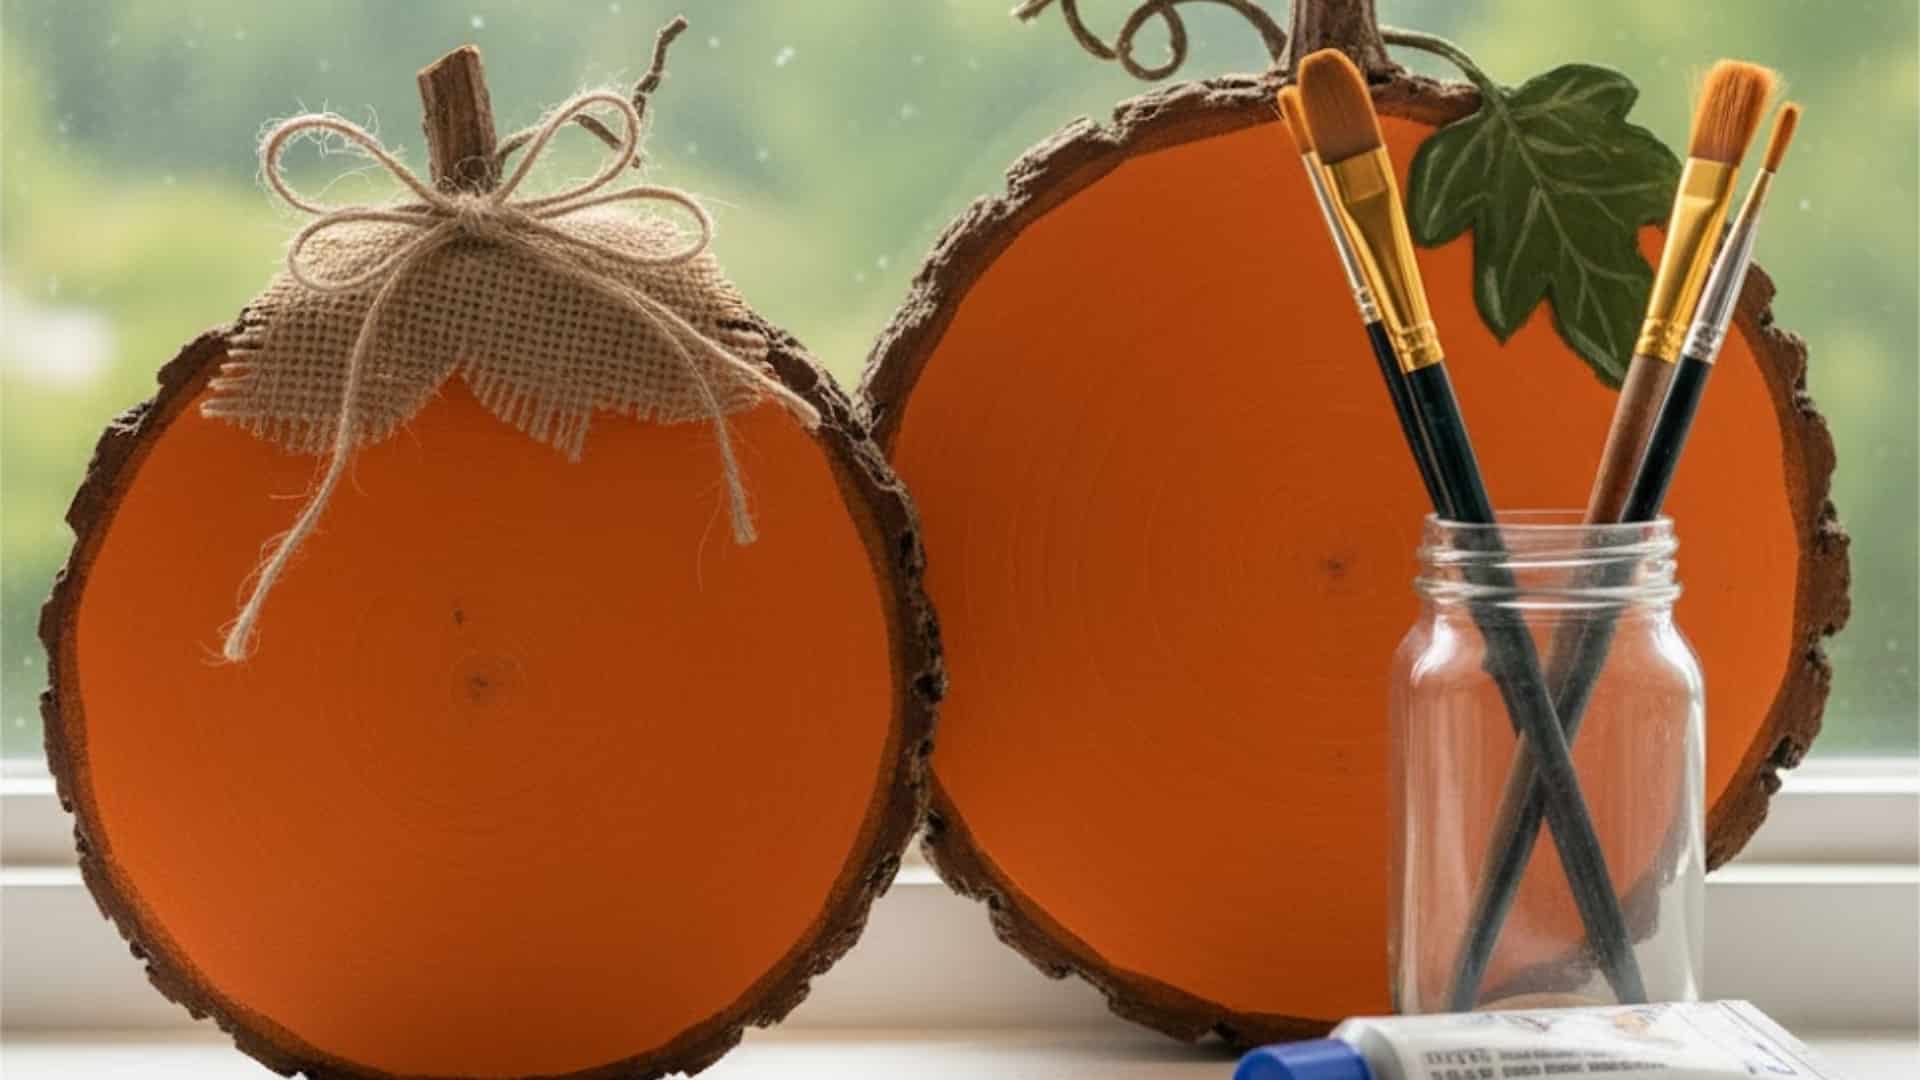
Painting on wood slices blends creativity with the rustic charm of fall.
Teens enjoy turning natural textures into artistic designs that capture Thanksgiving warmth. It helps them develop color blending, brush control, and compositional awareness while relaxing and being creative.
The finished pumpkins look beautiful displayed on desks or hung as décor. Each slice tells its own story through grain and texture.
To begin, grab smooth wood slices, acrylic paint, brushes, and sealant.
Steps to Make:
- Sketch pumpkin outlines or fall designs lightly in pencil.
- Paint warm layers, blending orange, brown, and golden tones.
- Seal the surface for a smooth, glossy finish.
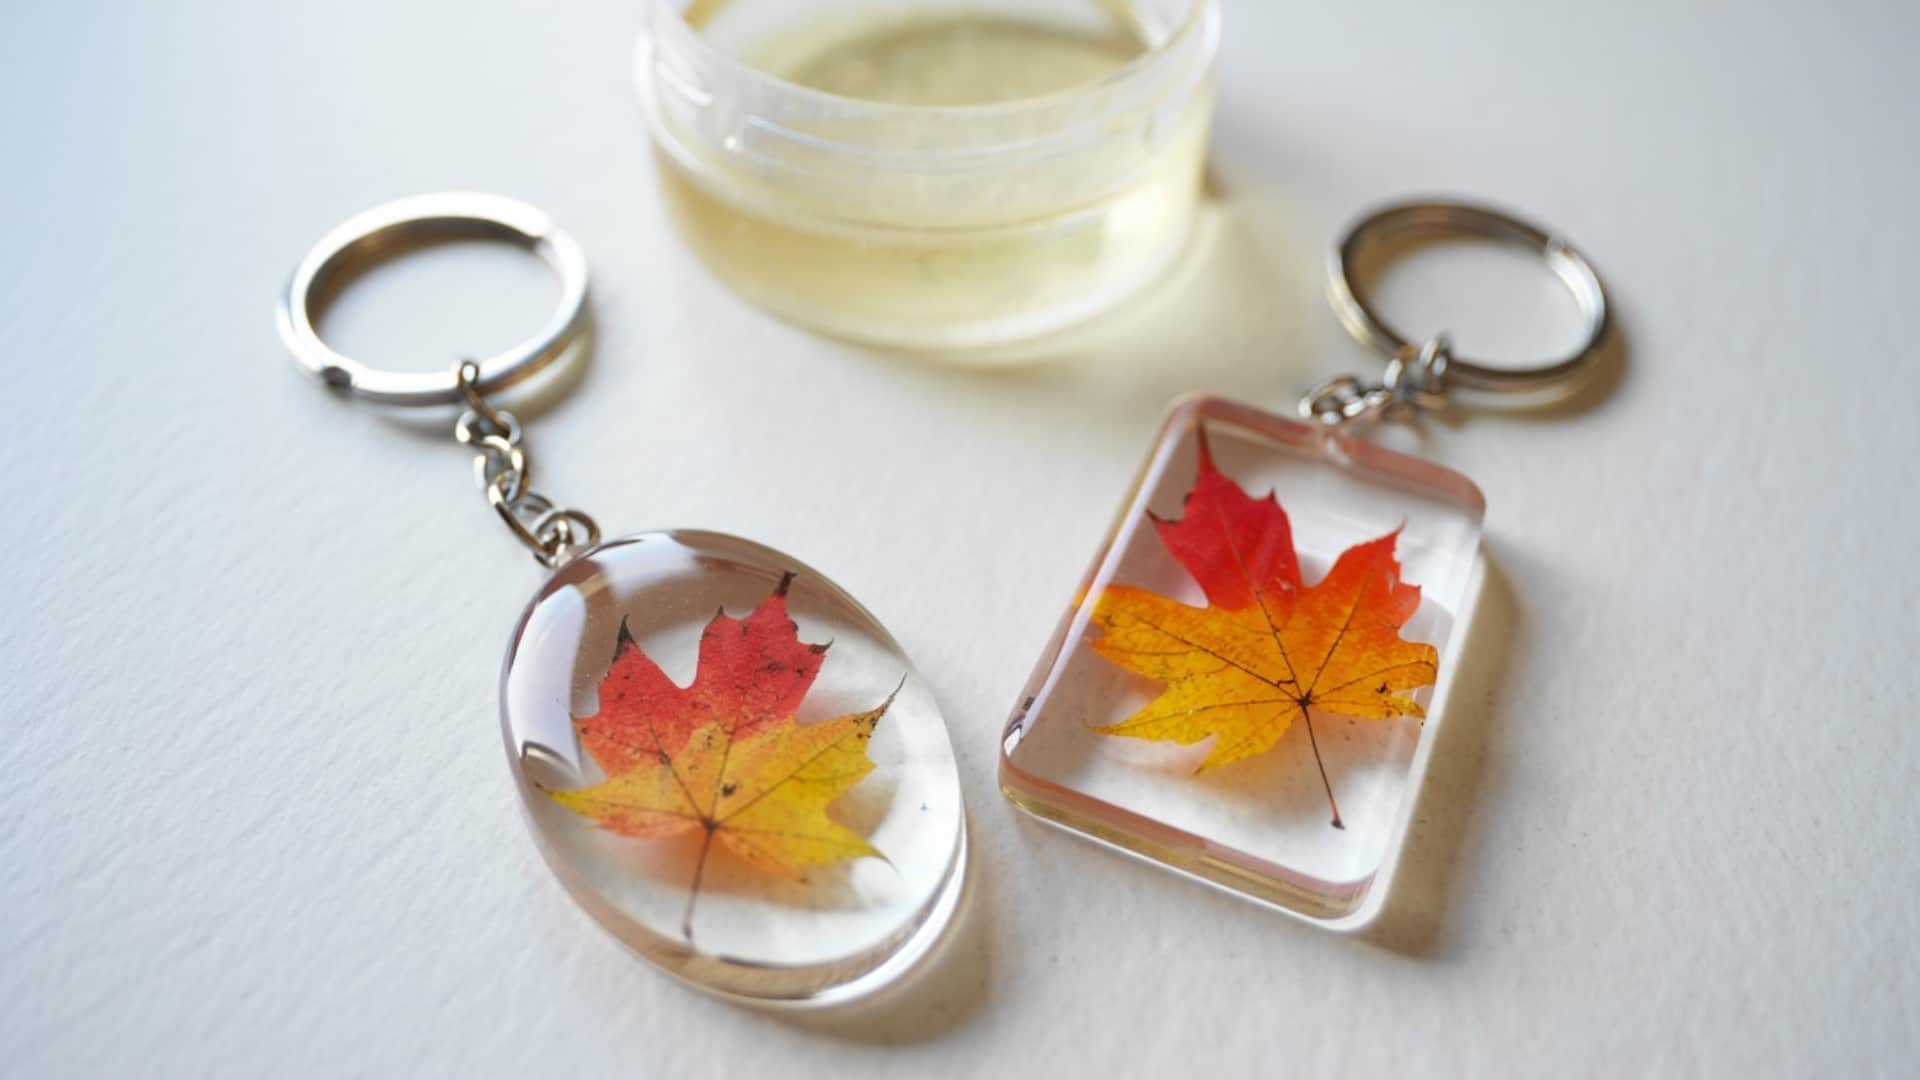
20. Fall Leaf Resin Keychains
This sleek project preserves real leaves inside clear resin, turning nature into wearable art.
It encourages focus, precision, and patience while teaching care for small details. Teens love how something simple becomes stylish when sealed in glass-like clarity.
The results look professional yet personal, perfect as gifts or accessories. It’s a creative way to hold onto autumn’s colors year-round.
To start, grab resin, molds, pressed leaves, and keychain rings.
Steps to Make:
- Pour a small layer of resin into the mold.
- Add pressed leaves, then fill to the top.
- Let it cure, then attach the key ring.
21. Turkey Silhouette Canvas Painting
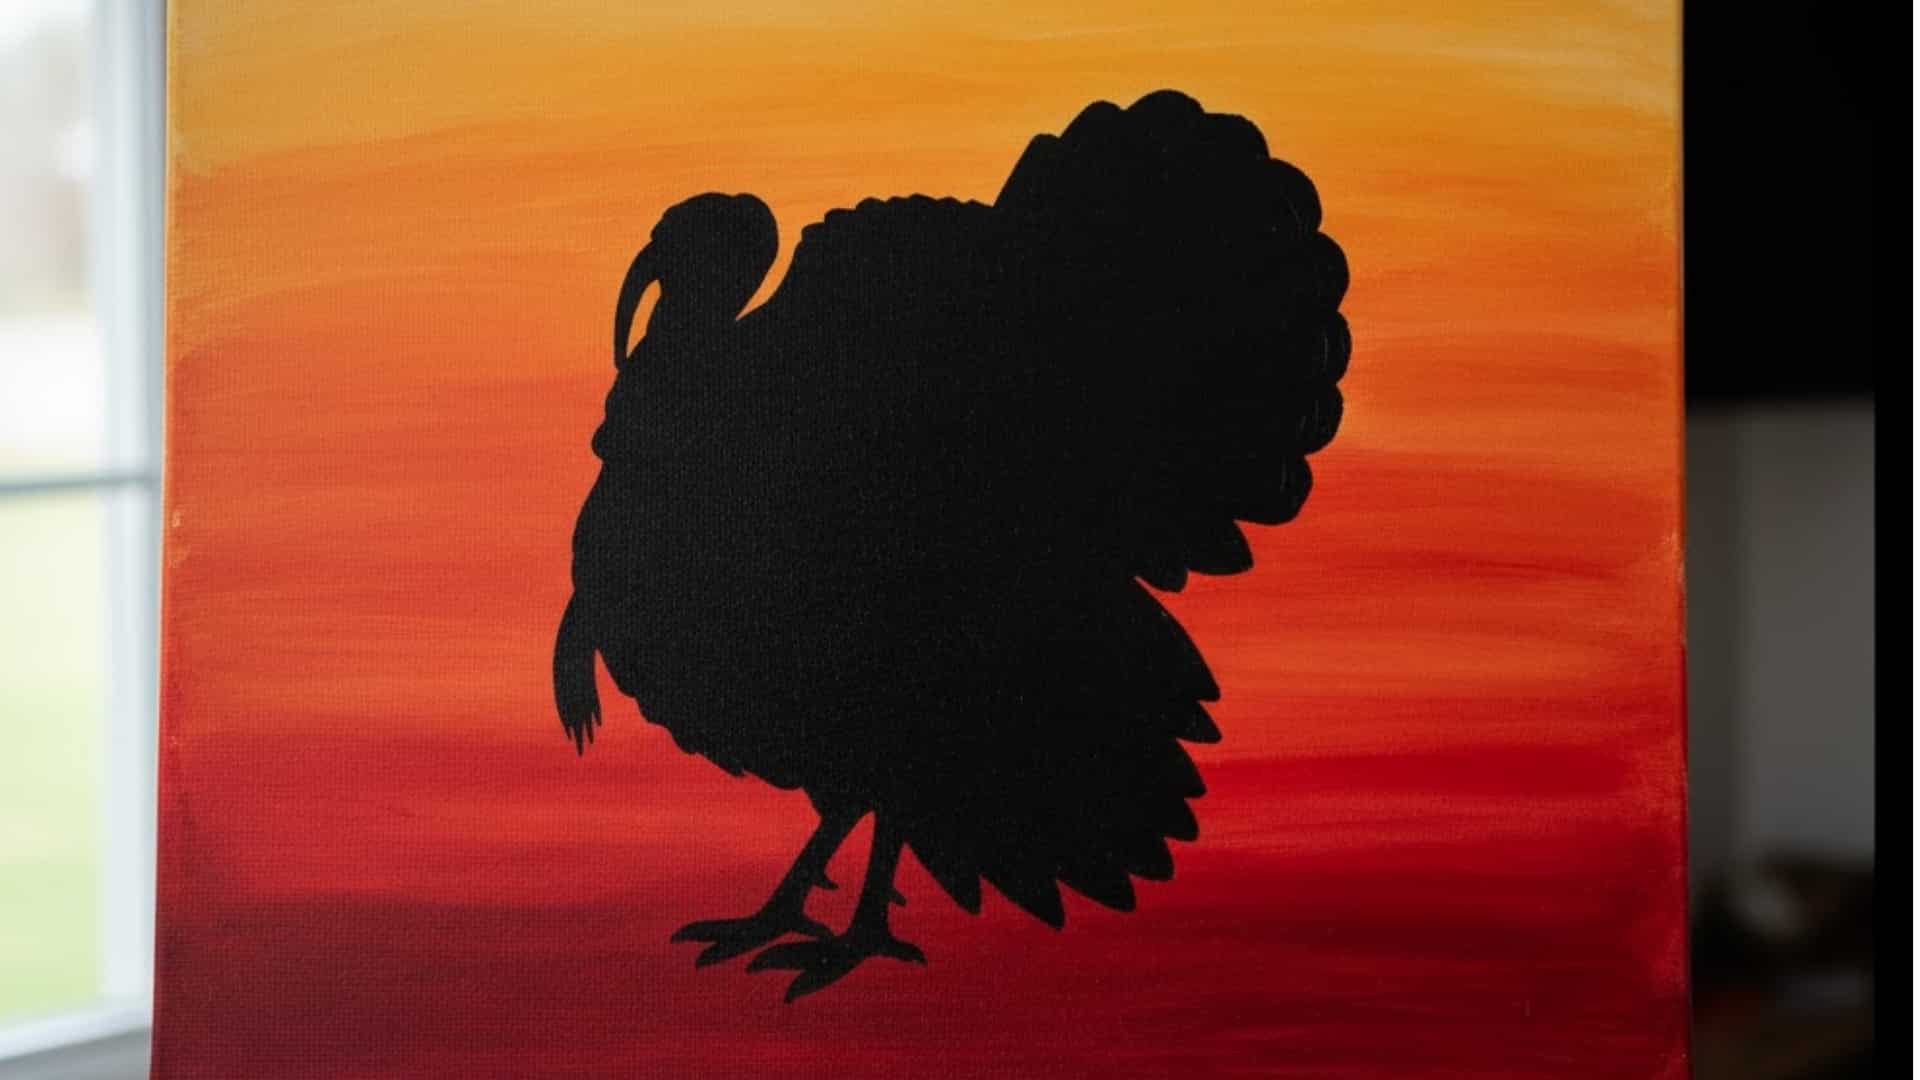
This project gives teens an easy yet expressive way to experiment with painting.
It helps them focus on shapes, contrast, and smooth brushwork while keeping the design simple.
The bold silhouette stands out beautifully against soft backgrounds and feels satisfying to create. The process is calm, creative, and gives a confident finished look.
It’s ideal for a cozy art session or gifting. To begin, gather a canvas, paint, brushes, and masking tape.
Steps to Make:
- Paint the background using orange, gold, and soft red shades.
- Use tape or a stencil to create a clean outline of a turkey.
- Fill the silhouette with dark brown or black paint and let it dry.
22. Embroidered Fall Quote Hoop
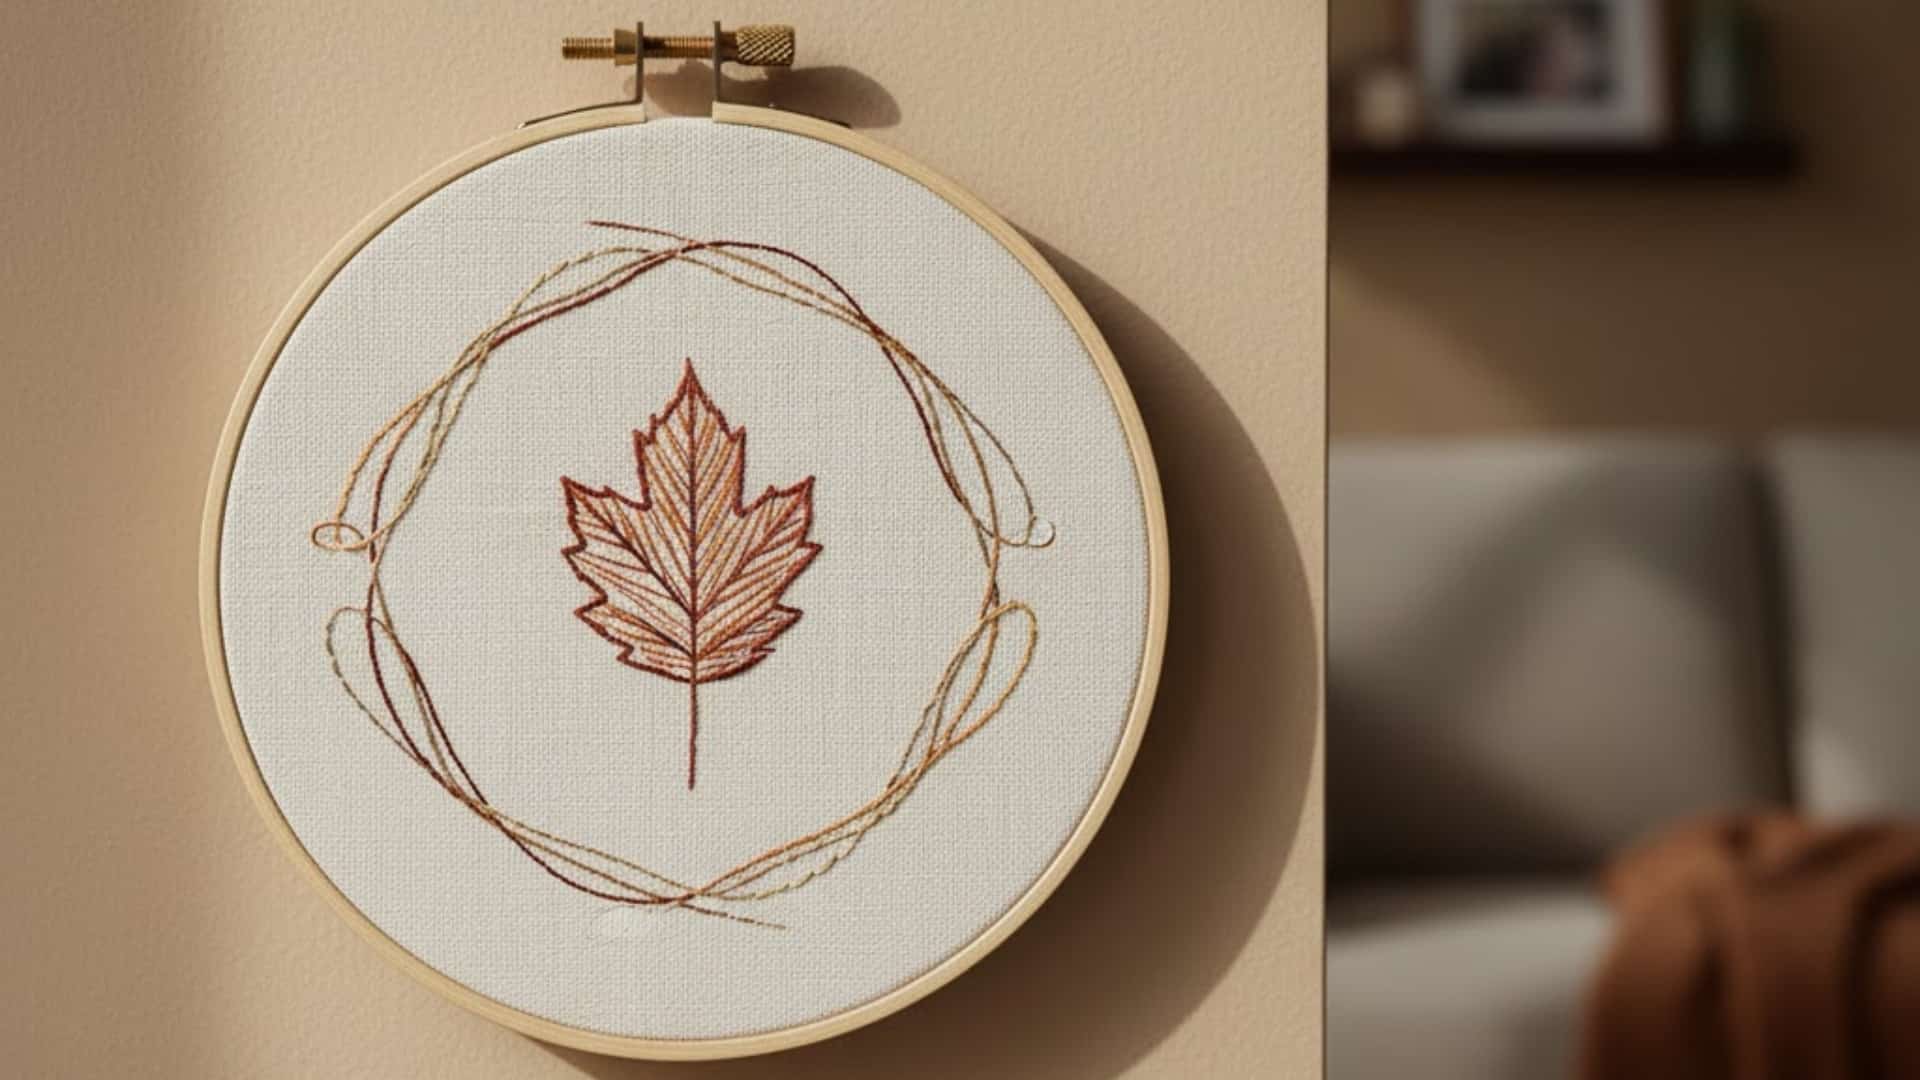
This soothing activity lets teens stitch fall-inspired quotes into delicate fabric art.
It teaches patience, focus, and mindfulness while keeping the process relaxing and steady. Stitching soft patterns feels almost therapeutic, helping them express gratitude through design.
The finished hoop looks classic, rustic, and cozy on any wall. It’s thoughtful, simple, and rewarding from start to finish.
To begin, grab your basic tools & materials, plus fabric, thread, a hoop, and a needle.
Steps to Make:
- Stretch the fabric tightly across the hoop and secure it.
- Lightly sketch a small Thanksgiving quote or short phrase.
- Stitch letters and outline simple leaf details around them.
23. Gratitude Journal Cover Design
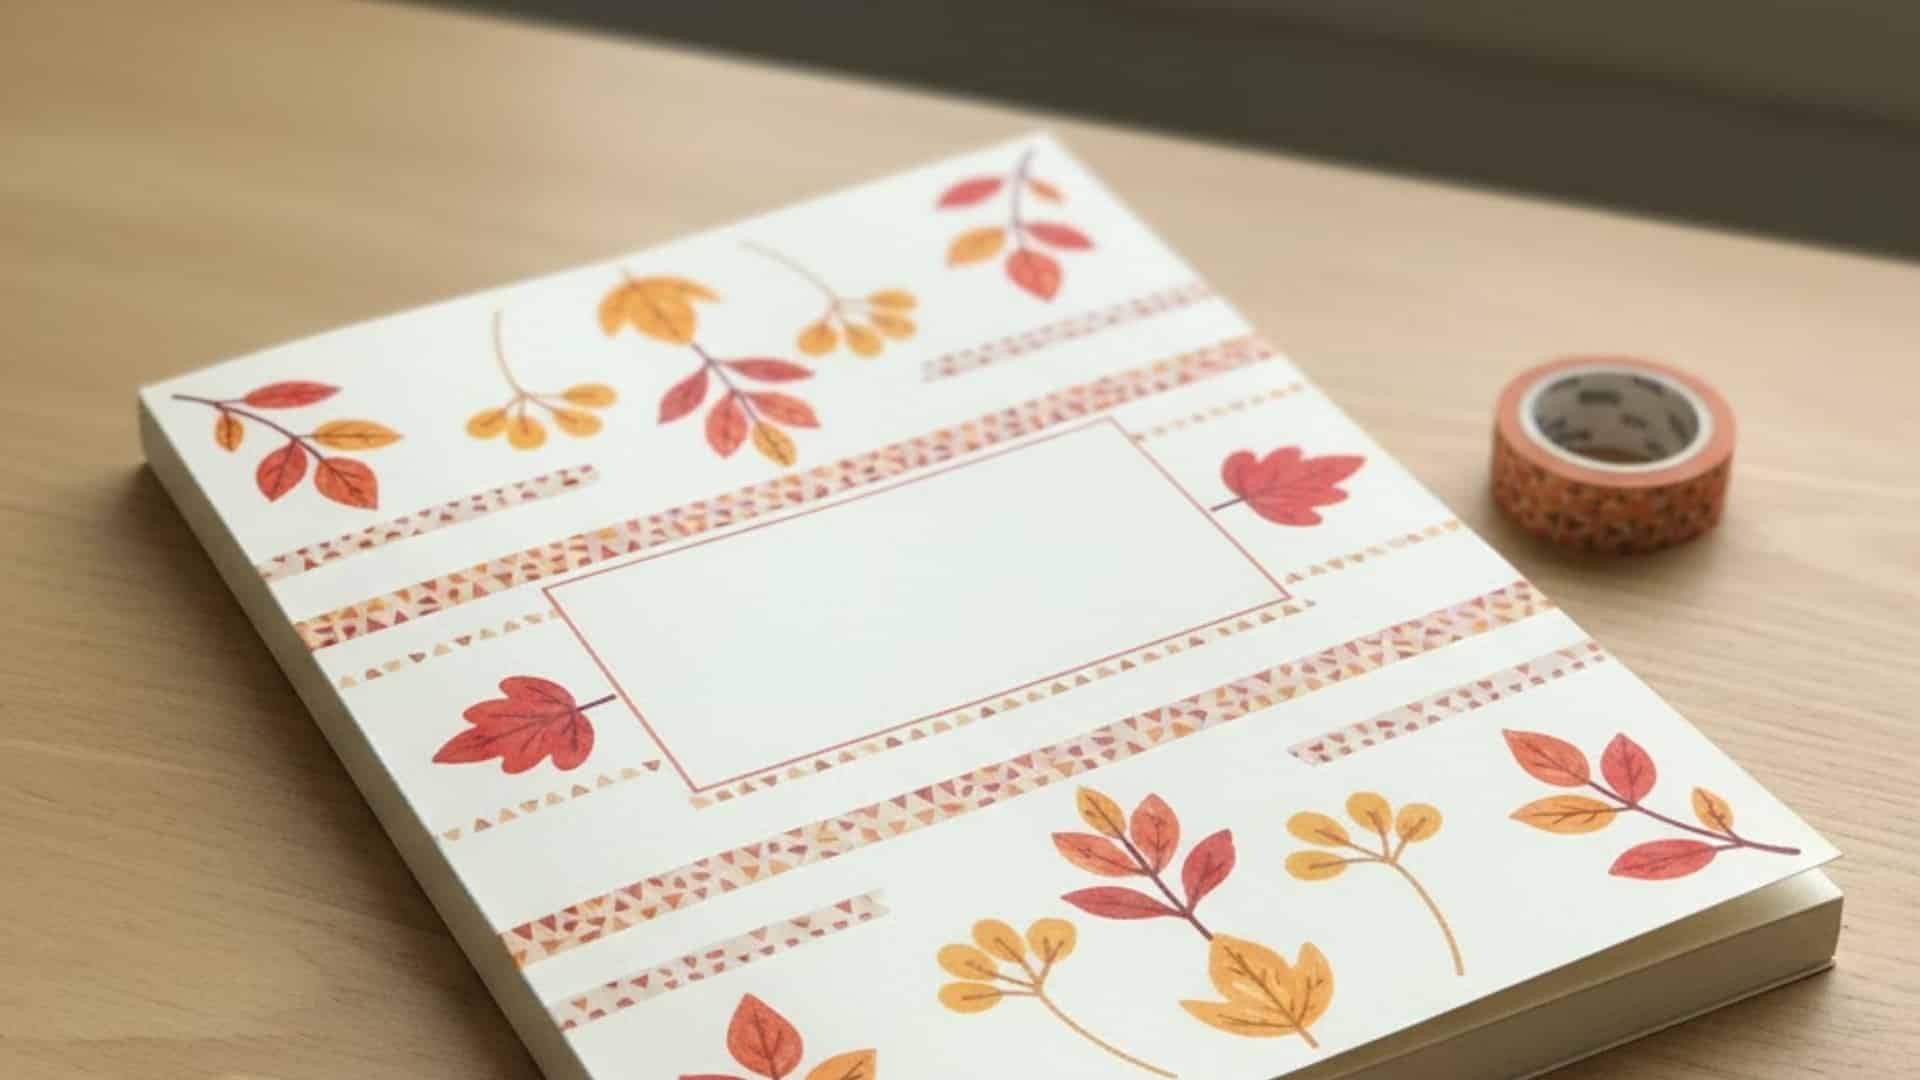
This creative activity helps teens personalize journals that hold their thoughts and ideas.
It mixes self-expression and reflection while letting them experiment with layout and texture. Designing a cover also builds focus and planning skills.
The final result feels motivating, bright, and deeply personal. It’s a creative break that feels both peaceful and purposeful.
To begin, grab a plain notebook, markers, stickers, and tape.
Steps to Make:
- Plan your layout with light pencil marks.
- Add quotes, drawings, or washi tape for design.
- Seal the surface for a smooth, lasting finish.
24. Corn Husk Flower Art
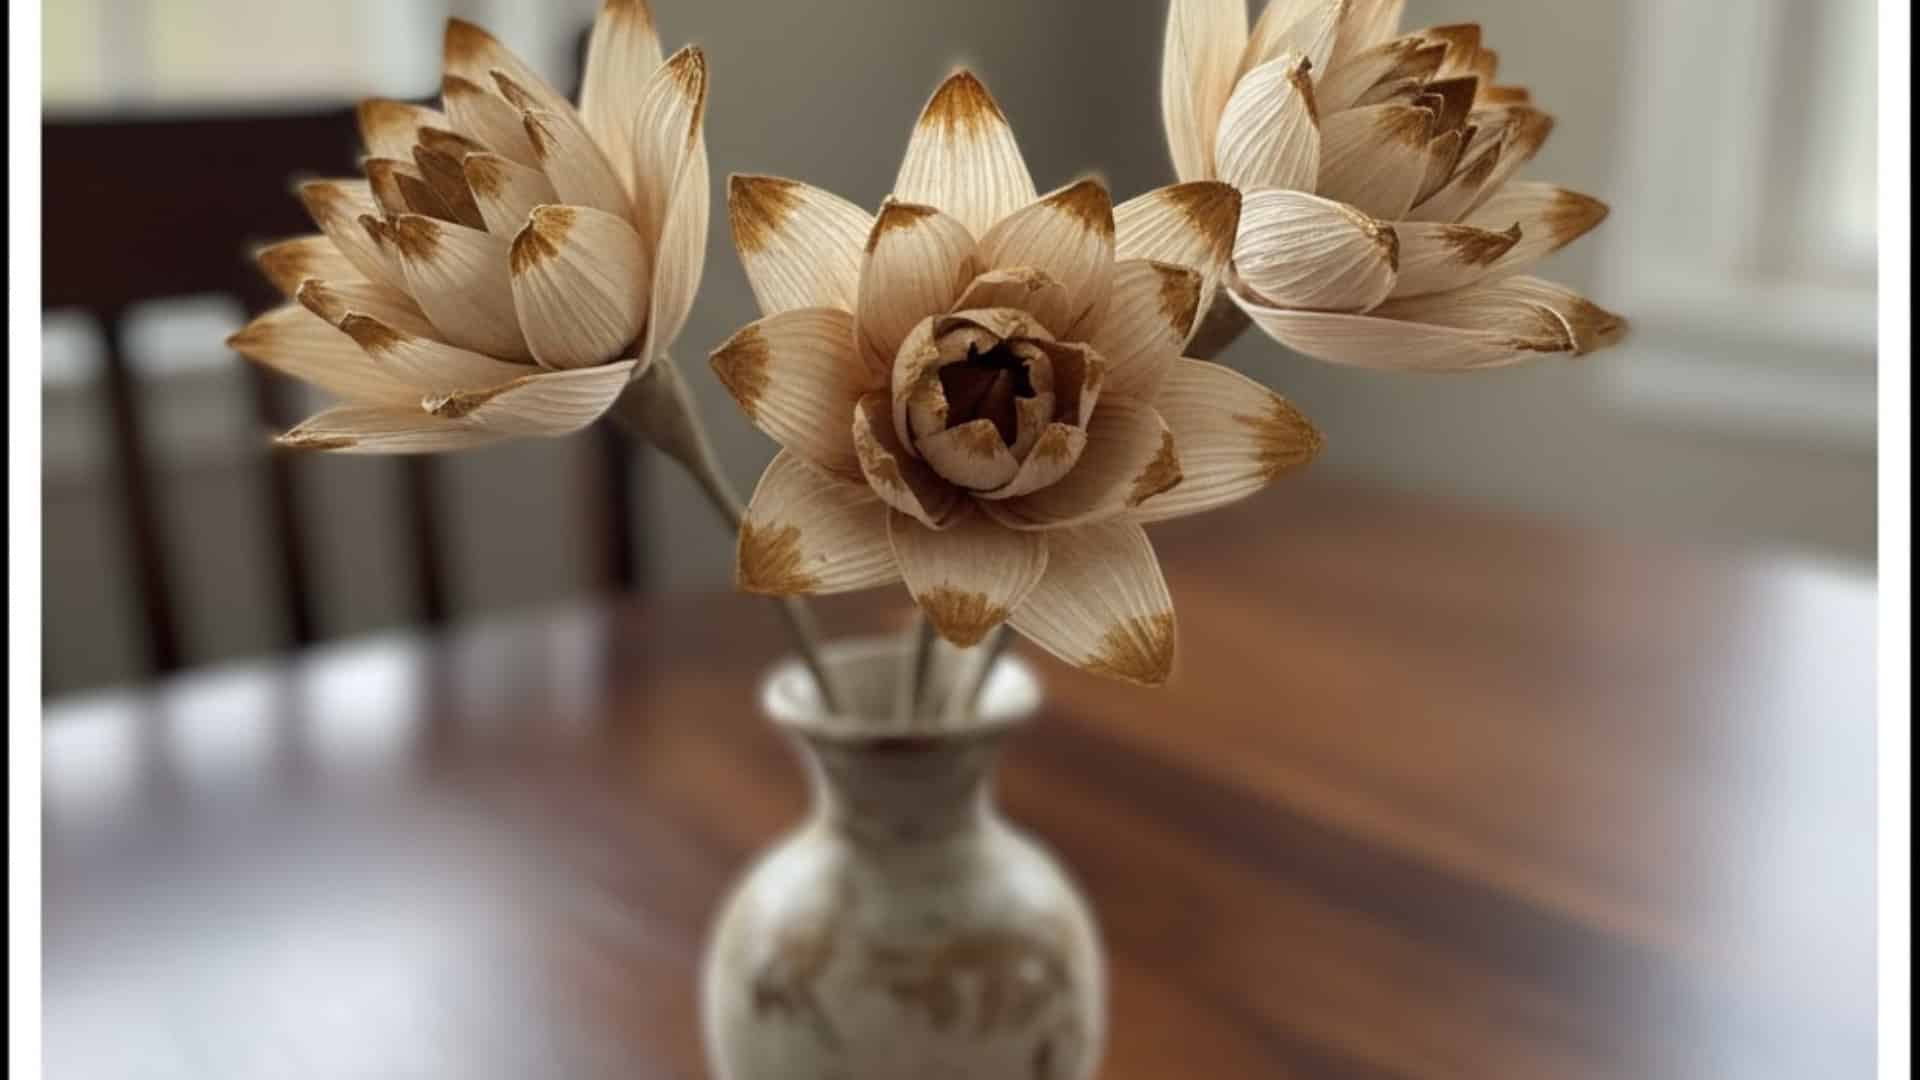
This rustic art project changes corn husks into stylish, handmade flowers. Teens enjoy shaping, layering, and coloring petals to mimic natural textures.
It builds patience and fine motor skills while connecting them to the harvest season.
The finished flowers look charming and timeless, perfect for gifts or home displays. It’s simple but feels surprisingly beautiful once done.
To begin, gather corn husks, glue, scissors, and paints.
Steps to Make:
- Soak husks in warm water to soften them.
- Cut and layer pieces into gentle petal shapes.
- Glue, dry, and add paint for soft shading.
25. Stained Glass Paper Leaves
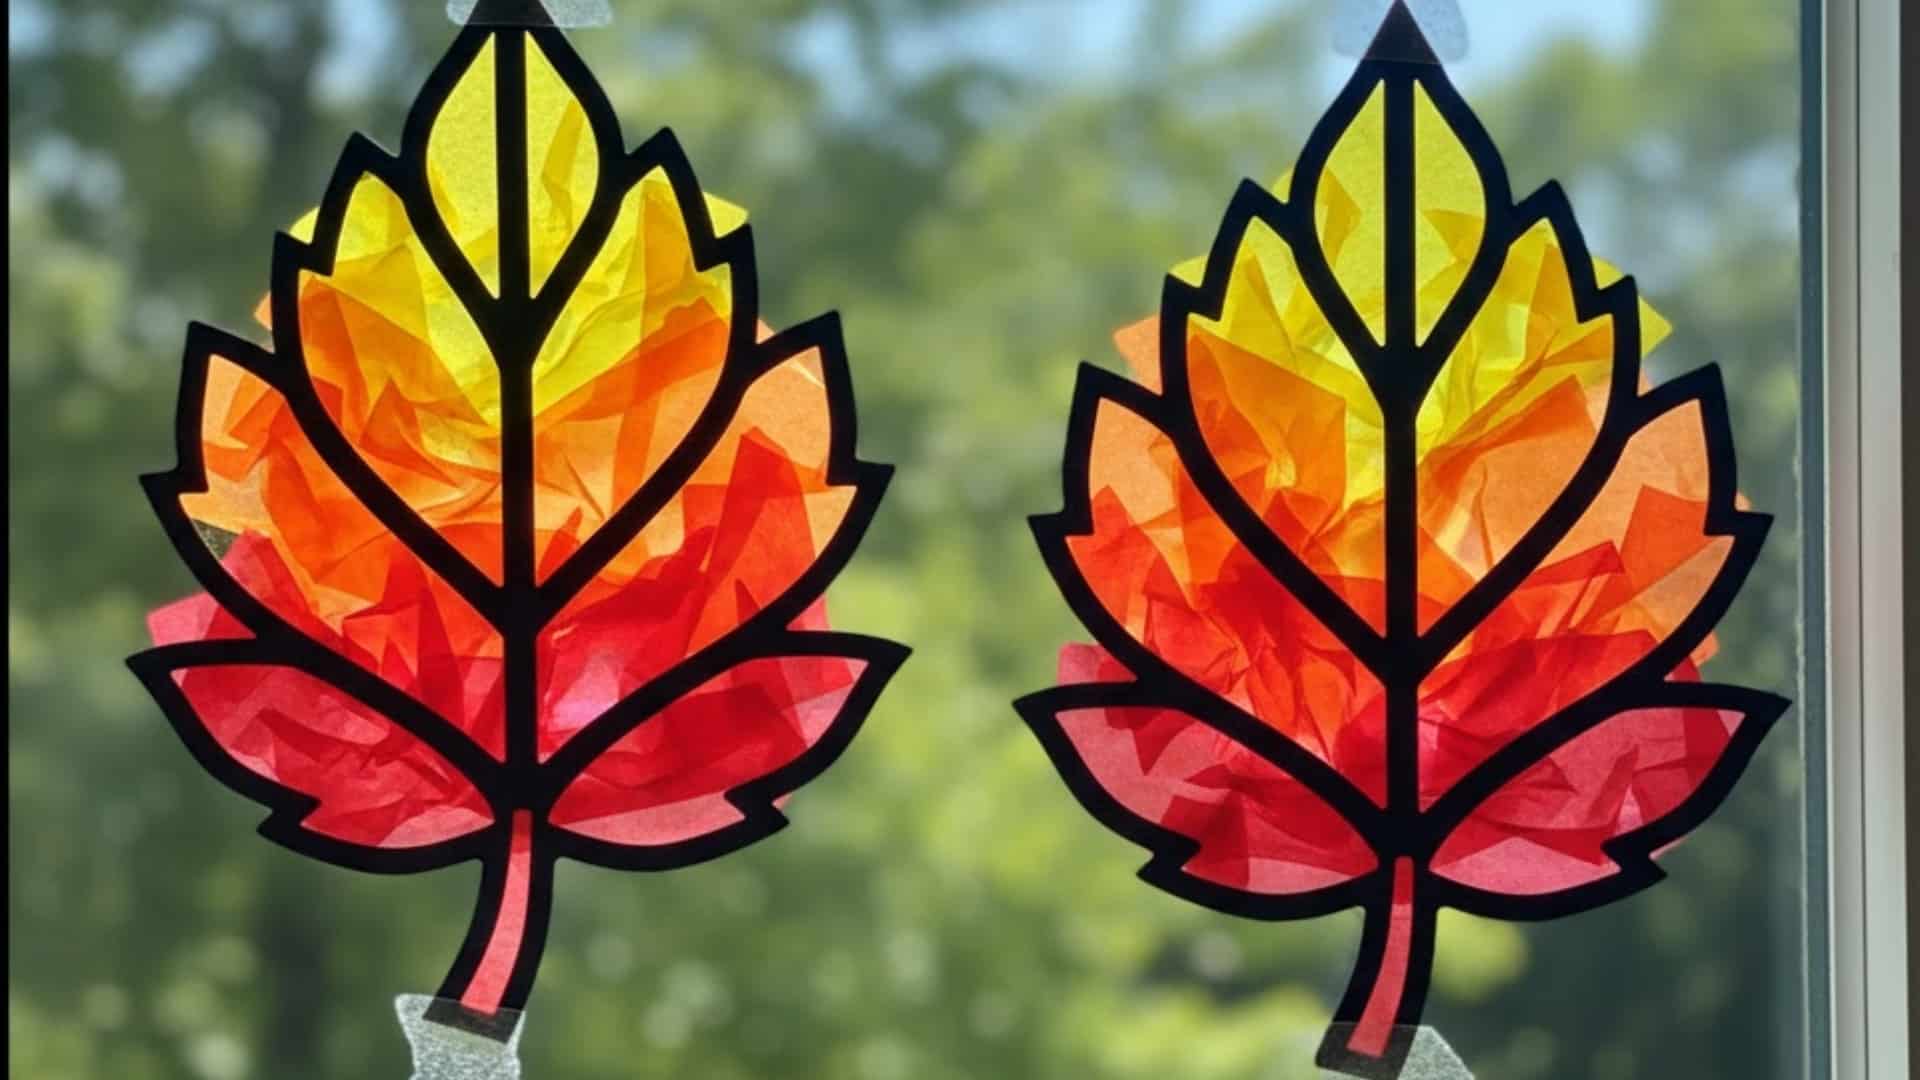
This radiant project lets teens experiment with color layering and light. It’s creative yet easy, showing how simple materials can look magical when sunlight shines through.
Teens learn about contrast, cutting precision, and balance as they design translucent leaves. It’s calming and expressive at the same time, ideal for cozy afternoons.
The finished work decorates windows beautifully, glowing whenever light passes by.
To begin, collect black cardstock, tissue paper, scissors, and glue.
Steps to Make:
- Cut out a leaf outline from cardstock to form a frame.
- Layer and glue colorful tissue paper inside carefully.
- Trim edges neatly once dry for clean lines.
26. Thanksgiving Banner with Stenciled Quotes
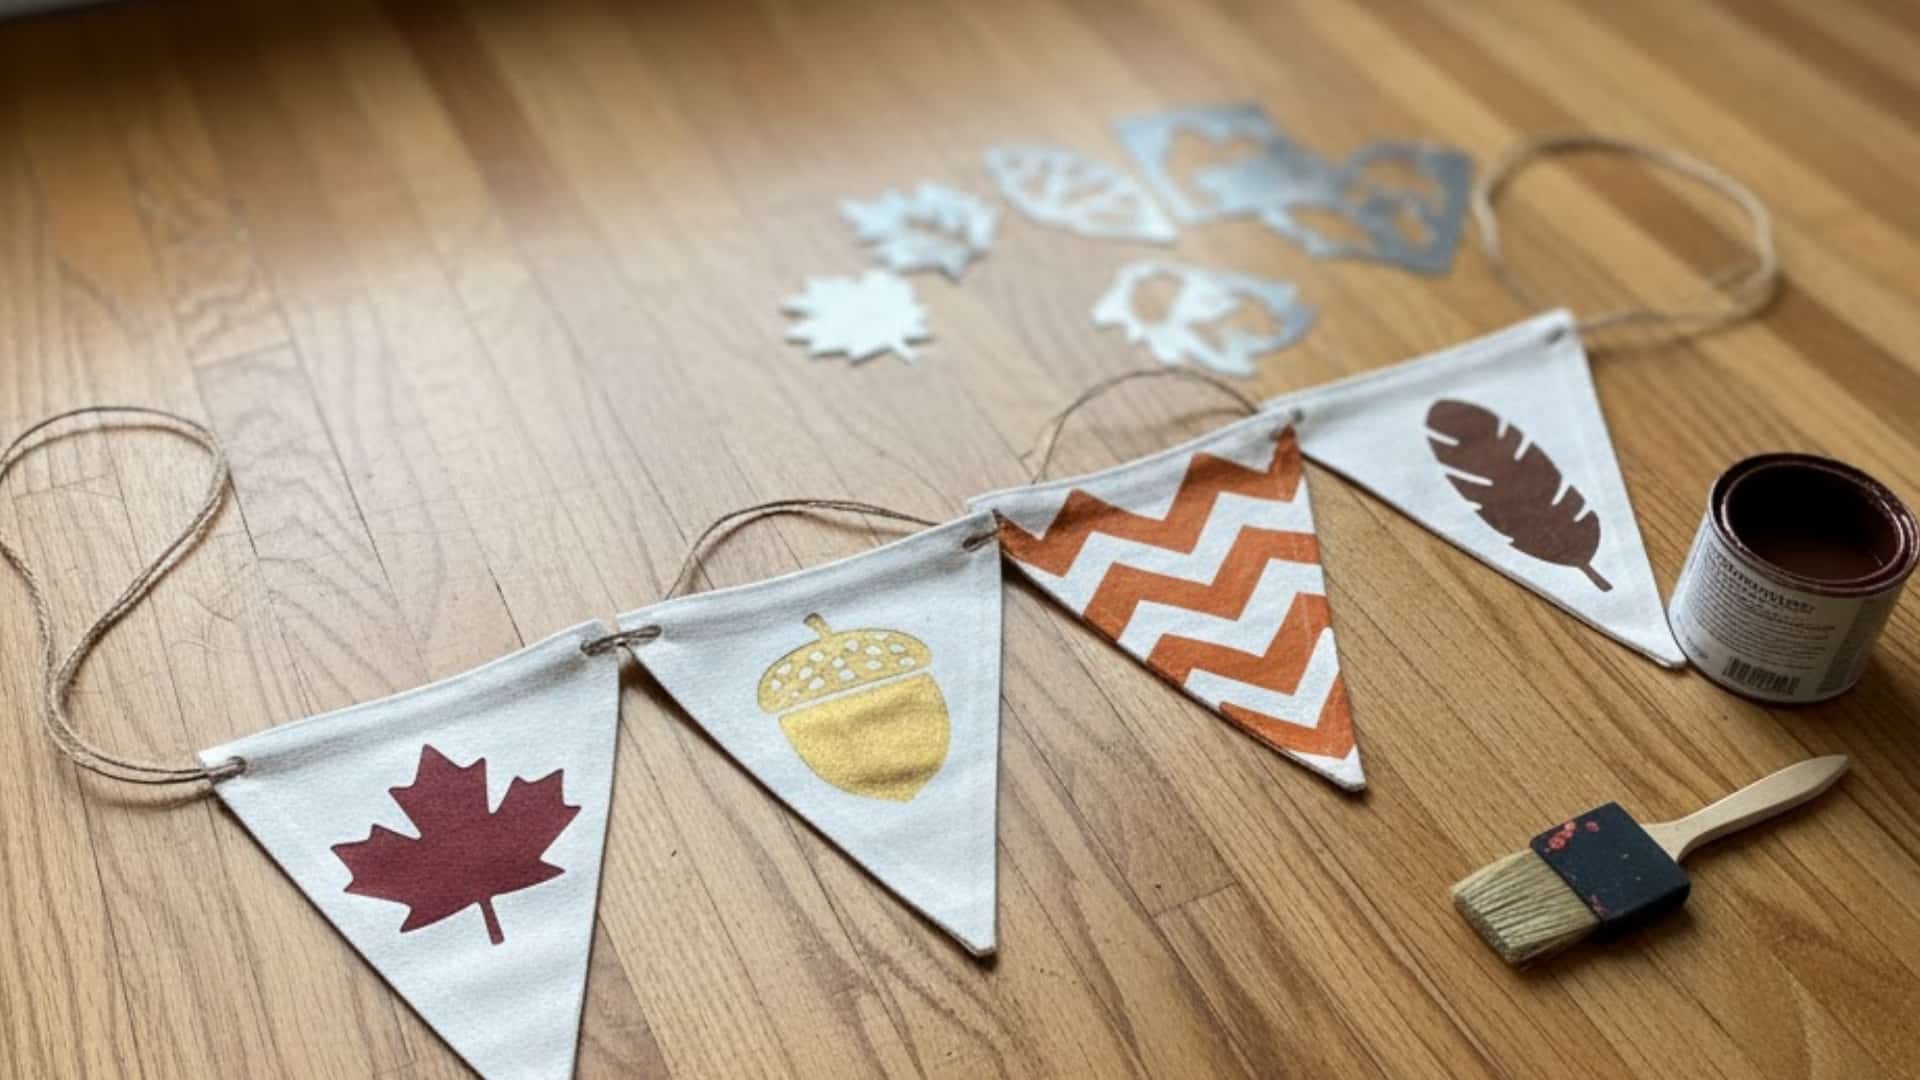
This cheerful craft mixes creativity with expression. Teens paint banners featuring thankful words or short quotes, learning to balance layout and steady handwork.
It’s simple, fun, and perfect for decorating rooms or parties.
The process builds patience and precision while keeping a festive mood. Finished banners make any space look lively and heartfelt. Each one feels personal and meaningful.
To start, grab small canvas triangles, stencils, paint, and twine.
Steps to Make:
- Arrange triangles in order and stencil one letter per piece.
- Paint carefully, then let the designs dry completely.
- Tie triangles onto twine and hang across a doorway.
27. Pumpkin Centerpiece Painting
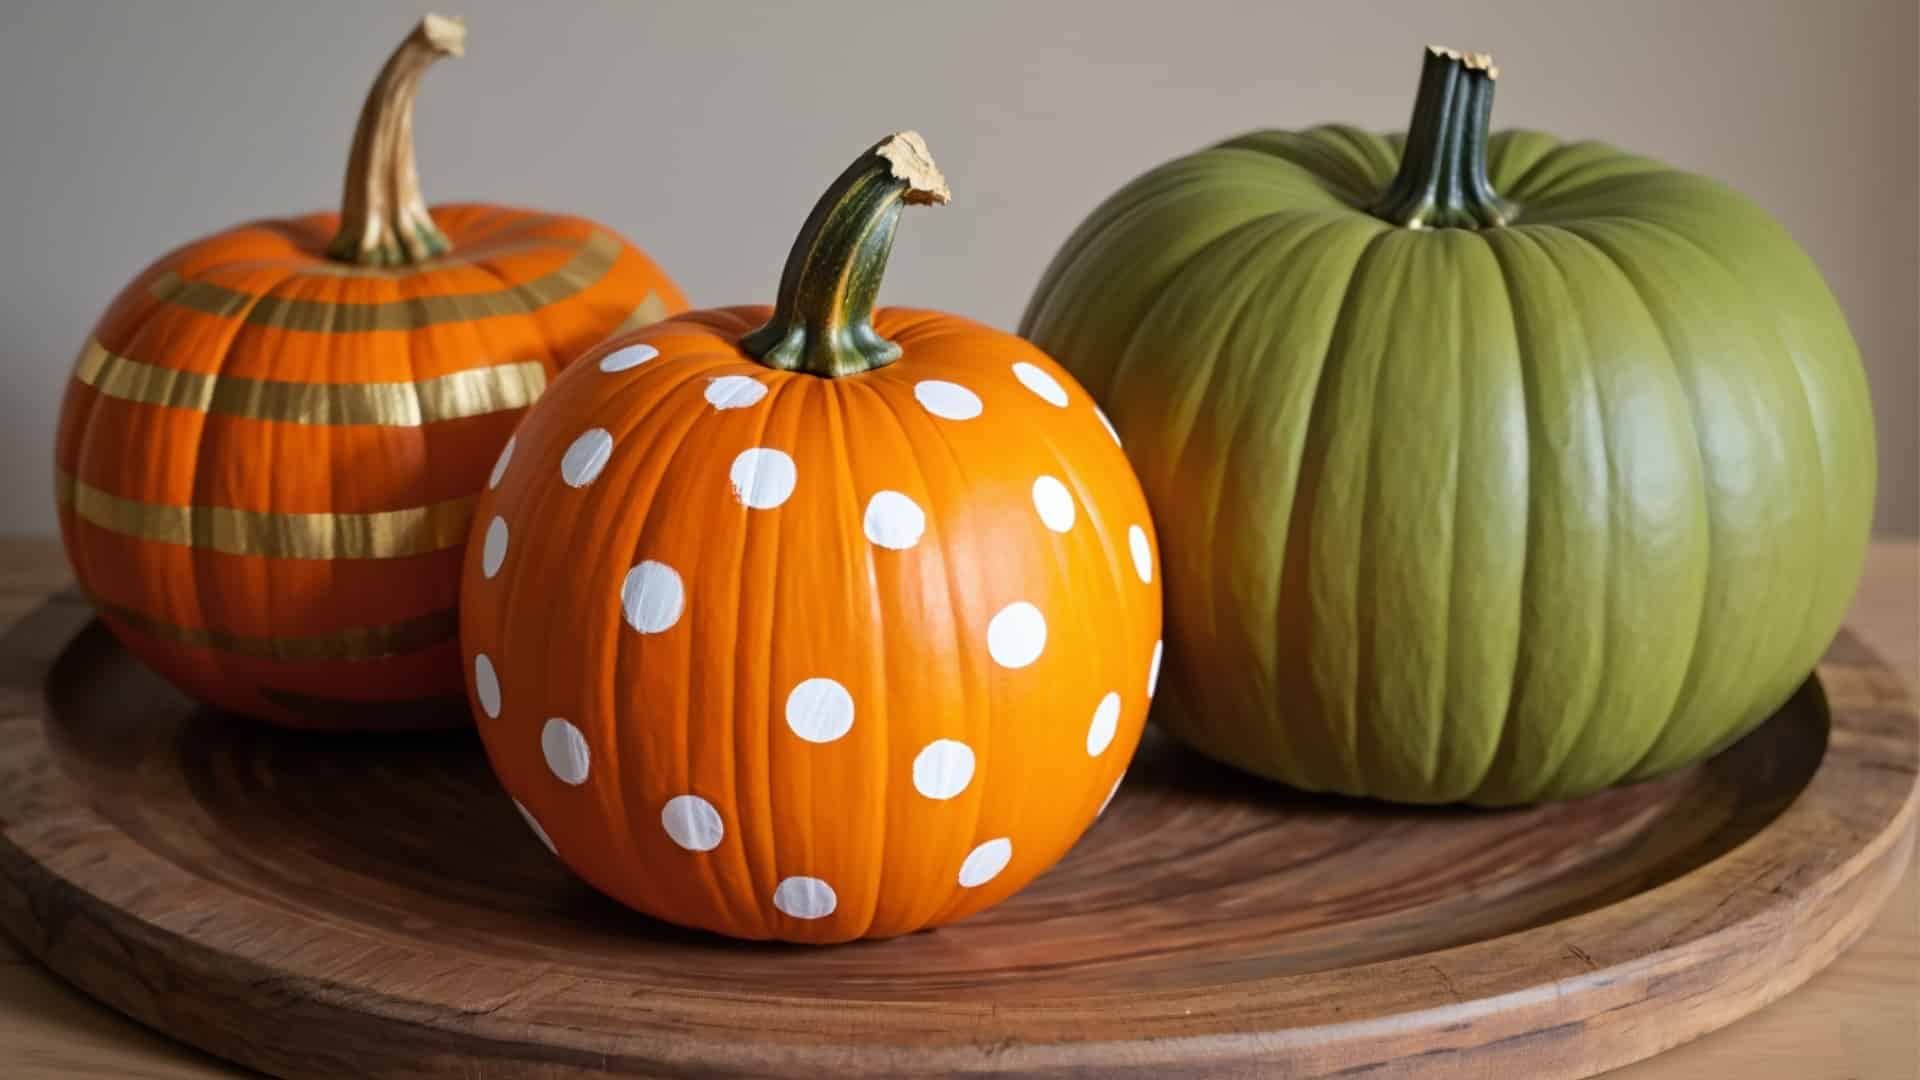
This creative project helps teens paint mini pumpkins with unique patterns and messages.
It’s easy, calming, and allows them to explore brush control and design. The activity promotes self-expression while giving results that feel festive and stylish.
Painted pumpkins make lovely centerpieces or gifts for friends. Teens enjoy the cozy process and pride in seeing them displayed. Each one feels personal and cheerful.
To begin, collect mini pumpkins, paint, and brushes.
Steps to Make:
- Wipe pumpkins clean and plan a simple design.
- Paint with warm fall tones, such as orange, gold, or red.
- Let dry completely before displaying.
28. 3D Paper Cornucopia Model
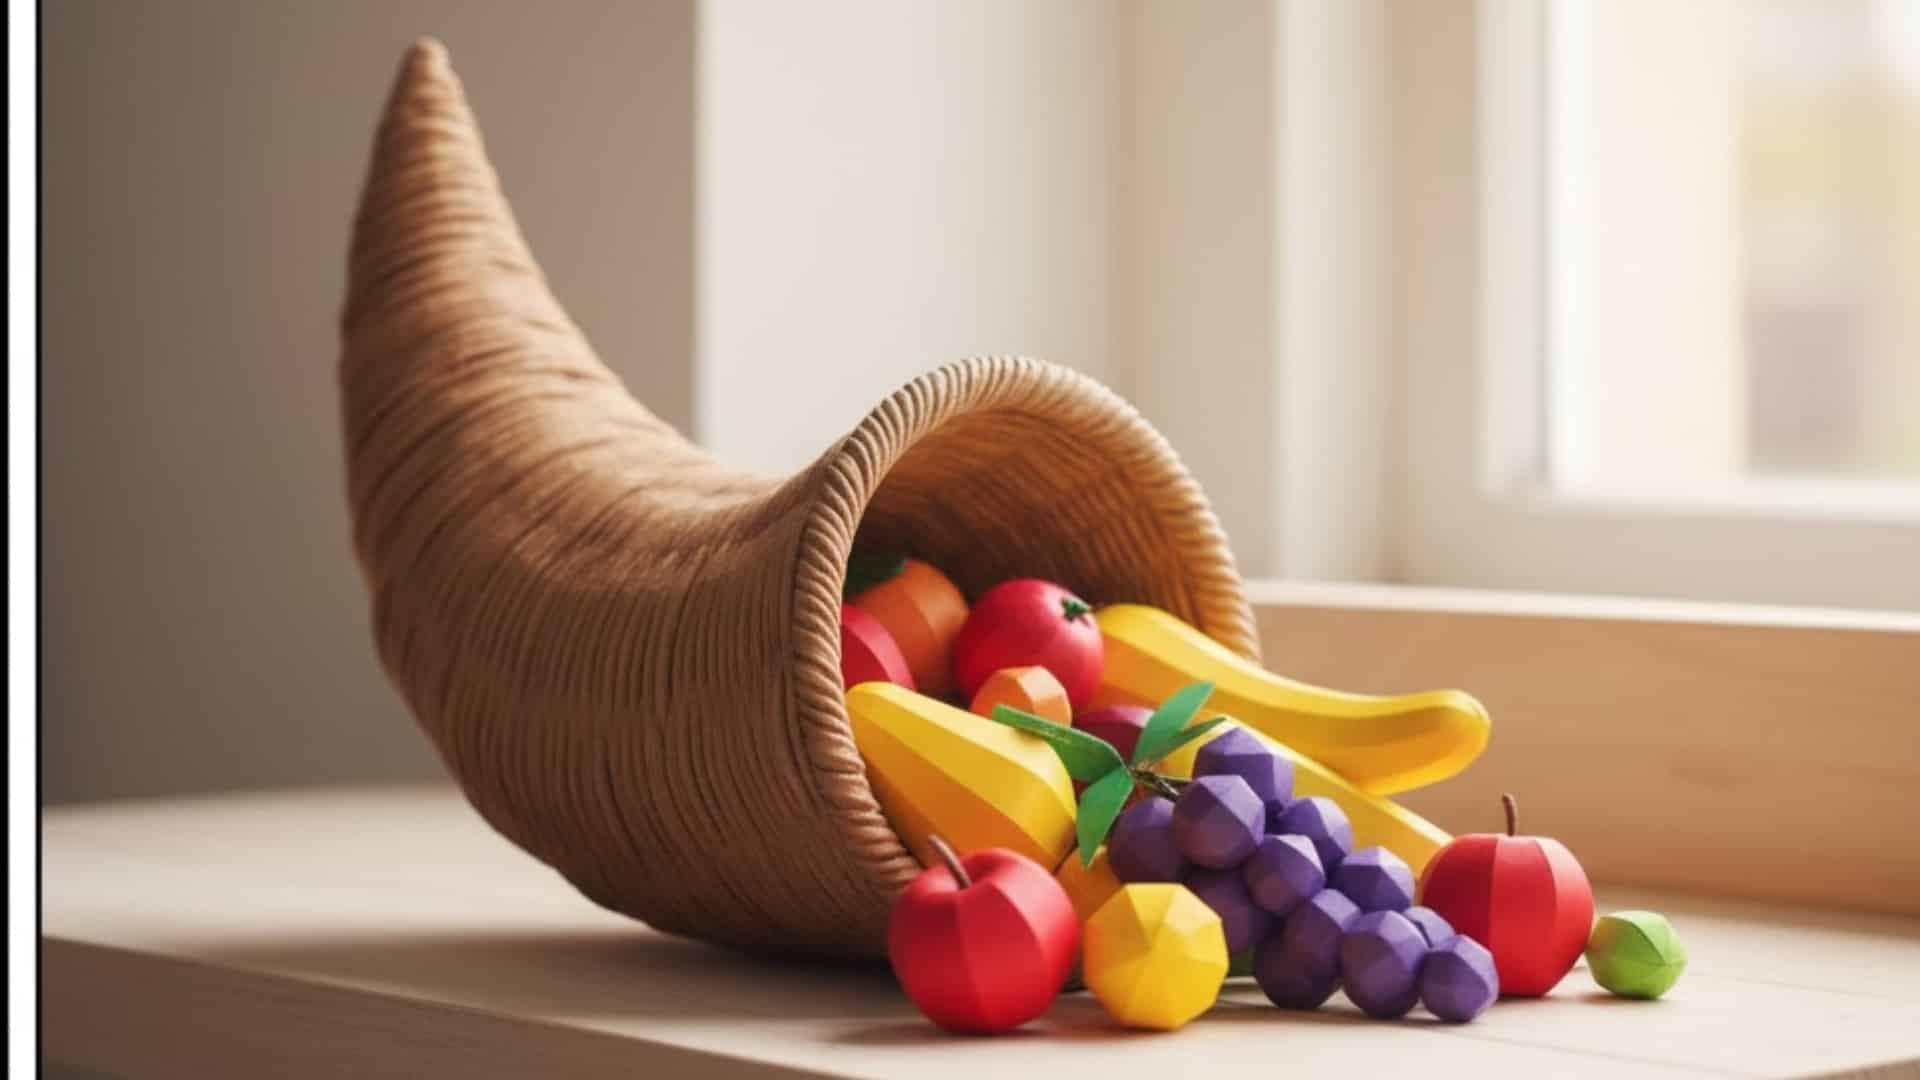
This hands-on project teaches creativity and patience through simple paper modeling.
Teens craft cornucopias filled with colorful fruits, symbolizing abundance and gratitude. The process improves focus while staying enjoyable and relaxing.
Finished models add brightness to tables, classrooms, or shelves. It’s artistic, symbolic, and full of meaning. The cheerful mix of color and form feels truly festive.
To begin, gather brown paper, colored paper, glue, and scissors.
Steps to Make:
- Roll brown paper into a cone shape for the base.
- Cut and shape fruits and vegetables from colored paper.
- Glue them, spilling gently from the cone’s opening.
29. Tie-Dye Thanksgiving T-Shirts
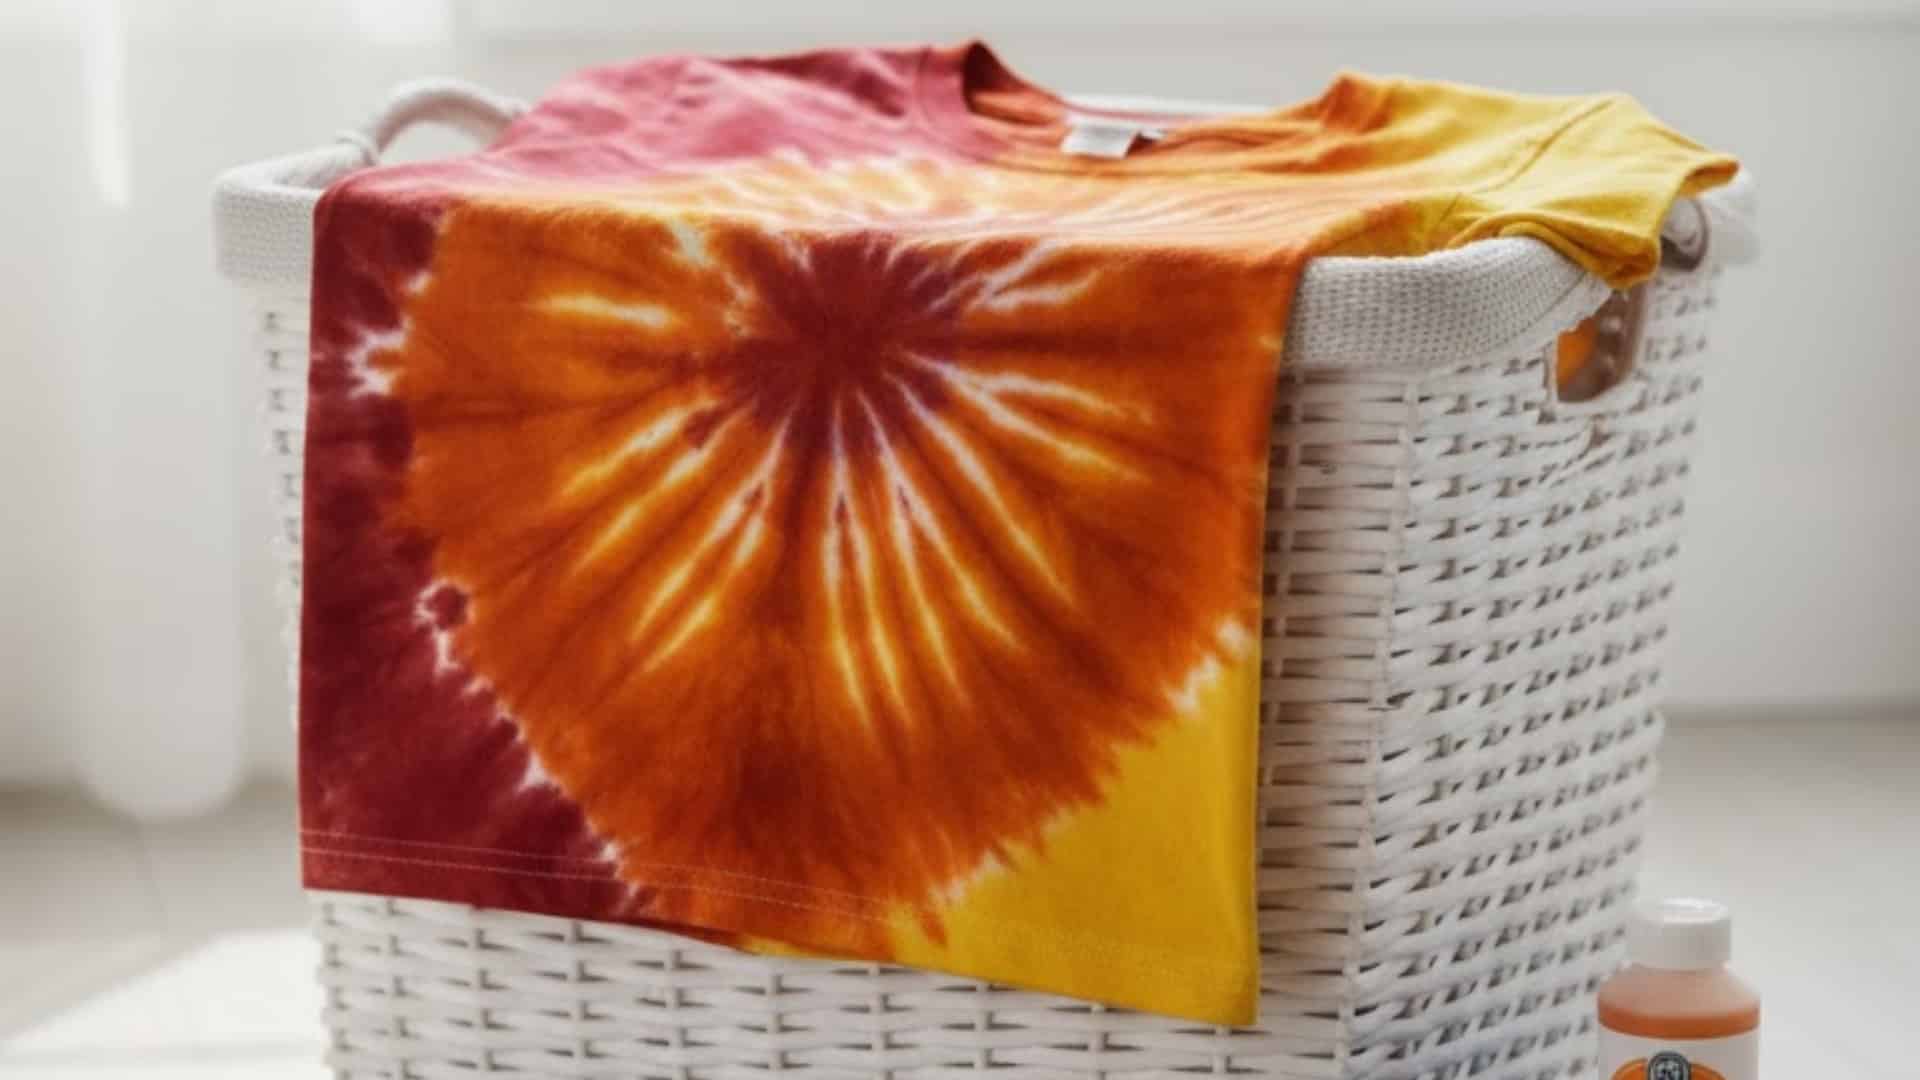
This playful project brings creativity to wearable art.
Teens design shirts inspired by fall colors, learning about blending and composition while having fun. It’s expressive, exciting, and builds confidence through bold, visible results.
Each shirt looks unique and energetic, perfect for gatherings or family photos. The process feels spontaneous and cheerful, leaving lasting memories.
To begin, grab plain shirts, dyes, rubber bands, and gloves.
Steps to Make:
- Twist or fold the shirts, then tie them tightly with rubber bands.
- Apply dyes in orange, red, and yellow tones evenly.
- Rinse, dry, and unfold once the colors set.
30. Clay Pumpkin Candle Holders

This relaxing sculpting project lets teens shape small clay pumpkins that double as candle holders.
It’s a calm, hands-on way to blend art with purpose while improving focus, control, and creativity. The clay feels grounding to work with, helping teens slow down and enjoy the process.
The finished holders glow beautifully when lit, adding warmth and seasonal charm. They make thoughtful, handmade gifts or festive decorations.
To begin, gather air-dry clay, tealights, carving tools, and paint.
Steps to Make:
- Mold clay into small pumpkins, leaving space on top for tealight candles.
- Add ridges, stems, and small details for a realistic finish.
- Let dry, then paint in soft oranges and seal lightly for shine.
Meaningful Thanksgiving Art Projects for Adults
Thanksgiving crafts for adults bring calm and creativity together, helping people relax while adding warmth and gratitude to their homes through mindful, hands-on projects.
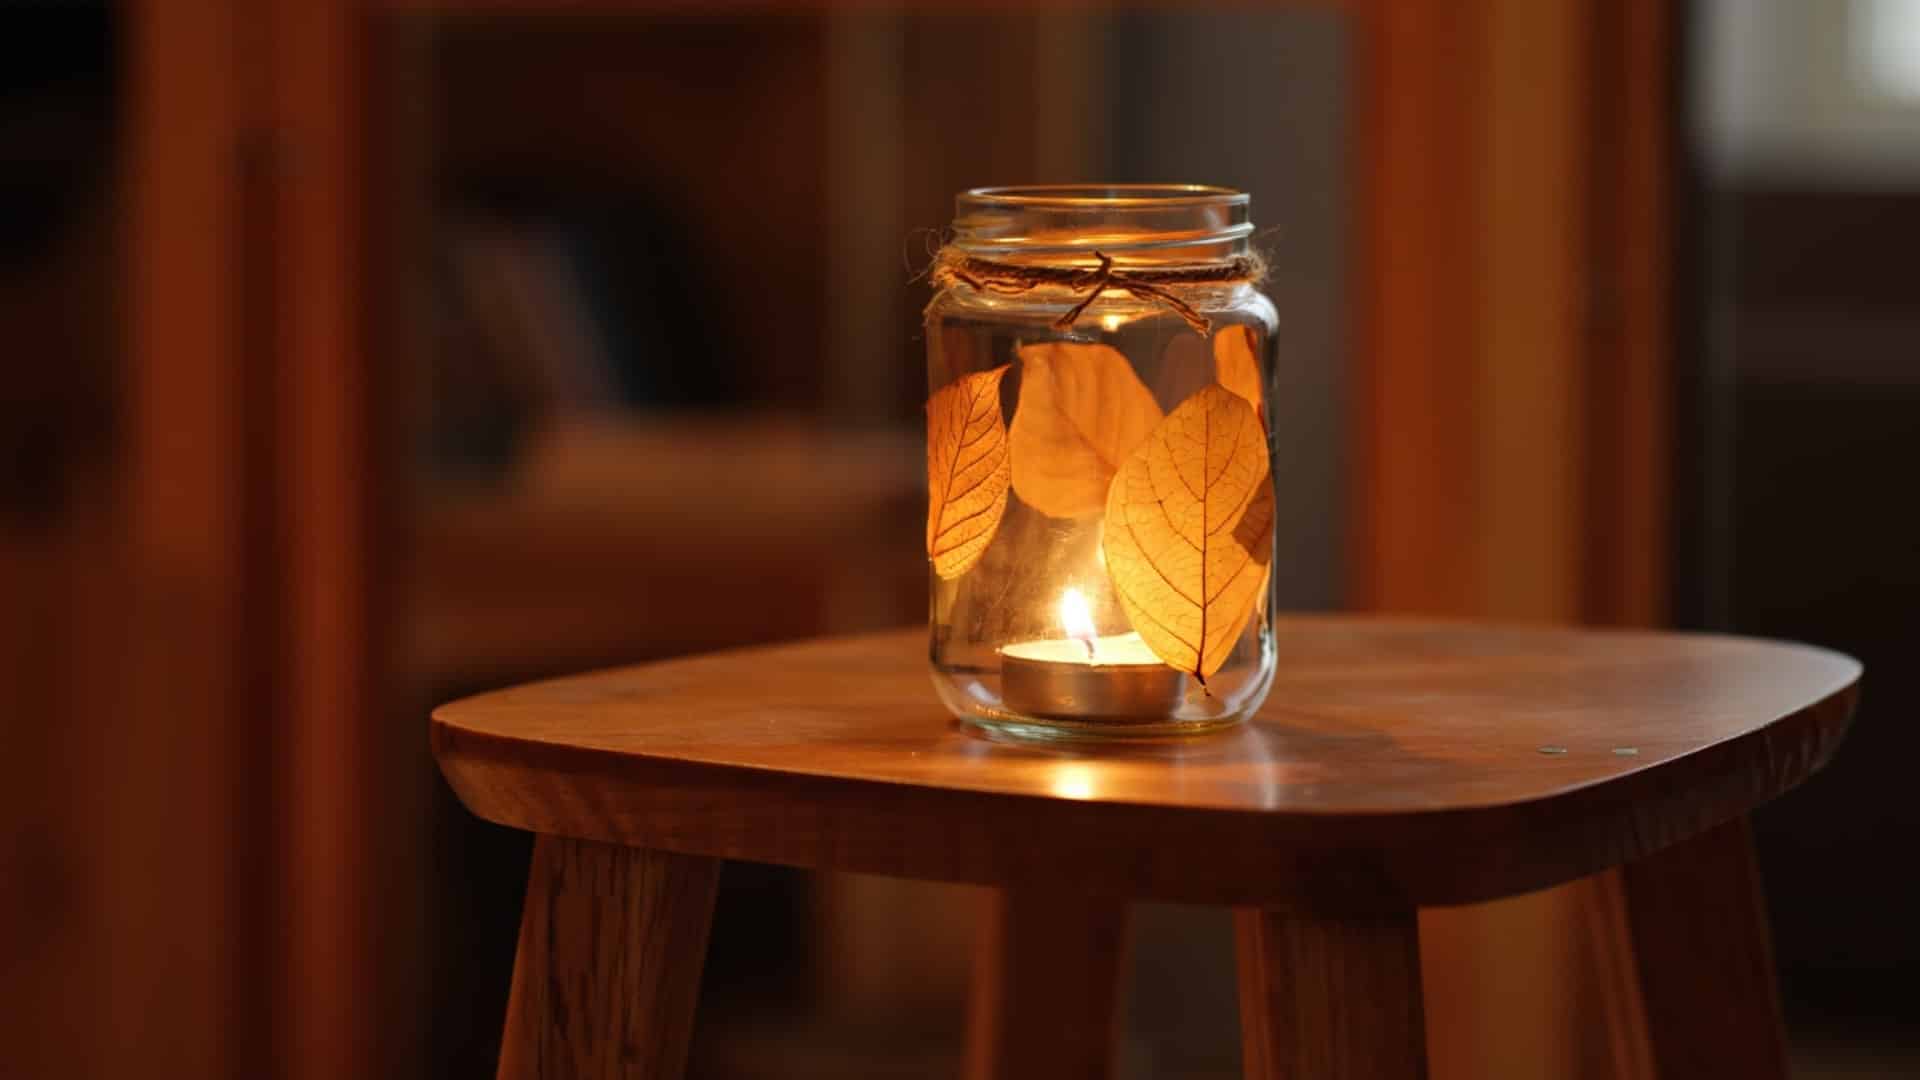
31. Pressed Leaf Candle Holders
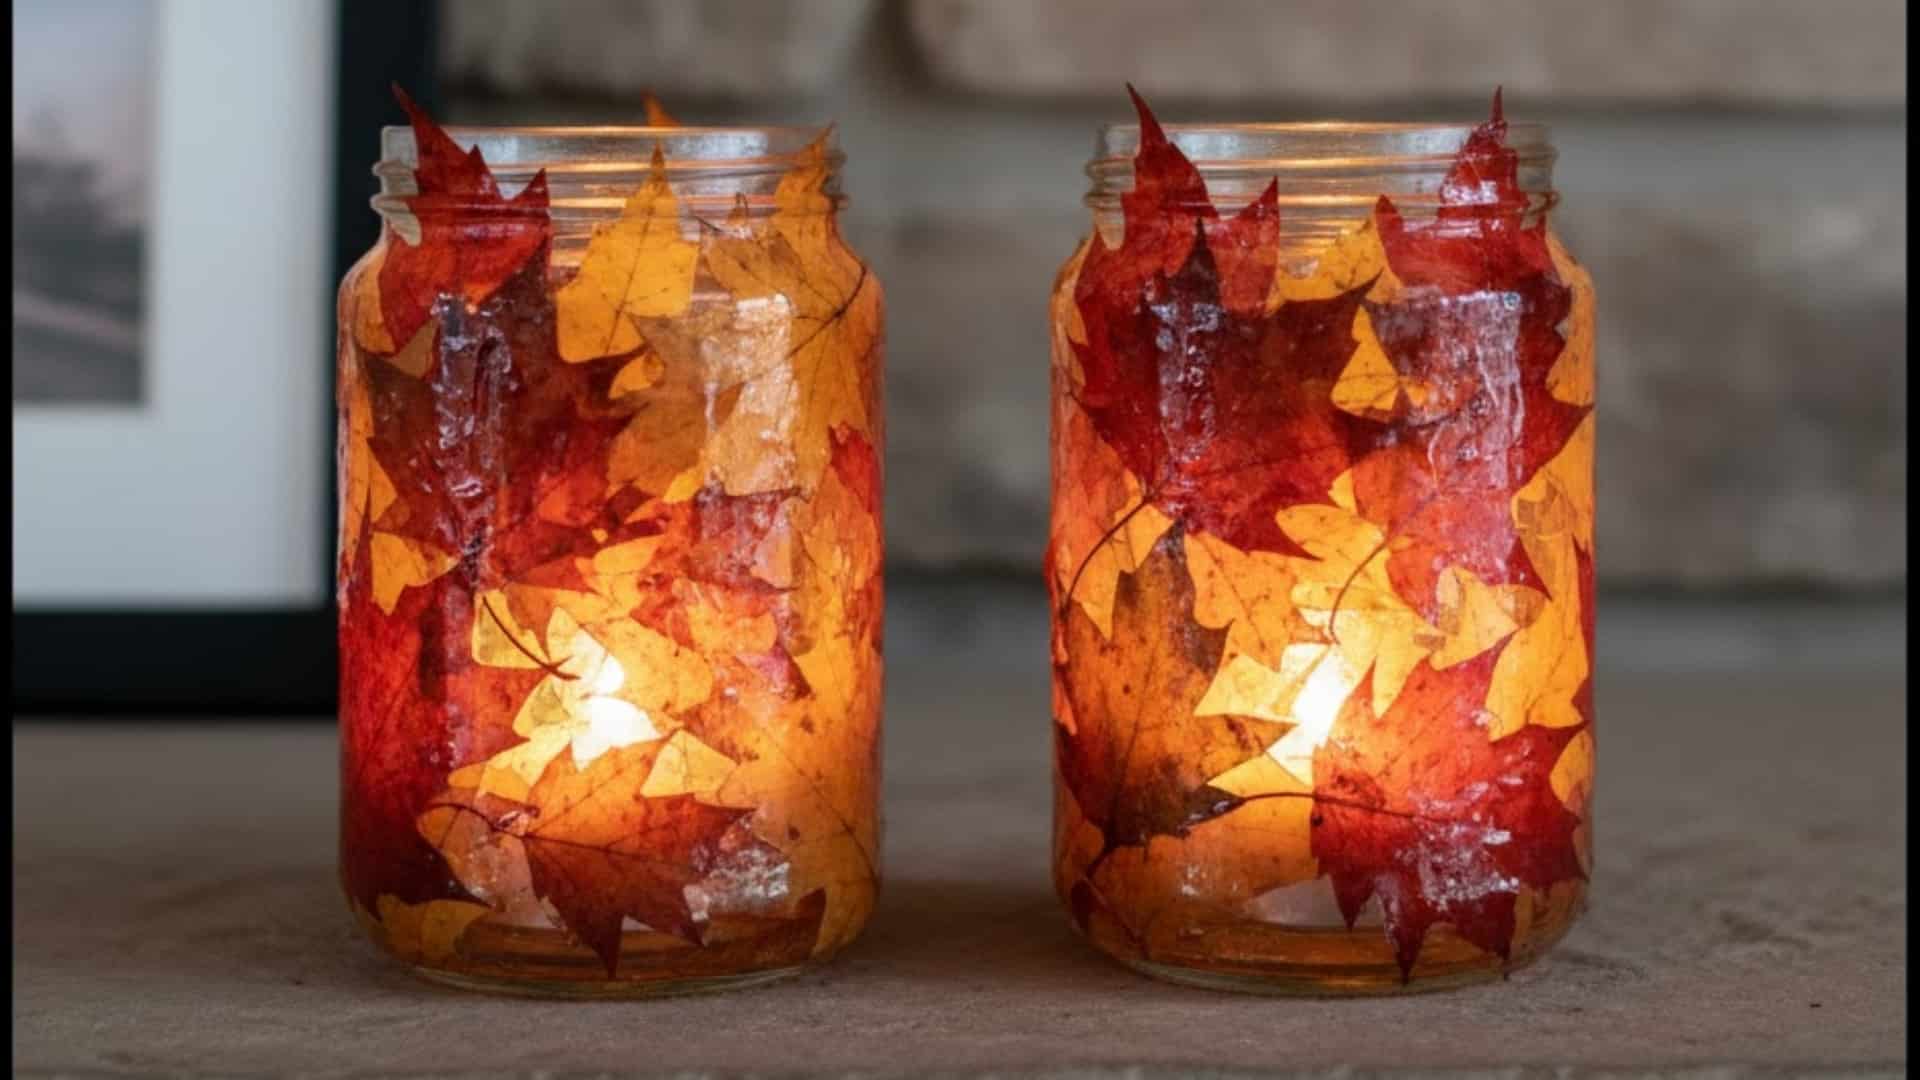
This calm, nature-inspired project helps adults turn simple glass jars into glowing art.
It brings a soft rhythm to your day, focusing on color, shape, and touch. The process feels soothing, teaching patience as it creates beautiful handmade décor.
The finished holders radiate light that flickers through pressed leaves. They’re perfect for gifts, dinners, or quiet reflection.
To begin, gather glass jars, pressed leaves, glue, and brushes.
Steps to Make:
- Apply a thin, even coat of glue to the glass surface.
- Press leaves gently, then smooth them with your fingers to remove air.
- Seal with another coat of glue and let it dry overnight.
32. Thanksgiving Memory Wreath
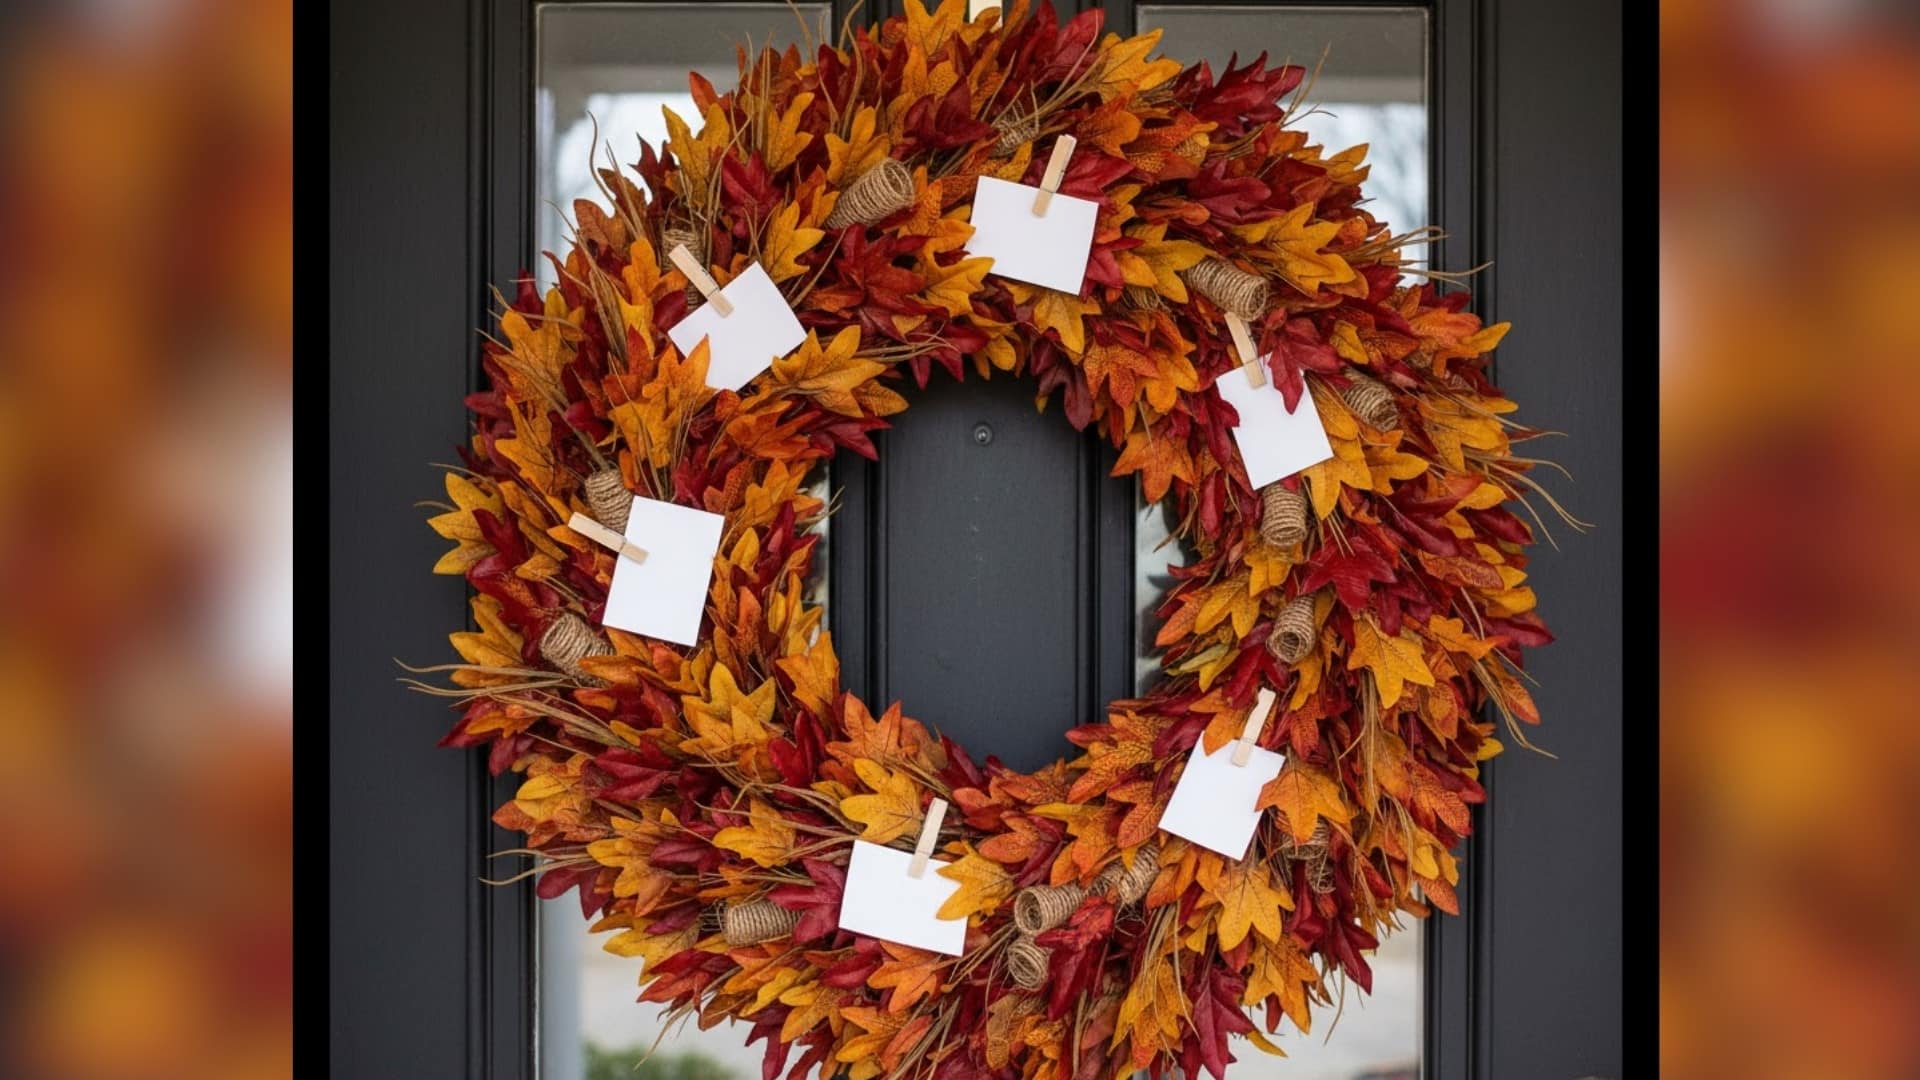
This project mixes emotion with creativity.
Adults use photos, notes, and mementos to build wreaths that celebrate family memories. It’s both reflective and decorative, offering a sentimental way to honor loved ones.
The gentle crafting process feels calming, letting your mind wander through cherished moments. Each finished wreath becomes a circle of gratitude and remembrance.
It makes a beautiful seasonal keepsake. To begin, gather a wreath base, faux leaves, small photos, and ribbon.
Steps to Make:
- Wrap the base evenly with leaves, ribbon, or twine.
- Attach photos or memory notes between the decorations.
- Add finishing touches, such as small charms or bows.
33. Painted Gratitude Rocks
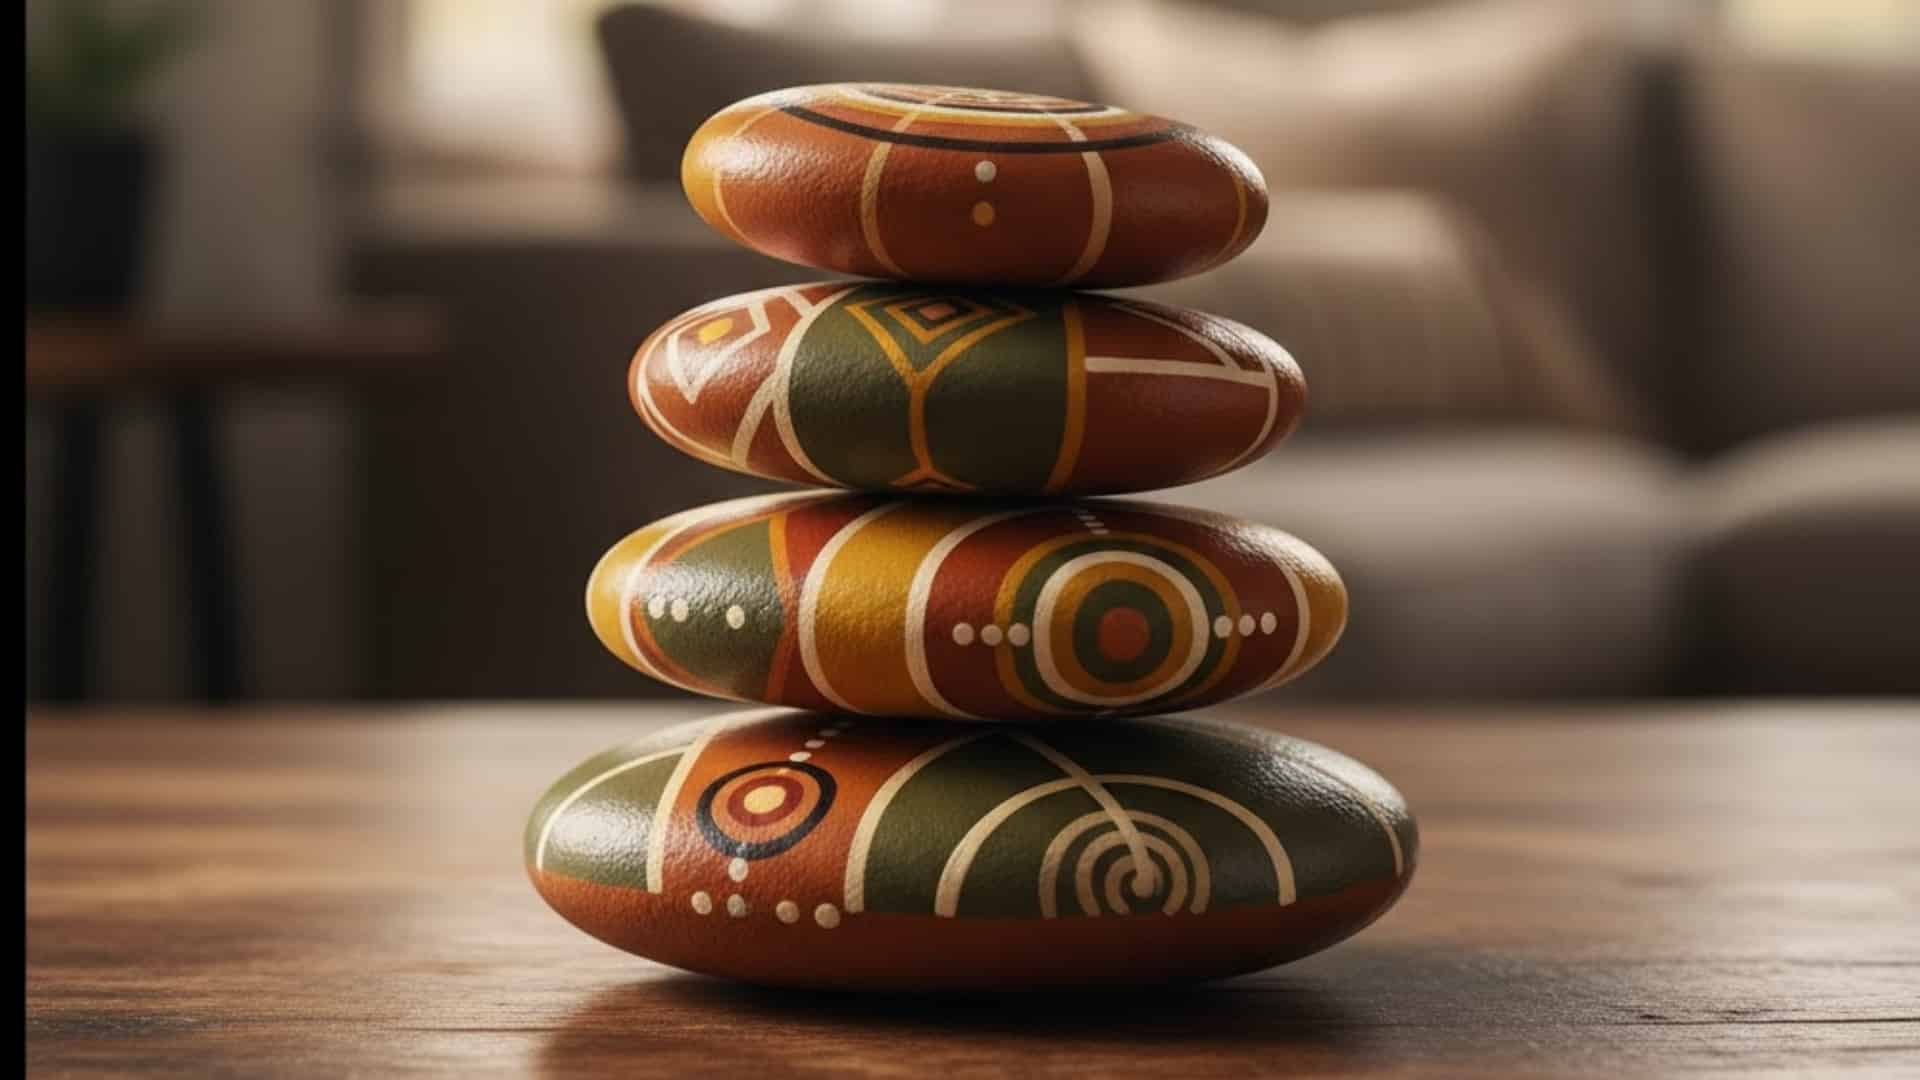
This mindful project helps adults slow down and reflect as they paint words of gratitude on smooth stones.
It’s relaxing, expressive, and a simple way to practice positivity. The process requires little effort but feels deeply personal.
Each rock becomes a symbol of calm, appreciation, and inner peace. Displayed together, they form a small garden of thankfulness.
To begin, collect flat stones, acrylic paints, brushes, and varnish.
Steps to Make:
- Clean and dry stones before painting.
- Paint words, symbols, or patterns that reflect gratitude.
- Seal with varnish for shine and durability.
34. Fabric Pumpkin Centerpieces
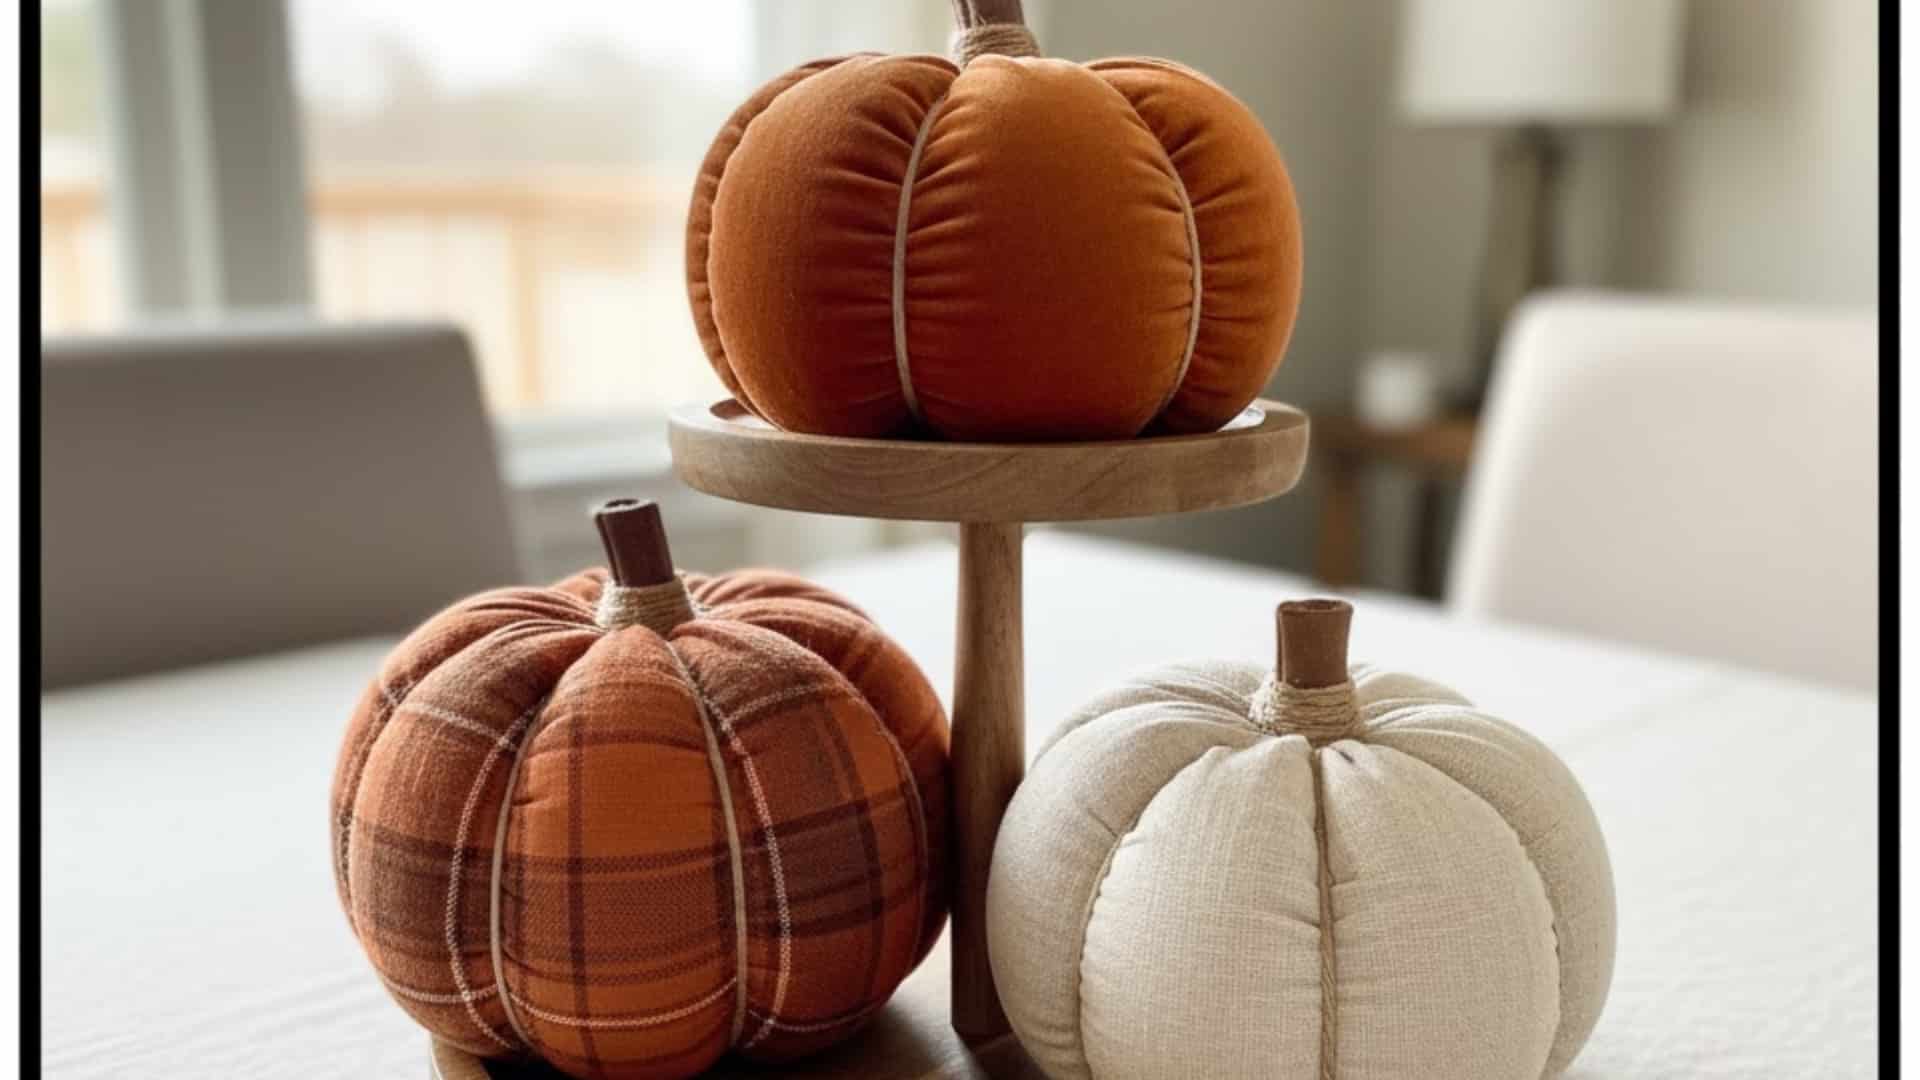
This cozy sewing craft lets adults create soft pumpkins for long-lasting autumn décor.
It’s relaxing, creative, and beginner-friendly, offering a peaceful break from busy schedules. The repetition of stitching and shaping fabric feels meditative.
Finished pumpkins look charming and rustic and can be used year after year. They also make thoughtful, handmade gifts.
To begin, gather fabric squares, stuffing, thread, and ribbon.
Steps to Make:
- Sew fabric edges into a pouch and fill with stuffing.
- Pull the thread tight to close the top and shape the curves.
- Wrap with ribbon or twine to form pumpkin ridges.
35. Watercolor Autumn Cards
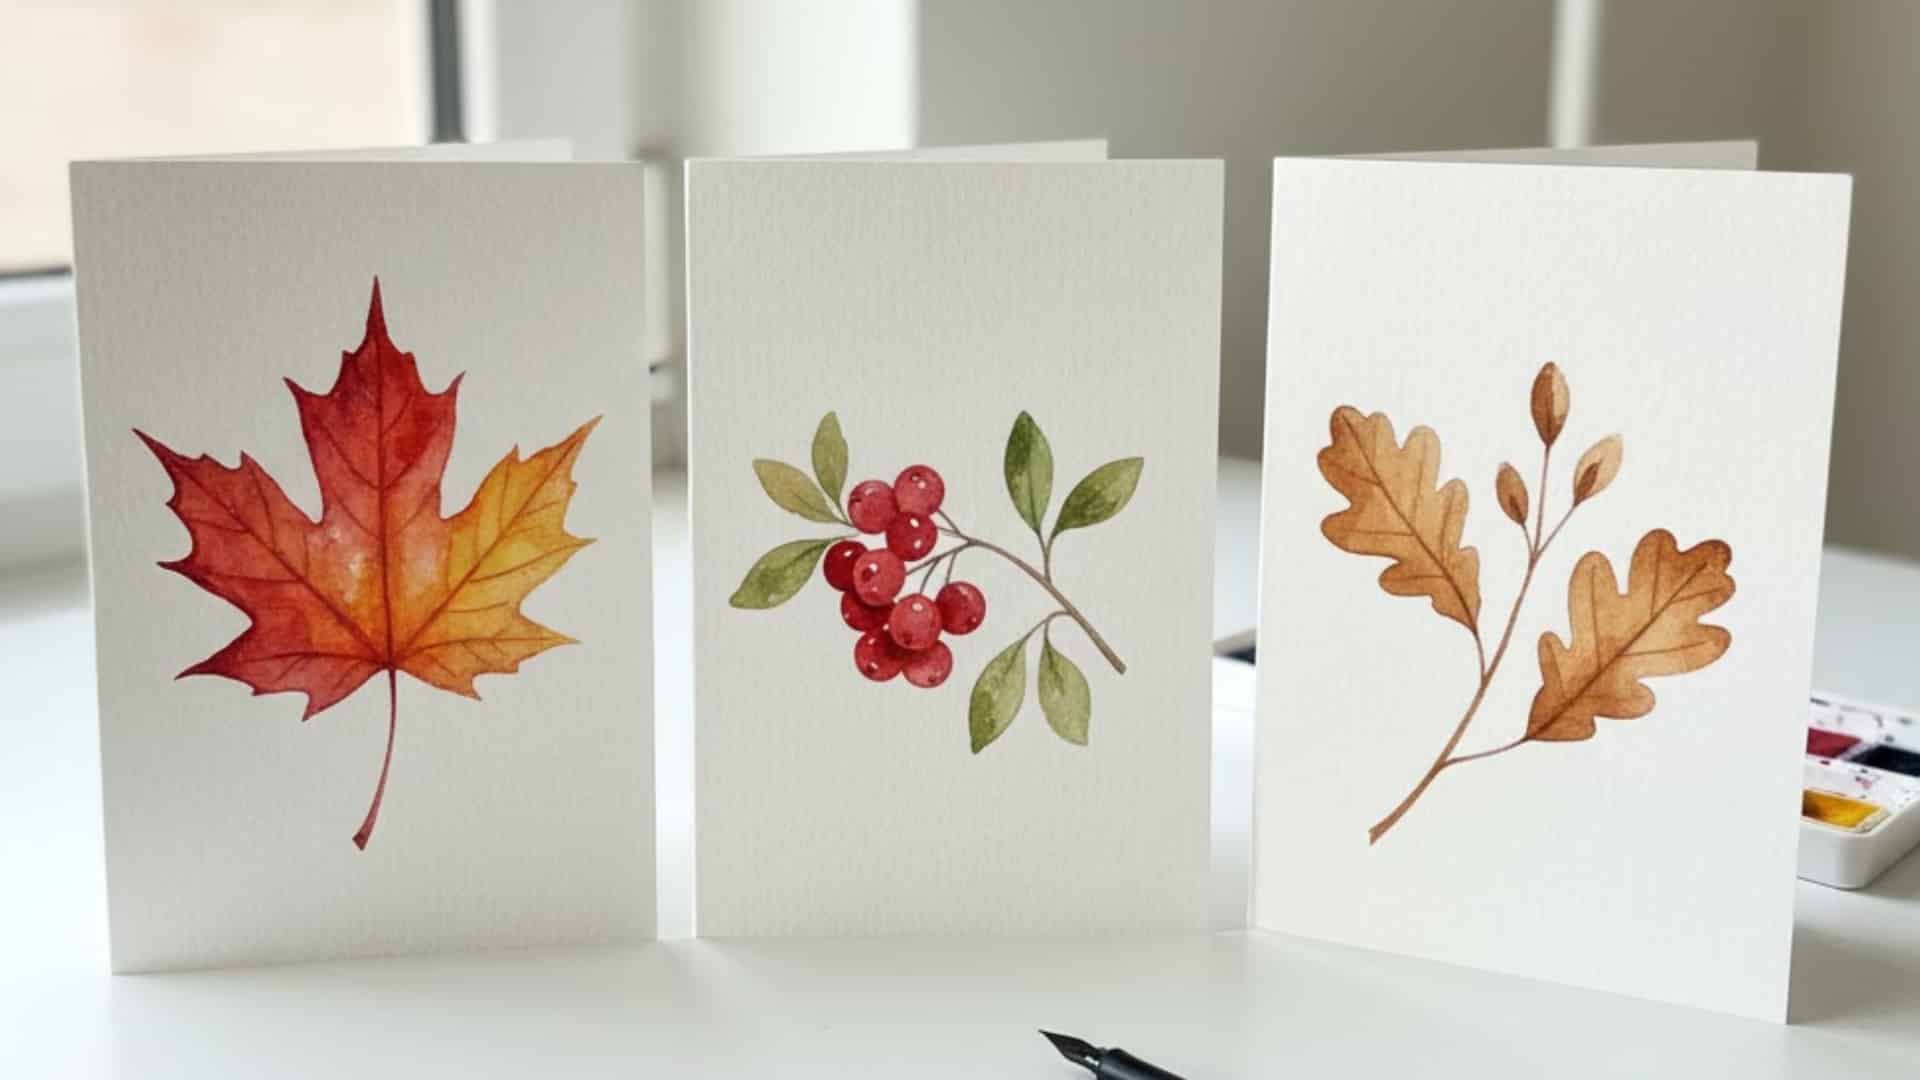
This peaceful project lets adults share gratitude through art. Painting soft autumn scenes feels meditative and uplifting while sparking creativity.
Each card becomes a personal keepsake filled with sincerity and care. The blending of watercolors soothes the mind and strengthens artistic confidence.
Finished cards make heartfelt gifts for family or friends. They’re simple yet full of emotion.
To begin, gather watercolor paper, brushes, paints, and pencils.
Steps to Make:
- Sketch a leaf, tree, or harvest theme lightly in pencil.
- Blend soft fall tones like orange, gold, and brown.
- Add handwritten words or details once dry.
36. Burlap and Lace Table Runner

This project brings rustic charm to Thanksgiving décor.
Adults enjoy combining rough burlap with soft lace, finding peace in every measured movement. The texture contrast feels balanced and soothing while crafting.
The project is beginner-friendly but looks professionally made once finished. It’s an easy way to add warmth and personality to your decor.
The finished runner fits beautifully across dining tables or shelves. It adds texture and heart to every gathering. To begin, gather burlap, lace trim, scissors, and glue.
Steps to Make:
- Cut the burlap evenly to the desired length for the table.
- Attach lace carefully along both edges using fabric glue.
- Press flat and let it dry before setting it out.
37. Wooden Thankful Sign
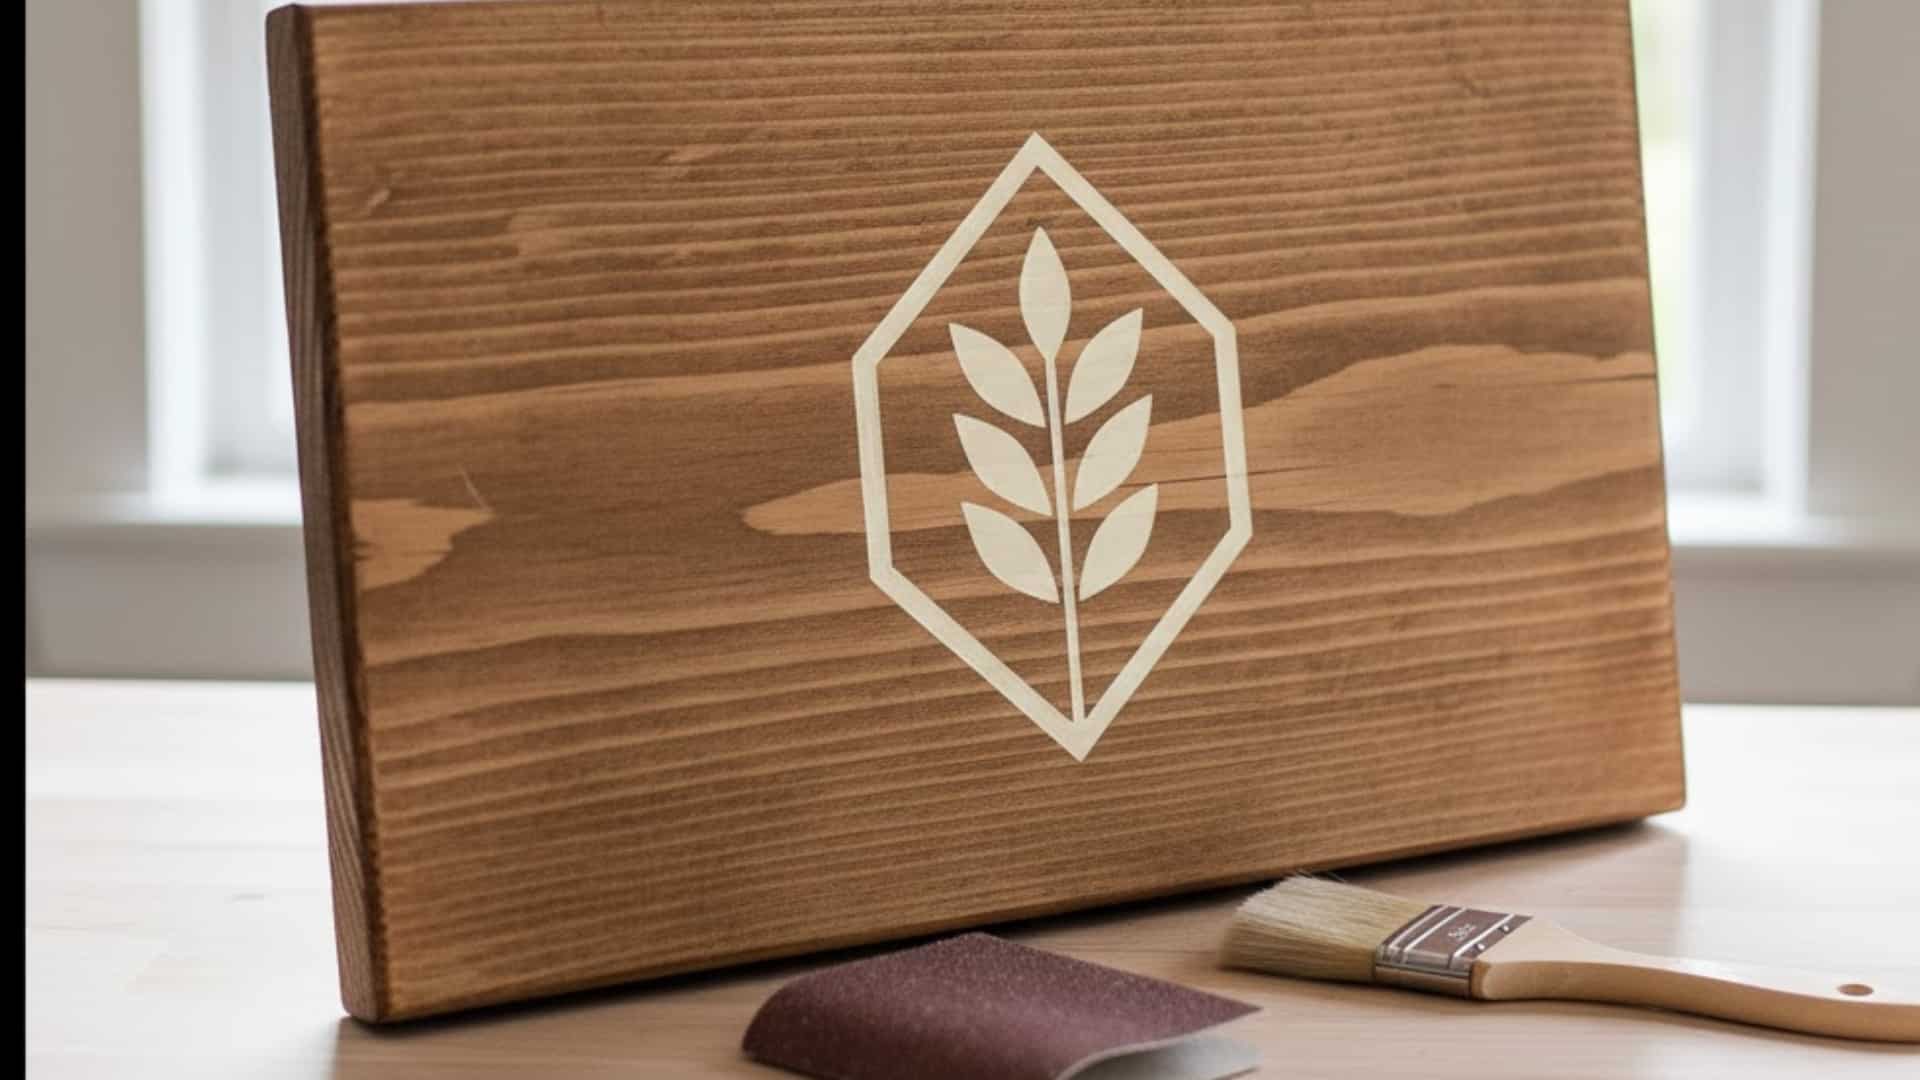
This calming craft lets adults create rustic wooden signs that celebrate gratitude. Painting meaningful words or phrases feels grounding and expressive.
It’s a great way to unwind while producing something decorative and heartfelt. The process requires patience but feels meditative and rewarding.
Finished signs fit perfectly in entryways or dining areas, radiating warmth and sincerity. The simple materials create art that lasts.
Each brushstroke reminds you to stay thankful year-round. To begin, gather wood planks, stencils, paint, and sandpaper.
Steps to Make:
- Sand wood smoothly to remove rough edges.
- Paint or stencil your chosen word neatly in the center.
- Let dry and seal with a clear finish.
38. Autumn Leaf Resin Coasters
This artistic project preserves the beauty of fall leaves in glass-like resin.
Adults enjoy its slow, careful pace that feels both creative and mindful. Arranging the leaves inside molds teaches precision and design balance.
The final coasters shimmer beautifully under soft light, capturing nature’s colors permanently.
It’s easy but deeply satisfying once complete. Each coaster looks like a polished piece of autumn. They make great gifts or table accents. To begin, collect dried leaves, resin, molds, and gloves.
Steps to Make:
- Carefully arrange the leaves inside the silicone molds.
- Pour resin slowly and remove small air bubbles.
- Let them cure overnight before gently removing them.
39. Cinnamon Stick Candle Wraps

This cozy, fragrant craft blends aroma with beauty. Adults love wrapping candles in cinnamon sticks, combining natural scents with rustic style.
It’s easy to make yet stylish when displayed. The process feels relaxing and quick, perfect for cozy afternoons. The final candles smell wonderful and create soft, glowing warmth.
They’re great for gifts, dinners, or simple self-care. Each one radiates homemade charm.
To start, grab pillar candles, cinnamon sticks, ribbon, and glue.
Steps to Make:
- Arrange cinnamon sticks evenly around the candle.
- Glue carefully and secure with decorative ribbon.
- Add a small bow or charm for a touch of detail.
40. Thanksgiving Gratitude Jar
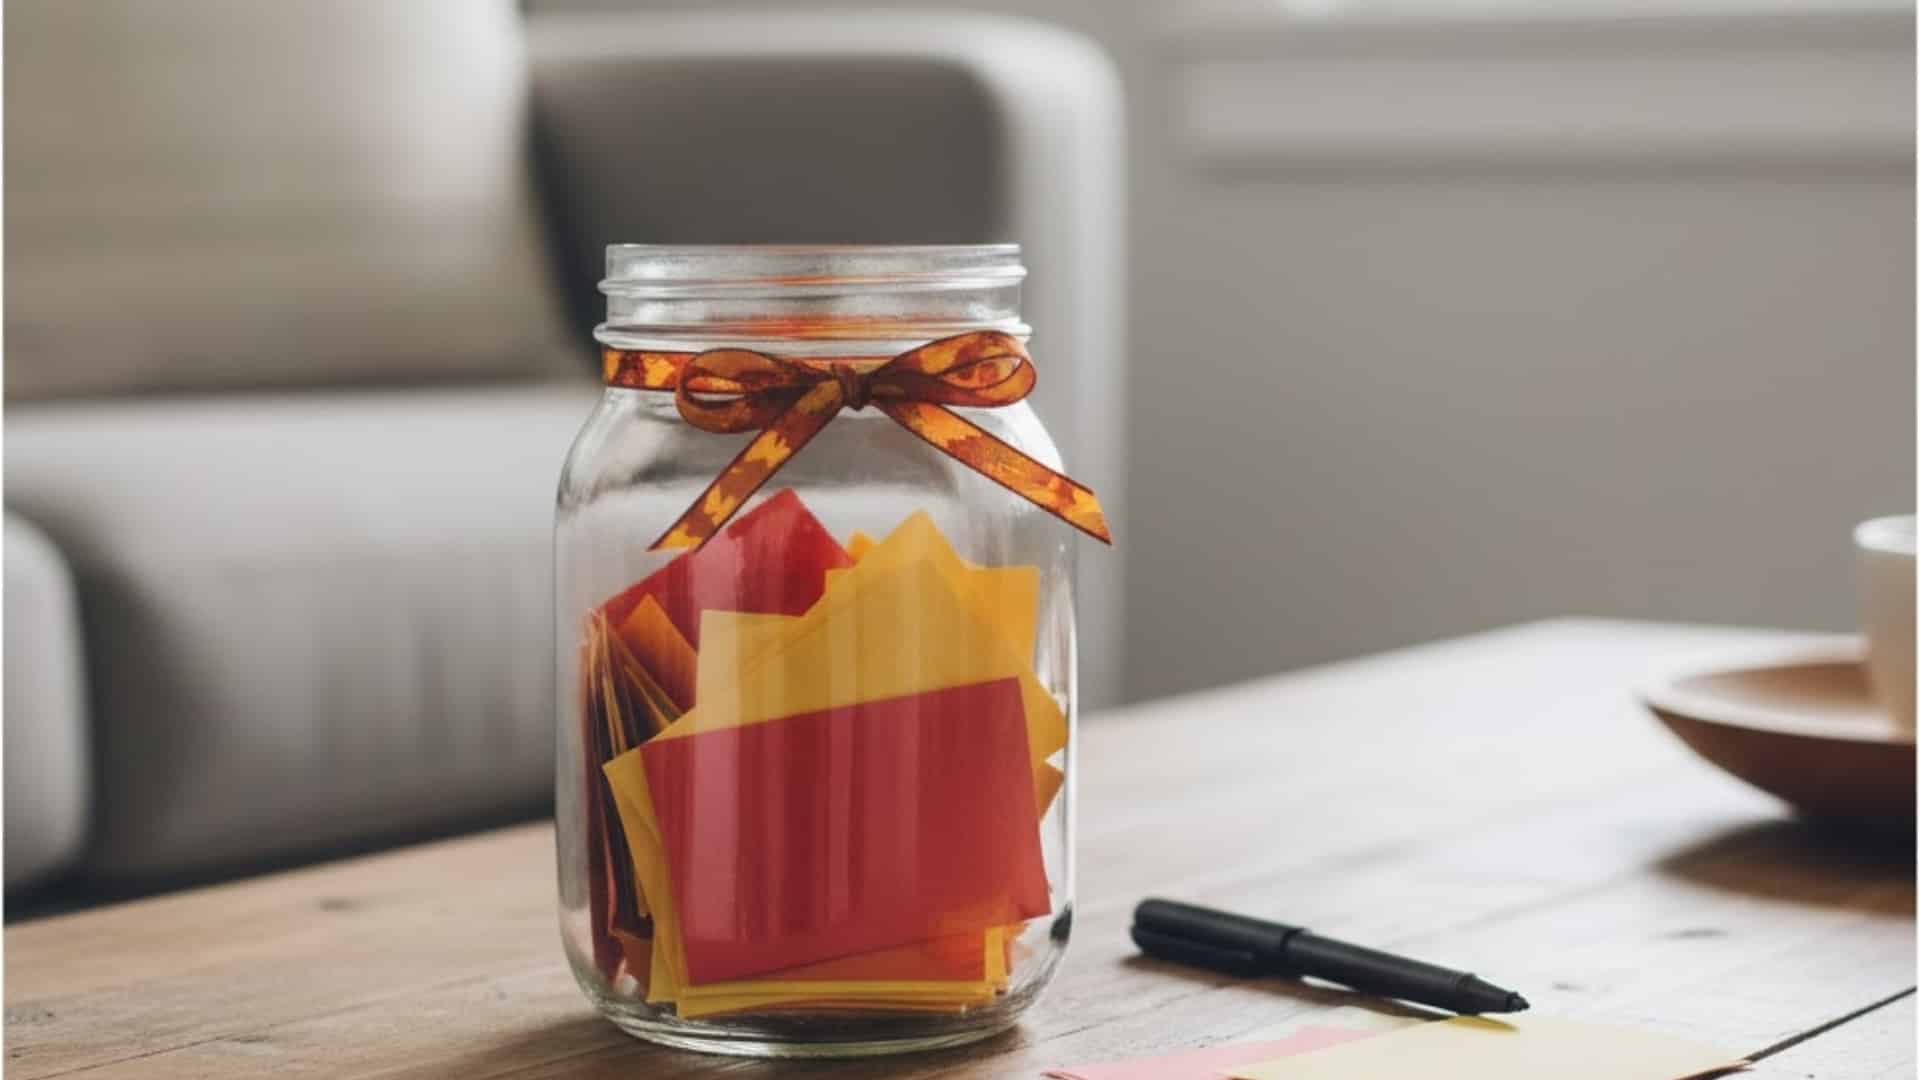
This emotional project helps adults reflect daily on thankfulness. Decorating and filling a jar with notes of gratitude builds positivity and mindfulness.
Each slip of paper becomes a small reminder of appreciation. The process feels comforting and simple, perfect for quiet mornings or family gatherings.
Over time, the jar fills with colorful memories. It’s creative, heartfelt, and meaningful. Sharing the notes together adds connection and joy.
To begin, gather a jar, paper slips, ribbon, and pens.
Steps to Make:
- Decorate the jar with ribbon, labels, or small ornaments.
- Write gratitude notes each day leading up to Thanksgiving.
- Read them together when the jar is full.
41. Painted Pinecone Garland
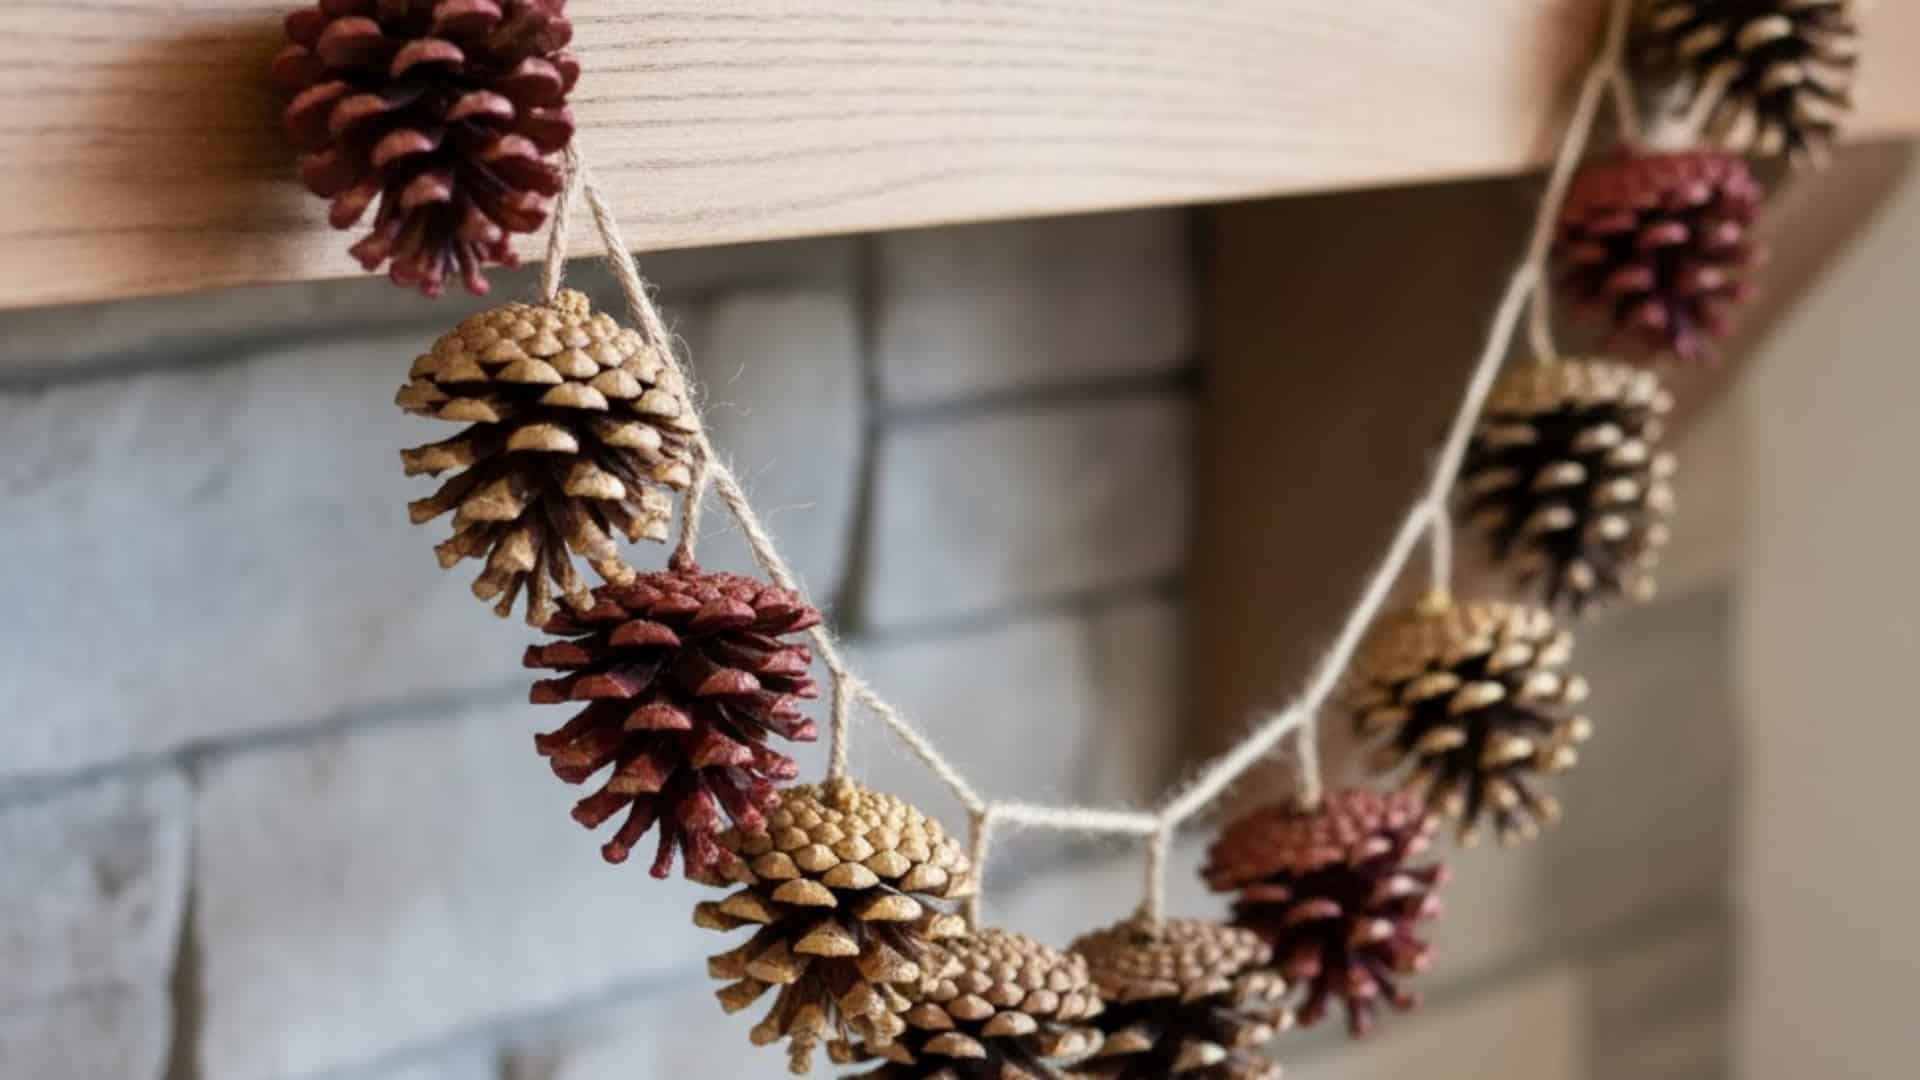
This relaxing project turns natural pinecones into colorful seasonal garlands.
Adults enjoy the meditative rhythm of painting and assembling each piece. It combines creativity and nature while adding a rustic touch to décor.
The process feels calm, simple, and rewarding. Once finished, the garland brings cozy color and texture to walls or mantels. It’s ideal for evening crafting sessions.
Every pinecone adds personality and charm. To begin, gather pinecones, paint, twine, and brushes.
Steps to Make:
- Paint pinecones in autumn shades like red, orange, and gold.
- Let dry completely before threading onto twine.
- Hang across a window, mantel, or wall.
42. Thanksgiving Table Place Cards
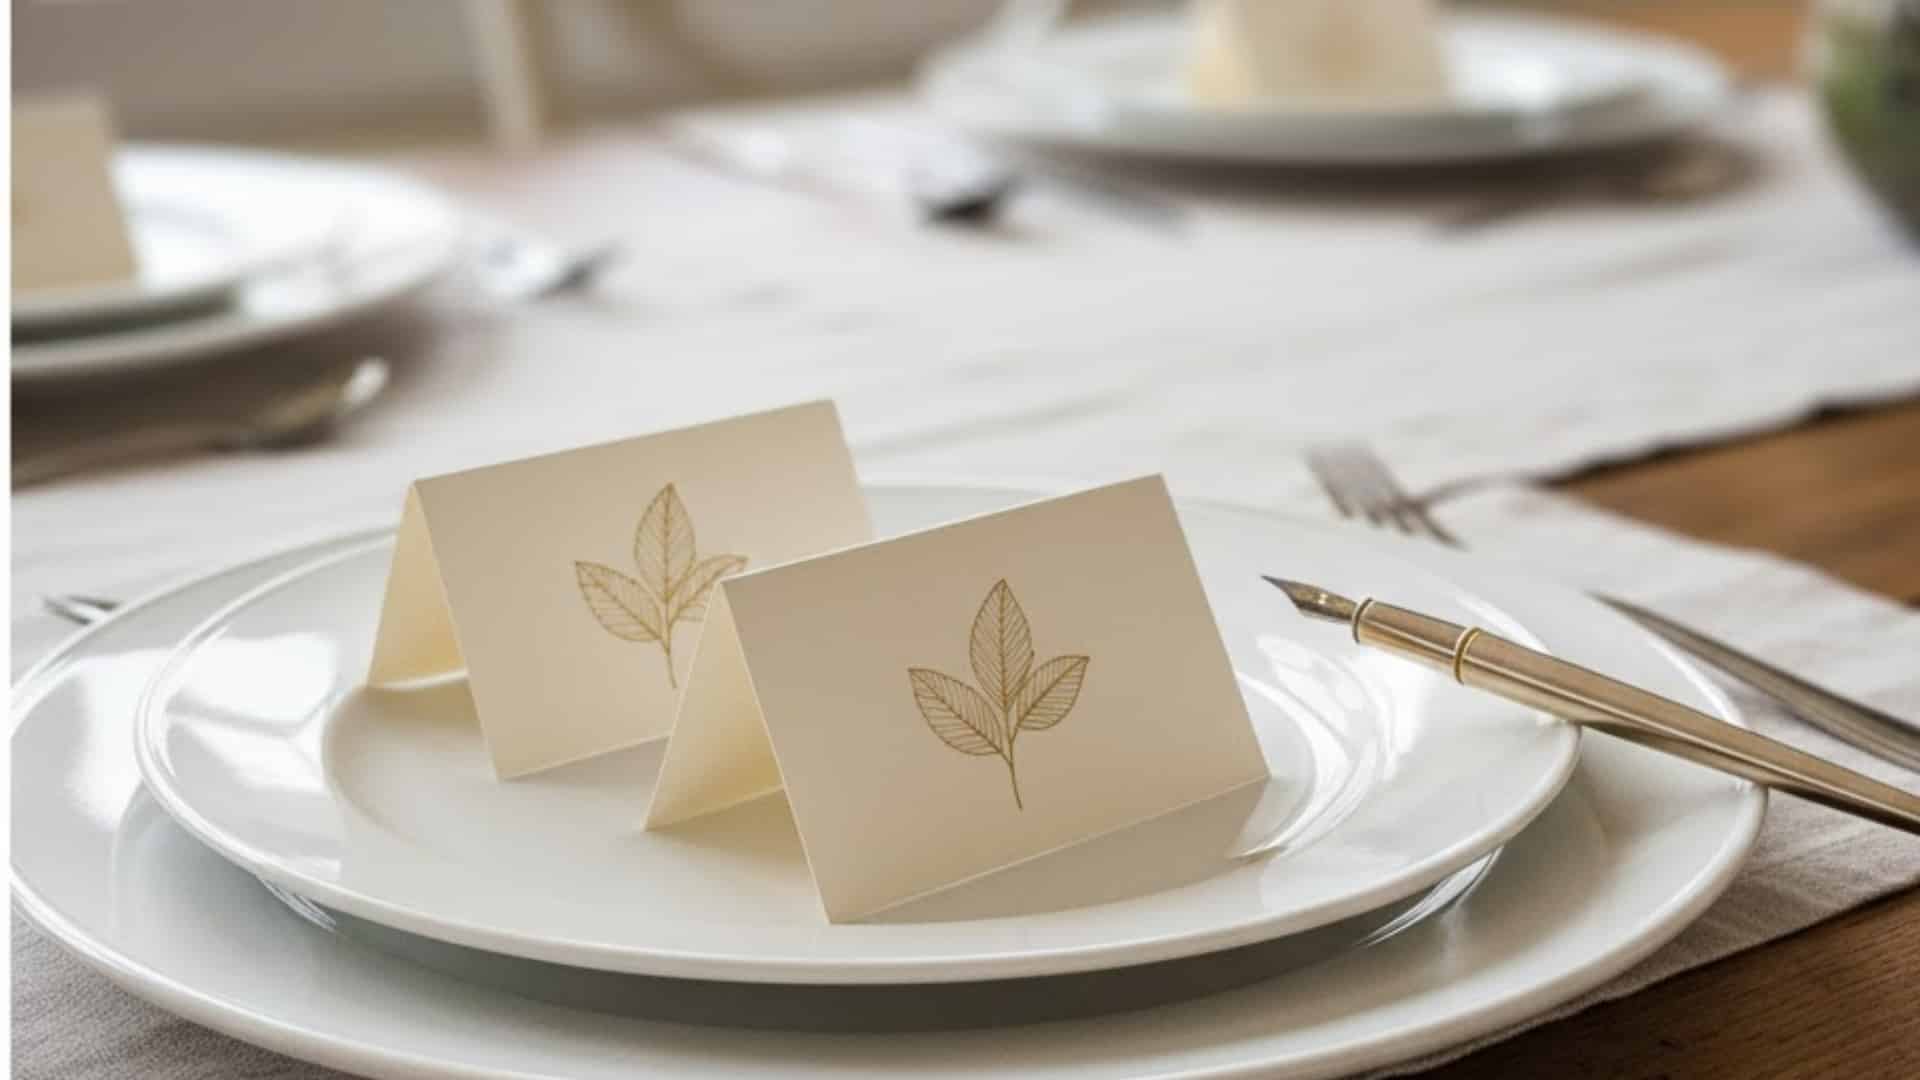
This thoughtful project helps adults personalize Thanksgiving seating in a beautiful way.
Designing unique name cards adds charm to any table while showing guests that you care and are creative.
The process feels peaceful and detailed, encouraging mindfulness. It’s a small craft that creates a big impression. Each card becomes both décor and keepsake.
Adults enjoy experimenting with handwriting, texture, and color. The results feel stylish and personal. To begin, collect cardstock, markers, ribbon, and small decorative items.
Steps to Make:
- Cut the cardstock into evenly folded name cards.
- Write guest names using brush pens or calligraphy style.
- Decorate with small leaves, stickers, or ribbon.
43. Leaf-Printed Napkins
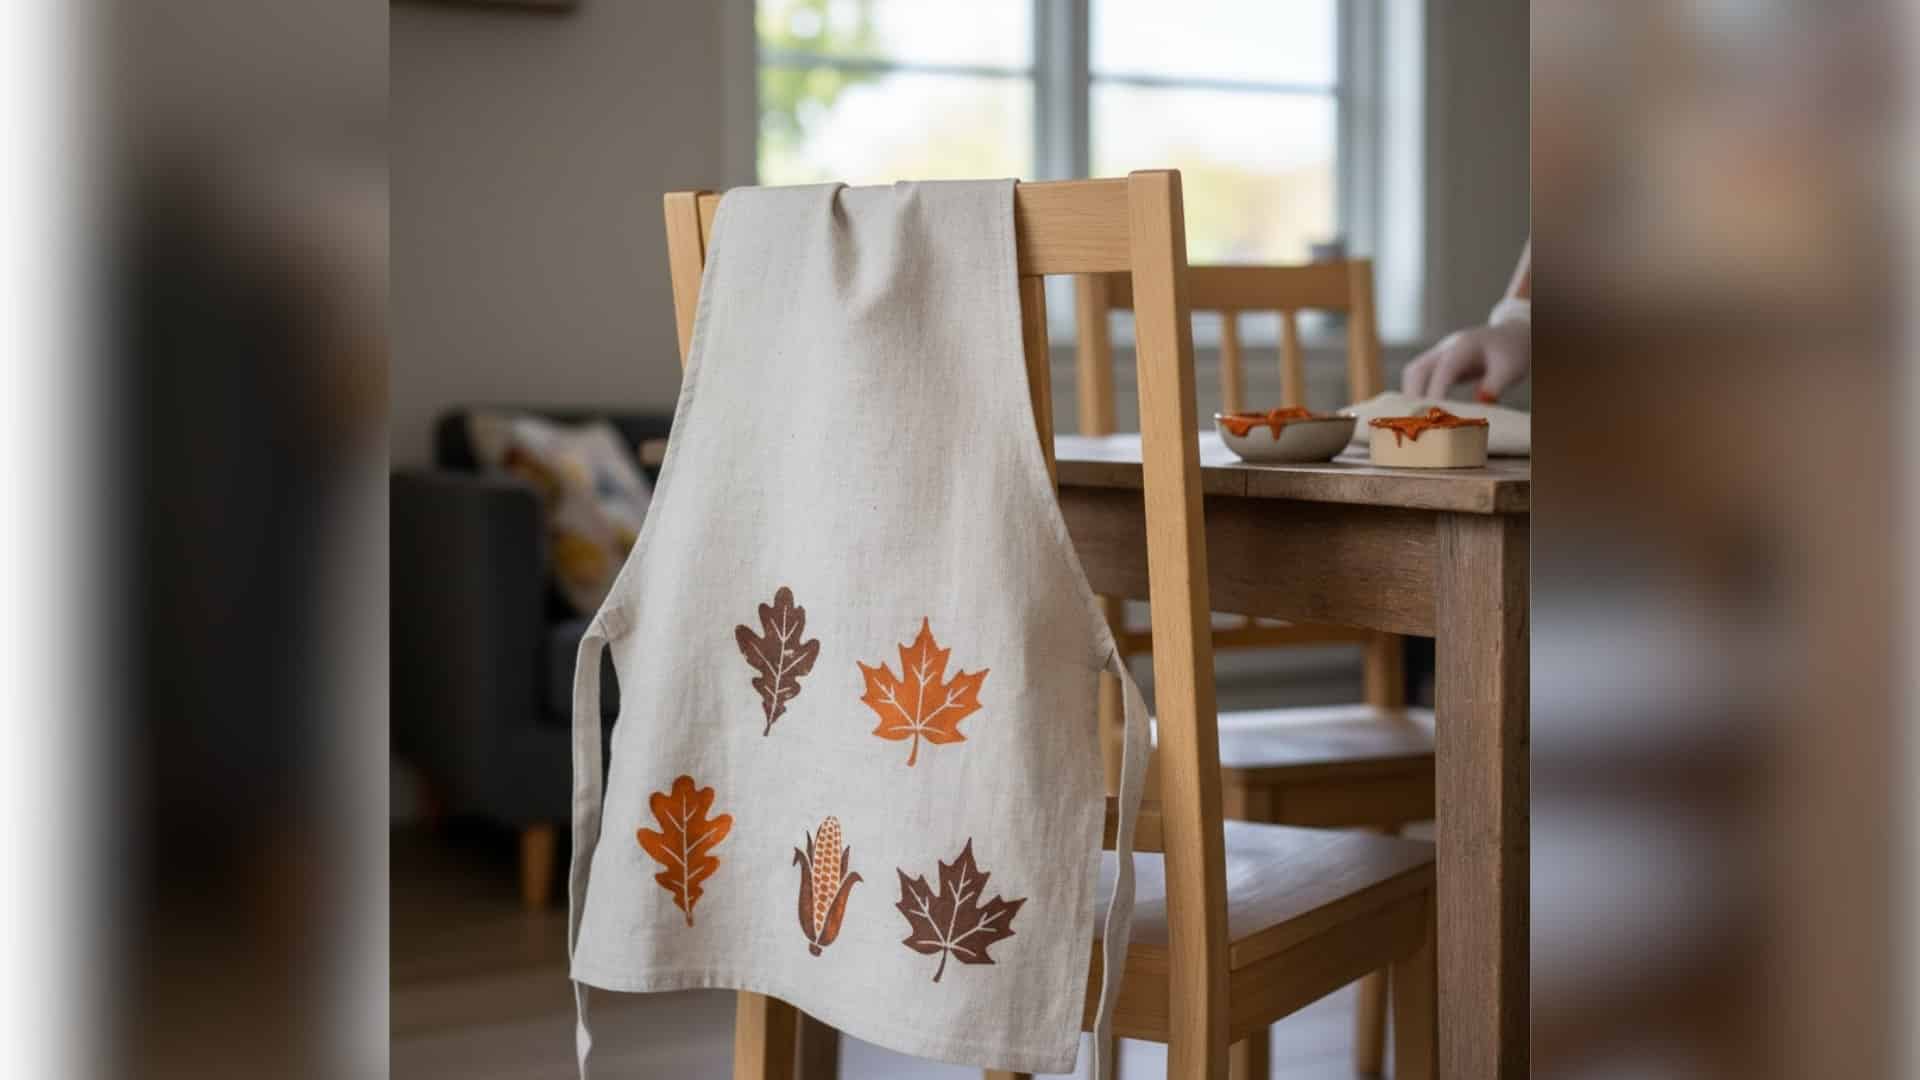
This creative project helps adults make stylish table linens using real leaves. The process mixes simplicity and beauty while connecting with nature.
Pressing painted leaves onto fabric feels relaxing and artistic. It’s an easy way to make something reusable and meaningful.
The final napkins look professional yet handmade, perfect for special dinners. Each piece feels unique, soft, and full of fall charm. To begin, gather cloth napkins, fabric paint, and leaves.
Steps to Make:
- Paint one side of each leaf evenly with fabric paint.
- Press gently onto napkins, transferring patterns clearly.
- Let dry before ironing to set color.
44. Mini Canvas Thankful Wall Art
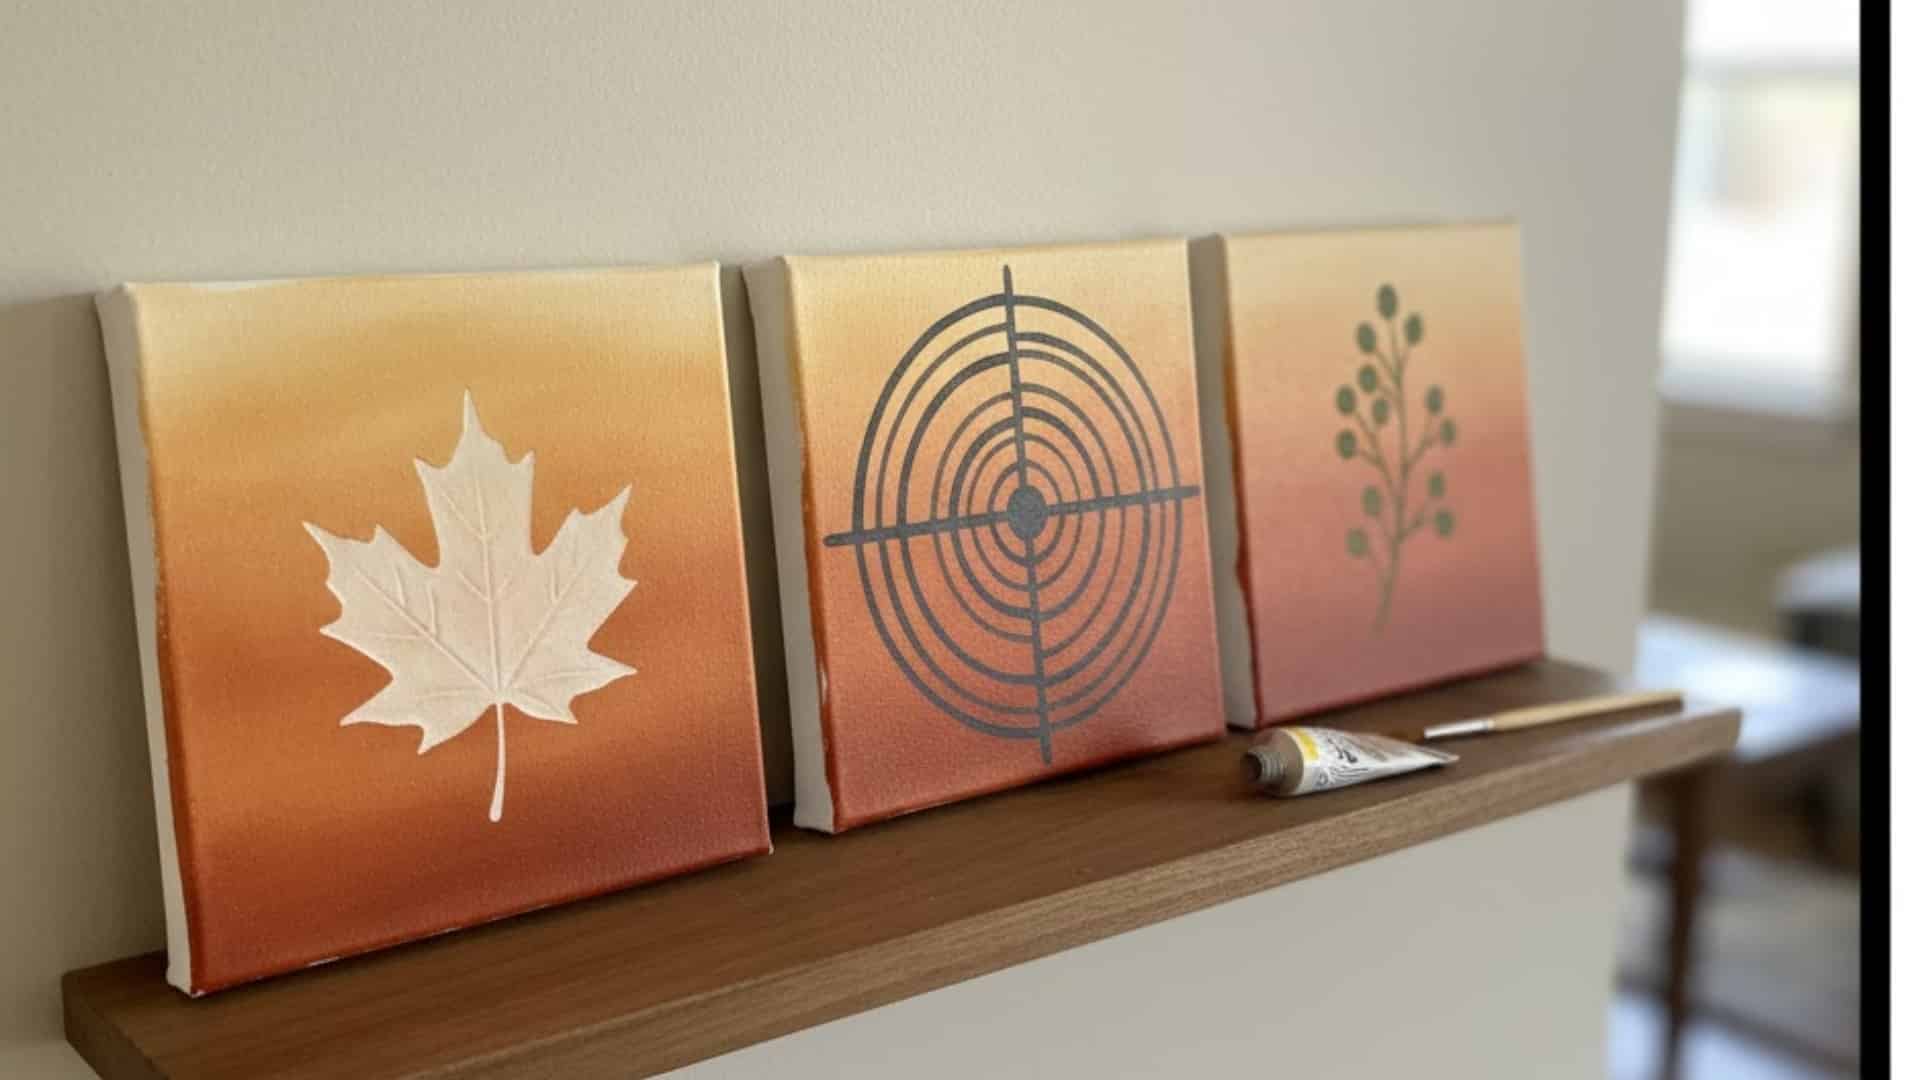
This small-scale painting project gives adults a chance to express gratitude visually. It’s quick, calming, and perfect for those short on time.
Painting a thankful word or scene on mini canvases feels personal and relaxing. The process encourages creative flow without pressure.
The finished art looks charming on walls or shelves. It’s simple, heartfelt, and inspiring to make. Each canvas adds personality and warmth to home spaces. To start, grab small canvases, paint, and brushes.
Steps to Make:
- Paint warm background tones using light brushstrokes.
- Add words like “Grateful” or “Blessed” in the center.
- Let dry before displaying or gifting.
45. Thanksgiving Centerpiece Jar Lanterns

This final project lets adults combine creativity and ambiance.
Decorating glass jars with warm tones and simple designs creates stylish lanterns for tables or porches. The process feels meditative, encouraging focus and relaxation.
The results bring soft, golden light to any space. It’s an easy yet rewarding craft that brightens gatherings. Each lantern reflects the heart of Thanksgiving: warmth, gratitude, and simplicity.
To begin, gather jars, twine, glue, and tea lights.
Steps to Make:
- Paint or decorate jars with autumn colors and patterns.
- Wrap twine or ribbon around the tops neatly.
- Place tea lights inside and light them for a glow.
Tips for Making Your Thanksgiving Art Projects More Fun
Crafting gets a lot better when it’s not just about glue and paint. It’s about memories, laughs, and sharing small stories while you create something together.
- Add a gratitude twist to every project: Write notes of thanks on leaves, cards, or small tags, and include them in your crafts.
- Use recycled materials: You’ll save money and make your projects caring to the planet; old boxes and jars can look beautiful with a little color.
- Turn it into a group thing: Invite family, friends, or neighbors to join. It’s always more fun when everyone’s hands are messy together.
- Don’t chase perfection: Sometimes a crooked turkey or glitter explosion becomes the piece everyone remembers and smiles about the most.
- Play music or talk while crafting: These moments often become the heart of the holiday season; warm, loud, and full of joy.
So yeah, make it about connection, not competition. Thanksgiving crafts should feel like love and laughter turned into something you can hang on the wall.
Conclusion
Thanksgiving always reminds me that joy comes from small moments shared with people we love. It is not about perfection, but about connection, creativity, and care.
Art brings that spirit alive, turning simple materials into heartfelt memories that last long after the dinner is done.
Whether you spend time painting pumpkins, crafting garlands, or designing gratitude jars, each project lets you slow down and feel thankful.
These Thanksgiving art projects give you more than just decorations; they help you bond, laugh, and express gratitude together.
I believe the best art always starts with heart and a little imagination.
What Thanksgiving craft are you most excited to try this year? Tell us, share with us in the comments below.