Are you tired of looking at your outdated bathroom tiles and wondering if there’s a way to update them without spending a fortune? I’ve got great news! You can alter your bathroom tile floors with a simple DIY project that doesn’t require hiring expensive contractors.
This easy technique will completely refresh your space, and the results will leave you in awe. Your neighbors will think you hired professional designers when they see the incredible changeover.
I love how a simple, affordable solution can create such a dramatic change in your home.
Want to take it even further? Add a few low-maintenance indoor plants to complete the refreshed look and bring in a calming, spa-like vibe.
Get ready to fall in love with your bathroom again and enjoy your beautifully updated floors!
Why Paint Bathroom Tile Floors?
Painting your bathroom tile floors offers a cost-effective alternative to expensive tile replacements. In just one weekend, you can completely change your space without the need for contractors.
If your tiles are still in good condition but look worn or outdated, a fresh coat of paint can work wonders. It’s a cleaner, quicker solution compared to ripping up old tiles and dealing with all the dust.
Plus, you get to choose any color you want, giving you more freedom than traditional tile options. The process is faster, less messy, and much more affordable than a complete renovation.
How to Paint Tile Floor: Step-By-Step Process
I’ll guide you through changing your old tile floors with paint, ensuring a smooth and lasting finish.
Essential Materials and Tools
Here’s a quick breakdown of the materials you’ll need for painting your bathroom tile floor. These estimated costs reflect affordable to mid-range quality options based on market prices.
| Material | Estimated Cost Range |
|---|---|
| Epoxy or Enamel Paint | $30 – $70 per quart (enough for 1-2 coats on a moderate area) |
| Bonding Primer (e.g., Insl-x Stix) | $15 – $40 per quart |
| 220-grit Sandpaper | $5 – $12 per pack (several sheets) |
| Denatured Alcohol or Krud Kutter | $8 – $20 per bottle (16-32 oz) |
| Microfiber Roller | $6 – $15 each |
| Small Paintbrush (for edges and grout lines) | $4 – $12 each |
| Polyurethane or Epoxy Sealant | $25 – $60 per quart |
| Painter’s Tape (optional) | $5 – $15 per roll |
| Mixing Cups for Paint and Hardener | $3 – $10 per set |
| Total Estimated Material Cost | $101 to $254 |
NOTE: These costs are estimated and may vary based on your location, material quality, and project size.
Cleaning, priming, painting, and sealing your tiles will help you properly prepare and apply the right materials for a professional, durable result that stands the test of time.
Step 1: Clean and Prepare the Tile Surface

Thoroughly clean the tile floor to remove soap scum, dirt, and mildew. Use a strong cleaner like Krud Kutter or denatured alcohol for the best results.
Sand the tiles lightly if needed to create a rougher surface for better paint adhesion. Let the floor dry completely before moving on to the next step to ensure a clean, residue-free surface.
Step 2: Mix the Paint and Hardener
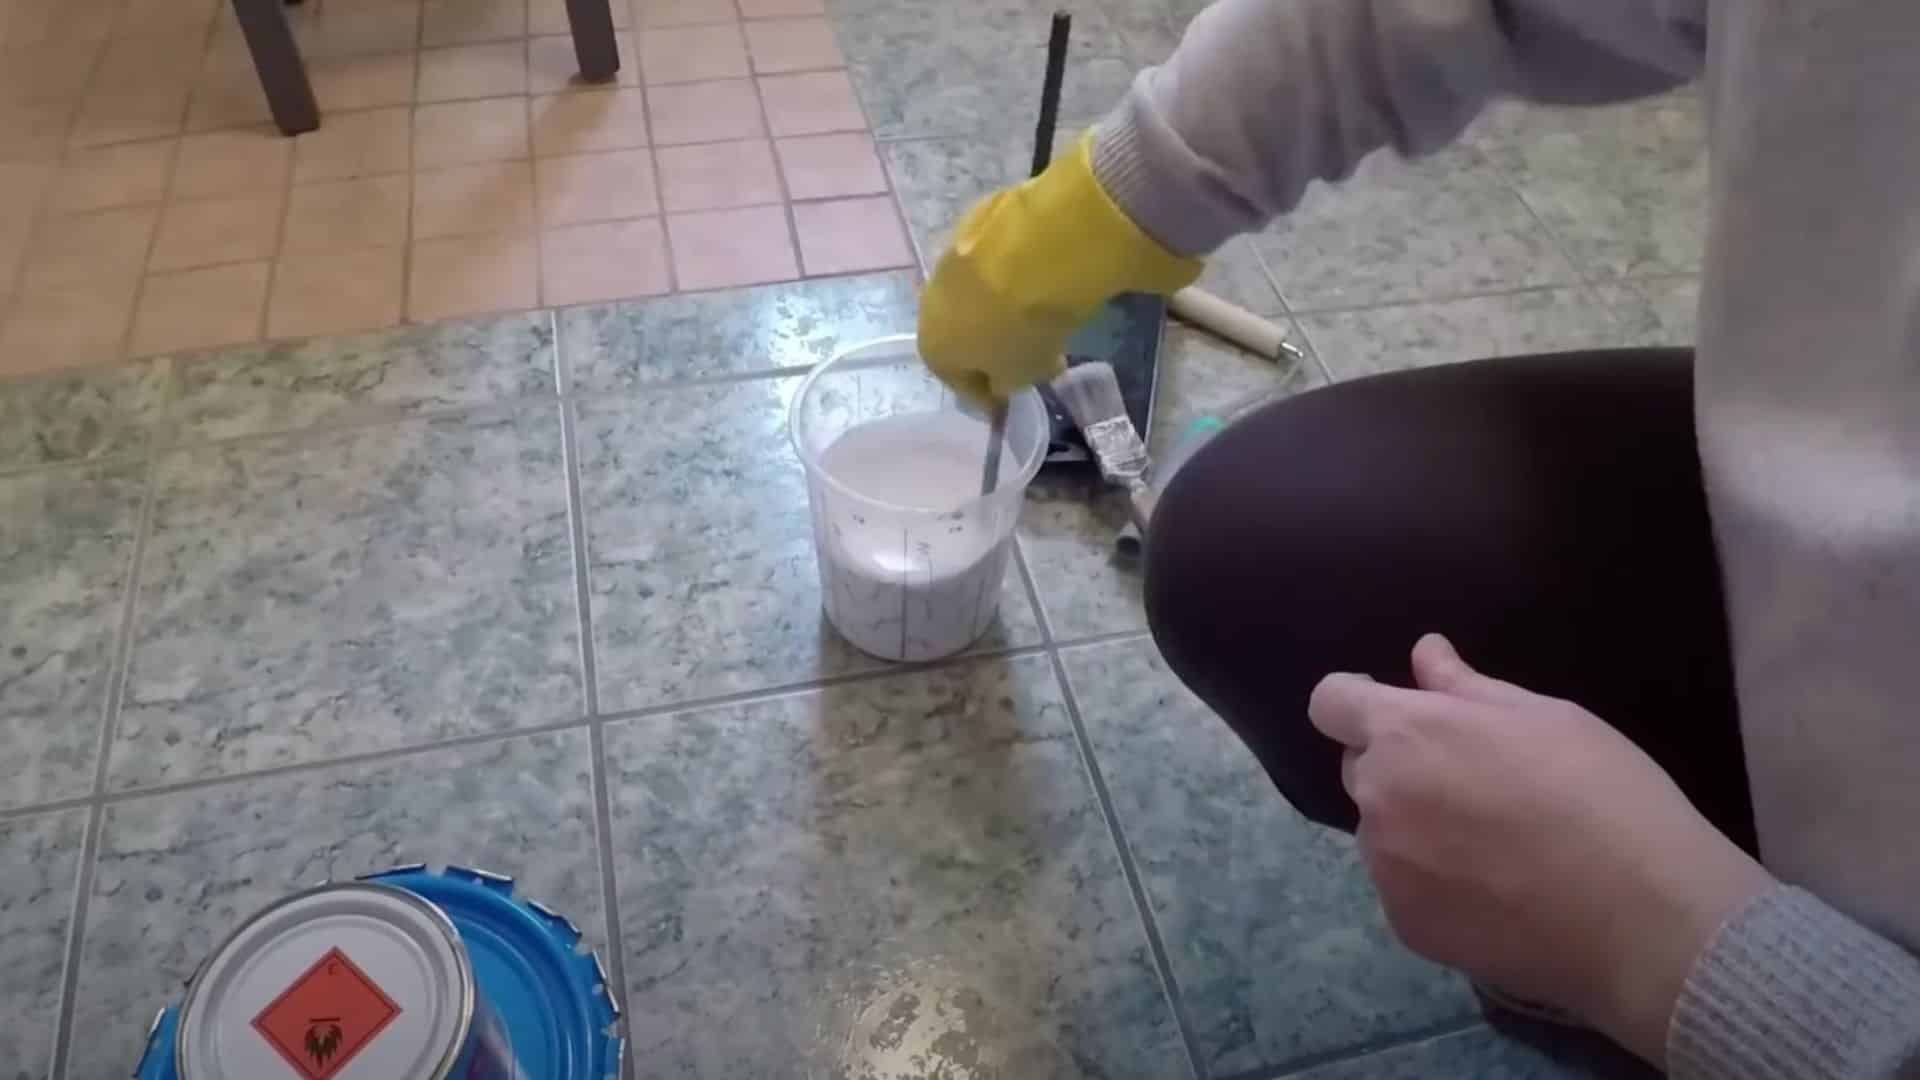
Use a two-component paint designed for tile floors. Follow the manufacturer’s instructions for mixing the paint with the hardener, typically at a 5:1 ratio.
Measure carefully using a marked mixing cup and stir the mixture thoroughly to ensure it blends evenly for the best application.
Step 3: Apply the First Coat of Paint
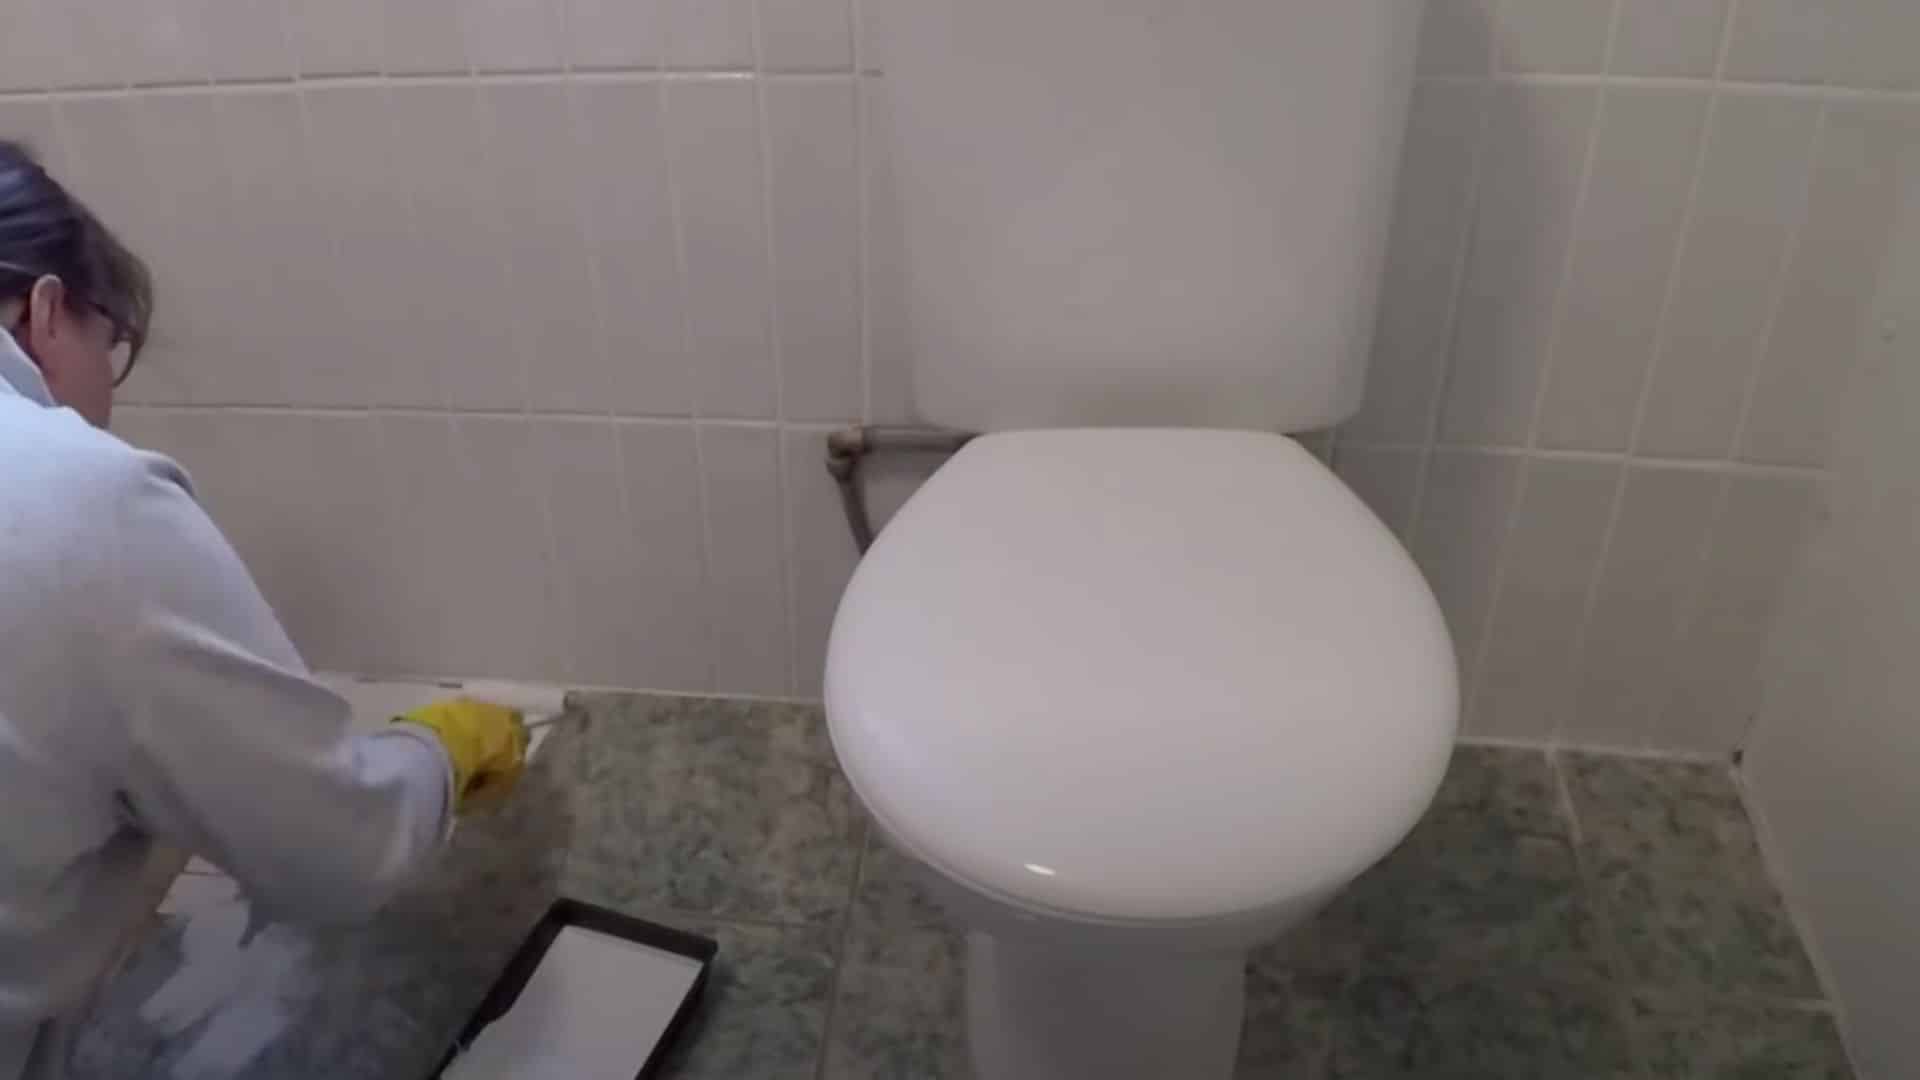
Using a brush, apply the first coat of paint to the edges and corners of the tiles. Then, use a roller for the larger sections of the floor.
Apply thin, even layers to prevent drips and ensure smooth coverage. Let the first coat dry completely before moving on, usually for several hours, depending on the paint and room conditions.
Step 4: Allow the Floor to Dry and Ventilate
After applying the first coat, leave the floor to dry for at least 24 hours. A well-ventilated room will help speed up the drying process.
Avoid walking on the floor during this time to prevent smudging or leaving marks. Complete curing is necessary for a solid and durable finish, so patience is key before continuing to the next step.
Step 5: Apply the Second Coat of Paint

Once the first coat has dried, apply a second coat to ensure thorough coverage. Repeat the process by brushing the edges and corners, then using a roller for the rest of the floor.
Allow the second coat to dry completely, checking for any imperfections to touch up if needed. This step ensures durability and a smooth, long-lasting finish.
For more information, watch the detailed video explanations by Slightly Bonkers in Ireland
Best Indoor Plants to Pair with Tile Bathroom Floors
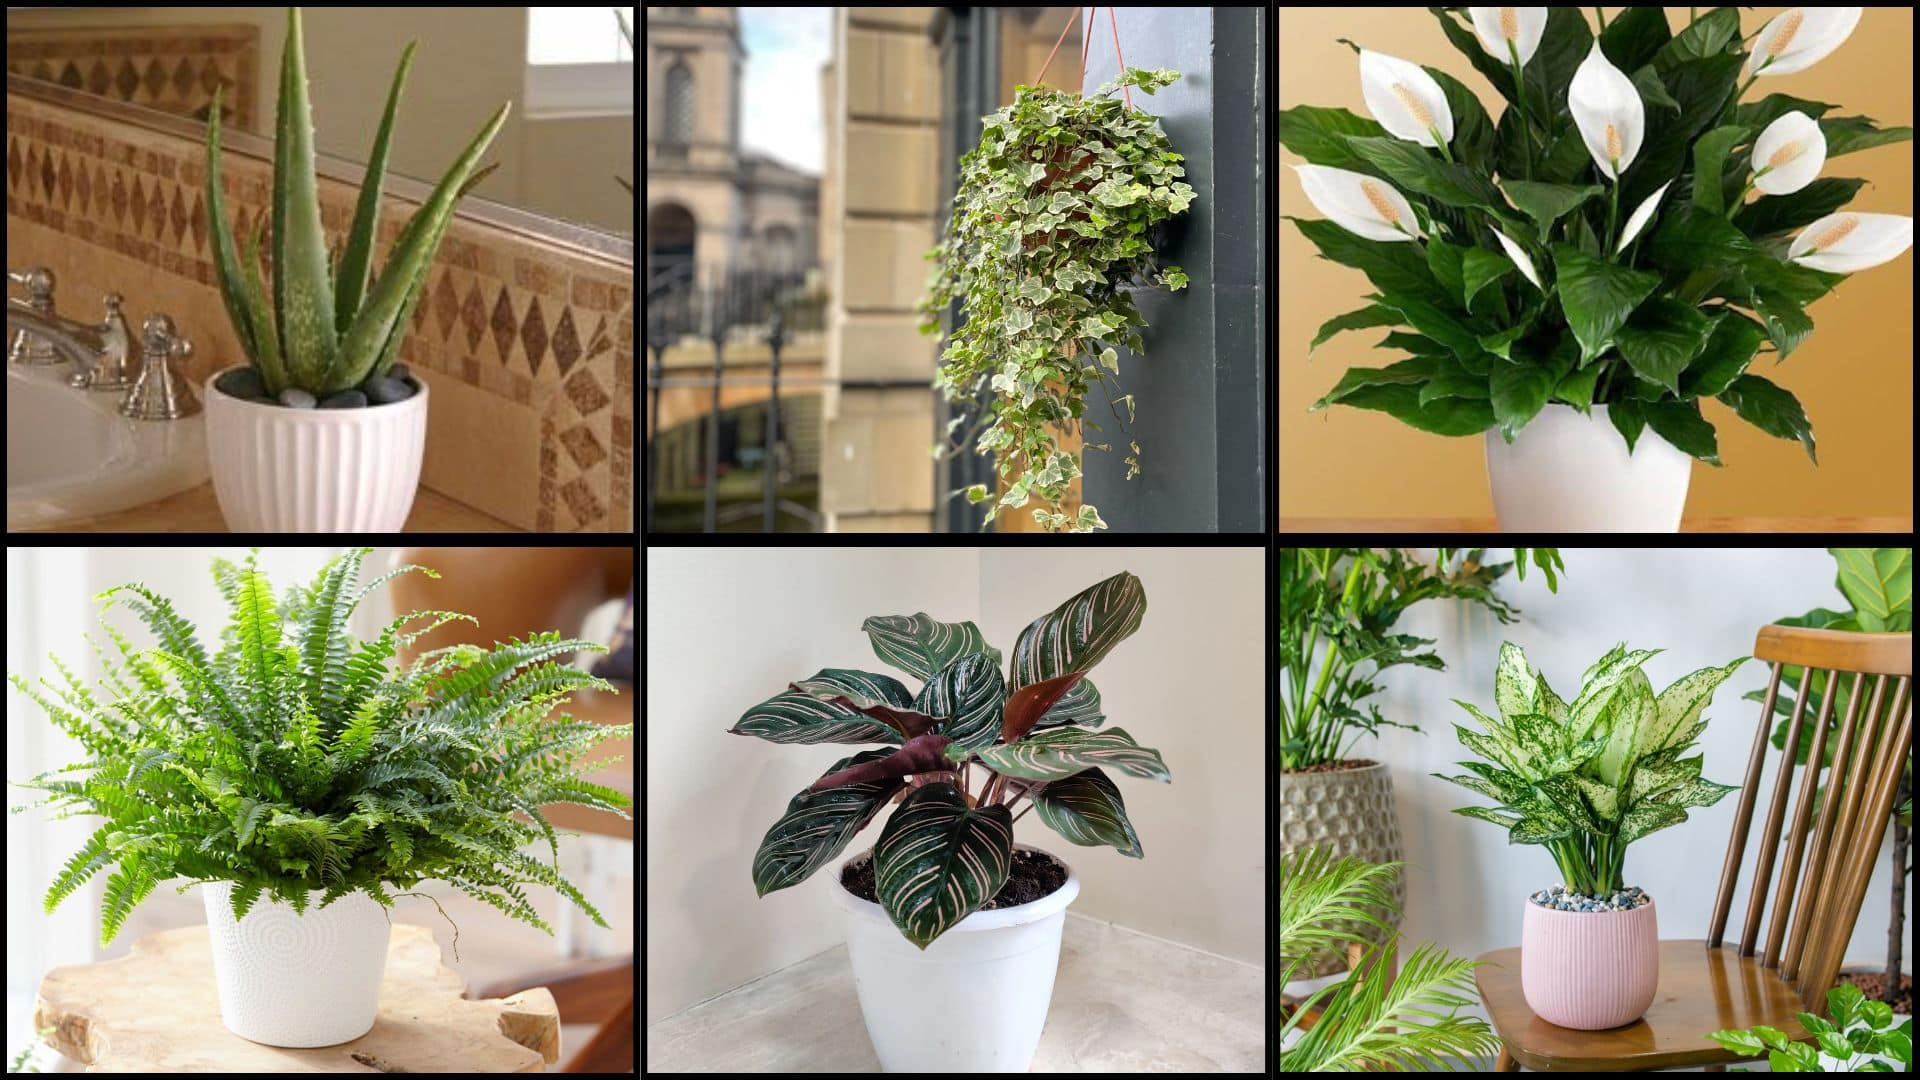
Indoor plants are a great way to complement the beauty of your newly painted bathroom tile floors. Here are some plants that pair perfectly with your bathroom tile:
- Aloe Vera: Its thick, fleshy leaves offer a clean, modern look, blending seamlessly with minimalistic tile designs.
- English Ivy: The trailing vines create an elegant, flowing effect, adding movement that contrasts beautifully with the smooth texture of tile.
- Peace Lily: Graceful, glossy leaves and white blooms provide a soft contrast to the tile, creating a serene atmosphere.
- Boston Fern: Its lush, feathery fronds bring refreshing greenery to the bathroom, improving the natural feel of the space.
- Calathea: Known for its patterned leaves, Calathea adds texture and visual interest, making it a perfect match with neutral tile floors.
- Chinese Evergreen: With its variegated leaves, this plant introduces color contrast and texture, improving the bathroom’s appeal.
These plants not only brighten up your bathroom but also work harmoniously with the tile, making the space feel vibrant and inviting.
Maintenance and Care for Painted Tile Floors
To keep your painted tile floor looking fresh and vibrant for years, proper maintenance is essential. Follow these simple tips to ensure the longevity of your floors:
- Clean Gently: Use a soft microfiber mop to clean the painted tiles. Steer clear of harsh cleaners that may damage the paint.
- Avoid Scrubbing: Don’t use abrasive materials to scrub the surface. This can scratch the paint and compromise its finish.
- Reapply Sealant: Reapply a protective sealant every 1-2 years to safeguard your floor from moisture and daily wear.
- Fix Chips Quickly: Repair any chips or scratches immediately to prevent further damage.
- Maintain Dryness: Keep the floor dry to protect the paint’s adhesion and durability.
By following these guidelines, you’ll preserve the beauty and strength of your painted tile floors, ensuring they stay in excellent condition.
That’s a Wrap
Painting your bathroom tile floor proves that you can achieve amazing changeovers without a hefty budget or professional help.
You now have all the knowledge to create a beautiful floor that looks like it was professionally installed. Your bathroom will soon be the most complimented room in your house.
And don’t forget to bring in a few indoor plants when your floor is dry. The greenery will complement the new tile color and make your bathroom feel more peaceful and alive.
I can’t wait to hear about all the praise you’ll get when friends see your newly converted space.
Start gathering your supplies today, and get ready to be amazed by what you can do. Comment below and share what color you’re choosing for your floor makeover!