Have you ever tried to plant seeds so tiny they seemed to disappear between your fingers? You’re not alone!
Many gardeners struggle with those small specks that promise beautiful flowers or tasty veggies. The good news? You don’t need special skills to grow them well.
Gardeners have learned many tricks to help these tiny seeds grow strong over the years.
This guide will walk you through simple ways to handle, plant, and care for small seeds. With a bit of patience and these handy tips, you’ll soon see those little dots turning into thriving plants right before your eyes.
Let’s get your small seeds off to a great start!
What are Small Seeds?
Small seeds include plants like poppy, lettuce, foxglove, and oregano. These seeds are often very tiny – sometimes no bigger than dust particles or grains of sand.
These small seeds need extra care because they have limited food stored inside them.
They dry out faster than larger seeds, can be easily planted too deep, and need steady moisture to start growing.
Their small size means they’re more sensitive in the early stages, requiring gentle handling and careful attention to soil conditions and watering practices.
Should You Start Small Seeds Indoors or Outdoors?
When deciding where to plant your small seeds, think about your goals and setup.
Growing tiny seeds inside your home lets you watch over them during their fragile first days, with steady warmth and light helping them sprout more reliably.
Some seeds do best with this careful start, while others grow better when sown right in the garden soil where they’ll live.
Your seed packet will often tell you which way works best for that specific plant type.
| Factor | Indoor Starting | Outdoor Starting |
|---|---|---|
| Control | More control over temperature, light, and moisture | Less control, subject to weather changes |
| Cost | Requires seed trays, lights, and potting mix | Needs minimal extra equipment |
| Space | Needs indoor space on windowsills or under lights | Uses garden space you already have |
| Timing | Can start weeks or months before outdoor planting time | Must wait until soil warms and frost danger passes |
| Care Needed | Daily monitoring and watering | Less frequent attention needed |
| Risk of Failure | Lower risk when done properly | Higher risk from pests, weather, and poor soil contact |
| Transplant Shock | Plants must adjust to outdoor conditions | No transplant stress for seedlings |
| Season Length | Extends your growing season | Limited to your local growing season |
| Seed Types | Best for very small or valuable seeds | Good for larger seeds or those that resist transplanting |
Best Methods to Sow Small Seeds
1. Multi-Seeding
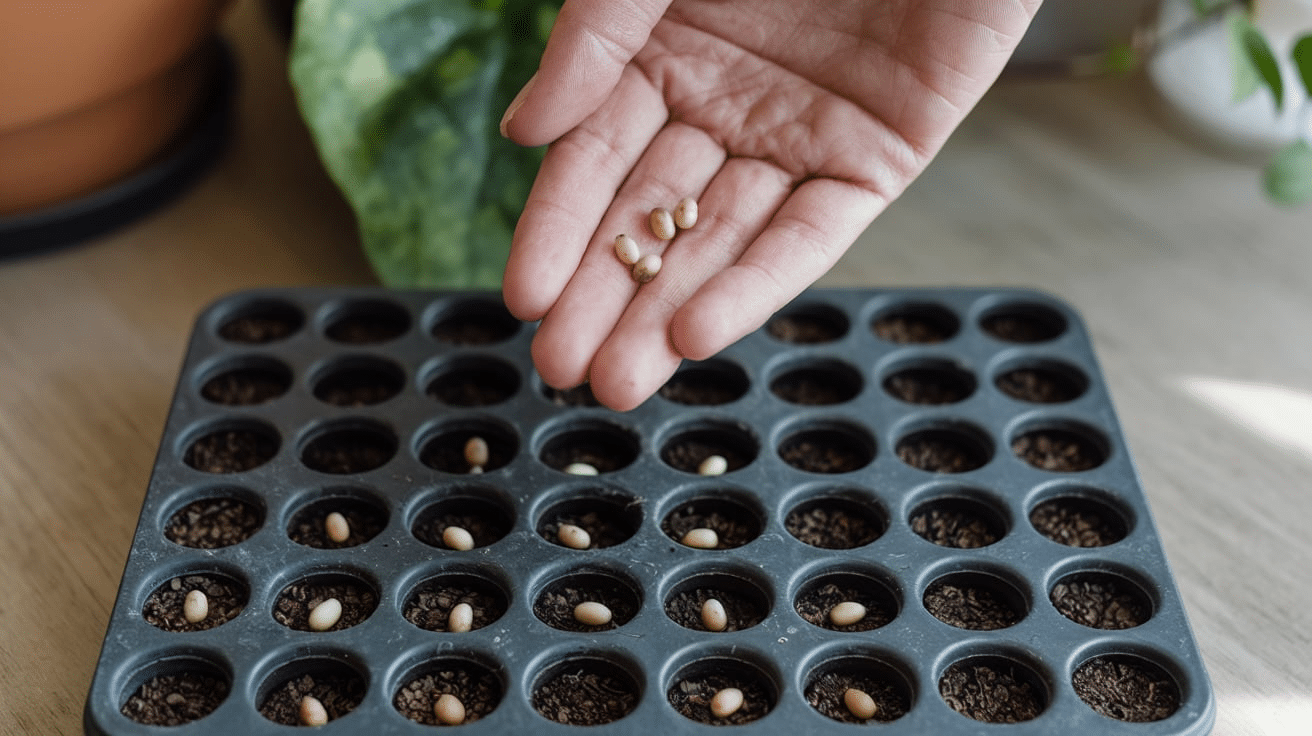
This method means putting several seeds in each cell or pot.
It’s a fast way to plant many seeds, saves space in seed trays, and increases the chances that at least one seed will grow in each spot.
You’ll get less exact spacing, will need to thin extra seedlings later, and might waste some seeds. This works great with 72-cell trays.
Just drop 3-5 tiny seeds in each cell and then thin to keep only the strongest seedlings once they grow.
2. Mixing with Sand
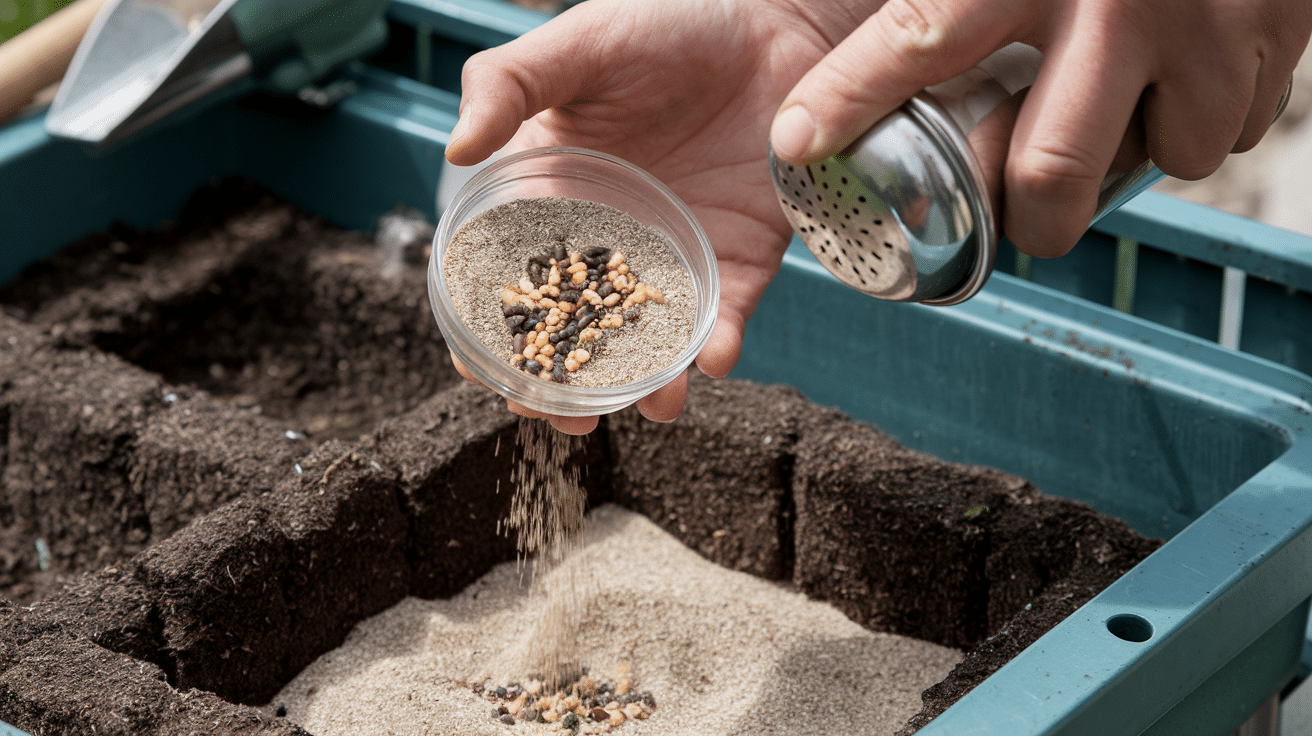
Mix your tiny seeds with fine sand or cornmeal to help spread them more evenly. This helps you see where seeds have been placed, creates more even spacing, and makes handling easier.
The drawbacks are that it takes extra time to
mix and that it’s hard to know exactly how many seeds you’re using.
Try using a salt shaker filled with your seed/sand mix for easy spreading.
3. Surface Sowing
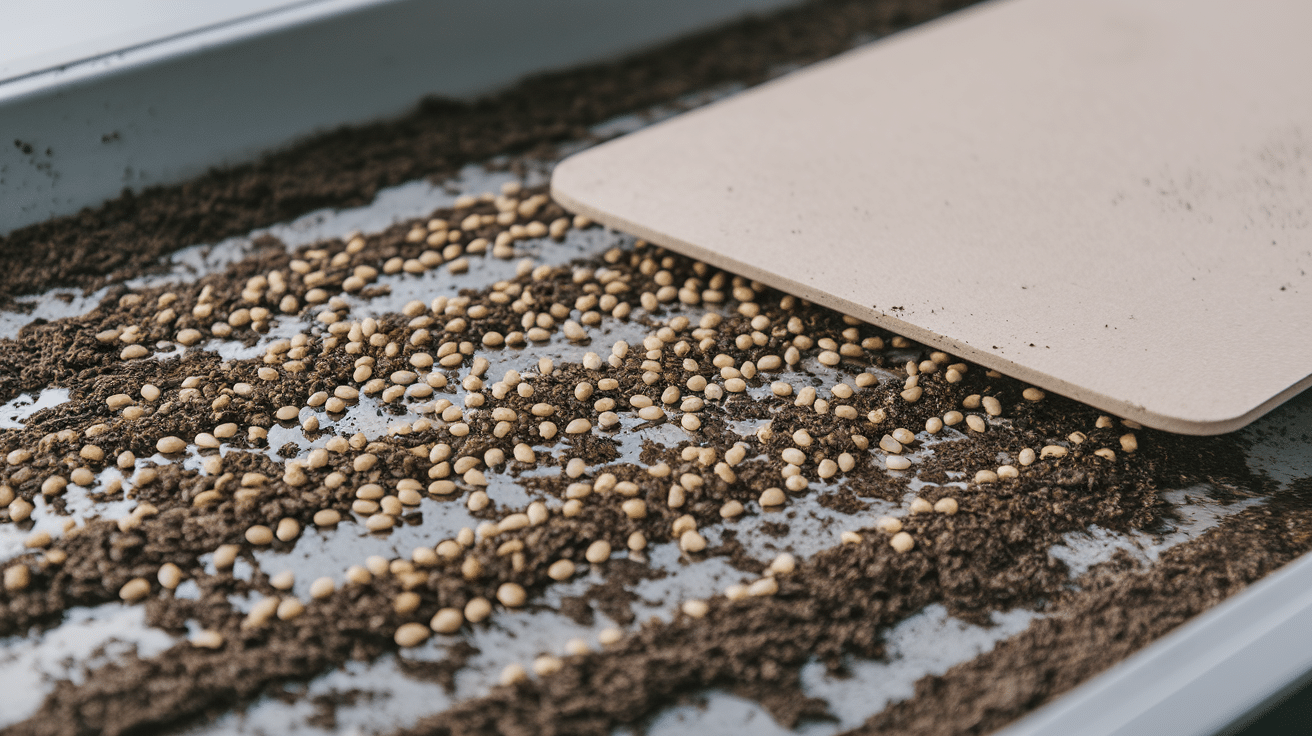
Some tiny seeds need light to grow and should sit on top of the soil. This method is perfect for light-dependent seeds, removes any risk of planting too deep, and makes it easy to monitor germination.
The challenges are that seeds can dry out quickly, can be washed away when watering, and may be eaten by birds if planted outdoors.
After surface sowing, gently press seeds into contact with the soil using a flat object like a book or board. Don’t cover them with soil.
4. DIY Seed Tape

Make your own seed tape using toilet paper and a flour paste. This creates perfect spacing, works great for direct sowing in garden rows, makes thin rows easy, and reduces the need for thinning later.
On the downside, it takes time to make, can be fiddly work, and the paper might dry out if not planted soon.
To make seed tape: cut toilet paper into 1-inch strips, mix flour and water to make a paste, use a toothpick to place dots of paste along the paper, place a seed on each dot, let dry, then plant the whole strip.
5. DIY Seed Gel
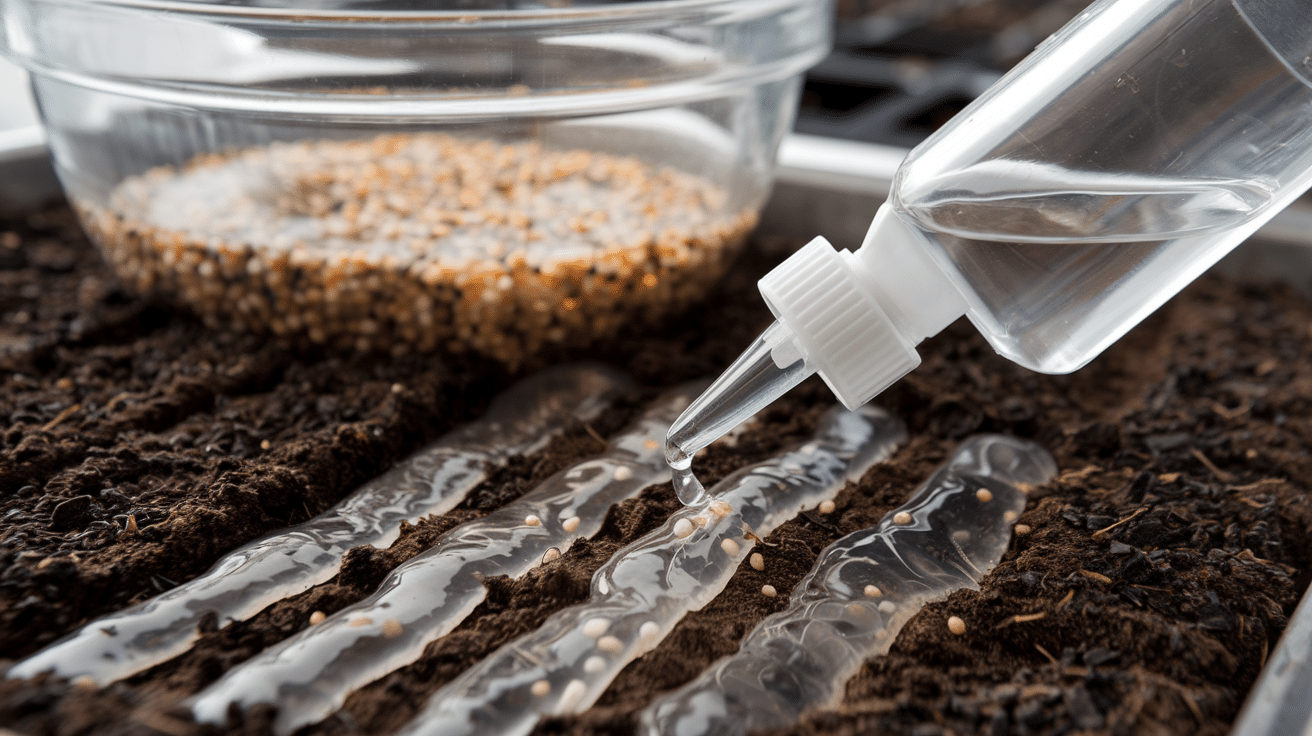
Mix seeds with a gel made from water and methylcellulose (available at garden stores). This gives you control, like using a liquid, keeps seeds moist longer, and can be applied with a squeeze bottle for good spacing.
The cons are that it requires special materials, take
s more setup time, and can be messy. This method is great for very small seeds that are hard to see.
6. Toothpick or Tweezer Method
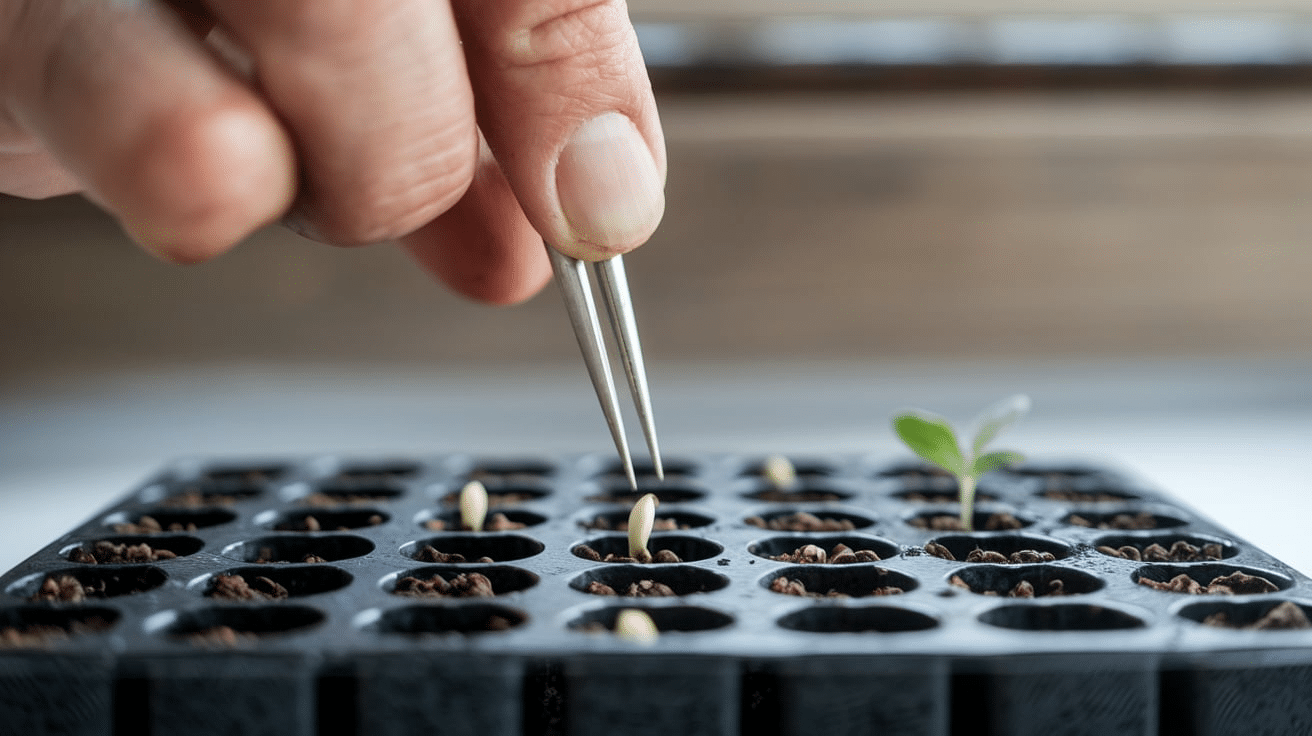
Use a damp toothpick or fine tweezers to place the seeds one by one. This gives you the most exact placement, wastes no seeds, and is perfect for rare or costly seeds.
The downsides are that it’s very time-consuming, requires steady hands, and isn’t practical for large amounts. This method works well when you have just a few seeds that need careful placement.
7. Using a Dial Seed Sower
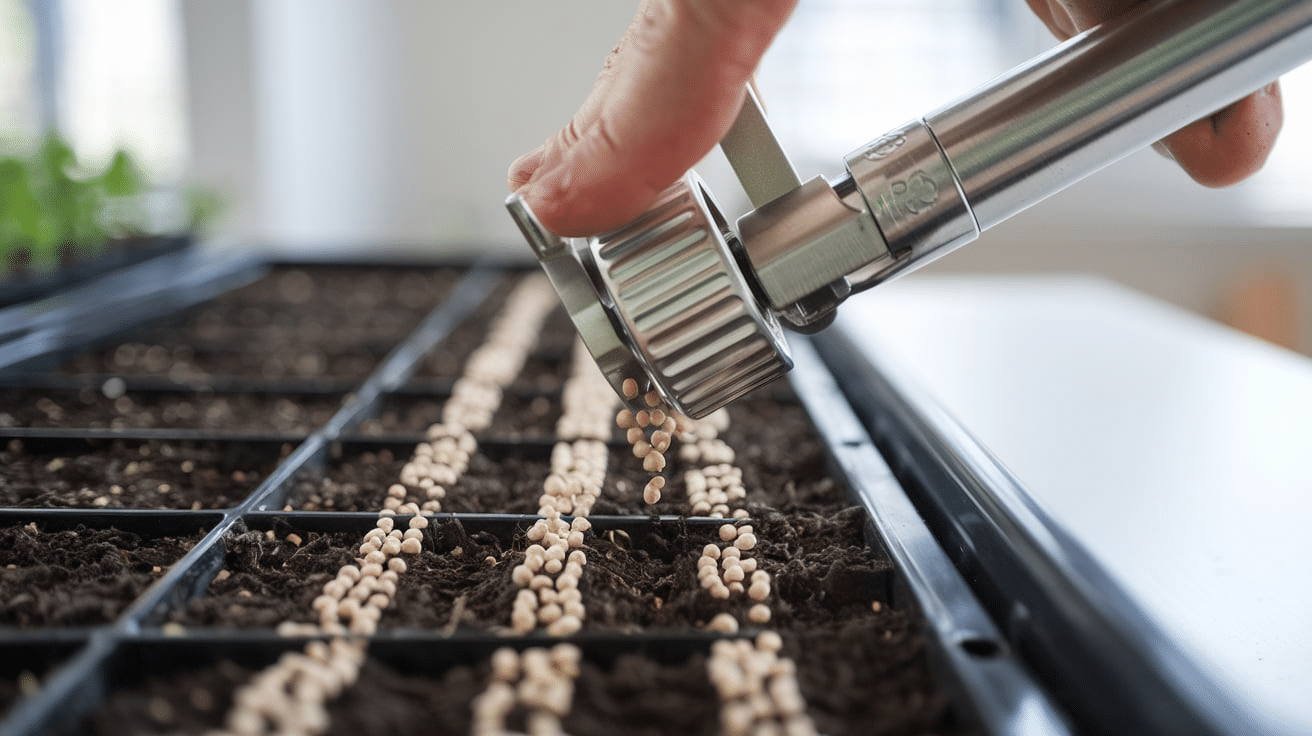
These small tools let you control how many seeds come out at once.
They offer more control than hand-sowing, have different settings for seed sizes, and make the job faster.
The drawbacks are that it’s another tool to buy, may still need practice to use well, and isn’t perfect for all seed types.
Seed sowers work best for mid-sized small seeds rather than the very tiniest ones.
Tools and Supplies That Help
- 72-cell trays: These give you many planting spots in a small space. Each cell is the right size for starting seedlings.
- Seed-starting mix: This is lighter than garden soil and helps small seeds push through easily. It’s also free of weed seeds and diseases.
- Salt shakers, envelopes, and spoons: These common household items help handle and spread tiny seeds.
- Heat mats and thermostats: Many small seeds need warm soil to grow. Heat mats placed under trays keep the soil at the right temperature.
- Humidity domes: Clear plastic covers that help keep moisture in so seeds don’t dry out.
- Mesh trays and vermiculite: Fine mesh trays hold soil while allowing water to soak in from below. Vermiculite is a light mineral that helps cover seeds very lightly.
Germination Tips for Tiny Seeds
Temperature and humidity advice: Most small seeds like temperatures between 65-75°F (18-24°C). Keep humidity high (around 70-80%) using a clear dome or plastic wrap over containers.
Light for surface-sown seeds: Seeds that need light should be placed 2-3 inches below grow lights or in bright, indirect sunlight. Don’t place them in direct sun, which can dry them out.
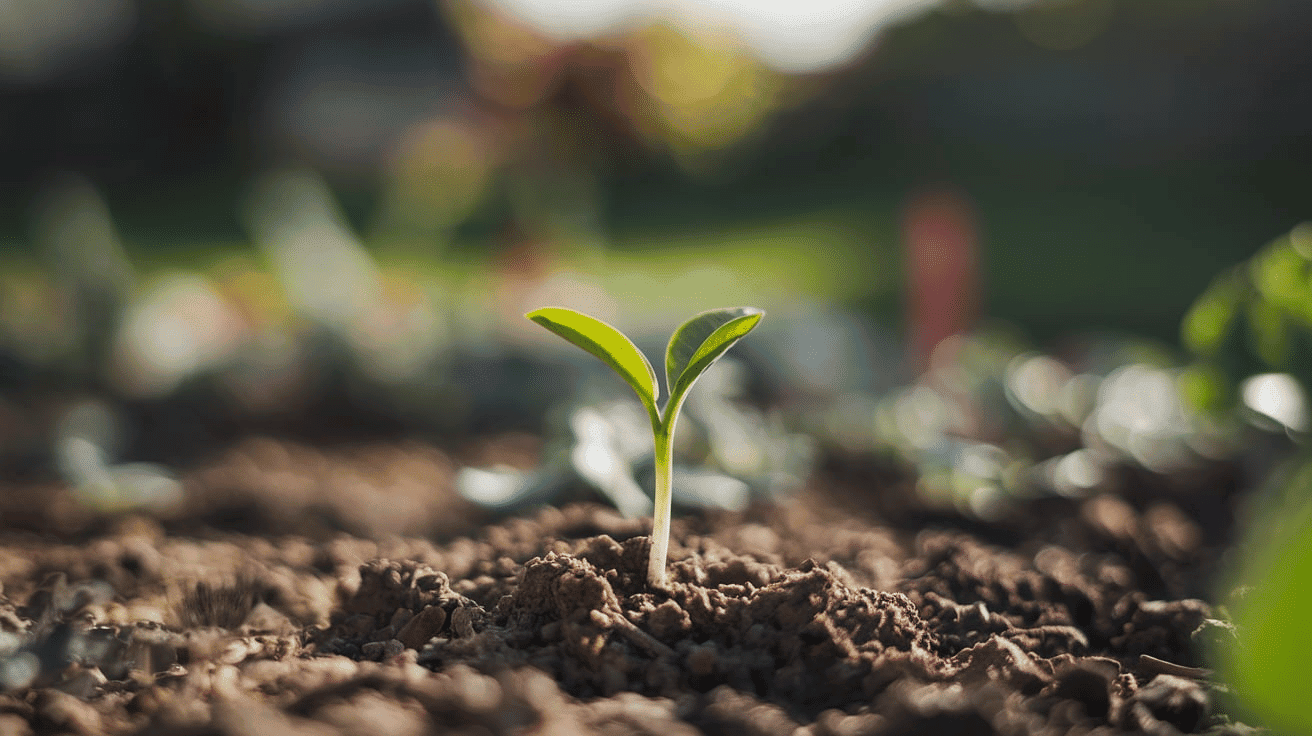
Signs of successful germination: Look for tiny green dots appearing on the soil surface. Sometimes, the first leaves (cotyledons) look different from the plant’s normal leaves.
Common Mistakes to Avoid
1. Burying too deep: A good rule: plant seeds only as deep as 2-3 times their width. For dust-like seeds, just press them into soil contact.
2. Overwatering: Too much water can cause seeds to rot or develop fungus. Keep soil moist but not soggy.
3. Skipping humidity control: Small seeds dry out fast. Use covers to keep moisture in until sprouts appear.
4. Using regular potting mix: Regular potting soil is too heavy for small seeds. Use a fine-textured seed-starting mix instead.
Conclusion
Starting your seed growing journey is simpler than you might think. Throughout this guide, we’ve shared practical tips that anyone can use, no matter your gardening experience.
We’ve shown how small seeds hold amazing potential. With just a bit of soil, water, and light, you can turn these tiny bits into beautiful plants for your yard or home.
Consider beginning with one or two methods from our guide. As you get comfortable, you can try more.
Keep track of what works—each seed type responds differently to care techniques.
The joy of watching your first seedlings push through the soil makes the effort worthwhile.
Your patience will be rewarded with thriving plants and the satisfaction of growing them yourself.