Have you ever wanted to recreate the lovely wooden walls you see in farmhouse magazines? I’m here to show you that DIY shiplap is easier than you think, even if you’ve never used a saw before.
Initially used in shipbuilding to seal the hulls of ships, shiplap is now a go-to trend for adding instant joy and character to your home. It allows you to convert dull, empty walls into beautiful focal points without shelling out big bucks for a contractor.
And once it’s up? You can take your space a step further by styling it with indoor plants. Think bold greenery against soft wood tones; it’s an easy way to bring in color, life, and calm.
I’ll guide you step by step on how to create your very own wooden wall masterpiece. Trust me, your friends will think you hired a professional!
DIY Shiplap: Step-By-Step Process
I’ll walk you through creating gorgeous thin shiplap walls with just plywood strips and some basic tools.
You’ll learn all the steps, including measuring, cutting, attaching, and finishing, to get a clean, professional finish that can completely alter any room.
Materials You Must Have
Below is a table that outlines the estimated cost ranges for the materials required for a DIY shiplap project. The prices are based on 2025 verified market data, ranging from low-cost to more affordable options.
| Material | Estimated Cost Range |
|---|---|
| Quarter-inch Plywood | $30 – $70 per sheet (4’x8′) |
| Saw (miter, circular, jigsaw) | $40 – $150 (budget models to affordable quality handheld saws) |
| Pin Nailer | $50 – $130 |
| Masking Tape | $3 – $10 per roll |
| Nickel (for spacing) | $0.10 – $0.50 per piece |
| Stud Finder | $10 – $50 |
| Trim Screws (headless) | $5 – $15 per box |
| Solid Oak Board (hanging rail) | $20 – $60 (depending on length and thickness) |
| Paint and Paintbrush | $15 – $40 (basic paint + brush kit) |
| Hooks for hanging towels | $5 – $20 (set of hooks) |
| Total Estimated Material Cost | $178 to $545 |
NOTE: These costs are estimated and may vary based on your location, material quality, and project size.
Step 1: Measure and Cut the Plywood Strips
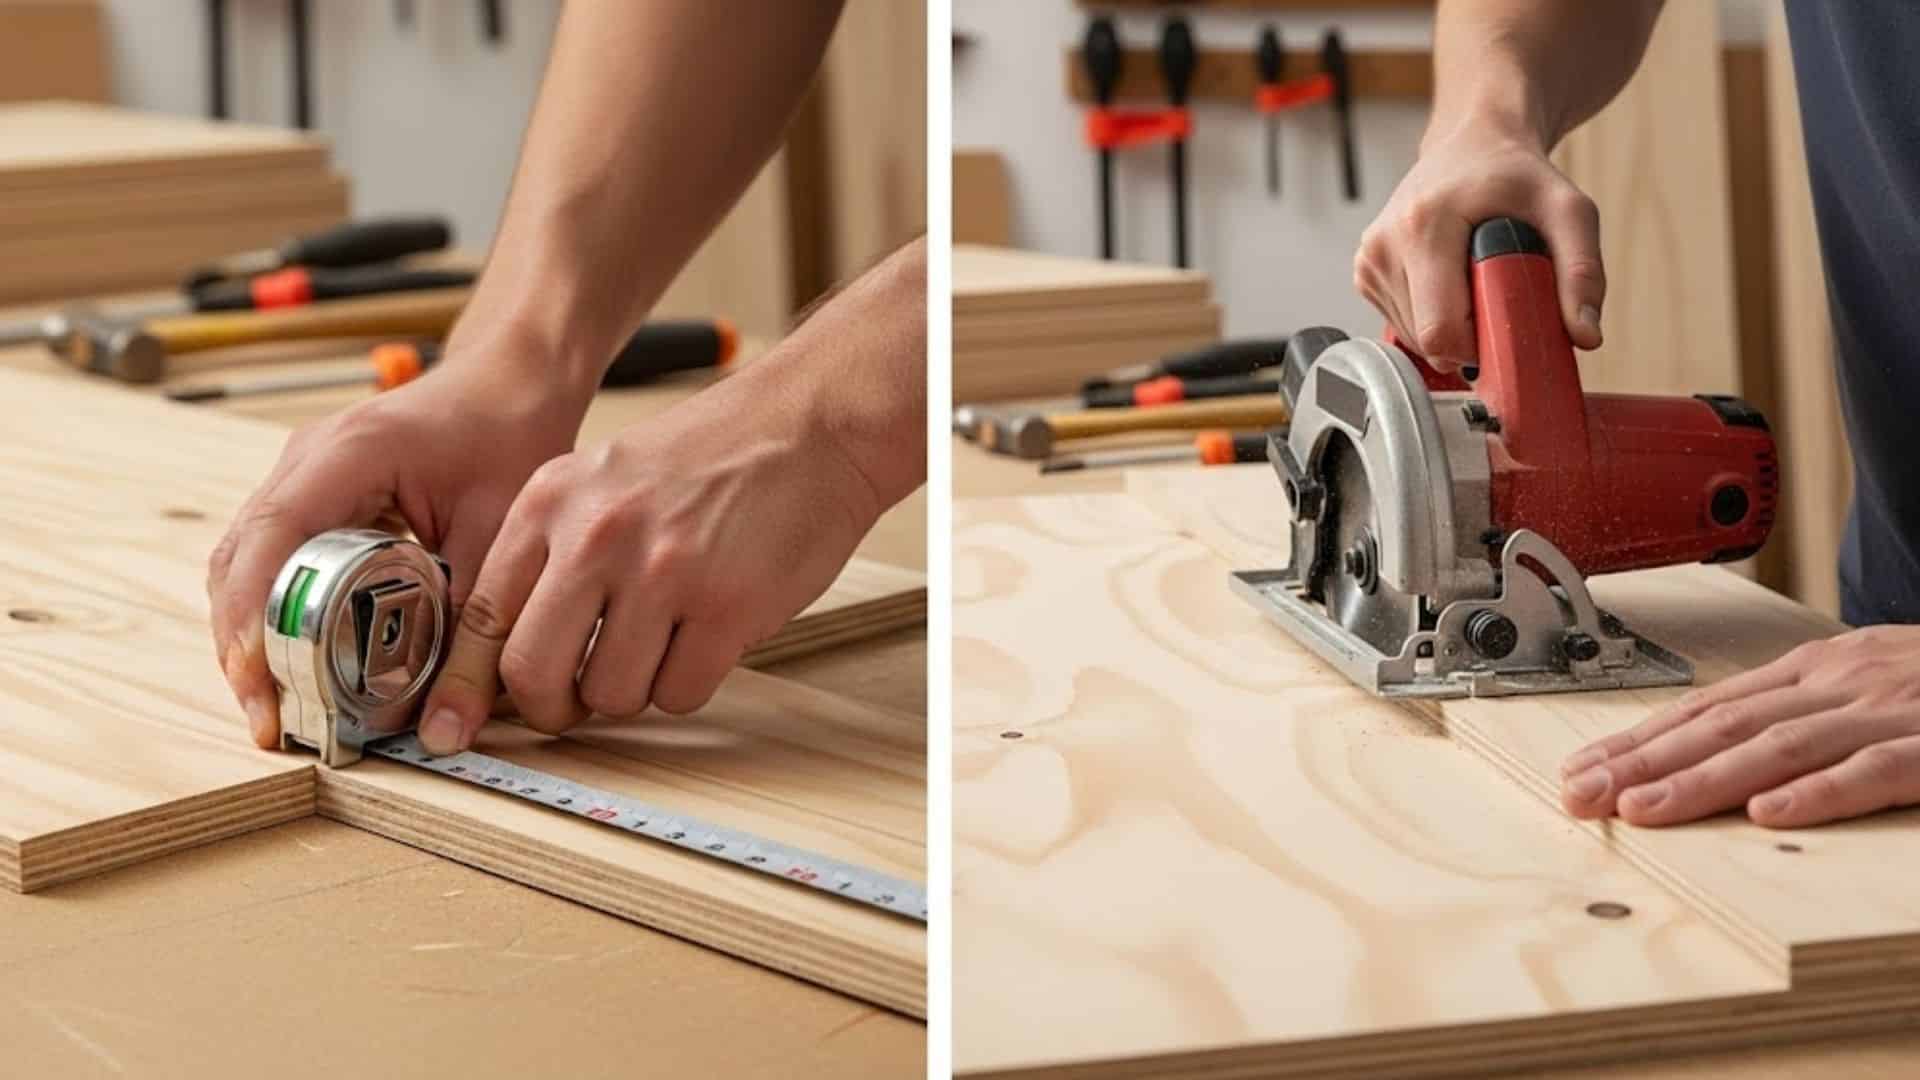
Grab your leftover plywood or a fresh sheet and measure out strips about 5 ½ to 5 ¾ inches wide. You’ll be using these for the shiplap wall, giving your space that rustic or modern touch.
A miter or circular saw will do the job. Cut your strips to the same size, ensuring a clean, even look when attaching them.
Step 2: Locate the Studs and Mark Them
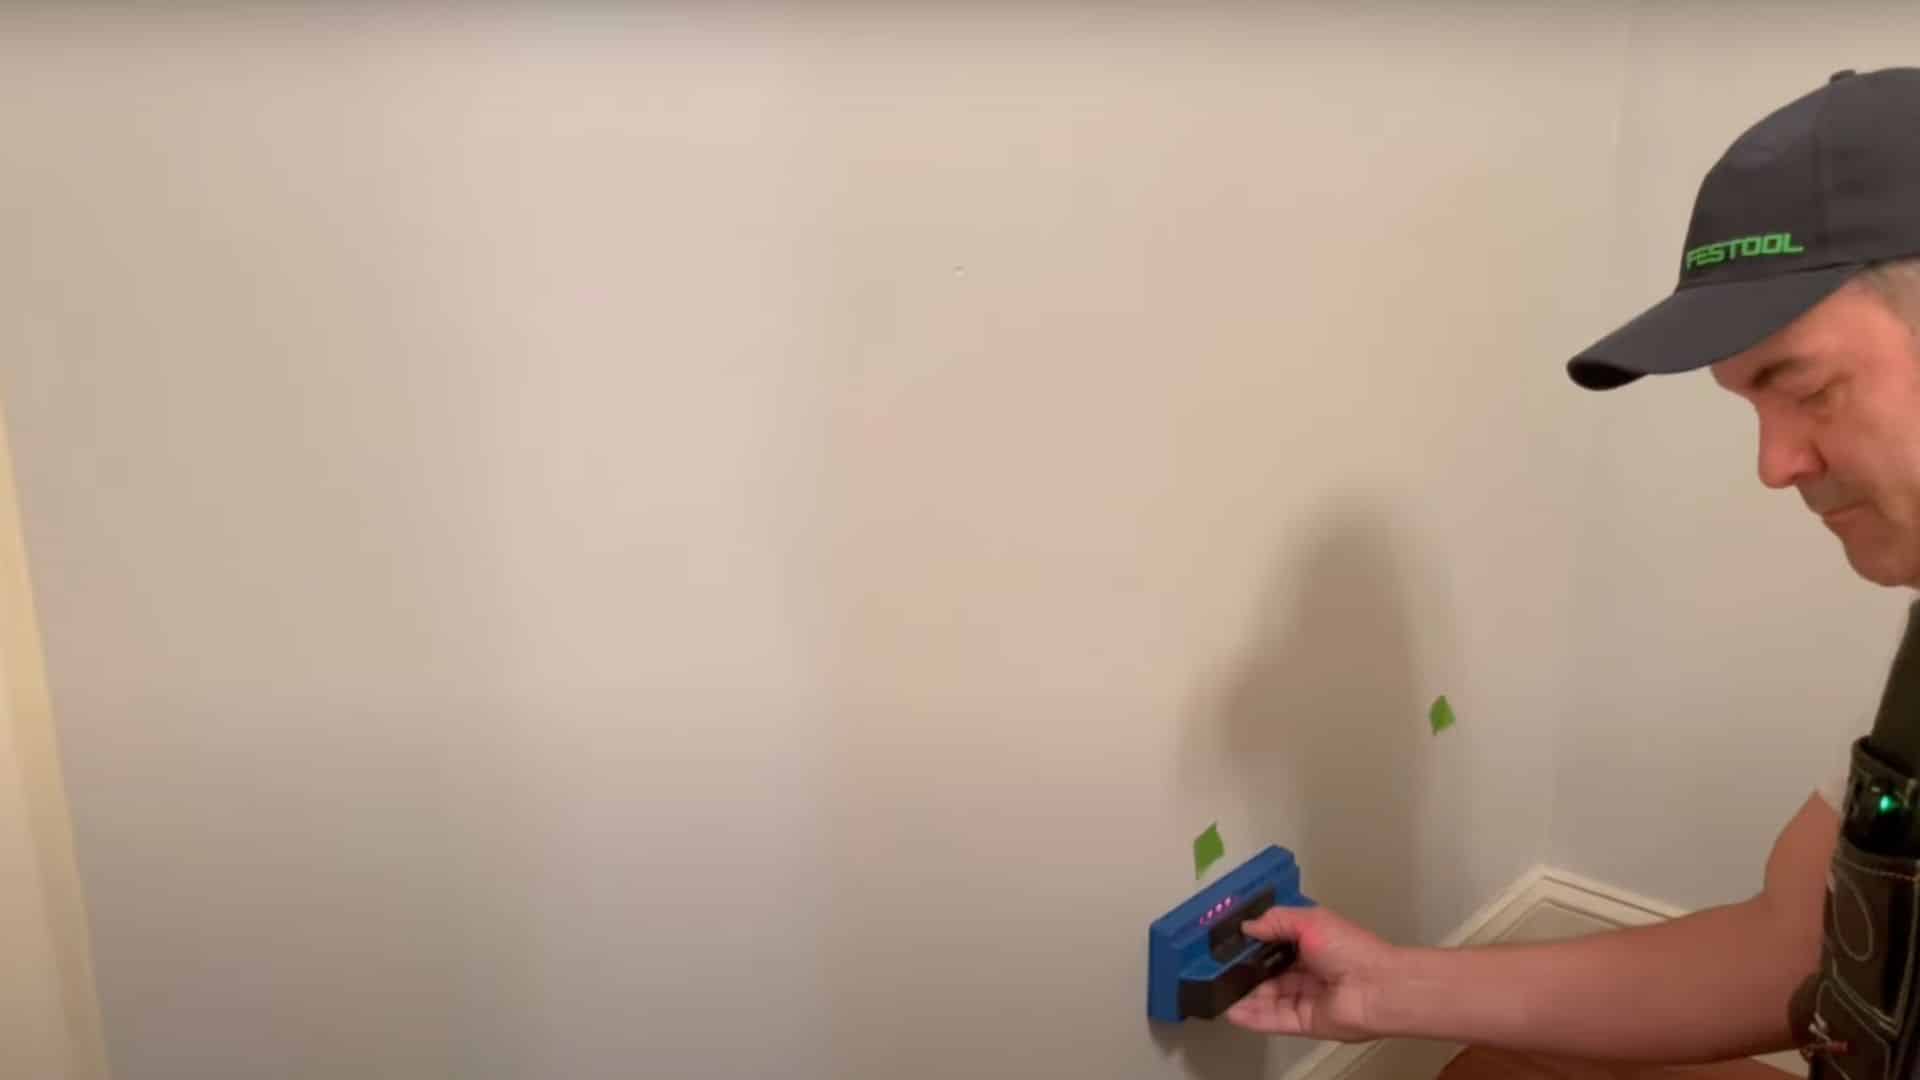
Get a stud finder and start locating the studs in the wall. Mark those spots clearly with masking tape.
This is key because attaching your plywood strips directly to the studs will give the installation strength and durability. Marking these spots ensures your plywood stays securely in place and holds up over time.
Step 3: Attach the Plywood Strips
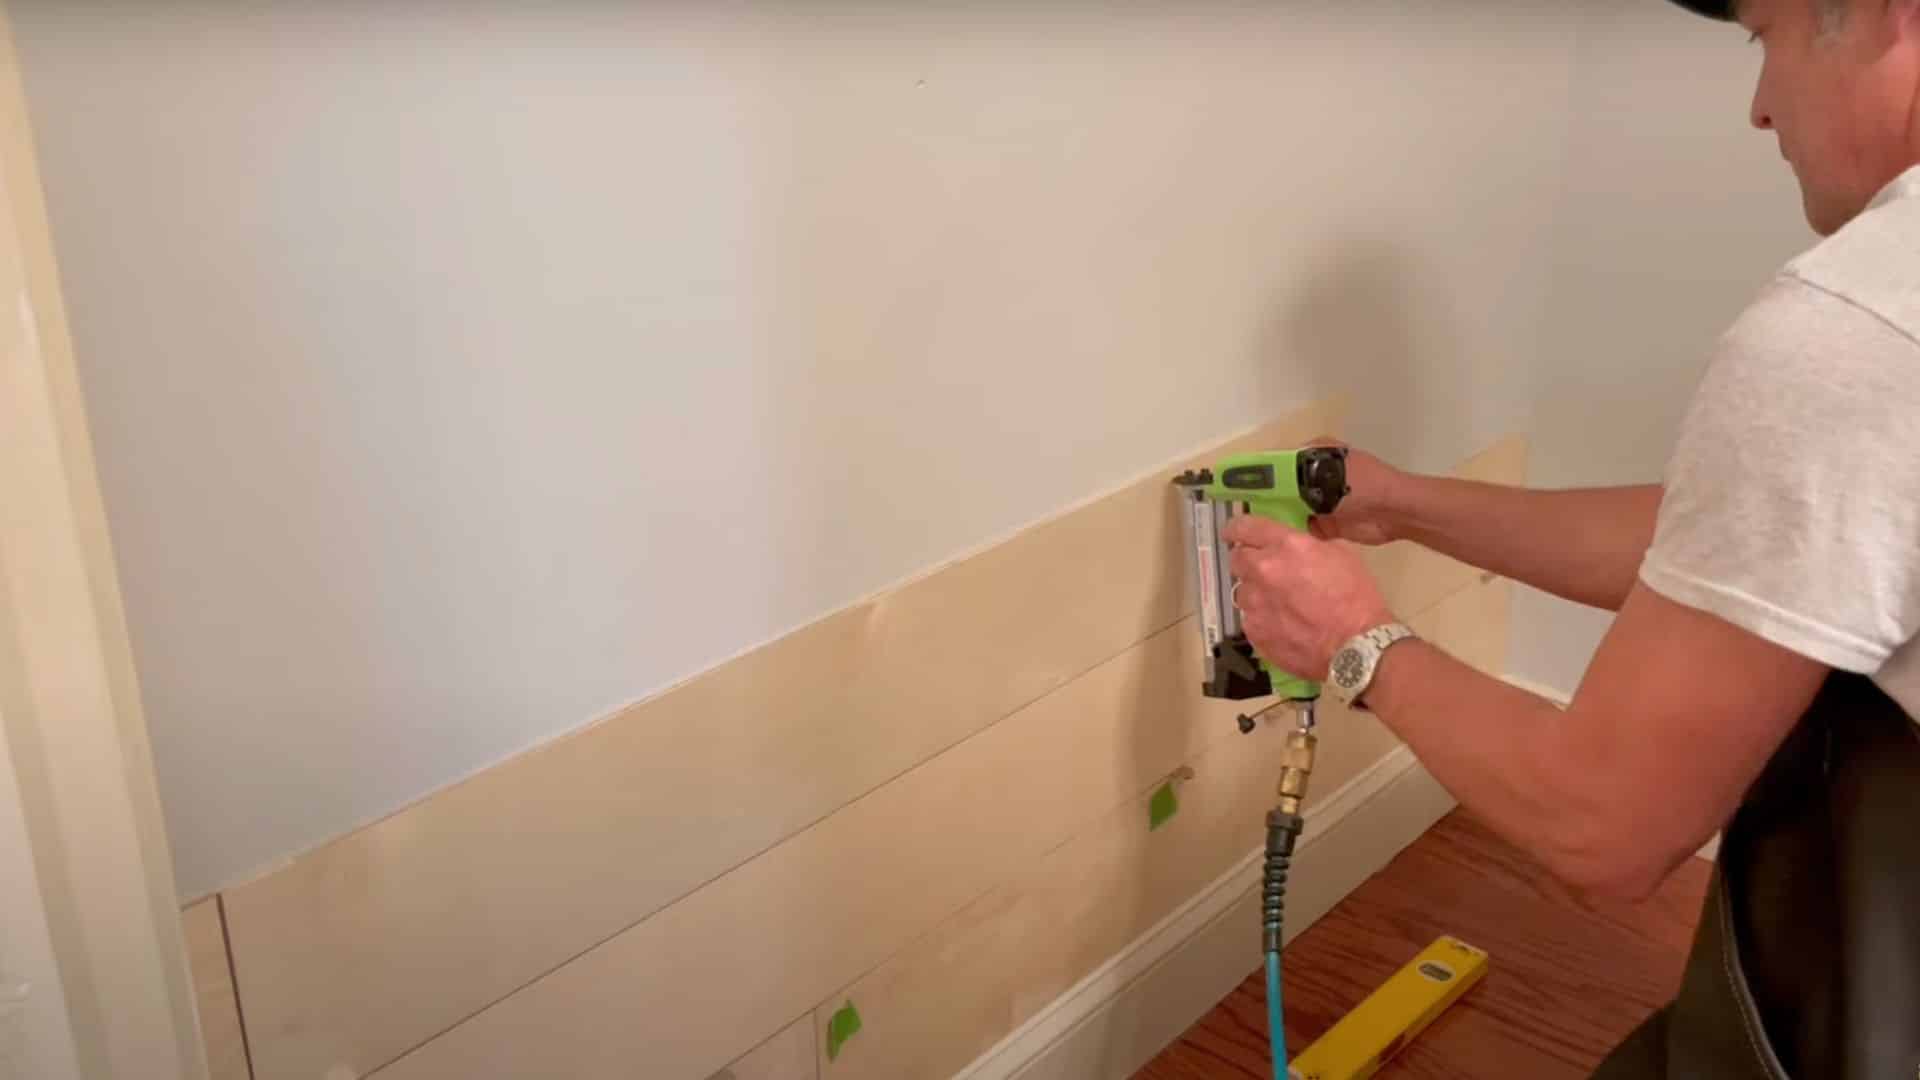
Now it’s time to attach your plywood strips using a pin nailer. This tool makes the job fast and easy, and you won’t have visible nail heads when you’re done.
Space your strips evenly with a nickel between them to get that classic shiplap gap. This gives the wall its signature texture and look, enhancing the overall style of your space.
Step 4: Handle Obstacles and Cut Around Them
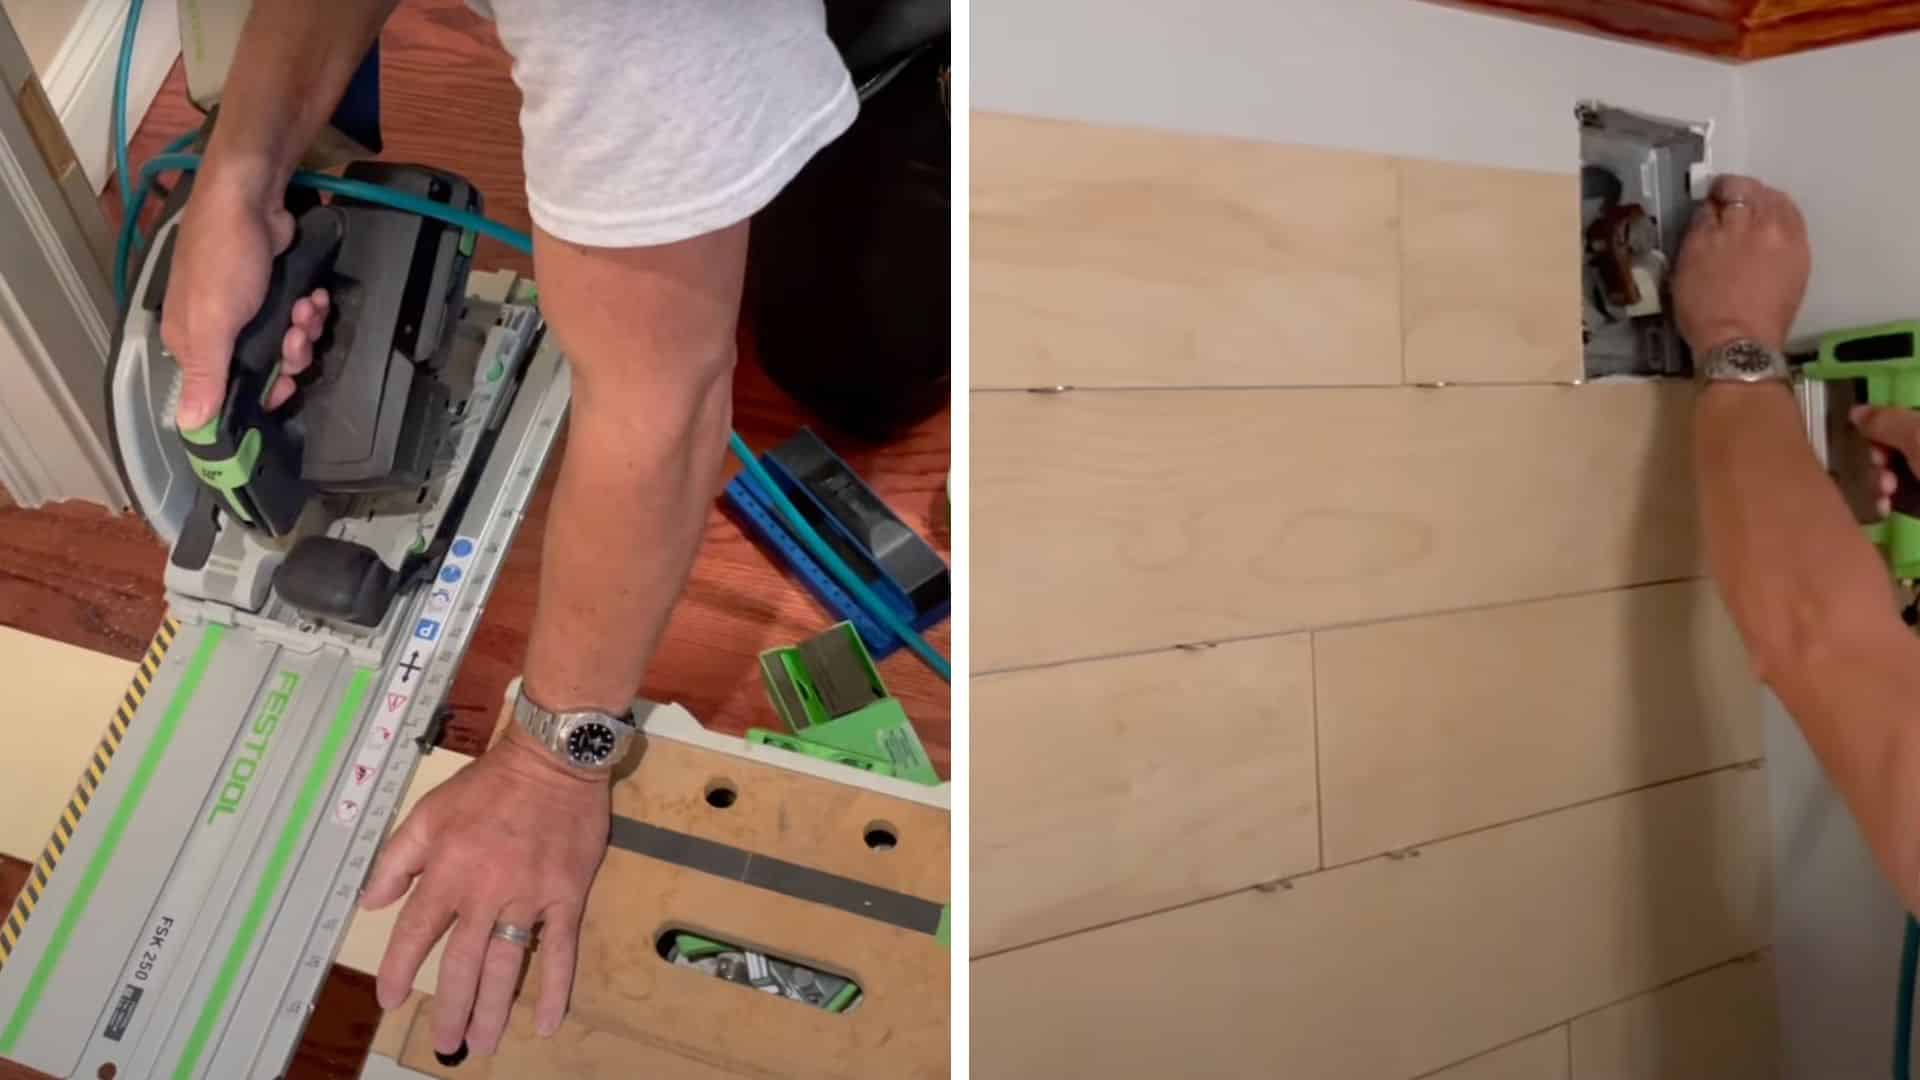
As you go, you’ll likely run into obstacles like light switches or vents. Mark where cuts need to be made and grab your jigsaw to cut the plywood strips to fit.
For example, remove the vent cover and cut around the edges. The key is precision; take your time to ensure the cuts fit perfectly, so the shiplap continues to look clean and polished.
Step 5: Install the Hanging Rail and Hooks
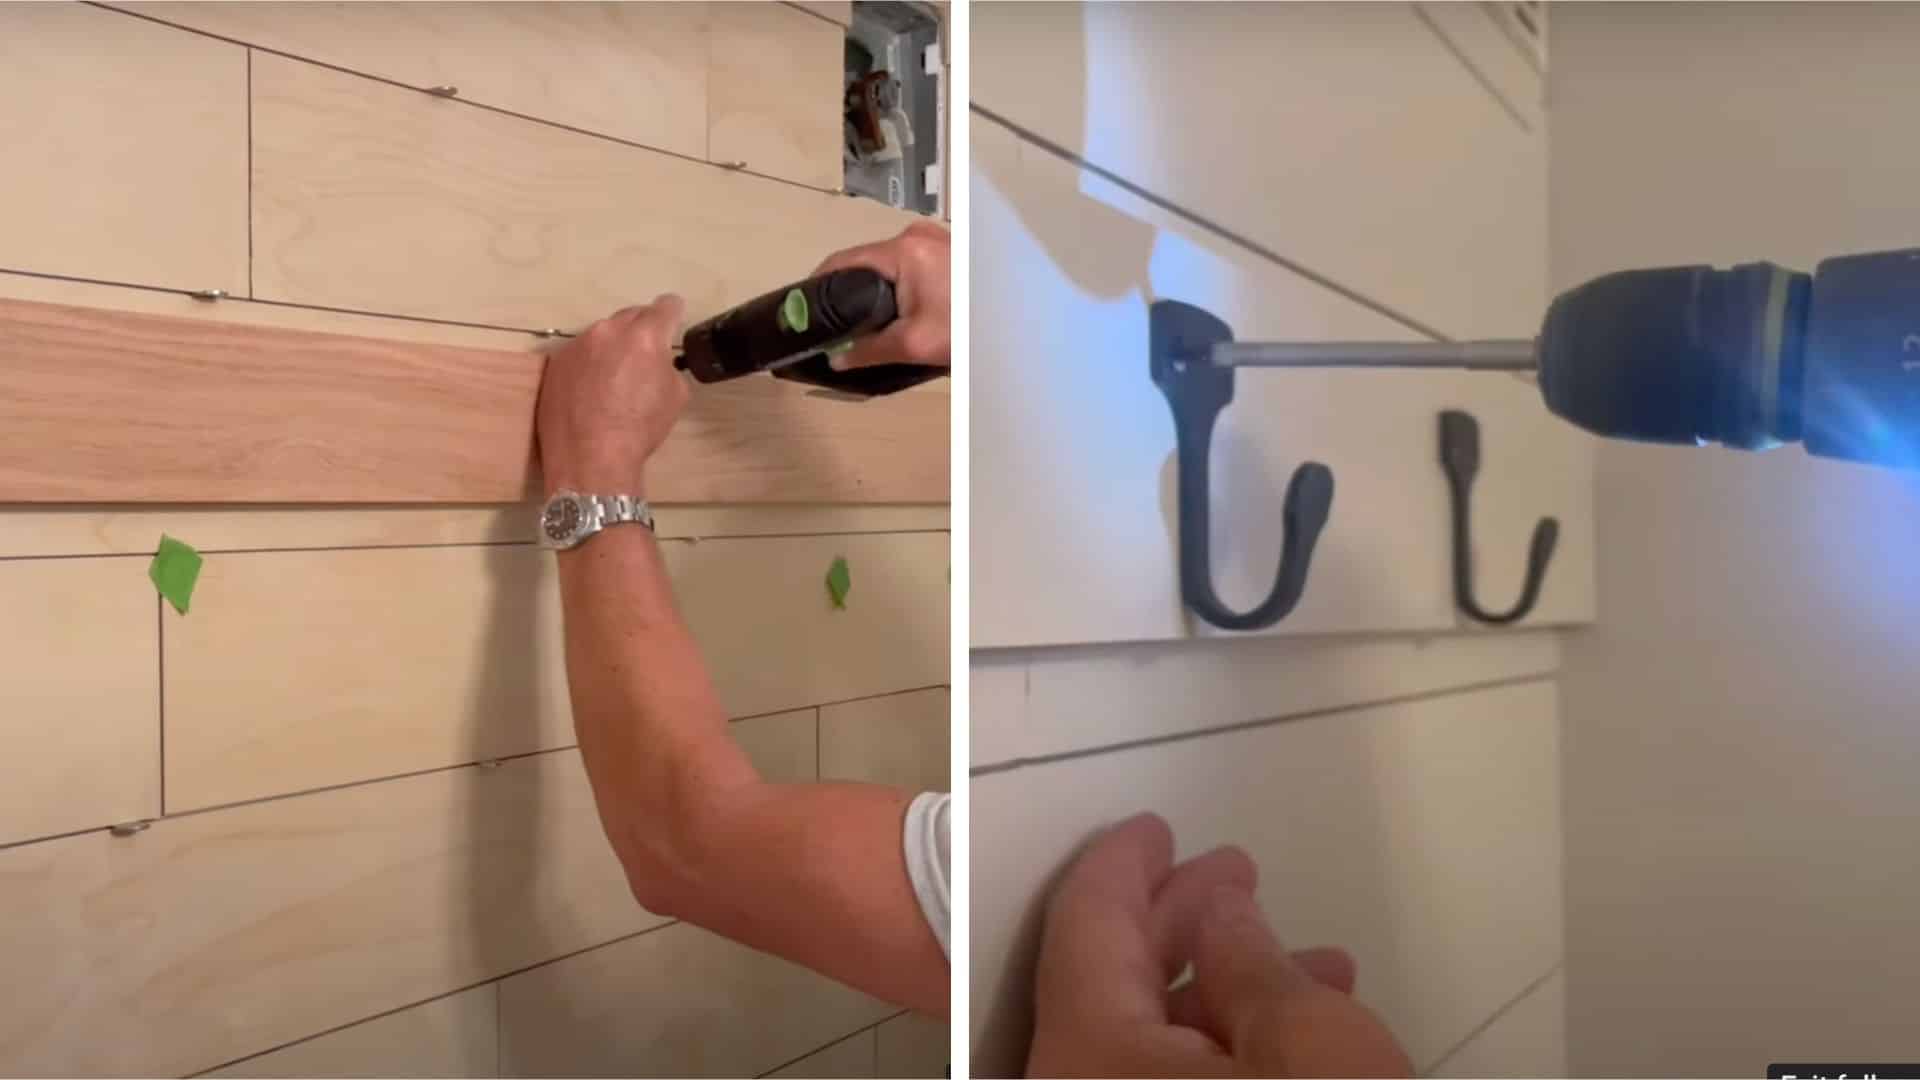
Once the shiplap is on, you’ll want to add a hanging rail for functionality. Measure and install a solid oak board at the right height for towels or accessories.
Secure it with headless trim screws, which won’t show but will keep the rail sturdy. Finish up by adding hooks, making your new half-bathroom both stylish and practical with a place to hang everything.
Or you can customize it to suit your needs, such as hanging paintings or adding shelves to showcase plants or any art pieces.
See It in Action: DIY Shiplap Video Tutorial
Displaying Indoor Plants with Your New Shiplap Wall
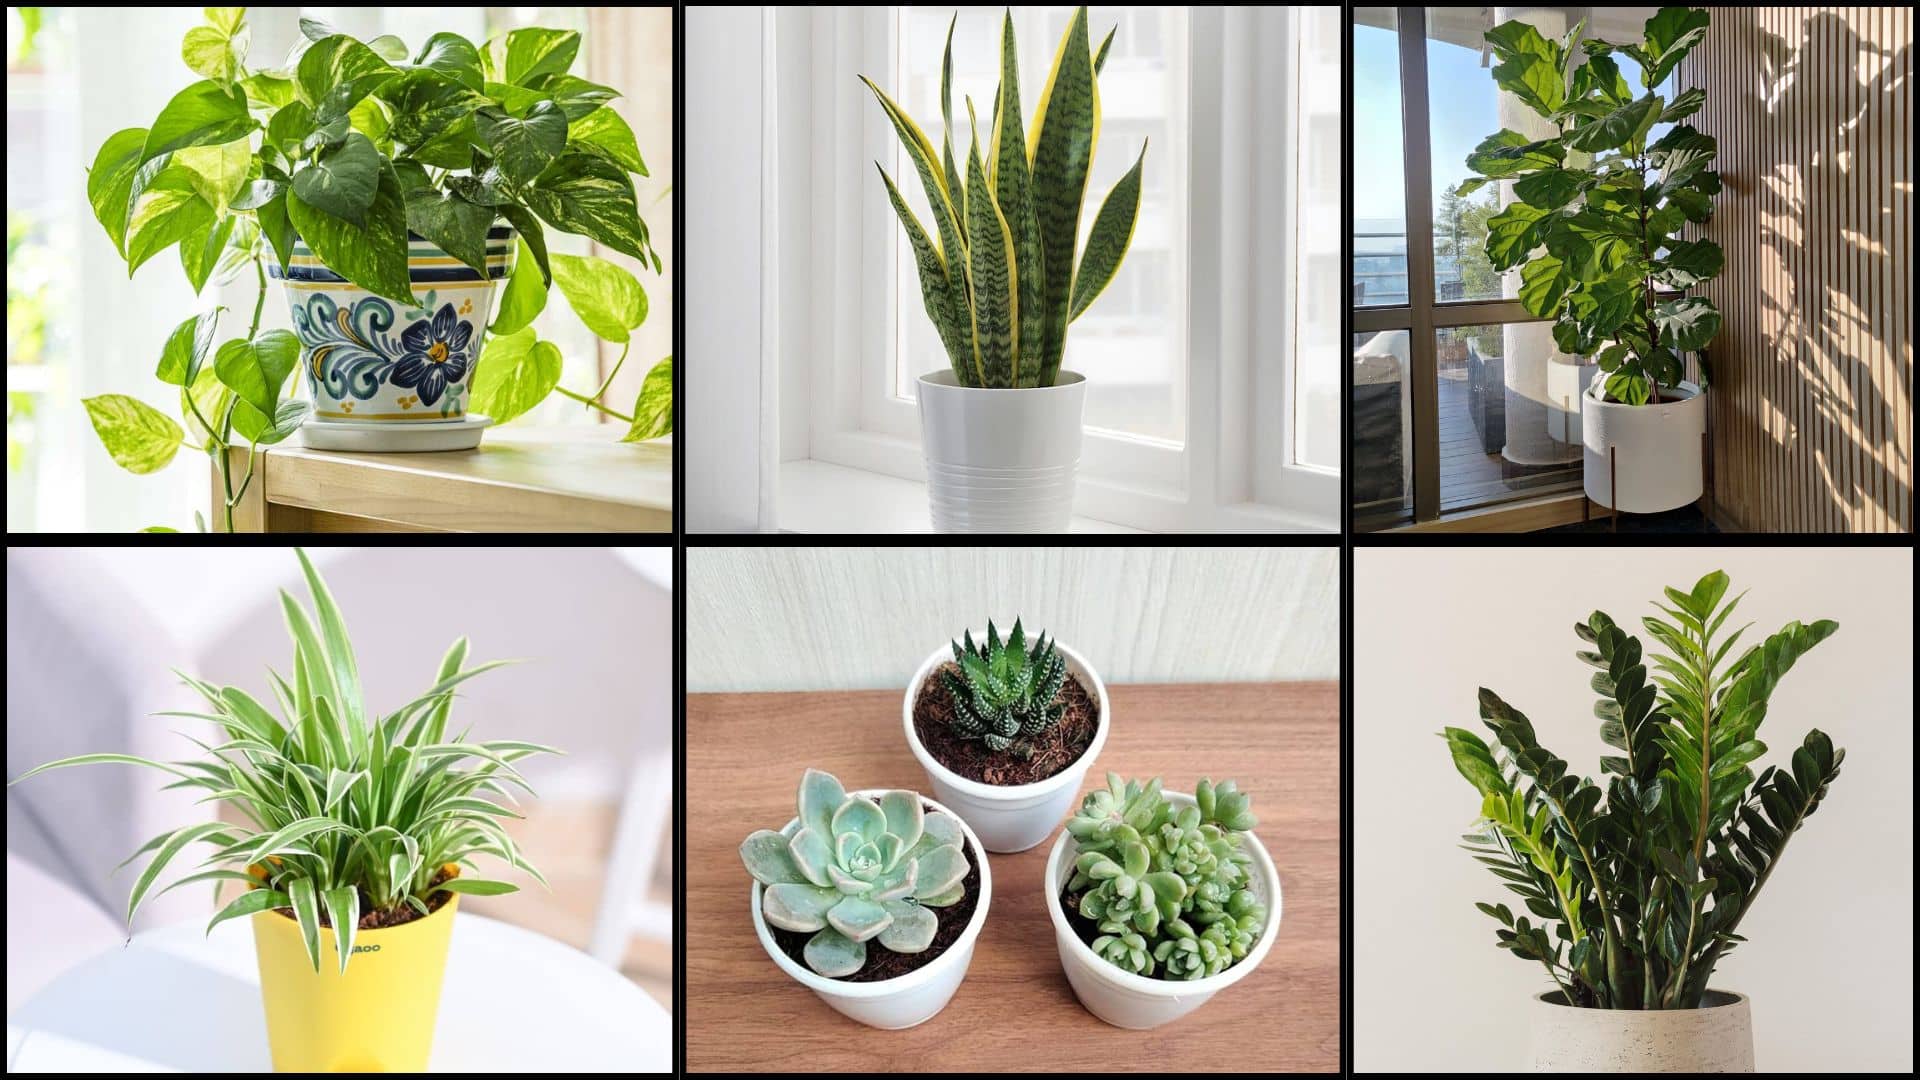
Shiplap offers a versatile backdrop for showcasing your favorite indoor plants. Here’s how some plants pair perfectly with shiplap:
- Pothos: Hang trailing vines near shiplap corners where the cascading green softens hard wooden edges beautifully.
- Snake Plant: Place tall snake plants against the walls to create striking vertical lines that complement horizontal board patterns.
- Fiddle Leaf Fig: Position large fiddle leaf figs beside accent walls to add bold green contrast against neutral wood tones.
- Spider Plant: Mount spider plants on floating shelves where their flowing leaves create movement against the structured wooden backdrop.
- Succulents: Arrange small succulent collections on DIY shiplap floating shelves for clean, minimalist displays that enhance modern farmhouse style.
- ZZ Plant: Set ZZ plants in floor pots near the walls where their glossy leaves create a beautiful texture contrast.
By combining these plants with shiplap, you can bring nature indoors, enhancing your home’s appeal and atmosphere.
Mistakes to Avoid When Installing DIY Shiplap
When installing shiplap, it’s easy to make mistakes if you’re not careful. Here are some common errors to avoid:
- Incorrect Spacing: Ensure the gaps between planks are consistent for a neat, uniform look throughout the wall.
- Over-Complicating the Process: Keep it simple! Use nickels or basic spacers for even gaps without the hassle.
- Not Using a Level: Always use a level to make sure your planks are straight and aligned.
- Not Prepping the Wall: Clean and smooth the wall before starting. This helps your shiplap stick better and gives a polished finish.
By avoiding these mistakes and taking your time, you’ll get a flawless shiplap wall every time.
How to Maintain Diy Shiplap for The Long Run
To keep your DIY shiplap wall looking great, regular maintenance is key. Here are some simple tips to help you maintain its beauty for the long run:
- Dust Regularly: Shiplap can accumulate dust, especially in the grooves. Use a microfiber cloth to gently dust the surface and keep it fresh.
- Clean with Gentle Solutions: Use a mild vinegar-water solution to wipe down the wall. Avoid harsh chemicals that could damage the wood or finish.
- Watch for Moisture: Since shiplap is wood-based, ensure it doesn’t get too wet, particularly in high-humidity areas like bathrooms. Wipe off moisture promptly to avoid warping.
By following these tips, your shiplap wall will stay in top shape for years, remaining a durable, beautiful feature in your home.
Wrapping It Up
DIYing shiplap involves measuring plywood strips, locating wall studs, attaching the boards with even spacing, and adding those finishing touches. I want to reassure you that this project is entirely achievable, even if you’re new to DIY.
The best part is watching your plain wall convert into something straight out of a design magazine.
Shiplap pairs perfectly with houseplants that add a cozy, lived-in feel. Place a fiddle leaf fig in the corner, hang some trailing pothos, or add succulents to open shelves. These small touches make your space feel warm and fresh.
Your new shiplap wall will be the standout feature in your home, sparking compliments every time guests visit. Start gathering your materials and get ready to amaze yourself! What room are you excited to start on?