
I first grew tomatillos after making salsa verde and fell in love with their tangy flavor and delicate, papery husks. That dish sparked my interest, and I decided to grow them myself.
I started with seeds and learned what tomatillos need at each stage, from tiny sprouts to full-grown fruit ready to pick.
Along the way, I faced challenges such as poor pollination and overwatering, but I also discovered tricks that made a significant difference.
In this blog, I’ll walk you through every stage of tomatillo growth, from planting and transplanting to flowering and harvesting. I’ll share what worked for me, what didn’t, and what to watch for.
What Are Tomatillos?
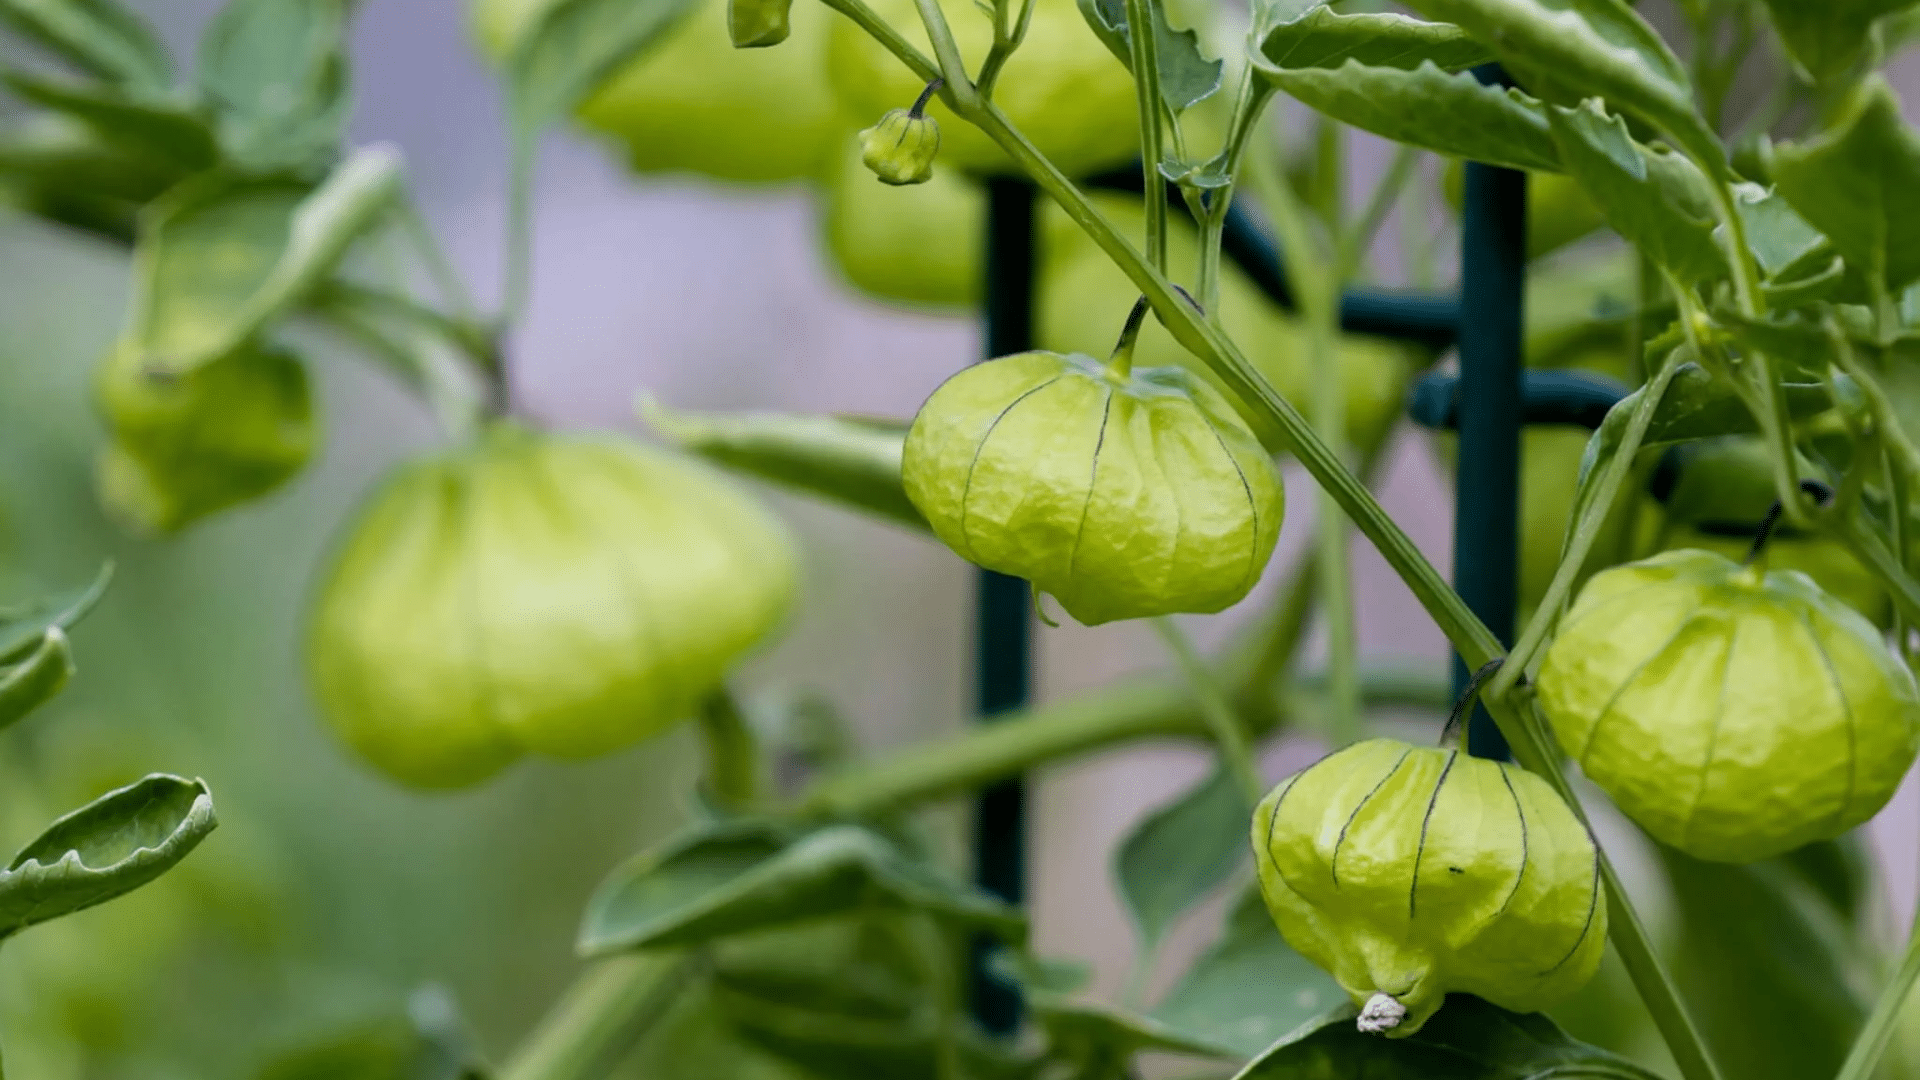
Tomatillos (Physalis philadelphica) are small, round fruits covered in a thin, papery husk. Native to Mexico and a staple in Latin American cooking, they’re often used to make green sauces like salsa verde.
Unlike tomatoes, tomatillos stay firm when ripe and have a tart, citrusy flavor. They grow on bushy plants that resemble tomato plants but require at least two plants to pollinate and produce fruit.
Tomatillos come in green, purple, or yellow varieties, though green is most common in cooking. Each fruit grows inside its own husk, which dries and splits as the tomatillo matures.
They thrive in warm weather and full sun, making them a popular pick for summer gardens. With the right care, tomatillos are both productive and easy to grow at home.
How Tomatillos Grow: A Step-by-Step Guide
From sprouting seeds to harvest-ready fruit, these stages will help you successfully grow tomatillos in your garden.
Stage 1: Seed Starting & Germination
Start seeds indoors 6 to 8 weeks before your last expected frost date. Plant them ¼ inch deep in a moist, well-draining mix and keep the temperature around 70–75°F.
Germination usually takes 7–14 days. Once seedlings have a few true leaves and outdoor temps stay above 60°F, begin hardening them off to prepare for transplanting.
Stage 2: Seedling & Transplanting
After germination, seedlings grow stronger roots and true leaves. Provide plenty of light and keep the soil moist.
Once outdoor soil warms to 60°F and frost danger has passed, harden off the seedlings over a week. Transplant them into the garden 18–36 inches apart for proper air circulation and healthy growth.
Stage 3: Vegetative Growth
As tomatillo plants grow, they develop a sturdy structure of stems and leaves. Place them in full sun for 6–8 hours daily and enrich the soil with compost.
Keep the soil evenly moist and apply balanced fertilizer. Focus on phosphorus and potassium to promote flowering over leafy growth.
Stage 4: Flowering & Pollination
Yellow flowers begin blooming in early summer. Since tomatillos are not self-pollinating, grow at least two plants to ensure successful pollination.
Bees and other insects transfer pollen between plants. Once pollinated, each flower forms a husk where the tomatillo fruit will grow.
Stage 5: Fruit Development
Tomatillos begin to form inside their husks and mature over 50–70 days. As the fruit grows, it fills the husk, which may split when ripe.
Provide steady water and avoid overwatering to prevent disease. As the fruit ripens, reduce nitrogen and increase phosphorus and potassium to boost yield and flavor.
Stage 6: Mature Plant Care
At full size, around 3 to 4 feet tall, continue deep watering at the base. Fertilize monthly using a low-nitrogen mix to support fruit over foliage.
Avoid overhead watering, which can spread disease. Prune crowded branches and remove suckers to encourage airflow and healthier plants.
Stage 7: Pest & Disease Management
Watch for aphids, flea beetles, and fungal issues like powdery mildew. Use neem oil or insecticidal soap to manage pests, and water only at the base to keep foliage dry.
Rotate crops yearly and maintain proper spacing to prevent recurring issues. Strong, healthy plants recover more easily from minor attacks.
Stage 8: Harvesting Tomatillos
Tomatillos are typically ready 75–100 days after planting. They’re ripe when the fruit completely fills the husk or starts to split open.
Pick firm fruits early in the day for the best flavor. Regular harvesting encourages the plant to keep producing until the first frost.
Common Pests That May Affect Your Tomatillo Plants
Tomatillos can face pest problems during the growing season, but early action and monitoring help keep plants healthy and productive.
- Aphids: Tiny green or black insects that suck sap from leaves and stems, causing yellowing and curled foliage.
- Flea Beetles: Small, jumping beetles that chew small holes in leaves, weakening young plants.
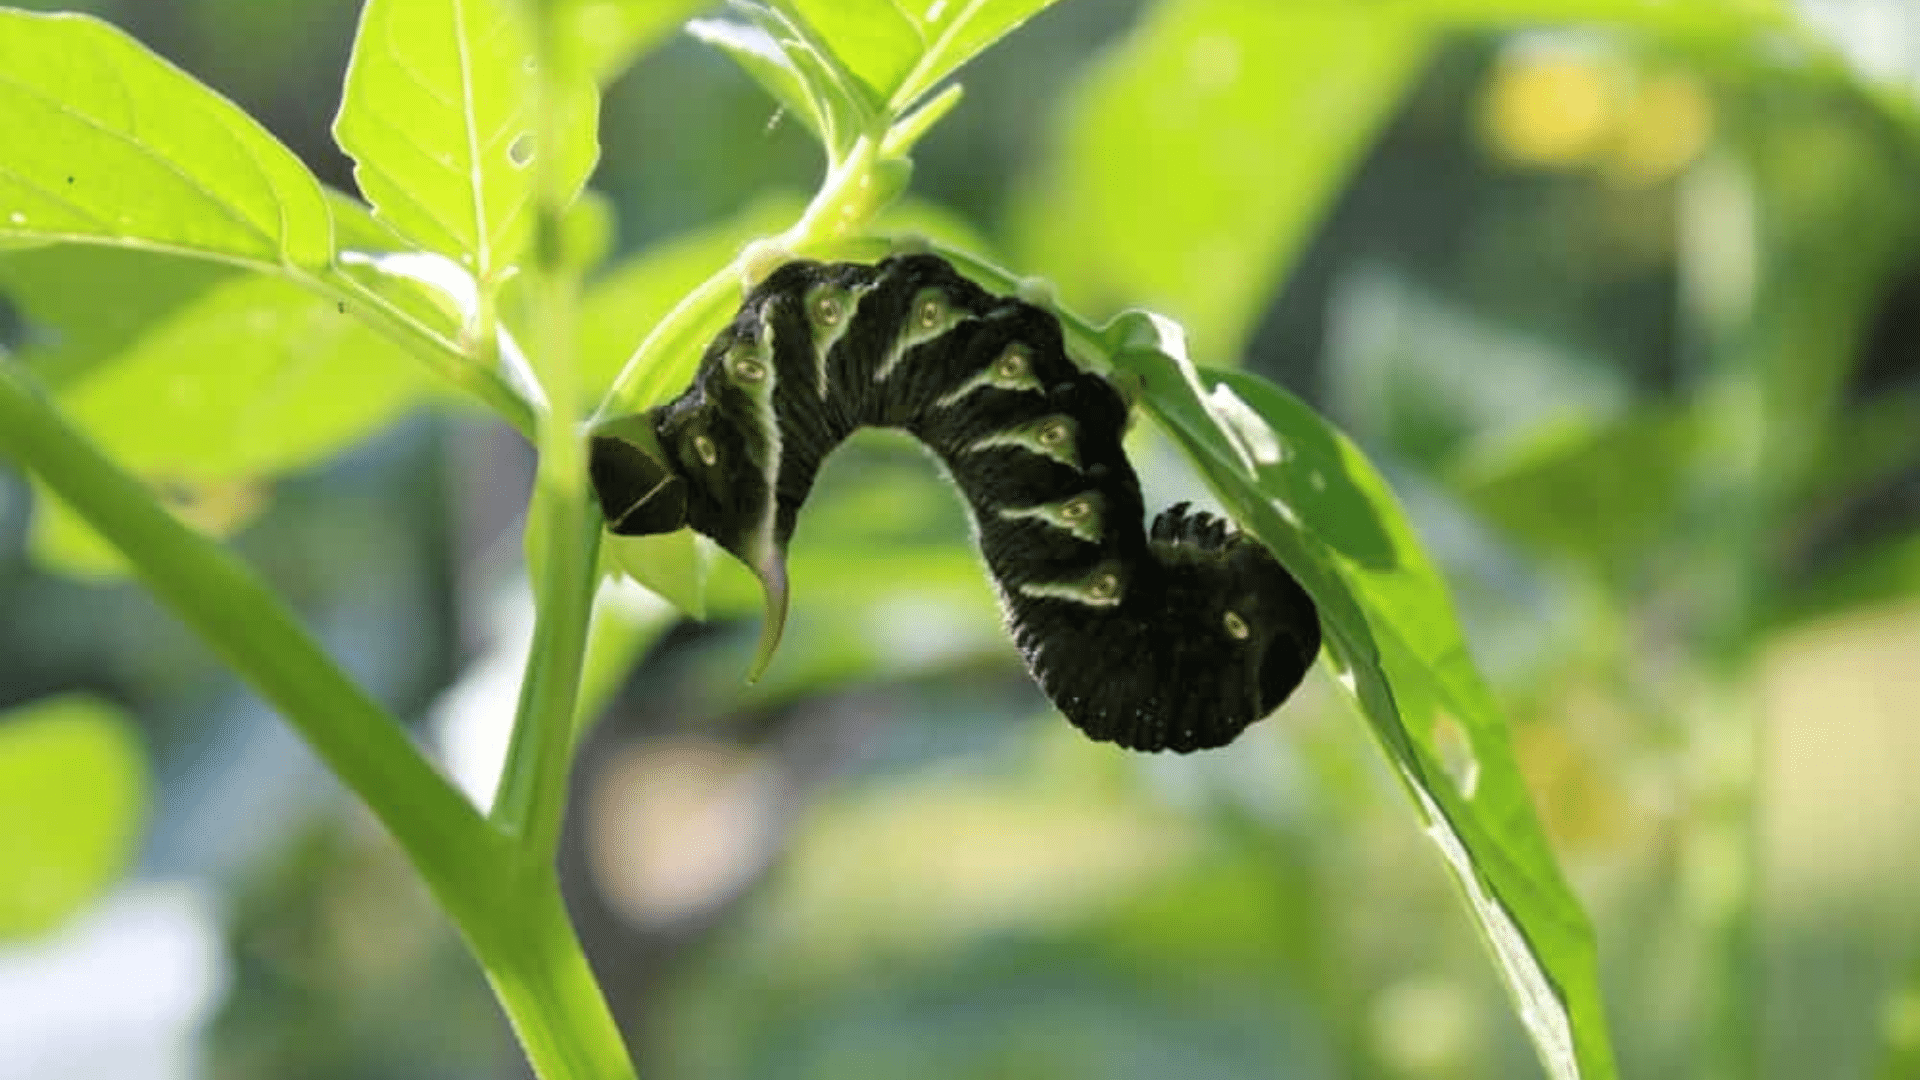
- Tomato Hornworms: Large green caterpillars that strip foliage and damage fruit quickly if left unchecked.
- Cutworms: Nocturnal pests that chew through young stems at the soil line, often killing seedlings.
- Whiteflies: Tiny, winged insects that cluster under leaves, sucking plant juices and spreading disease.
- Slugs and Snails: Mollusks that feed on leaves and fruit, leaving slimy trails and large holes.
- Spider Mites: Microscopic pests that cause speckled leaves and fine webbing, thriving in dry heat.
Best Practices for Growing Tomatillos
Learn the top tips and techniques to help your tomatillo plants thrive from seed to harvest with healthy yields all season long.
- Start Indoors Early: Begin seeds 6–8 weeks before the last expected frost date for a head start.
- Plant in Pairs: Grow at least two plants to ensure proper cross-pollination and fruit development.
- Use Well-Draining Soil: Rich, loamy soil with compost supports healthy roots and steady growth.
- Provide Full Sun: Ensure 6–8 hours of sunlight daily for maximum fruit production.
- Stake or Cage Plants: Support tall, sprawling vines to keep fruit off the ground and improve airflow.
- Water at the Base: Keep soil moist but not soggy; avoid overhead watering to prevent disease.
- Mulch Generously: Use mulch to retain moisture, reduce weeds, and regulate soil temperature.
- Fertilize Monthly: Use a low-nitrogen fertilizer to promote fruit instead of excess foliage.
- Monitor for Pests: Watch for aphids, flea beetles, and slugs; treat early with neem oil or soap.
- Harvest Often: Pick tomatillos every few days to encourage continuous fruiting until frost
Post-Harvest Storage Tips
Learn how to properly store fresh and frozen tomatillos to keep their flavor, texture, and shelf life at their best.
- Refrigerate in husks: Store tomatillos with husks on in a paper bag in the fridge for up to 3 weeks.
- Remove husks before use: Peel off husks and rinse off the sticky coating just before cooking or storing.
- Freeze for long-term use: Wash, dry, and freeze whole or sliced tomatillos in airtight containers or freezer bags.
- Avoid plastic bags for fresh storage: They trap moisture and cause tomatillos to spoil faster.
- Check for spoilage weekly: Discard any tomatillos that feel mushy or show mold.
- Use frozen tomatillos in cooked dishes: They work well in salsas, stews, or roasted recipes after thawing.
Why I Recommend Growing Tomatillos?
Tomatillos have become one of my favorite plants to grow. They’re forgiving, resilient, and produce plenty of fruit- even in containers or small raised beds.
Their bright, tangy flavor makes homemade salsa verde unbeatable, and I’ve used them in everything from soups to grilled sauces. What surprised me most was how long they kept producing with minimal care.
Once the plants take off, they continue blooming and fruiting until frost.
Growing tomatillos taught me about cross-pollination (since they need a buddy), how to time plantings for continuous harvests, and the benefits of crop rotation.
They’ve also sparked conversations with neighbors curious about their papery husks. If you’re looking for a satisfying plant that’s both fun to grow and useful in the kitchen, tomatillos are a great choice.
Conclusion
Growing tomatillos has been one of the most satisfying parts of my garden.
From the excitement of germinating seeds indoors to watching those lantern-like husks fill out in late summer, each stage offers something new to learn and enjoy.
They’re productive, flavorful, and perfect for gardeners who want something a little different. I love how they keep producing until frost with just a bit of care.
If you’ve been thinking about growing them, I hope this guide helps you feel ready to start. Try planting a couple this season; you might be surprised by how easy and rewarding it is.
And when harvest comes, don’t forget to share your favorite recipe or a photo of your tomatillos. I’d love to see what you grow and create.


One Response
hello. one of my plants this year is producing interesting fruit/lanterns. The lanterns begin as is typical; as the fruit begins to grow, the lanterns are receding with fruit continuing to grow. sort of an acorn top look. The fruit is sticky and continue to grow. I have three other plants that are developing normally. What are your experiences with this, and/or thoughts?