There are many reasons why you might need to dig up a small tree. Maybe it’s growing too close to your house, or it’s not doing well where it was planted. You may also want to relocate it as part of a garden update or landscape transformation.
No matter the reason, how you move the tree makes a big difference. Pulling it out too fast or cutting the roots too close can cause lasting harm. Roots need to stay as whole as possible, and the tree must be moved gently.
The good news is that with the right tools and steps, you can safely dig up a small tree and replant it in a better location. This blog will walk you through everything you need to know—from when to start, to how to dig, move, and care for the tree afterward.
With a little patience and planning, you can help the tree stay healthy and strong, even in a new spot.
Tools and Materials You’ll Need
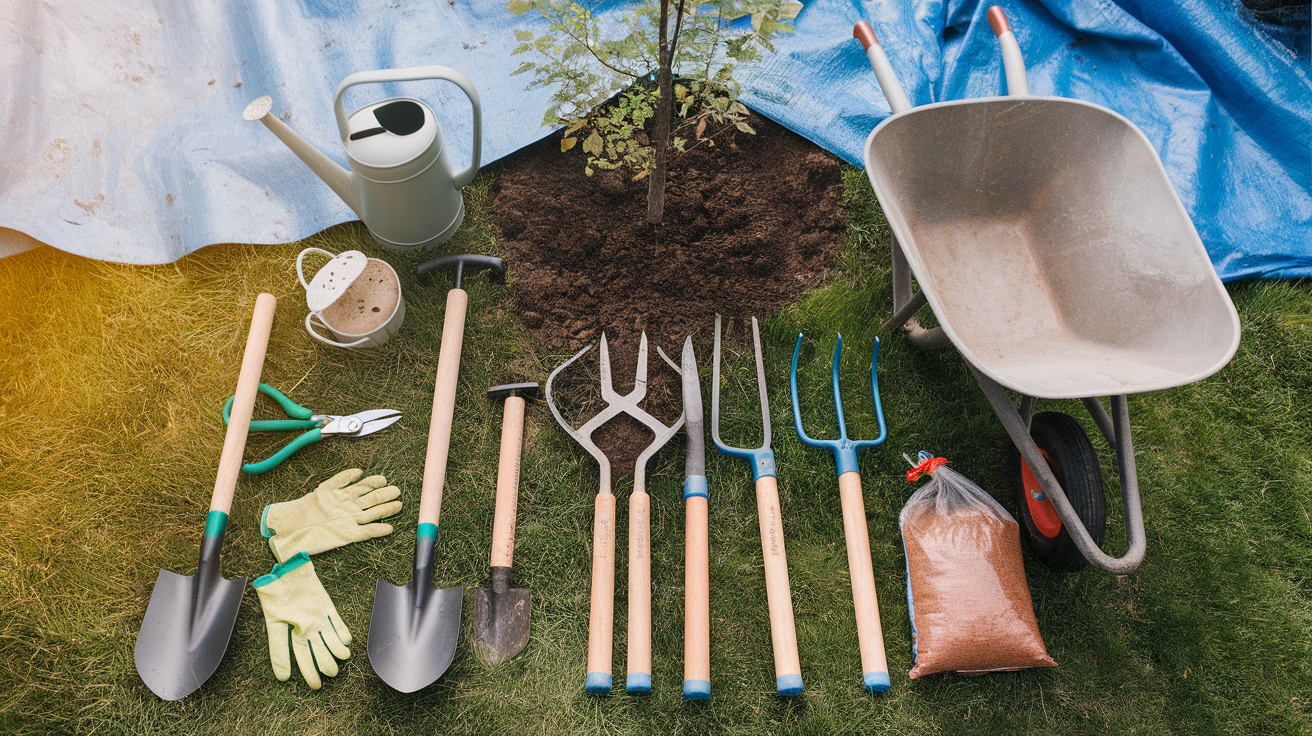
Before you start digging, it’s important to have the right tools on hand. Using the proper gear makes the process easier, safer, and helps protect the tree during the move.
- Shovel: For digging around and under the root ball
- Gloves: To protect your hands from rough soil and roots
- Pruning shears: For trimming small branches or roots
- Tarp: To move the tree and keep the soil together
- Watering can: To moisten the soil before and after digging
- Root saw (optional): For cutting thicker roots
- Garden fork (optional): To loosen tough soil
- Wheelbarrow (optional): To transport the tree
- Mulch (optional): For post-move moisture and root care
Having these tools ready means fewer delays and better results. It also helps keep the tree safer during each step of the move.
How to Choose the Right Time?
The best time to dig up a small tree is when it’s not actively growing. Early spring or fall is ideal because the tree is usually dormant during these times. This helps reduce shock and makes it easier for the tree to adjust after the move.
Avoid digging in very hot or dry weather. These conditions can stress the tree and make the soil hard to work with. Also, avoid very wet days, as soggy soil can cause the root ball to break apart, making it harder to move the tree safely.
Good timing gives the tree a better chance to survive and thrive in its new location. Planning around the seasons can make a big difference.
Preparing the Tree for Removal
I start by watering the tree the day before I dig it up. This softens the soil and helps keep the root ball intact. I’ve found that wet soil is not only easier to work with, but it’s also gentler on the roots.
Before I start digging, I do a bit of light pruning. I trim back any long or weak branches to make the tree easier to handle. It also encourages the tree to focus its energy on root growth once it’s replanted.
Then I estimate the size of the root ball. My rule of thumb is to dig about one foot wide for every inch of trunk diameter. This way, I can keep more of the root system intact and give the tree a better shot at a smooth recovery.
Step-By-Step Guide to Digging Up A Small Tree
Digging up a small tree takes care and patience. Following each step in the right order helps protect the roots and makes replanting easier. Start slow, stay steady, and your tree will have a better chance to thrive in its new spot.
Step 1: Mark a Wide Circle Around the Tree
Start by drawing a circle around the base of the tree. Make the circle about 12 inches away from the trunk for every inch of trunk width. This helps you keep more of the root ball intact.
Use a garden hose or a stick to trace your digging line. Keeping this shape even helps you dig more smoothly around the tree. A wide circle protects larger roots, providing you with room to work.
This first step may seem simple, but it’s one of the most important. Cutting too close can damage major roots. Give the tree the space it needs for a safe move.
Step 2: Dig a Trench Around the Roots
Use a sharp shovel to dig down along the marked line. Go slowly and keep the soil as intact as possible.I try to dig about 12 to 18 inches deep, depending on the tree’s size.
Work your way around the full circle. As you dig, you’ll start to uncover roots—be gentle with them. If you see thick roots, don’t pull; just note their location for cutting later.
This trench forms the edge of the root ball. It gives you a clear area to begin loosening and lifting the tree. Take your time here to avoid breaking important roots.
Step 3: Undercut the Root Ball Carefully
Now that you’ve made the trench, it’s time to work underneath. Use your shovel to cut at an angle below the roots. The goal is to make a shallow bowl under the tree.
If you hit thick roots, use pruning shears or a root saw to cut cleanly. Avoid twisting or yanking, as this can cause hidden damage. Keeping cuts clean helps the tree recover faster.
As you work, the root ball should start to loosen. Don’t rush. Keeping the soil packed around the roots helps the tree survive the move.
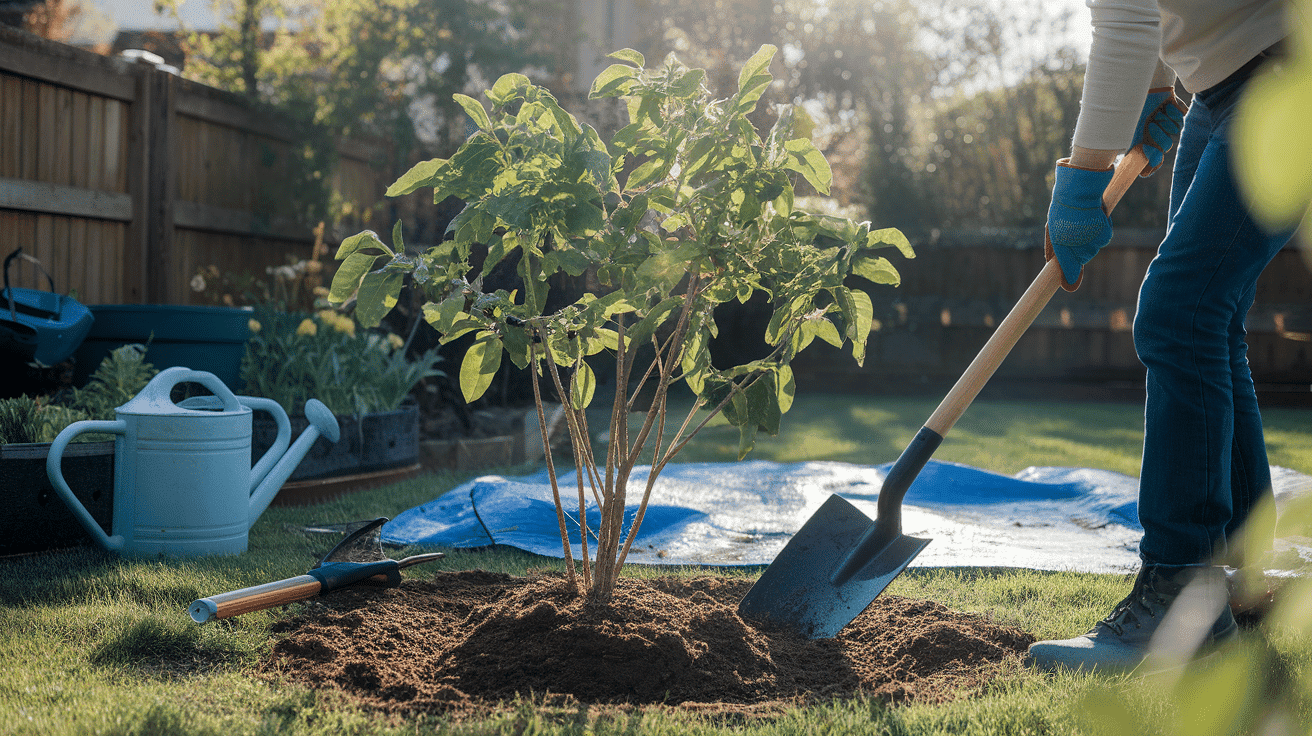
Step 4: Lift and Move the Tree onto A Tarp
Once the root ball is loose, place a tarp next to the hole. Carefully slide the root ball onto the tarp. It’s best to lift from below, not by the trunk.
Ask someone for help if the tree is large or heavy. Even with small trees, it’s better to work in pairs. A steady lift keeps the roots from breaking apart.
Now that the tree is on the tarp, you can drag or carry it to its new location. Keep the roots covered and moist during the move to prevent damage. This final step is the start of a new life for your tree.
What to Do if The Tree Is Too Heavy?
Even small trees can be difficult to lift once you factor in the soil surrounding their roots. If the tree feels too heavy to move safely, don’t rush the process. There are simple ways to make the task easier and safer.
Start by using a garden fork or root saw to cut through thicker roots with care. Avoid pulling too hard, as this can damage the root system. Take your time and work around the tree in small sections.
You can also trim some of the top branches to reduce the overall weight of the tree. This helps balance the tree and makes it easier to handle. If it’s still too heavy, use a dolly, wheelbarrow, or ask for help to move it without straining.
How to Transport a Small Tree Safely?
Once the tree is free from the ground, the way you carry it matters. Lifting the tree by the trunk can cause damage to the roots. Always lift from underneath the root ball to keep everything together.
Wrap the root ball in damp burlap or place it on a tarp. This keeps the roots from drying out and makes the plant easier to move. Try to keep the root area shaded if there’s a delay in planting.
Move the tree as quickly as you can to its new spot. The less time the roots spend out of the ground, the better the tree will be able to adjust.
How to Replant or Store the Tree?
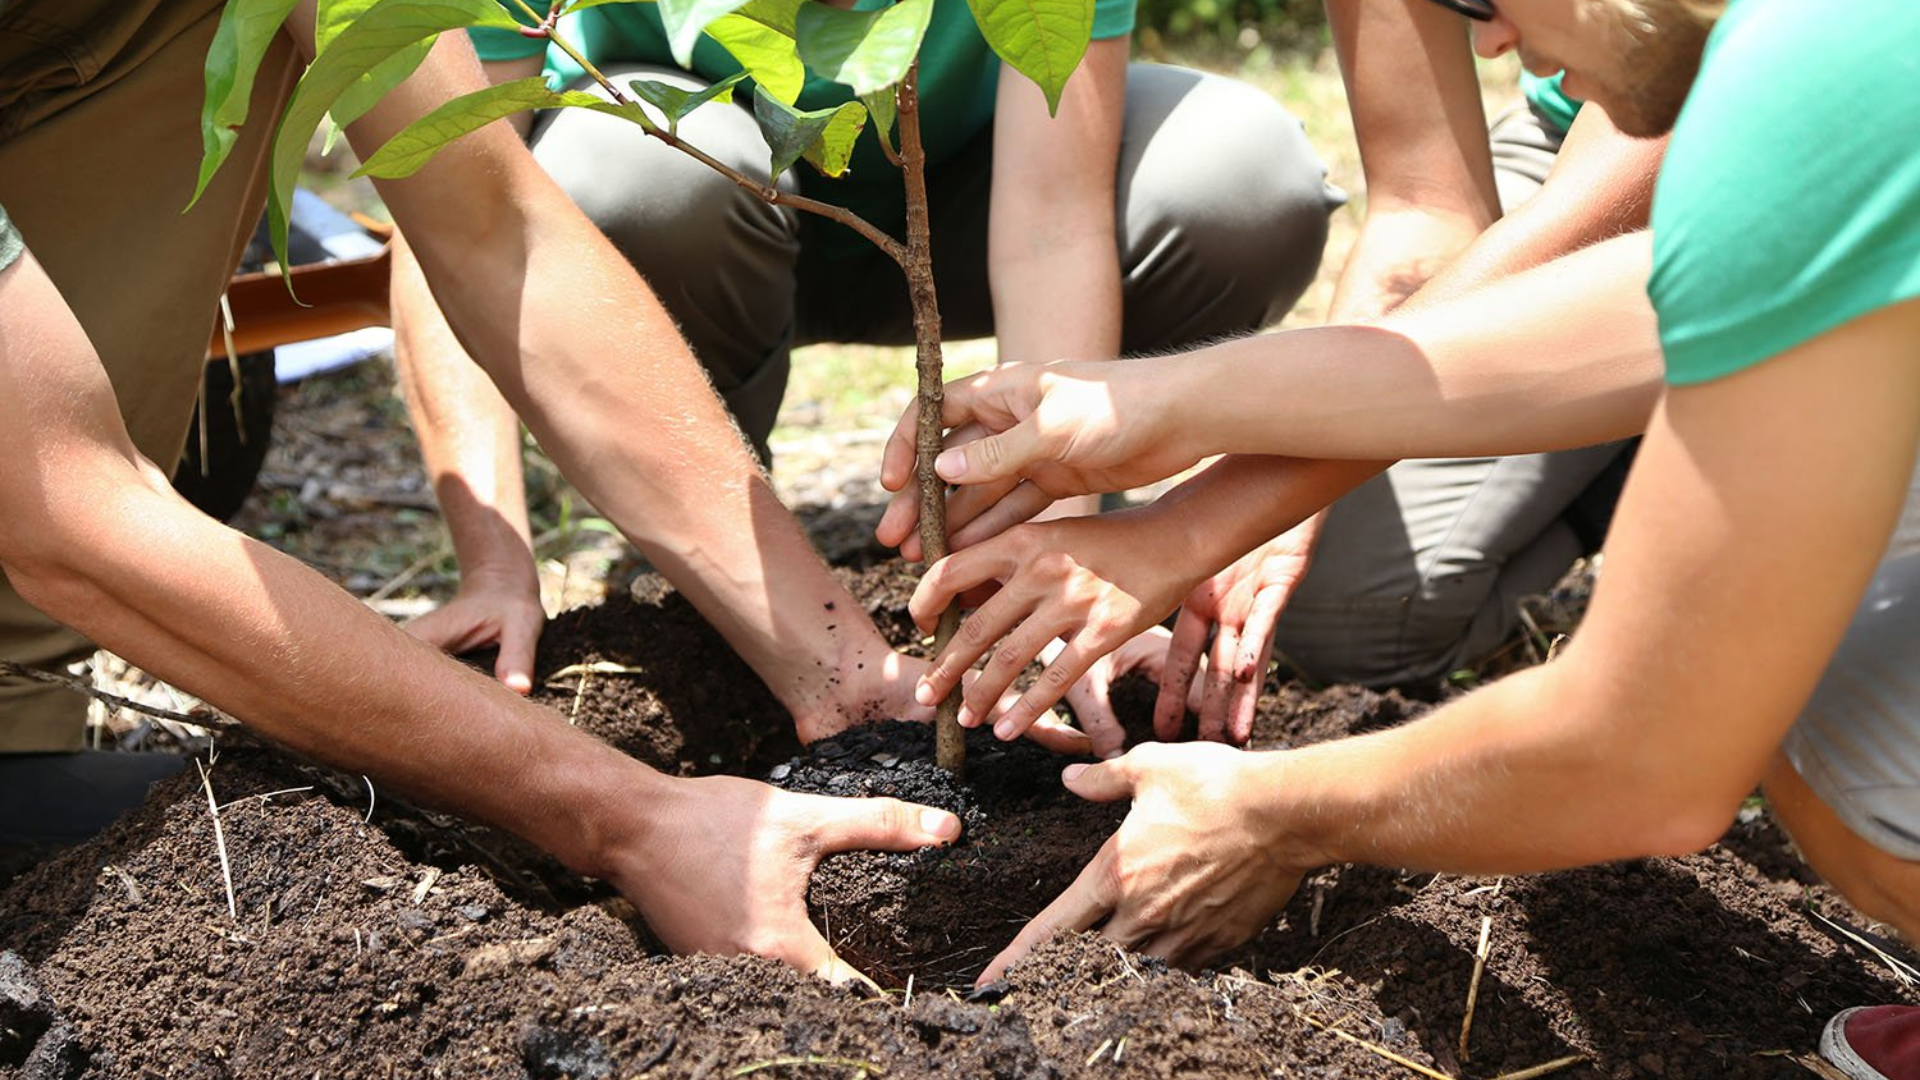
Before moving the tree, prepare the new planting hole. Make it twice as wide as the root ball but not deeper. The top of the root ball should sit level with the surrounding soil.
Place the tree gently in the hole and fill it in with soil, pressing down lightly to remove air pockets. I always water it right away to help the roots settle.
If you can’t replant right away, keep the roots moist. Wrap the root ball in a damp cloth or burlap, and store it in a shaded area. Avoid letting it sit for too long, as dry roots can harm the tree’s chances of survival.
Aftercare Tips to Help the Tree Recover
Once the tree is in its new spot, aftercare is key to helping it settle in. These steps will help reduce stress and give the tree a good start.
- Water regularly: Keep the soil damp, especially for the first few weeks
- Apply mulch: Add a layer around the base to hold moisture and protect roots
- Watch for wilting or leaning: These are signs the tree is stressed and needs extra care
- Check the soil often: Make sure it stays moist but not soaked
- Avoid heavy foot traffic: Keep the area clear so roots can recover undisturbed
With steady care, the tree can bounce back and grow strong again. Small actions now can make a big difference later.
Common Mistakes to Avoid
Digging up a tree is simple, but a few common mistakes can cause serious harm. Knowing what to avoid helps protect the tree before, during, and after the move.
- Cutting roots too close to the trunk: This can shock the tree and weaken its support
- Letting the root ball dry out: Dry roots can damage the tree quickly
- Planting too deep: This can suffocate roots and slow recovery
- Skipping watering: New transplants need steady moisture to survive
- Ignoring stress signs: Drooping leaves or leaning may mean the tree needs help
Avoiding these mistakes can make the difference between a tree that struggles and one that thrives. Stay careful and check your work as you go.
When to Call a Professional?
Some trees need more help than others. If your tree is over 8 feet tall or very mature, it may have a wide, deep root system that’s hard to handle alone. Digging it up without proper tools can cause long-term damage.
If the roots are close to sidewalks, buildings, or underground lines, it’s best to let a professional handle the situation. These situations require extra care and sometimes permits.
Soil issues, such as clay, pests, or disease, can also make things more challenging. If you’re unsure how to manage any of these issues, seeking help early can protect both the tree and your yard.
Conclusion
Digging up a small tree is not hard, but it does require care. Every step you take can help or hurt the tree’s chances of surviving in a new place. That’s why it’s crucial to plan and follow each step carefully.
Start by using the right tools: a shovel, gloves, a tarp, and plenty of water. Dig around the roots carefully and lift the tree, keeping the soil still attached to them. Replant it at the same depth it was before, and water it well after moving.
Add mulch around the base to keep the ground moist and protect the roots. Continue to check on the tree in the days and weeks that follow. This early care helps the tree adjust and start growing again.
When you move a tree the right way, it has a strong chance of doing well in its new home. Stay patient, follow the guide, and your effort will pay off. A little care now leads to long-term growth later.