Getting your sprinkler system up and running is one of the first steps to getting your lawn ready for spring and summer. After a long winter, it’s important to turn it on the right way so you don’t end up with broken pipes or water leaks.
The good news? You can do it yourself with just a little bit of time and care. In this guide, I’ll walk you through everything you need to know to safely and easily turn on your sprinkler system.
Whether you’re brand new to this or just need a quick refresher, this step-by-step blog will help you get it right. So grab a cup of coffee and let’s get started—it’s easier than you think, and your grass will thank you for it later!
Understand Your Sprinkler System Components
Before turning anything on, it’s helpful to know what parts make up your sprinkler system. This way, you’ll know exactly what to look for and what each part does.
Most systems have a few key pieces: the main water shut-off valve, the backflow preventer, a control panel or timer, and the sprinkler heads. Some systems may also have separate zone valves if your yard is divided into sections.
Each part plays an important role. The shut-off valve controls the water flow. The backflow preventer keeps dirty water from going back into your clean water supply. The control panel tells the system when to water. And the sprinkler heads spray the water across your lawn.
Knowing these parts makes everything easier when it’s time to turn the system on and check that it’s working right.
Turning On Your Sprinkler System
Now that you know the parts of your sprinkler system, it’s time to turn it on. Taking it slow is key, especially if your system has been off all winter. Turning it on too fast can cause a lot of pressure in the pipes, which could lead to damage or leaks.
Step 1: Check for Any Visible Damage First
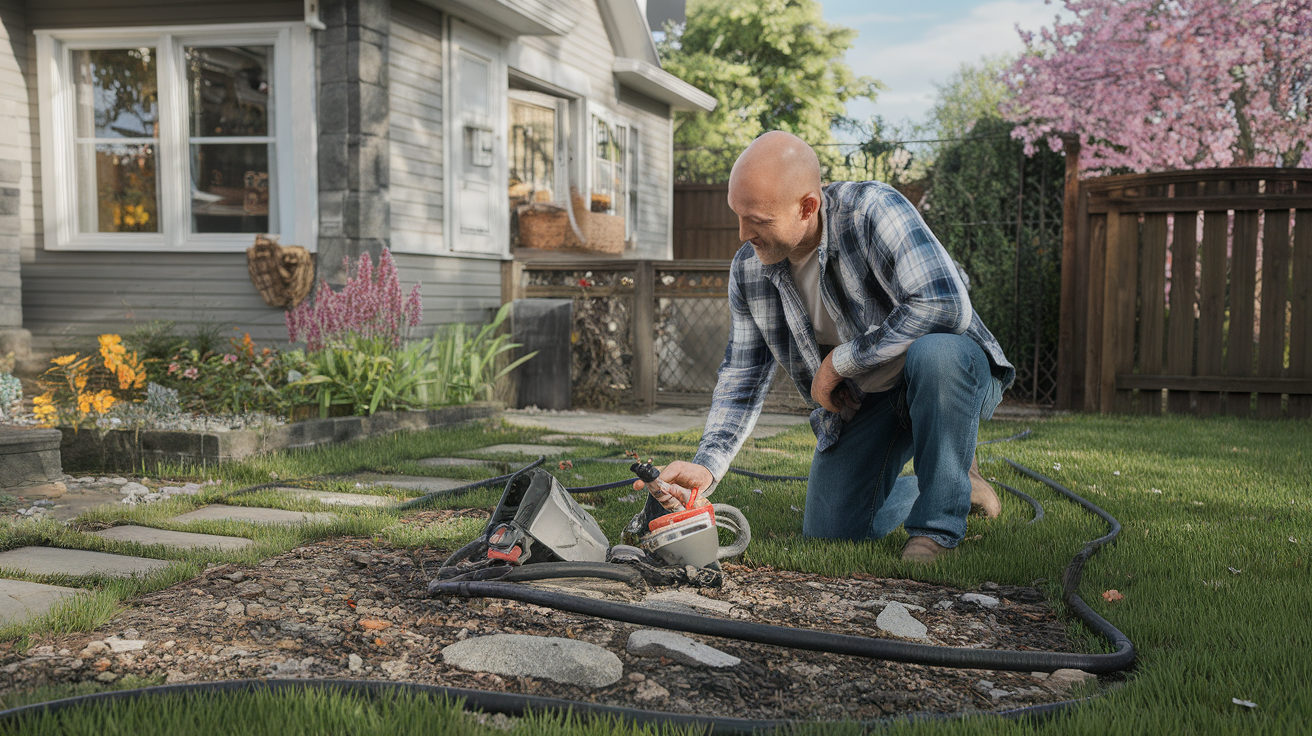
Before you even touch the water valve, walk around your yard and take a look at your sprinkler heads. Are any of them cracked, leaning, or buried under dirt? Damaged heads can cause leaks or uneven watering.
Also, peek inside the valve boxes to make sure there’s no standing water, broken wires, or chewed-up parts. If anything looks off, fix it first before turning on the water.
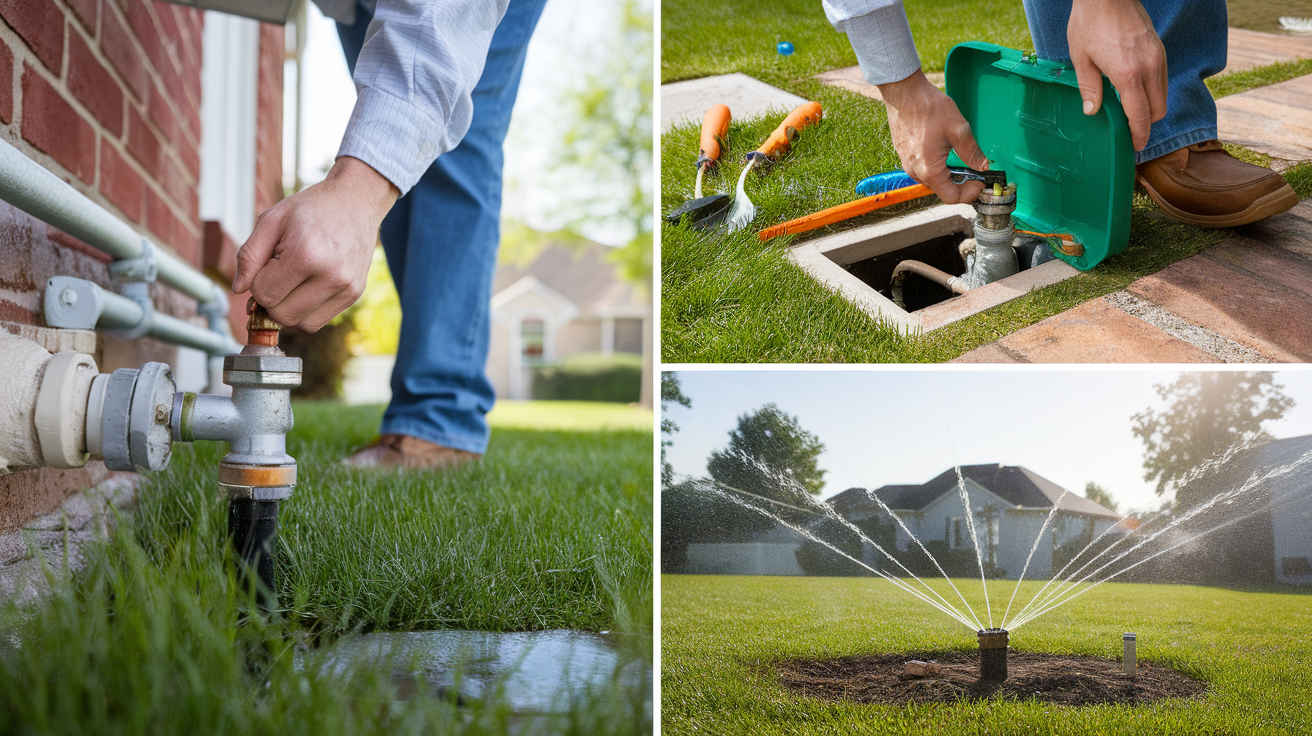
Step 2: Slowly Open the Main Water Supply Valve
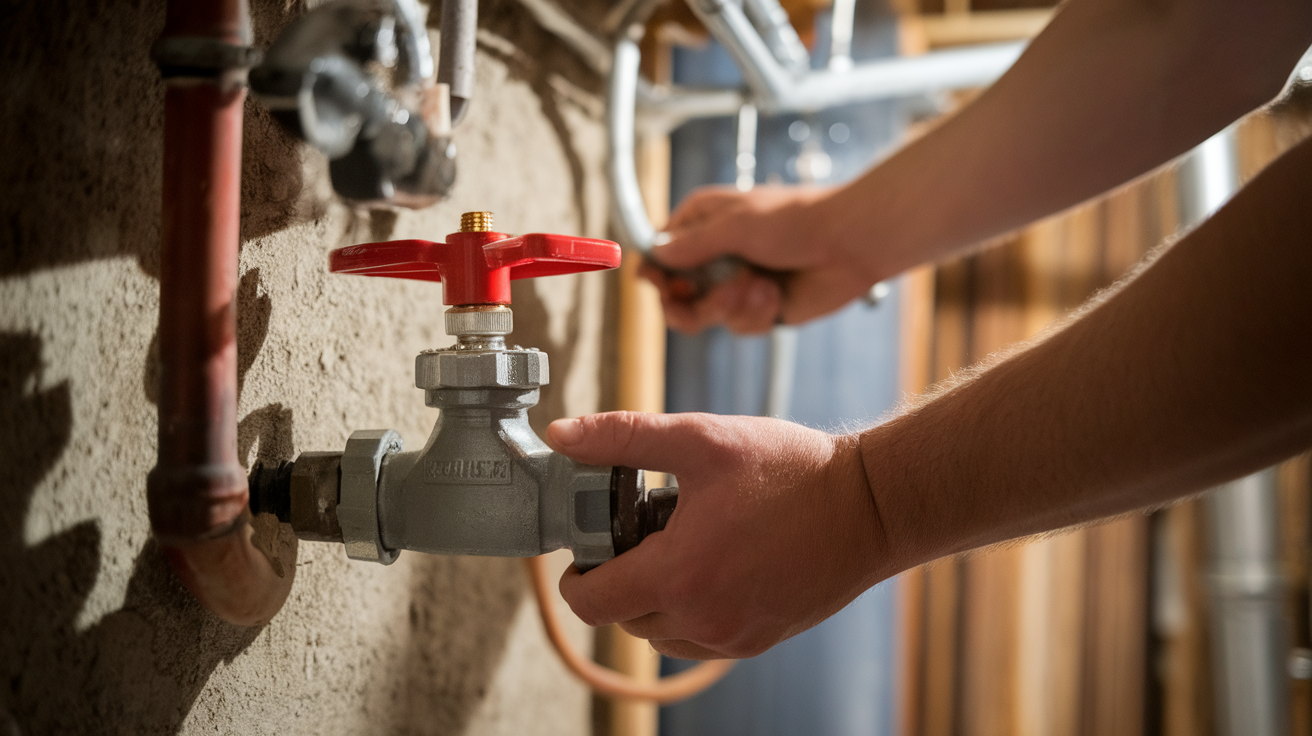
You’ll find the main shut-off valve inside your house, in the basement, garage, or outside in a ground box. When you’re ready, turn this valve very slowly.
If you open it too fast, the rush of water can cause pressure surges—also known as water hammer—that may damage pipes or fittings. Instead, open it just a little and let the water start filling the pipes. After a minute or two, you can open it fully.
Step 3: Check the Backflow Preventer
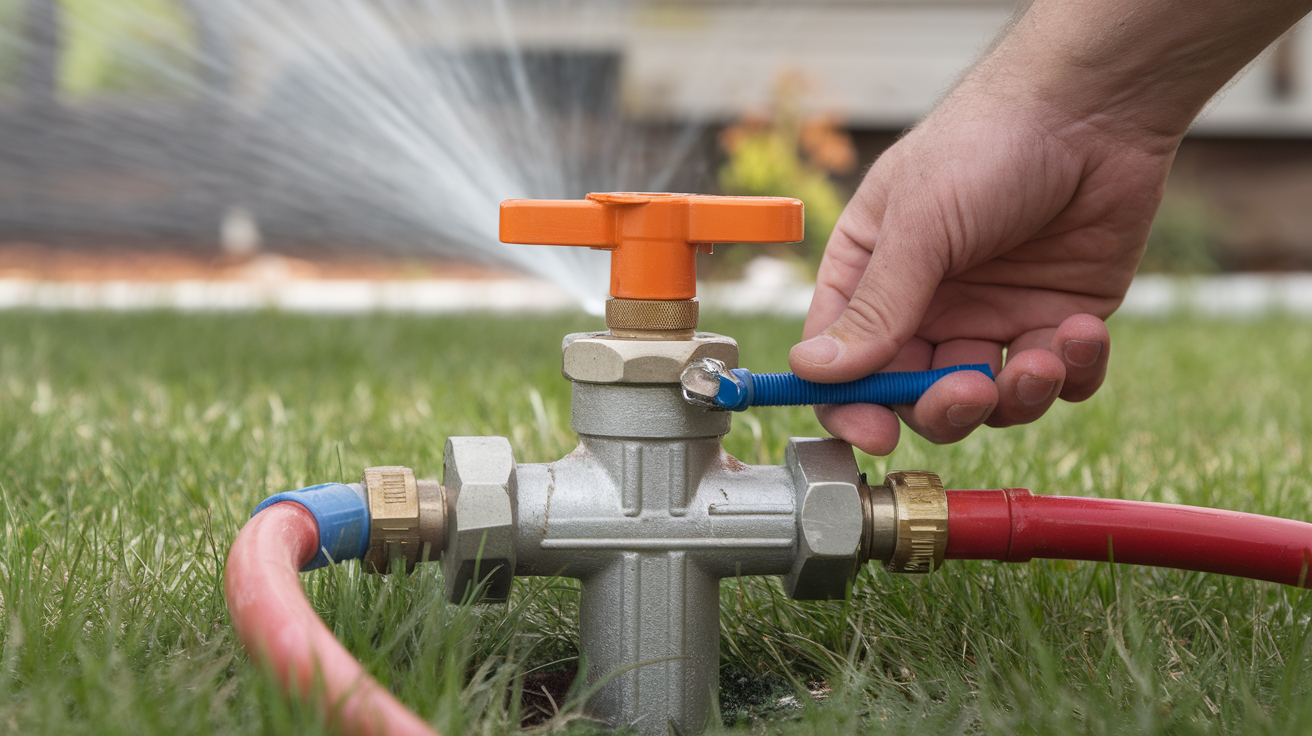
Most sprinkler systems have a backflow preventer outside near the house or near the water supply. Its job is to keep dirty water from going back into your clean water line. Look at the valves and test cocks (small screw-like parts) to make sure they’re closed and in the right position. If they were open for winterization, now is the time to close them.
Make sure nothing is leaking here—it’s a common trouble spot when turning the system back on.
Step 4: Turn On the Sprinkler System Controller
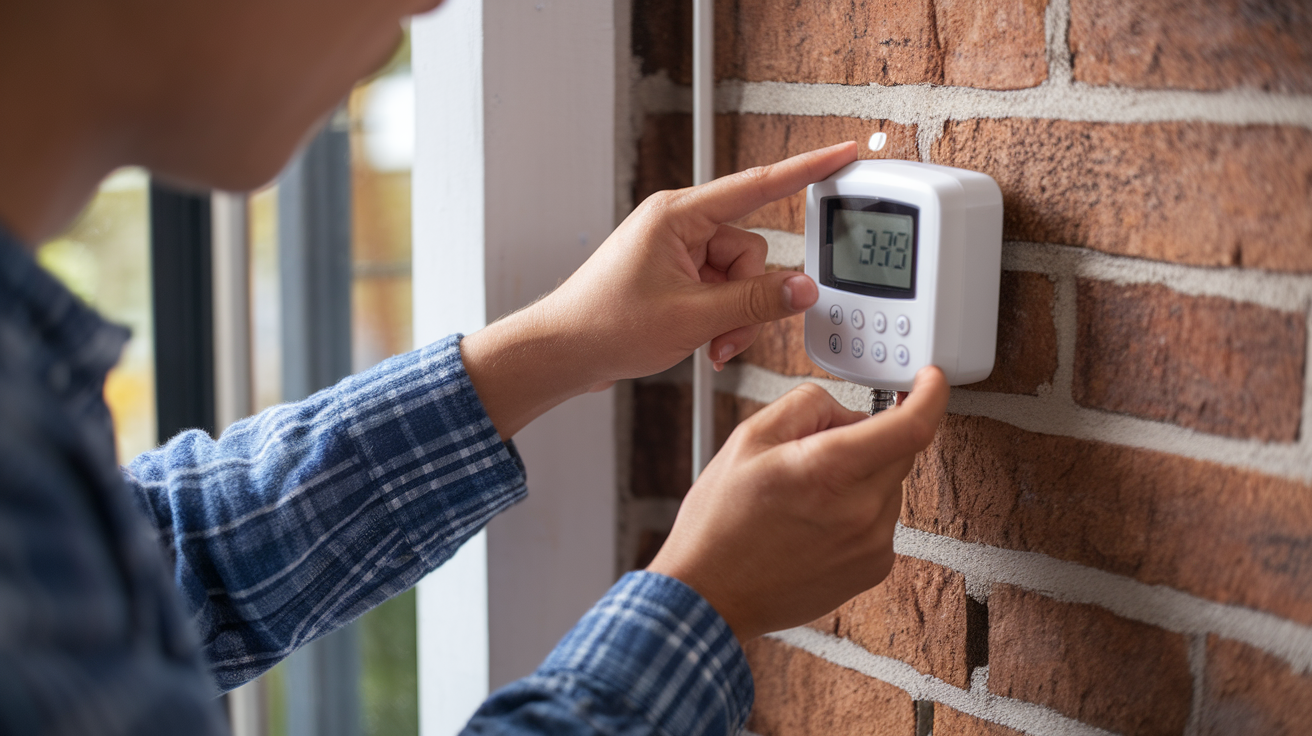
Now, go to your controller or timer—the box that controls when and how your system runs. If you unplugged it for the winter, plug it back in. Set the date and time, and then check your watering schedule. Make sure the zones are set up the way you want and that the watering times match your current needs.
Quick Tip: Start with shorter watering times in the spring. You can always increase them later as the weather gets hotter.
Step 5: Test Each Zone Manually
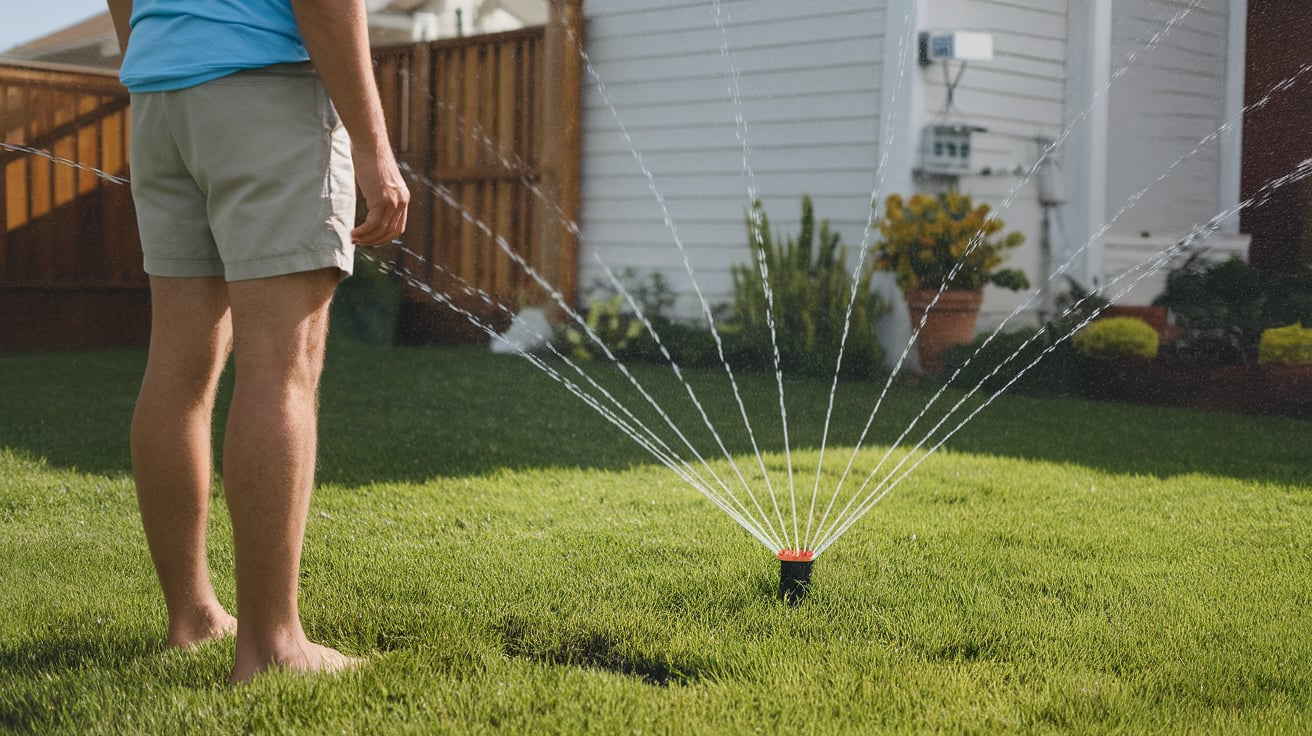
Most sprinkler systems have different “zones” for different parts of your yard. Use the controller to run each zone for a few minutes manually. This lets you see if the sprinkler heads are popping up, spraying evenly, and covering the right areas. While each zone is running, walk around and watch closely.
- Are all heads popping up?
- Do any heads look clogged or spray in the wrong direction?
- Is water pooling anywhere?
Make a list of anything that needs fixing. You can adjust or replace parts once you’ve checked all zones.
Step 6: Watch for Leaks or Low Pressure
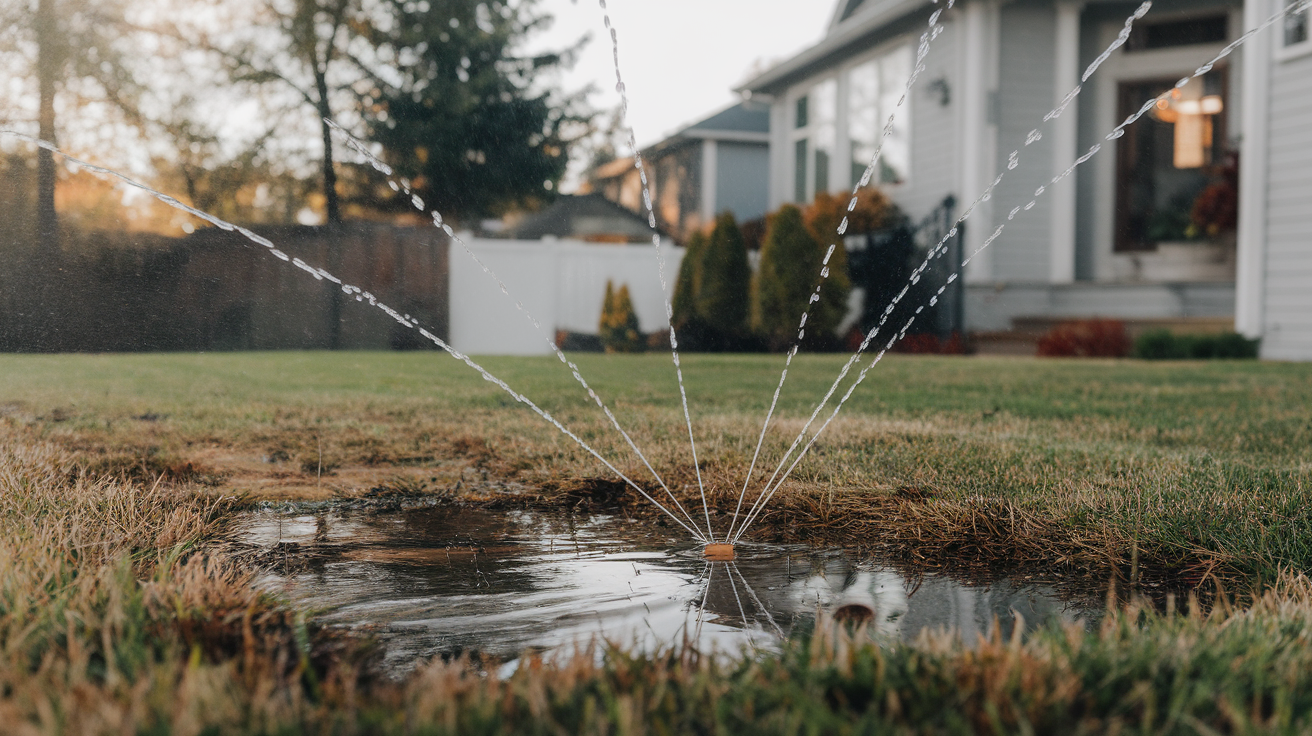
As the water flows through your system, pay attention to how it sounds and looks. If the pressure seems low in one zone or you see puddles forming, that could be a sign of a leak or blockage. Don’t ignore these signs—it’s much easier to fix them now than wait until your lawn starts suffering.
Step 7: Make Any Needed Adjustments
After testing the whole system, go back and fix any issues. This might mean:
- Tightening loose sprinkler heads
- Replacing a cracked head
- Cleaning out nozzles
- Adjusting spray patterns or angles
If everything looks good, you’re done! Your sprinkler system is now up and running for the season.
Turning on your sprinkler system doesn’t have to be stressful. Just take your time, follow each step, and check as you go. A little bit of care in the beginning can save you a lot of trouble—and money—down the line. Plus, your lawn will get the water it needs to stay green and healthy.
How to Turn On a Sprinkler System Without a Controller
If your sprinkler system doesn’t have a controller—or it’s broken—you can still turn it on manually. It just takes a little extra time. Manual systems are often older setups, but they still work well if you know what to do.
1. Locate the Main Water Valve: Find the valve that supplies water to your sprinkler system. It’s usually in the basement, garage, or outside in a valve box. Slowly turn it on to let water flow into the system.
2. Find the Zone Valves: Each part of your yard may have its own zone valve. These are often in a valve box in your yard. Lift the lid and you’ll see small handles or levers connected to each zone.
3. Open the Valves Manually: Turn the handles about a quarter-turn to the open position. You’ll hear water start to flow and see the sprinkler heads pop up. Let each zone run for a few minutes to check coverage and leaks.
4. Close the Valves When Done: Once you’re finished checking a zone, close the valve to stop the water. Move to the next zone and repeat.
Mark your valves and zones with a waterproof label so you remember which one goes where next time, and that’s it!
When Is the Best Time to Turn On a Sprinkler System?
The best time to turn on your sprinkler system is usually in early spring, once the ground has fully thawed. For many areas, this means sometime between mid-April and early May, but it really depends on your local climate.
If the ground is still frozen, turning the system on too early can cause serious problems like burst pipes or leaks. That’s why it’s important to wait until you’re sure the freeze is over. A good sign it’s time to start watering is when your lawn begins to turn green, and there hasn’t been much rain.
Dry soil and warmer daytime temperatures are also clues. Before flipping the switch, check the forecast to make sure freezing nights aren’t expected. If the weather looks good, you’re probably safe to go ahead. A little patience now can help you avoid big repair bills later.
How to Reprogram Your Sprinkler Timer
If your sprinkler controller has been off for the winter, now is the time to reprogram it so your lawn gets the water it needs.
- Set the Date and Time: Make sure the timer is showing the correct date and time so the schedule works properly.
- Choose Watering Days: Pick which days of the week you want the system to run.
- Set Start Times: Choose the time of day you want each zone to begin watering. Early morning is usually best.
- Adjust Run Times for Each Zone: Program how long each zone should run, depending on sun exposure, plant type, and soil.
- Check for Seasonal Adjustments: Some timers have a “seasonal adjust” feature that lets you reduce watering times during cooler months.
Once everything is set, double-check your schedule and do a test run to make sure the system turns on correctly.
Regular Maintenance Tips
Even after your sprinkler system is up and running, regular care helps it stay in great shape.
- Check sprinkler heads for clogs or leaks every few weeks
- Adjust spray patterns to make sure water isn’t hitting sidewalks or driveways
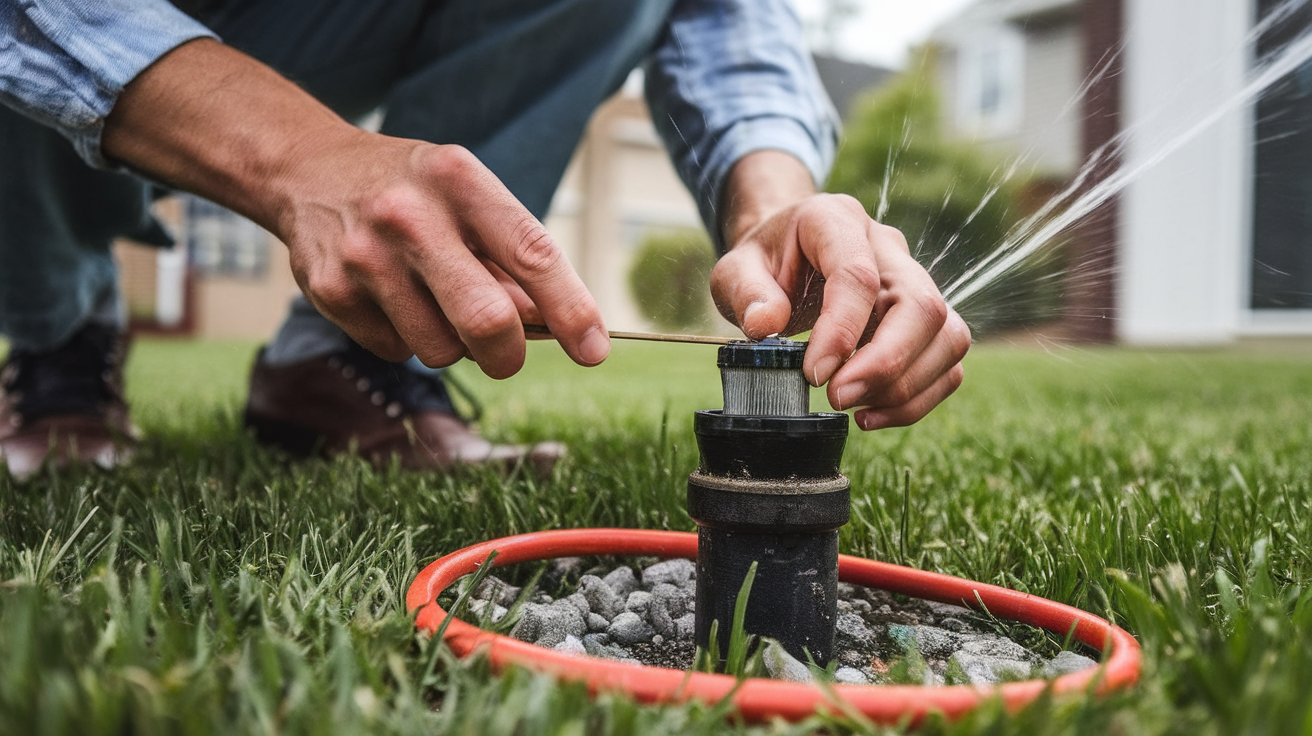
- Clean the filter screen inside the valve box once a season
- Inspect the controller battery (if it has one) at least once a year
- Drain the system before winter to avoid frozen pipes
Taking care of your sprinkler system doesn’t have to be hard. A few minutes here and there can keep your lawn green and your water bill low!
Conclusion
Turning on your sprinkler system the right way can make a big difference for your lawn and help you avoid costly repairs. Whether you’re using a controller or going manual, the key is to take it slow, check for damage, and test each zone carefully.
Once everything is running smoothly, your yard will get the water it needs to stay healthy and green. Don’t forget to adjust your schedule as the seasons change and keep up with regular maintenance throughout the year. A little attention now can save you a lot of time and stress later.
Hopefully, this guide gave you the confidence to get started, even if you’re new to sprinkler systems. Your grass, plants, and wallet will thank you. Ready to enjoy a lush, green yard? You’ve got this—just take it one step at a time!